2004 Chevy Astro AWD Build: Lifted - CCV Poptop

Snowgeek135

Observer
One year ago I was inflicted with the camper van flu thanks to a friend with a Westy Camper. I didn't have the cash for VW Syncro Westy nor a Sportsmobile so I spent countless hours searching for the right option....then I stumbled across T.Low's Astro.

In April I ended my long run of Toyota vehicles and bought a Chevy mini van.....this was the hardest vehicle choice I have ever made.

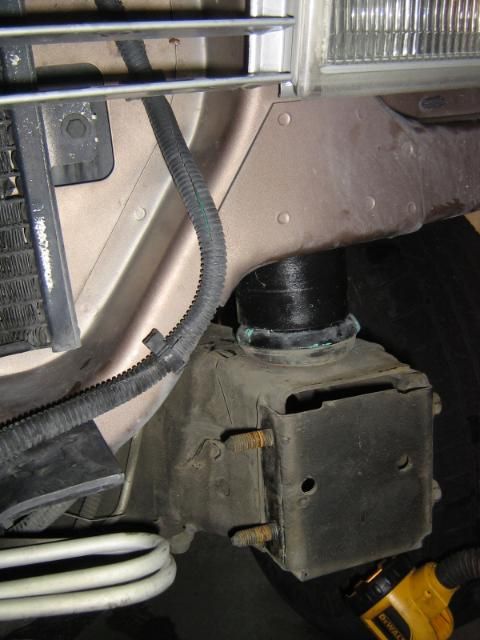
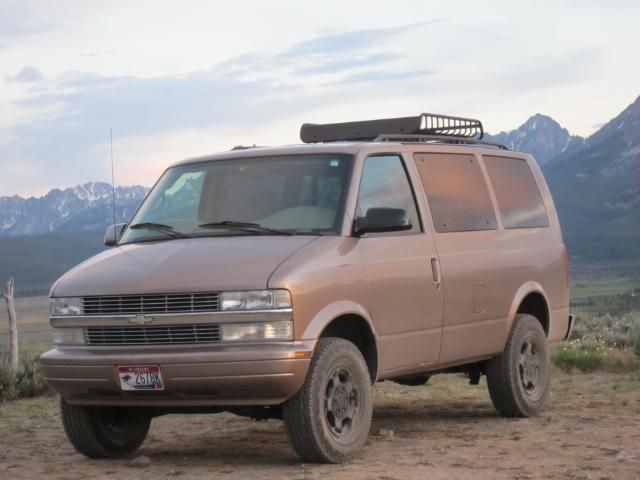
Over the last 5 months I have installed a 4" overland kit, powder coated the wheels, installed Cooper AT3 245/75/16 tires, and started making other visual and functional tweaks.

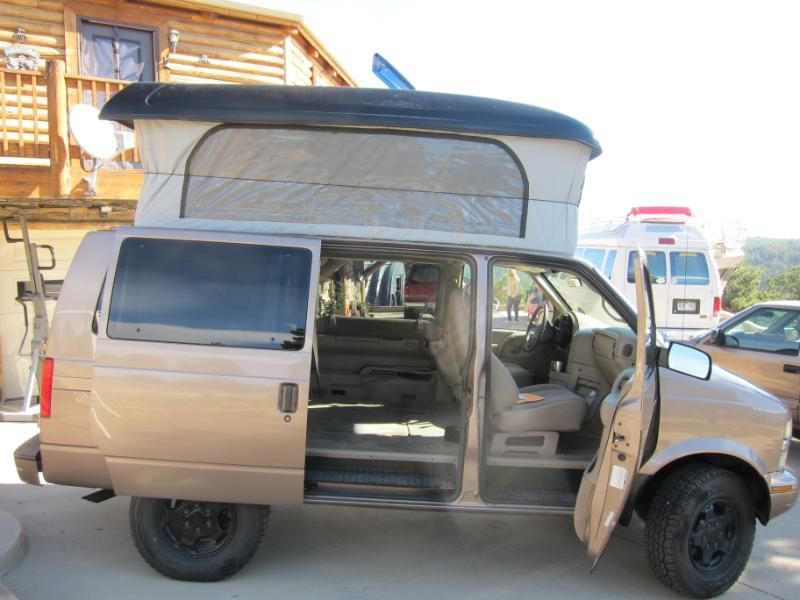
2 weeks ago I picked the van up from Derek at Colorado Camper van and this is where I am at now. :jumping:

I will follow up with a full build thread soon.

At Derek's cabin outside Loveland Colorado

IMG_3257.jpg


IMG_3247.jpg


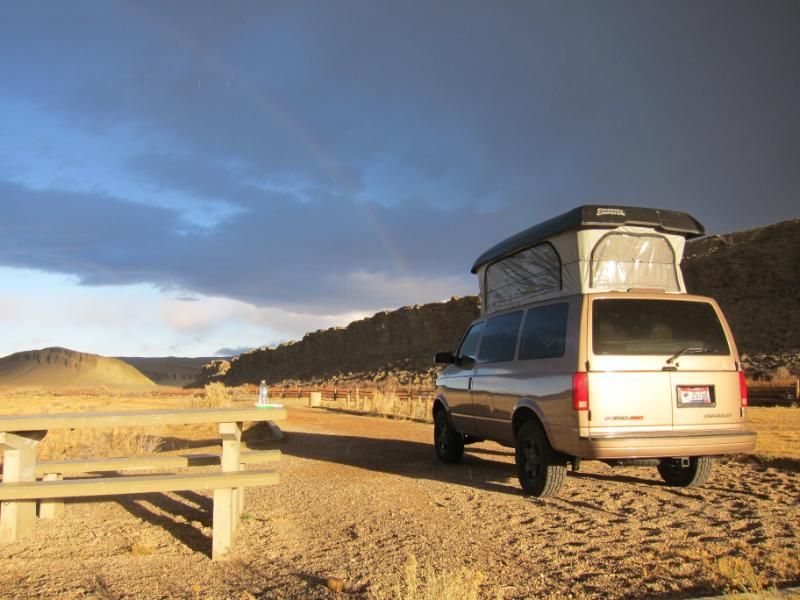
Camping outside Sinclair Wy on the way home :campfire:
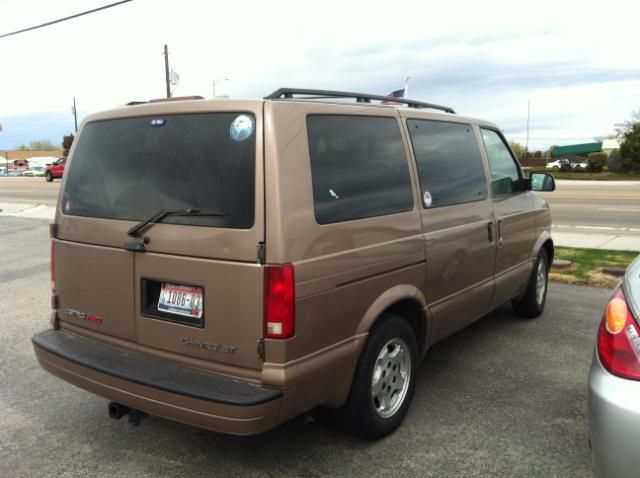
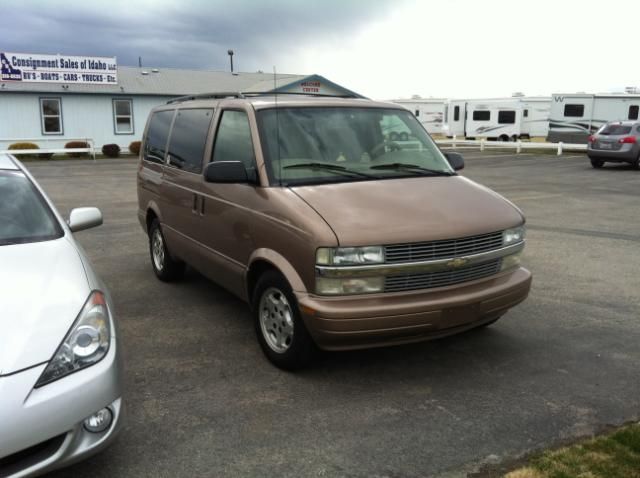
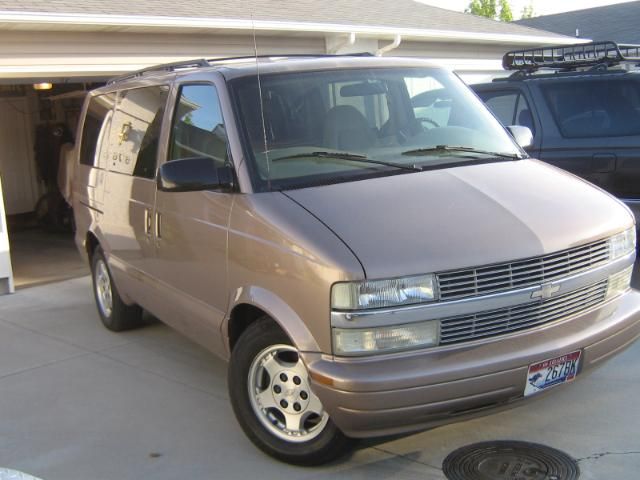
IMG_3318-1.jpg


Before the top:

IMG_1693.jpg


IMG_2775.jpg


IMG_2784.jpg


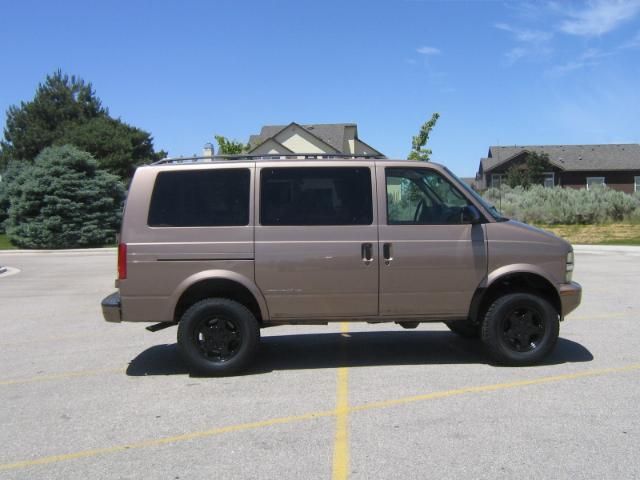
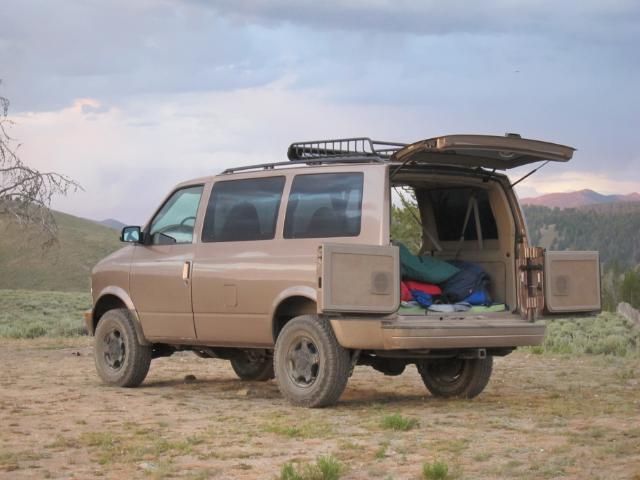
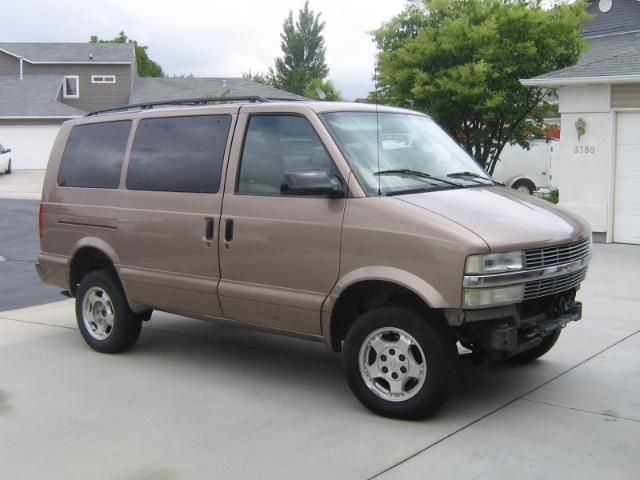
When I brought it home:

PhotoDec01120054AM.jpg
 
Last edited:

Snowgeek135

Observer
Ok so i am doing this build thread a little backwards because i have done a ton of work and had no time to organize or post pictures. So back to the beginning even though i have already posted what it looks like now.

Basic 2004 Astro AWD, 95,000 miles, 3.42 gears, good paint, good upholstery.

I know my toyota's but I don't know what to look for on these motors and transmissions. I took it to a trusted mech. every thing checked out with the exception of tires and shocks.... Perfect those were on their way out anyway.

It even came with the old retired couples hula dancer on the dashboard, aarp stickers, and dog hair through out. :rolleyes:

IMG_0171.jpg


IMG_0170.jpg


IMG_0165.jpg


I got it home and my 4runner in the background had no clue what was about to happen. :axe:

PhotoDec01120054AM.jpg


So the plans laid out like this.

Overland 4-5 kit, 245/75/16 tires, ccv top, weekender style interior.

You will notice as i go through most of this that i have copied and stolen every idea i have from others on the this forum and on astrosafarivans.com. I hope at some point to contribute enough to be a template for others.

First things first Overland 4" kit. I really wanted to piece the lift together but I had a dead line and tons going on at the time. OLV was a touch slow to respond and didn't answer some of my questions but overall i had a good experience with him. I also ordered Rancho 5000 shocks from him, I wanted to do something a little cooler but i needed to get moving with the build and figured it was an ok starting spot.

I recruited my friend who started me dow the road of this whole camper van thing a year or so ago, to help me lift it......after all i helped him lift his westy... His van is in the background of one of these pics

Subframe pucks and longer bolts:
PhotoDec1420853PM.jpg


Subframe puck and e brake bracket:
PhotoDec1422716PM.jpg


Sketch balls way to support the back end: :yikes:
PhotoDec1433422PM.jpg


Olv lift springs:
PhotoDec1435148PM.jpg


Quick way to get the u-bolts back into place:
PhotoDec1442916PM.jpg


Rolled it out of the garage:
At this point I have installed subframe pucks and rear springs. I still have torsion keys, shocks, bj flip, and cutting the fan shroud remaining to tackle. But this was a good first days work.
PhotoDec1445259PM.jpg


I apologize for typos and lack of capitalization.....i will be posting most of this working on an ipad while holding our 2 month old baby.

I am skipping a ton of pics just to keep this build thread from being too boring.... But let me know if there is something you want to see.

More to come....

Ryan
 

Stroverlander

Adventurer
Excellent, nice looking van. I enjoy reading other Astro/Safari build threads and seeing all the personal differences in the builds.
 

Snowgeek135

Observer
Strover, i have poured over your astro as well. Your animated gif was what convinced me i had to go over the 2" lift. I looked and looked for your color... It is the best color offered... In the end i had to settle for my color cause it was one of the only low mile good condition van at came up in 6 months in my area.

Thanks for your build thread...


Ryan
 

Itsavanman

Adventurer
very nice.. have you noticed any more sway after adding the pop top? going to be engineering my own popup and debating on whether i should install thicker sway bars with disco's
 

Snowgeek135

Observer
very nice.. have you noticed any more sway after adding the pop top? going to be engineering my own popup and debating on whether i should install thicker sway bars with disco's

To be honest, i really didn't. It kills me....i wanted to get to the recycle yard to weigh my van before i had the top put on but just simply couldn't make it work. Derek at ccv estimates that there is about 150 -200 lbs added total after removing the stock material. I drove Denver to Boise after getting the top on this took me through some windy and winding roads and it has been fine so far.

I will keep you all updated as i drive the super windy road to our ski resort with about 35 20 mph turns.

Ryan
 

Stroverlander

Adventurer
Strover, i have poured over your astro as well. Your animated gif was what convinced me i had to go over the 2" lift. I looked and looked for your color... It is the best color offered... In the end i had to settle for my color cause it was one of the only low mile good condition van at came up in 6 months in my area.

Thanks for your build thread...


Ryan

Nice, I'm glad it helped, still need to update the gif to add a photo with the larger tires.
 

Snowgeek135

Observer
Well, some times in the process of the project you get excited and overlook that one crucial step. For me it was cutting my fan shroud.... After my first day i pulled it back into the driveway and thought what the hell is that noise. :eek: I had forgotten motor = connected to the subframe .... fan shroud = connected to the body .....that i just lifted.

So back in the garage i go.

Fan shroud from the top without the air box:

IMG_1539.jpg


That top of the shroud sure comes of easy...... This lower part was a a bit frustrating: i am still not sure if i was missing something but it was well a pain....kind of like a puzzle. I think i finally just tried enough times it found its way out.

Before:

IMG_1550.jpg


Trimming up that shroud. What you are really doing here is just letting the fan drop out the bottom of the shroud. I am kind of the king of used tools.....notice the pawn shop price tag on my saw.

IMG_1551.jpg


After:

IMG_1552.jpg


Now my next task was to flip the upper ball joints. Remove two bolts..... Drill two rivets.... Simple enough. [-o<

How she looks normally:

IMG_1532.jpg


IMG_1533.jpg


In the middle of the process:

IMG_1555.jpg


IMG_1558.jpg


The end product:

IMG_1587.jpg


Some where in the middle there i broke almost every drill bit i own.... i still haven't gone back to the drill doctor to sharpen them all up. There are so many i hate to even look at the pile. :cry:

Next step is the torsion keys.

Now i should say i really am not looking for the tallest van out there. I simply want enough height to clear my 245/75/16 tires. I really don't need to install the keys for that but i know i will be adding a winch bumper down the road so I wanted the adjustability and didn't want to have to work on the lift again.


Stock key dropped out:

IMG_1600.jpg


Stock key v.s. the overland key:

IMG_1601.jpg


My left key was a cinch but some where in the process of getting my right key installed i broke a few and twisted a few more c-clamps, i would post pictures of how i finally made this work but i am afraid of being utterly flamed for my technique. i will just say it had to do with a long socket on a floor jack, a bunch of protection, and some luck.... The factory tool for this would have been great.

Overland key in place:

IMG_1634.jpg
 
Last edited:

Snowgeek135

Observer
Nice, I'm glad it helped, still need to update the gif to add a photo with the larger tires.

Yeah, the bigger tires and blacked out rims really look great on your van. You painted your rims right? Did you sand blast them prior? I will be excited to find out how durable that turns out to be. I have this funny feeling it will stand up just as well as the powder coat on my wheels.....i am just $200 poorer than you.
 

bknudtsen

Expedition Leader
Nice work Ryan! I am a fan of the Astro. I got my driver's license in one 25 years ago. That thing lasted forever! Keep up with the documentation and pics. It's fun to watch it all come together! Especially since I am in a "hurry up and wait" phase on my van project.

Brad
 

Stroverlander

Adventurer
Yeah, the bigger tires and blacked out rims really look great on your van. You painted your rims right? Did you sand blast them prior? I will be excited to find out how durable that turns out to be. I have this funny feeling it will stand up just as well as the powder coat on my wheels.....i am just $200 poorer than you.

Yes, I painted a used set I bought with tires on them, sold the tires so came close to breaking even on that purchase. I was going to beadblast and powdercoat the wheels myself but the stars never aligned with a friend to sort it out and make it happen in a timely manner so I decided to try painting them. The wheel painting details are back a few pages in my build thread but I spent a ton of hours and grunt work :Wow1: prepping/painting and probably had close to half of what you spent in supplies, so don't feel bad about the money spent. $50/wheel isn't bad for pc and if they prepped them well should hold up well in the long run.

The wheel enamel paint seems to be holding up well so far, I've washed them a few times and used a spray cleaner polish/wax on them. One nice thing about painting them myself is if the paint does get damaged, touch up or re-spray is a pretty straightforward affair.


With your 245/75-16 tires, are you getting any rubbing on the subframe from the inside edge of the tire at or near full lock?
 

Snowgeek135

Observer
With your 245/75-16 tires, are you getting any rubbing on the subframe from the inside edge of the tire at or near full lock?

Strover, as of right now I get a touch of rub at that seam that we all pound back at the back edge of my wheel well. It is funny though....while i have wheeled around in it quite a bit the only time and i mean only is when i pull into my driveway. This is on my list at the moment but my wifes subaru needs a brake job and some power steering work before the van gets any more attention.

Ryan
 

Snowgeek135

Observer
Witt, thanks a ton i am having a lot of fun with. Your white rim pics look great how did the van do for you guys. Did you end up liking the seating layout. Your son is super lucky to have such a great view!

Ryan
 

Forum statistics

Threads
189,915
Messages
2,922,163
Members
233,083
Latest member
Off Road Vagabond
Top