Blender, My LX450/FZJ80 + FJ45esk + GM + Land Rover crazy concoction

Metcalf

Expedition Leader
Making progress....


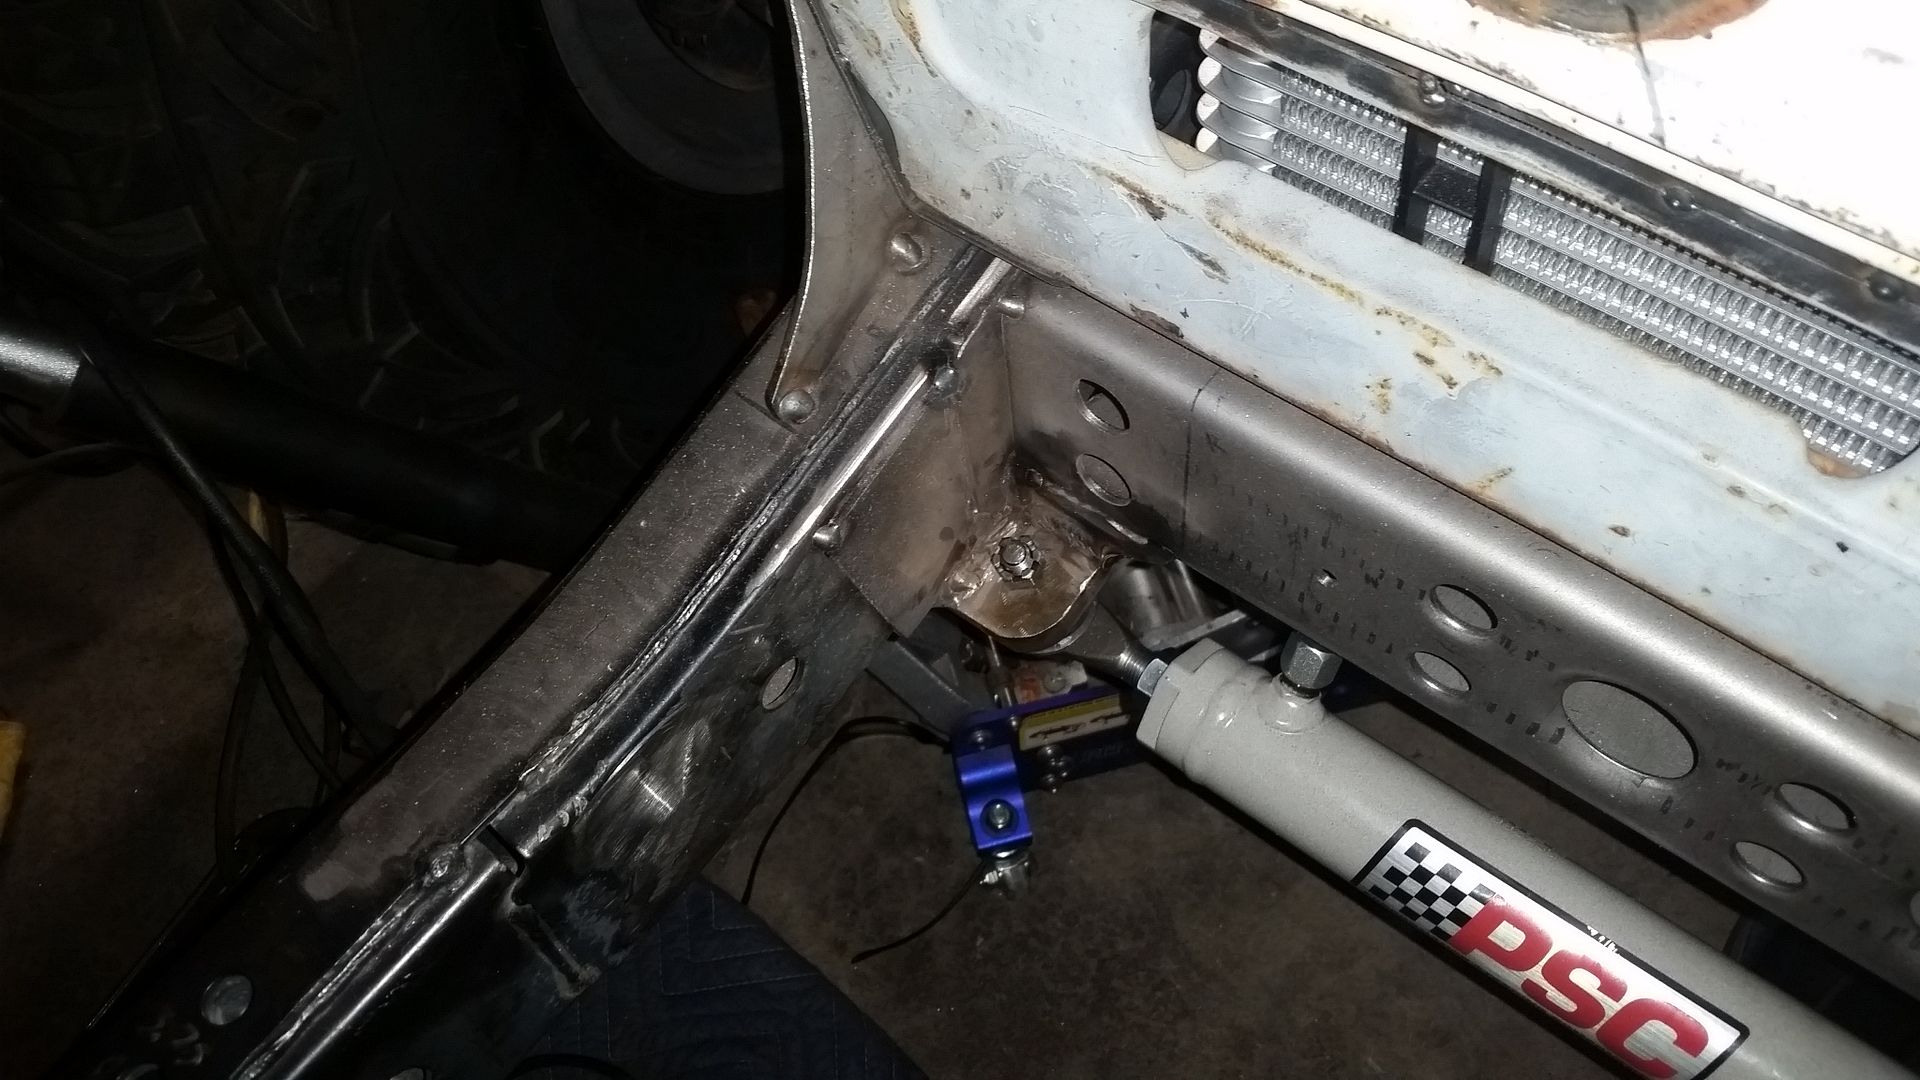
I finished up the frame mount for they assist ram. I plated the frame with 10 gauge around 3 sides. I also tied it into the grill crossmember. I don't think it is going to go anywhere now ever.


This car is getting something a little bit different for recovery points. I am going to use some JATE rings from a military Land Rover like a Wolf 90/110. One thing I have never liked is D-ring mounts that hang out in front of the bumper....and how they deal with side loads. The thing I really like about these is that the mounts where very simple and clean. The ring folds almost flat against the bumper also. I should be able to pull in a variety of directions. In the out position there is plenty of room to attach a winch hook, hard or soft shackle, or loop a strap. I will be using these on the rear bumper also to make things look uniform.

My funny name for them...

Lip Rings

Some details and tips....


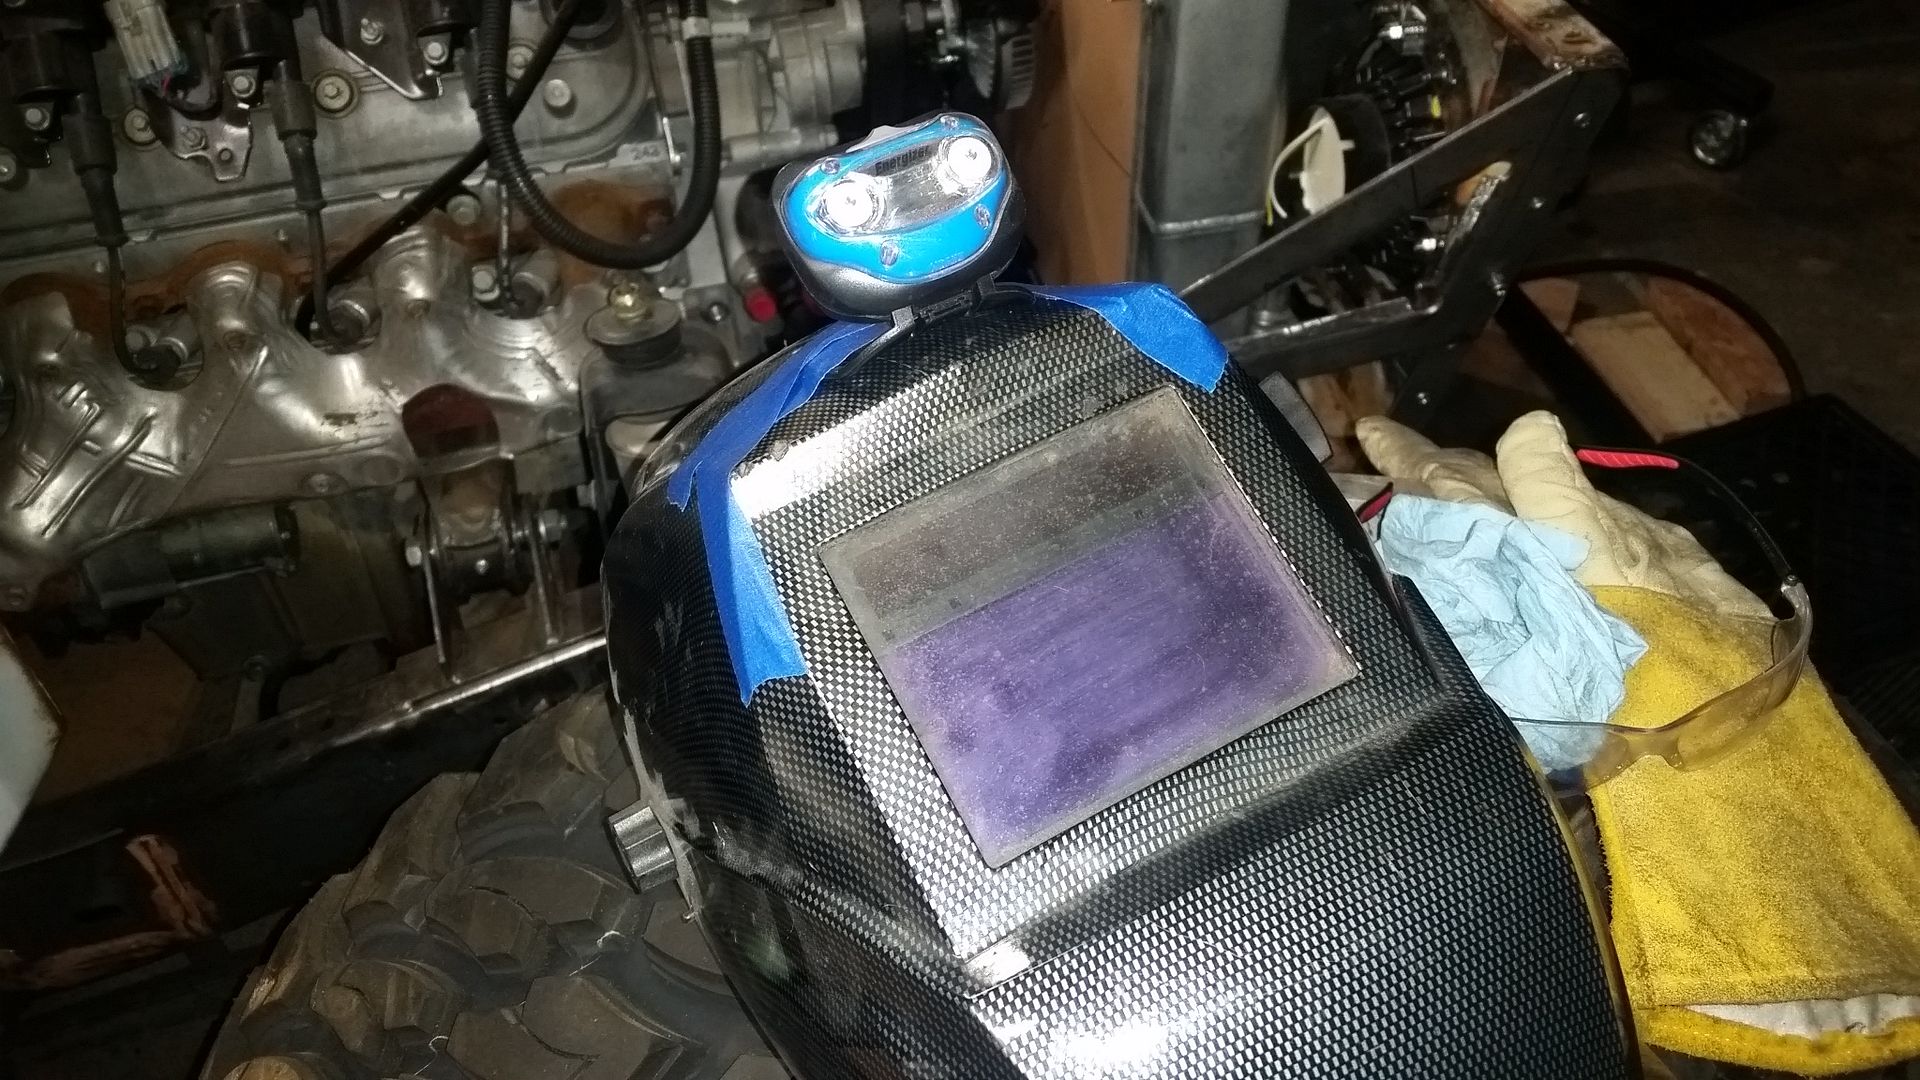
BEST WELDING HELMET MODIFICATION EVER!

Thanks go to DanielBuck for this idea. Now I need to glue it on or something. Maybe some industrial velcro?
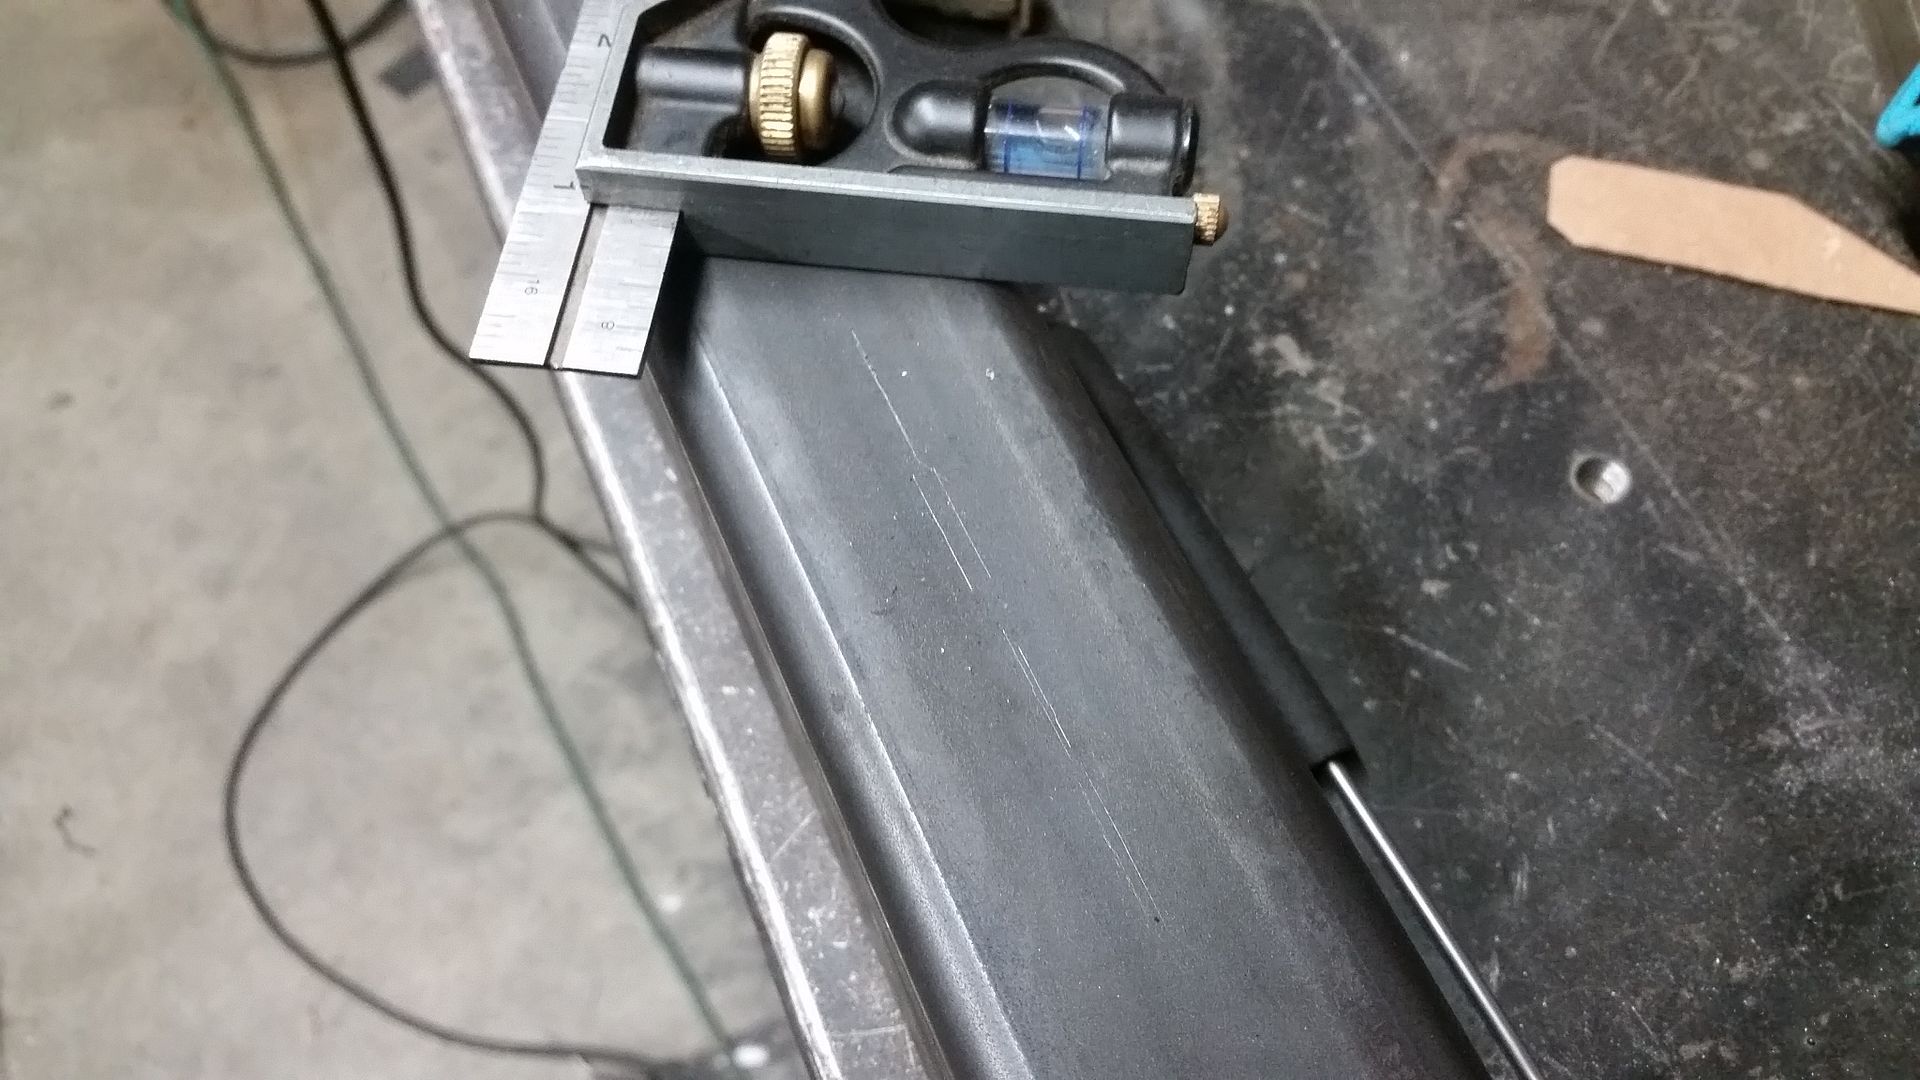


Shop tip.

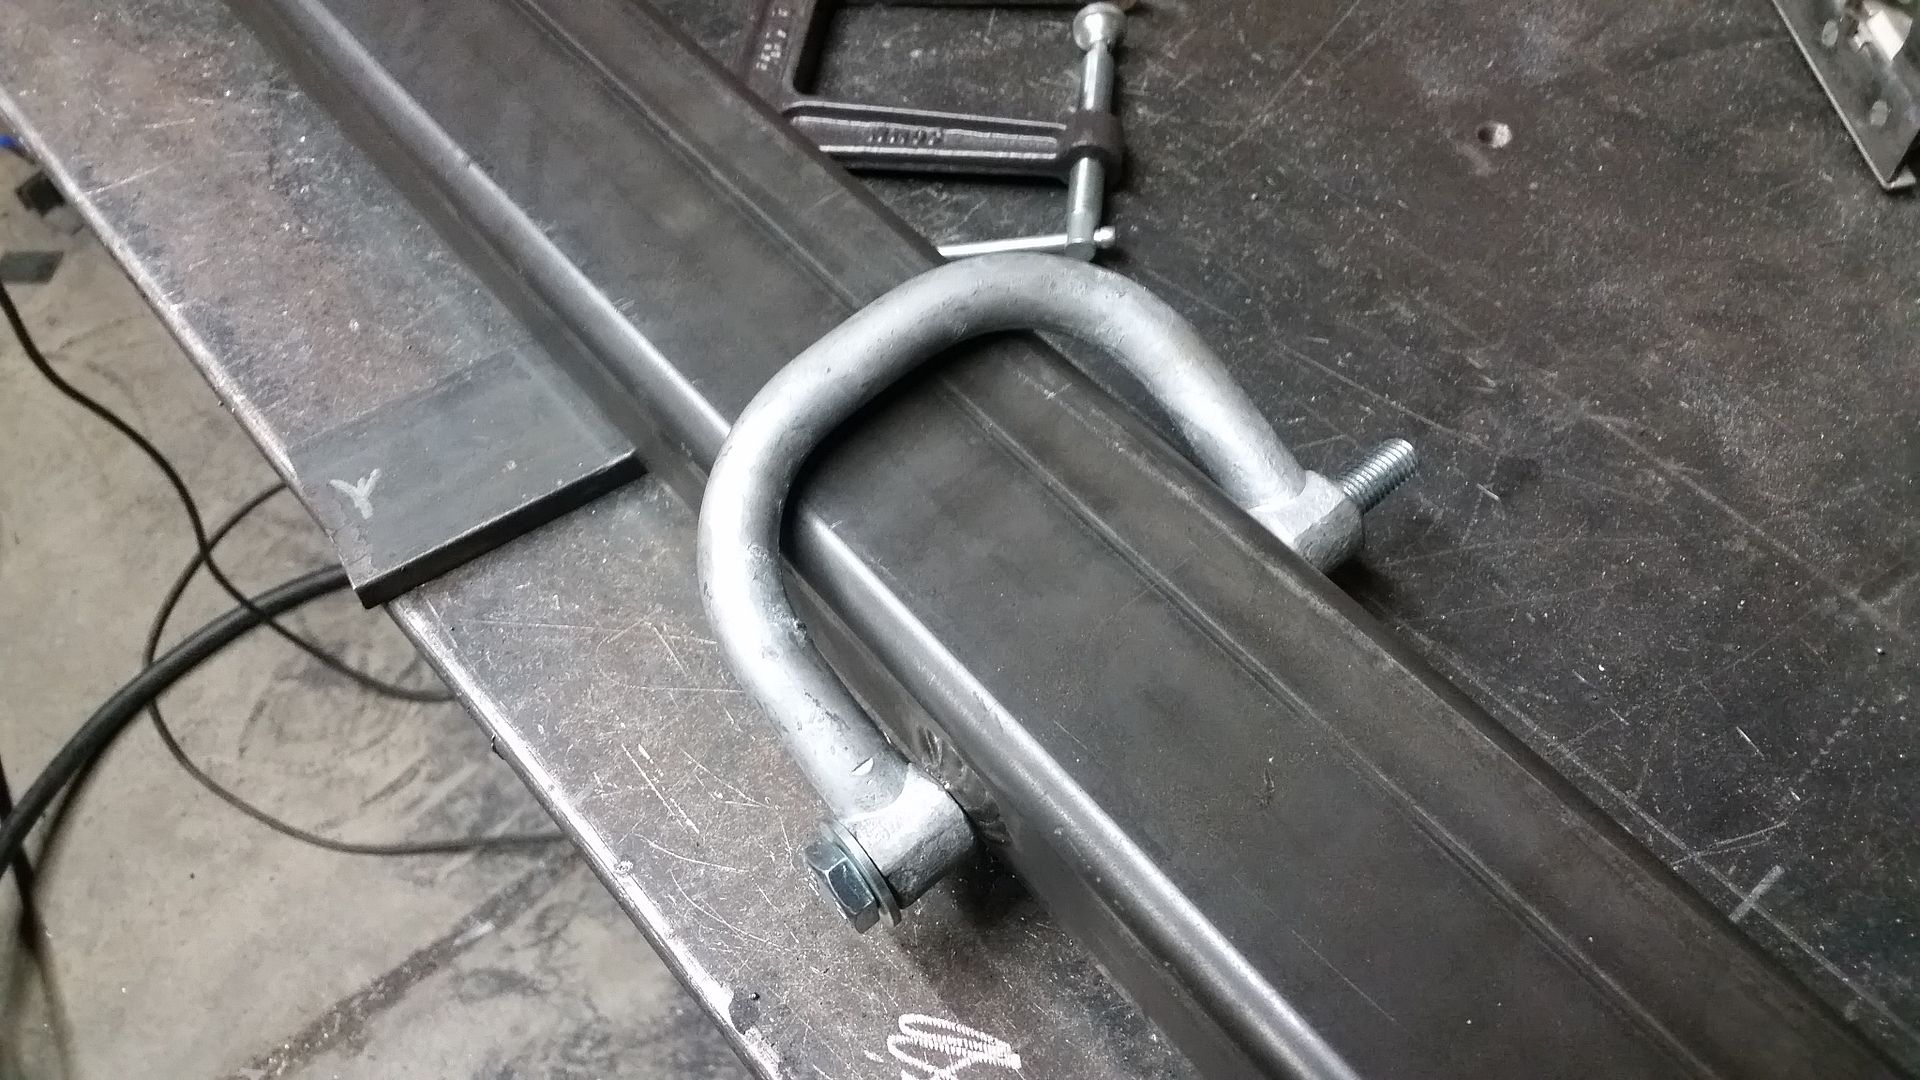
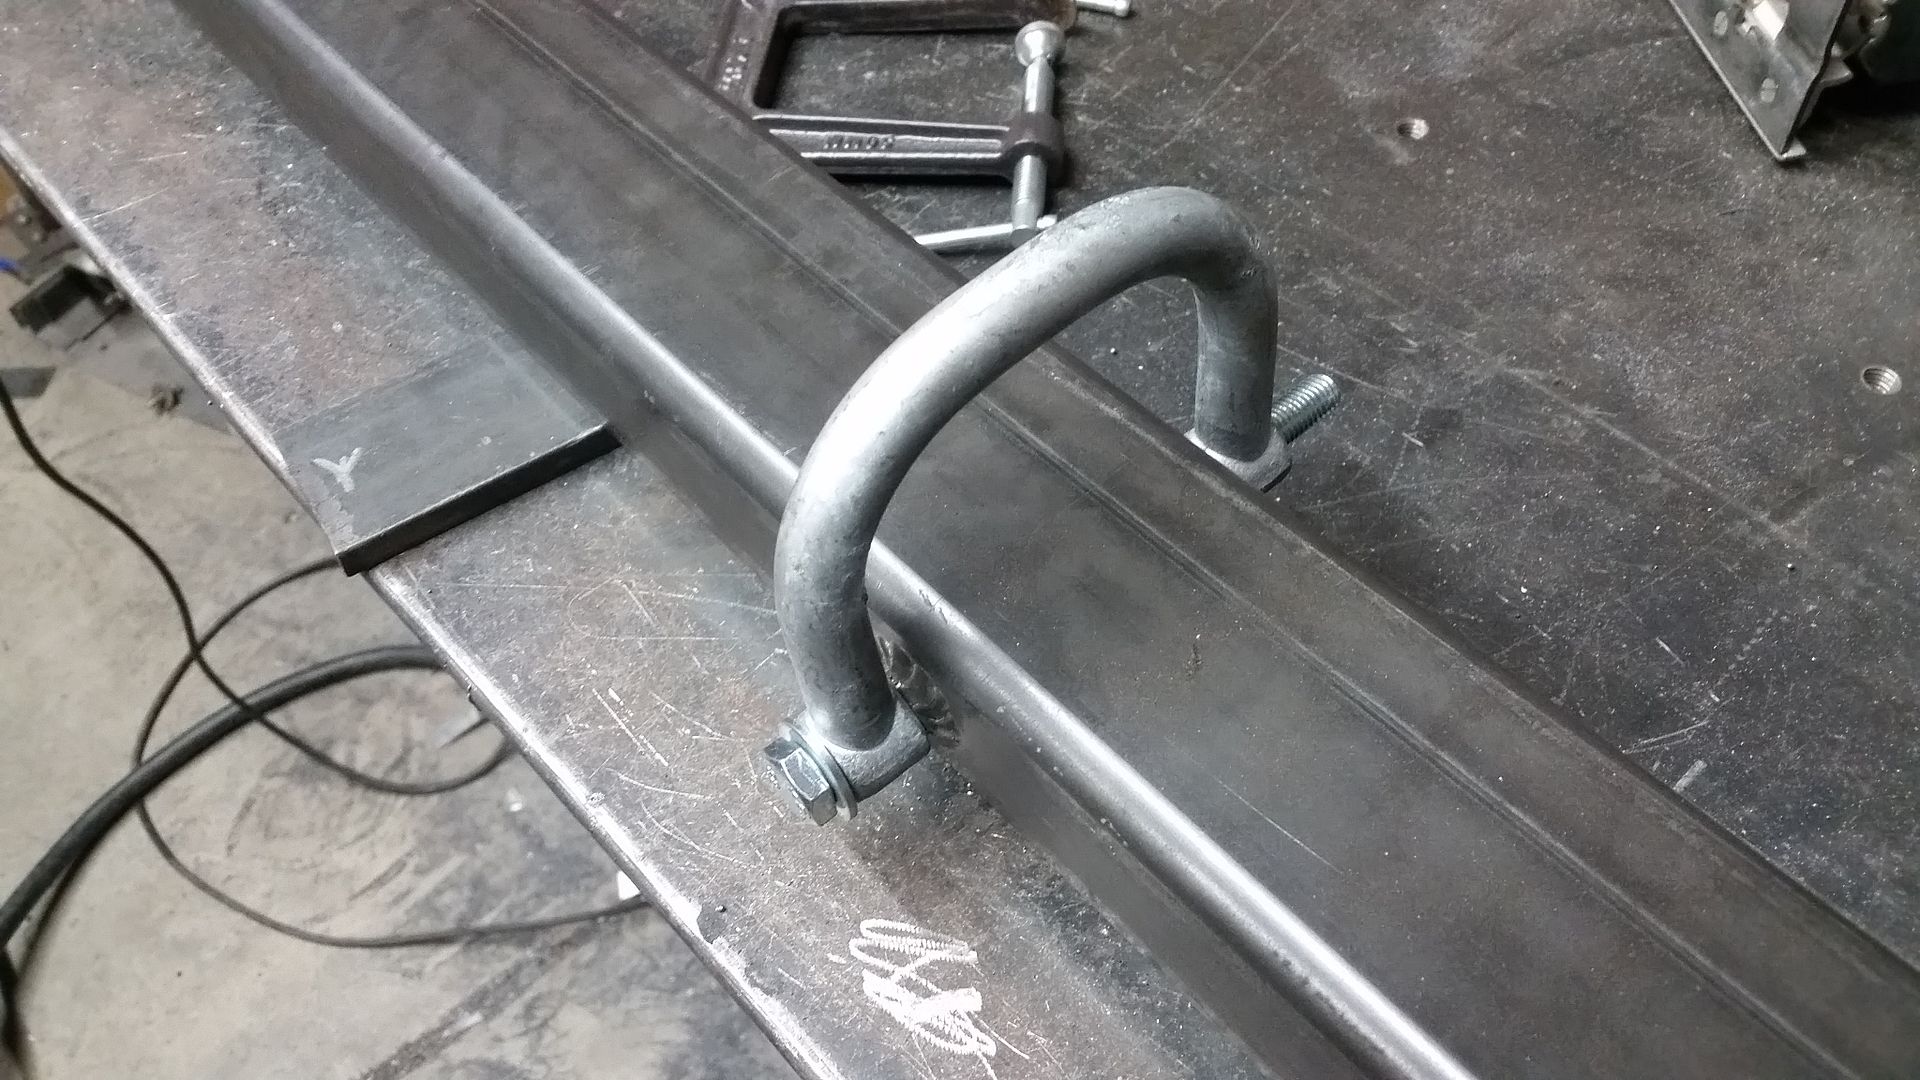
Sometimes when you are using a square on the edge of tubing the radius is taller than the edge. This can make marking the middle of the tube a challenge since it just isn't half of the tube. If you mark from both sides and slowly adjust things you can find the dead center.


Welding around tubing this this kinda sucks, but the helmet light helps a ton!
 

Metcalf

Expedition Leader
Front bumper part two...


Most of the front bumper and winch mount is done. Now I can start trimming the frame to set the final position of the bumper. It is going to be dropped down about 2" into the rail. The remaining height of the frame will be taper cut. I will be making a bunch of reinforcement plates to spread the load out to the rails and slightly change the profile to the eye.

Dropping the winch will allow the drum skidplate to also protect the assist ram. Lowering the winch will also get it totally below the main grill opening which should help preserve cooling capacity with this large winch on the front.

A few details...


Paper templates glued to chip board to make metal parts...


Bend the metal and trim trim trim to fit in the end of the bumper....twice.


Weld into the end of the bumper.


Add a hole into the end of the bumper. Now I can attach a 1/2" shackle if needed to rig something to the side of the vehicle. The pocket also works for a jacking point. I have a few other uses in mind for later....


Winch mount with skidplate under the drum. And the skidplate will protect the hydro assist ram.


This is about the final forward position of the bumper. The 8274 is a bit deep, but I think it is worth it for that much winch.


A better shot of the skidplate.

Hopefully tomorrow I can start trimming the frame for the final winch position! It looks like I get to bob about 3.25" off the end of the frame!
 

shmabs

Explorer
I recently discovered the welding helmet head lamp trick as well, it's a game changer for sure. I was thinking of sourcing a small LED light strip that's battery powered and going that route.

I'm really enjoying this build (like all your others) especially the small tech or fab tips along the way. Thanks for the continued inspiration.

Mike
 

Metcalf

Expedition Leader
Only a bit more today.....I ran out of welding gas and decided to call it a day.


This is basically what the front bumper is going to look like. I still need to add on all the reinforcement plates to the frame. Overall I am pretty happy with it. The winch is just low enough the top sits below the main grille opening which should help air flow. The hawse sits a little low, but I adjusted the tapered cut in the frame to 55 deg to help cover that up a bit. It is still a bit exposed but everything is a trade off. The aluminum hawse is cheap enough I could replace it and not feel too bad about it.

Some details and tips....


The approach angle isn't too bad. I wish it was better, but the 8274 is a pretty dang deep winch front to back.


This is the skidplate on the bottom of the winch mount that will protect the winch drum along with the assist ram for the steering.


This worked out pretty well. I was able to cut through about 80 percent of the frame before I set the bumper in place. Once the bumper was tacked I was able to insert the saw blade into the slot and finish cutting off the frame. This let enough of the front frame brace stay intact until the bumper could support things.
 
Maybe I missed it, but is that ride height?

The tucked in bumper is definitely outside the box thinking. Guys need to push the envelope more often. The only problem I can see with the winch being so low is the winch line getting beat up.
 

Metcalf

Expedition Leader
Maybe I missed it, but is that ride height?

The tucked in bumper is definitely outside the box thinking. Guys need to push the envelope more often. The only problem I can see with the winch being so low is the winch line getting beat up.

ThIs is at full metal to metal bump with all the bumpstops removed. I doubt it could ever get this compressed once I put bumpstops back in it. Ride height might be as much as 7 inches taller depending on final weight.

I've been running a similar winch setup on my flat fender with good luck. It does have more protection from the leaf spring shackles, but I don't think I have hit the hawse once in years of hard wheeling.
 

Metcalf

Expedition Leader
Two less brackets to make now....


Pretty simple, but kinda took forever.

Tip.


Sometimes taking a little extra time to lay out the brackets lets you eliminate some cutting. I still want a plasma table and a few robot helpers....
 

Metcalf

Expedition Leader
what do you use for cutting the old trusty grinder ?your cuts looks perfect .

I do most sheet cutting with a variable speed jig saw and good Bosch metal cutting blades. Edges are cleaned up with on a big disc sander and with a file. If they have inside corners I use a grinder with a flap wheel.
 

Metcalf

Expedition Leader
I am building this thing two brackets at a time....


These are the side plates that tie the bumper and winch mount into the frame. They are 10 gauge cold roll plate like the rest of the brackets. I really like this thickness of material. It seems like a good compromise for overall strength, weldability, a good match to the stock frame thickness, etc. For the section that overlapped the weld from the bumper to the OE frame I added a small 1/2" flange to move the weld outboard to a fresh area.

Now to make another pair for the drivers side.

Fab tip.


If you ever end up with an odd inside cut like this. Score the metal with a small cut off wheel about 50% through. You don't have to get into the corners perfectly at this point.


Usually you can break out the piece with a section of pliers. Then clean up the edges with a triangle and/or round file.

Note the extra tang length for the folds. That makes it easier to bend generally. I bent these tangs over the edge of a table with everything clamped down. I just used a big crescent wrench to get enough leverage to fold the tang. Once it was fit to the frame I trimmed it to length.

Preview for the next few days...


Metcalf

Expedition Leader
3.5 brackets today!


I was able to finish off the sides plates on the drivers side to match the work done yesterday. The top cap for the passenger side was also finished. I made both but ran out of time to finish up everything.

It's hard to see, but the top bracket has a gentle 'swoop' to it that matches the OEM frame bend. I like little touches like that....

I think tomorrow I will be DONE with the front bumper fab! Yipee!
 

Metcalf

Expedition Leader
Front end fab is finished for now, time to move onto the rear end of the car.


Here is the rear end as it sits right now. There is WAY too much frame sticking out past the rear axle if you ask me. I plan on bobbing off about 18-20" total I believe. I realistically only need enough frame to get the rear bumper just past the tire with a little room for it to move around. The space aft of the frame side panhard bracket to the rear bumper will be what I use of the fuel tank.

I need to get the ball rolling on a direction for the rear of the vehicle so I can start to order material, parts, and whatever. I should probably permanently attach the rear body panels. All the seat mount fab is done now and some of the access to those panels will be blocked once the bed is on the vehicle. That should keep be busy for a bit while I develop a plan for the bed, frame bob, rear bumper, and fuel tank...


I want to make a scale model of the rear section of the frame past the cab. To do this I tapped a few sections of chip board together into a big enough sheet to cover the area in question. I left the factory edge intact to the top. I used my ever handy high strength square magnets to hold it to the frame....


Fuzzy pic, working alone sucks. I used a level and a digital level to make the top of the cardboard pattern level to the belly section of the frame. The magnets are really handy for this kind of thing. They are strong enough to hold the chipboard in place, but do allow you to slide things when needed.


Next I marked the pattern relative to the top of the frame. The top surface is what I am most worried about using for a reference. I also had to mark things like the top of the coil buckets. I also made sure to note the diameter of the marking tool used to account for any offset with I digitize things.


Once the frame rail pattern was done I decided to start laying out the possible location of the rear bumper and fuel tank.

I started with a section of 2x3x3/16 box tubing. It is the last of the stick I used to make the rockers along with the front bumper. My general plan is to have the rear bumper be similar in construction to the front. I will use the same JATE rings and end cut/pocket details. The rear bumper is 54" wide right now and has about a 4" overhang past the frame. The rear section of the frame is WIDE on this car. I have a few other details that I would like to work into the bumper if possible.

I want to build a rough computer model of the rear section of the vehicle to get a better idea how it will look at ride height. Right now the vehicle is at full bump. I need to find a good balance between departure angle, fuel tank clearance, and fuel tank capacity. I am also going to adjust the height of the bed floor to help with fuel tank clearance and capacity if needed.


This is generally about how low I think the tank should be. The bottom of the tank would be about equal to the bottom of the axle tube when it is at full bump. I believe the rear suspension will be up about 5-6" from here at ride height depending on load.

Once I get the models and some rough dimensions figured out, I should be able to start thinking about how to make all this stuff...
 

Metcalf

Expedition Leader
No rear winch?

I've not really found the need very much over the years for the type of stuff I do. A quality front winch seems to work well enough to get me out of any dumb situation I get myself into generally. Some day I do want to play around with a mid mounted winch system, but that would probably have to be in a custom chassis.
 

Metcalf

Expedition Leader
Digital building again...


I am thinking I am going to do something like this for the back end....

This is just a rough model, but should be a good place to get a discussion started. The rear bumper will be similar to the front made from the same 2x3 box tubing, tapered ends, and I will add in the JATE rings also. I am thinking I will add a pintle mounting pattern also in case I want/need to tow something. I don't want to mess with having a hitch really. I think it will get in the way most of the time for what I want to do.

The fuel tank is the other big part of the equation. I need to design the fuel tank to fit under the bed along with a pump and fill system. I'd like to get 30 gallons of capacity, but I don't know if that is going to happen without making a bunch of compromises. I think something like 25 gallons would be just fine too. I don't want less than 20 gallons.

For the construction of the tank I am leaning toward 1/8" aluminum with a steel frame mounted skidplate. I'm not sure how thick the skidplate needs to be, that sure seems like it is going to get heavy quick. I would love to find a way to do a Domex/100xt 1/8" skid.....or maybe a 3/16 6061-t6 aluminum. Sourcing and forming material like that may be too expensive and challenging....

My wish list for the bed.

-Room to lay down a 40x13.5x17 tire in the back with a little extra space
-Light weight
-Simple to build
-Modular design with easy to replace panels
-Protected lights so they don't get crunched on the trail
-Really good departure angle
-Tie down points
-Cover up the fuel tank
-Need a fill system for the tank that doesn't get in the way
-License plate mount with light
-Backup lights
-Some small 'fenders'

I'm sure I am forgetting stuff....

Ideas appreciated.
 

Forum statistics

Threads
185,950
Messages
2,880,151
Members
225,627
Latest member
Deleman
Top