You are using an out of date browser. It may not display this or other websites correctly.
You should upgrade or use an alternative browser.
You should upgrade or use an alternative browser.
Meet the Trot'n Turtle - Unimog U1300L Build
- Thread starter Hodakaguy
- Start date
Hodakaguy
Adventurer
you can do a table for the whole family with the radial engine as a frame with a round piece of glass on top, and the pistons could be used as whisky glasses, haha
Not sure yet what I'm going to do with them.....something cool I hope lol.
Hodakaguy
Hodakaguy
Adventurer
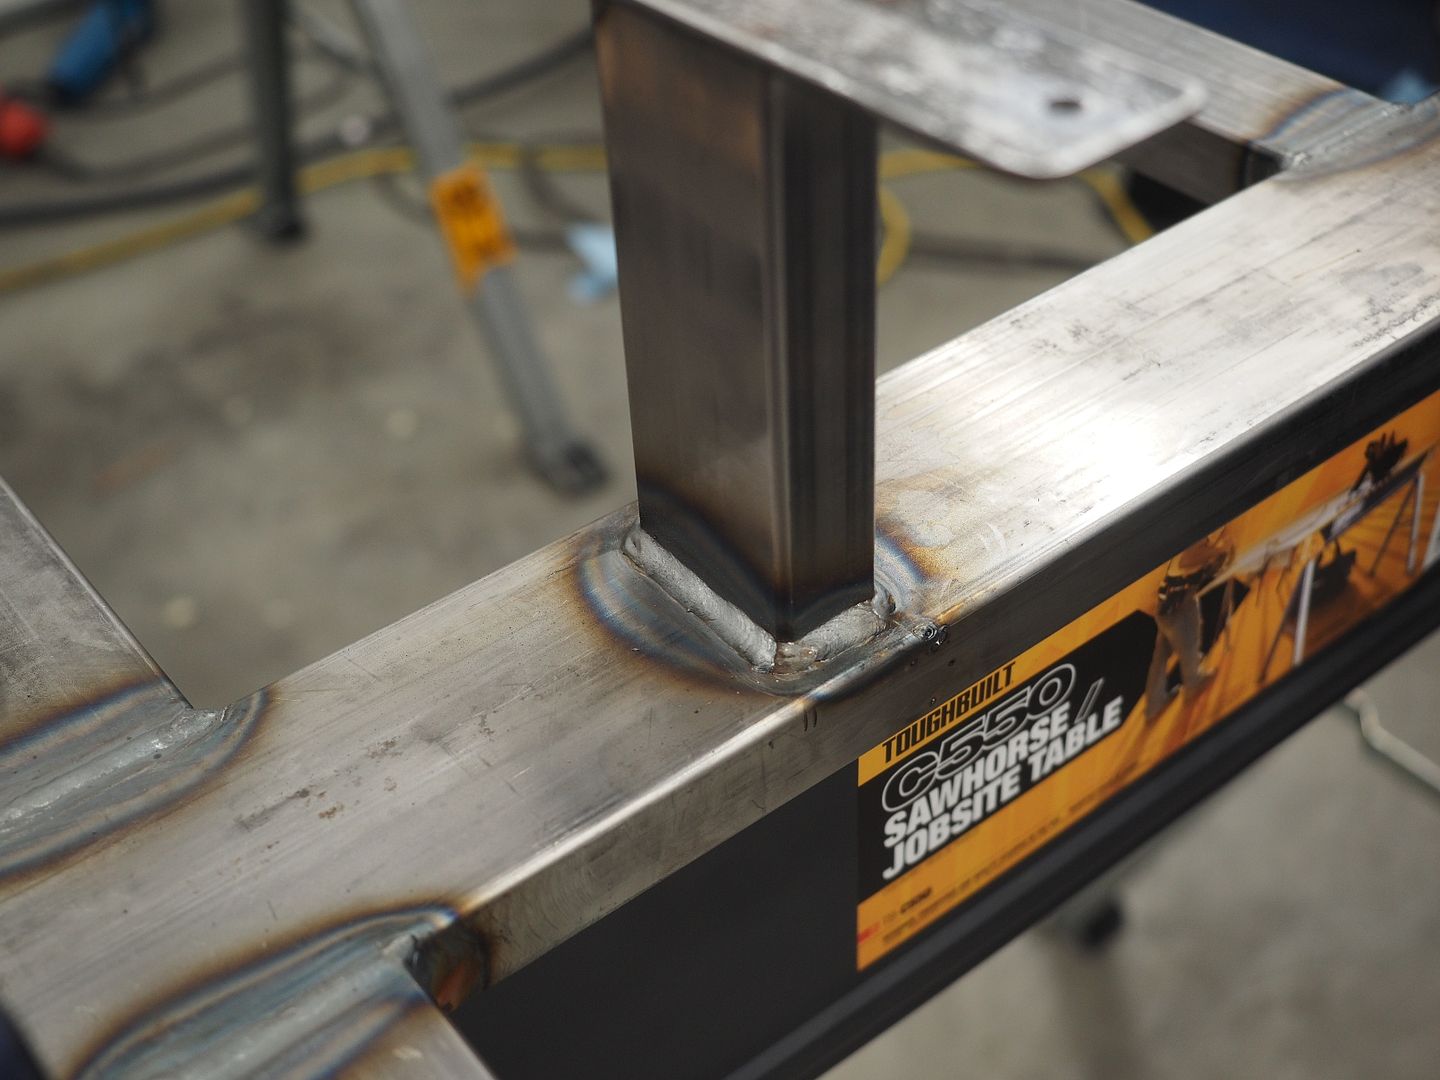
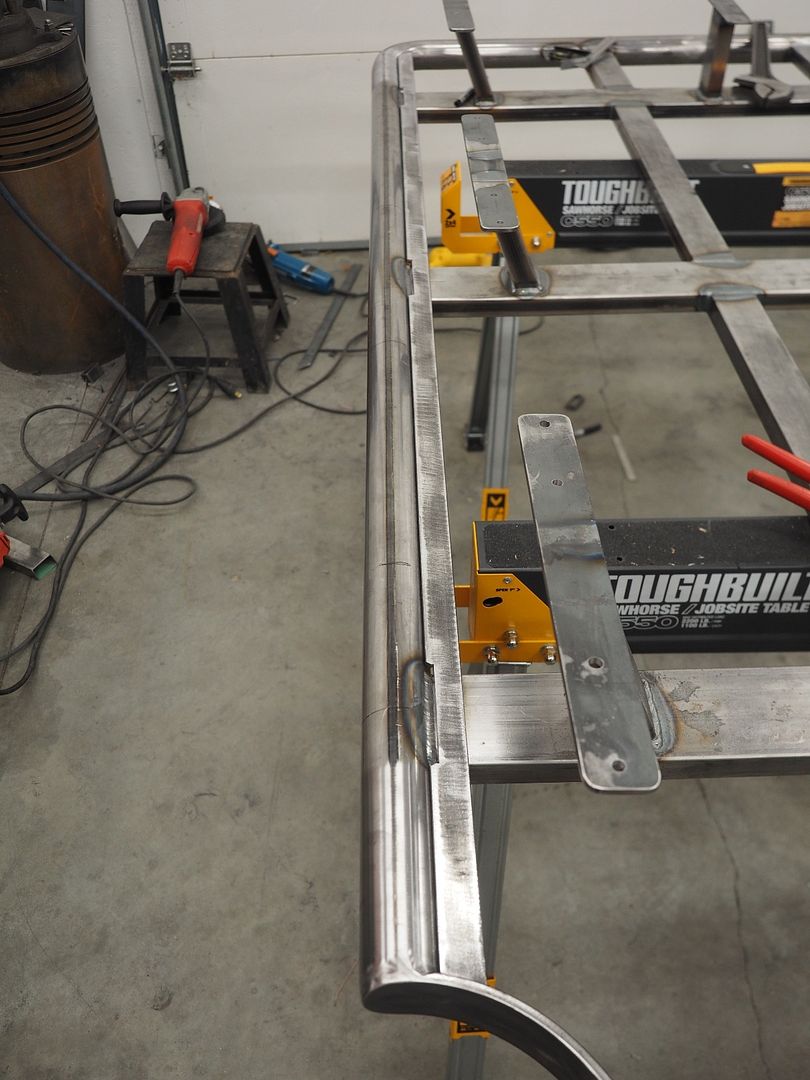
Lots of work today but not a lot of pictures to show for it, making the mounts and ensuring they are all squared in every direction is time consuming.
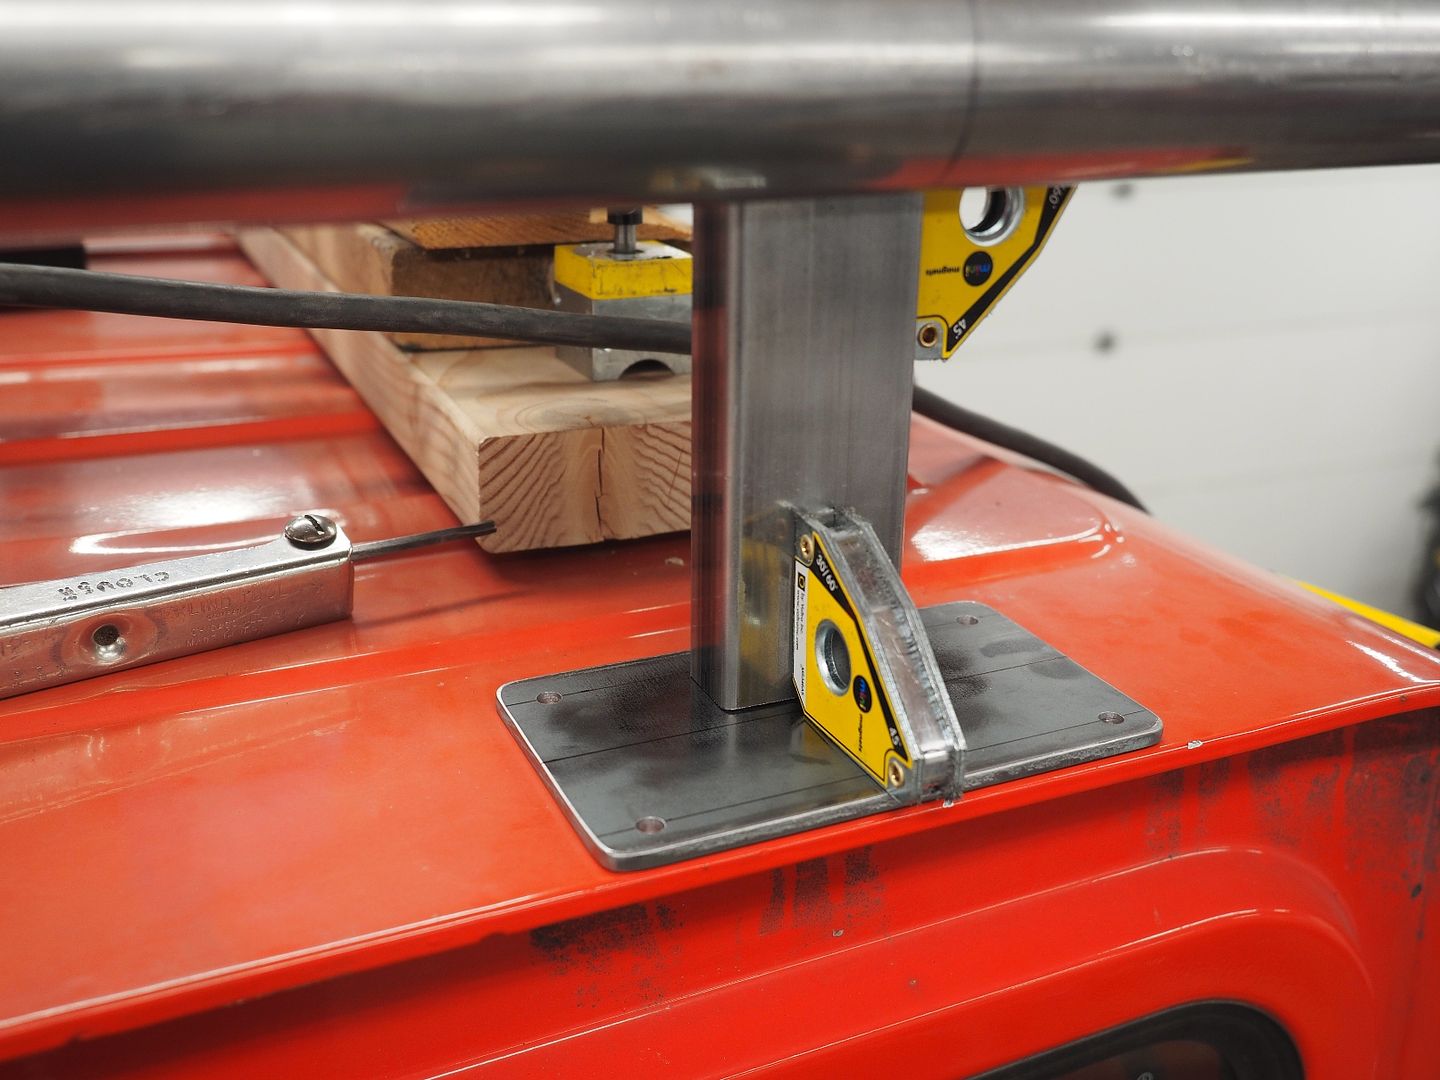
Started this morning by welding in the passenger side front mount then building/installing the rear mounts. The rear mount plates will have two rivet nuts and two through bolts at the back edge of the cab where the metal it double thick. Should be nice and solid.
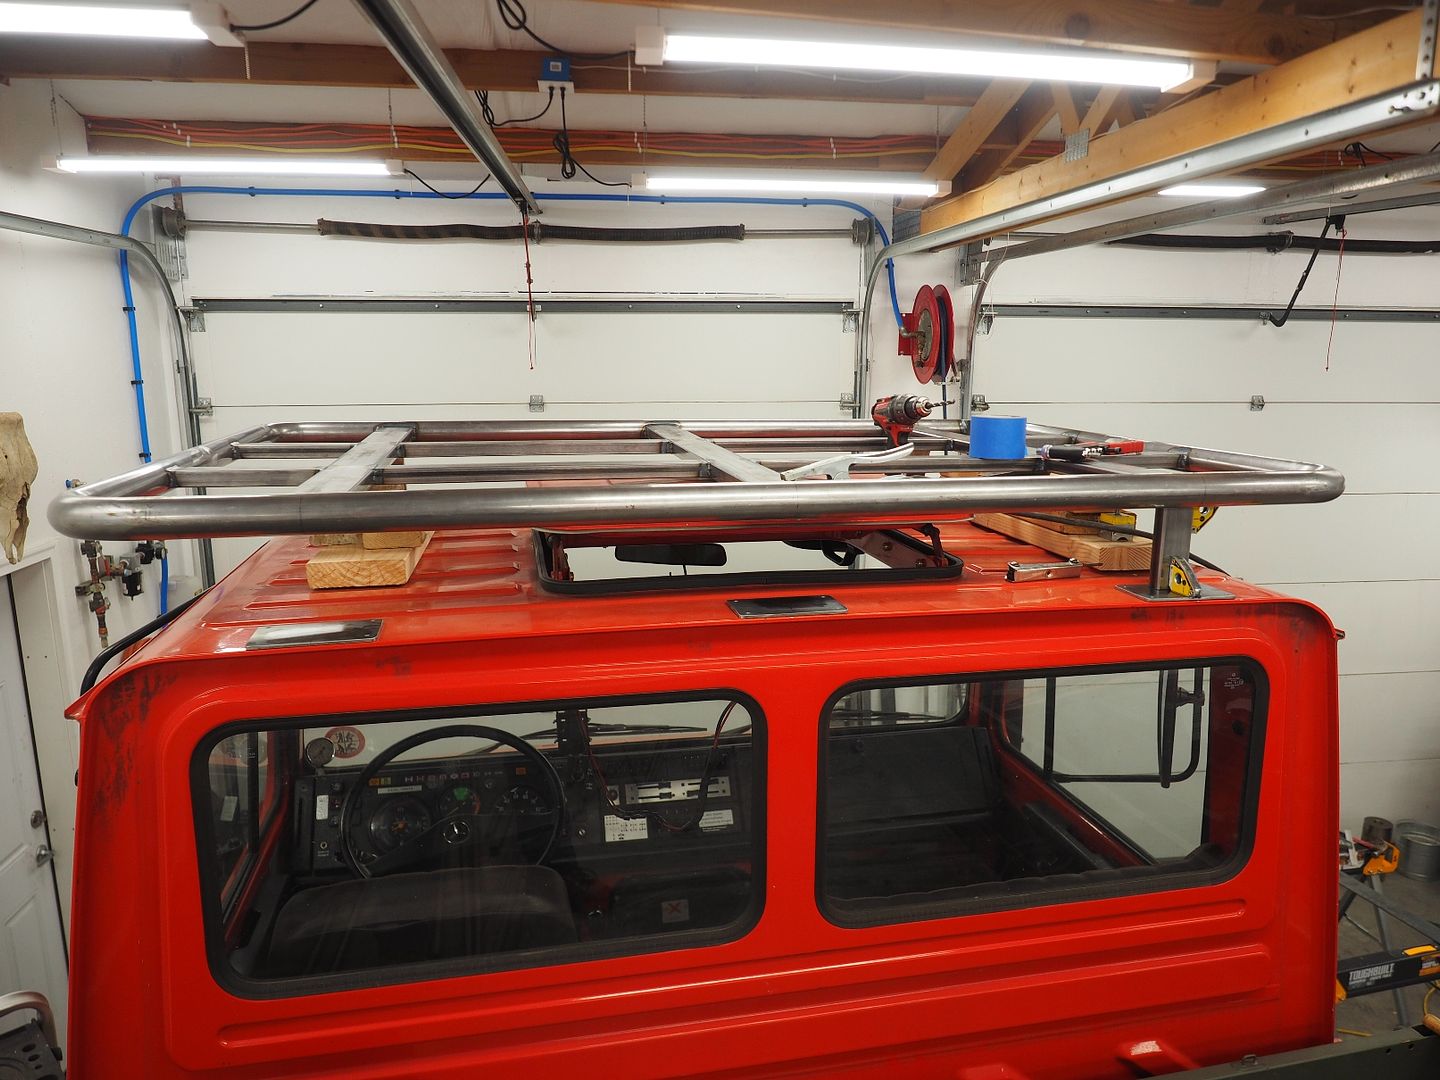
Here's how the rack is at the end of the day, still have three more mounts to build/install that will angle down behind the front mounts.
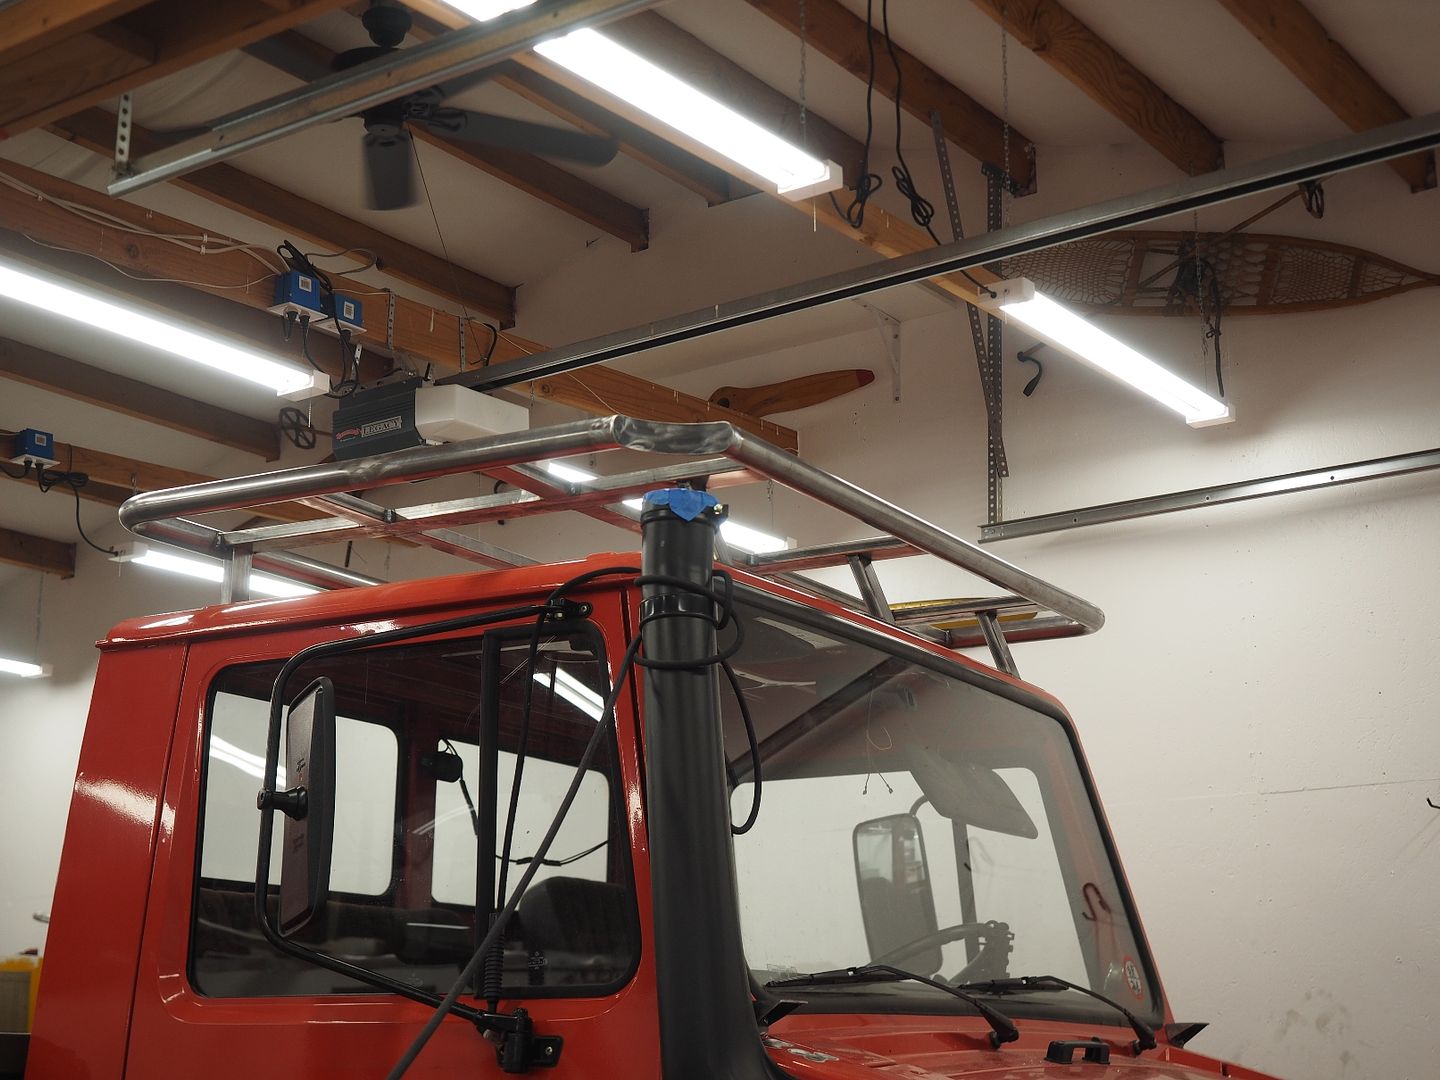

Hopefully I will be done with the rest of the mounts tomorrow, then weld out the rack and start on the light mounts.
Hodakaguy
Started this morning by welding in the passenger side front mount then building/installing the rear mounts. The rear mount plates will have two rivet nuts and two through bolts at the back edge of the cab where the metal it double thick. Should be nice and solid.
Here's how the rack is at the end of the day, still have three more mounts to build/install that will angle down behind the front mounts.
Hopefully I will be done with the rest of the mounts tomorrow, then weld out the rack and start on the light mounts.
Hodakaguy
Hodakaguy
Adventurer
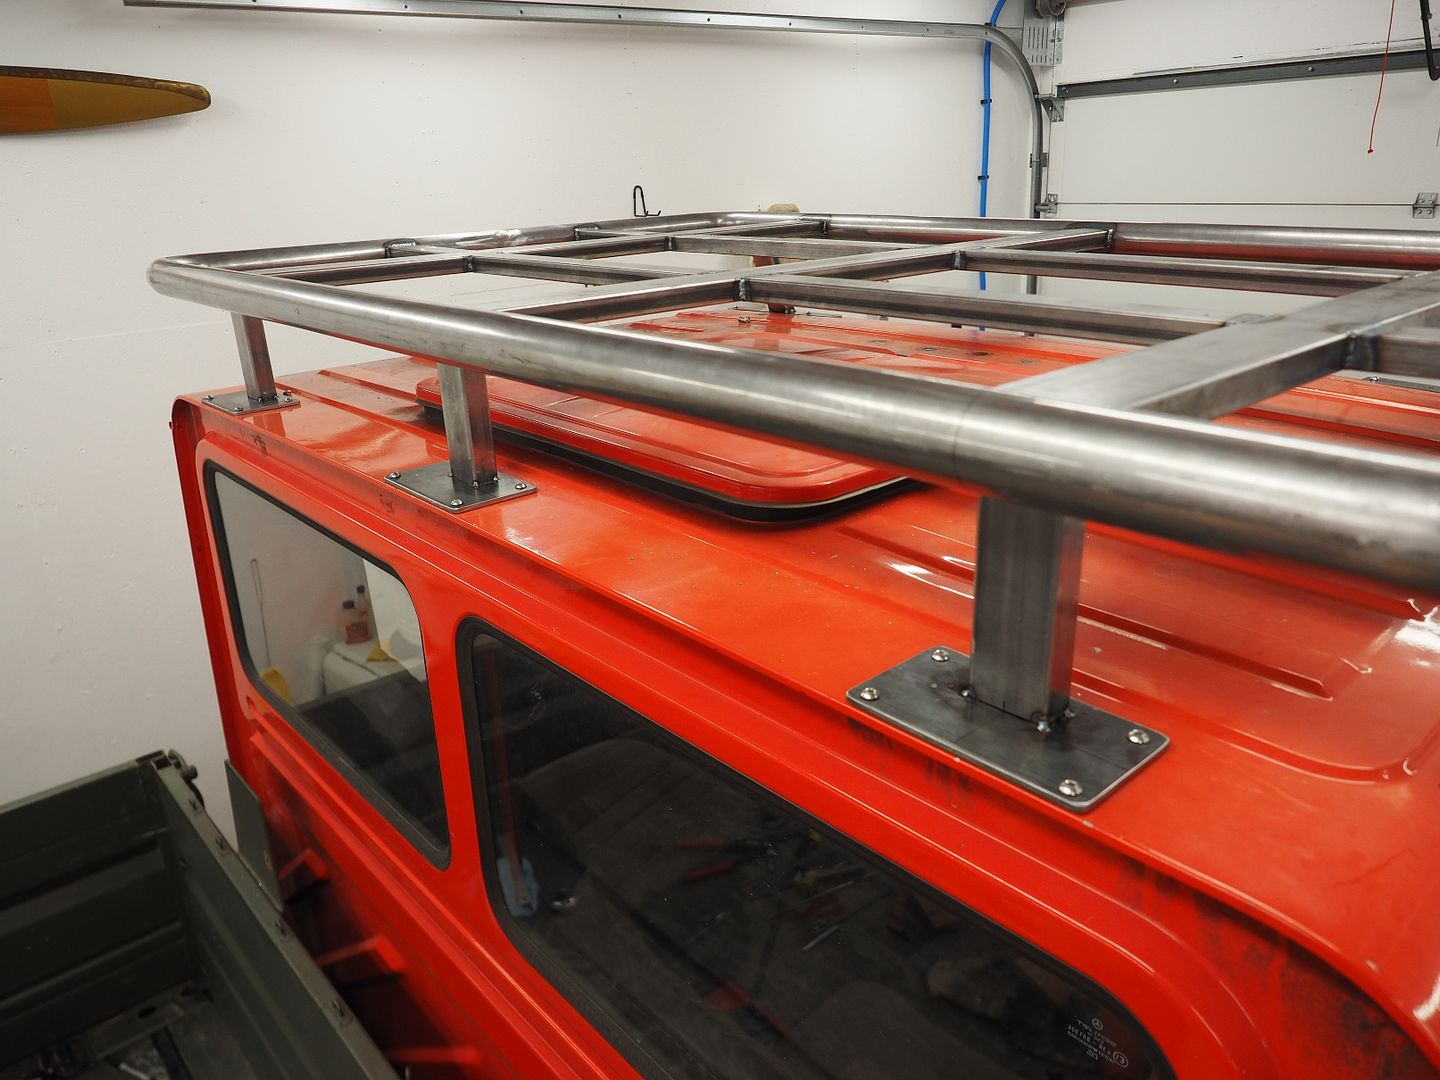
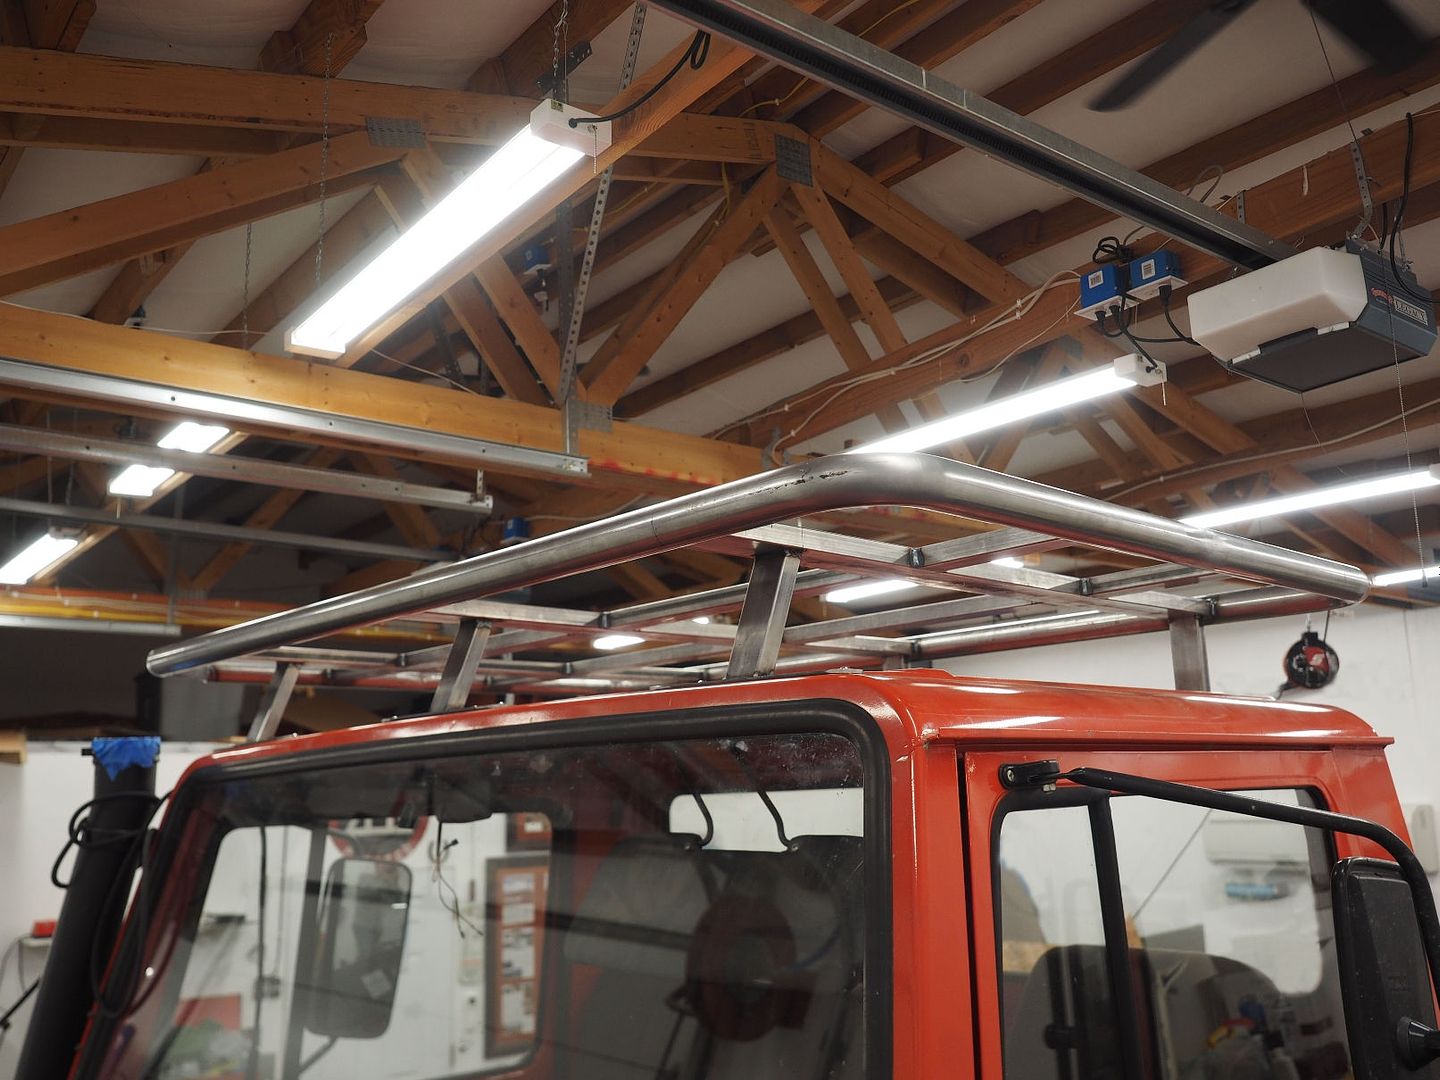
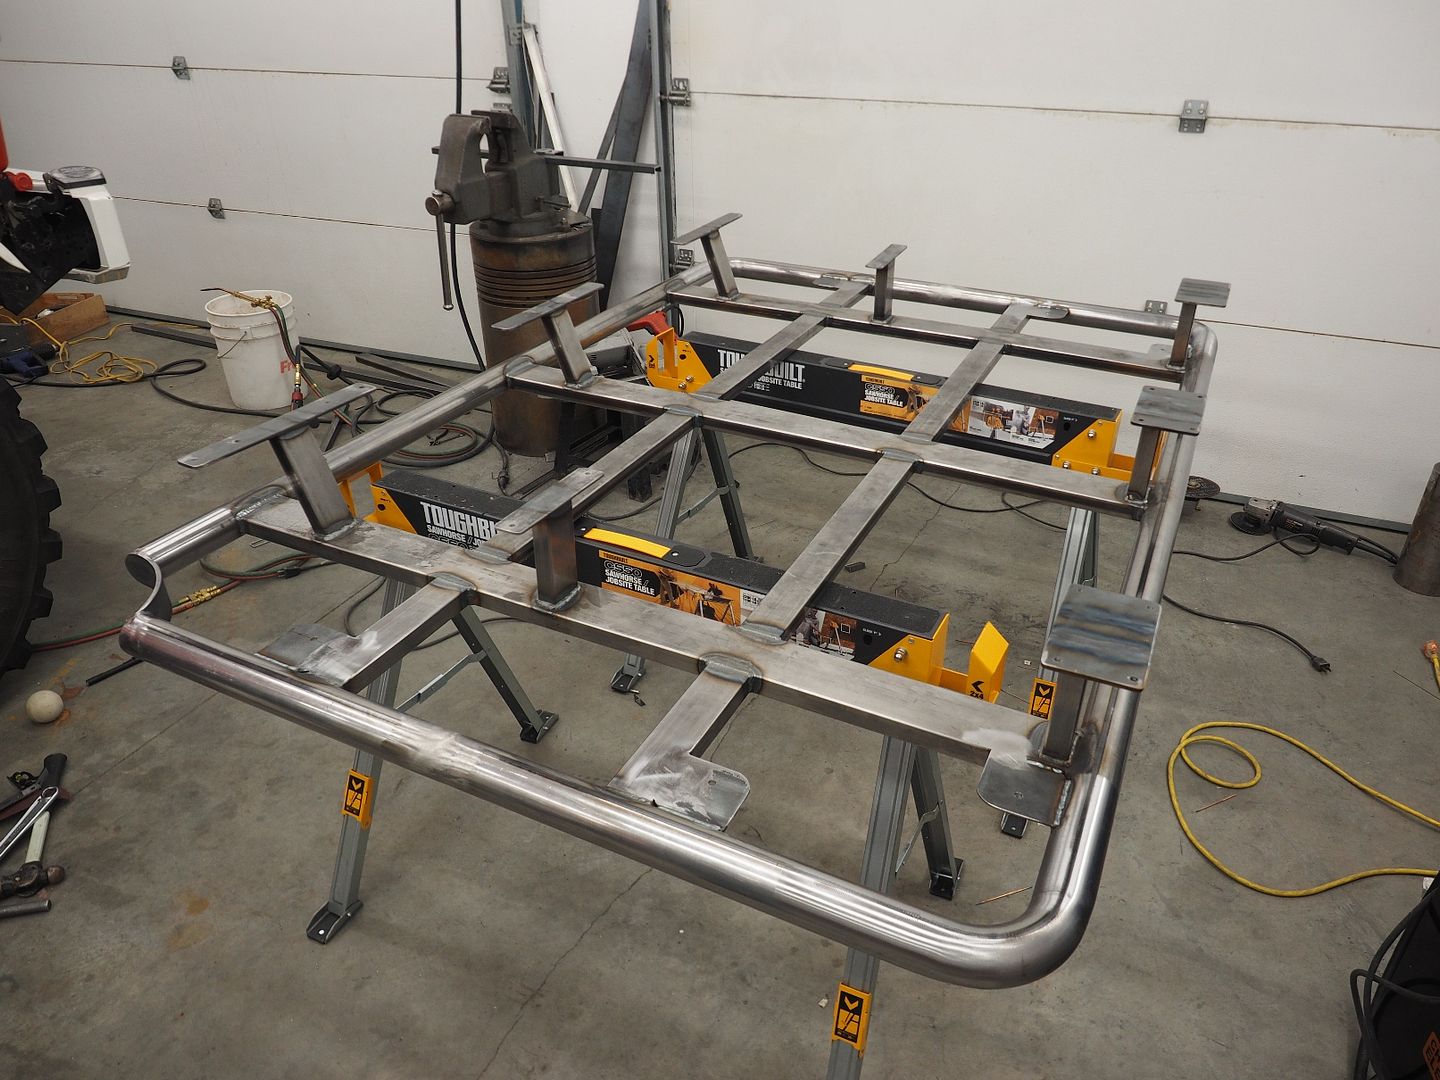
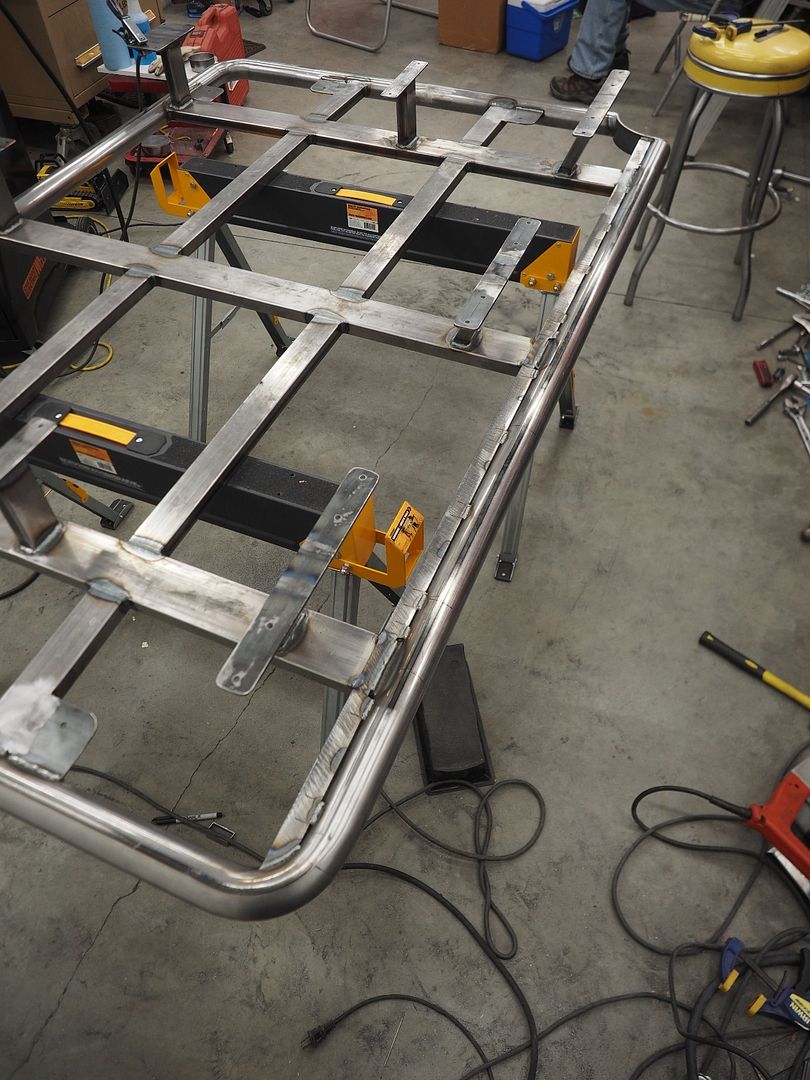
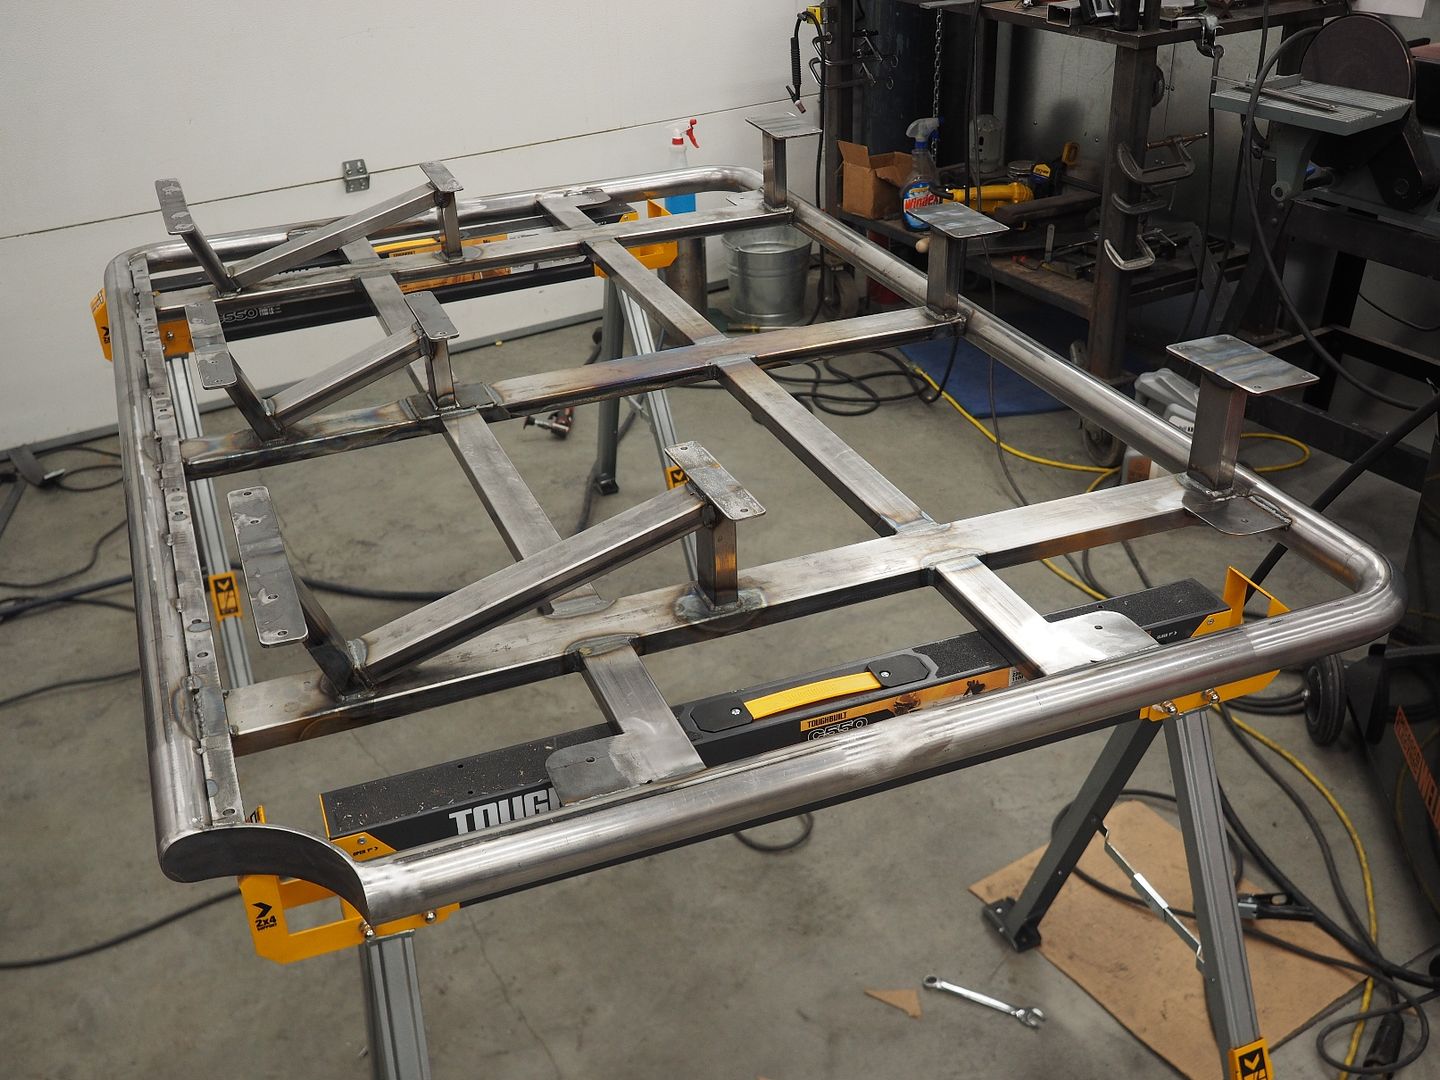
Started by installing the remaining mounts this morning. We decided to change our plan a bit and added center mounts instead of angled mounts off the front, this will give a little more support plus we liked the looks better this way ")
Center mounts installed.
Next up we removed the rack and welded everything out. We decided to weld the supports with Mig since it will minimize heat distortion. Once everything was welded we straightened everything back out to spec again.
Support welded in place.
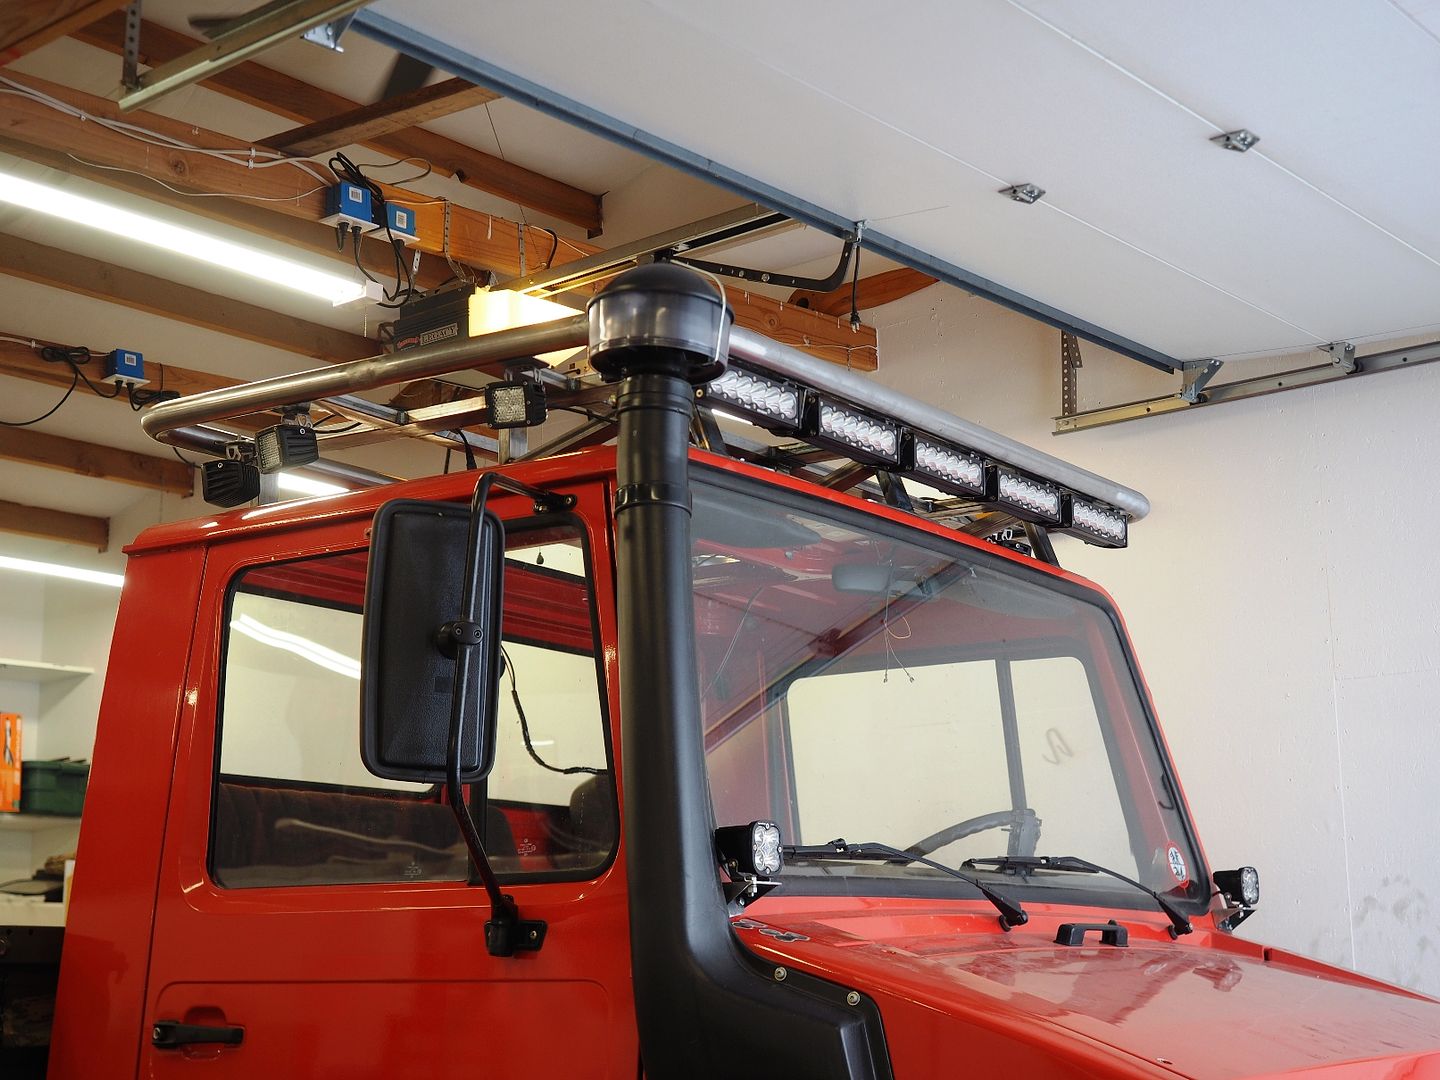
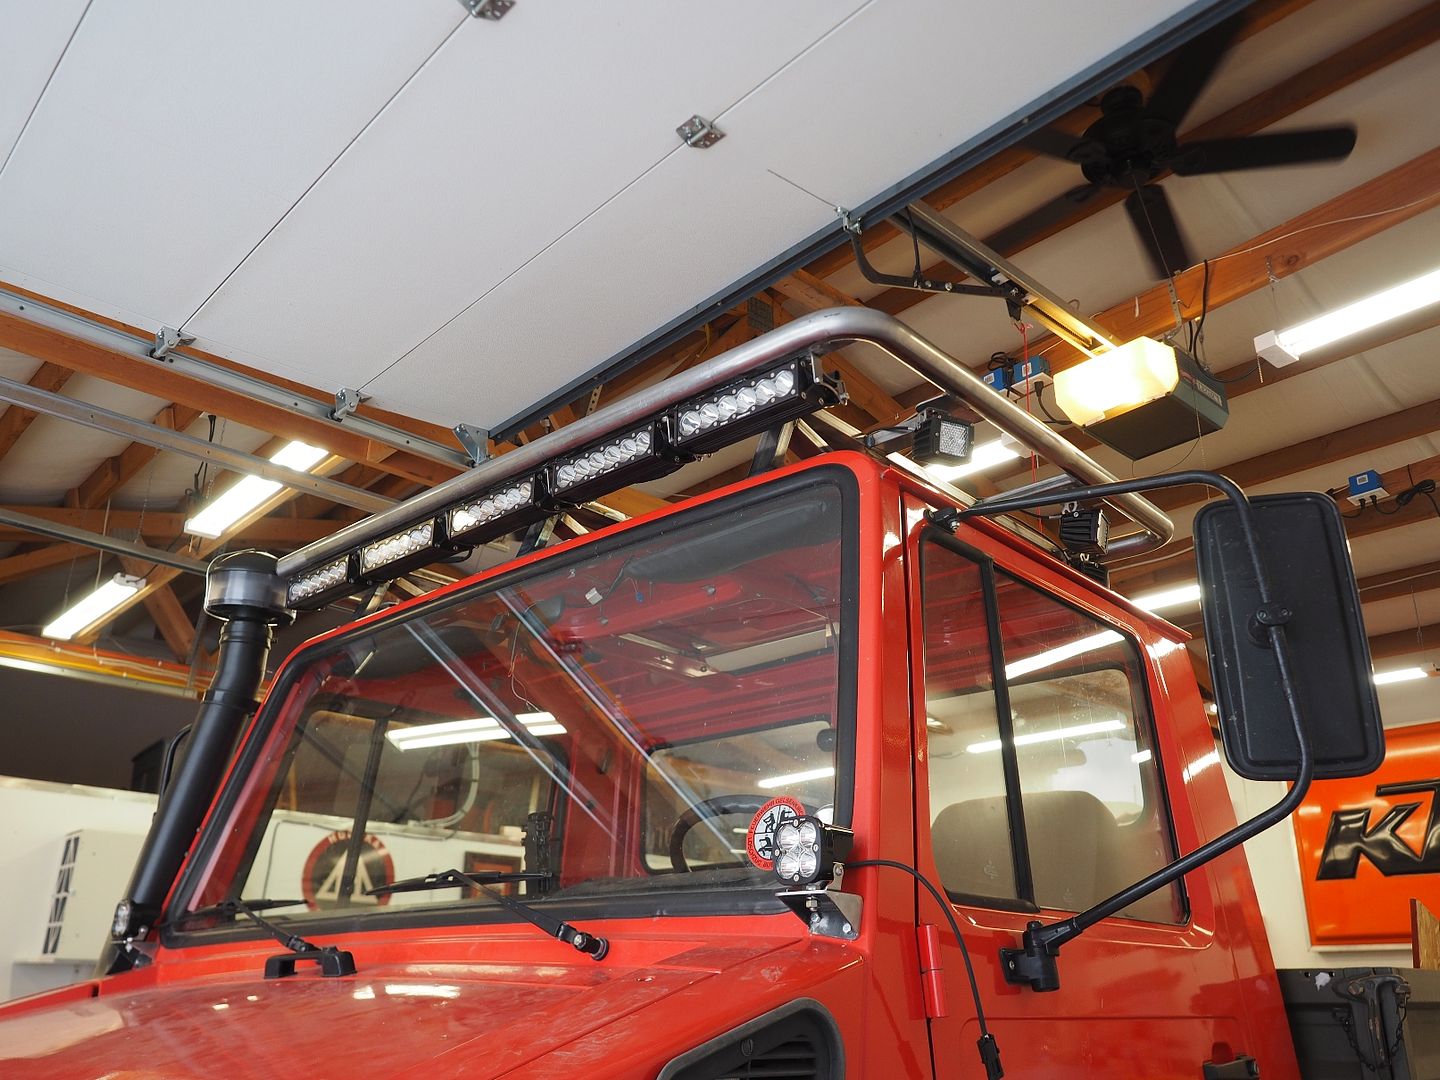
Here the rack is fully welded and we have installed mounting plates for the side and rear flood lights.
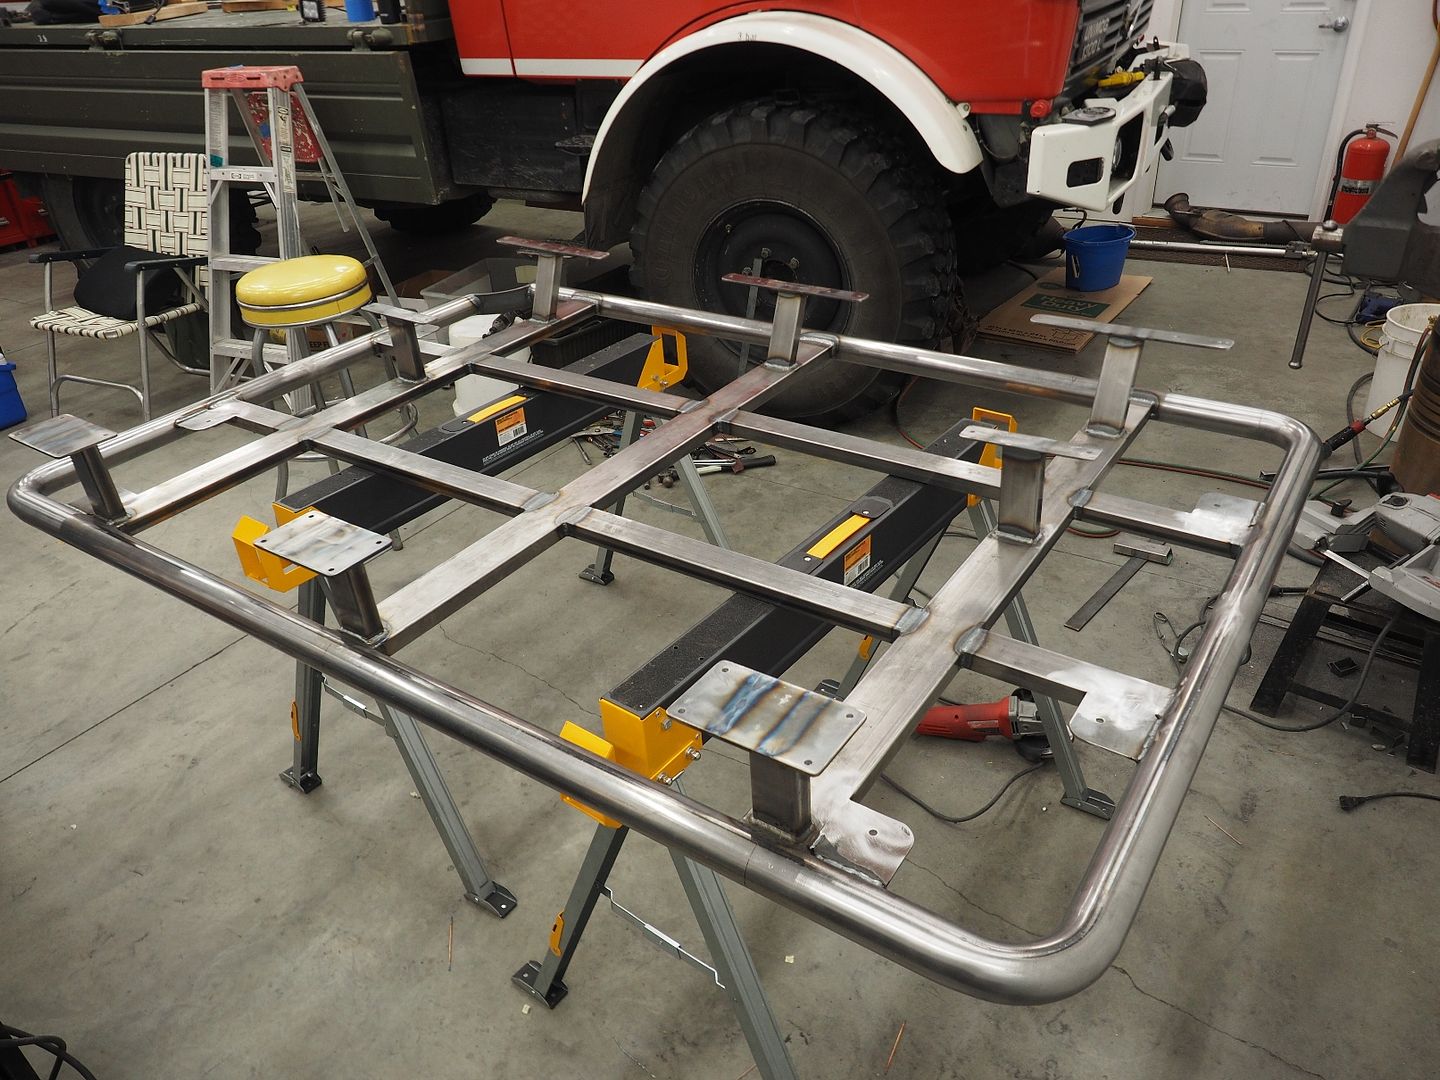
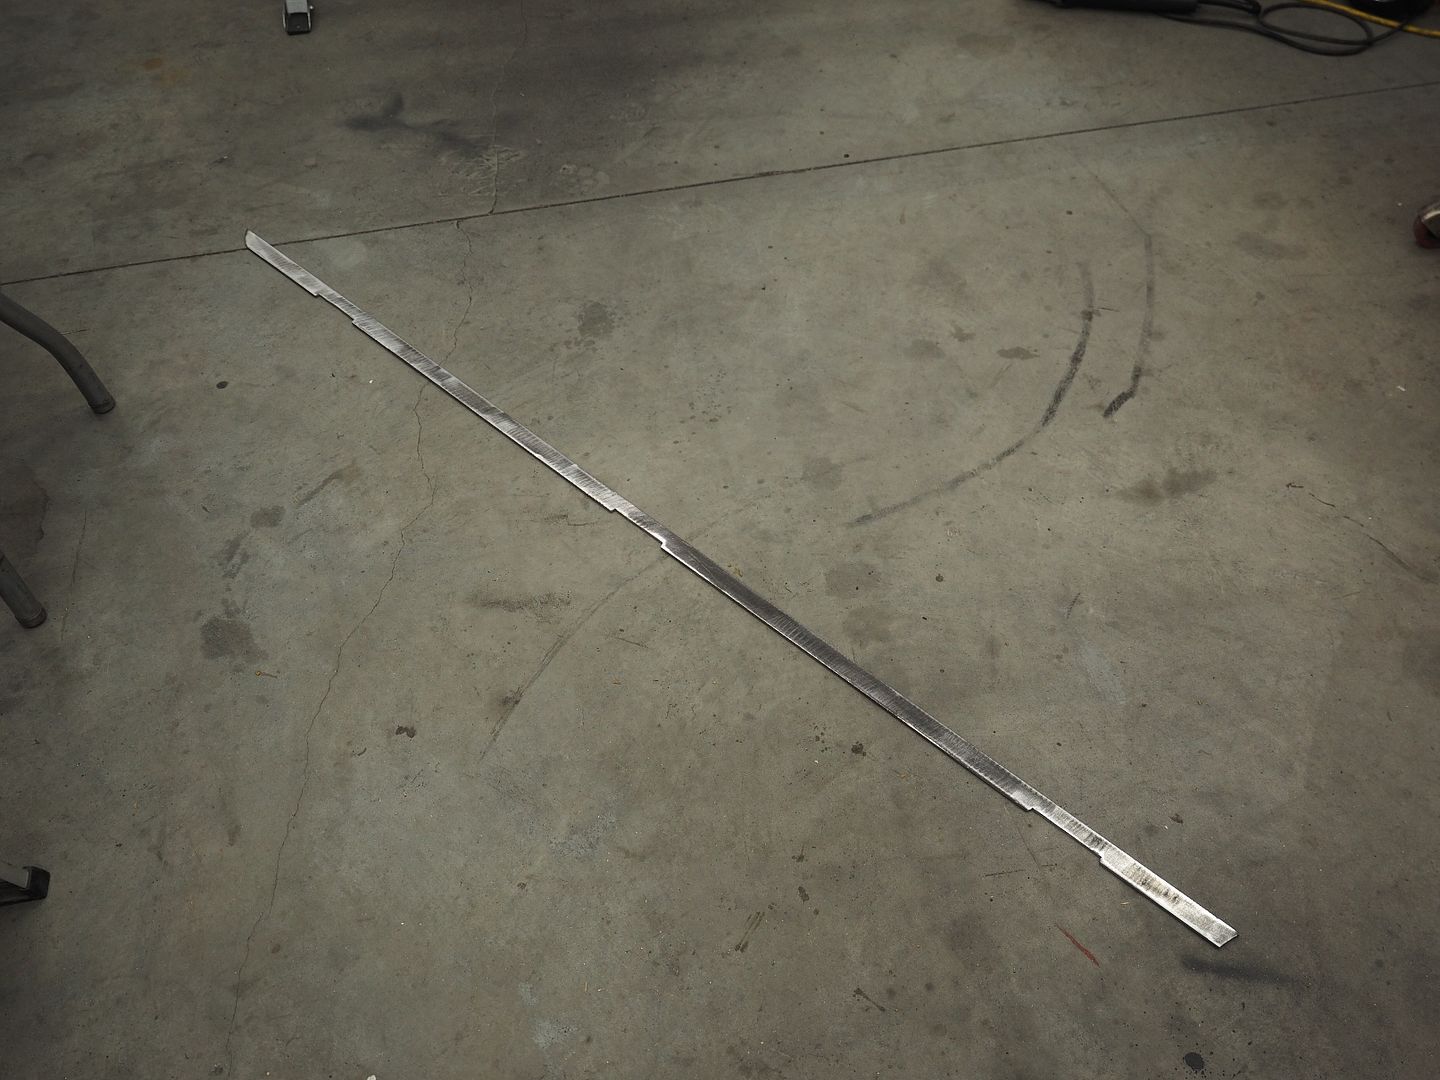
Now on to installing the mounting tab for the front driving lights. This section of flat bar will be the mounting tab for the lights, it's notched to clear the welds at the tubing locations.
Sitting in place.
Welded in.
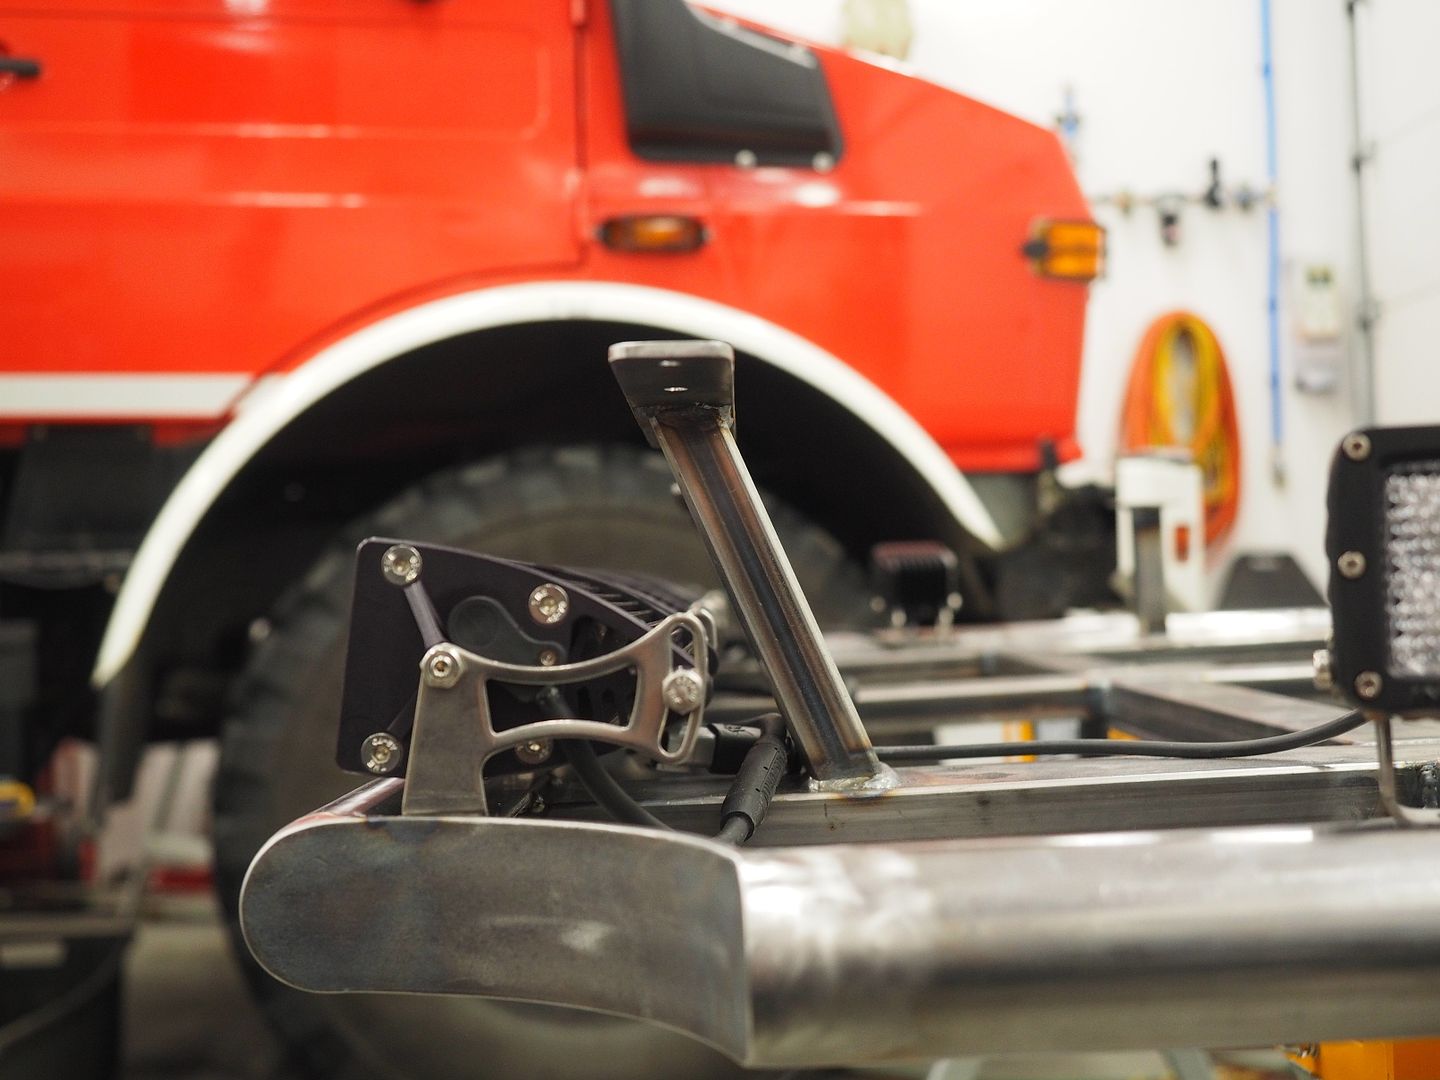
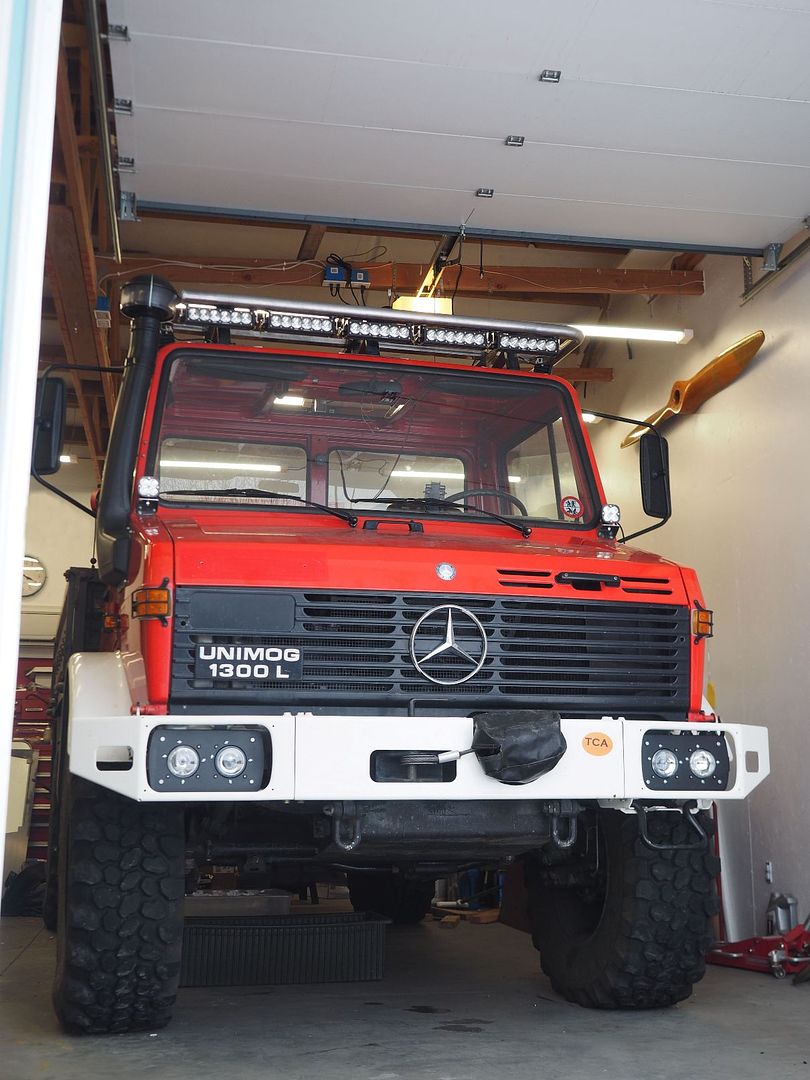
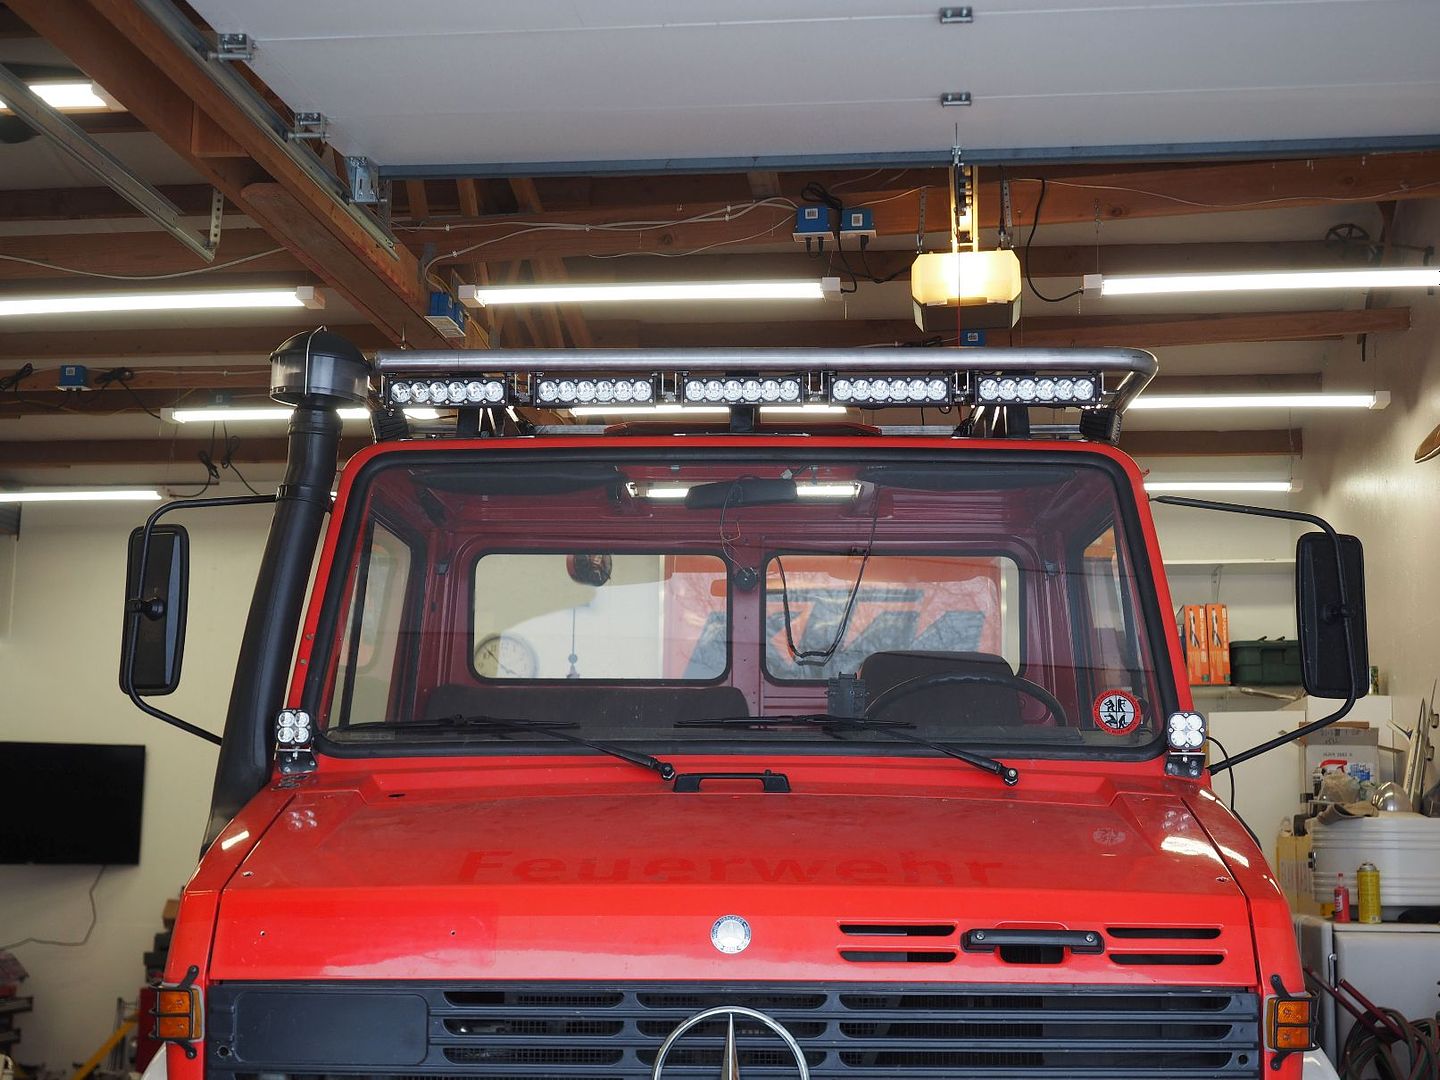
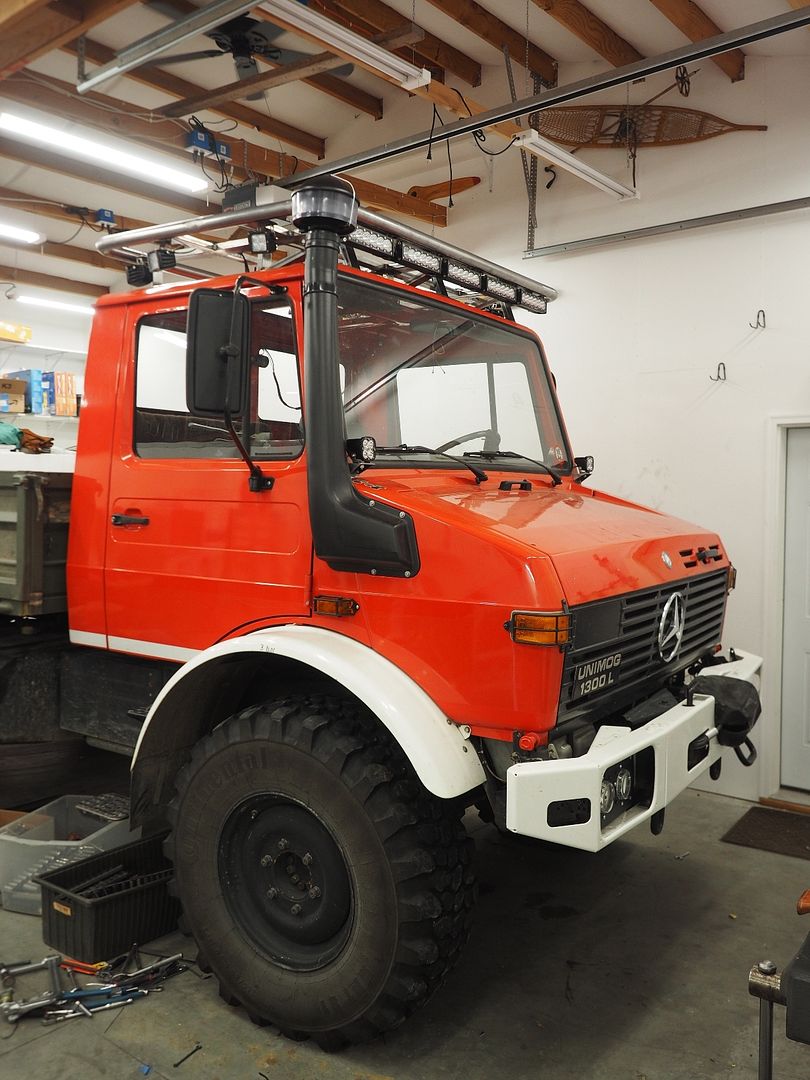
And the lights temporarily installed for a picture. 5 BAJA Designs 10" ONX6 Driving lights for the front, two Rigid flood lights for each side and two for the back. Switches will be wired as: Front driving lights, Right flood lights, Left flood lights, Rear flood lights. I like LOTS of light
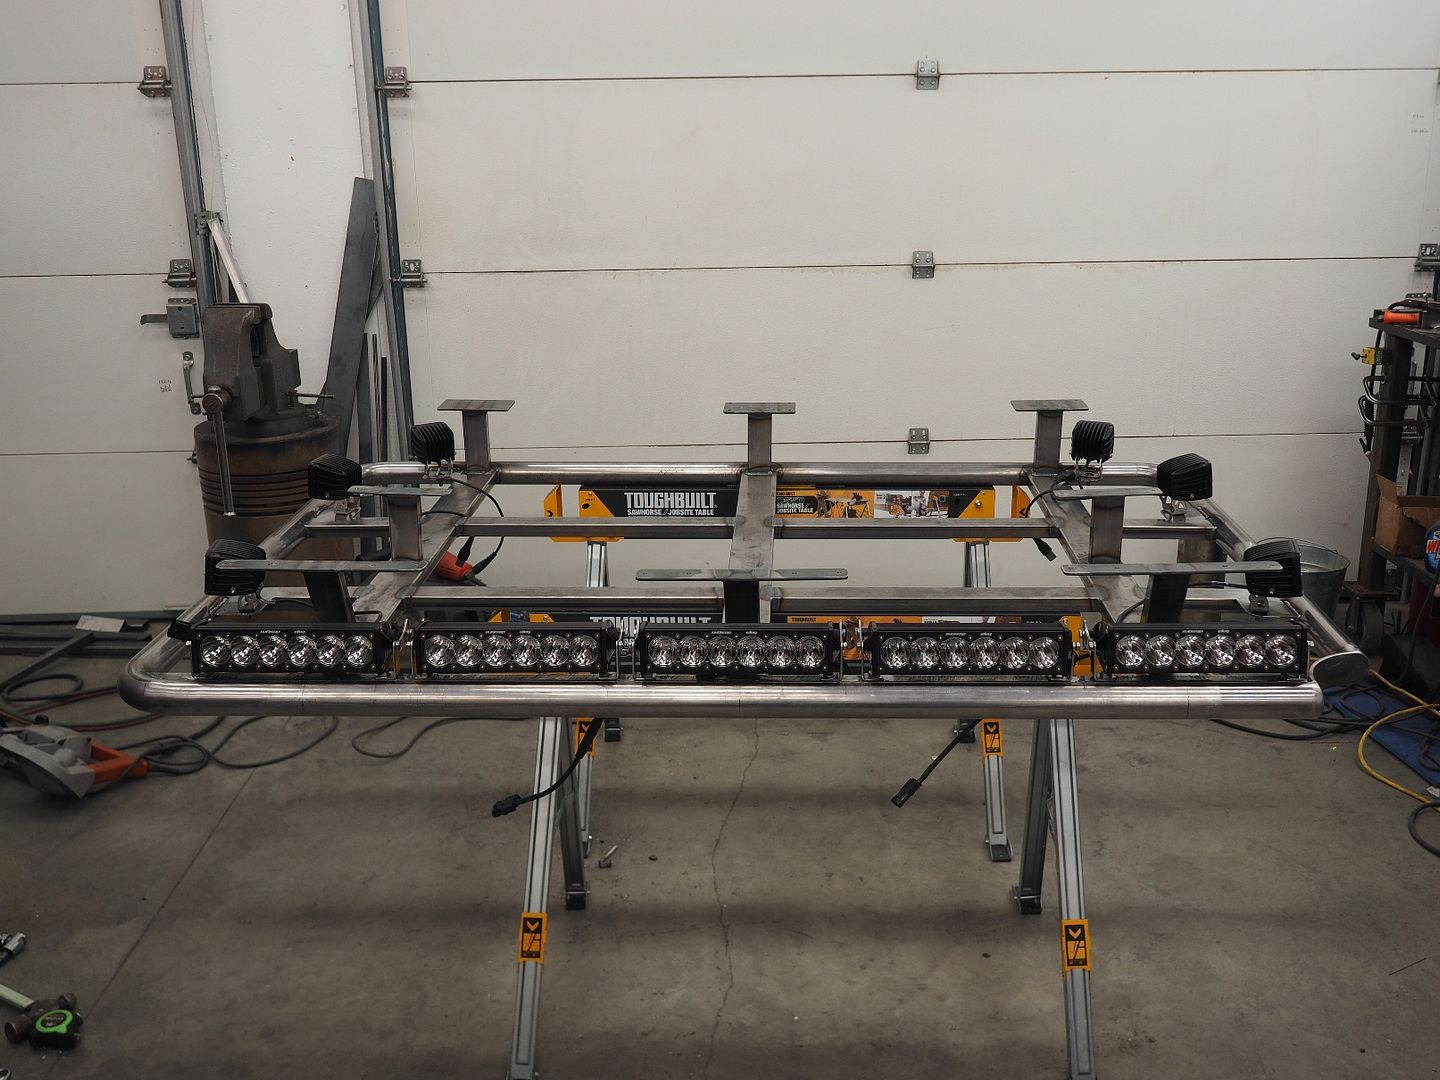
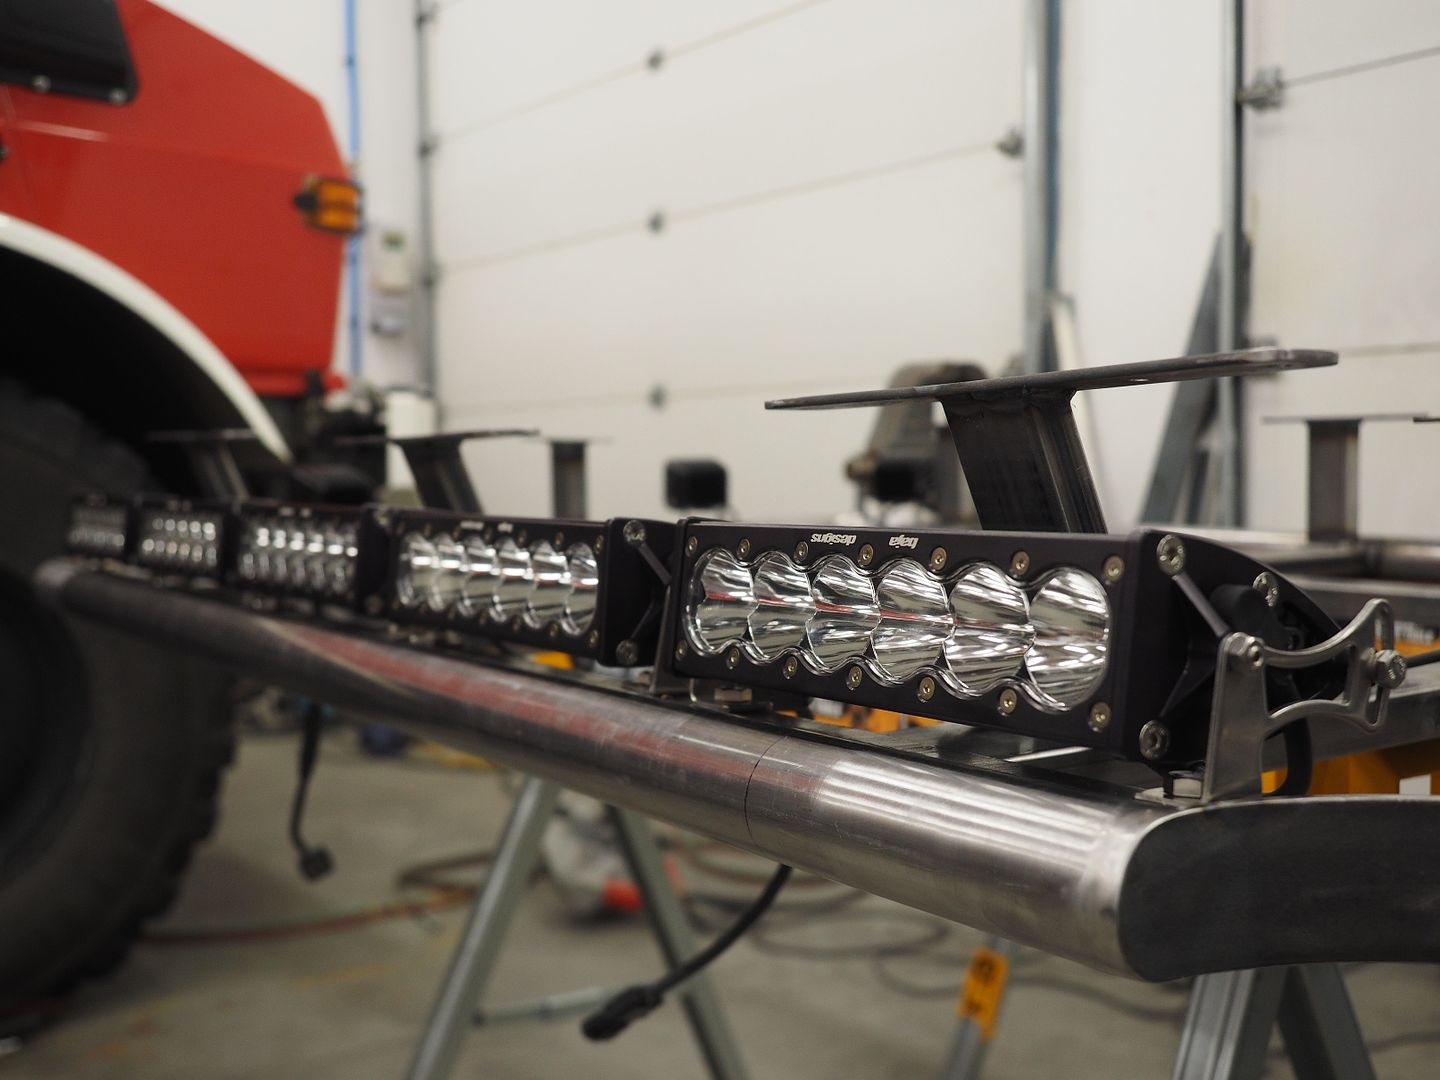
Here you can see why the front mounts are set at the angle that they are, for clearance of the driving lights.
Hope to get it all assembled and mounted on the truck next weekend.
More to come.....
Hodakaguy
Center mounts installed.
Next up we removed the rack and welded everything out. We decided to weld the supports with Mig since it will minimize heat distortion. Once everything was welded we straightened everything back out to spec again.
Support welded in place.
Here the rack is fully welded and we have installed mounting plates for the side and rear flood lights.
Now on to installing the mounting tab for the front driving lights. This section of flat bar will be the mounting tab for the lights, it's notched to clear the welds at the tubing locations.
Sitting in place.
Welded in.
And the lights temporarily installed for a picture. 5 BAJA Designs 10" ONX6 Driving lights for the front, two Rigid flood lights for each side and two for the back. Switches will be wired as: Front driving lights, Right flood lights, Left flood lights, Rear flood lights. I like LOTS of light
Here you can see why the front mounts are set at the angle that they are, for clearance of the driving lights.
Hope to get it all assembled and mounted on the truck next weekend.
More to come.....
Hodakaguy
Hodakaguy
Adventurer
With those lights on in the desert, there will be a lot of call's from people, claiming that they have seen a UFO
It's looking good.
Yeah it won't be lacking light when I'm done lol.
Hodakaguy
Hodakaguy
Adventurer
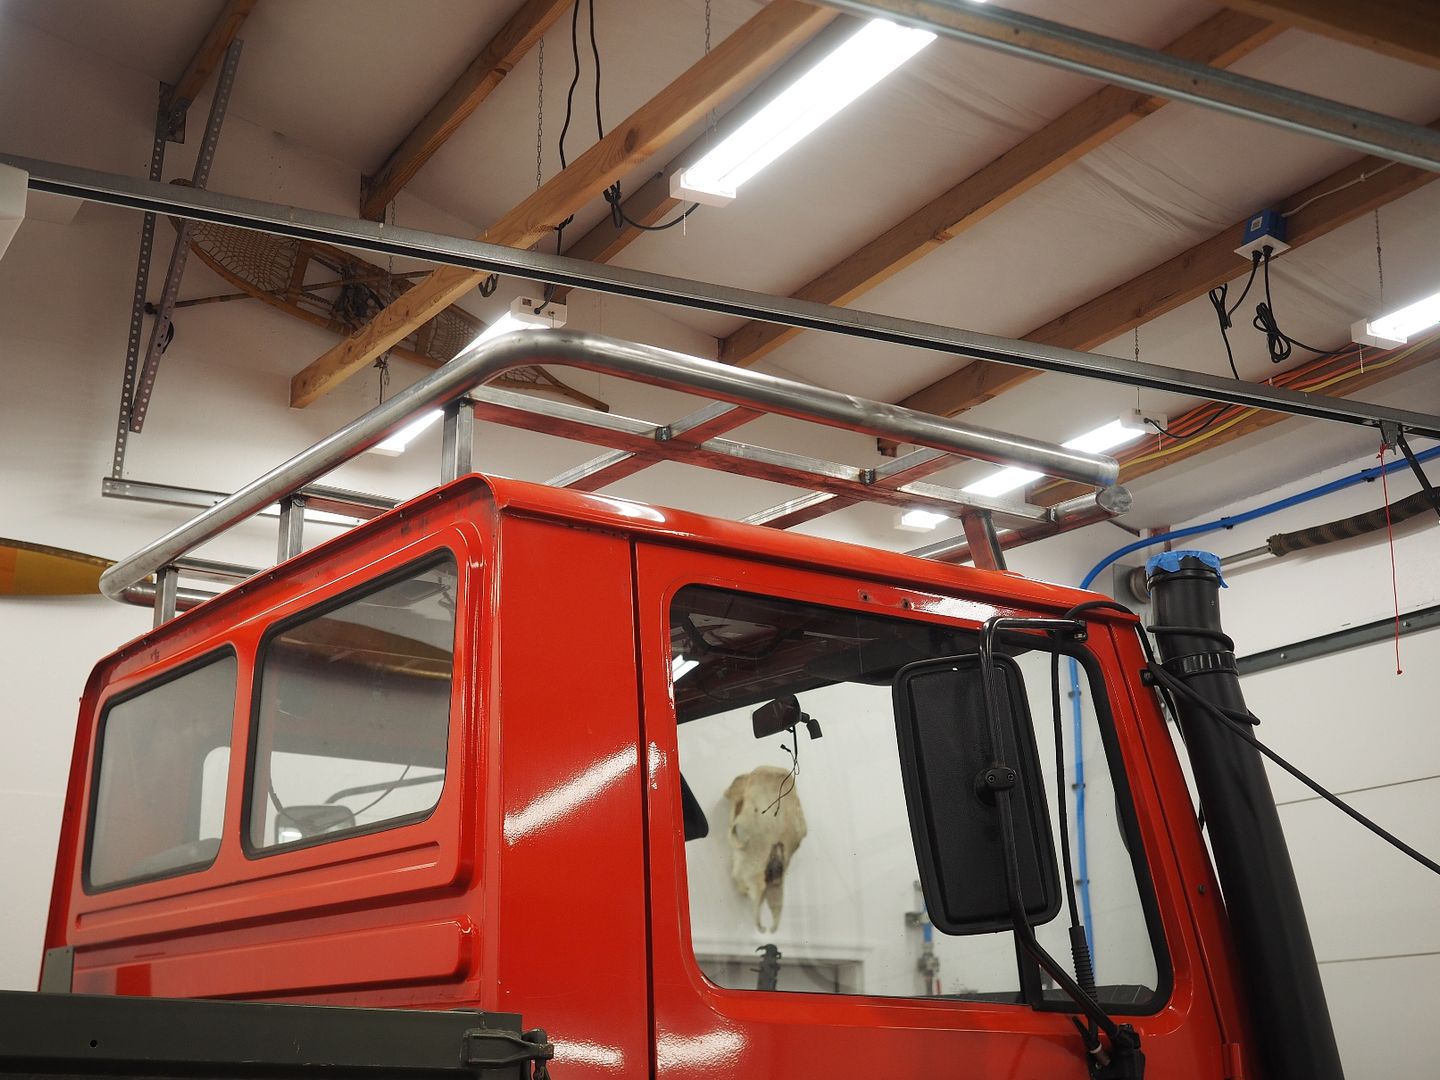
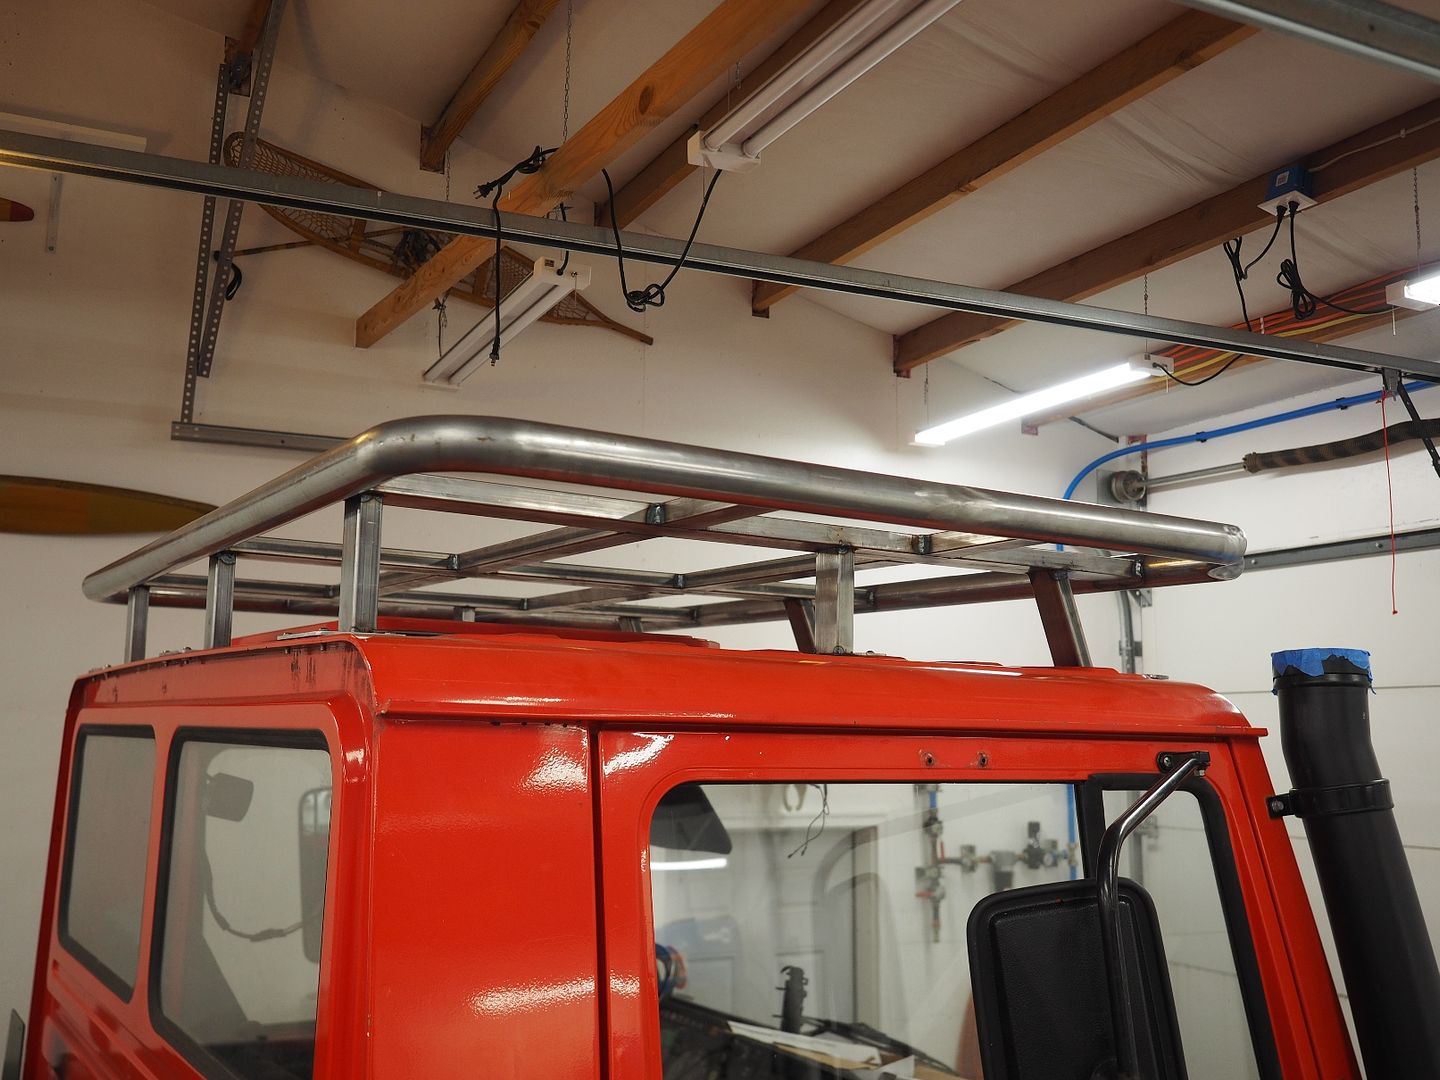
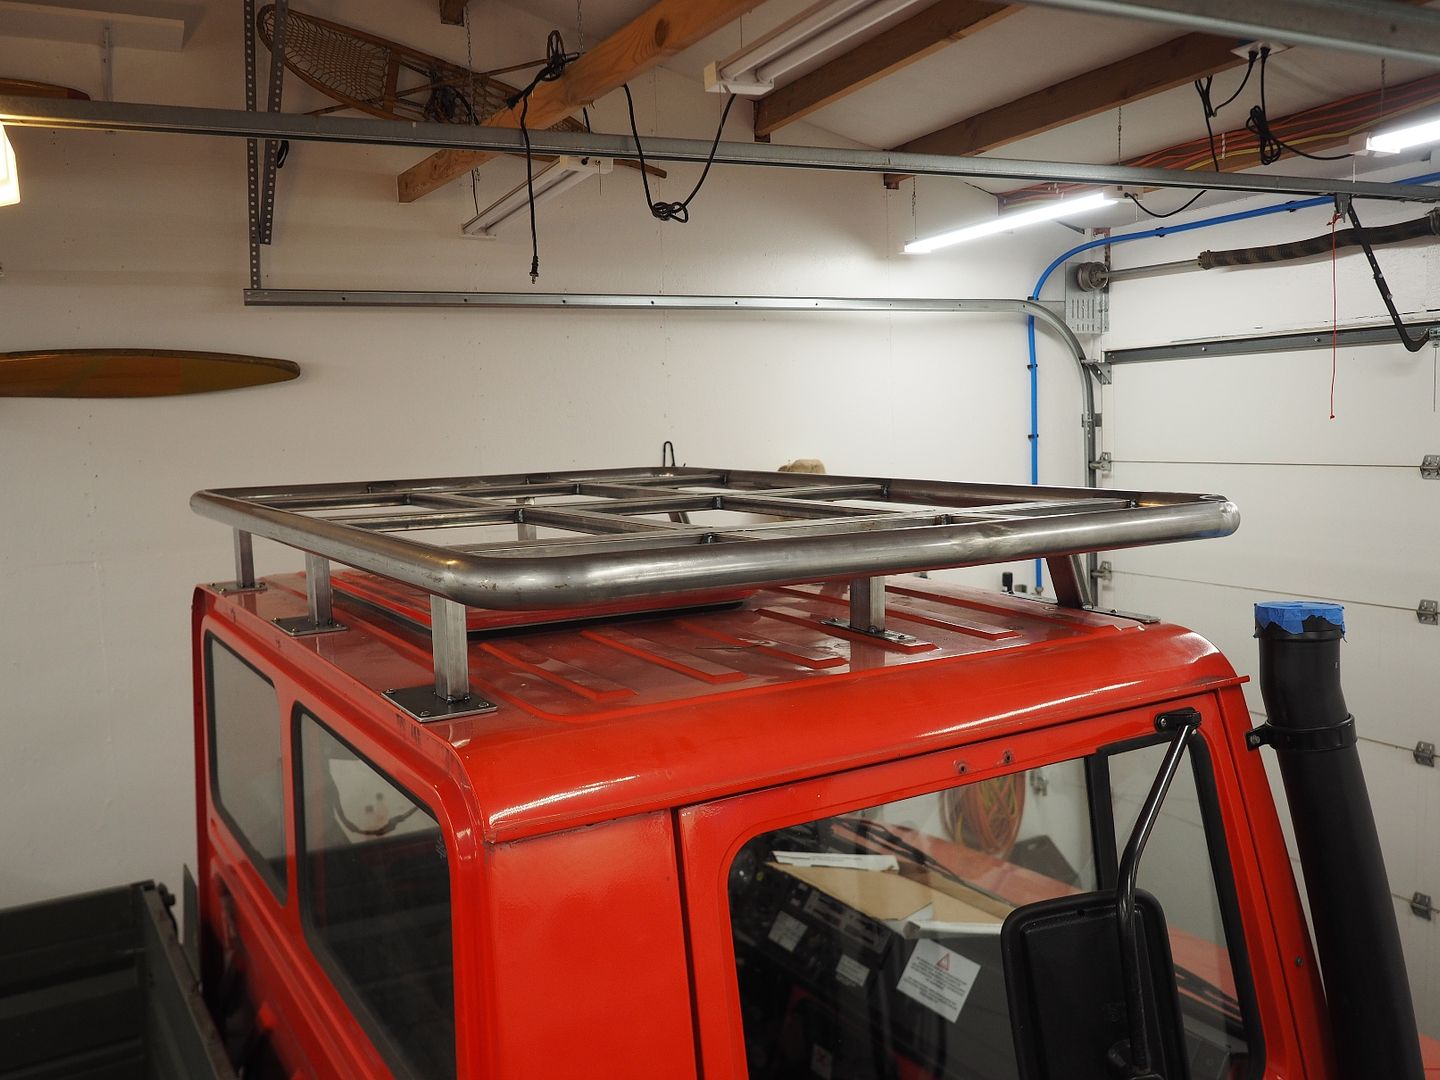
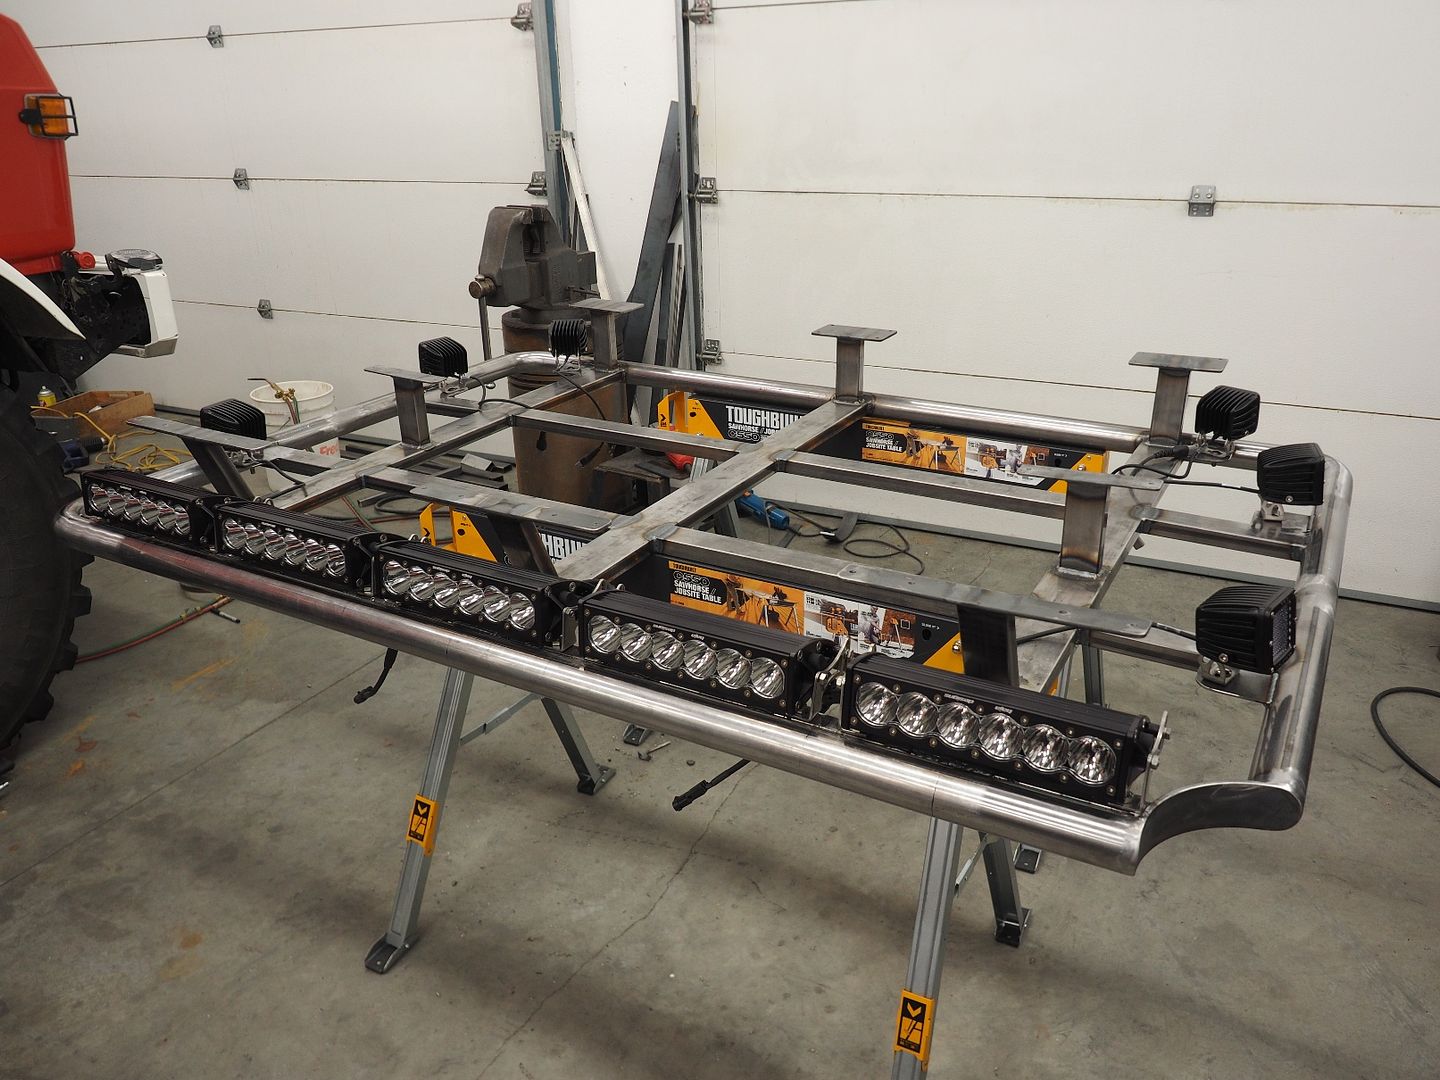
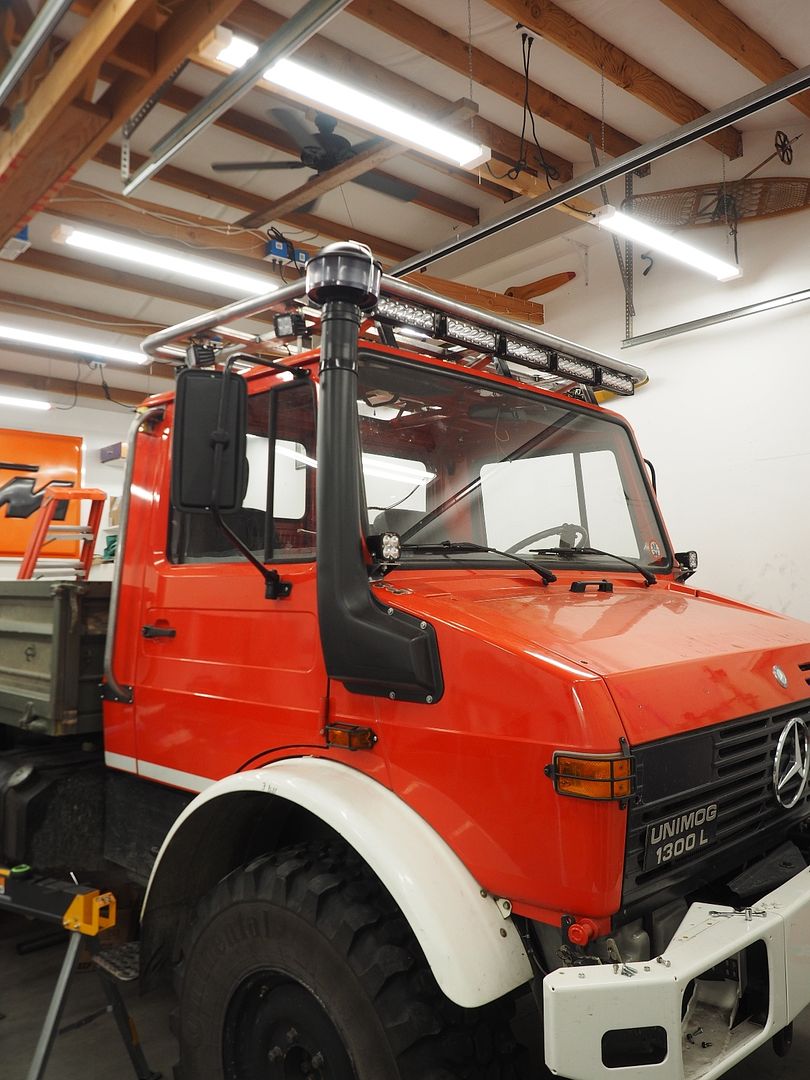
Up early this morning to finish up the roof rack. Added in gussets to the front legs to keep them from bending under weight since they are on an angle.
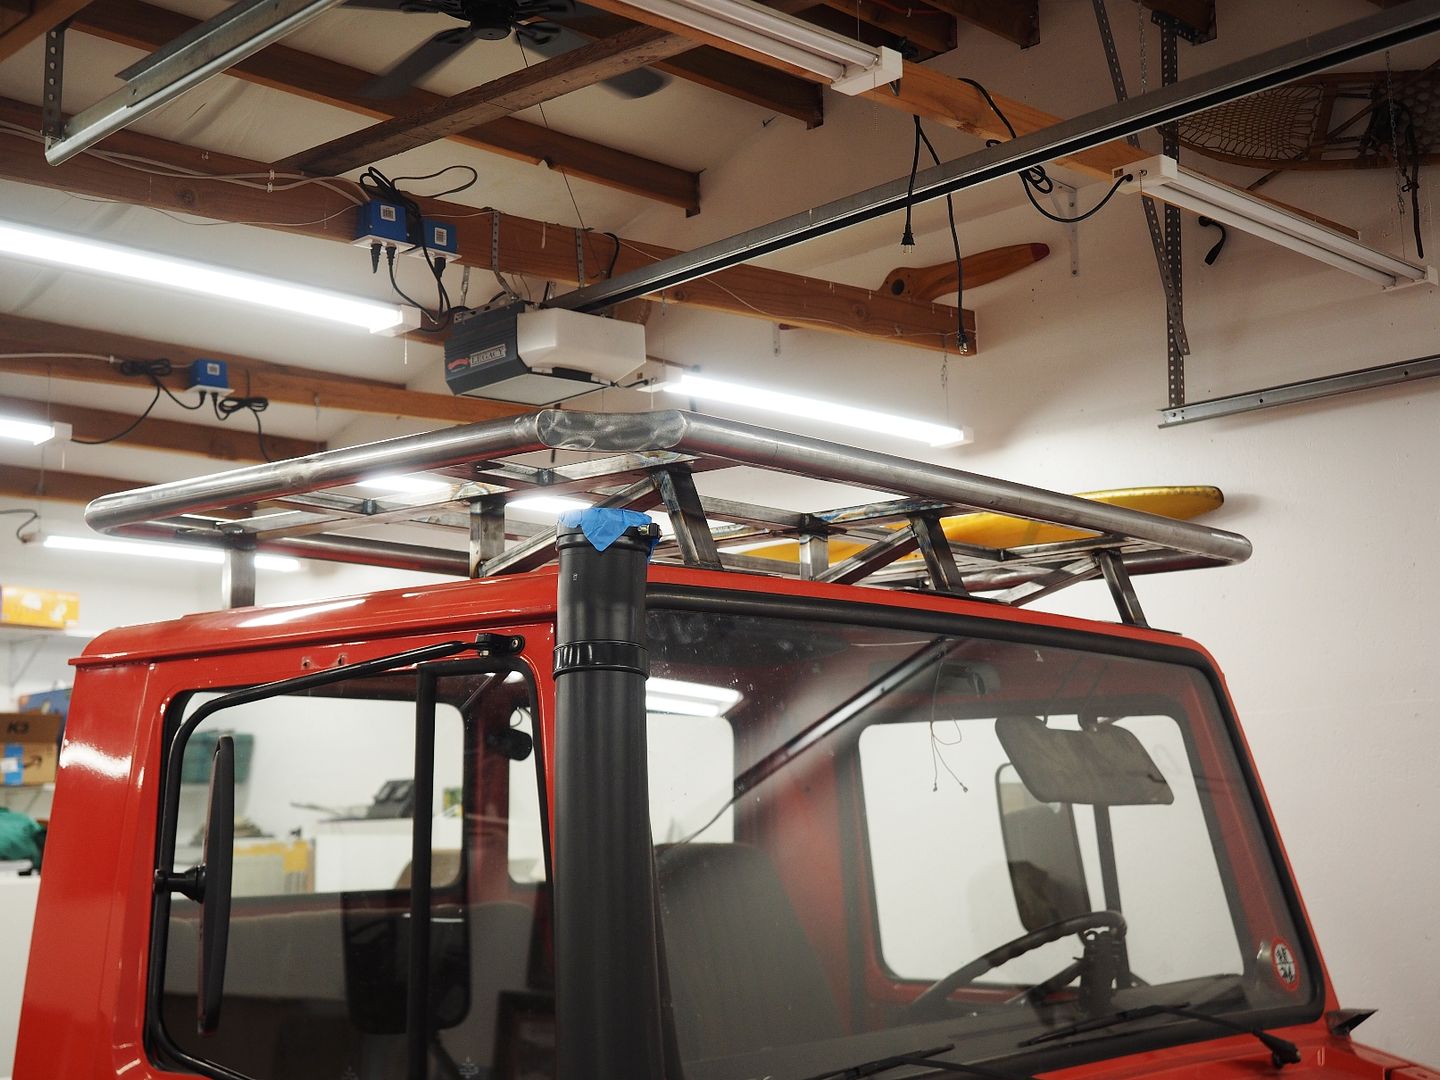
Fully welded up and assembled on the truck. Not going to be short on light lol.
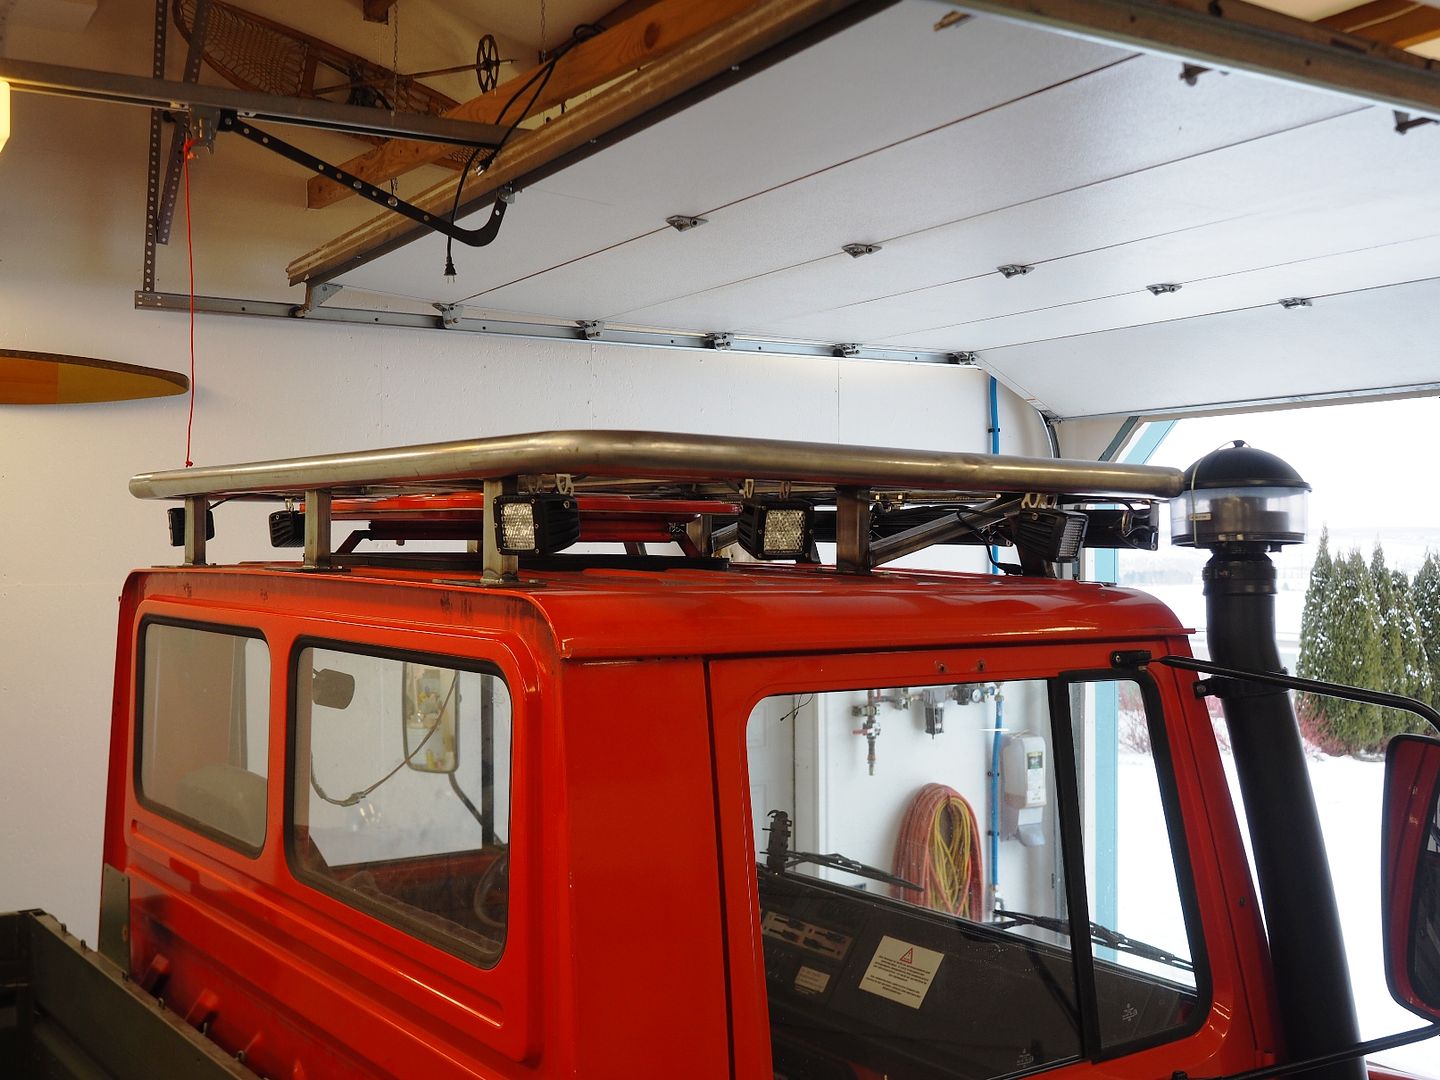
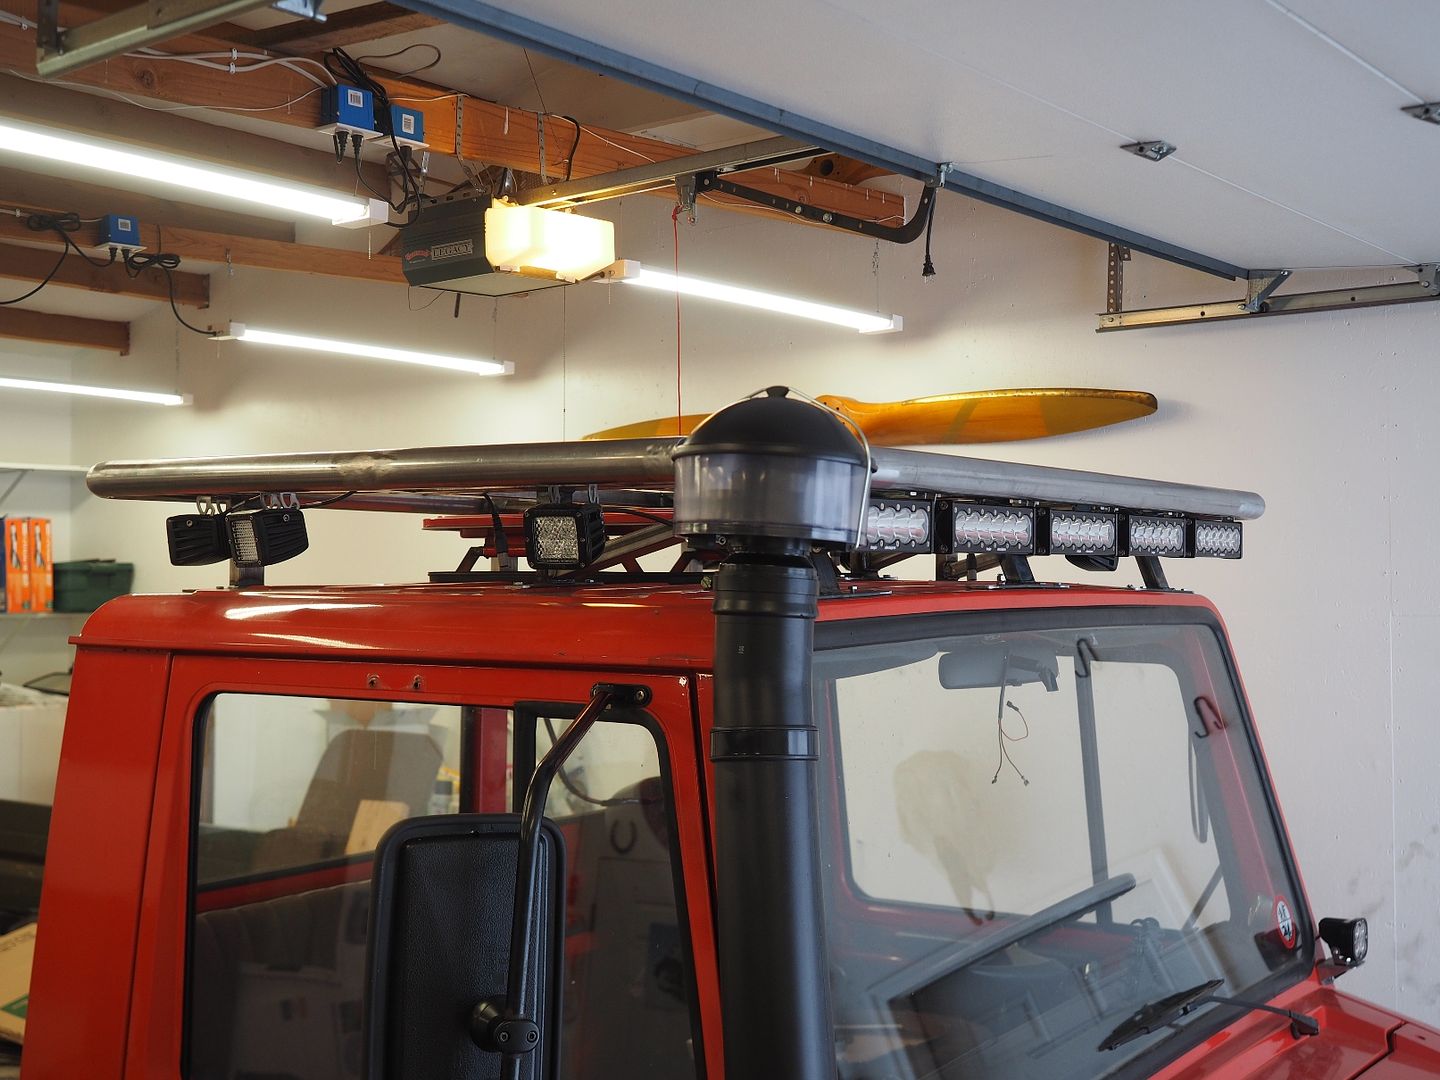
Now to get it powder coated...and lots of wiring to come! Roof racks are a pain in the butt to build, glad that project is over! Starting to look less like a fire truck all the time
Hodakaguy
Fully welded up and assembled on the truck. Not going to be short on light lol.
Now to get it powder coated...and lots of wiring to come! Roof racks are a pain in the butt to build, glad that project is over! Starting to look less like a fire truck all the time
Hodakaguy
thebigblue
Adventurer
sweet
Hodakaguy
Adventurer
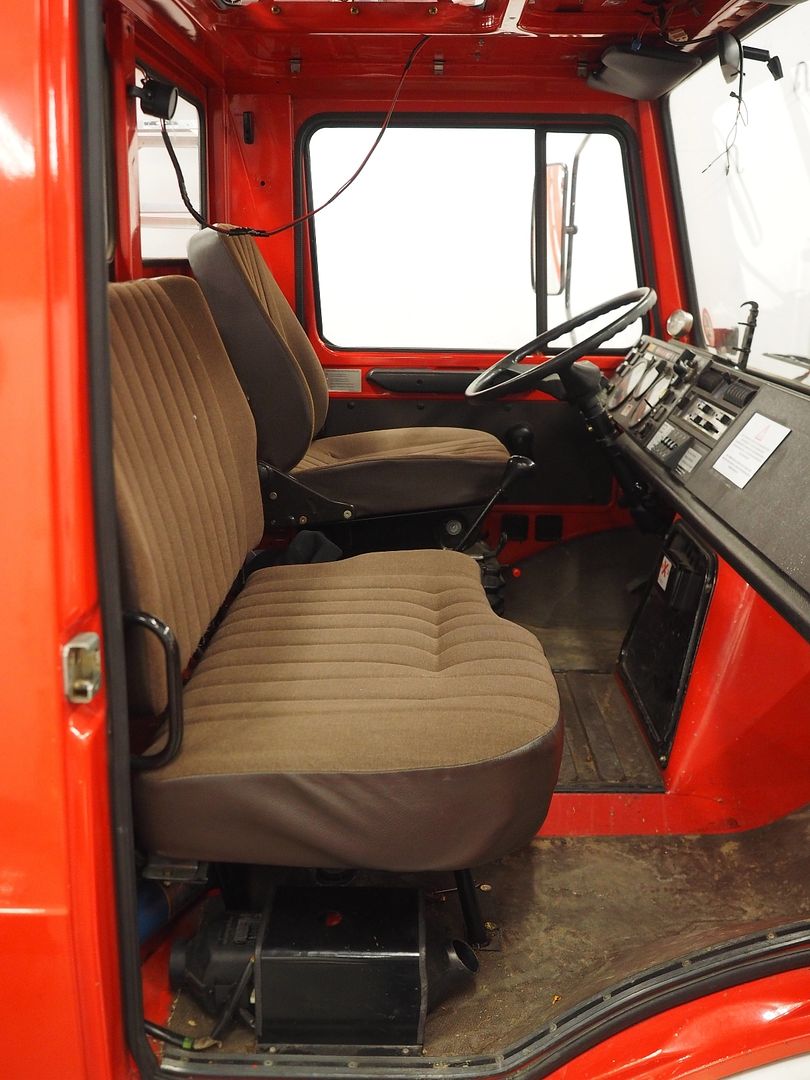
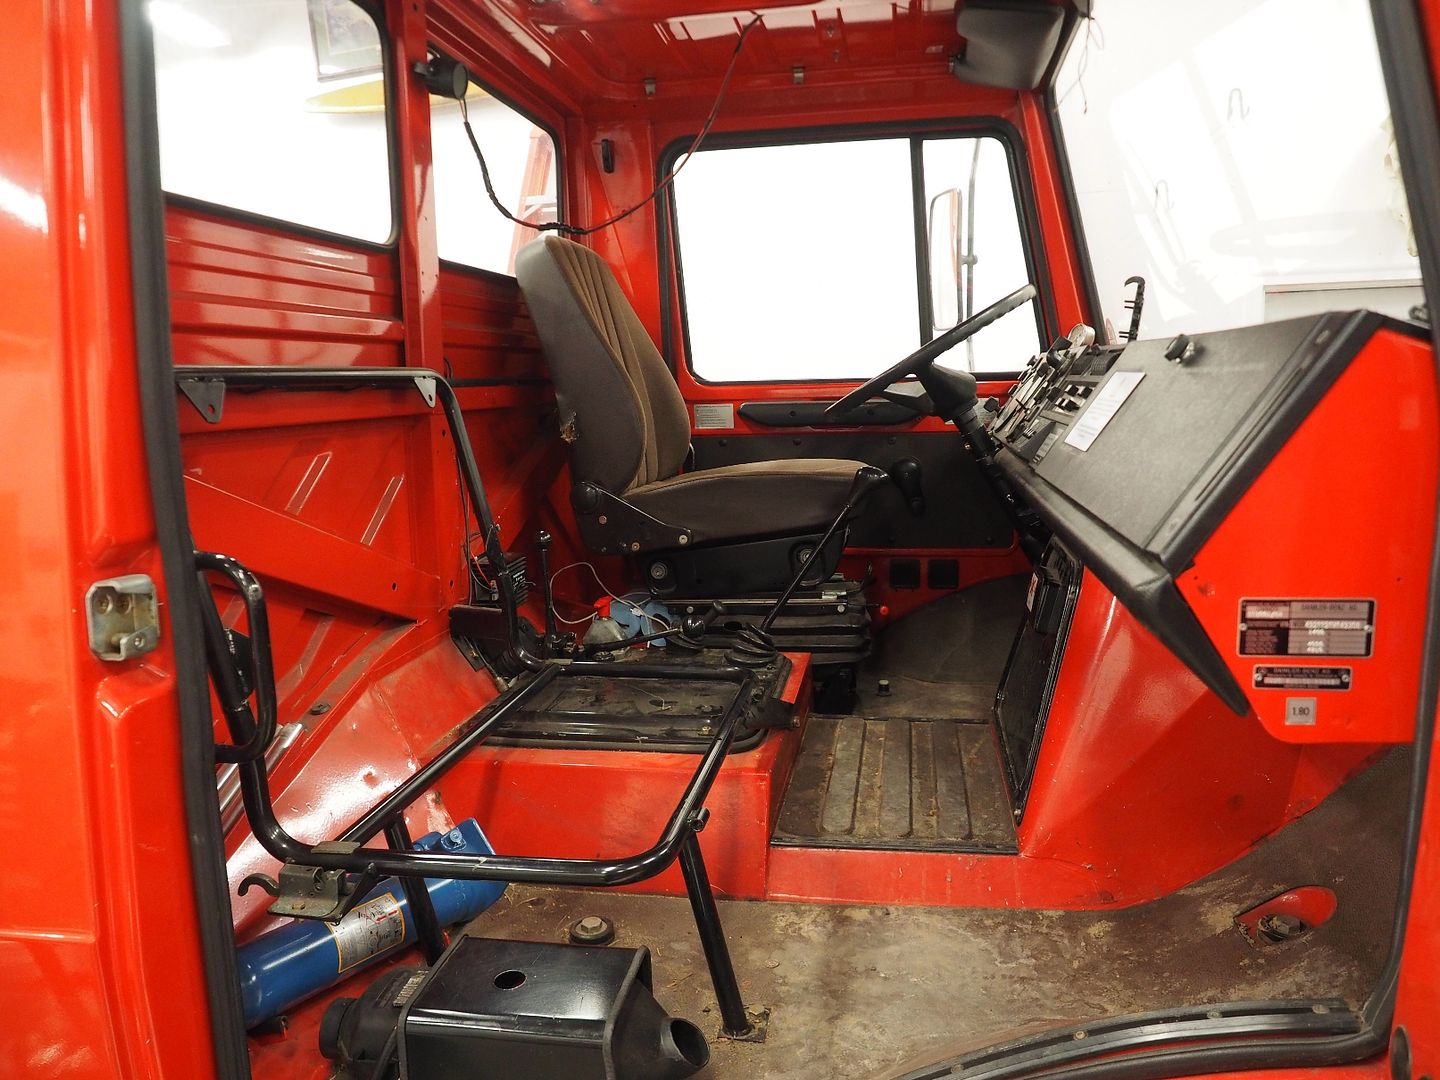
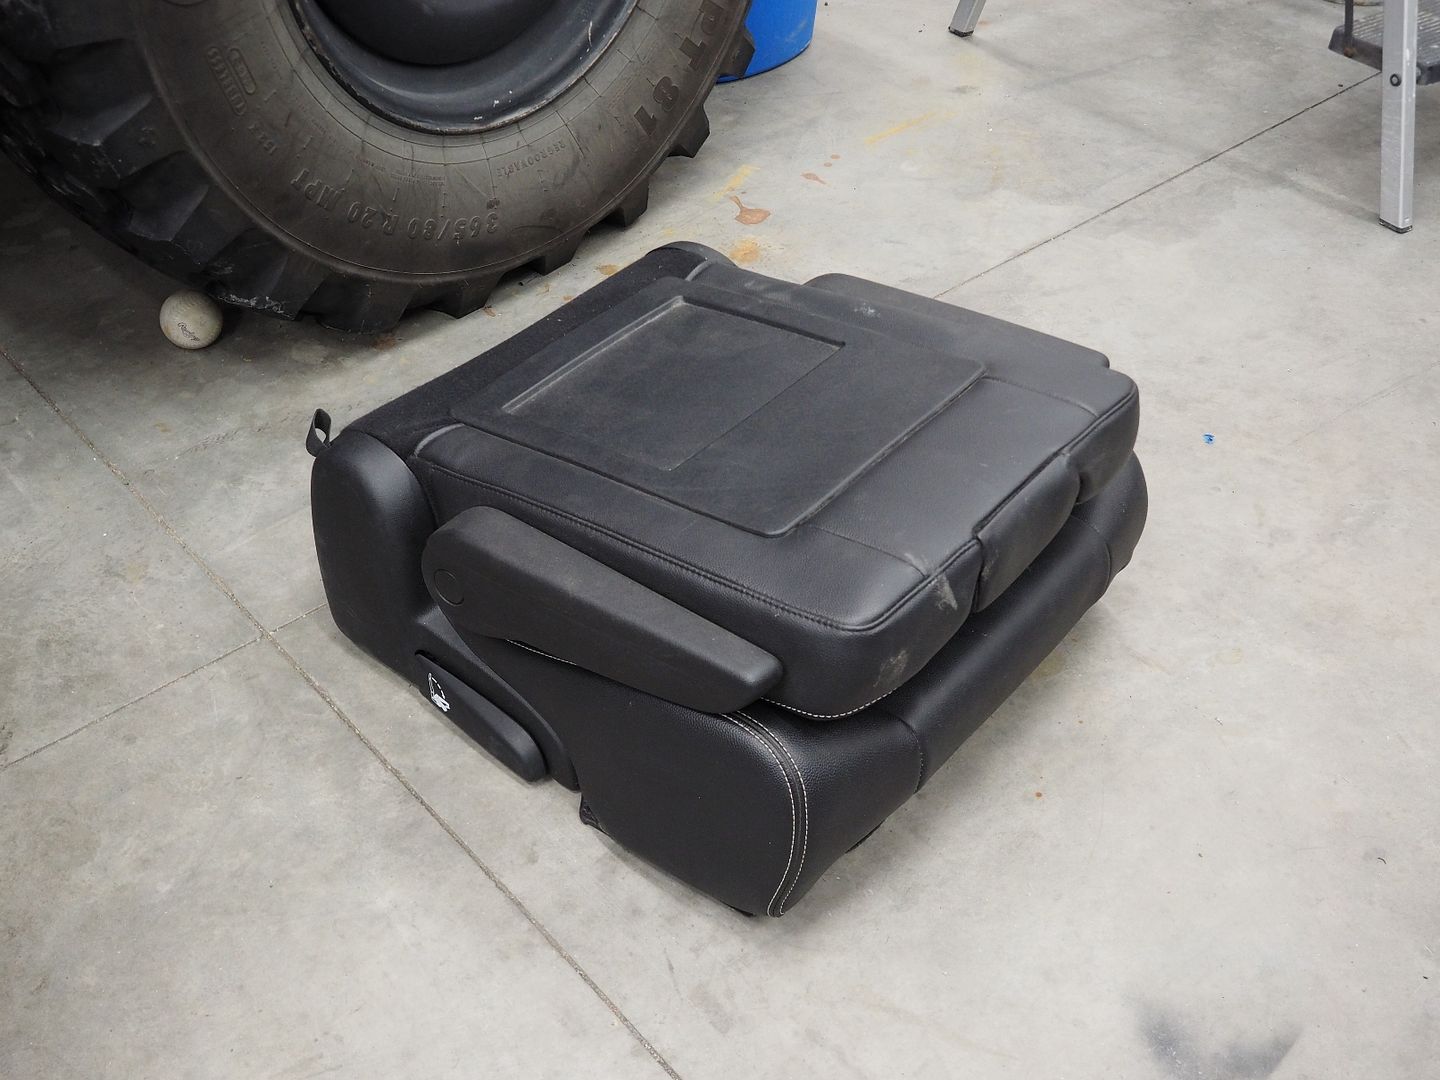
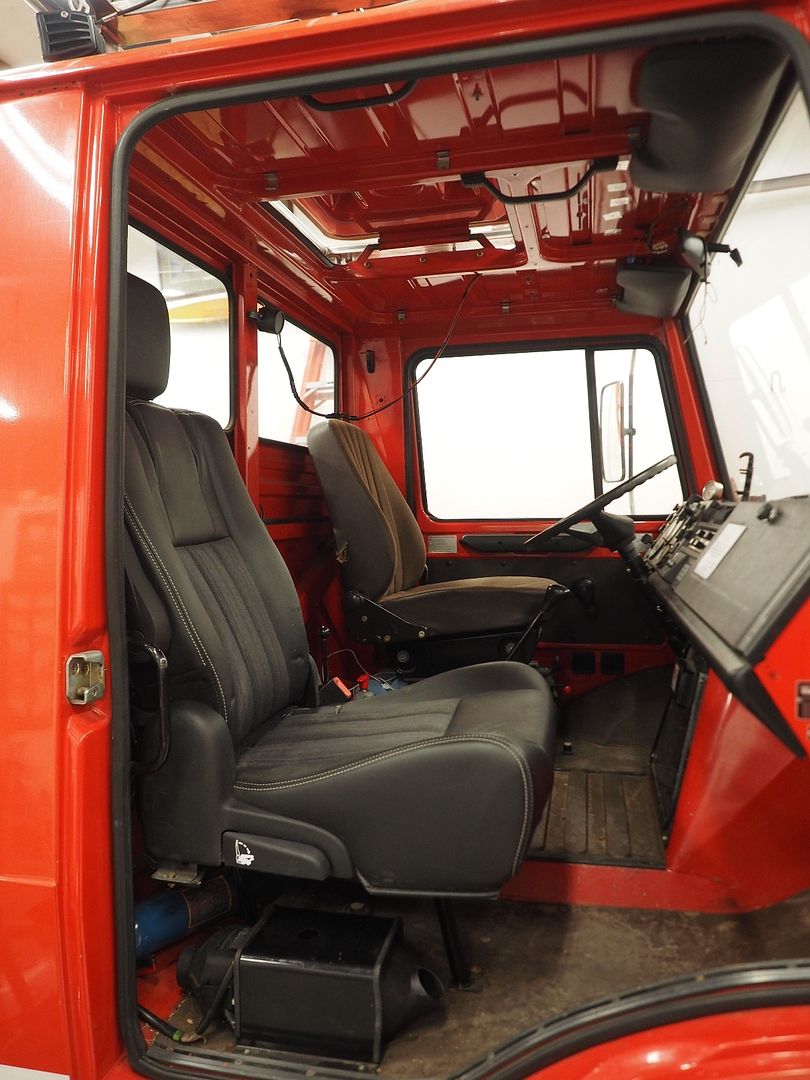
Playing with seats today. I'm wanting to change out the stock seats for something more comfortable but I'm wanting to keep seating for 3 people at the same time. Today I borrowed a Stow & Go seat out of a Chrysler mini van from a friend for a test fit, it fits really well! (I'll fabricate custom seat bases when doing the real install, just sitting on the stock base in these shots). The seat is 21" wide and has drop down arm rests, just narrow enough to fit in a center console seat from a modern truck in the middle. The console seat will be nice since you can fold it flat and use it for cup holders and storage when only two people are in the cab.
Stock bench seat. It's a tight fit for two people on the bench seat but it works ok with my Son in the middle.
Removed the bench, here is the stock frame.
Stow-n-Go seat.
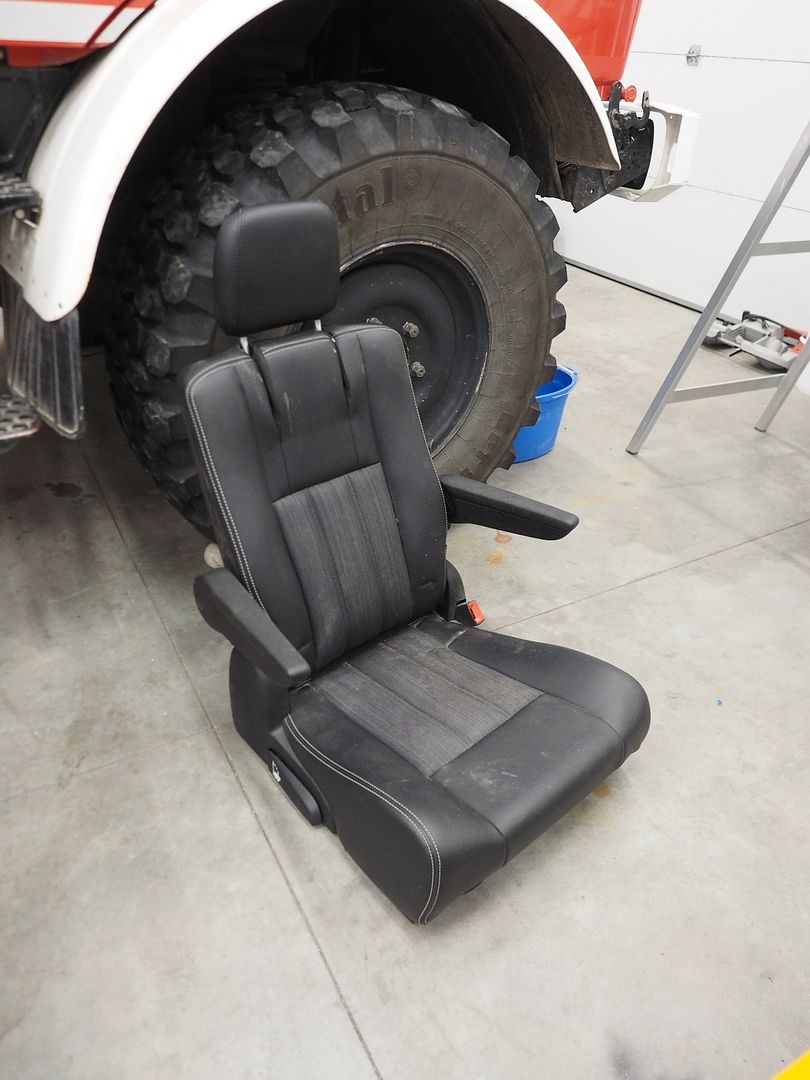
And sitting on the stock frame brace for fit up, not a bad fit. I sat in the seat and it feels really good, I think these will do the trick.
Now to source a couple of these Stow & Go seats and a matching console seat....time to hit some junk yards!
Hodakaguy
Stock bench seat. It's a tight fit for two people on the bench seat but it works ok with my Son in the middle.
Removed the bench, here is the stock frame.
Stow-n-Go seat.
And sitting on the stock frame brace for fit up, not a bad fit. I sat in the seat and it feels really good, I think these will do the trick.
Now to source a couple of these Stow & Go seats and a matching console seat....time to hit some junk yards!
Hodakaguy
Hodakaguy
Adventurer
The camper design is evolving slowly, I want something easily removable that will slide into the troop bed. May end up using something like a FWC camper instead of fabricating that part....time will tell
I did pick up a short nosed Grandby Camper last weekend that might work, will have to play with mounting down the road.
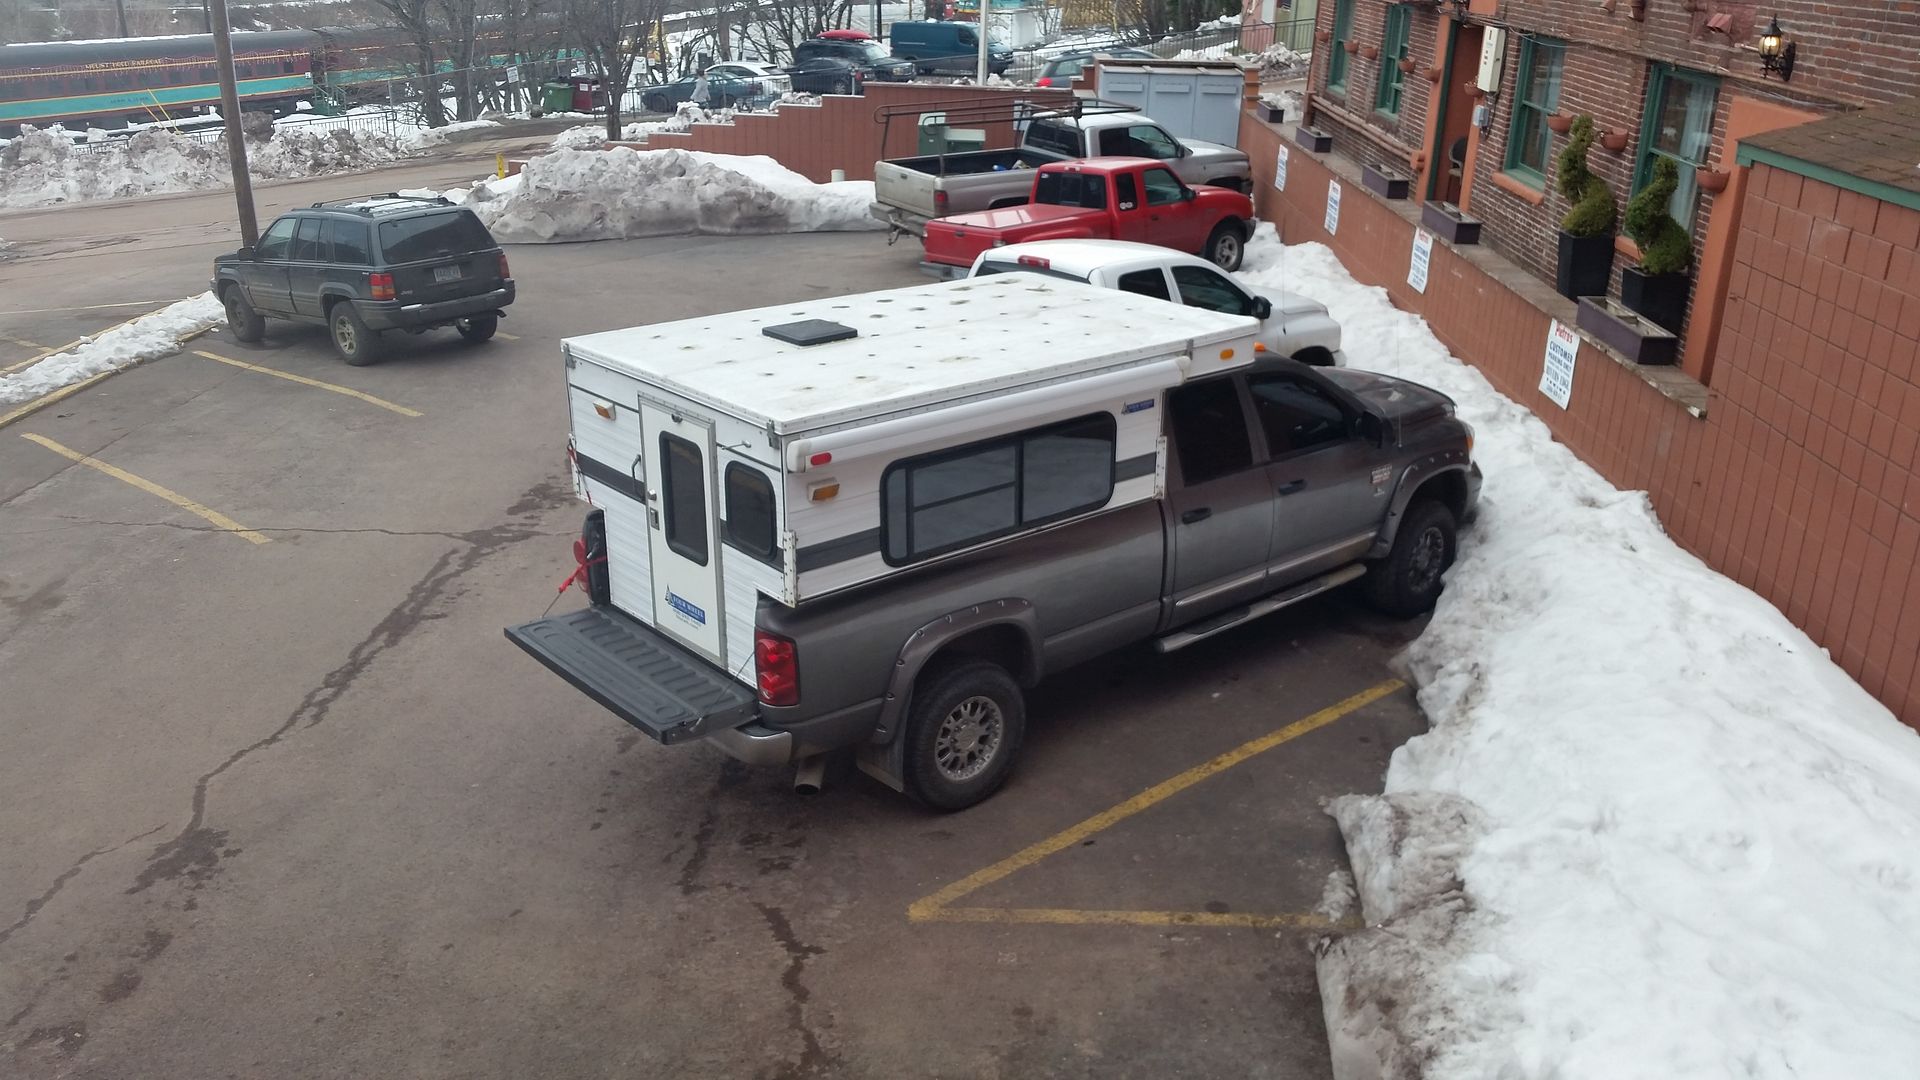
I did pick up a short nosed Grandby Camper last weekend that might work, will have to play with mounting down the road.
Last edited:
Wyuna
Observer
A camper with the ability to remove the camper when not needed allows you to use the Mog for other things, its too good of a vehicle to use just for camping trips.
I noticed this camper unit over here in Australia, if you made it with legs on the corners that lift and support the camper, it would allow access to a camper less mog when needed.
https://www.unidan.com.au/portfolio/unimog-ul1700l-crane-truck-48000-2/
Wouldn't be hard to make with your skills, you have the frame, outer skin and liquid tanks that you can fab up, so not ultra expensive as its just your time. (it's normally the interior that costs a bit if you have to outsource.
I see these kind of campers a lot here in Australia, mainly on Landcruiser ute 70 series, when they just rock up into the camp ground, add the legs lower and drive off.
I did notice that these landcrusier campers was that they retractable legs mounted on the frame, saves carrying them around, as long as they are protected it would work.
plus with a side entry, you can mount a motorbike or another spare tire on the rear.
The good thing with your Granby Camper is that you can use it now.
Hodakaguy
Adventurer
Starting on side ladders today.
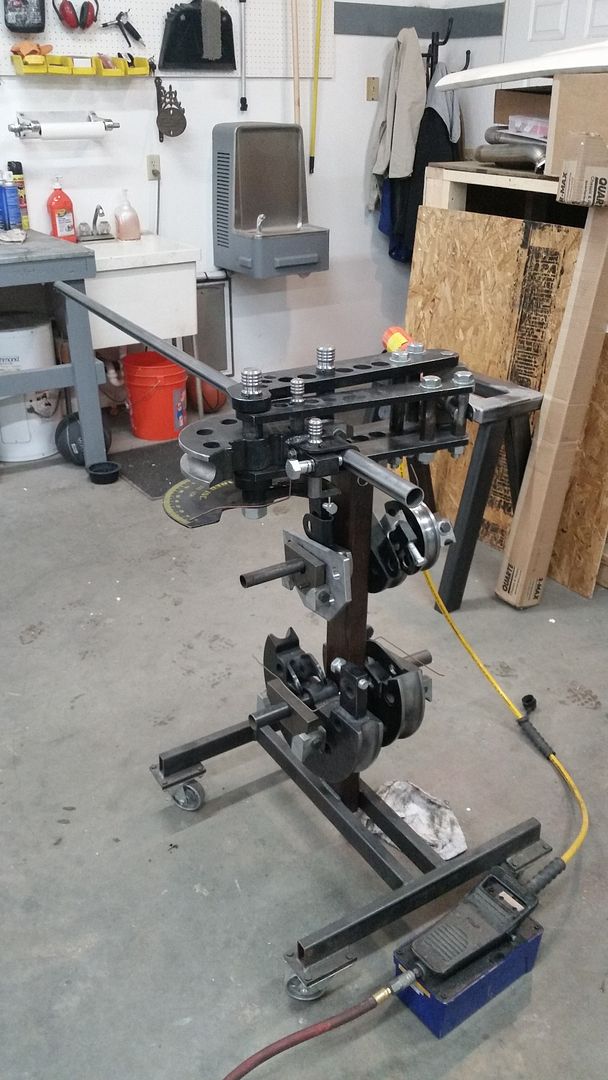
First up headed to a friends house to bend some 1.25" tubing for the side rails...Man I need to get a bender, soooo many things I could build.
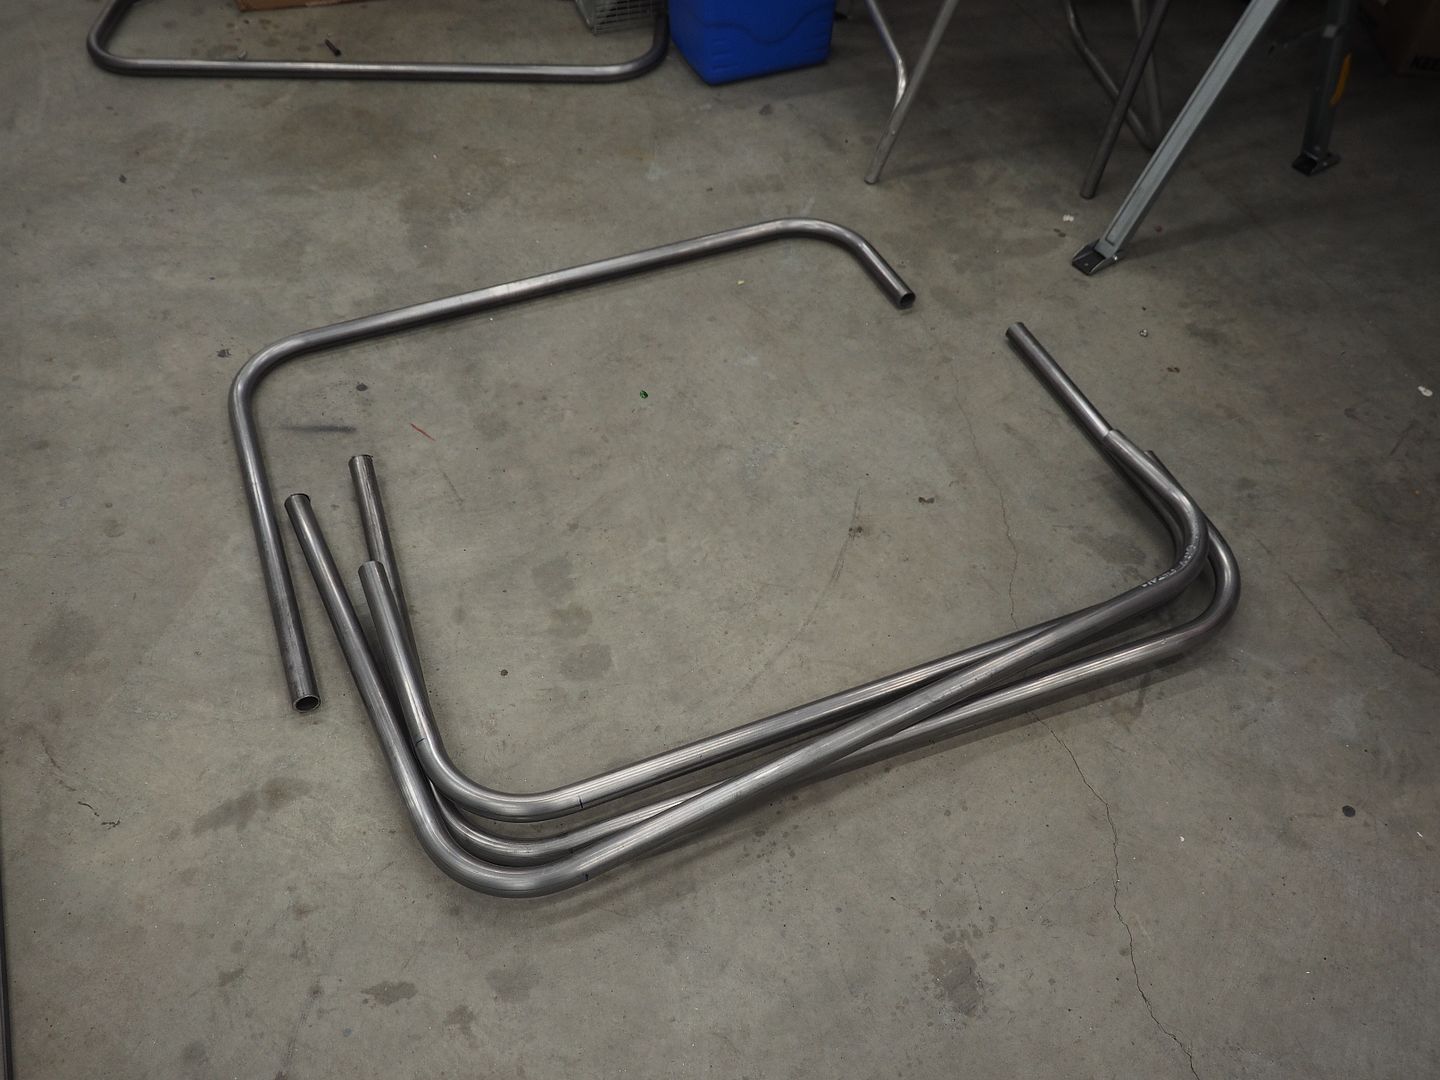
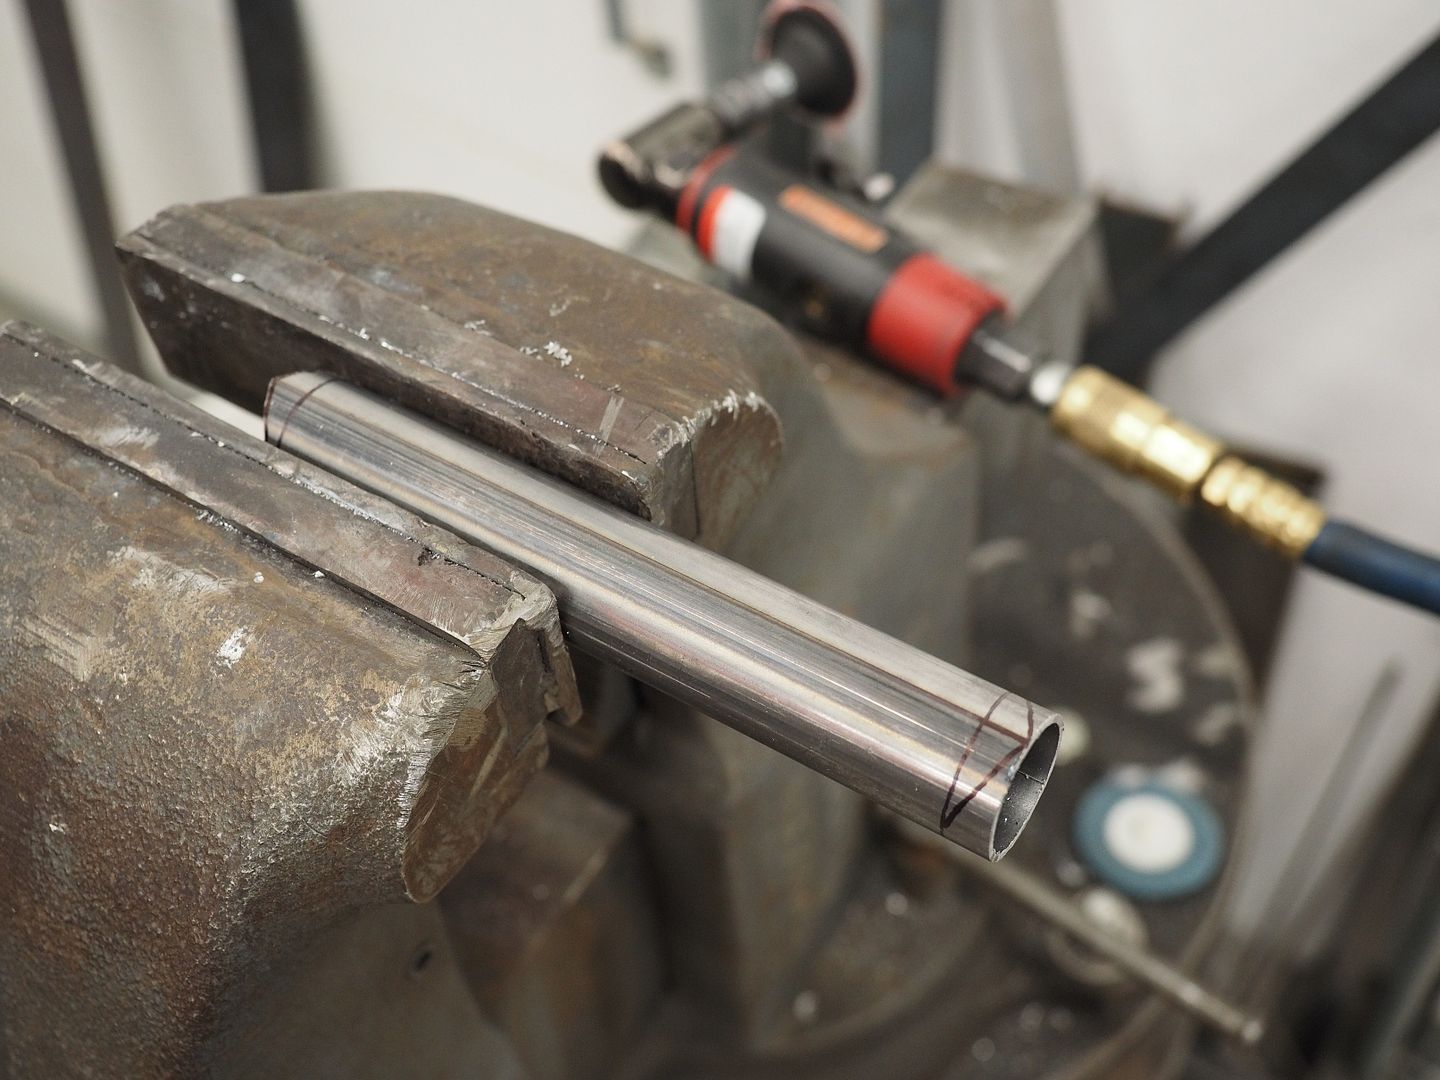
Notching tubing for the steps
Steps and mount plates
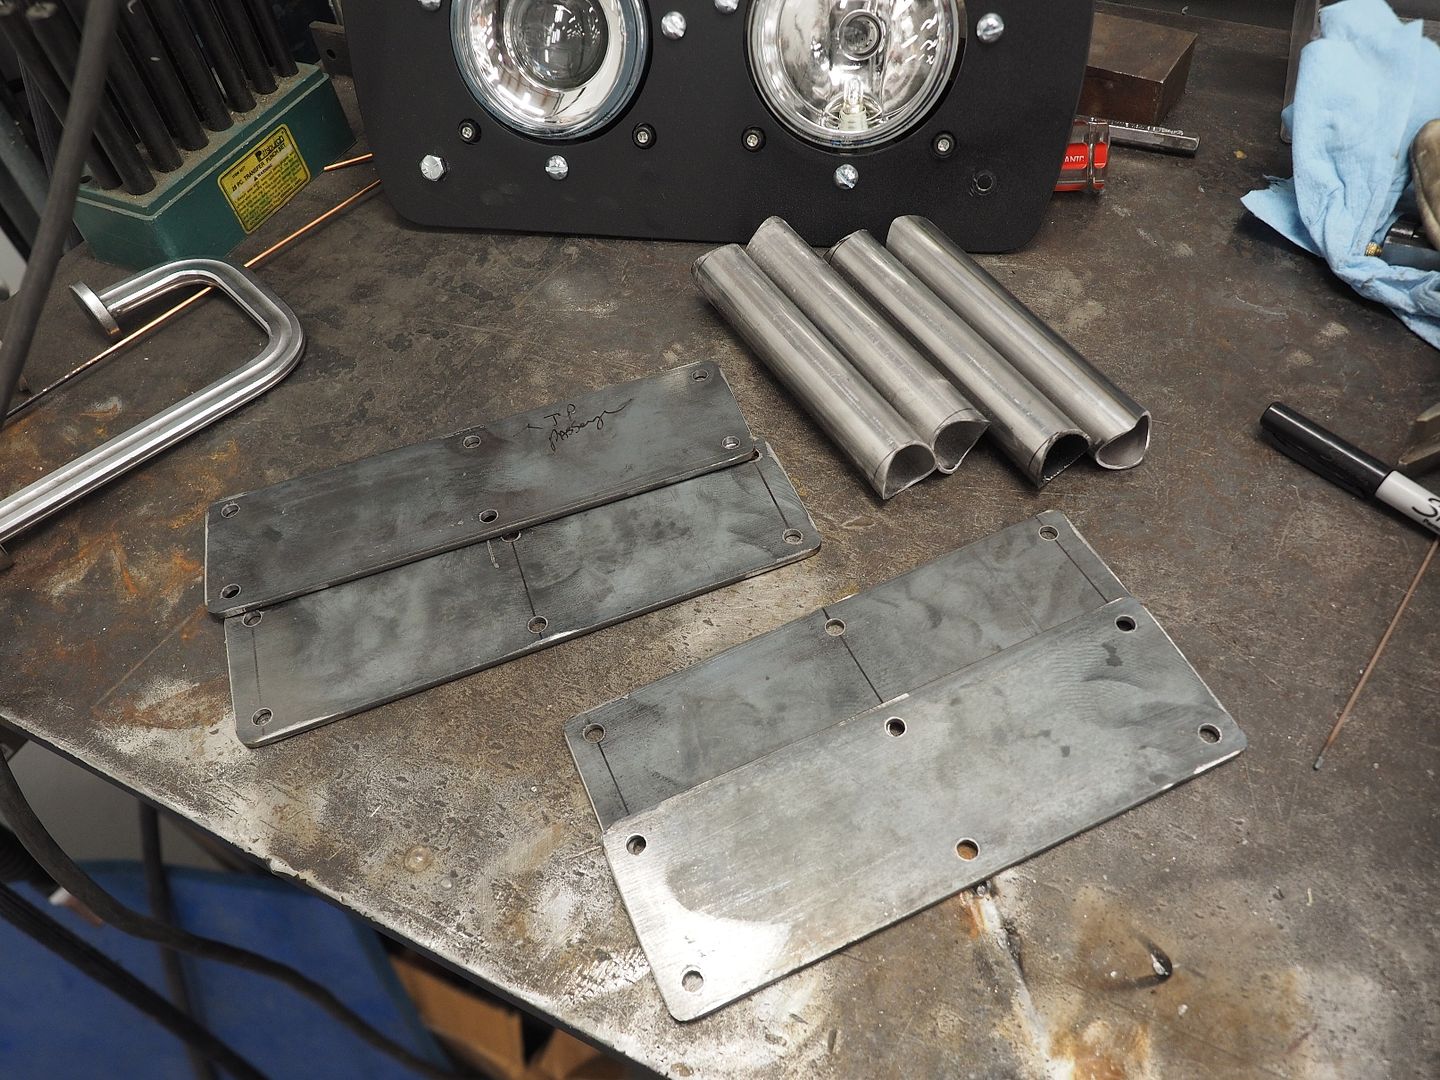
Two of the mounting bolts will go through the rear double lip and have lock nuts on the rack, the rest are set with rivet nuts.
And one rail in place, more to come tomorrow.
Hodakaguy
First up headed to a friends house to bend some 1.25" tubing for the side rails...Man I need to get a bender, soooo many things I could build.
Notching tubing for the steps
Steps and mount plates
Two of the mounting bolts will go through the rear double lip and have lock nuts on the rack, the rest are set with rivet nuts.
And one rail in place, more to come tomorrow.
Hodakaguy