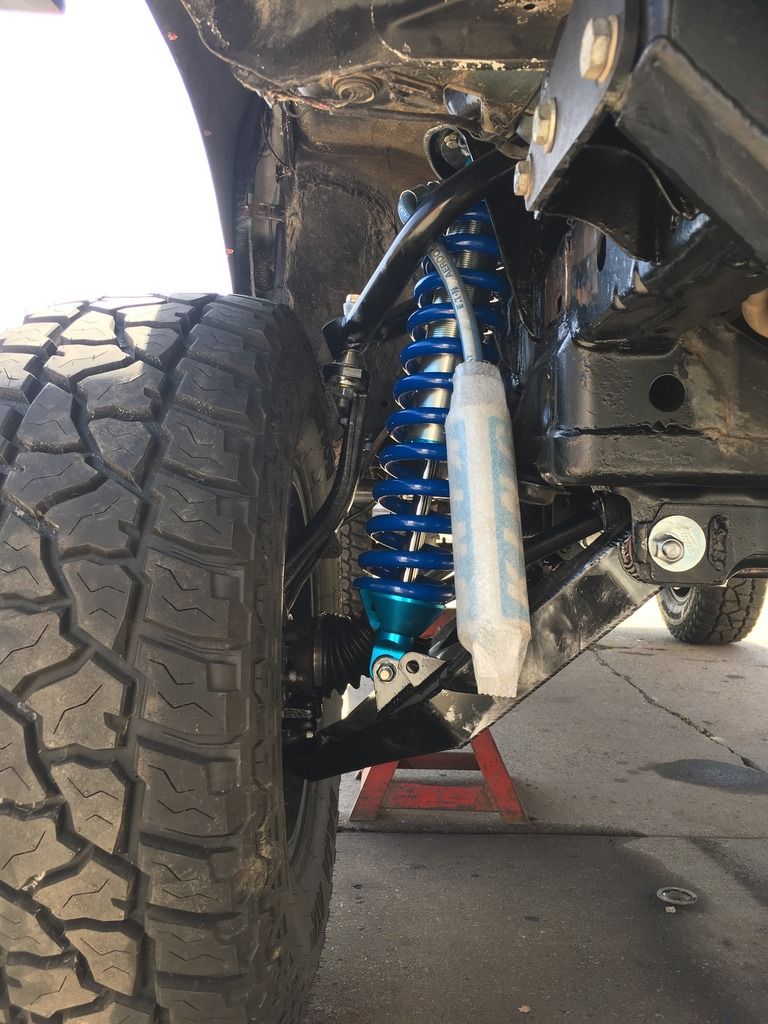
seanpistol's 01 Tundra

seanpistol

Explorer
Got my truck back from the second alignment tonight, and I'd have to say it's got to be the best alignment I've ever had. It drives so nice, doesn't track or wander and the steering wheel is perfectly straight.

The numbers are:

Camber- +0.3 degrees both left and right
Caster- +2.4 degrees both left and right
Total toe- +.20 degrees

But... the vibration was still there. I decided that I'd eliminate the alignment as a possibility and pull one driveshaft at a time to eliminate those as possibilities. Pulled the front driveshaft first, hopped on the highway and the vibration was gone!!!!! I'm going to hook it back up tomorrow and see if I just had it hooked up in a position that put it out of balance. If that doesn't work I'll take it into the local driveline shop and get their take on it.

Tomorrow I am going to pick up 16" limit straps. Solo provided 14" straps, but that has me welding the bracket over a weld and a curvature on the frame. If I move it up 2" it's a nice smooth surface in the middle of the frame and I can get a good weld all the way around it. I also need to weld the remote resi brackets onto the frame.
 
Last edited:

seanpistol

Explorer
I don't have my numbers handy, but I do know my front end is bent. Leading cams are maxed inward to keep camber close but outside of spec iirc. Between alignments I have been struggling to keep the toe reasonable. It's killing my tires. I bought a toe bar to ball park it regularly, but I really need to have my work checked a few times afterwards. A dealer alignment after every wheeling trip isn't my idea of fun.

Showing the width in a photo is really hard at least for a photography newb like myself. My junk is a modest ~84.5" wide at the front outside of tires including a little sidewall bulge. You should be 1.5-2" wider per side maybe between your wheels/tires? If so that's a big truck.

I'm going to mark the position of my alignment cams with a paint pen for a quick and easy adjustment. Some people will just put a tack weld on them.

I'll measure the width tomorrow. Solo says a minimum 4.5" backspacing- I have 4.75" backspacing and can't get a full finger between the sidewall and the neck of the spindle! A front end with a 3.5" LT kit and a 12.5" wide tire couldn't get any narrower.
 

seanpistol

Explorer
You'll go on one trip and hit one big water hole or mud hole. Come back and order glass fenders. Guarantee it.

Or you'll get caught in a rain storm and won't be able to see anything out the sides. Get home and order glass haha

I feel like you speak from experience!
 

seanpistol

Explorer
My junk is a modest ~84.5" wide at the front outside of tires including a little sidewall bulge. You should be 1.5-2" wider per side maybe between your wheels/tires? If so that's a big truck.

Just measured- I'm also 84.5" from outside of sidewall to outside of sidewall, on the money!
 

Leibbrand

Adventurer
... I had to rotate the coilover to keep the upper arm off the resi hose. Part of the multi-day fun of installing a kit that has no instructions.


Hey Sean, was this the final or the before shot, could you post the after? I played around with it a bit but didn't find a way to avoid the arm coming in contact.

Did you have to machine the lower arms LBJ socket? I stuck a new OEM LBJ and it seemed the diameter in the LCA was too tight. I've never paid much attention before doing LBJs on my 4runner, but having a hard time thinking that much material can move when I mate them.

Thanks for mentioning the steering extensions needing to be cut down, not something I would have noticed. Did you end up just taking the 1/2 of or did you take 1 inch?
 

seanpistol

Explorer
I ended up taking 3/4" out of both steering extensions. Also- those need to be painted. So do the spacers for the heimed uppers.

I threw new OEM LBJ's in and they slid right in. I didn't need to drill them out or anything like that.

For the coilover photo above... that's the before. That photo is the passenger side- say you're looking at it from directly above, it needs to be rotated almost 90 degrees counter-clockwise. You have to bolt the top mount to the coilover off the truck, then throw the whole thing in. You also need to angle the resi hose coming out of the coilover at about a 45 degree angle towards the ground.
 

smokeysevin

Re-redoing things the third time
That is part of the reason I bought the BMS Steering clevis, no need to extend anything, just run Heims.

Sean
 

seanpistol

Explorer
Got my adjustable limit strap clevises welded on. Trail Gear makes them.
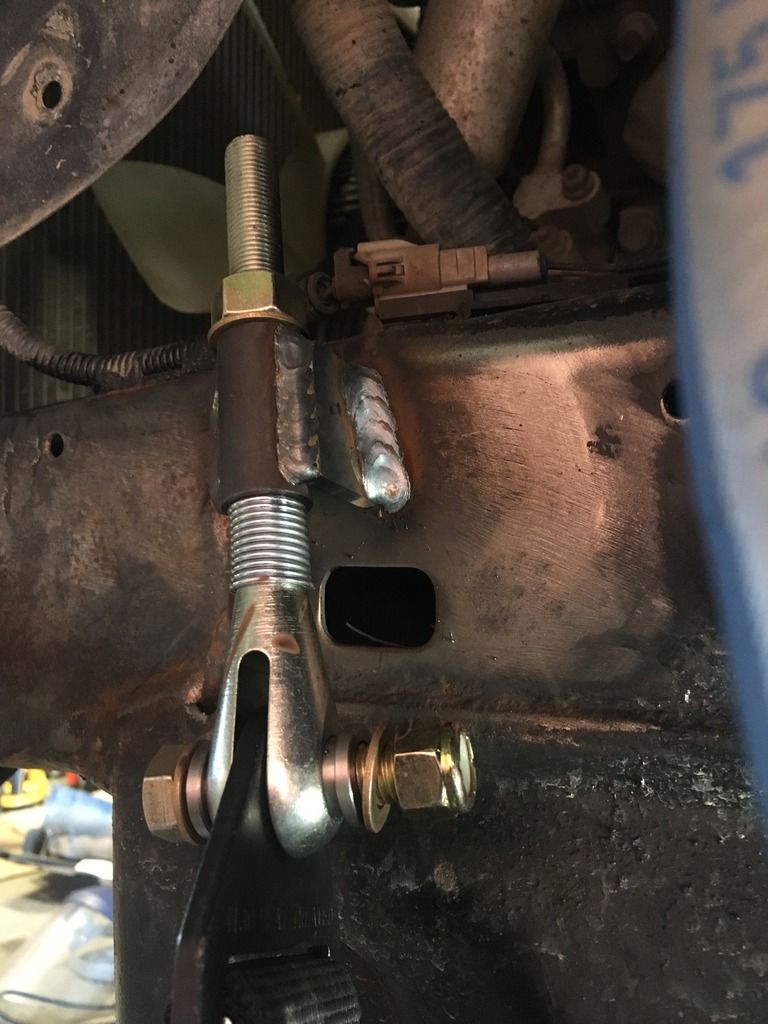


Also got the mounts for the reservoirs welded on. I've been driving around with the them held to the frame with bungees... The location that they are in is what was needed to keep the hose from rubbing on the limit strap clevis or the upper a-arm. Would have been nice if the hoses were a couple inches shorter for looks, but it would have also needed a 90 degree fitting off the reservoir. It's functional, out of the way and I'm happy. All painted up and done!
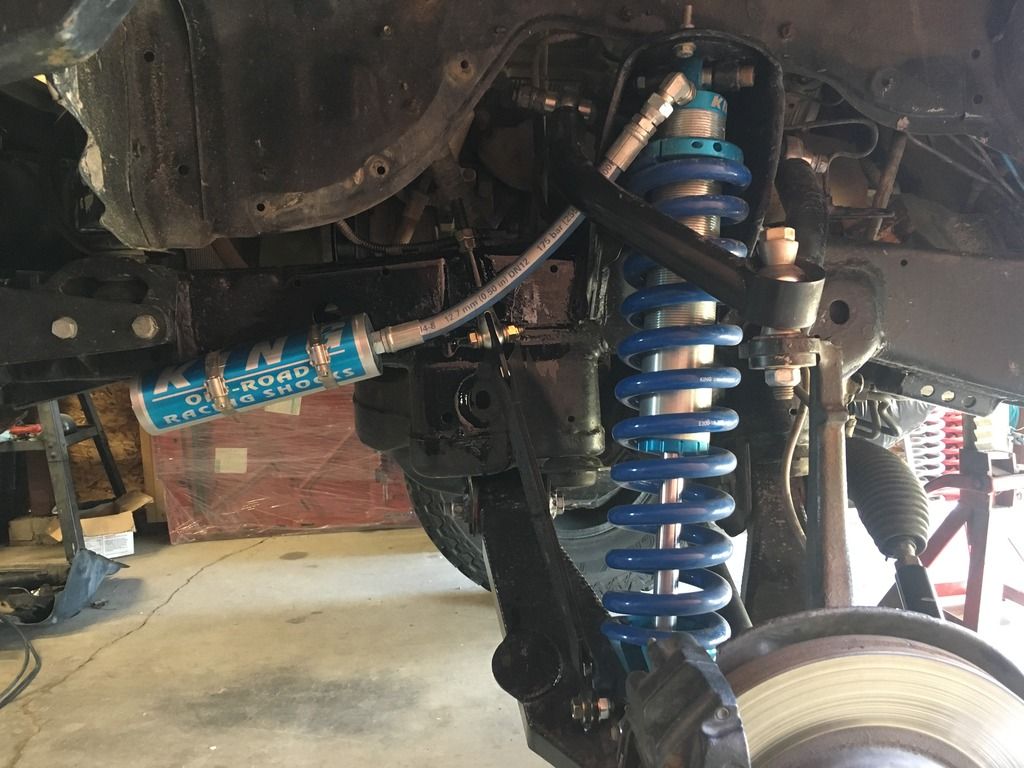


Next items on the to-do list:

-replace 14" limit strap with 12" strap
-make my own washer fluid reservoir and mount it in the engine bay
-pull coilover and cycle suspension to see what needs to be trimmed
(I flexed it out on a loading dock but wasn't all the way on the bumpstops. Looks like I may have to take a little more off the front bumper, but maybe not.)
-figure out front driveshaft vibration, may be as simple as re-installing in a new 90 decree increment
-build spare extended CV axle
-order FROR twin-stick and install
-order wiring harness from front locker and install
 
Last edited:

Blender

Adventurer
I'm curious what you have in store for the washer reservoir. PVC like JJC or some kind of welded contraption?
 

Forum statistics

Threads
188,398
Messages
2,904,176
Members
230,274
Latest member
mbauerus1
Top