Sabre
Overlanding Nurse
Our last trip to Moab reinforced the need to get both more ground clearance and more protection for the Montero. Of course, work, family and home projects come first, so I've put things off. This past summer we took a trip down the Oregon coast, camping in the woods. When we slid sideways off a narrow path in a densely-forested patch of big Doug firs, we came down on a huge exposed root and crumpled the rocker panel in front of the driver's side rear wheel. That gave me the gumption to take the Montero to its next logical level.
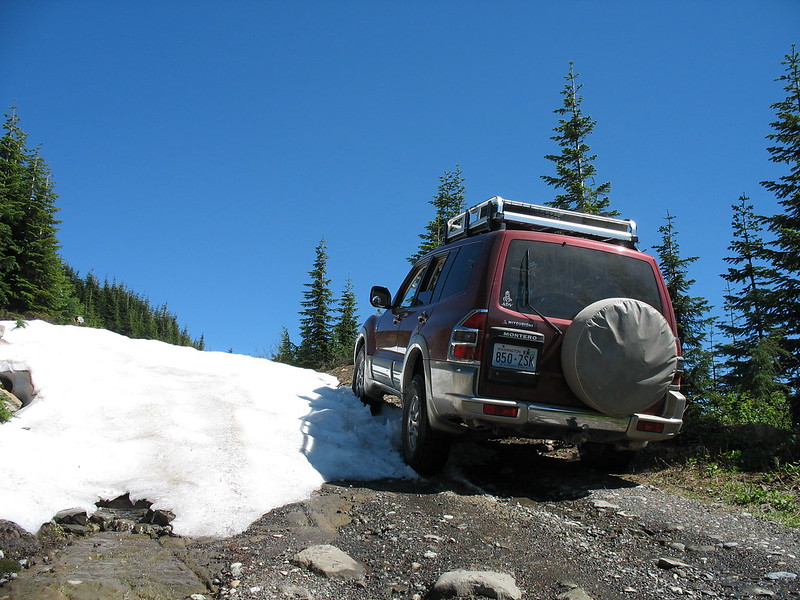
Here's the rig before removing the cladding. You can see how things hang down quite low.
Here's a showoff pic of me with Bill Burke. He's saying, "damn, Sabre, that crap really hangs down there!" Um, yes, Bill. Yes it does.
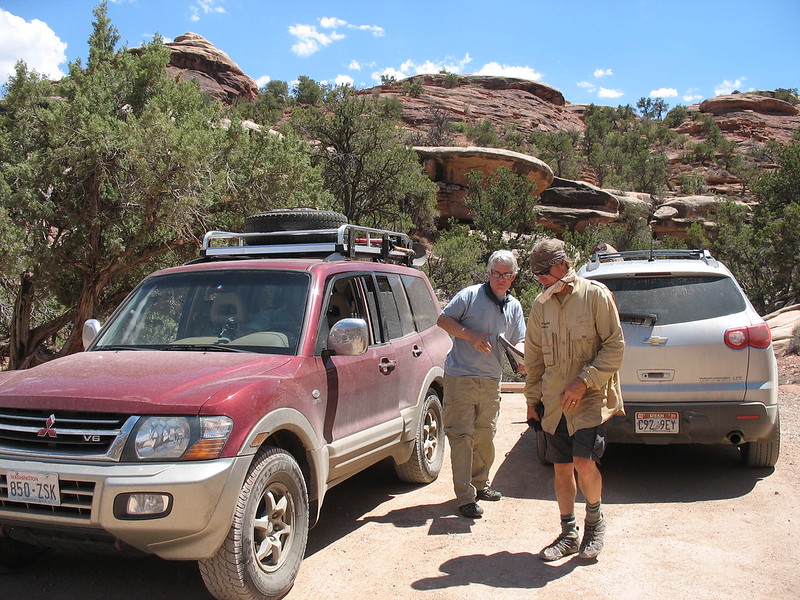
Oh yeah...note the chrome grill, mirrors, rear bumper center section and tail light housings. I hate chrome, so it's all going away.
Step One: Remove the damned cladding. I've always hated this stuff. With a little abuse it starts to look tawdry and requires reapplication of body molding tape and the stupid plastic fasteners behind them. It just looks crappy after a while and hangs down too low anyway, so off it came. Just some simple prying, some grunting, swearing, and sweat, and Bob's-your-uncle. Actually, the worst part of the job was removing the leftover 3M adhesive molding tape!
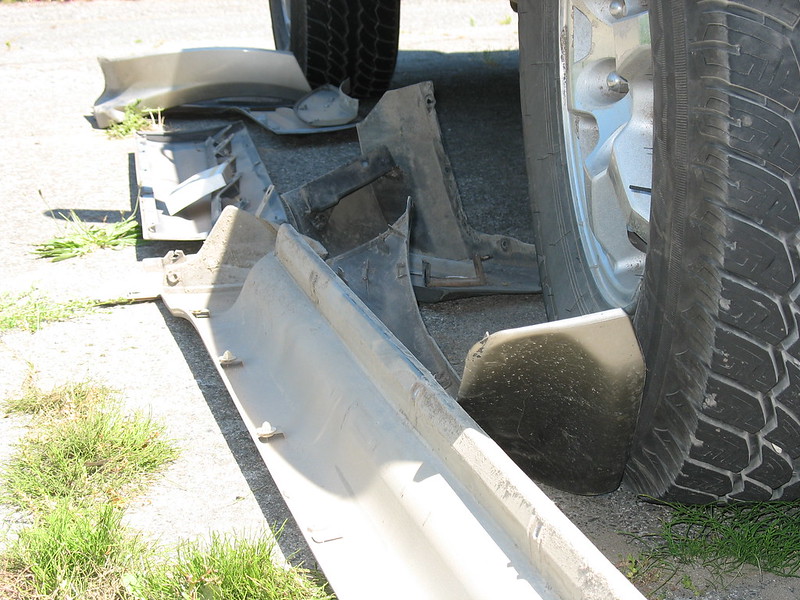
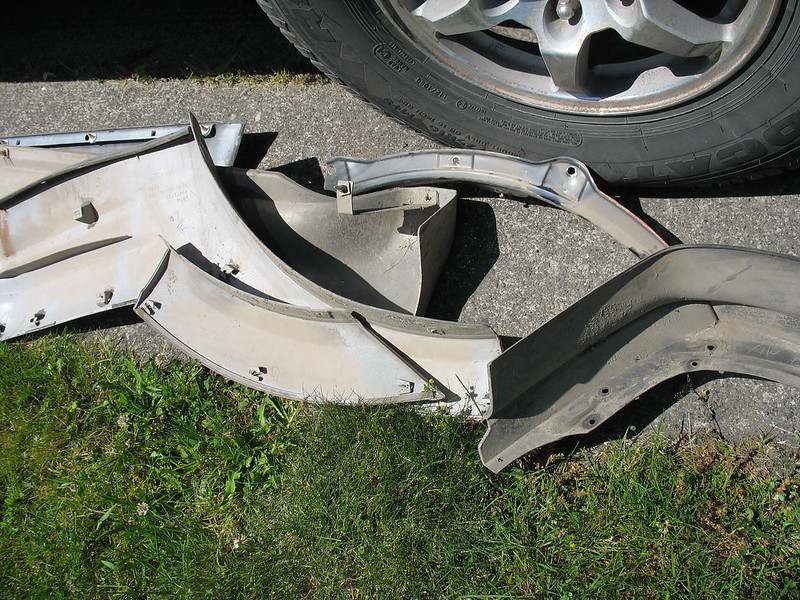

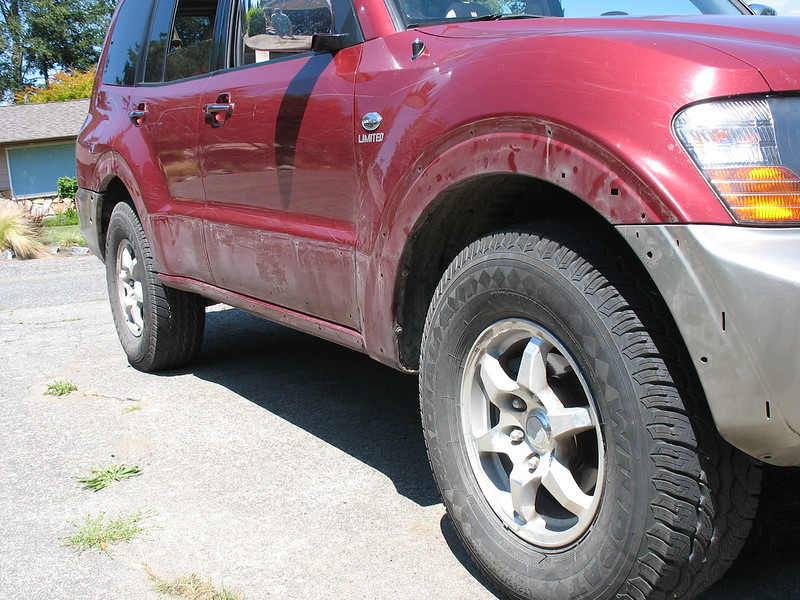
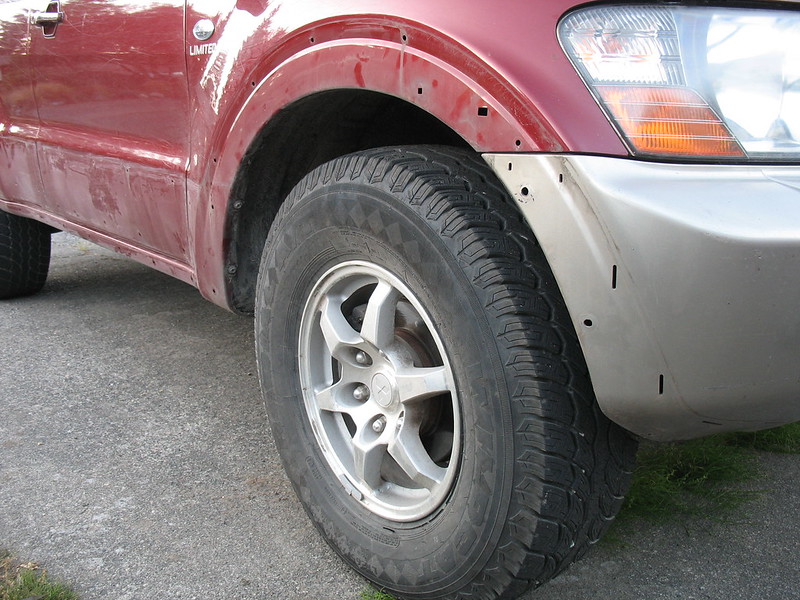
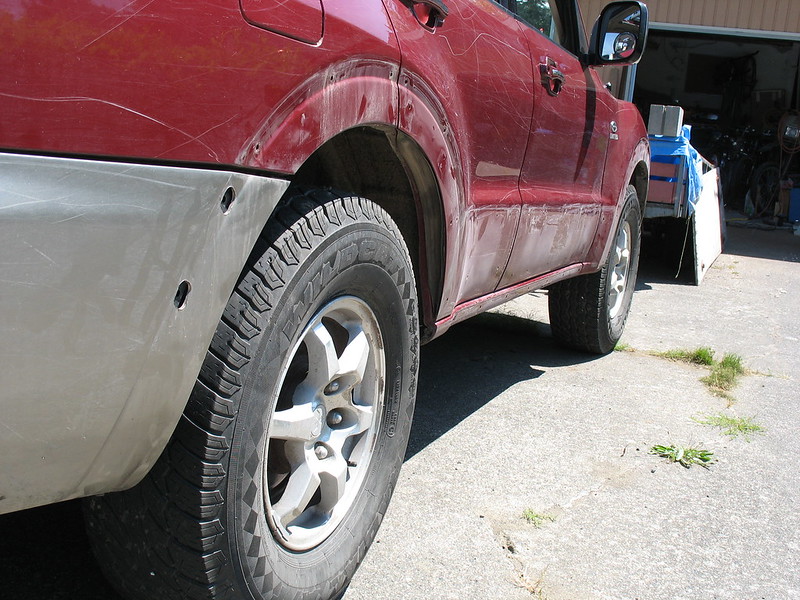
Now we're left with one thousand six hundred little holes.
No, not really one thousand six hundred. But there were something like 60 of them. Two different sizes of round holes in the doors and fenders, two different sizes of rectangular holes on the rocker panels, and some odd shapes and sizes on the sides of the front and rear bumpers. But hey look! More ground clearance already!
I will admit to being sort of anal retentive about certain things...I think my patients find this comforting. Anyway, I was NOT going to slap Bondo on those holes and call it good. No, they were going to be filled properly: by WELDING. Only problem was, I had never welded before. So I took a one-day "intro to MIG" class at the local technical college. Then I found a very nice welder on Craigslist that was pretty much new. It's a great machine...a 200-amp inverter welder that does MIG and stick welding, and has an optional spool gun, too. A good buddy in a local welding shop set me up with a tank; happily, my company gets a discount on gas since we have an account for oxygen. Next stop was the local scrap yard where I brought home a pile of steel and started running beads, learning the machine. My first project was a cart for the welder, which you'll see below.
I got this nifty little tip for spot welding that worked really well, standing the wire off the metal at exactly the same distance every time and making consistent welds much easier for this rank amateur. I didn't want to take the door skins off or rip out the innards, so it wasn't possible to buck the welds from the back with a copper dolly. I just practiced a lot on thin sheet stock and did my first welds on the underside of the rockers, where mistakes wouldn't be so obvious. Yes, I certainly did have my share of burn-throughs under there! But all in all, I was very pleased with the results.
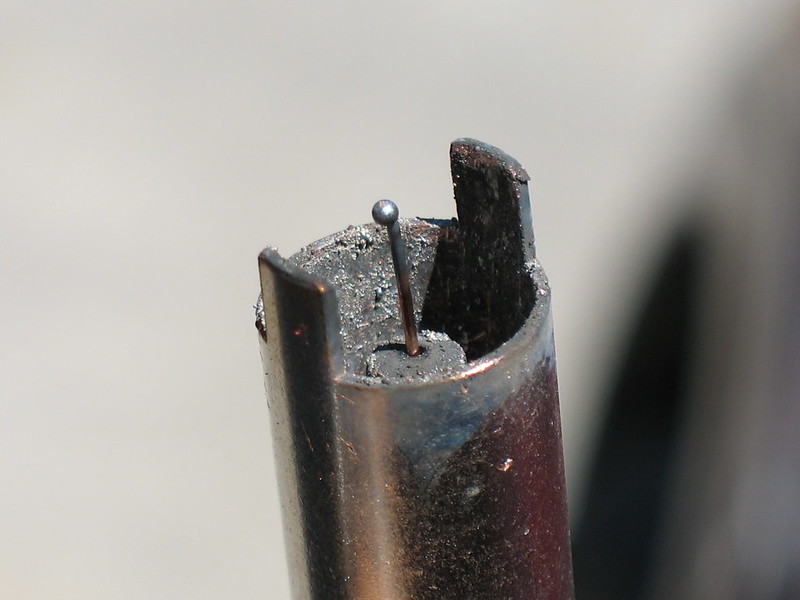
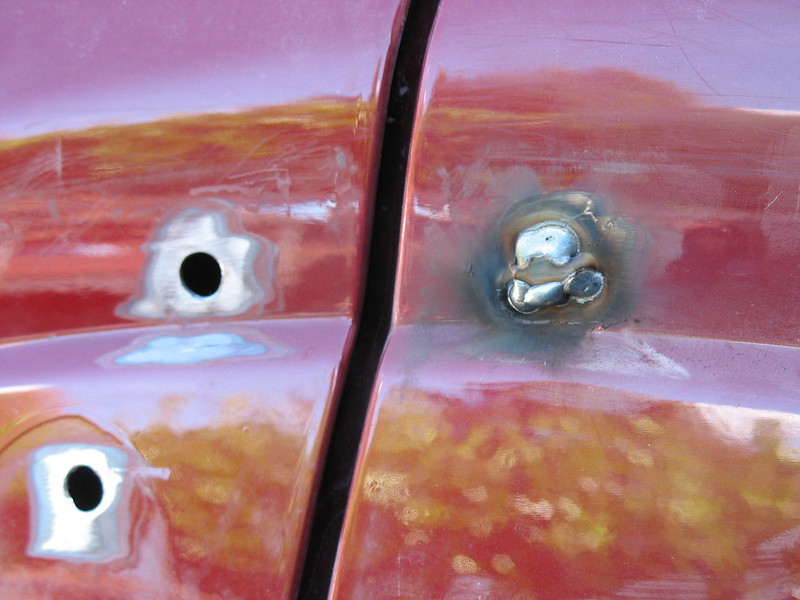
What I did was to put the head of a nail (chosen to be the correct diameter) into the hole and pull it tight against the body by pulling on the nail's shank with a pair of ViceGrips. This gave a quick way to fill the hole and gave a base upon which to build up the little spot welds necessary to fill the hole above flush. A little grinding and sanding was all that was needed after that!
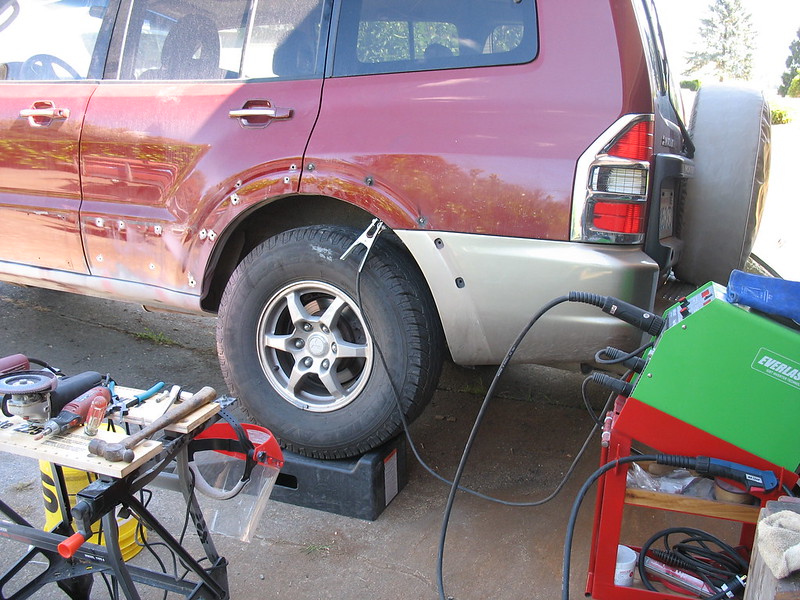
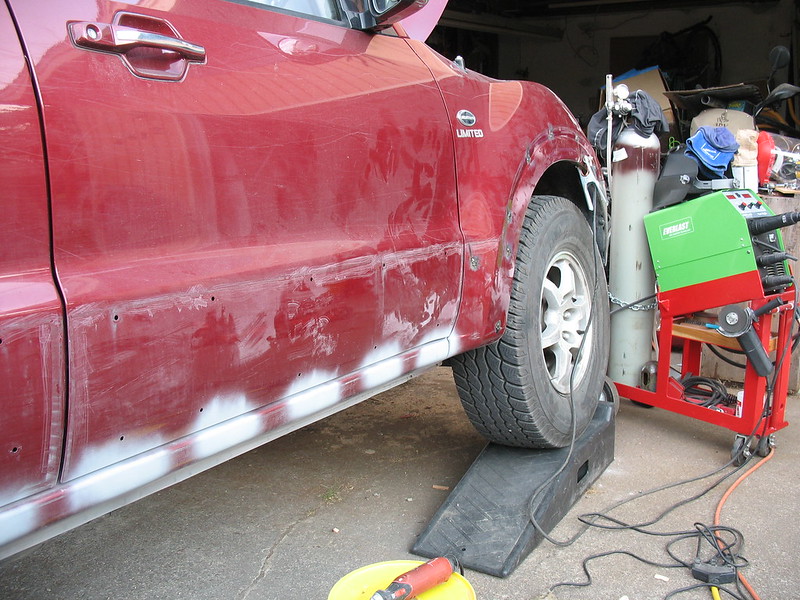
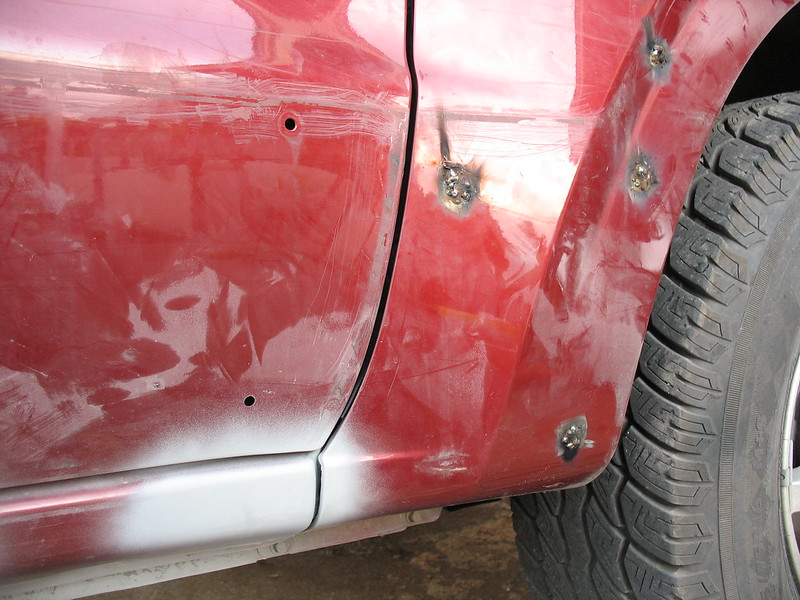
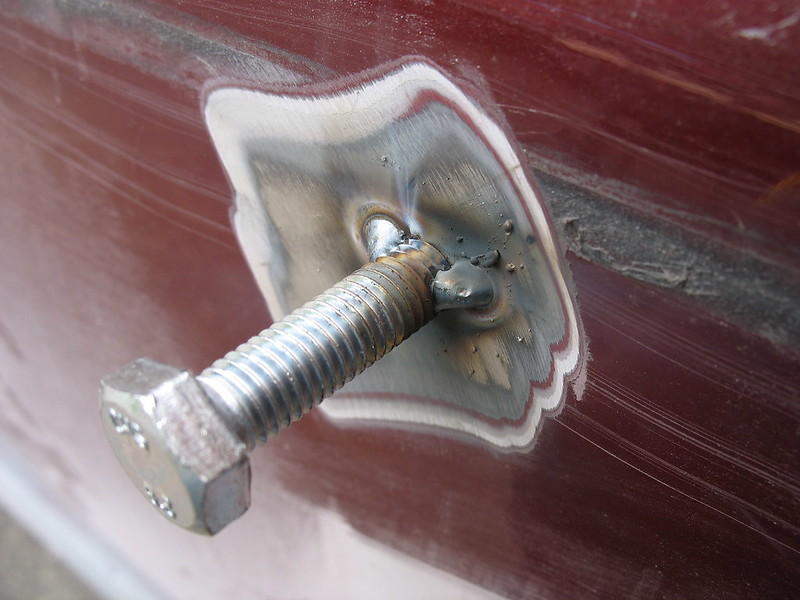
For the larger holes, I used bolts. I twisted them a few threads into the hole, tacked it in place, cut it off, and finished the weld. It worked really well!
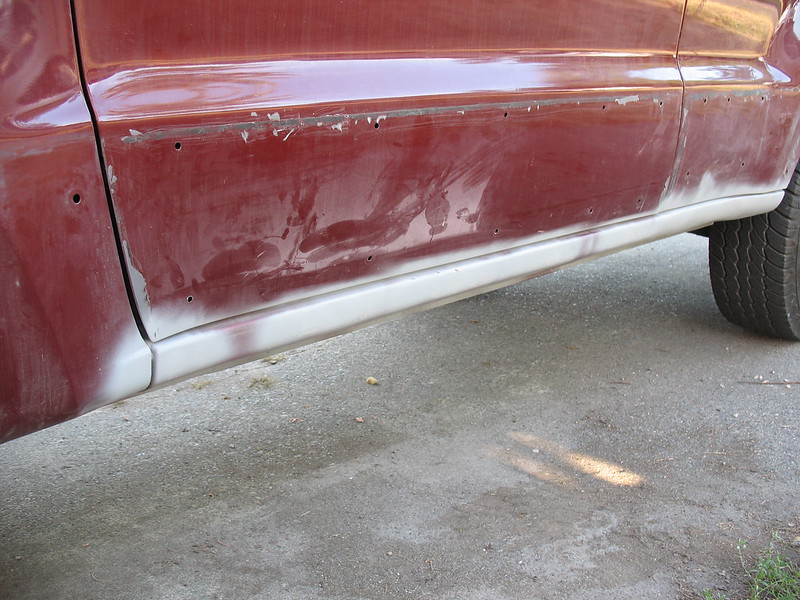
Here, the rocker panel holes are done and sprayed with primer. Oh, I never took a "before" pic of the crunched rocker panel, but here's the "after" pic. The entire rocker under the passenger door (to the extreme right in the picture) was crunched upwards, jamming the door closed. A Harbor Freight sliding dent puller and a small sledge hammer did the rough work, followed by a LOT of welding to close up all the holes I'd drilled. When it was ready for finish, there was really a surprisingly small amount of Bondo on there! Not bad for a guy who's never done any body work before. Thank you, YouTube.
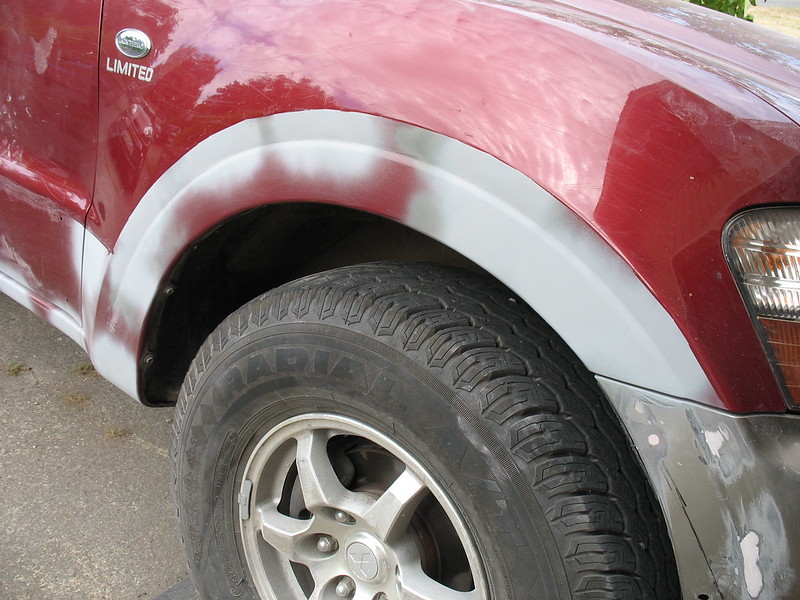
Of course, I did use filler for the holes in the bumpers. I backed it with some embedded metal mesh on the inside in the hope that the filler wouldn't pop out later. I'm thinking that the heavy coating of the stuff I chose to coat the bumpers will make that an utter impossibility. More on that later.
By the way, using an auto-darkening welding helmet on a sunny day is a total PITA.
The next step was to pull the bumpers. They come off quickly and easily. But before doing this, I cut a lot off the bottoms of them to increase ground clearance. This required fabricating new mounting brackets for the rear bumpers where they meet the rear wheel arches as well as configuring a new way of attaching the front finder liners. Just fiddly little stuff, easily done.
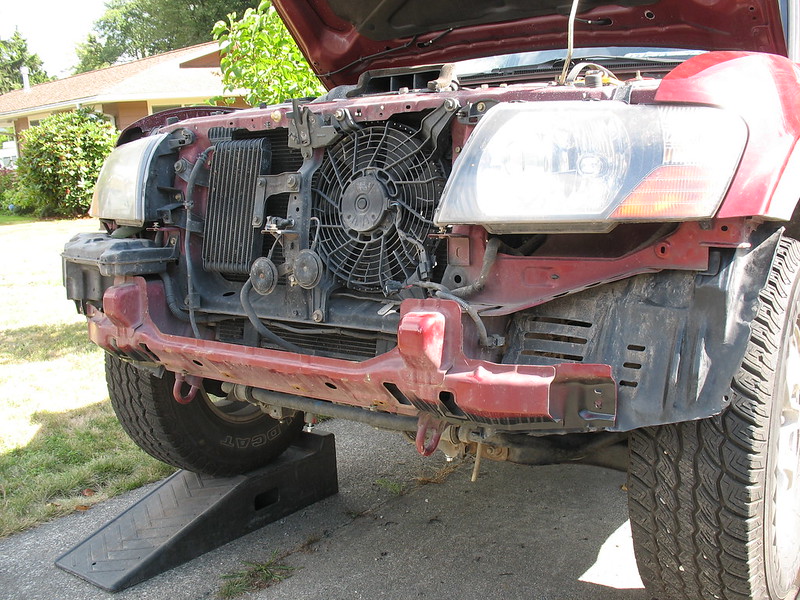
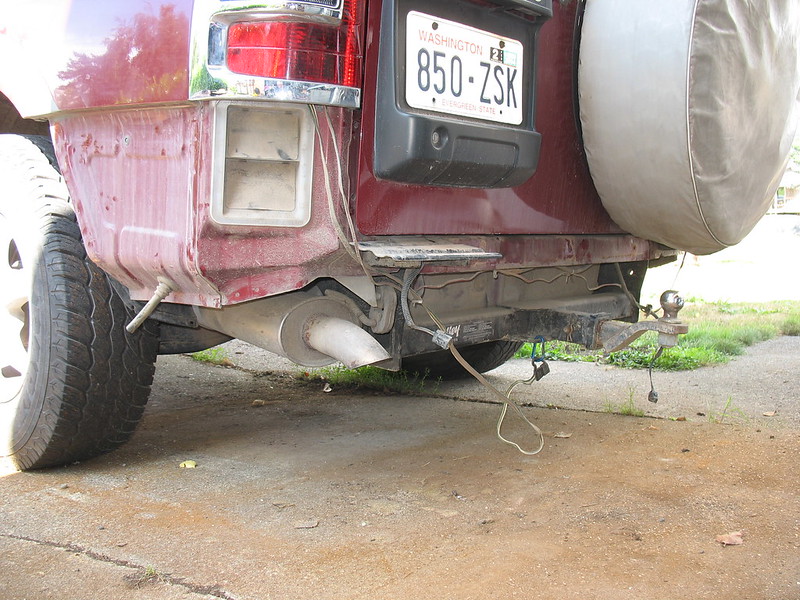
Now they're off and it's time to prep the body and bumpers for the application of bedliner. I had studied the options carefully and knew that I wanted something that was UV-stabilized and also wanted something as smooth as possible rather than chunky or gritty. Something with just a pebble texture if possible. I also wanted to choose a color that would complement the Montero's paint. The one I chose was Monstaliner. Yes, it's sort of expensive, but it is wonderful stuff, and comes as a kit that includes pretty much everything you need. If you follow the directions, it is VERY simple to use! It's a two-part urethane, massively tough and durable. Prep was simply a matter of cleaning with MEK, scuffing the surfaces (scuffers included in the kit!) and cleaning it again.
Let's do it!
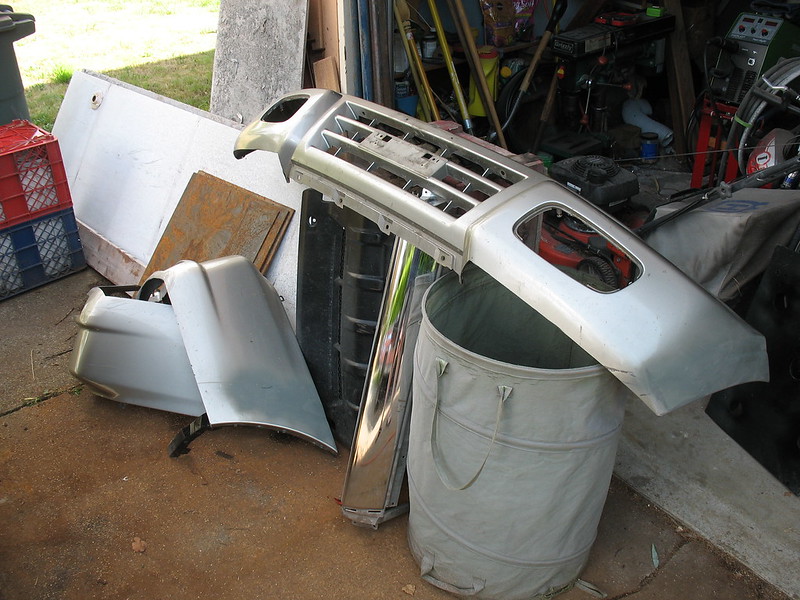
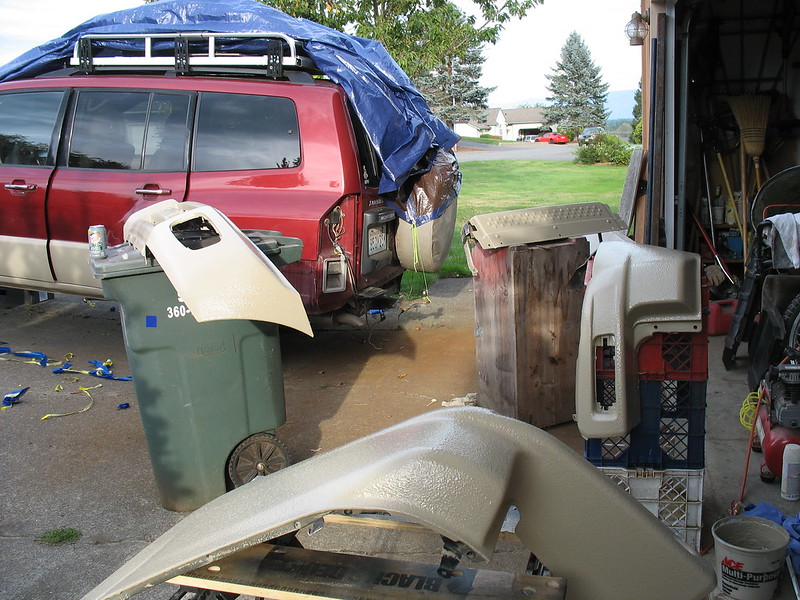
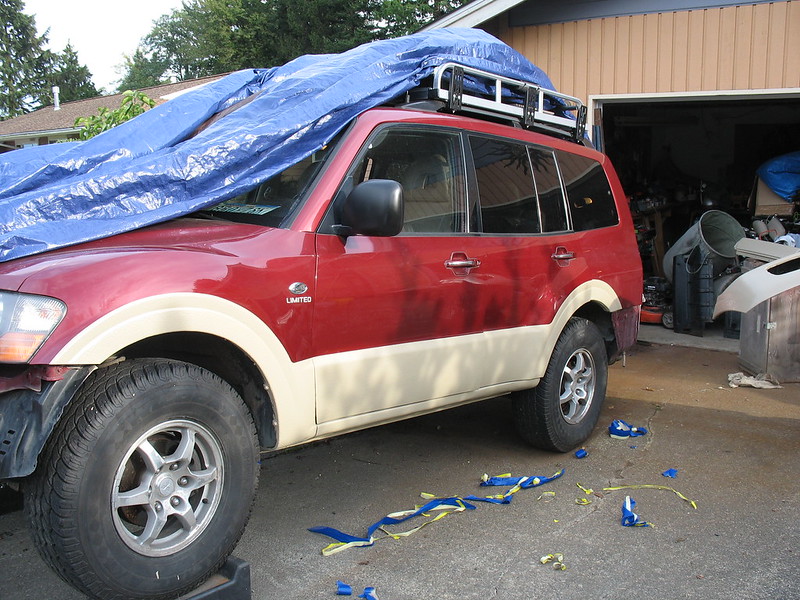
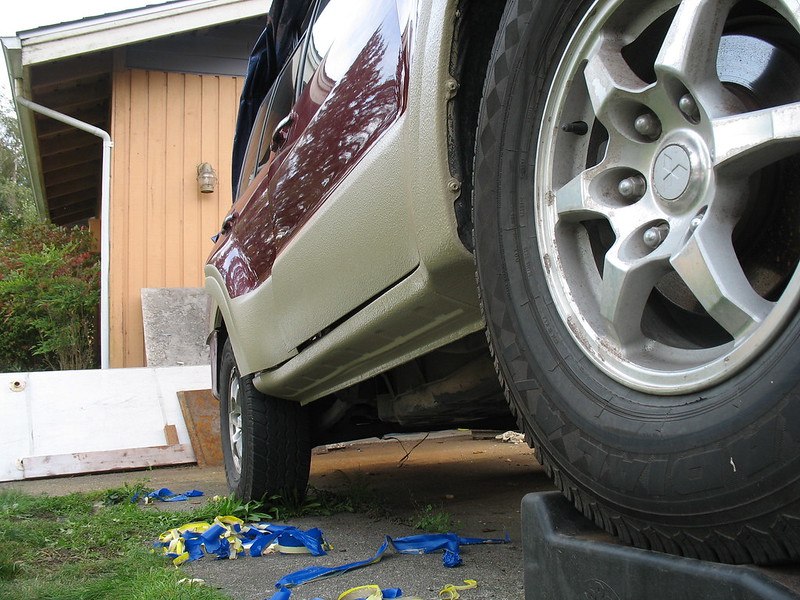
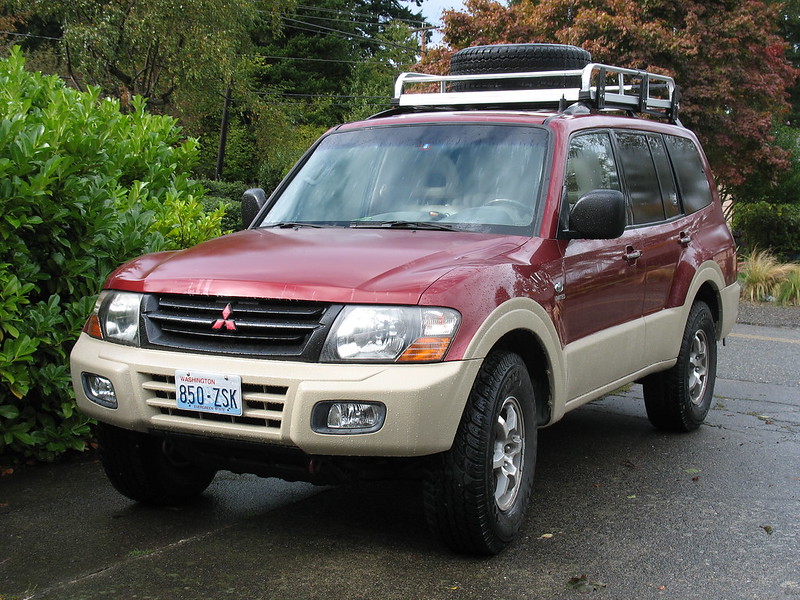
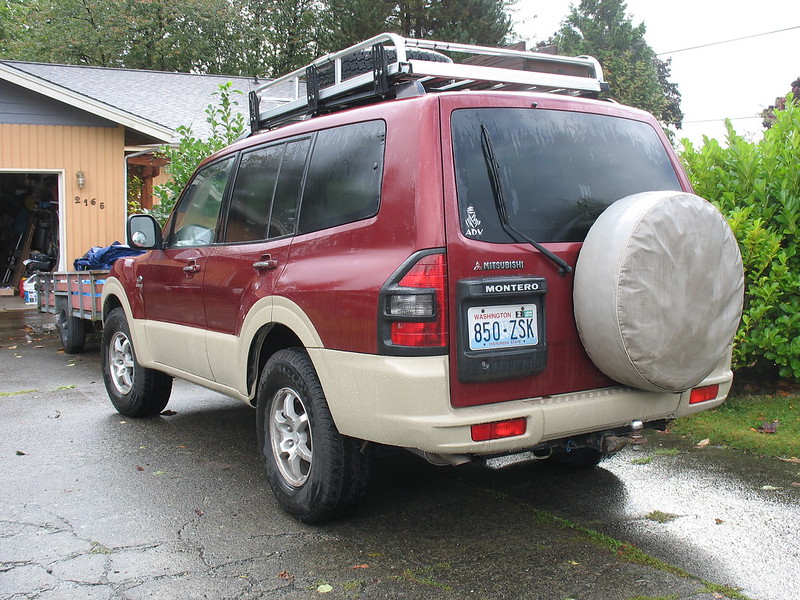
Lastly, as long as the bumpers were off, I decided to get rid of the chrome on the grill, mirrors and rear tail lamp housings. I used satin trim paint. It looks great and is VERY tough stuff! I drove down a single track last month, really just blazing a trail through saplings that were 12 to 15 feet tall, and there's not a scratch on those mirrors!
OK, let's put it all back together. What do you think?
Here's the rig before removing the cladding. You can see how things hang down quite low.


Here's a showoff pic of me with Bill Burke. He's saying, "damn, Sabre, that crap really hangs down there!" Um, yes, Bill. Yes it does.

Oh yeah...note the chrome grill, mirrors, rear bumper center section and tail light housings. I hate chrome, so it's all going away.
Step One: Remove the damned cladding. I've always hated this stuff. With a little abuse it starts to look tawdry and requires reapplication of body molding tape and the stupid plastic fasteners behind them. It just looks crappy after a while and hangs down too low anyway, so off it came. Just some simple prying, some grunting, swearing, and sweat, and Bob's-your-uncle. Actually, the worst part of the job was removing the leftover 3M adhesive molding tape!


Now we're left with one thousand six hundred little holes.
No, not really one thousand six hundred. But there were something like 60 of them. Two different sizes of round holes in the doors and fenders, two different sizes of rectangular holes on the rocker panels, and some odd shapes and sizes on the sides of the front and rear bumpers. But hey look! More ground clearance already!


I will admit to being sort of anal retentive about certain things...I think my patients find this comforting. Anyway, I was NOT going to slap Bondo on those holes and call it good. No, they were going to be filled properly: by WELDING. Only problem was, I had never welded before. So I took a one-day "intro to MIG" class at the local technical college. Then I found a very nice welder on Craigslist that was pretty much new. It's a great machine...a 200-amp inverter welder that does MIG and stick welding, and has an optional spool gun, too. A good buddy in a local welding shop set me up with a tank; happily, my company gets a discount on gas since we have an account for oxygen. Next stop was the local scrap yard where I brought home a pile of steel and started running beads, learning the machine. My first project was a cart for the welder, which you'll see below.
I got this nifty little tip for spot welding that worked really well, standing the wire off the metal at exactly the same distance every time and making consistent welds much easier for this rank amateur. I didn't want to take the door skins off or rip out the innards, so it wasn't possible to buck the welds from the back with a copper dolly. I just practiced a lot on thin sheet stock and did my first welds on the underside of the rockers, where mistakes wouldn't be so obvious. Yes, I certainly did have my share of burn-throughs under there! But all in all, I was very pleased with the results.

What I did was to put the head of a nail (chosen to be the correct diameter) into the hole and pull it tight against the body by pulling on the nail's shank with a pair of ViceGrips. This gave a quick way to fill the hole and gave a base upon which to build up the little spot welds necessary to fill the hole above flush. A little grinding and sanding was all that was needed after that!


For the larger holes, I used bolts. I twisted them a few threads into the hole, tacked it in place, cut it off, and finished the weld. It worked really well!


Here, the rocker panel holes are done and sprayed with primer. Oh, I never took a "before" pic of the crunched rocker panel, but here's the "after" pic. The entire rocker under the passenger door (to the extreme right in the picture) was crunched upwards, jamming the door closed. A Harbor Freight sliding dent puller and a small sledge hammer did the rough work, followed by a LOT of welding to close up all the holes I'd drilled. When it was ready for finish, there was really a surprisingly small amount of Bondo on there! Not bad for a guy who's never done any body work before. Thank you, YouTube.

Of course, I did use filler for the holes in the bumpers. I backed it with some embedded metal mesh on the inside in the hope that the filler wouldn't pop out later. I'm thinking that the heavy coating of the stuff I chose to coat the bumpers will make that an utter impossibility. More on that later.

By the way, using an auto-darkening welding helmet on a sunny day is a total PITA.
The next step was to pull the bumpers. They come off quickly and easily. But before doing this, I cut a lot off the bottoms of them to increase ground clearance. This required fabricating new mounting brackets for the rear bumpers where they meet the rear wheel arches as well as configuring a new way of attaching the front finder liners. Just fiddly little stuff, easily done.


Now they're off and it's time to prep the body and bumpers for the application of bedliner. I had studied the options carefully and knew that I wanted something that was UV-stabilized and also wanted something as smooth as possible rather than chunky or gritty. Something with just a pebble texture if possible. I also wanted to choose a color that would complement the Montero's paint. The one I chose was Monstaliner. Yes, it's sort of expensive, but it is wonderful stuff, and comes as a kit that includes pretty much everything you need. If you follow the directions, it is VERY simple to use! It's a two-part urethane, massively tough and durable. Prep was simply a matter of cleaning with MEK, scuffing the surfaces (scuffers included in the kit!) and cleaning it again.
Let's do it!


Lastly, as long as the bumpers were off, I decided to get rid of the chrome on the grill, mirrors and rear tail lamp housings. I used satin trim paint. It looks great and is VERY tough stuff! I drove down a single track last month, really just blazing a trail through saplings that were 12 to 15 feet tall, and there's not a scratch on those mirrors!
OK, let's put it all back together. What do you think?


Last edited:

