Barn Door for JK factory hardtops

jscherb

Expedition Leader
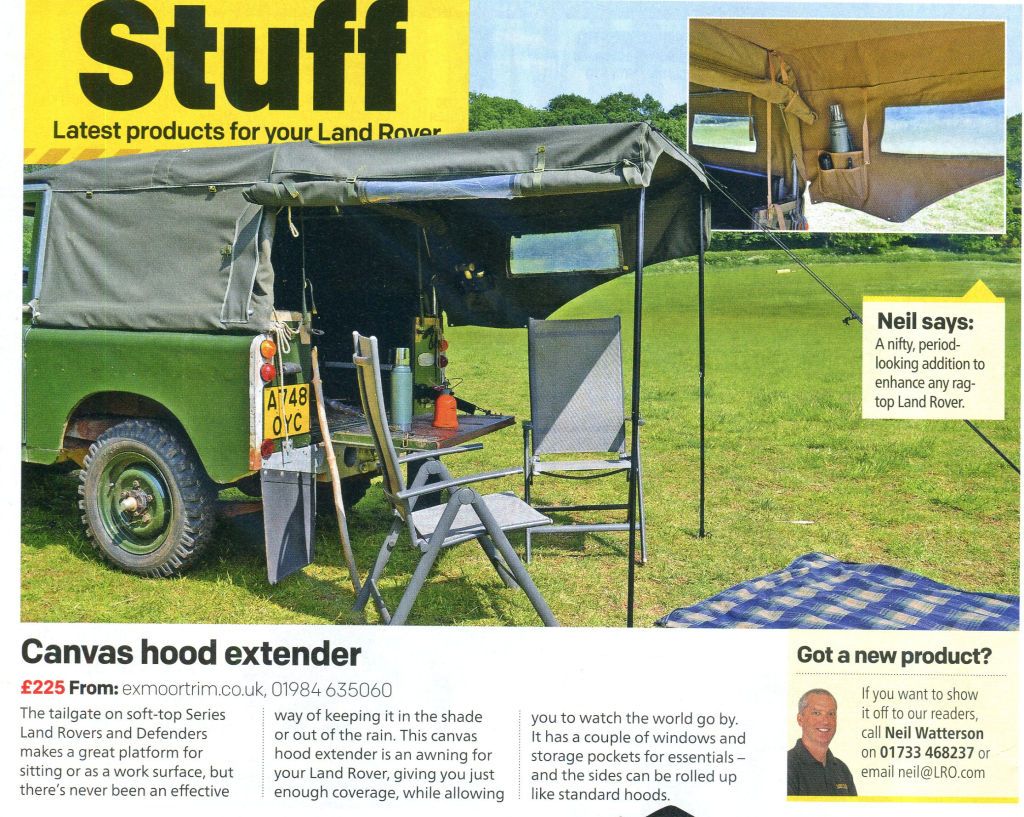
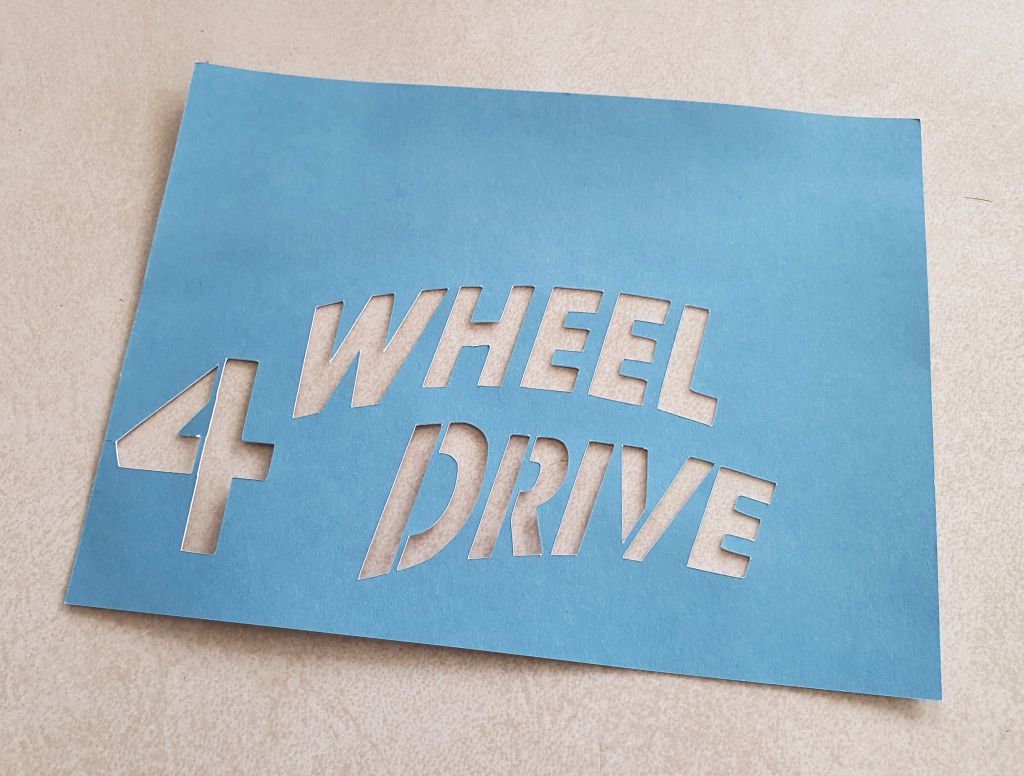
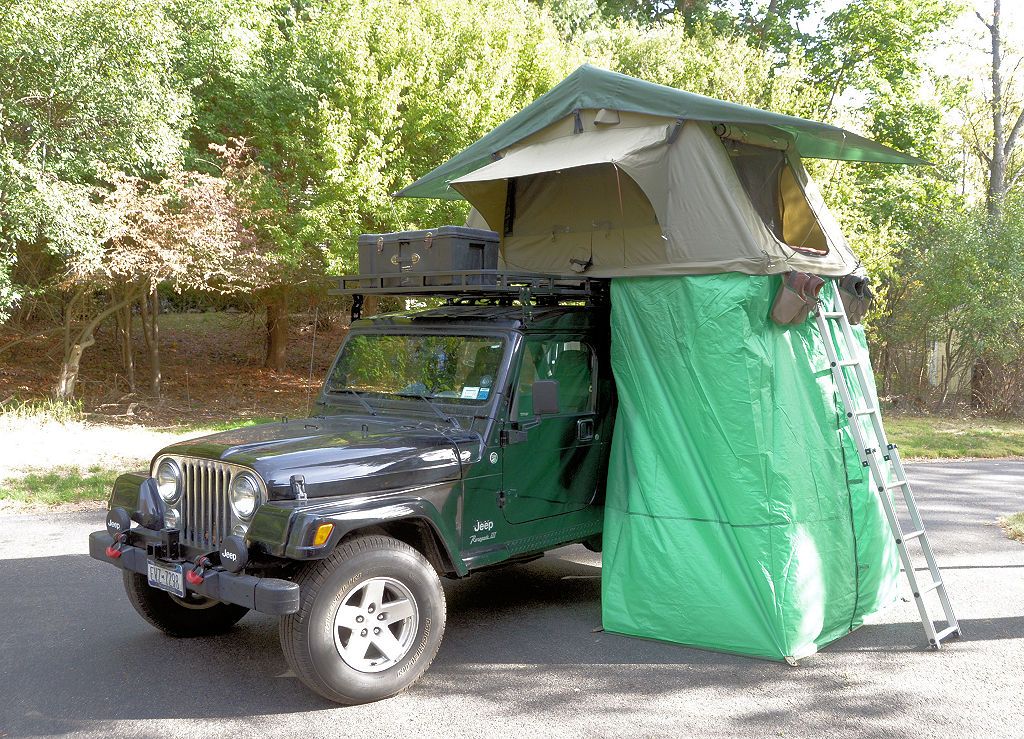
Early in the "Land Rover Ideas for Jeeps" thread I posted this item:

HoodExtender_zpsoqz09vuo.jpg


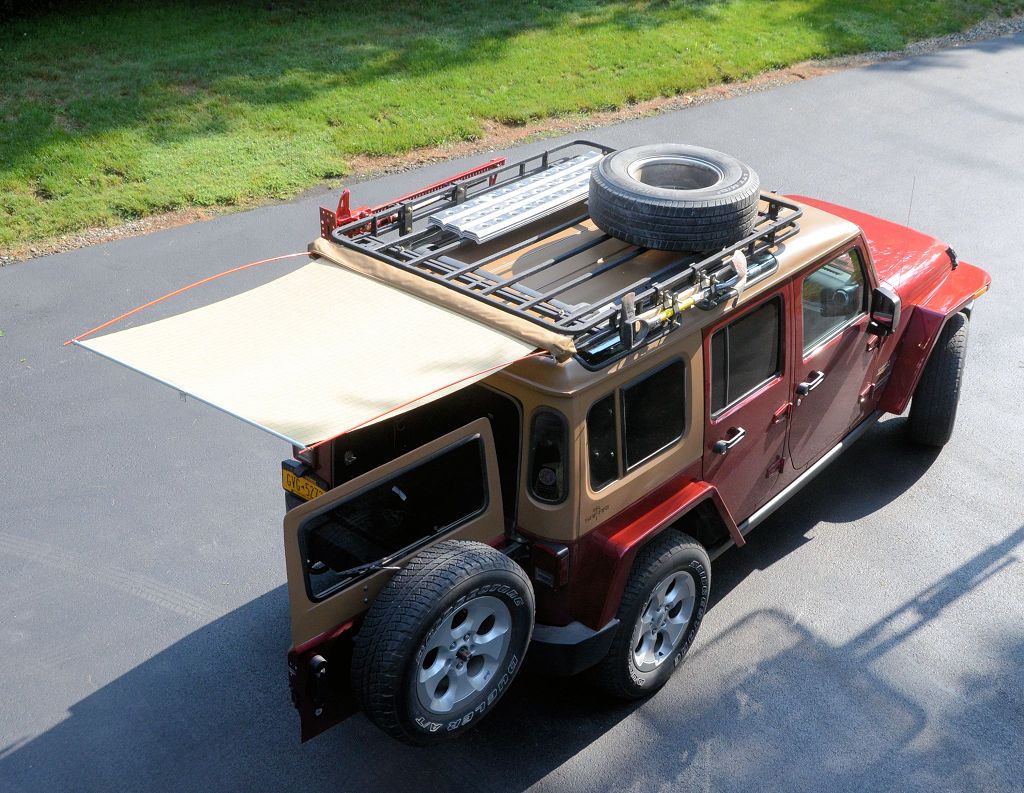
With that as inspiration I made a Jeep prototype out of a cheap Harbor Freight tarp:

GarageTest1_zps6ndgwhre.jpg


GarageTest1a_zpsglx7xtn2.jpg


AwningOnLJ2.jpg


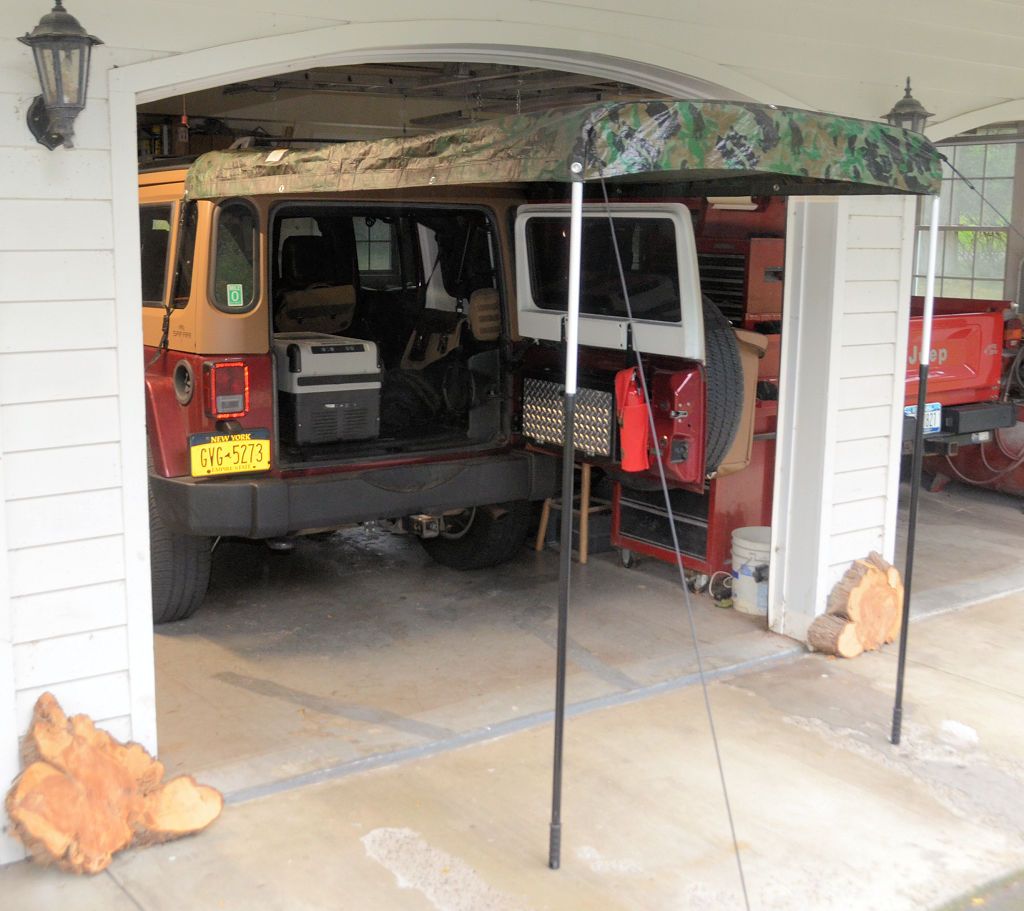
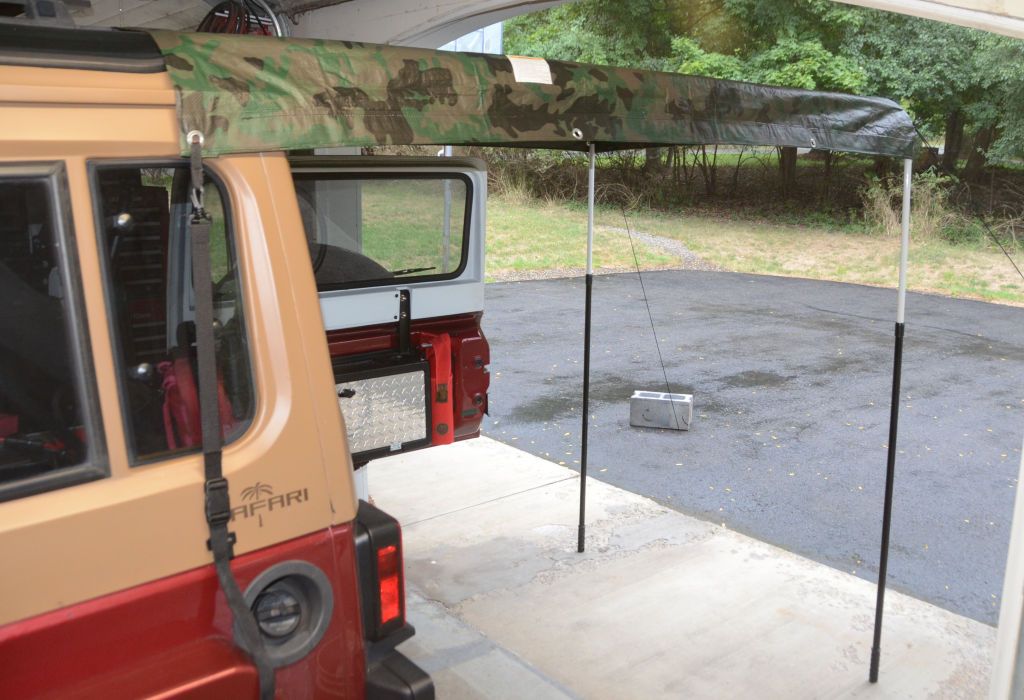
What I like about this design is that it doesn't require a roof rack - it just straps to the hardtop (or soft top!) so I can use it when the rack isn't installed or when it is, all I've got to do is throw it in the back of the Jeep and set it up when needed.

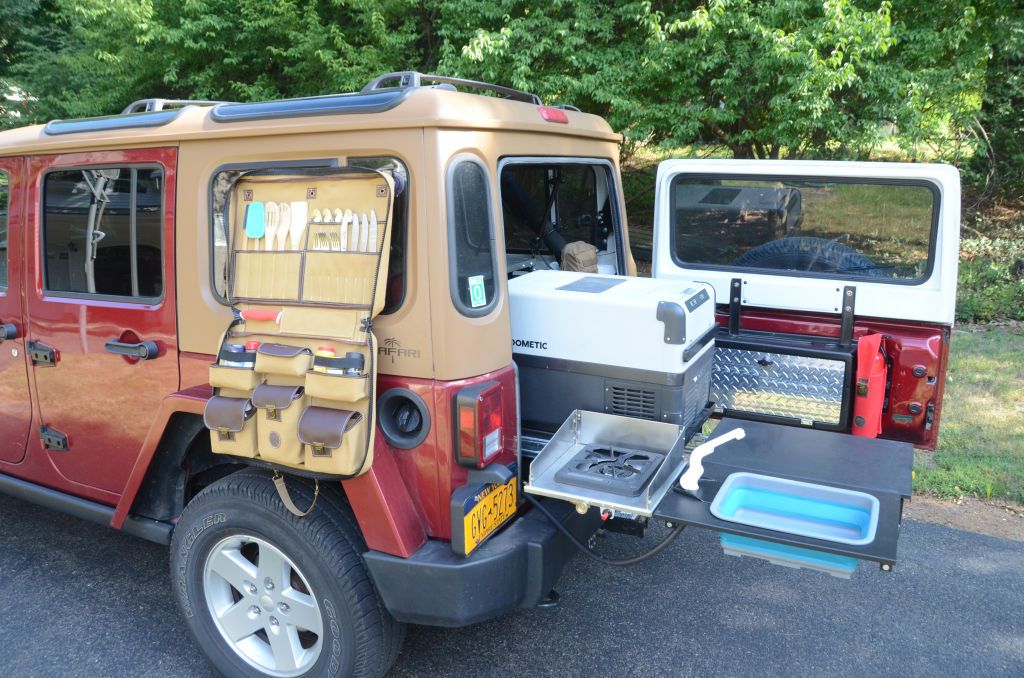
What I didn't like about the prototype was the width - being only as wide as the roof it wasn't wide enough for kitchen access from the side. Here's my Trail Kitchen deployed:

JKDripRail5.jpg


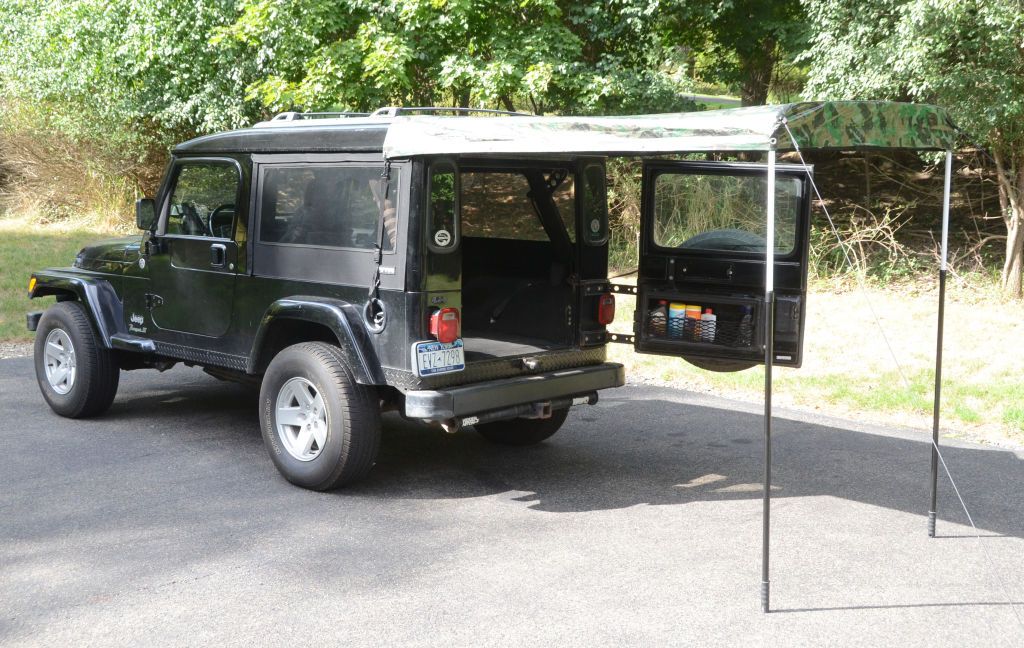
So if I want to stand on the side to access the stove and sink, the awning covers the kitchen but it wouldn't really cover me because the awning is only as wide as the roof.

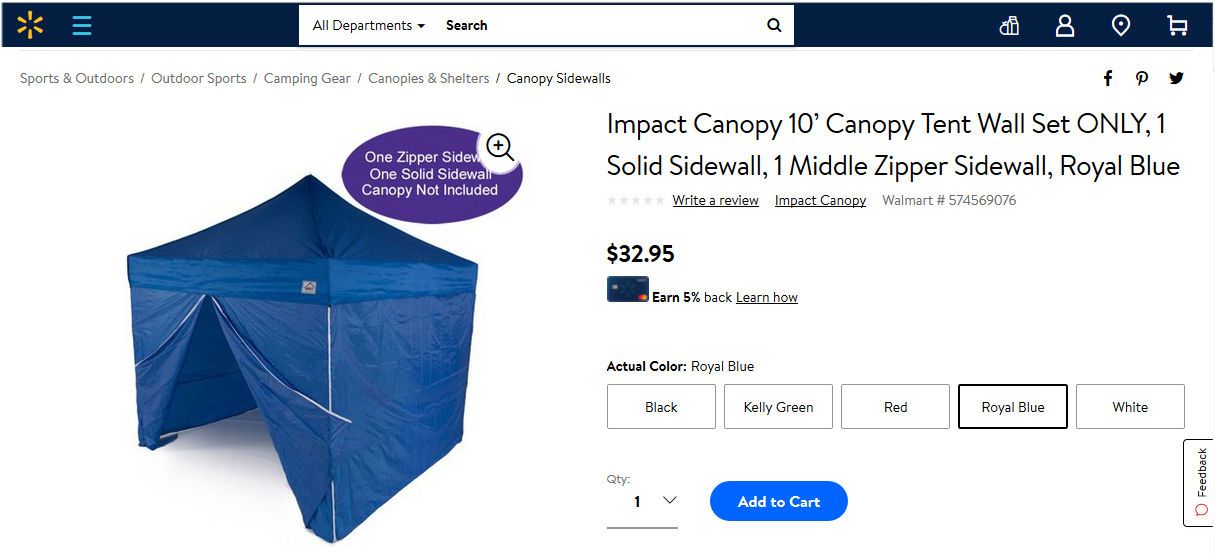
When I finished the prototype I put it aside and haven't done anything with it until now while I considered the improvements I wanted to make. The requirements for an improved design are a) wider to cover the cook, b) folds smaller for packing, c) can still attach without a roof rack but when a roof rack is present can mount to that which would provide more headroom. Also d) sewn from something nicer than a cheap Harbor Freight Tarp and e) optionally has zip-on walls for protection in worse weather (and possibly to function as a changing room).

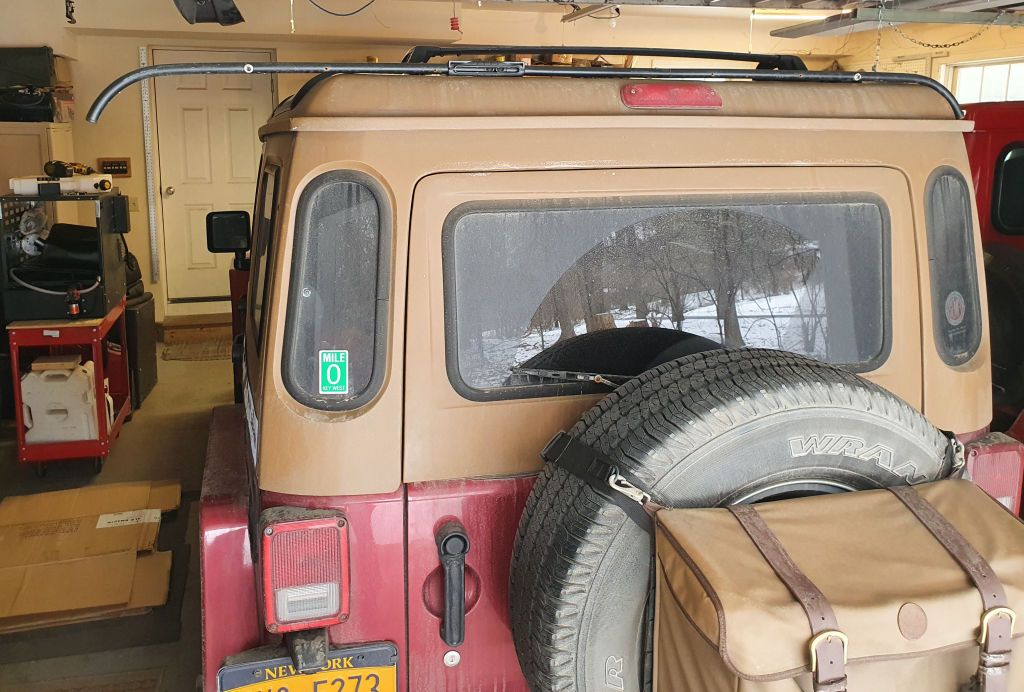
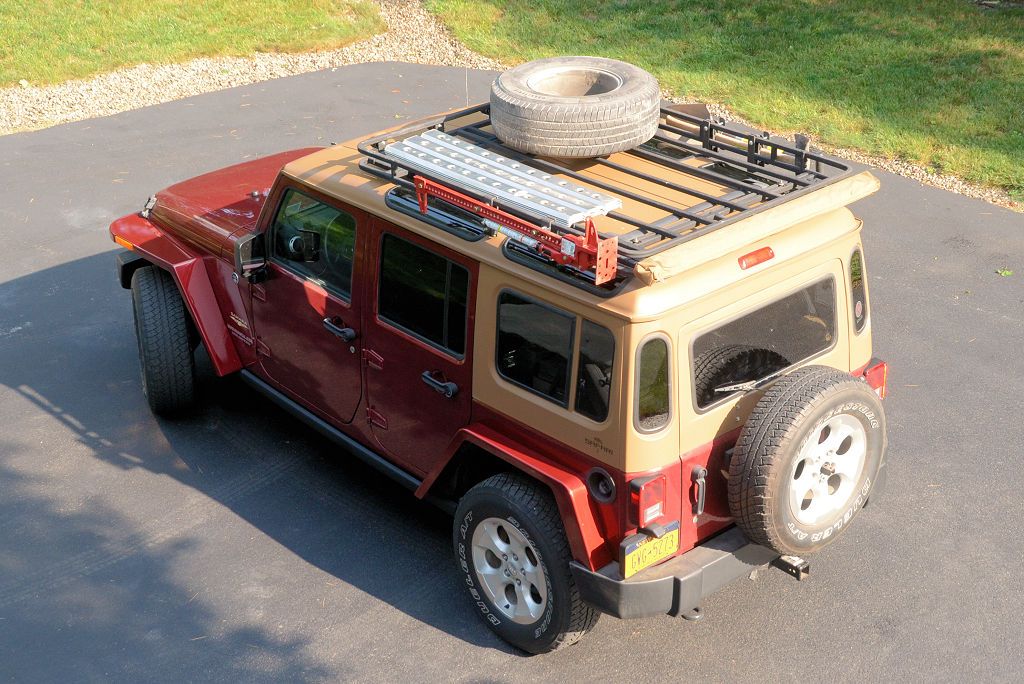
I've finalized an improved design and I've begun work on it. To solve requirements (a) and (b), I mocked up a crossbar using a sliding joint from a factory Sunrider hardtop and lengthened the crossbar at the same time. The Sunrider joint (visible to the left of the third brake light) enables the bar to fold in half, which means the awning can (for example) be made 6' wide but fold for packing to 3'. And the extra length off to one side can shelter me while cooking in the rain.

LongBarMockup.jpg


The front bar would strap to a hardtop in the same way that my prototype above does and would not require a roof rack, but also could attach to the rear crossbar my roof rack, giving me about 5" more headroom.

The rear bar would work the same as the one on my prototype, with poles that get inserted into the curved-down ends of the crossbar except that it would be wider, also using a Sunrider joint.

I would also make both bars the same, so that it would be possible to have the awning be free-standing by slipping poles into the front bar and adding guy lines to stabilize it so the awning could be left in place and the Jeep could then leave, spend the day on the trail and back at camp the Jeep could back under the awning for cooking and changing.

All of the above are simple changes to the proven prototype design so it's just a matter of doing the work.

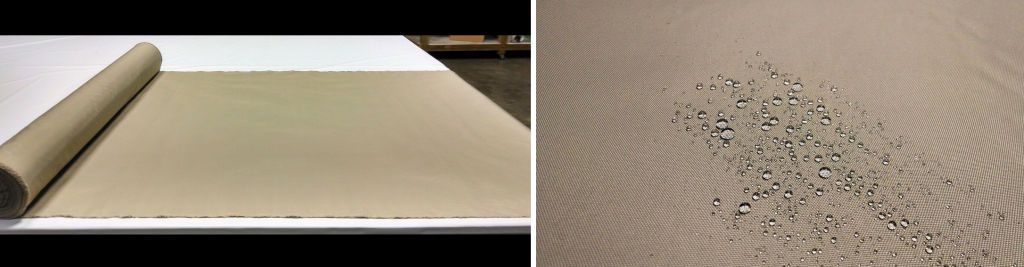
I've got plenty of scrap soft tops to provide the crossbars and Sunrider joints. I won't sew the top from soft top fabric because that's too heavy; I'll use a lighter waterproof canvas. I'll begin work on the frame while I order the canvas and the zippers for the side walls and wait for them to come in.
 

Jurfie

Adventurer
Clever, as always; I like this version, especially the ability to drive away from camp and leave it standing as a “campsite reservation” if one has a RTT.
 

jscherb

Expedition Leader
Clever, as always; I like this version, especially the ability to drive away from camp and leave it standing as a “campsite reservation” if one has a RTT.
Thanks. Fabric is ordered and on its way and should arrive the beginning of next week. I found a lightweight boat cover fabric on ebay that was pretty reasonable, these photos are from the listing:

FabricOrder.jpg


I'll begin work on the awning when the fabric arrives.

Also still waiting on the surplus Swiss army water bladder I ordered through Amazon so that project is on hold until that arrives.
 

jscherb

Expedition Leader
The graphics on the early Jeeps weren't stickers, they were painted on using stencils, so I tried making a stencil this morning on the Cricut.

4WDCurveStencilTest.jpg


Anything the Cricut can make a decal out of can also be made as a stencil.
 

Dan Grec

Expedition Leader
I have an awning on the back of my JK that is only as wide as the hard top, and you are spot on that it's simply not wide enough.
When the rain comes down even a little bit sideways you only get a strip about 1 foot wide that is actually rain free.

It worked OK for the sun, I would always drape a sheet or towel down whatever side the sun was actually on to create a good shady space.

I'll be doing something different next time.

-Dan
 

jscherb

Expedition Leader
I have an awning on the back of my JK that is only as wide as the hard top, and you are spot on that it's simply not wide enough.
When the rain comes down even a little bit sideways you only get a strip about 1 foot wide that is actually rain free.

It worked OK for the sun, I would always drape a sheet or towel down whatever side the sun was actually on to create a good shady space.

I'll be doing something different next time.

-Dan
Definitely agree with that, Dan. I made this self-supporting awning a few years ago and it works well and is easy to deploy but it doesn't offer much protection from the rain as you say, it's mostly for sun.

JKAwning2_zpswdmavr9p.jpg


For that one I started with a large Ikea window shade, and made the rack mount, supporting pole mounts and storage bag for it.

GarvinOnJK2_zpsidlme3gv.jpg


I think what I'm doing with this new one will be wide enough for most situations, but for really sideways rain I'll do side walls that will attach to the awning with Velcro. I plan to do them the same way I did the changing room/annex for my roof top tent - I used canopy tent wall set I found on Walmart.com

RTTAnnex1.jpg


I used one set of these to make it:

CanopyWallSet_zpsdr9yy7gs.jpg


The price has gone up to $60 since I made the RTT changing room but it'll still be a good value to enclose the new awning.
 

MattJ

Adventurer
I've tried all sorts of awning solutions in all sorts of conditions, and concluded there's no solution that is perfect balance of cost, ease to set up and protection. The Slumberjack products are incredibly durable and offer great protection and are very lightweight to pack. But they sure aren't cheap and take some time to set up. Here are some different configurations I have tried:

y4m5sB1fwaAdrJGwuKk8vUYCTak8y8tb9T-Yo3nxsgbu7MkYliS91e53nzO5TGKjYXlRhuIxHdTkAH8ul4qR10r-2JlxGiuI57clqRM65QHqZp9Yv9sRwm_1Ye8XBON5VqiyrdfFP01vzHoH_-VfxisL93yu4wt-y0fnMYvBx7m6OdJ1MD6wZ5IKIuAVb6r2yP9


y4mUccMUNc0qZfIJ9QWxv7L1qWlsPYird5l3opasuL0FrcvxfibJvhWVvalzpDwUTiw7DzrSBoTkhlwrYuuqkd2wh6c4QrAPIti-SvmRdUEe67qaKZHFRUc5eEwzuMHYGew3Y6Ro39w_TTsEUL4rO_D9IZ3EyXtiARjK0bzC6gZBKN10iIRn8BFsfWfGQDDEriJ


y4mbhikHrWSFGwy0g9xPoKU1mf6V-8IooSy06BNyitH0dCv2Sfz0grpKEBMh-V6pSRFF6CfGFPgHBuJr2rGo5pBzzrHQTmrgx-lH-NwHCK3sraxDSRGdNd7xg-3NmIXVlkzvoLiozlO8GhKqc248XAoZnmlGZ4IGQp2S5mE8cfcs_BLjiBiYYDV-30ExBVOYGaB
 

jscherb

Expedition Leader
Yesterday the Swiss Army Surplus water bladder arrived. It's a very rugged rubber bag with handles on each end and a cap with a pushbutton valve in it. It's advertised to have a 20 liter capacity (just over 5 gallons), which seams reasonable when it's compared to a 5 gallon jerry can.

SwissArmyBag1.jpg


The listing on Amazon:

The first thing I did was fill it up with water to make sure it doesn't leak (one reviewer claimed that his leaked at the seams). In this photo it's not quite full, I was filling it in the utility sink in my workshop and the bag is a bit large for the size of the sink so I couldn't quite get it full. A garden hose would be best for filling it.

SwissArmyBagLeakTest.jpg


Doesn't seem to leak. This thing is heavy when full - a gallon of water weighs about 8.3 pounds, so 5.3 (20L) x 8.3 = 44 lbs. plus a few pounds for the heavy rubber bag puts it at over 45 pounds.

I then tried it in the floor compartment of the JKU to see how it might work there as a water source for the sink. It fits pretty well but doesn't fill the entire compartment, so there's still some storage room left. Could possibly fit two of them in the compartment but perhaps the second one couldn't be filled to capacity.

SwissArmyBagInCompartment.jpg


The pushbutton valve makes it unusable as a sink water source and awkward at best as a shower water source. The cap appears to have a proprietary thread so finding a different cap probably isn't going to work. I do have a plan but that will have to wait until Wednesday when something else I ordered arrives. I'll post the solution when I implement it.

SwissArmyBagNozzle.jpg


Another thing that arrived the other day is this "camping shower" I found on eBay for about $8.00. It's also advertised as having a 20 liter capacity but comparing it to the Swiss bladder it doesn't seem like that could be true. I didn't buy it for the bag anyway, I bought it for the shower head, which I figured would have an appropriate water flow rate for a trail shower with the limited water capacity that bags like these have. The shower head has an integrated shut off valve, which will be perfect once I fix the shutoff valve in the cap of the Swiss bag.

SwissArmyEbayCompare.jpg


One feature the cheap camp shower bag has is a thermometer on the bag.

eBayBagThermometer.jpg


Similar stick-on thermometers are available and inexpensive so I'll probably order one to try out on the Swiss bag: https://www.ebay.com/itm/Aquarium-S...ndicator-Strip-Microbiology-Food/283647676219. I've ordered a couple to test them on the Swiss bag.
 

pith helmet

Well-known member
Mine doesn’t leak at all. I use a cam strap to lash it to a tree, mostly for washing water since I have yet to totally get rid of the rubber taste. I’ve had o luck with a cap replacement, so I’m really looking forward to your mod idea.
 

jscherb

Expedition Leader
The parts came early so I was able to modify the Swiss Army water bladder cap today.

I've modified the cap by removing the original spout and valve and replacing it with a quick-connect fitting:

CapInstalled.jpg


CapInstalled2.jpg


Here are the steps:

1. Remove the valve by first removing the snap ring on the inside. The easiest way to do this is to push the valve button in slightly to relieve tension on the ring and pry the ring off with a small screwdriver (the pliers in the photo are holding the cap upright for the photo).

ValveDisassembly.jpg


Remove all the valve parts:

ValveDisassembled.jpg


2. The quick-connect fitting requires an 11/16" hole. Using the original hole in the cap as a guide, drill a hole using an 11/16" drill bit. I'm doing this with the cap clamped in a vise in the drill press but the plastic drills easily so this can be done with a hand drill as well. It's hard to find individual 11/16 twist drill bits but an 11/16" hole saw will work fine if you can find that.

DrillingCap.jpg


3. Once the hole is drilled, cut off whatever remains of the original spout and sand the cut smooth. I'm doing the cutting with a bandsaw but a hand saw will work just fine.

CuttingCap.jpg


CapCut.jpg


After cutting it's a good idea to sand the cut areas to ensure it's smooth and parallel to the inside surface of the cap.

4. The parts before assembly. A gasket will be required in order to seal the fitting to the cap. I used an ordinary hose washer, which is a tight fit on the fitting, but that's good because it helps the washer seal.

DisconnectParts.jpg


5. Secure the fitting to the cap with the supplied nut. Job done.

The full bag on the workshop floor, not leaking ;):

CapNotLeaking.jpg


Because the disconnect fitting has a hose barb on the inside of the cap, if a pickup tube is needed to draw water from the bottom of the bladder (if the bladder is sitting vertically, for example), a piece of 3/8" flex tubing can be added.

Parts.

The parts are from the CPC PLC-series connectors: https://www.usplastic.com/catalog/item.aspx?itemid=83681&catid=926.

The disconnect is this part: https://www.usplastic.com/catalog/item.aspx?itemid=74733. It has an automatic shutoff valve inside so when the hose it unplugged the cap is sealed:

The inserts for the hose ends are either non-valved: https://www.usplastic.com/catalog/item.aspx?itemid=74830&catid=926, or with automatic shutoff valves included: https://www.usplastic.com/catalog/item.aspx?itemid=74836&catid=926, depending on whether shutting off the hose is important to your application or not.

It's a pretty simple mod to implement and it adds a lot of functionality and ease-of-use to the bladder.
 
Last edited:

pith helmet

Well-known member
This is great, Jeff! I am ordering the parts tonight. When I saw those connections on your rotopax
I wondered if that as the route you were going. Many thanks for sharing your ingenuity and efforts!
 

jscherb

Expedition Leader
In an earlier post I mentioned that I had ordered the cheapo camp shower just for the showerhead. The hose that came with that is 3/8" I.D., which matches the fittings I used on the Swiss Army bladder cap, so I slipped a hose-end fitting into the end of the hose and plugged it into the bag. The showerhead has a shutoff valve so there's no water flowing in this photo.

Showerhead.jpg


I had planned to throw the bag on the roof of the Jeep today to test the water flow out of the showerhead but it's snowing right now so I'll wait for a nicer day. I'll do a video when I get the water flowing so people can see what the flow is like.
 

jscherb

Expedition Leader
I did some calculations... many people make showers out of 4" PVC pipe, painted black and bolted to the side of a roof rack. The nominal I.D of 4" Schedule 40 PVC pipe is a few thousandths under 4", so I used 4" for the calculation. The area of a circle is pi * diameter, in this case 12.56 square inches. Assume a 6' length of pipe and you've got roughly 905 cubic inches.

A gallon is 231 cubic inches, so dividing 905 by 231 results in 3.9 gallons.

The Swiss Army bladder is 20 liters, or about 5.3 gallons.

What about the weight? Schedule 40 4" PVC pipe weighs 2 lbs. per foot, so a 6' piece is 12 lbs. Add to that the end caps and brackets to mount it to a roof rack and you're probably at about 15 lbs. The Swiss Army bladder weighs 2.15 lbs. empty, so roughly a savings of 13 lbs. over the PVC solution.

Summary...

Swiss Bladder:
5.3 gallons
About 45 lbs. full
Very portable. Can hang from a tree, set on the Jeep roof or strapped to a roof rack

PVC Pipe (6'):
3.9 gallons (31.2 lbs)
About 45 lbs. full
Not portable. Bolts to a roof rack
 

Jurfie

Adventurer
The area of a circle is pi * diameter, in this case 12.56 square inches.

Actually, it's pi * r^2 but in the case of a 4" diameter pipe, it is the same thing so your calculations are correct. ;)

@pith helmet mentioned a rubbery taste; will heated up water smell the same do you think? I can see using one of these as a camp shower, but not if I still smell funky. Different funky, sure, but still funky.
 

jscherb

Expedition Leader
Actually, it's pi * r^2 but in the case of a 4" diameter pipe, it is the same thing so your calculations are correct. ;)
Typo, sorry. I know the formula. Since 2^2 is 4 I calculated it as pi*d and mistyped when I wrote it down. Sorry about that.

@pith helmet mentioned a rubbery taste; will heated up water smell the same do you think? I can see using one of these as a camp shower, but not if I still smell funky. Different funky, sure, but still funky.
I haven't gotten that far in my testing yet. Seems like there should be some procedure that elminates the taste, or at least reduces it enough so that it's not objectionable. After all, these are intended for drinking water ("NUR FUER TRINKWASSER" as it says on the bag), and the Swiss are very meticulous about details, so I'll be researching this.
 

Forum statistics

Threads
185,903
Messages
2,879,343
Members
225,497
Latest member
WonaWarrior
Top