Barn Door for JK factory hardtops

pith helmet

Well-known member
Actually, it's pi * r^2 but in the case of a 4" diameter pipe, it is the same thing so your calculations are correct. ;)

@pith helmet mentioned a rubbery taste; will heated up water smell the same do you think? I can see using one of these as a camp shower, but not if I still smell funky. Different funky, sure, but still funky.
I have had no issue using it for washing water, or even cooking or coffee water. It won't leave you smelling like a tire. I have a well at home so I’m used to aftertaste-free drinking water. t’s just a bit more taste than I like to drink straight.
 

jscherb

Expedition Leader
While researching showers I came across this review in Land Rover Monthly magazine for the Roadshower 4s: https://www.landrovermonthly.co.uk/articles/products/roadshower-4-review/

_Q7B7279.jpg


One nice feature it has is the ability to pressurize the tank:

_Q7B7330.jpg


The 4s holds 4 gallons, weighs 49 lbs full, is 55" long (and bigger around than a piece of 4" PVC) and sells for around $300. They have a larger version (the 04L), which holds 10 gallons, is 82" long and weighs 116 lbs. full and about $500.

I haven't tried the water flow from the Swiss Army bladder yet (too cold outside to spray water even if I don't get under the shower myself), but I'm sure it isn't going to really be satisfying. I've got an idea that will deliver 1gph at 35 PSI from the bladder that I plan to prototype, I've got most of the parts on hand already and just need to source one or two more bits for it.
 

MattJ

Adventurer
Eager to see your pressurized solution, Jeff!

I considered purchasing one of those Road Shower 4S products, but decided it was just to much extra weight (especially mounted that high). I ended up using a similar portable shower kit from RinseKit, modified to stay at constant pressure with a CO2 tank that I use for reinflating my tires. A bicycle pump would work too, but the RinseKit would need to be recharged as the water level got low, I think. The RinseKit comes with a heating unit that plugs into the 12v cigarette socket.

y4mPXg5KvQe4S1Hv3HBM9qEWwrI2BJrJiq6NB-TkL2LXS5CxQfEATAS3LyDc1BK7CGZJ2TagE9QtJuRuIHnpkFZrpKYgrIIOPfRtPITvB3kXnONnZRGV2qX1cvvYwnhzxvGTdzKX6OUZeKMttbZ04Cq7t1tJgSGr70wyqjETXWyaaw285QbEZicVMJXAouFoLAr


And in the summer when a cold shower is just fine, I simply bring the 12v marine pump kit that Jeff inspired me to build!

y4mO4_Nuq72SC4Aq5XEjpRP0szu28uhGkje3t7Giu6590x6Q7ihUBoownZMmRlhR2NUh5YLjhx1MbADhHWD9-0VVD-5kLmMrqpdX_1W0FYHPdvZFb9gHuxf3HrO-aSTVG4EsNL_Xp3-UwUrMrfl4UIFhcQRAfxzEhRxFbDgNz0NIIZsEMwiuUBnnuuNl17_rR5o


y4m4Ae3BfLKnyA_FiG3XblmmASK6ATAZhj1efiCfP0gAm0J3GtOdEzpbMzsGcffjYjO6BeXatDEDNkIIrajehELrRigSpSpYEYTtXKidMSC9G8idGakoDkJXym-1VD_eeXtb_KaHsOgpqNi25GSePt5C2ZY6ixn5ZRV81l4Dvejkkw9H7sHlXL1FUZtDSsh1RSK
 

jscherb

Expedition Leader
Since I'm planning to test the Swiss Army water bladder as a solar-heated shower source, I'd like to know how warm the water is before spraying myself with it. This stick-on thermometer should do the trick:

Thermometer2.jpg


The range is 90 degrees through 120; these are available in other temperature ranges but I figured a top end of 120 would be a good idea because that might signal caution required; below the middle of the range should make for a nice shower.

Thermometer.jpg


It seems to stick pretty well, but it's intended for hard surfaces so if over time it begins to come loose I'll attach it with super-strength automotive molding tape: https://www.3m.com/3M/en_US/company...gth-Molding-Tape/?N=5002385+3293241071&rt=rud
 

jscherb

Expedition Leader
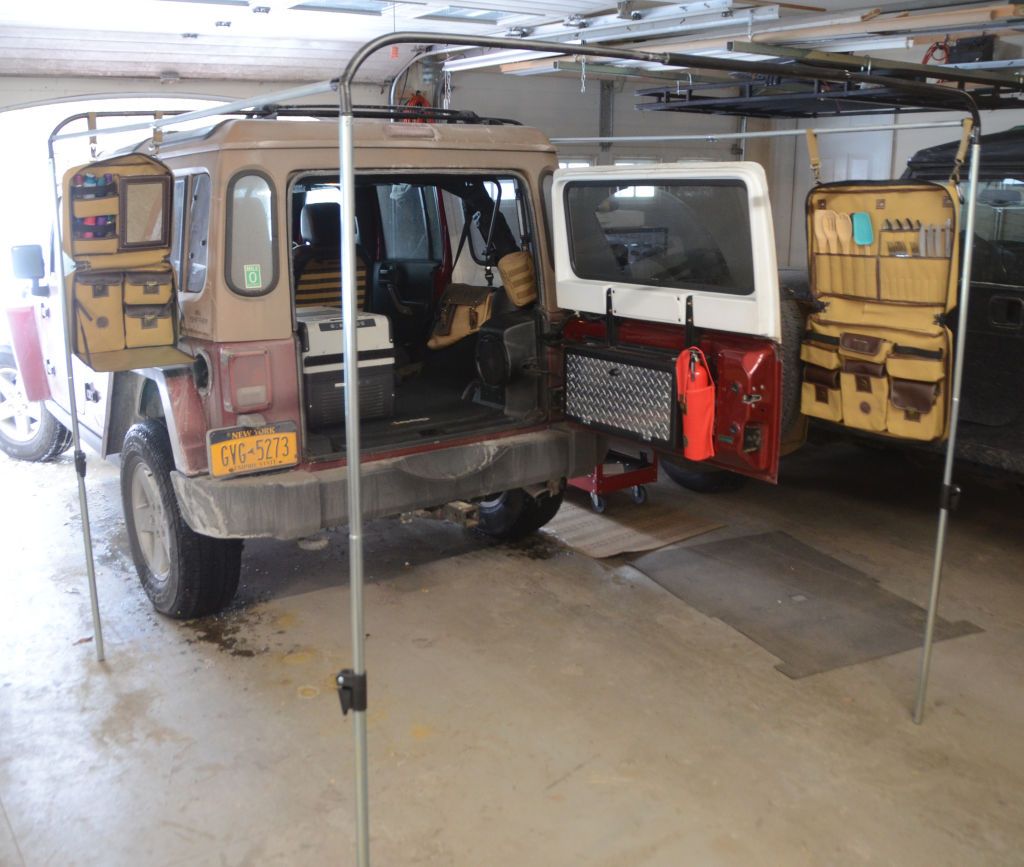
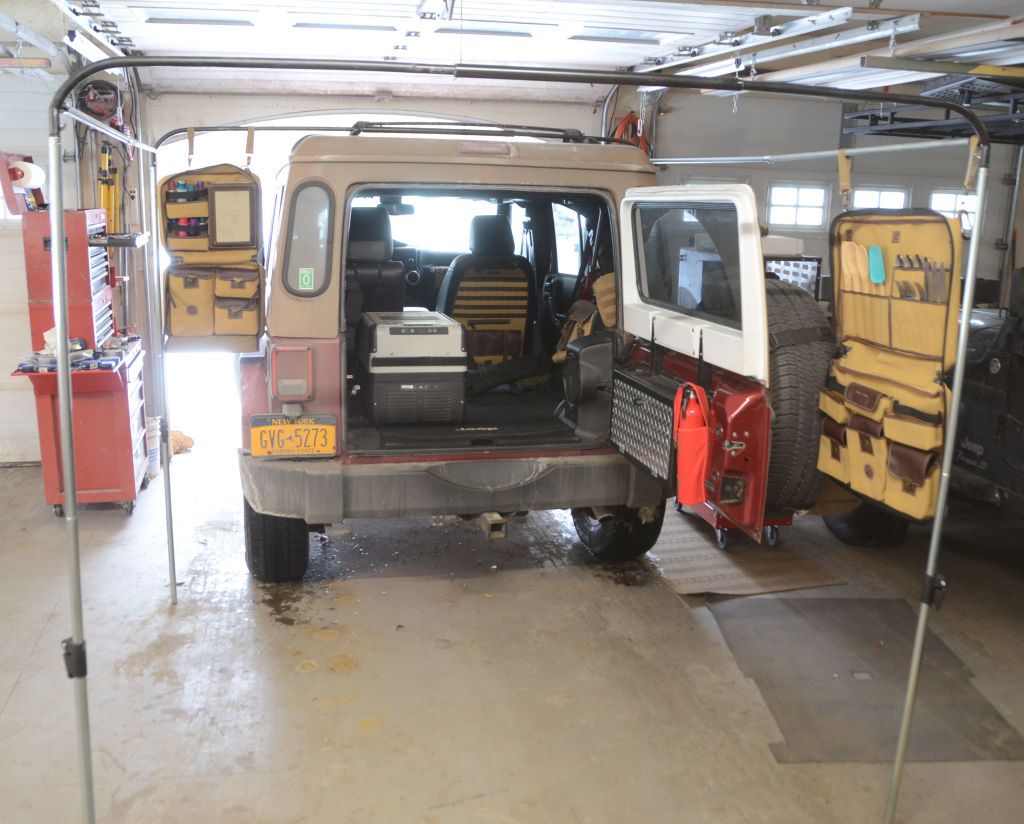
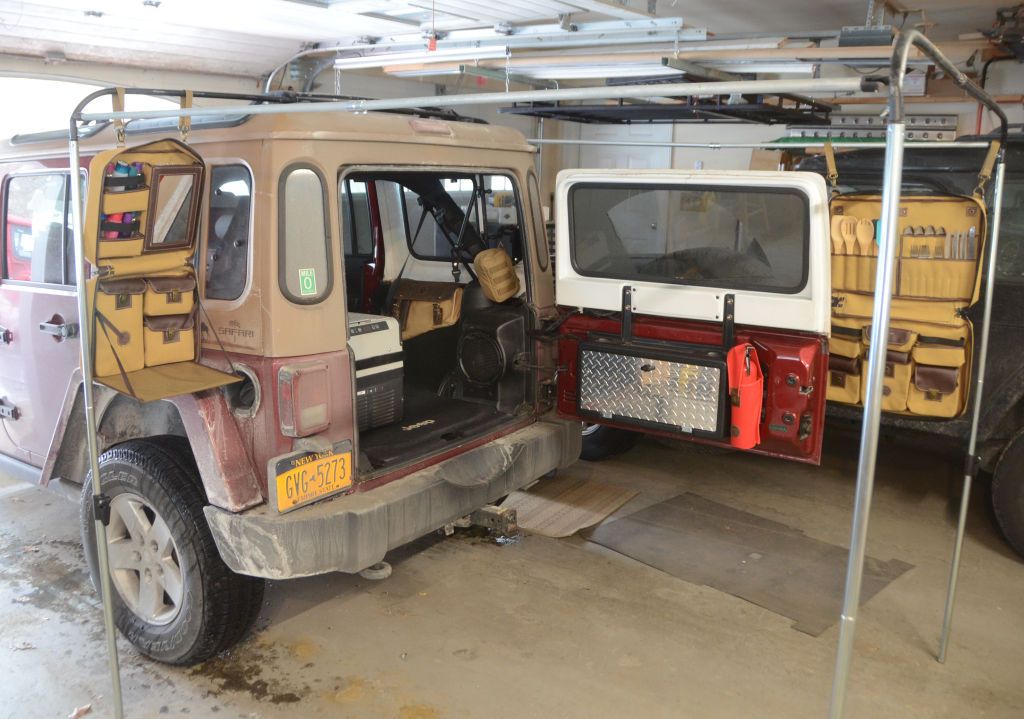
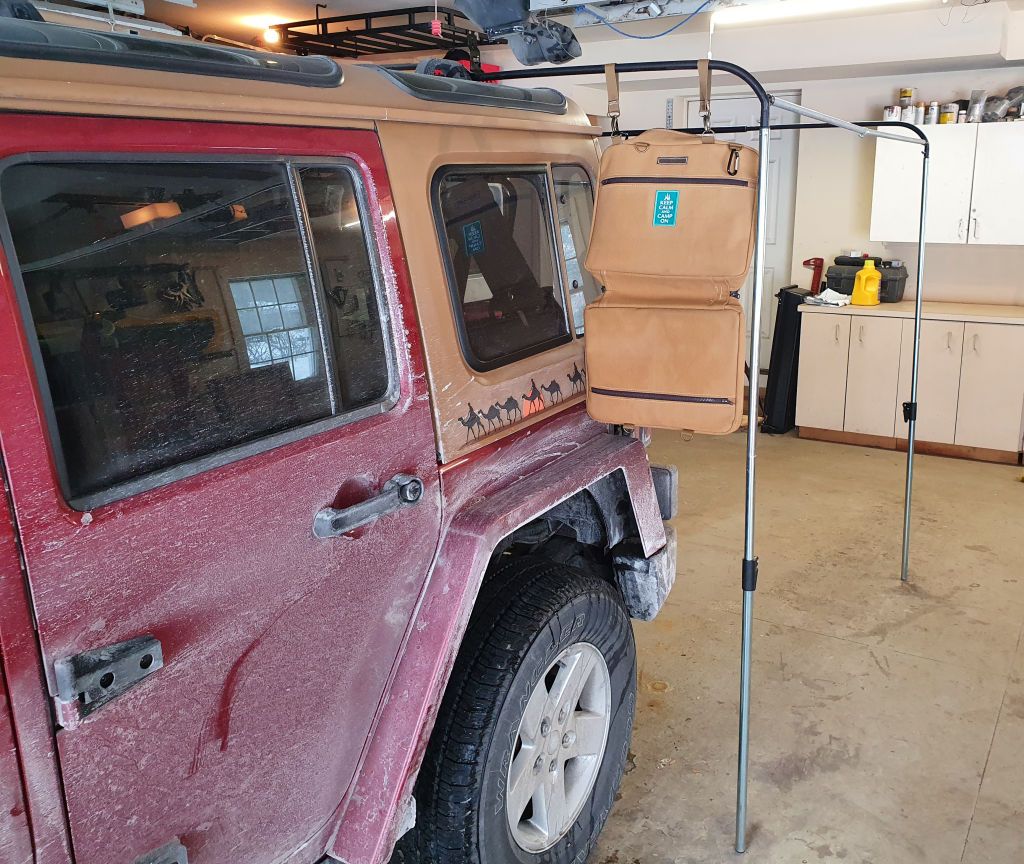
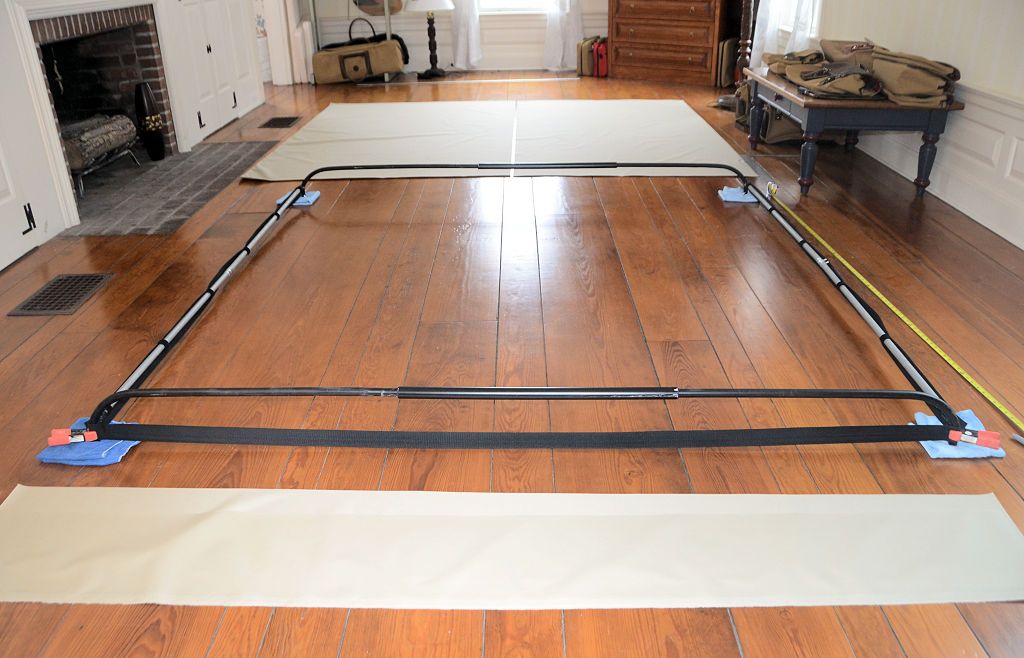
Some work-in-progress on the new awning, I did a test setup of the bows and poles. The awning is 6 1/2' square, which allows enough room off the driver's side of the Jeep to access the kitchen out of the rain and 6 1/2' behind the Jeep which covers the entire kitchen and beyond. It's 9 degrees outside today so the Jeep is halfway in the garage so I can work in relative warmth.

FrameCheck1.jpg


FrameCheck1a.jpg


FrameCheck1b.jpg


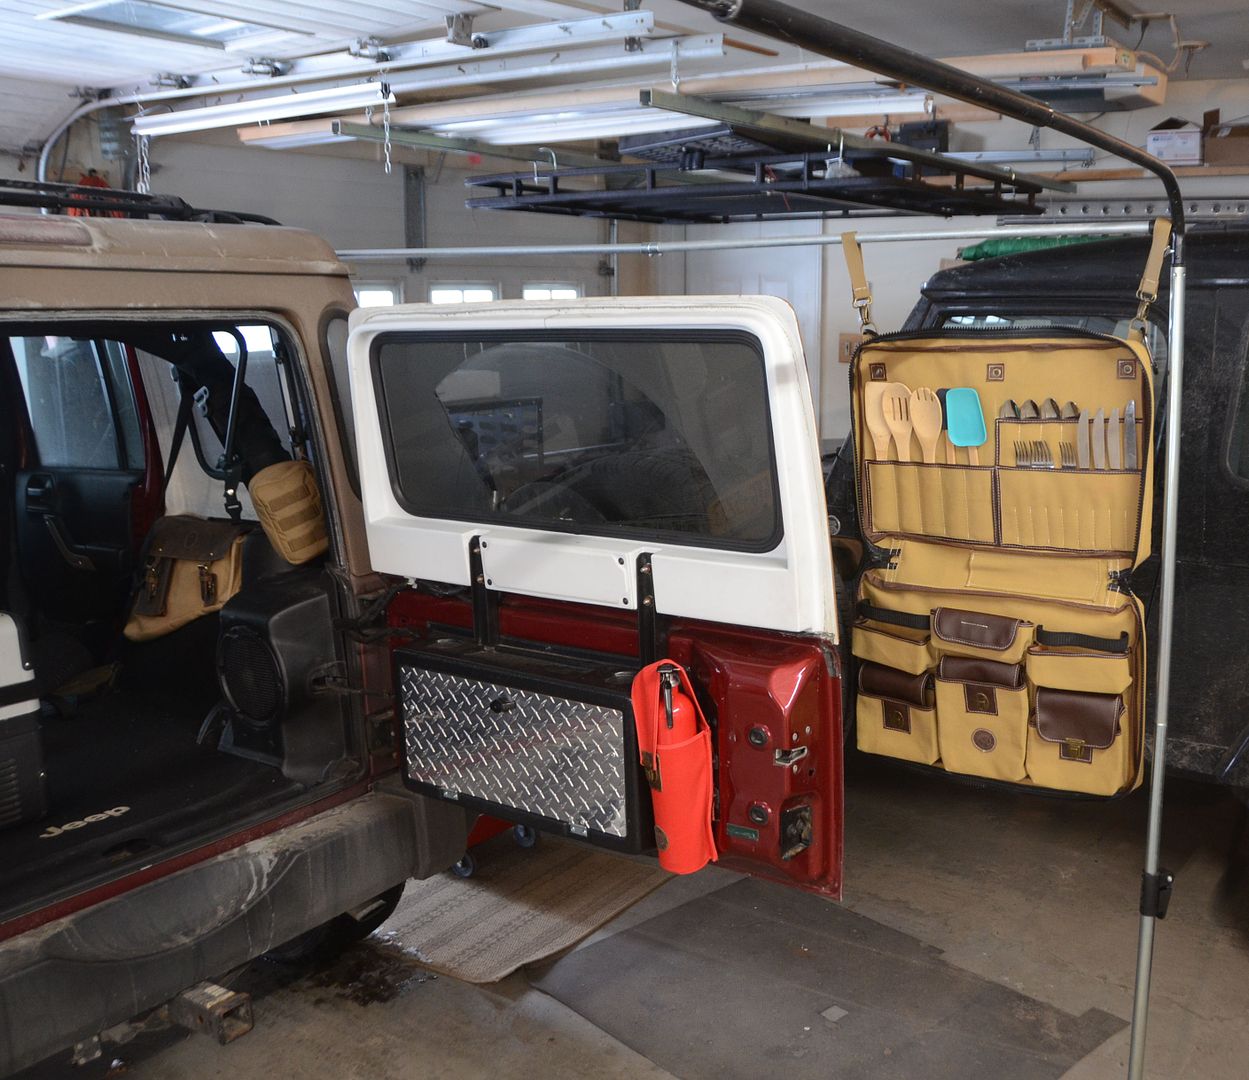
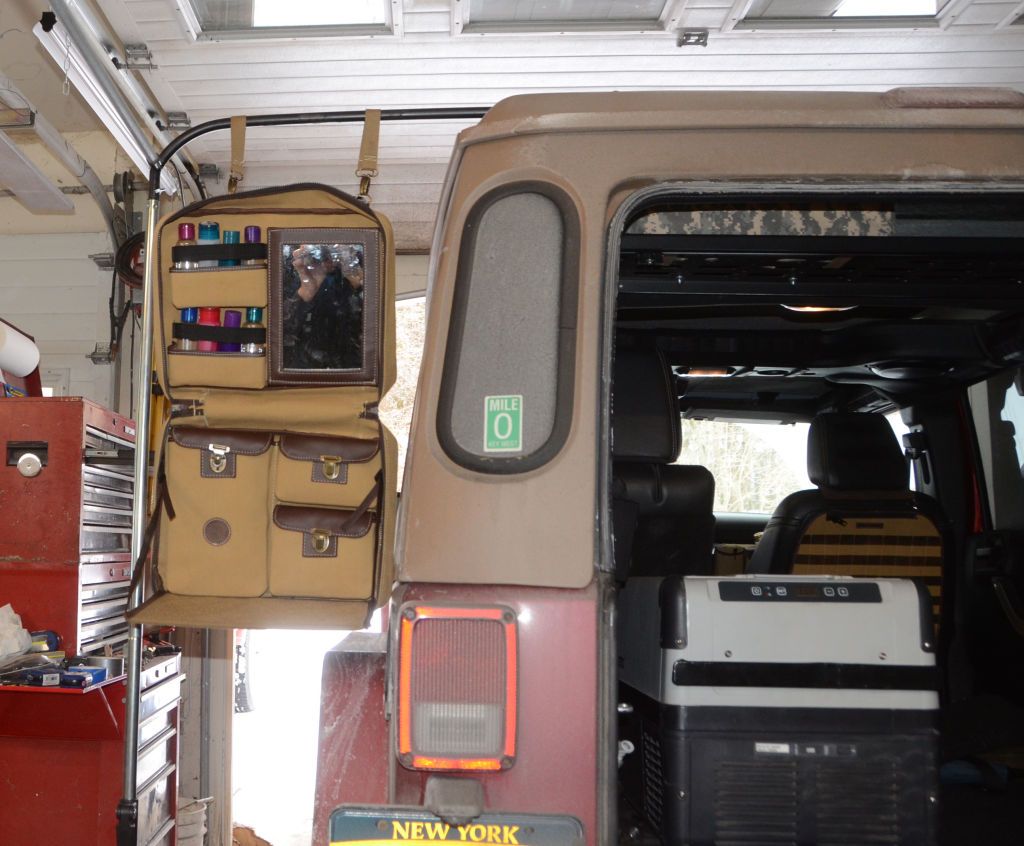
The awning extends far enough behind the open tailgate so the Kitchen Keeper can hang on the bar, and far enough past the driver's side of the Jeep so something like the Camp Cabinet can hang on the bow there.

FrameCheck1c.jpg


You can catch the photographer (me) in the mirror of the Camp Cabinet in this next photo...

FrameCheck1e.jpg


FrameCheck1d.jpg


FrameCheck1f.jpg


I don't have the Trail Kitchen installed right now, but the awning provides enough cover for access on all three sides of the kitchen.

In these photos the front bow is strapped to the roof rack; when the canvas is done a roof rack isn't necessary, the front will strap directly to the hardtop or soft top.

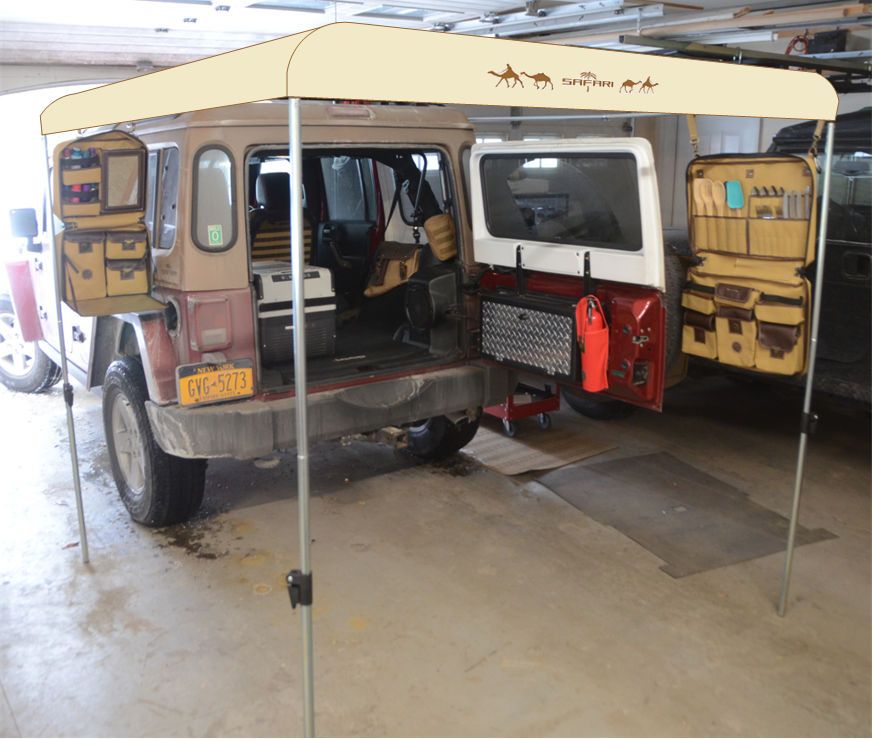
There will be several ways to set this up:

1. With no roof rack. The front bow straps to the hardtop or soft top and the rear bow can either be used alone, or with the side poles between the front and rear bows. Without the side poles, guy lines with stakes (or weights) are used to keep the canvas tight. This is the minimal setup - two bows and two vertical poles.

2. With a roof rack. The front bow attaches to the roof rack, and the rest of the setup is as above. Again the minimal setup is two bows and two vertical posts plus guy lines.

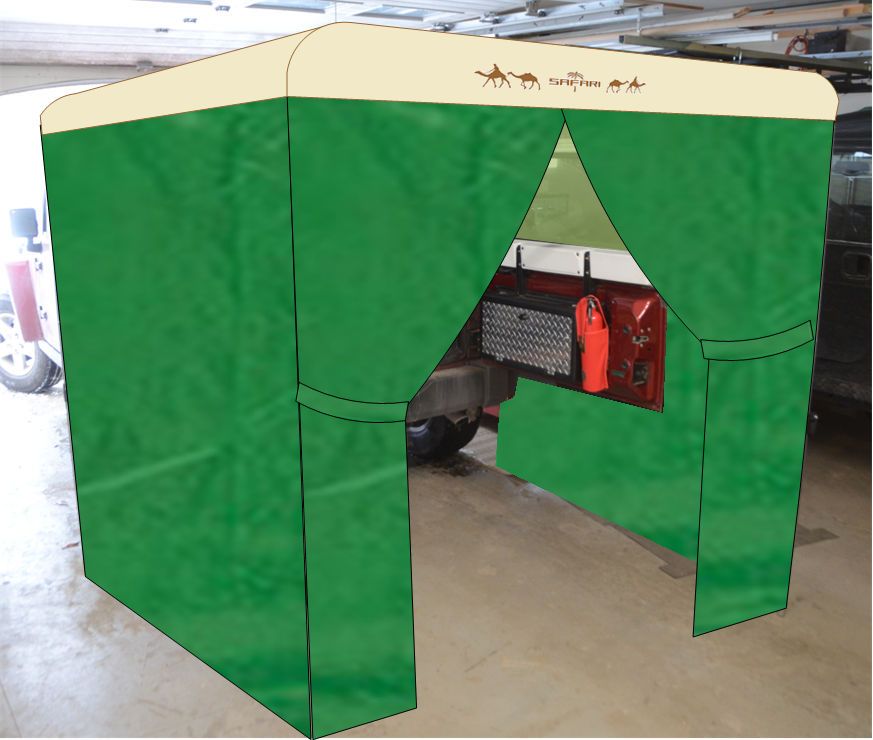
3. Without the Jeep. In this setup, two bows are used as above, and both side poles are used to keep the canvas tight. Four vertical poles are used, and guy lines with stakes (or weights) keep everything in place. The Jeep can be driven under the canopy (in this setup it's more like a canopy tent than an awning) when in camp and the canopy can remain in camp while the Jeep is out on the trail.

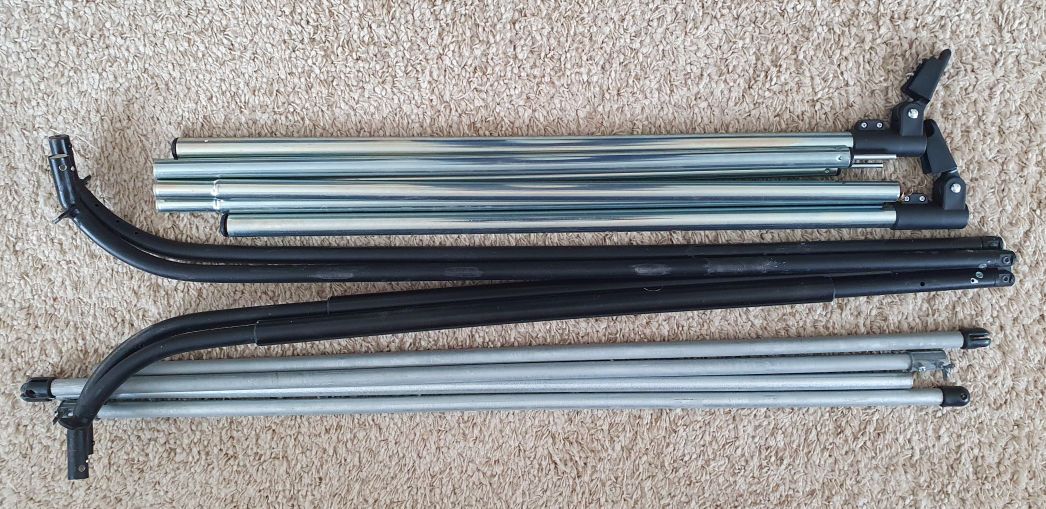
The bows and poles all disassemble and/or fold (the bows fold in half using Jeep factory Sunrider hinges to allow them to fold), and the entire set (plus the canvas) will go in a bag a little more than 3' long.

BowsAndPoles.jpg


The frame checks out ok so now I can sew the canvas.
 

jscherb

Expedition Leader
A little "digital sewing" - this drawing shows what the canvas will look like.

CanvasMockup.jpg


The design calls for side walls to be made from the same canopy tent side walls I used to make my RTT/Changing Room annex from...

CanvasAndSideMockup.jpg


ChangingRoomDone_zpspiskdyv9.jpg
 

jscherb

Expedition Leader
Overland Outfitters sent me photos of some preproduction products this morning. The JK/JKU Door Pockets...

Option 1 - Large map pocket plus Molle:

DoorPanelMolle1.jpg


Option 2 - Large map pocket, large pocket with flap and cell phone pocket:

DoorPanelPocket1.jpg


DoorPanelPocket2.jpg


Option 3 - Large map pocket, water bottle pocket and smaller Molle:

DoorPanelBottle1.jpg
 

jscherb

Expedition Leader
They also sent me photos of a preproduction First Responder bag:

Preproduction1a.jpg


Preproduction1b.jpg


For reference, this is the prototype I sewed, hanging on a tree...

FirstResponderInTheWild.jpg
 

jscherb

Expedition Leader
And what I'm working on today... here's the new awning under construction laid out on the floor in a spare room. I'm in the process of making the attachments to the frame and the attachments for the side walls, these are being done with webbing and velcro and some of it can be seen on the frame. Once those are done the two pieces of canvas will be sewn into one wide piece and the webbing will be sewn in around the edges.

UnderConstruction.jpg


Probably won't finish this project or the water bladder shower project for a few weeks because I've got some travel coming up.
 

Jurfie

Adventurer
Overland Outfitters sent me photos of some preproduction products this morning. The JK/JKU Door Pockets...

Option 1 - Large map pocket plus Molle:

DoorPanelMolle1.jpg


Option 2 - Large map pocket, large pocket with flap and cell phone pocket:

DoorPanelPocket1.jpg


DoorPanelPocket2.jpg


Option 3 - Large map pocket, water bottle pocket and smaller Molle:

DoorPanelBottle1.jpg

Really like these. I look forward to their release!
 

jscherb

Expedition Leader
It's warm enough outside today to give the Swiss Army bladder a test as a shower so as soon as I finished plowing I threw the bag on the roof:

ShowerTest1.jpg


Flow isn't too bad but with a little more pressure it could be a very satisfying shower.


Next I'll increase the pressure but I won't be able to get to that for a few weeks because of travel.
 

MattJ

Adventurer
Hey Jeff - are you going to sew a custom bag for the awning and poles? I would think you could design something that packs up very nice since the poles fully disassemble.
 

jscherb

Expedition Leader
Hey Jeff - are you going to sew a custom bag for the awning and poles? I would think you could design something that packs up very nice since the poles fully disassemble.
The project wouldn't be complete unless it packed up in a nice custom bag :)
 

jscherb

Expedition Leader
I posted a test of the water bladder shower two weeks ago and wrote that it was very nice but a little more pressure would make for a more satisfying shower.

Here's my DIY solution...

PowerShowerTest1a.jpg


PowerShowerTest1b.jpg


PowerShowerTest1c.jpg


It's got a 35 psi/1 g.p.m. pump and while that's less than a typical home shower, it does a pretty good job. The showerhead can be fixed in place as shown in the photos above, or it can be removed and used by hand.


It's not just for showering people, here's another accessory for it...

PowerShowerTestHose.jpg


Quick-disconnect fittings are used everywhere so it's easy to get everything connected for use, and easy to swap from the showerhead to the garden hose.

I'm not happy with the hoses I used, the clear ones are a bit stiff for easy use and the black one is a little flimsy - it has a tendency to kink and restrict water flow, so I'm searching for a better alternative.

I also have an idea for an easy DIY shower enclosure, stay tuned.
 

Forum statistics

Threads
185,798
Messages
2,878,294
Members
225,352
Latest member
ritabooke
Top