Flippac build-out

Arclight

SAR guy
Hi all,

I just ordered a Flippac for My T100. Previously, I'd been using a Snugtop fiberglass top. I had built a custom safari rack with Hi-Lift, NATO can and shovel storage, interior and exterior lighting, and an interior gear rack.

Pics:
8MjNPBh.jpg


Now the Flippac isn't really set up for a roof rack, so I'm going to be starting a new build-out. I'm going to pull out the plastic bed liner, reconfigure all of my wiring that was mounted behind it, and make a new set of steel shelves for the inside.

Full build thread here:
http://www.expeditionportal.com/forum/threads/91893-New-Build-T100-SAR-and-expedition-rig

Questions:

1. How does everyone like the stock lighting in the Flippac? I currently have a custom controller I built with a 5m strip of 5050 LEDs. I love it. Should I think about something similar?
2. Can anyone share their ideas for mounting the Hi-Lift and other tools? I'm thinking about putting steel racking all the way up one side of the bed. Taking out the bed liner will get me a few more usable inches, so that's good.
3. Does anyone have further suggestions? How do you run your wiring - split loom or conduits along the bed rails?


Thanks!


Arclight
 

dman93

Adventurer
OK, this thread has been quiet so I'll respond to the first question. My recently-acquired but quite old Flip-Pac had the original lights which looked to be clean and un-damaged, but neither light worked. They had power and good bulbs. A little disassembly revealed a very hokey sliding mechanism to activate the actual switch ... and I decided they weren't worth trying to fix. So I installed new LED lights from SuperbrightLEDs which seem better quality, and presumably brighter for a given power draw.

As for running wires, electrical neatness is not my strength, so I have a rat's nest now, but actually think some plastic conduit tucked under the bed rails would be good.

And storage ... I still have not built anything in, but the Flip-Pac provides so much extra room when open that space efficiency is less of an issue than with a cab-high shell. I actually think removable boxes/cabinets is the way to go: take them out to maximize utility as a truck when not camping, and then optimize the camping setup for the opened configuration. A box or cabinet doubling as a step to help get up and down from the sleeping area would be handy. Maybe just leave enough room to sleep if rain or wind, or need for stealth, conspire against flipping the top.

That said, my torsion bar is broken and I'm still pondering whether to replace or make a pole/handle setup like some others have done. So I'm looking forward to your build Arclight ... I've gotten a lot of good ideas from your previous postings.
-dman93
'97 T100
 

Camelfilter

Explorer
My used flippac has the LED lights & I think they are plenty bright for my needs. There are 2, both on the drivers side. One is towards the rear it has both white & red LEDs (it's either all red or all white depending which way the switch is flipped). The one towards the front is all white.

Draw from both lights barely registers on my solar controller.

Bonus is that the rear light has 2 cigarette outlets, great for charging stuff.

As for jack storage-I'm not sure...I don't have a hi-lift (yet). It might be able to fit mounted along the drivers side window sill (if you are getting 2 windows). I say d-side, as that would not interfere with your view while driving

dman93-if I were you, I'd skip replacing the T-bar & just go ahead with the "delete" modification.

I'm "almost" there, still trialling out my method. More to follow (I'll switch devices in a bit & post some info...).
 

Camelfilter

Explorer
Arclight: another couple ideas for the high lift.

Off-road/aftermarket bumper. You could add all kinds of storage (fuel/water/jack, even spare tire).

Also could go with a hitch mount tire carrier. Rather than carry the spare, carry jerry cans & the jack. I "think" there is one that swings out, so you don't lose your gate function. You would likely lose some approach angle though.

--as for torsion bar delete, I'll start a new thread for my progress-
 

austintaco

Explorer
We use Action Packers. Two of them fit between the wheel wells and create a base that we then stack the Campmate and another action packer. I have my tool bag and inflator between the top Action Packer and the Windoor for easy access. On the non windoor side I have the Zodi shower and chairs. All 3 action packers, campmate, tools, chairs, and shower are then ratchet strapped down.
In front of this "pyramid" we have our camp table on it's side so that it creates a wall/barrier and I have that ratchet strapped to hold it up. That leaves the area between the table and the tailgate for all of the lighter odds and ends and luggage. We pack the rainfly at the very back so it's ready to go on if it's raining when we get to camp.

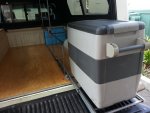
When we set up the flippac, after the cot area is set up, our luggage and small items go on top and the Campmate goes out for cooking or in the cab if its bear country. I should add that I removed my rear seat in the cab and made a platform. That's also where the fridge and extra battery are stored.

I'll take some pictures before I store the gear from the last trip. We finally figured out a system that works and lets me unload and use the truck as a truck when we are done.

Hi lift is on the front. swing out with tire, one water jerry can, and one fuel jerry can, and a spare tire mounted bike rack on the back.
 

Arclight
SAR guy
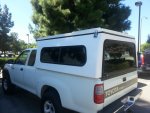
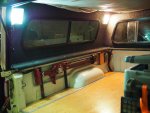
Here's an update to the build I promised. We took delivery of our new Flippac last month. It was done 11 weeks after I placed the order, and I got it installed the following week at FRP.


Prior to the installation, I took out the bedliner, removed the shell, and cleaned out the bed. There was about 5lbs of pea gravel rolling around in there, and it was generally filthy. I also disconnected all of my old wiring. The old shell had rubbed away some of the paint on the cab, so I touched it up with Toyota #045 before taking it over to Riverside. The install took about 3 hours, and the ladies were very nice and dropped me off at the mall.


Here it is after the install:

20140925_130906.jpg

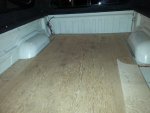
The first thing I did was purchase 2 sheets of marine-grade 1/2" plywood and build a floor, much like Doc's build. I made cardboard templates, cut out the wood, and attached it with 1/4-20 hardware bolted down in 6 places. I also routered out a channel on the end and inlaid a 1/2" Aluminum C-channel edge for durability. The gaps between the 5 panels are covered with 1/8x1" Aluminum trim. I laid out one of the strips, center punched and drilled the holes, then used it as a template for the other pieces. A 3/8" shallow countersink deburred them nicely.

20140928_203805.jpg

I installed 1/4-20 T-nuts on the underside for the cabinets and other accessories. I thinned out some 2" strips on the table saw and attached them to the bed with bits of double-sided foam tape to temporariliy hold them in place. I then used construction glue to bond these to the panels. Several places I was bolting through needed a spacer, as they were between the corrugations in the sheetmetal.


20140928_231321.jpg

Here it is all attached

20140928_231325.jpg

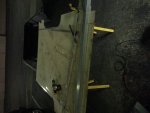
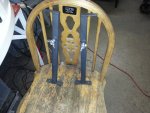
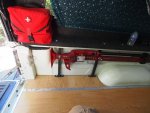
Since I gave up the roof rack, I needed a place to mount the Hi-lift jack. I settled on the driver-side inside inner bed and built these mounts. Material is 1x1x.063 thickness square stock, some 1" .125" flat stock and 1/2" bolts with machined spacer welded on.

20140928_234231.jpg

Here it is bolted up. There's not a lot of clearance, but I'm not wasting much space either.

PA040805.JPG

I took everything apart, sanded it with 220 grit sandpaper and an orbital sander, stained it "Minwax Natural" and gave it 3 coats of Urethane on top and two on the bottom. I gave it one light sanding between coats 1 and 2, and it looks good.

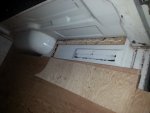
I also got my Blue Seas fuse box in and built a plywood mounting plate for it and the other electronics. I installed rivnuts on the inner fender and T-nuts on the plywood.

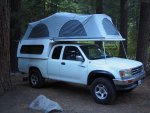
We took it on its maiden voyage last weekend, to Lee Vining, Ca. This is on the back side of the Sierras off Highway 395. Here it is deployed:

PA040792.JPG

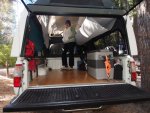
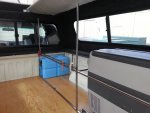
And the interior. I have the fridge bolted down right now with some Ancra quick-detach mounts. Note the Hi-lift on the left.
PA040793.JPG

And a gratuitous nature shot:
PA040795.JPG
 
Last edited:

Arclight
SAR guy
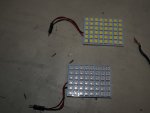
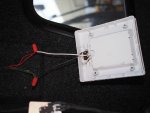
One of the first things we noticed camping was that the lighting could could use some work. The stock lights are fairly bright, but they draw about 1.7A. I orded sets of panels with 48x3528 size LEDs in both white and red. These were $8.99 per set of 2 from Amazon. I took down the lights and set to work modifying them.

PA060942.JPG

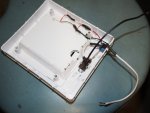
The stock lights are attached with 4 screws and use wire nuts. Be careful not to strip out the holes in the plywood plate they mount to.

[PA060940.JPG

Start by cutting the wires off the light bulb holder and removing it with a Dremel tool.

PA060941.JPG

Attach your LED panels with the included tape. You can fit two of the 48-LED assemblies in one fixture. I went for white LED and red LED and installed a switch. Get the "warm white" type as the light feels much nicer. You can drill two 1/8" holes in the plastic to thread the wires through to the back.

If you go for the red light mod, drill a 1/4" hole in the bottom and install a SPDT (single pole, double throw) toggle switch. Wire the positive wire from the light fixture to the middle terminal and wire the + from each lamp to the others. Seal it with some 1/8" heatshrink and dress it up.

PA060943.JPG

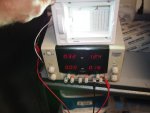
As you can see, each panel only draws about 160ma. The red and the white are about the same.
PA060945.JPG

And here it is installed. The one on the left is the white LED (not warm, oops!) and the one on the right is the stock light bulb.

PA060946.JPG

Arclight
 
Last edited:

Arclight
SAR guy
I also wanted to integrate the Flippac's tailgate into my Toyota's factory alarm system. I had this on my previous shell (there is a wire for the "trunk" that is not used on the alarm when installed on a pickup). Here is a link to my post about that. It should work on any vehicle with the RS3000 keyless entry.

http://www.toyotanation.com/forum/60-t-100-forum/432812-security-mod-how-alarm-camper-shell.html

I bought a nice micro switch with a Bronze roller, made a small bracket with 1x1" Aluminum angle iron and screwed it in place with one of the rear window's sheetmetal screws and one new one. I bought some 5/16" wire sheating to protect it and clamped it down with 3/16" UV-resistant cable clamps and the stock screws:

PA120981.jpg

Also, here's a new wiring product I discovered. It's a woven split loom,and it's a lot more flexible than the plastic stuff. You can but it at electronics stores or on-line:

http://www.summitracing.com/parts/RFW-BS50

It's best to cut it with a hot knife, so that it doesn't unravel.
 
Last edited:

Arclight

SAR guy
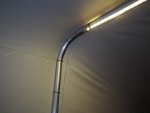
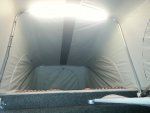
On the camping trip, I noticed a definite need for light up high in the tent. So I bought a roll of LED strip. The best value I have found for this application is "5050 Warm white LEDs, 300 per 5m" from Amazon. It was under $20.

I cut and bent a piece of .040x1/2" Aluminum stock from the hardware store, cleaned it with alcohol, and stuck the LED strip onto it. I soldered on 14ga zip cord and use heatshrink and non-split wire sheath to protect it. It mounts perfectly to the top tent bow with two zip ties.


PA120972.jpg

Here it is on full brightness:
20141007_232830.jpg

Arclight
 
Last edited:

Arclight

SAR guy
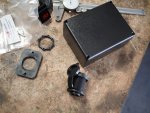
I also wanted a place to charge phones and plug in 12V stuff. I bought a diecast box from the electronics store, a Blue Seas dual-USB jack that outputs 2.1A, and a voltmeter. The connectors, wire and Anderson Power Pole jacks are from http://www.powerwerx.com

PA110962.JPG

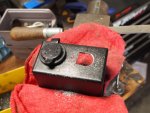
I used the step drill set from Horrible Freight to drill the big hole, and drilled a second hole to file square for the Anderson Power Pole outlets:

PA110963.JPG

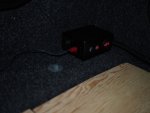
Here it is in use. The carpeted window sill makes a nice place for electronics to sit and charge. And I can keep an eye on battery voltage.

PA120968.JPG

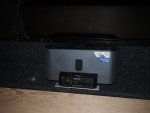
I also wanted some tunes and a clock, so I removed the 12V wall wart from an old iPod dock and crimped power poles to it. It's attached with velcro to an Aluminum plate I secured with sheetmetal screws:

PA120979.JPG

Arclight
 

Dave Bennett

Adventurist
On the camping trip, I noticed a definite need for light up high in the tent. So I bought a roll of LED strip. The best value I have found for this application is "5050 Warm white LEDs, 300 per 5m" from Amazon. It was under $20.

I cut and bent a piece of .040x1/2" Aluminum stock from the hardware store, cleaned it with alcohol, and stuck the LED strip onto it. I soldered on 14ga zip cord and use heatshrink and non-split wire sheath to protect it. It mounts perfectly to the top tent bow with two zip ties.


View attachment 251637

Here it is on full brightness:
View attachment 251615

Arclight

Love this mod - great thread!
 

brian90744

American Trekker
great build

I would recommend a Bed-Rug liner, it make the inside cozy and it's easy on the knees. I put a aux battery in the engine compartment and run a 12G wire the rear, add a power outlet. Sometime when the weather turned ,we would cram inside, And I moved the refrig outside so we had maximum room for 2 chairs. I installed a RV electrical outlet to run the wire outside. Keep up the build.=brian
 

Attachments

  • 12V or LP gas line port copy.jpg
    12V or LP gas line port copy.jpg
    85.1 KB · Views: 84
  • bedrug 7.jpg
    bedrug 7.jpg
    89.2 KB · Views: 91
  • Thickness 1.jpg
    Thickness 1.jpg
    73.7 KB · Views: 86

Arclight

SAR guy
That's an intresting idea on the cable hatch, Brian. I just picked up a 100W solar panel, so I'll have to figure out something for bringing the cables in.

In the meantime, I've been working on a shelving unit for the passenger side:

20141014_125055.jpg

20141014_213212.jpg

And a homemade fridge slide:
20141014_213212.jpg

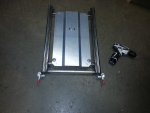
The slide uses two 200lb capacity 24" drawer slides like these:
http://www.amazon.com/gp/product/B005WXHT18/

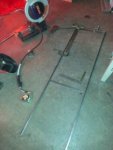
I made the frame out of 1/2" square .063" wall steel tubing, bolted the slides to it, and then built mounting brackets from 2x2" angle iron. The slide is locked securely with mini toggle clamps. I have a Truckfridge/Indel-B 51 liter fridge, so I ordered a mounting palte for it from:

http://www.truckfridge.com/

It's attached to the frame with 4x10-24 bolts.

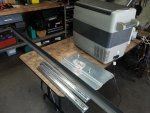
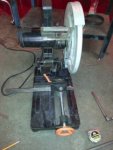
The setup I am doing most of my fabrication with is a Rage II dry cut saw and a MIG welder. The dry cut saw works sort of like a cold saw, but it has a higher-RPM carbide blade. It will make clean, accurate cuts in anything from thin tubing to railroad rails.

I use a variety of clamps and a square to line everything up prior to tacking. One trick: Alternate tacking inside and outside corners. Then measure both diagonals and squeeze your item with a bar clamp until it is square. The alternating inisde/outside trick makes it much easier to move it into square.

Tonight I'll try to finish up the shelving and fit the fridge.

Arclight
 
Last edited:

Arclight

SAR guy
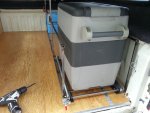
Our new baby is taking a lot of time lately, but I got over to the shop again to continue the buildout. I made a few adjustments to the shelving and got the fridge slide installed:

20141017_122639.jpg

It extends 24" and the lid just clears when the top is down.

20141017_122630.jpg

And I did some more work on building the shelves. One nice thing about working with the 1/2" square tubing is that it's easy to cut and I can get several pieces into the saw at once:

saw.jpg

It's kind of hard to see here, but the parts clamped up in the back are going to be the first level shelf and the uprights for the second. In my quest to wring every usable cubic inch of space out of my bed, I'm having to do a lot more work, like making my frame conform to all of the angles and indentations in the sheetmetal, The doubled-up 1/2" tubing has 1/2" spacers in between and makes for a very rigid beam, while also bringing the level of the shelf up to exactly 16" to match the height of the bench. I want to be able to span both sides with removable plywood panels.

20141017_122601.jpg

Finally, my 100W folding solar panel came from eBay. The kit is actually better than I thought it would be, with Taiwanese-made 50W panels,

20141016_140001.jpg

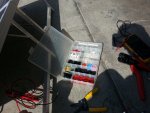
The only real thing that needed changing was losing the cheap alligator clips and adding some Anderson Power Poles.

20141016_141108.jpg

I went ahead and bought the crimper and a selection of the 15,30 and 45A terminals from http://www.powerwerx.com.

The panels fold in half like a suitcase, and pack up to about 3" thick. I'm going to make a special shelf up top just for this,

Arclight
 

Forum statistics

Threads
188,399
Messages
2,906,849
Members
230,176
Latest member
Arcadia1415

Members online

Top