NW Gen 4 Transformation

Stevemc181

Observer
I have now replaced the rear Lovells coils with a model called CRR-92HD, these are not listed on the Lovells website. The ones I had in it were CRR-91HD. The old ones were wound with 22mm wire, while the new ones are 23mm and are around 25% stronger. I can't say I notice any real difference in ride quality, but they have lifted the Paj back to a level ride height. I am usually well up on my weights in the vehicle and she is level with minimum pressure in the airbags. I'll see how it goes, but if necessary I might try some 20mm coil spacers.

Old coil on the left and new coil on the right, same free spring height, just a thicker wire.

PajCoils_zpsbaab6ab6.jpg


I am now thinking of removing the airbags and using coil spacers, I think the airbags are ok in a vehicle that is generally unladen and then just using them when loaded etc, but I think now with the heavier coils and the fact I have at least a two or three hundred kilos of added weight most of the time they are a just another possible point of failure.

018dca2ef16e1f706c6145bebaed5a17_zpsf2c1aef6.jpg


With the help of a member from the Pajero forums in Africa ( John Gavin) I have done a simple mod to the dash using cable ties. This has virtually eliminated the dreaded dash shakes. I also have added some modded dash brackets as posted previously, so not sure if this cable tie fix will work without first adding the brackets?

A rough schematic below from John G that show the points to attach the cable ties. I am really amazed at the difference this has made to the sturdiness of the dash.

DashFix_zps6ab6edf8.jpg


The dash fix is fully explained here: http://www2.pajeroclub.com.au/forum/showthread.php?t=33057&page=9
 

Stevemc181

Observer
A couple of other mods I have added along the way.

I have two digital temp controllers connected to my Engel fridges (One fridge is permanently mounted in a rear drop slide and one is only used when the 2nd row seats are removed for extended trips)

These temp controllers make it easy to set and forget the fridges, I have them on top of the rear fridge cage facing forward so they can be seen in the rear vision mirror. They will begin to flash if an out of temp range is reported and I can easily see if something is wrong. I have been using these for about 6 months now and they work extremely well. Easy to set to whatever temp is required. My particular fridges have no digital thermometer and are just a dial type setting. These offer much easier control.

IMG_2125_zps1456da3f.jpg


IMG_2133_zpsda88a7f6.jpg


I have also added a 12volt oven from a company called Travel Buddy. This thing is awesome for heating up Frozen meals etc. We make up a heap of Frozen Stews etc and put them in Tin Foil containers. Out of the Freezer and into the oven about two hours before we pull up to camp and dinner is done when you arrive, no mess no fuss :)

The Oven draws around 6 amps, so is really only suitable for use when the battery is being charged. On my recent 4 week trip, I made use of this oven just about every day and would count it as one of the greatest mods I have done so far!

fbab4bcd502aa58fabe3bdf3de5181e1_zps7fc51f5c.jpg
 

Stevemc181

Observer
My coil saga continues:

I only had the Lovells in for a month or so and found they also couldn't cope, so now I have pulled them out and put in a custom set of King Springs. These are called KCRR-35HDSP and are 360mm Free length with a tapered wire starting at the bottom 22mm and tapering to 18mm at the top, they are also wound for a variable rate and have coil rating of 1250lbs. So far so good for these, my ride height sits at 545mm from the hub centreline to underguard with my load of 300kg or so in the rear. With the bags fully inflated she lifts to 550mm. So while not a substantial increase in lift, you need to keep in mind that I am near GVM weights most of the time. The ride is not what I consider harsh, but I spent many years driving trucks, so the term "Harsh" is subjective :)

I toyed with spacers, but really didn't like the idea of using them, so have gone the custom coil route instead. I haven't had a chance to test these offroad yet, but I have a week away coming up in April that will see them used in some pretty rugged and isolated country once again.

Note: The coil is upside down in the picture below.


I also elected to leave the airbags in, just to offer a bit more support when adding a couple of hundred more kg's.


kbahus

Adventurer
You guys are lucky to have as many spring options as you do. We have OME and that is it. I recently got quote for Lovell's and shipping was $250 plus the cost of the springs which made it unfeasible for my budget.
 

kbahus

Adventurer
Ironman only seems to partially have their US distribution worked out. Actually buying product from is another story. I promise to make a thread if I end up getting my hands on a set which I have been trying to do.

TJM US was not interested in bringing suspension over, the guy I talked to said he couldn't confirm fitment and thus wouldn't do it. Sad because there would be zero fitment issues.

Sorry to thread jack.
 

Stevemc181

Observer
I've copied and pasted this over from another forum I'm on, but somebody may find it worthwhile if setting up a shower system.

This is a project I've wanted to do for a while as I am over using the portable 12 volt camp showers and their pissy little pumps!

Excuse the poor pics, but it's a ****ty day outside and I'm working in an open carport.
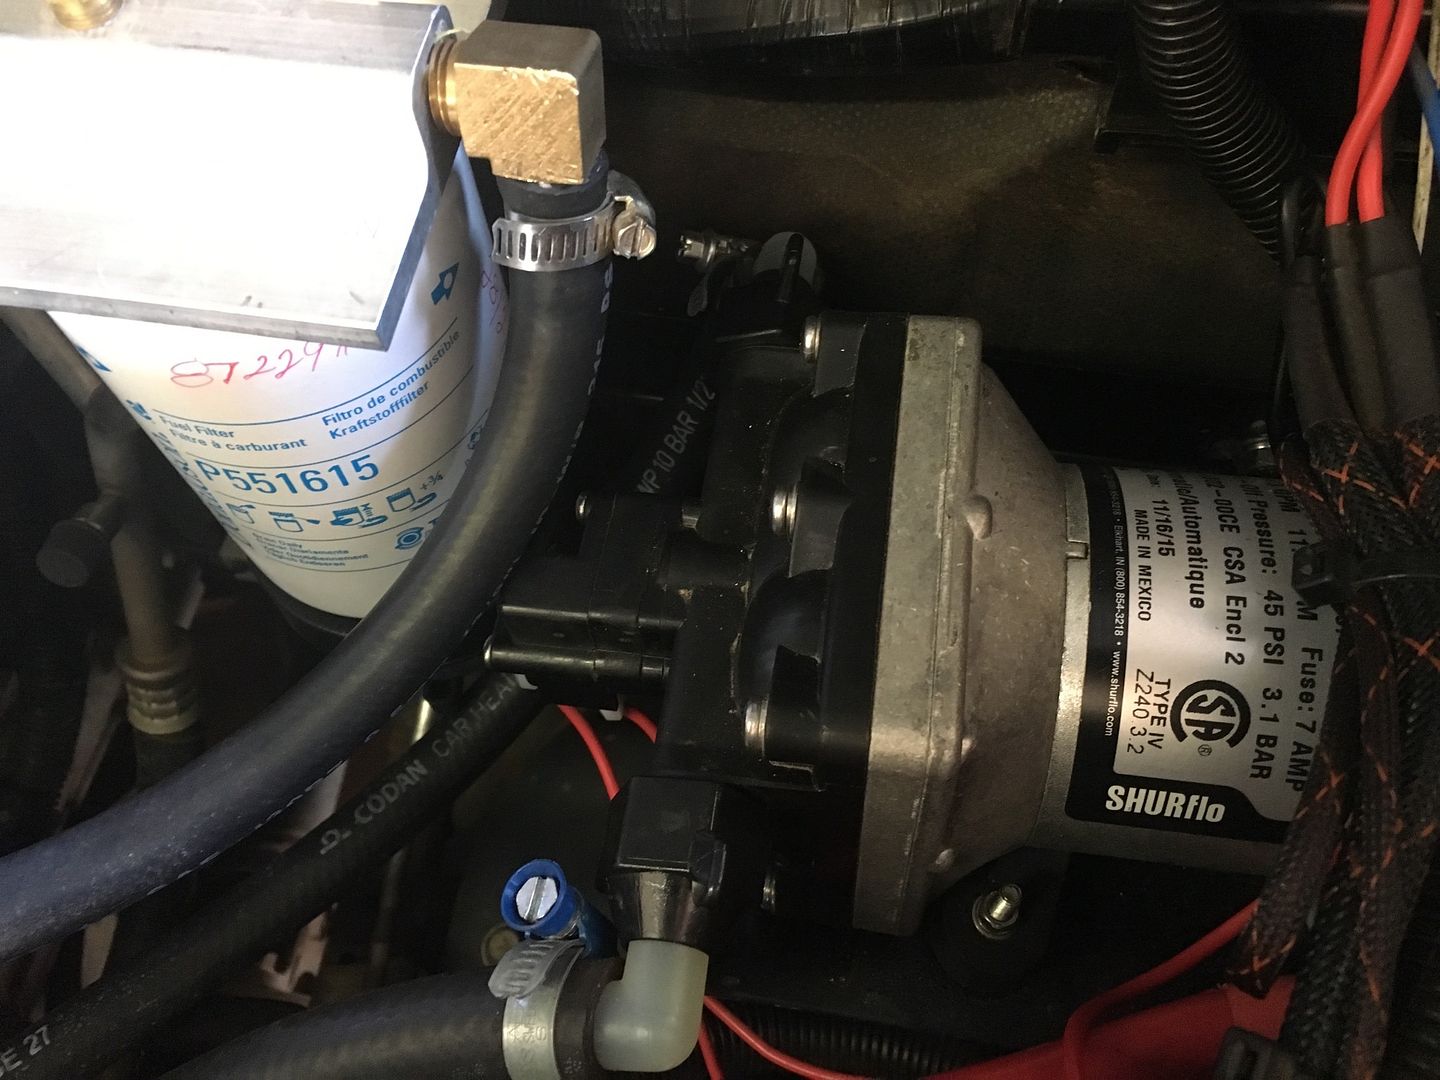
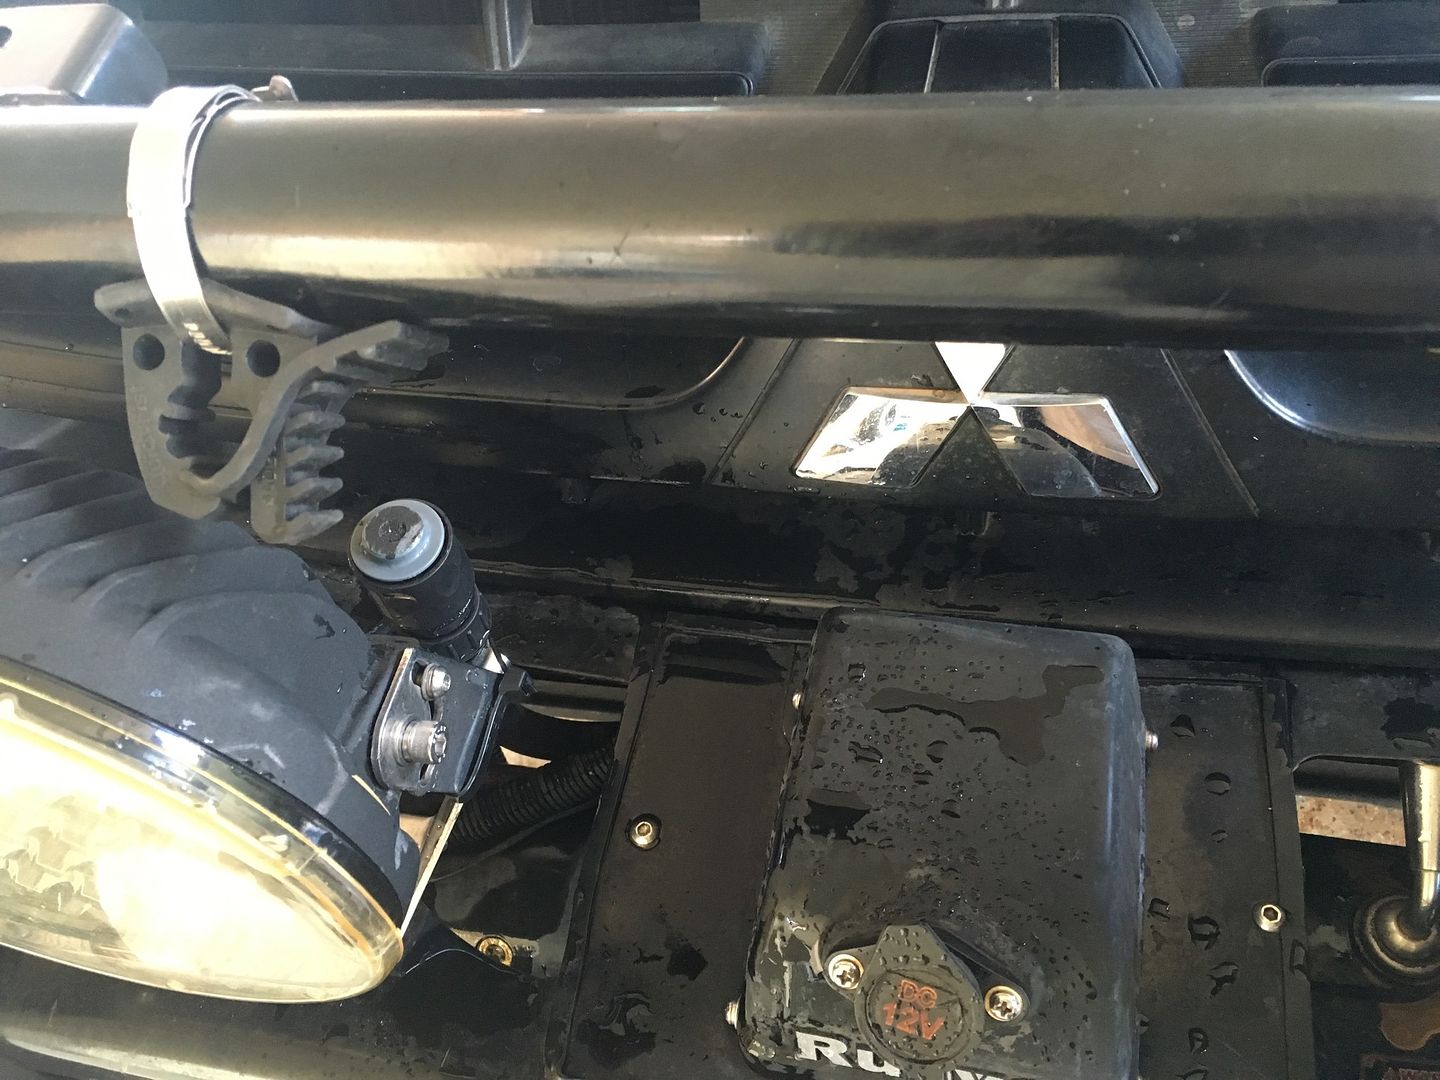
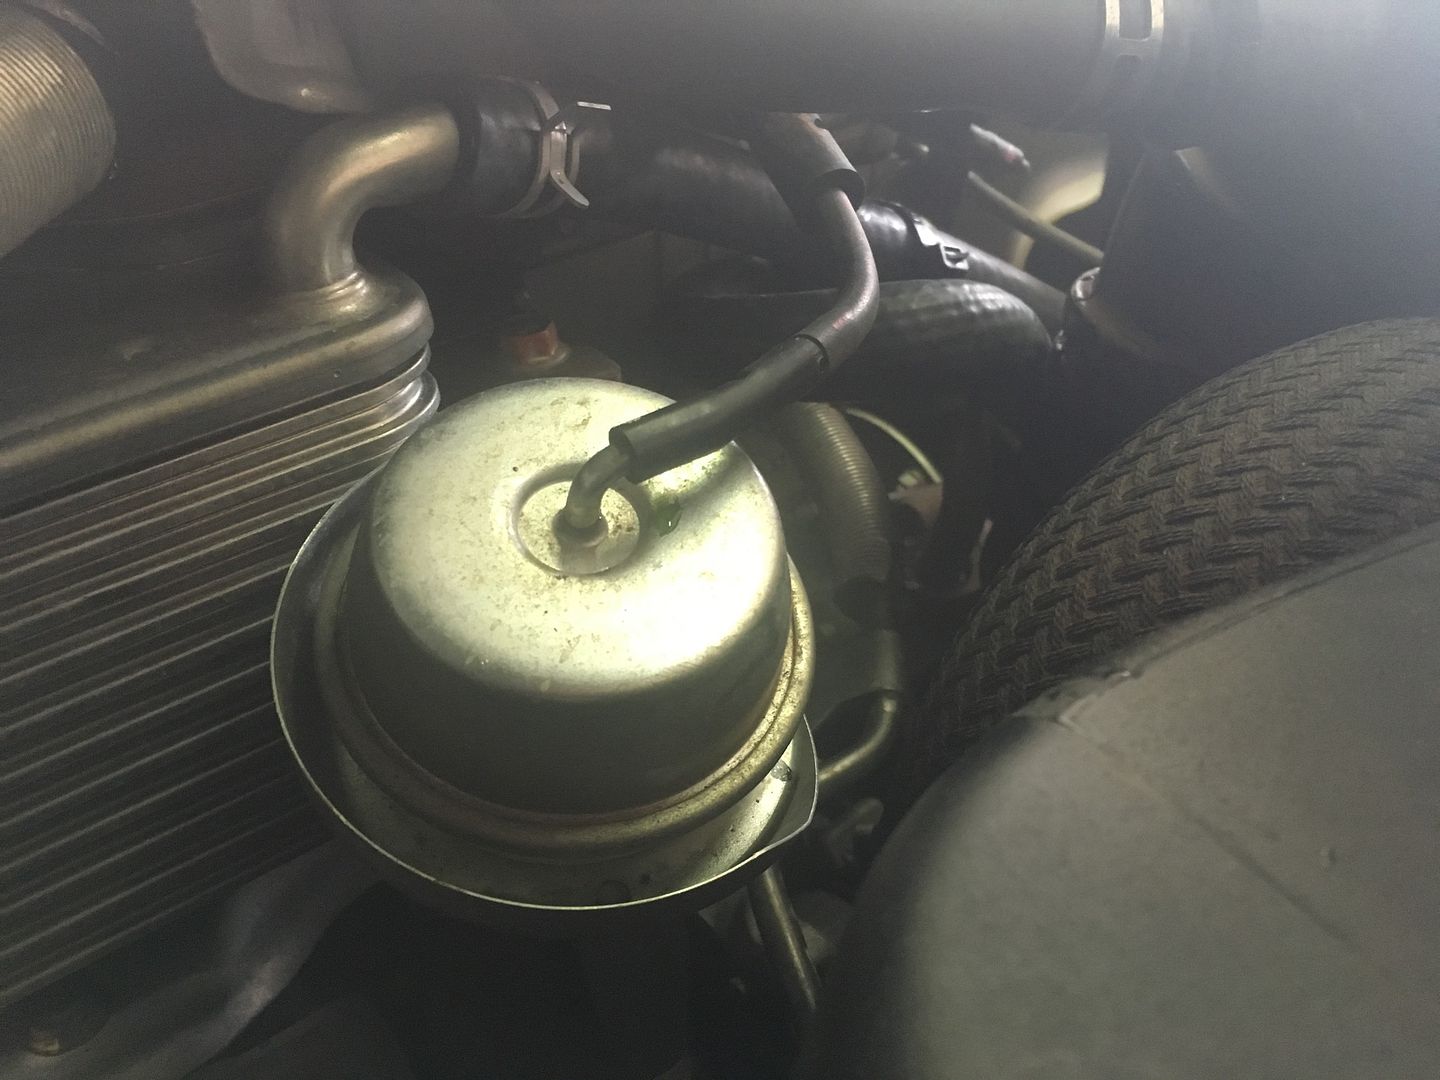
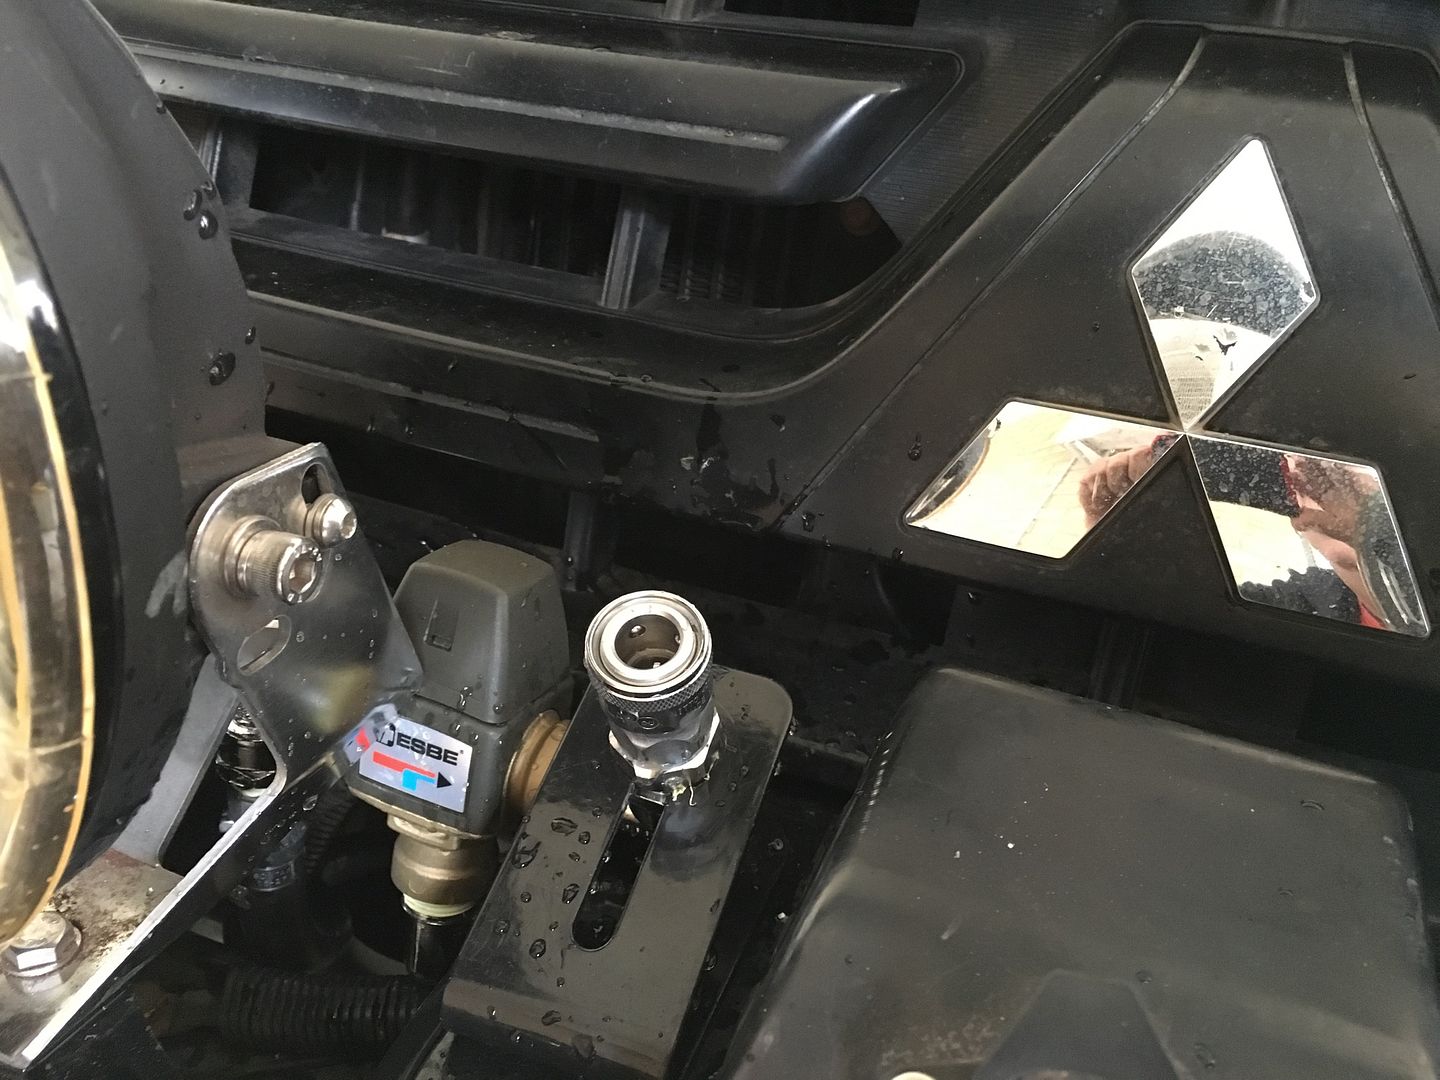
I've mounted an 11.4lpm Shurflow pump under the bonnet. This is in the spot where most would have the 2nd battery. I fabbed up a bracket to mount the pump to and used existing bolt holes on the firewall to attach it.

image_zpsjpvvfkgs.jpeg


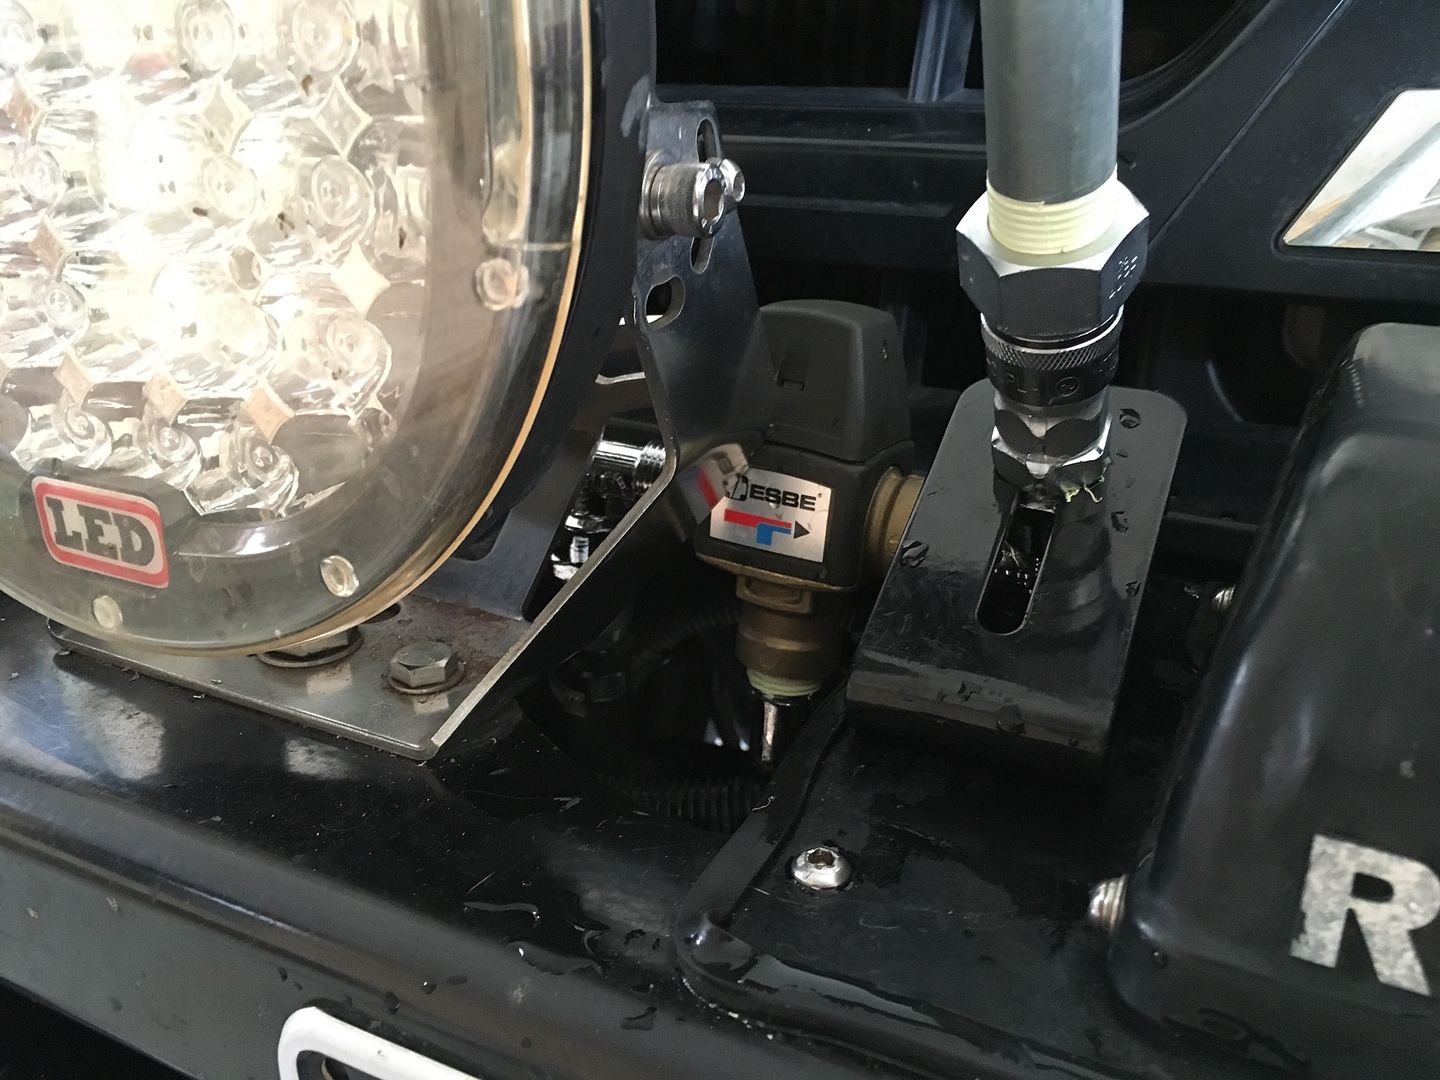
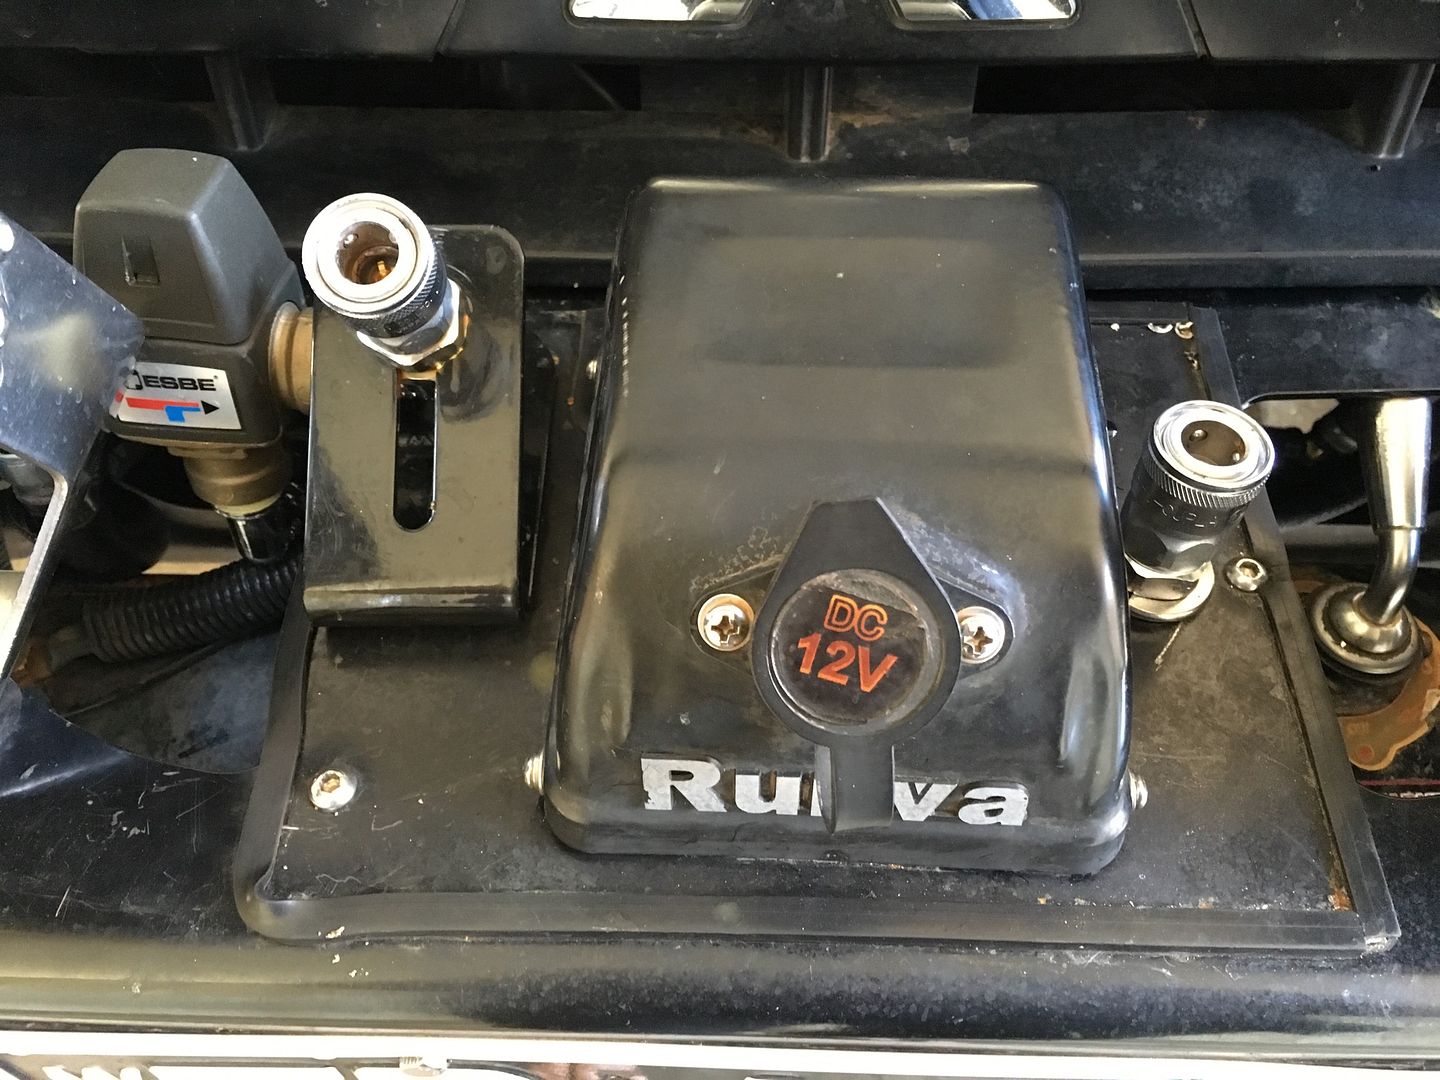
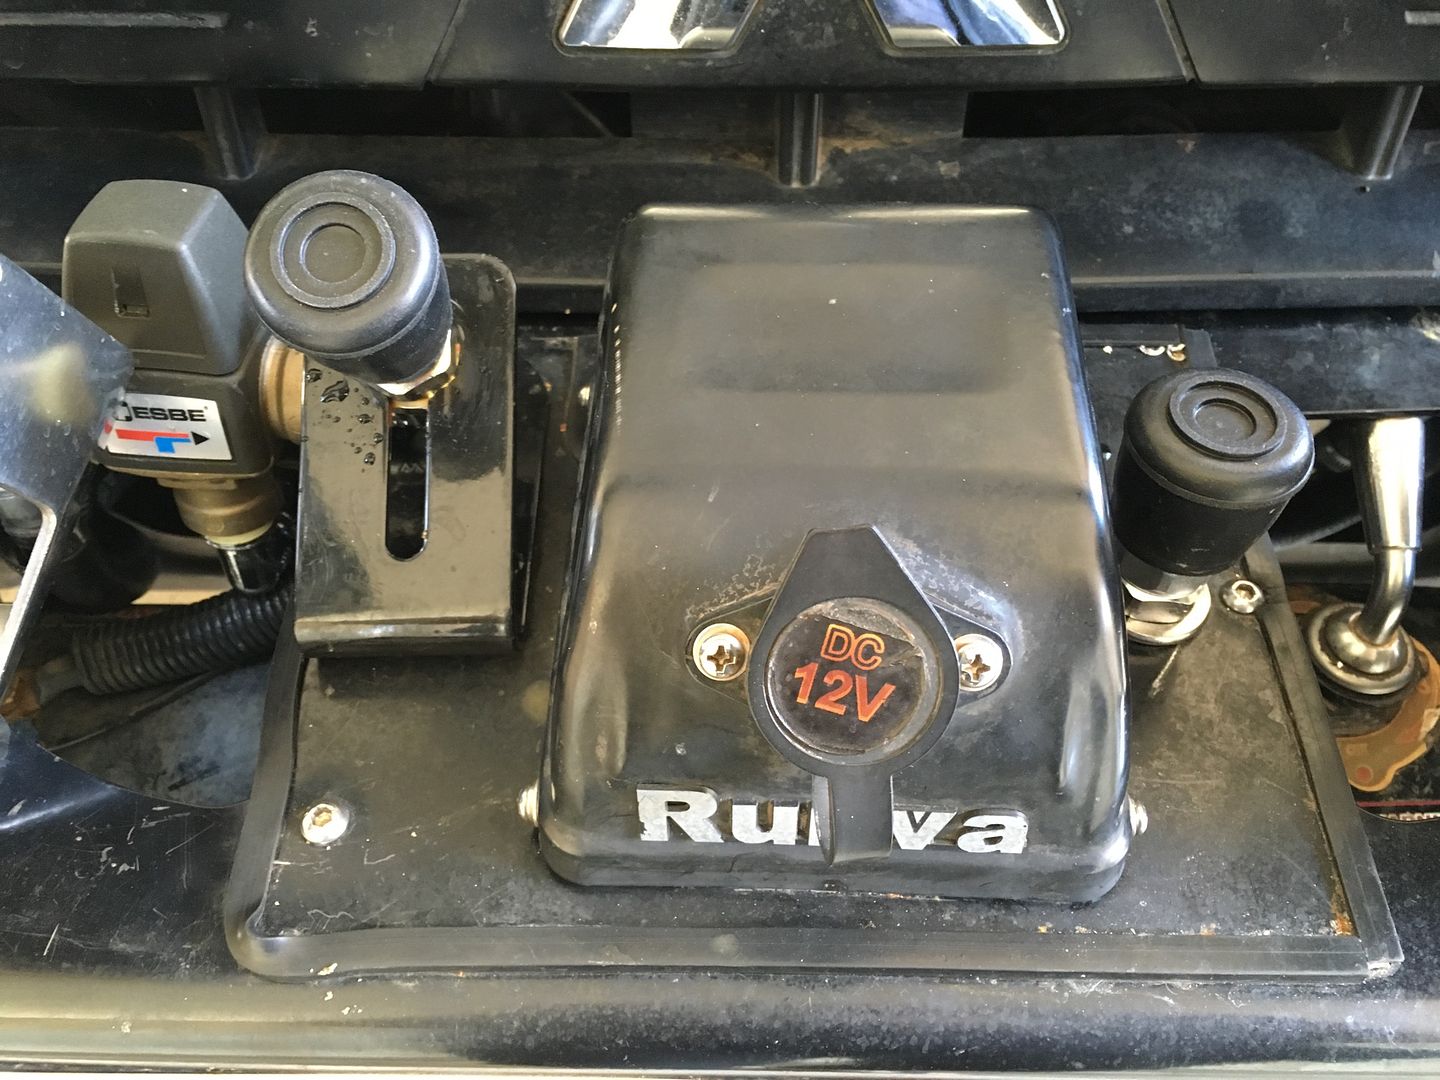
The pump intake and outlet are plumbed to a couple of quick connects in behind the spotlights using heater hose and I've mounted a waterproof on/off switch to the bullbar.

image_zpsuingyrft.jpeg


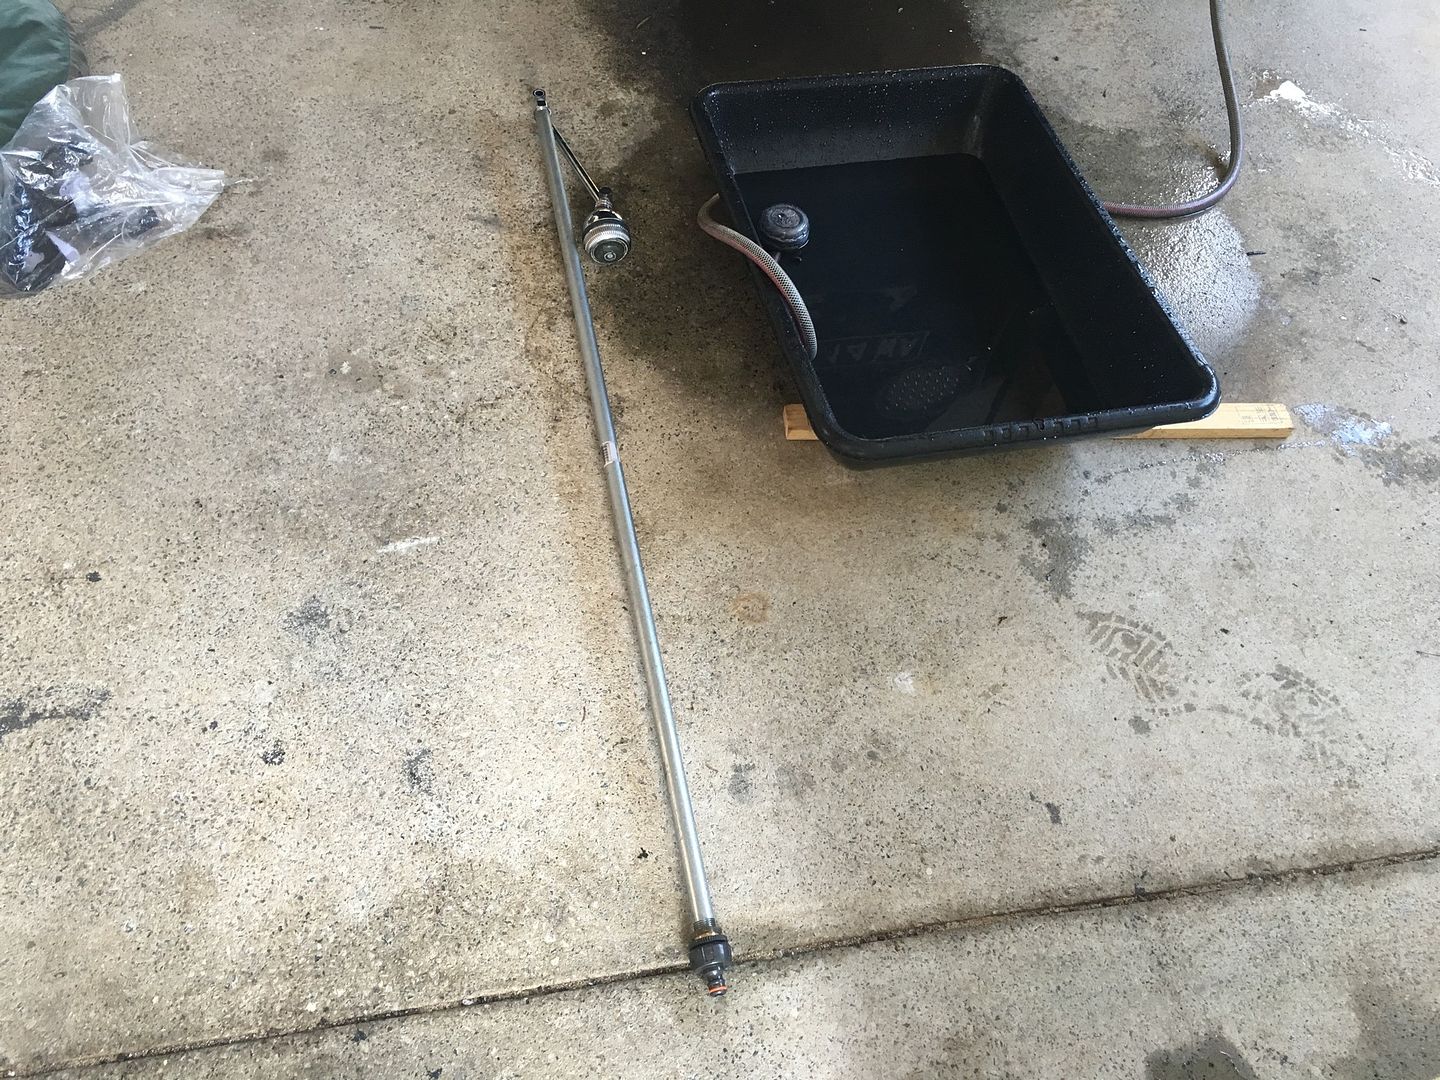
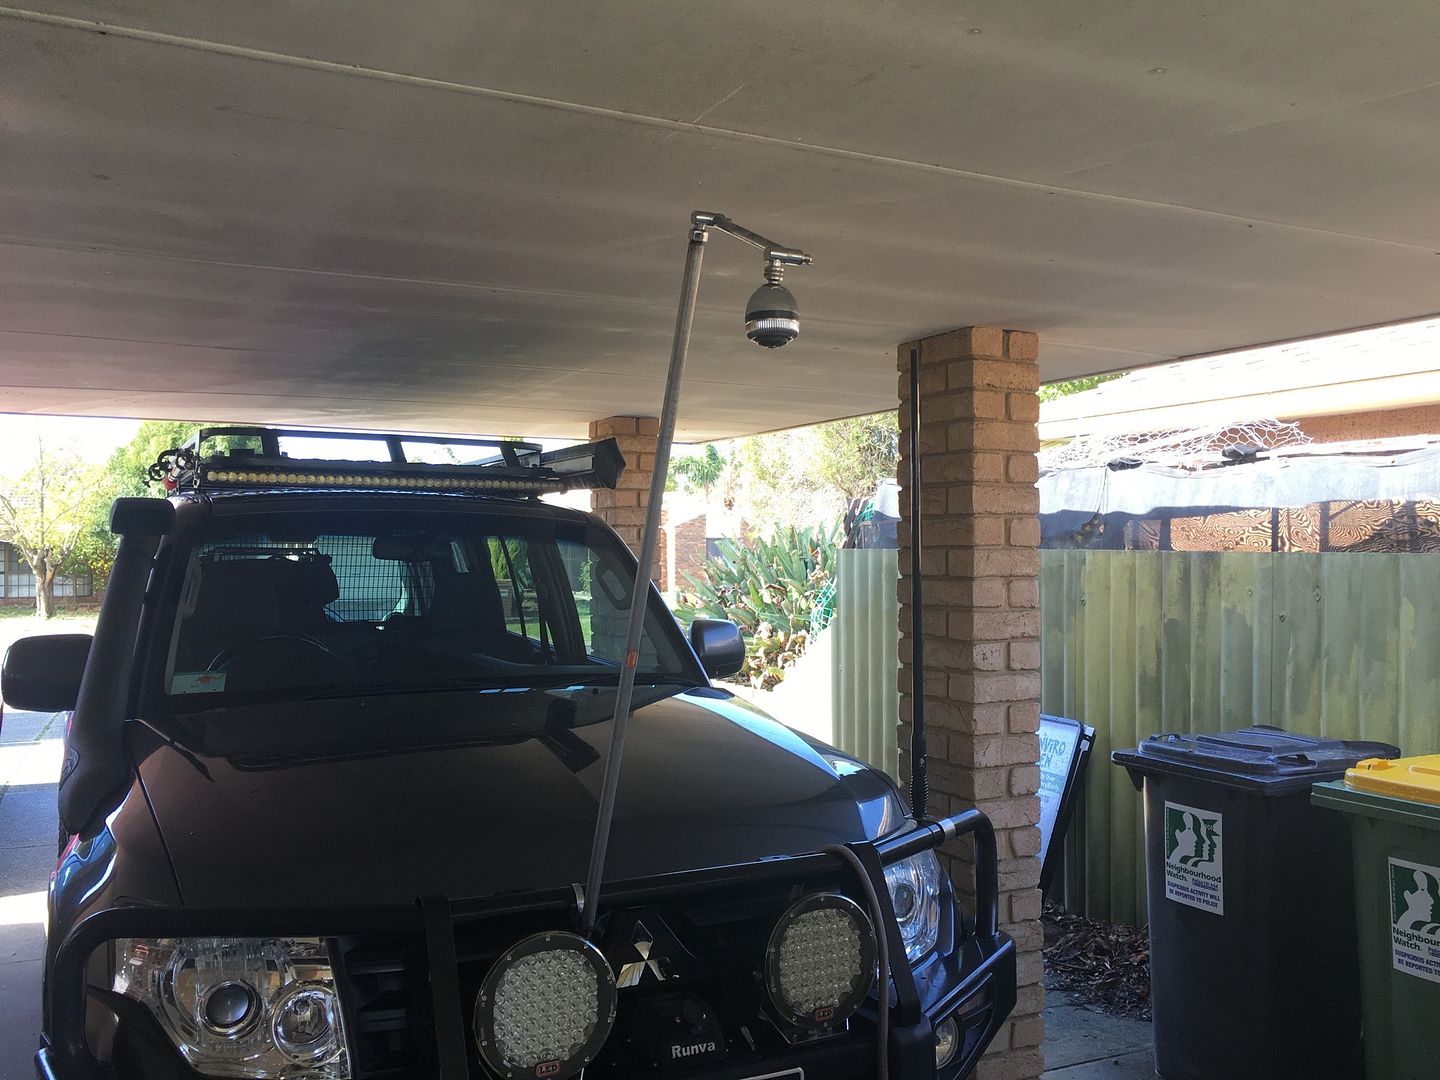
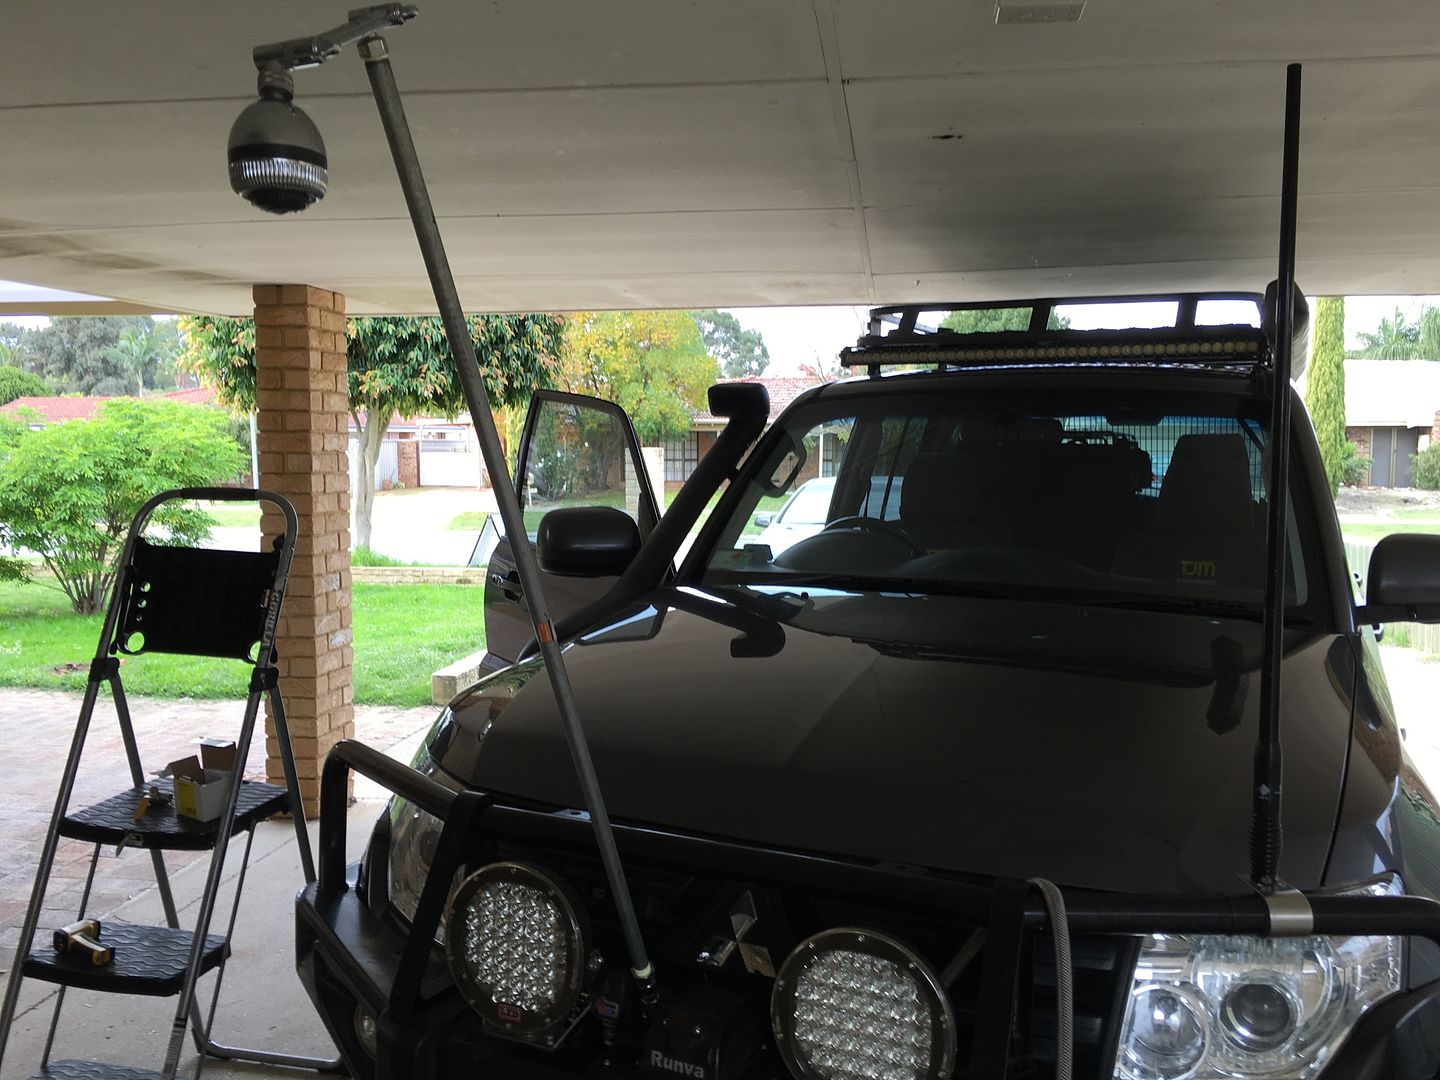
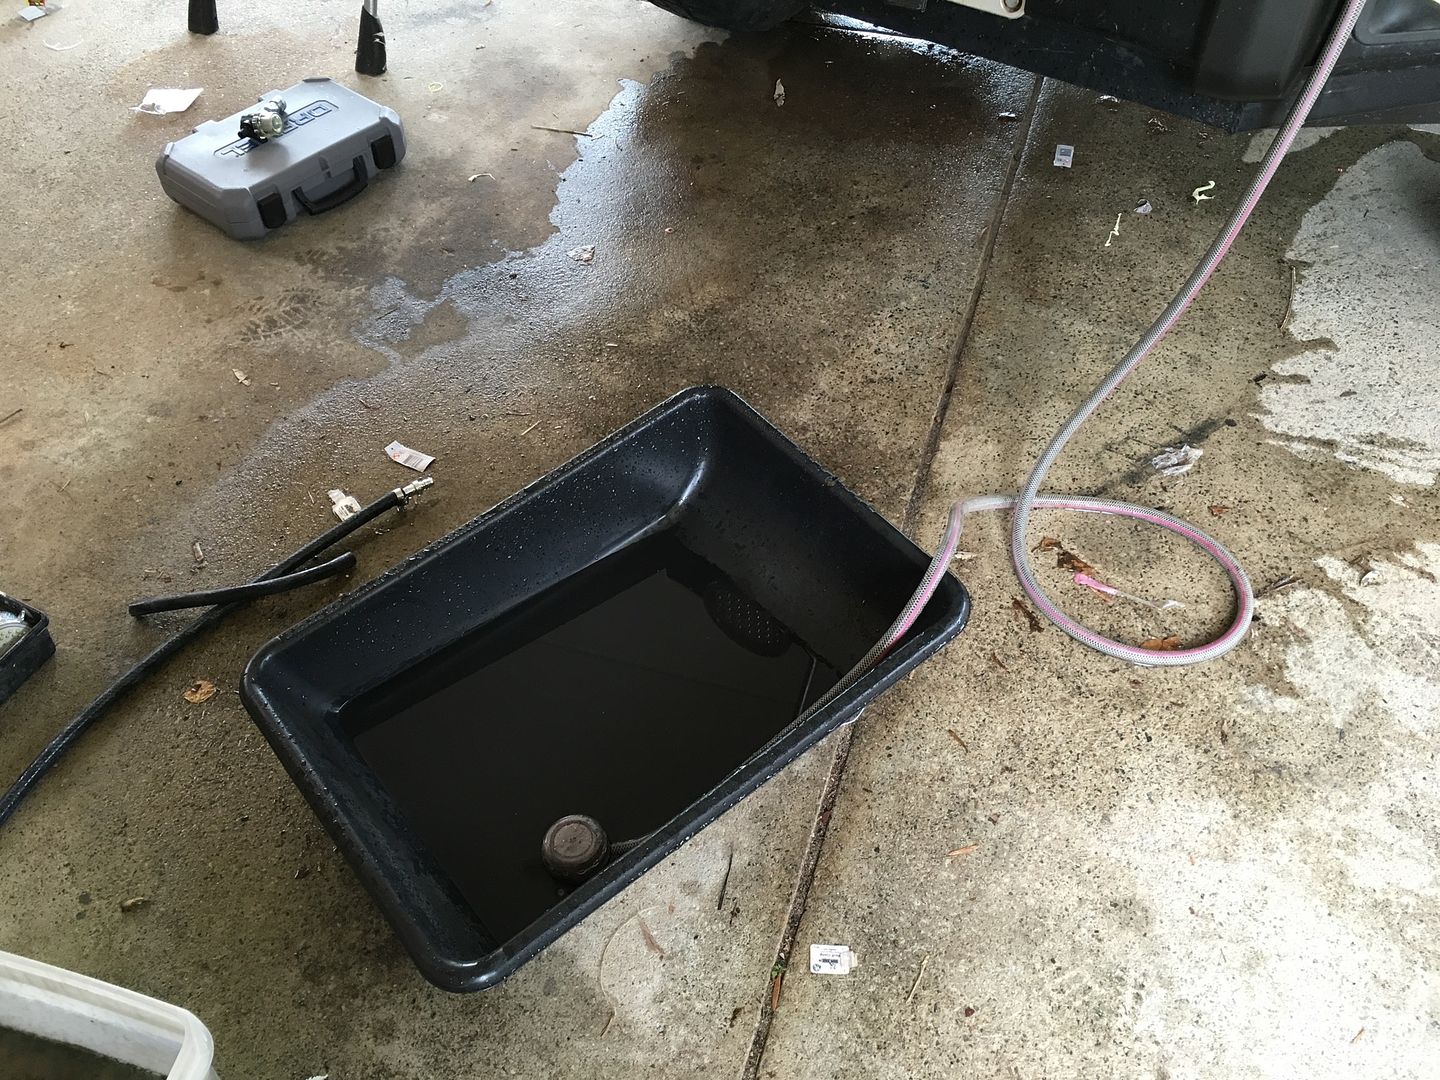
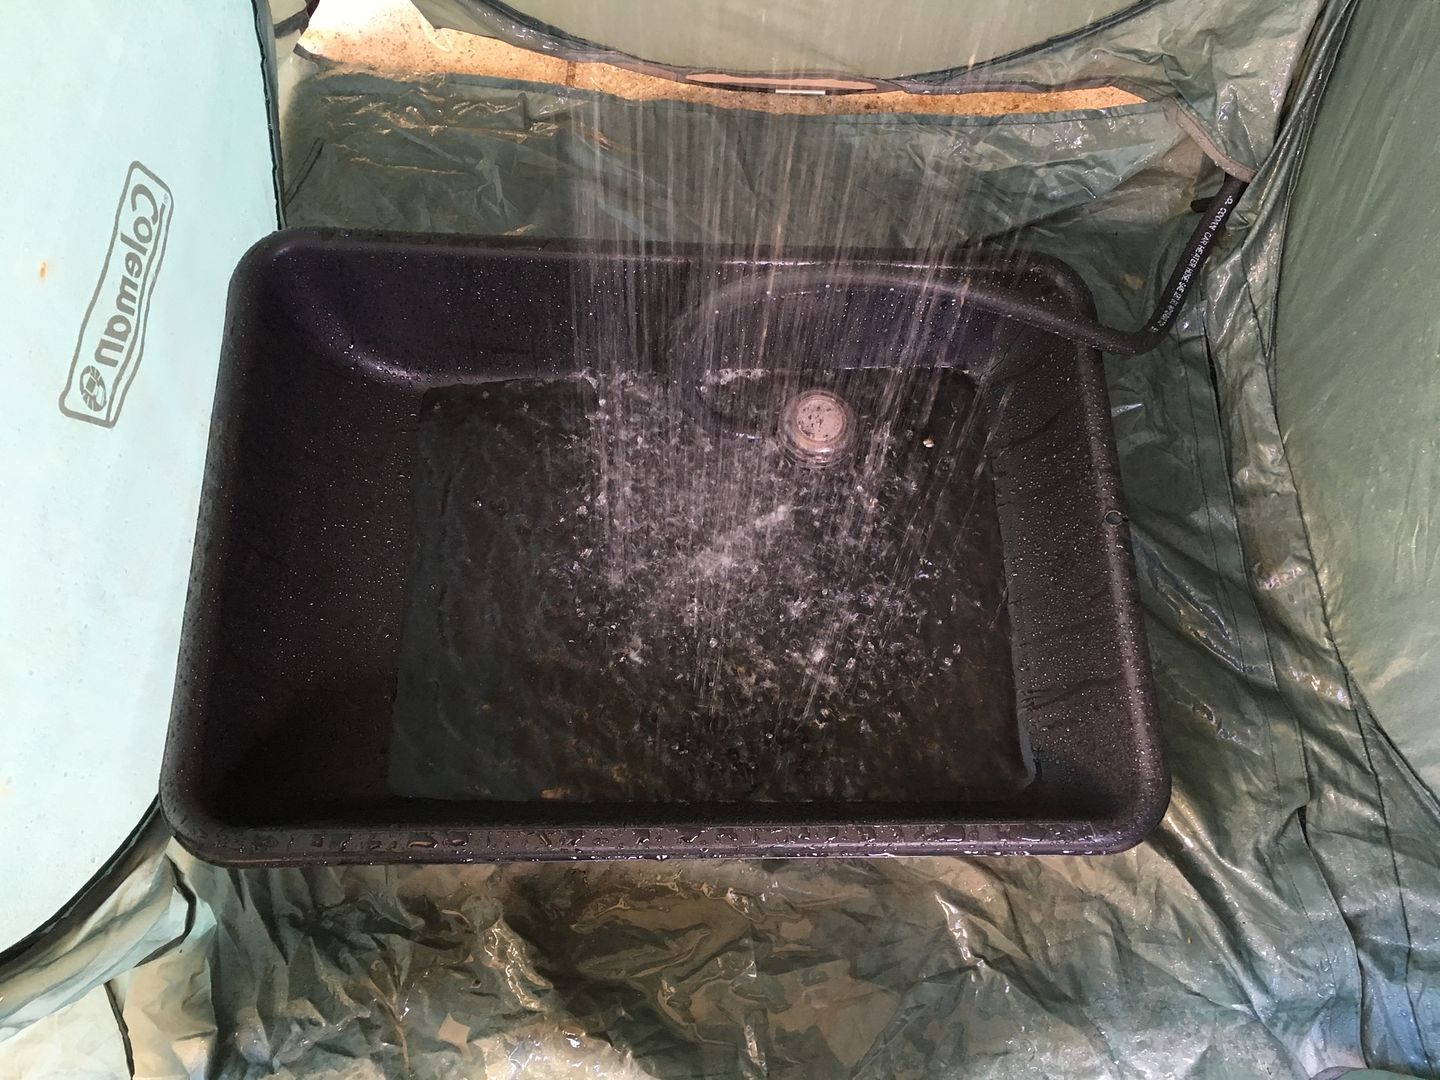
Next step was to head off to Bunnings and grab a section of Gal pipe wth 15mm threaded ends and some other bits and pieces for connecting it all up. The plastic mixing tub is from Masters and is an ideal size for standing and showering in, it's also large enough to collect most of the water used while showering.

image_zpsumqyzkyu.jpeg


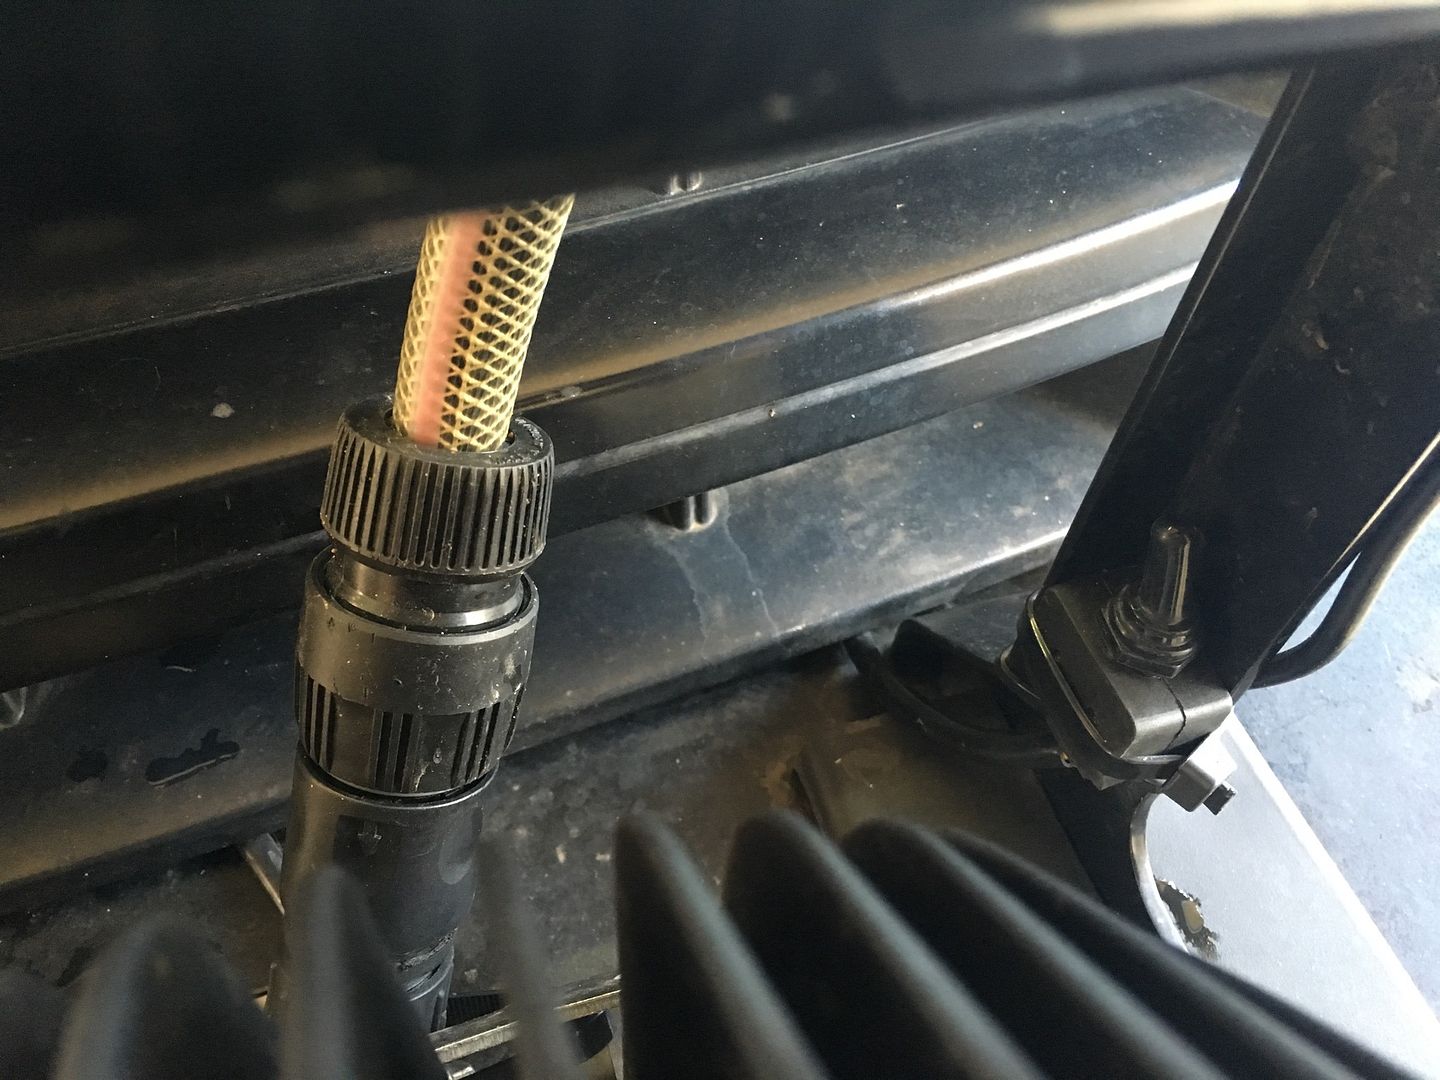
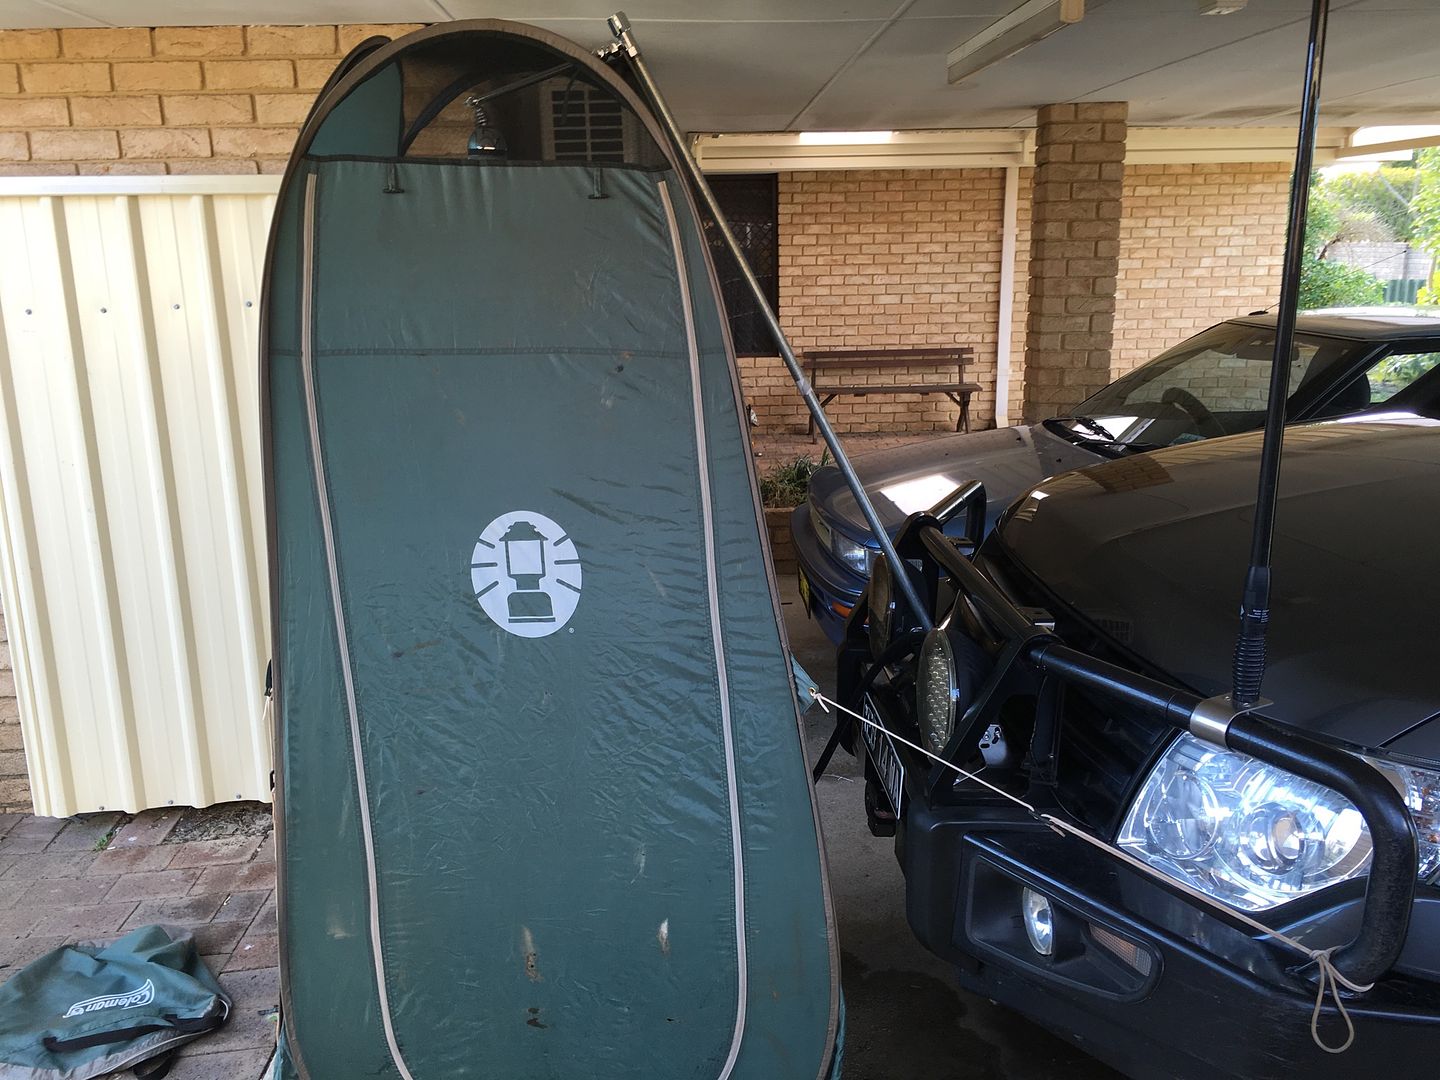
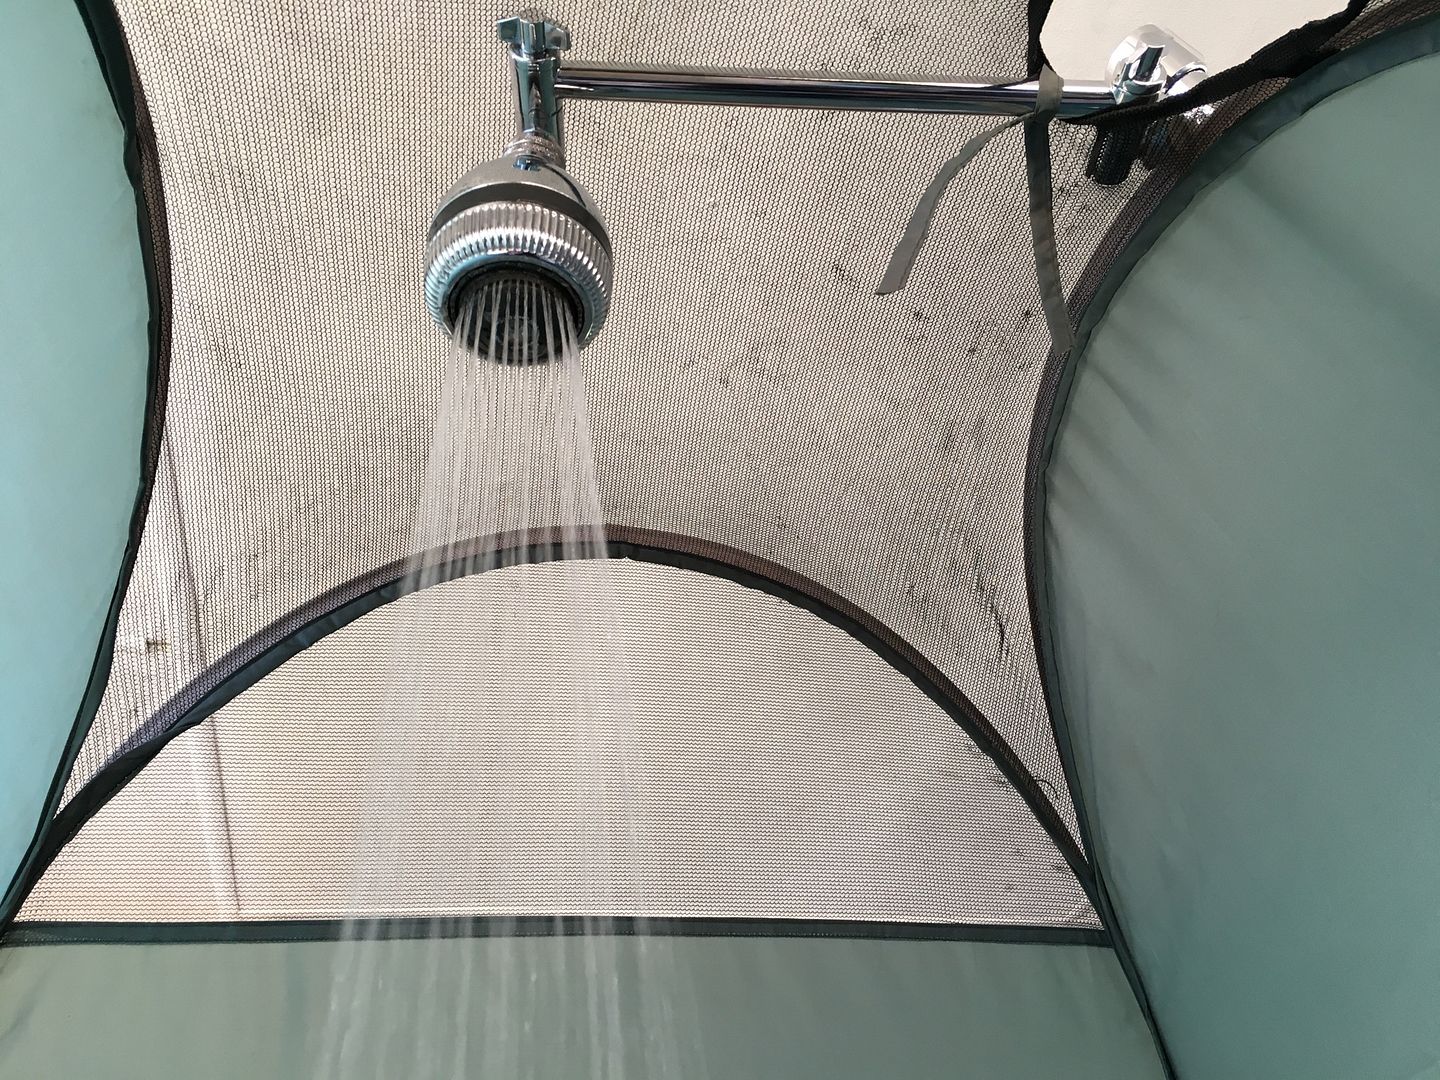
I just used what I had laying around to make up a temporary bullbar clamp. This is just a hose clamp and a small quick fist rubber clamp. Not ideal but it will do until I come up with something better. I'll probably grab some kind of saddle clamp to use when I find one that suits. But for now this works surprisingly well and is quick and easy to throw the shower pipe into.

The small bung in the quick connect is to keep dust out when not in use. I had trouble finding any kind of off the shelf bung, so these are just quick connect hose joiners filled with silicon and then cut down to suit.

image_zpsqjtothmc.jpeg


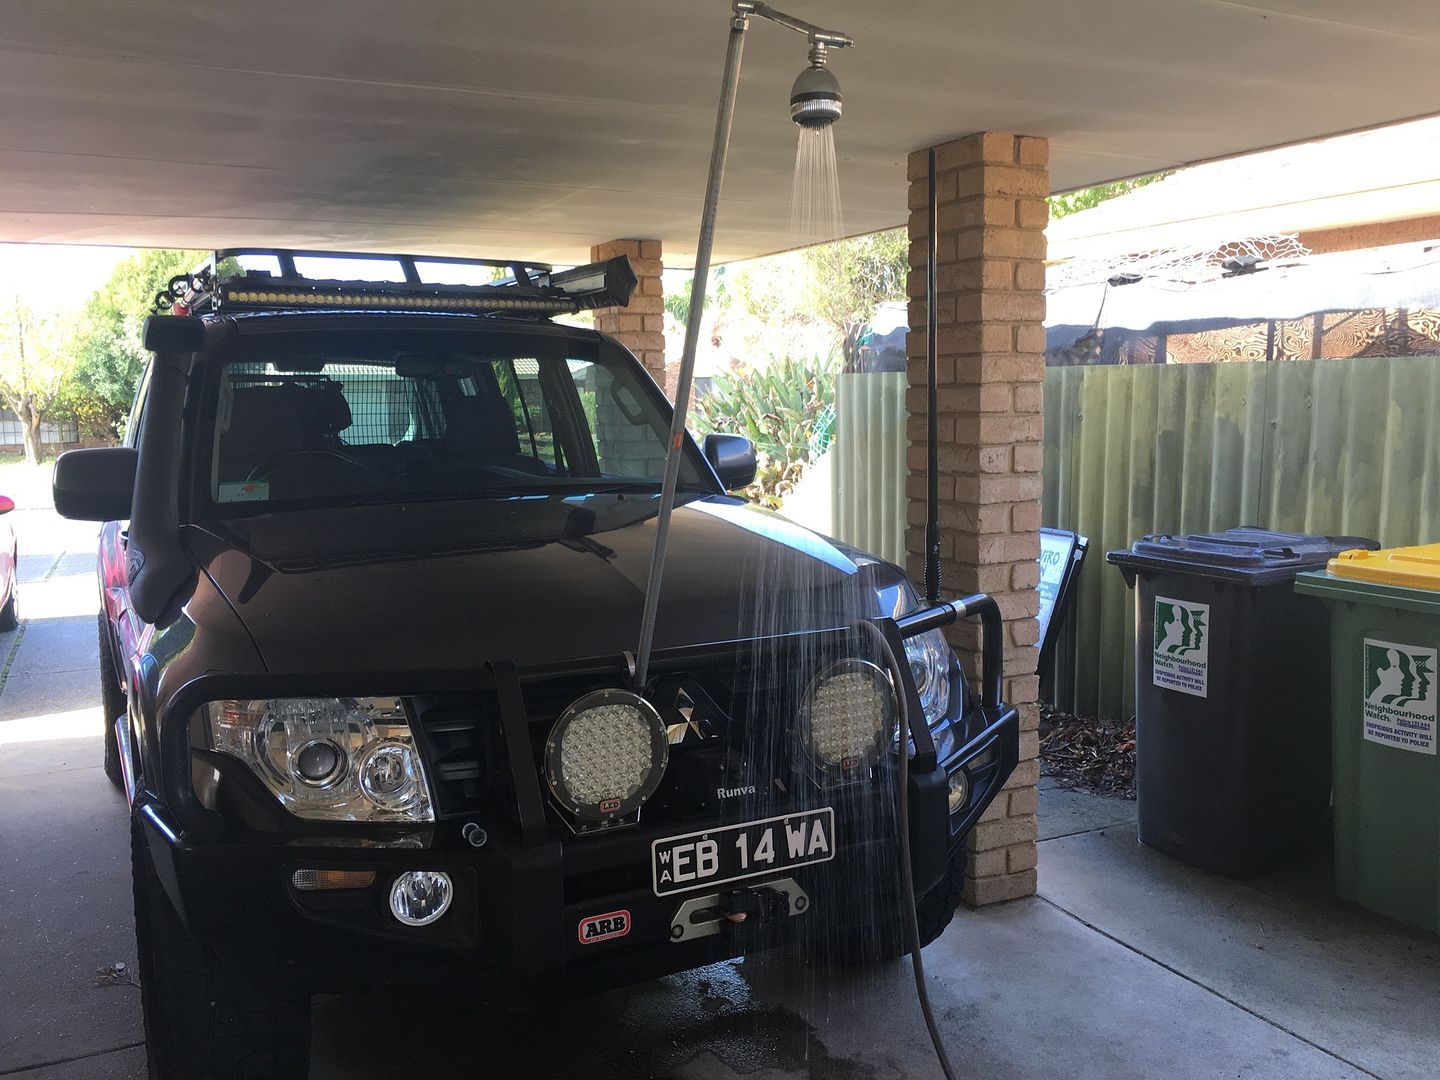
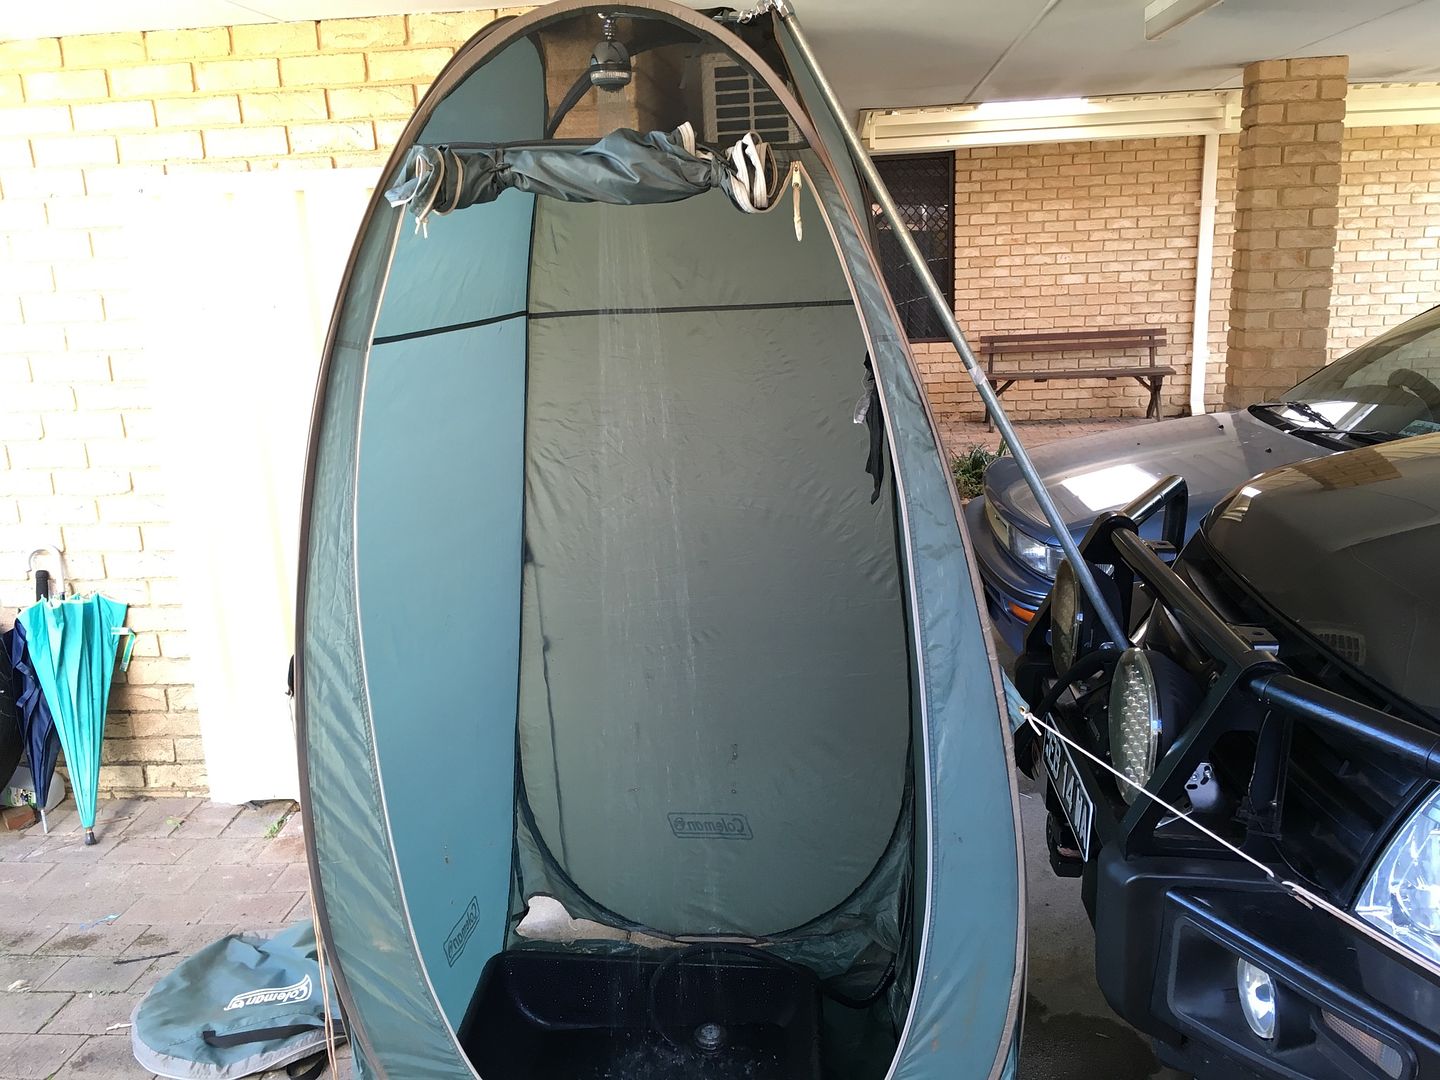
The finished product works extremely well and when I throw the shower tent up its at just the right height for the shower head. In the plastic tub I have a 40 or 50? Micron screen mesh filter, sorry can't remember the exact screen size. At the moment we just recirculate the shower water and by sloping the plastic tub we can have a great shower with 3 or 4 litres of water. Obviously if near a water source then recycling water isn't such an issue.

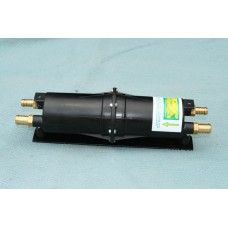
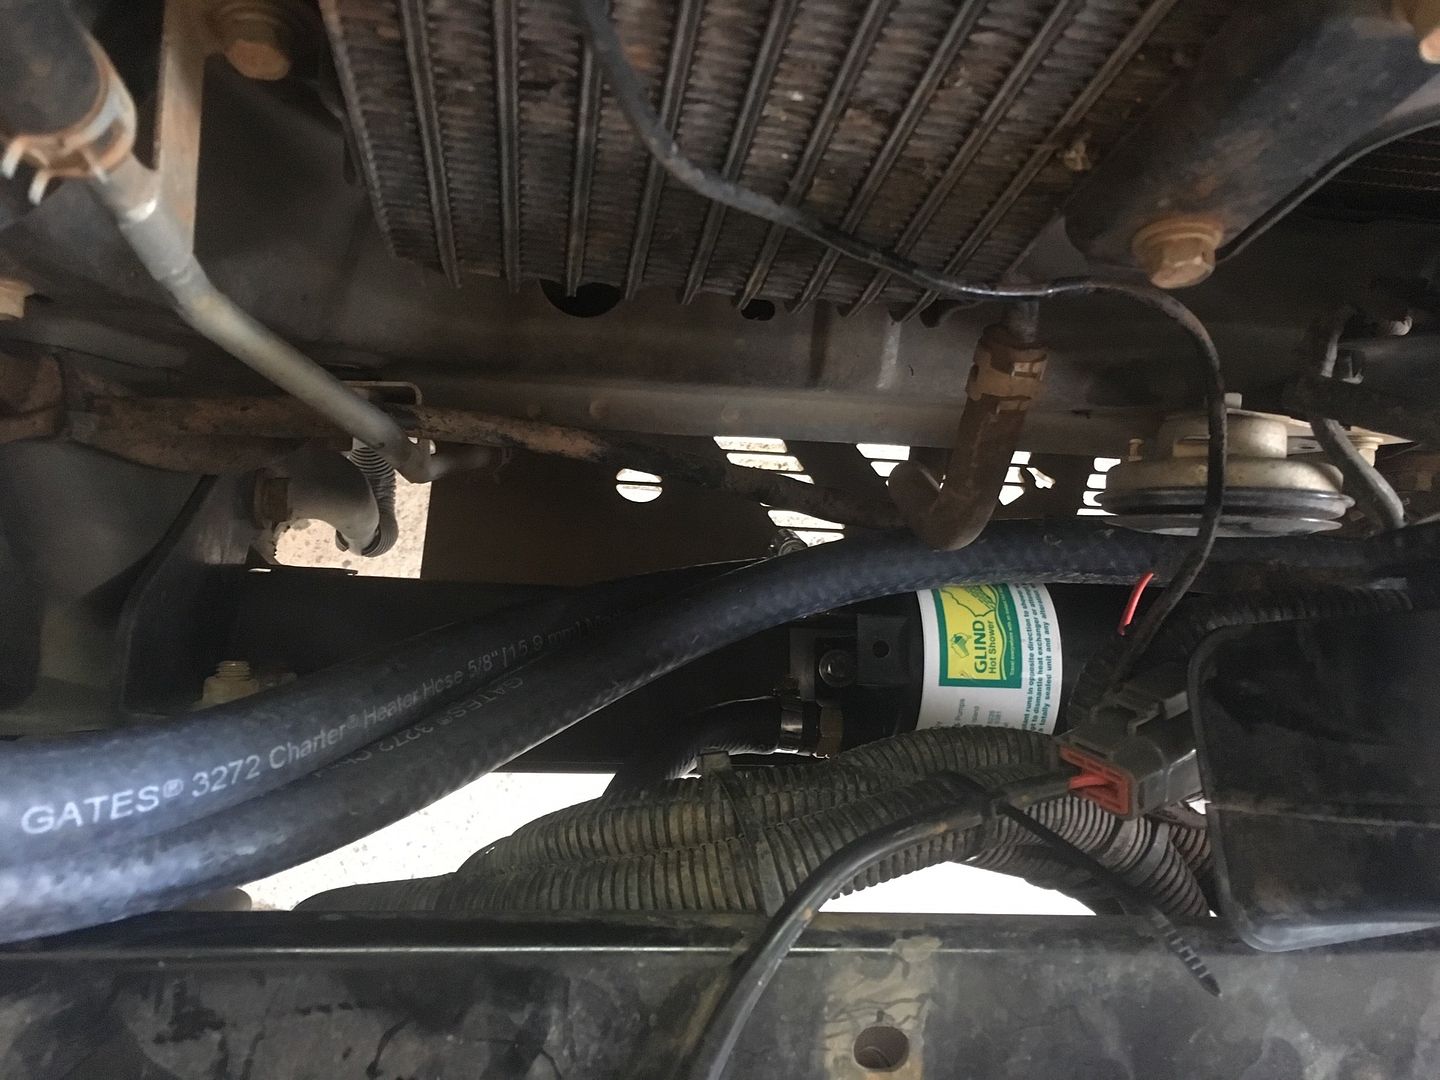
For heating the water, we are simply using the billy and adding it to the tub. I've thought about using a Glind or Helton style heat exchanger, but as we will probably buy a camper down the track I may just leave as is and eventually use a portable gas unit like the Joolca etc.

image_zpslwaalaxl.jpeg


The pressure out of this is as good as a home shower!

image_zpsavdwukmm.jpeg


So now I am a happy camper, as there is nothing quite like a decent shower every few days when on the road for extended periods. Most of the time we are solo so won't bother with a shower tent, but for times when we need the privacy it's an easy job to set it up under the shower head. I'll also throw a quarter turn ball valve inline, so we can regulate the flow. It only takes a couple of minutes to set the shower up and by the time water has boiled we are good to go! The pipe and shower head take up bugger all room and the plastic tub gets other stuff stacked in it when traveling.
 

Stevemc181

Observer
Next Step.

I've decided to go the whole hog with my shower set-up.
I've ordered the parts and will fit in the next couple of weeks or so. One thing that bothered me with using the Glind heat exchanger style of showers is the fact that the water can get extremely hot if you turn the water off at the shower head as there is no form of temp control. I've read a few posts on here of different solutions, the best one in my mind is to use a Thermostatic Mixing valve (TMV). This will allow me to set a temp where it will automatically divert and use water prior to entering the heat exchanger, or it will mix the appropriate qty in, to keep to a set temp. There are plenty of these around from a variety of manufacturers but for my particular setup I needed one that will suit a closed loop system.

Most of the TMV's around will only accept a cold water input up to 29°C and as I intend to recirculate my shower water, my cold intake line will sometimes be up around 35-40°C after it has recirculated. The model I have used is an Esbe VTA 321 http://www.esbe.eu/global/en/products/thermostatic-mixing-valves/vta320-vta520 These are difficult to find in Australia, but managed to find a seller in Canada who had one left that was branded Danfoss 065B8867 ESBE VTA321. These are also available in various temp settings, I have gone for one that is settable between 35°C and 60°C for when hotter water may be required. If I want colder water, I'll turn the engine off.

Prod_VTA321_verA_issueA_lr_zpsslkydlqp.png


I've decided to go with the tried and tested Glind heat exchanger:

glind_zps1fq4xsvm.jpg


Once all my bits and pieces arrive, I'll work out where to mount it all, but I am thinking of having the TMV somewhere easily accessible, so I can dial up the heat if needed.

I've also decided that as I am adding a heat exchanger to the system and there will be additional hose runs and clamps that it is best to also install a low coolant alarm. So I've also bought a Davies Craig setup and will fit this at the same time.

DVCLCA_zpsnkgwpxgp.jpg


This might seem like lot of effort for a shower, but when you are away for weeks, a decent shower is a godsend, and once the system is installed, it is just a matter of plugging in two hoses and flipping the switch. No need to carry bulky gas systems etc. I'll be sure to post up pics when it's all done and hope it works as well and as easily as what I am thinking :help[1]:
 
Last edited:

Stevemc181

Observer
I hooked up the Glind heat exchanger today and gave it a try.

I tapped into the heater lines for the EGR cooler and mounted the Glind in behind the grill on top of the cross member using a couple of M6 Nutserts.

image_zpspfqonpve.jpeg


I still need to get some protective rubber shield over the heater lines in a few spots, to stop it rubbing. I used a couple of Toyota heater lines with 180° bends and cut them to suit, then joined them with straight lengths.

image_zpswdfznz3e.jpeg


image_zpscqtvhsqh.jpeg


One thing I noticed when checking the coolant flow direction, was that there was bugger all flow at idle. I needed to raise the revs to about 1100RPM to get the coolant flowing so the heat exchanger will work. Not having a hand throttle to do this is a bit of a pain, but I resorted to a high tech method and cut a piece of timber to sit between the lower dash and accelerator pedal. Not elegant but it works and I can vary the engine speed easily.

There is no way I could get the water hot enough with just a single pass, but this doesn't bother me as I am recycling the shower water anyway. The Paj had been sitting for awhile and the engine water temp was at about 65° (149°F). With the shower running flat out and the revs on about 1100, I could maintain 40°C (104°F) shower water temp. If the engine is at operating temp of 88°(190°F), then I can maintain 50°C (122°F).

I only gave it a brief test today, and haven't received the Thermostatic Mixing Valve yet. I'll have a bit more of a play around with it and see how she goes with varying throttle and flow etc. Not quite as hot as I thought it would be, but should do the job ok. 38-40°C (100-104°F) is pretty normal for a shower and she seems to hold that with no problem while recirculating.
 
Last edited:

Stevemc181

Observer
I installed and tested out the Thermostatix Mixing Valve (TMV) today and it works extremely well. The TMV has temp settings from 1-6, so I set it on about 1.5 and gave it a go. After a few minutes of recycling my water, it was at around 42°C (107°F), I then switched off the pump and let the water sit in the heat exchanger for a few minutes. Normally with a heat exchanger style shower this would result in a short burst of very high temp water when you turn the pump back on. The TMV worked as it should and there was only a very small rise in water temp briefly.

The inlet side of the TMV was extremely hot as this was direct from the heat exchanger, but the valve did its job well and mixed in water from the pre-heat exchanger side. The temp stays pretty stable regardless of whether you switch the shower head off or not. So I'm pretty happy that one fault of this style of hot water system has been solved.

I also wanted a way to quick connect the shower pole so it sat at the correct angle and height. I sat and pondered various bullbar mounts and also pondered where I was going to mount the mixing valve. Having a beer and a think, it dawned on me that I still had my Runva winch control box mount sitting in the shed. This was at exactly the correct angle I needed, so out with my Dremel and drill and problem solved.

I used 1/2" air line quick connects which are ideal and screwed straight onto the threaded 15mm Gal shower pipe. Takes about 2 seconds to connect up and is free standing. I am also going to use these on the inlet side wth some heater hose, as the hose I am currently using is too soft.

This solves the shower side of things for me, and is quick and easy to hook up, only issue now is that it is best to have a shower with an hour or so of setting up camp for the day. Otherwise I need to get the engine up to temp first. I'll also install a tap inline so I can slow the flow if needed. No way it will get hot enough without recycling the water first. I can get away with 4 litres of water and have a good long hot shower.

image_zpsyiqoruop.jpeg


image_zpsu7sn08tj.jpeg


The shower tub is a concrete mixing tub from Masters hardware, I've attached a mesh filter to the pick up line and am going to install another mesh filter up at bullbar level, easy to clean and keeps the larger particles from recirculating.

image_zpsyju64wio.jpeg


I just need to grab a cover for the outlet and I'm all set!

image_zpsmjhtty6z.jpeg
 
Last edited:

Stevemc181

Observer
I added a 1/2" quick connect for the intake line today and also changed the intake hose out to some 1/2" heater hose.

image_zpszij7hc13.jpeg


I trawled the bits and pieces at Bunnings Hardware and came up with these rubber chair feet in 25mm, perfect for keeping the dust and crap out when not in use. They are a firm fit and won't dislodge easily.

image_zps4q68tn7h.jpeg


I am just using a standard Coleman pop up shower tent, but will probably grab one of the Joolca easy erect double ones in the future for a little more space and somewhere to plonk the Jimmys Thunderbox out of the way.

image_zpsb9zkfqd8.jpeg


image_zpsjhliwbcd.jpeg


You can't quite see it in this pic, but I've added a washing machine style quarter turn tap to the end of the shower pipe. This can be reached easily through the access hole in the top of the shower tent. Flow is easily regulated now.

image_zpsks7etux1.jpeg


I had the Paj sitting for about an hour after a short run and the water was still good enough for a warm shower. I have thought about adding a Davies Craig electric booster pump into the heater line, so I can get the coolant flowing with the engine off, but I don't think the engine running will bother me much for the 5 minutes it takes for a shower. We are usually camped solo, so bothering others isn't normally a concern.

image_zpsw1cofmd0.jpeg


Overall, I am pretty sure this setup will work extremely well for what we require. It's an expensive solution with all the bits and pieces, but one of my pet hates is not having a decent shower at least every few days. Particularly when camping in areas with no swimming holes etc. The best part of this type of shower is that the hard yards have been done prior to leaving on a trip, a good shower is now only a two minute setup.
 

Forum statistics

Threads
185,814
Messages
2,878,489
Members
225,372
Latest member
camshaft700
Top