The Wild Crow - A Not So Wild Build Thread

jim65wagon

Well-known member
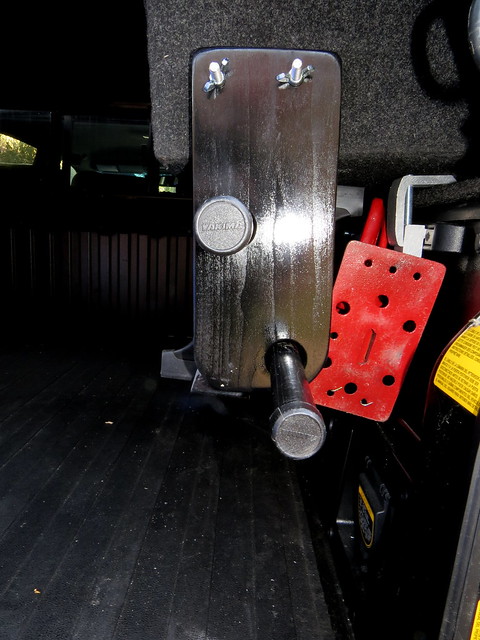
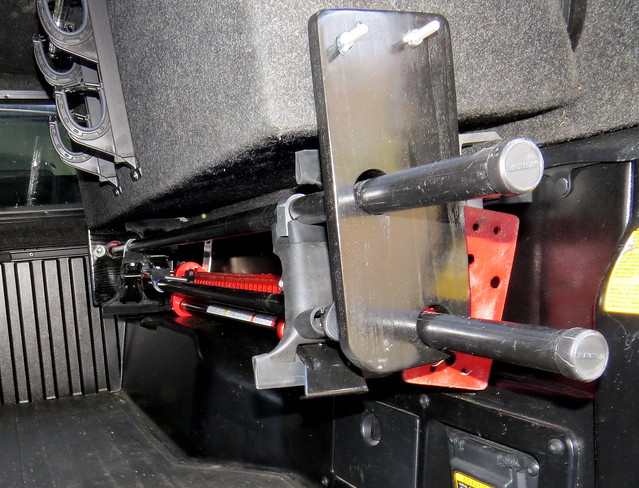
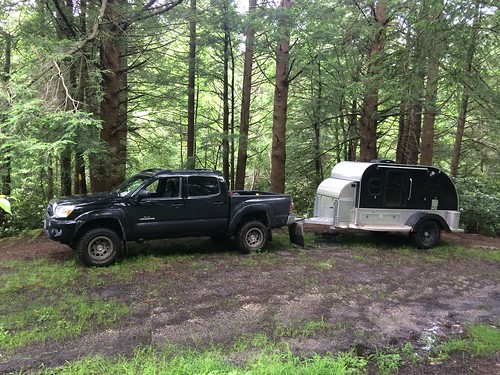
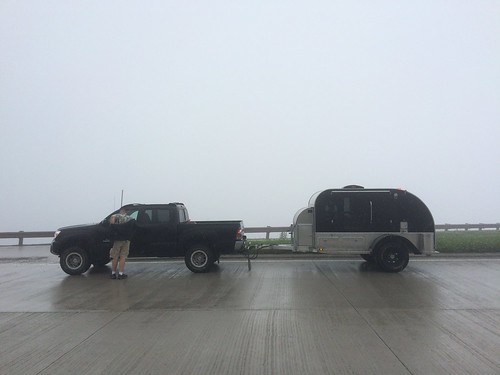
With the addition of the airbags, we decided it was time to test the Tacoma's towing ability. This would be an extremely important trip for us - if the Tacoma didn't live up to our expectations then we'd have to consider our vehicular options for our future One Year Trip.

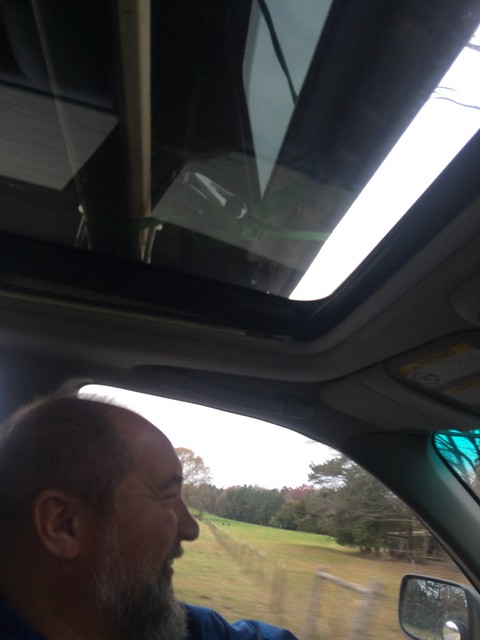
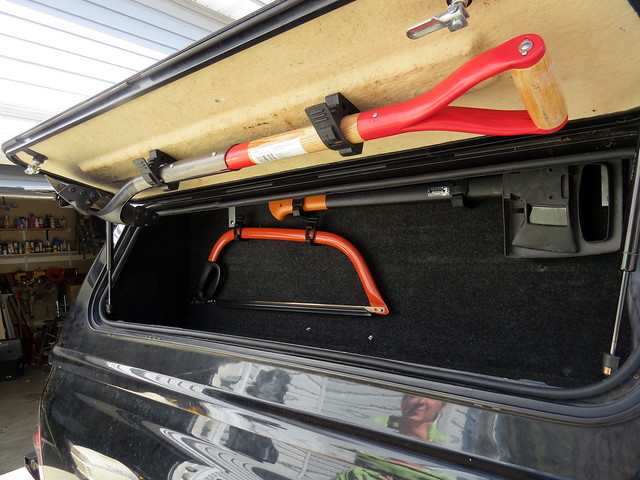
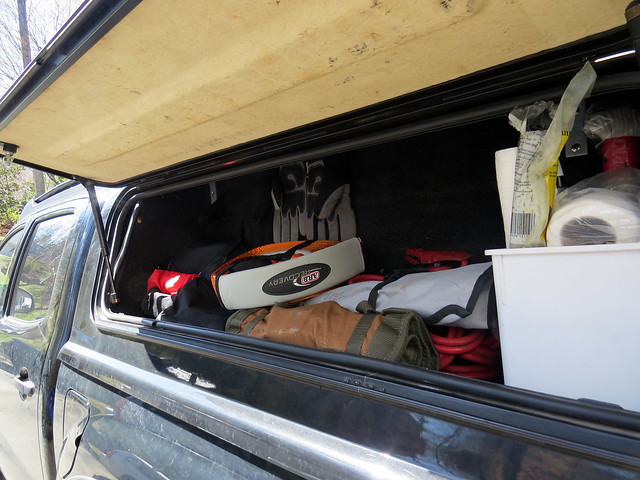
I had three days off - Beth had four (she got Friday the third off too, so she got the job of loading the trailer with provisions). We hooked up on the 4th in the morning.


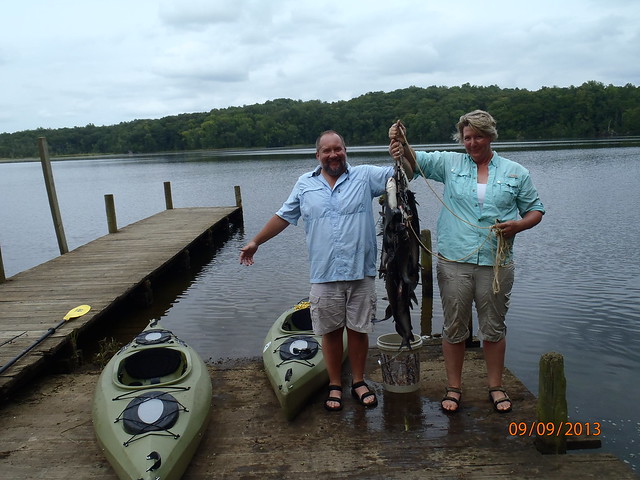
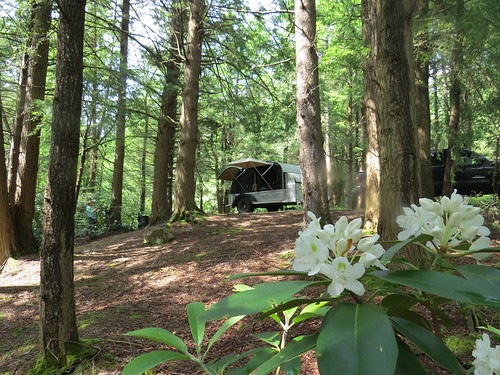
We headed to West Virginia to spend some time in the mountains. We decided to head for Thomas/Davis with the idea of camping and checking out some kayak launch sites for an upcoming trip to the Cheat River. We've spent quite some time in this area and know of a sweet campsite on FR18.


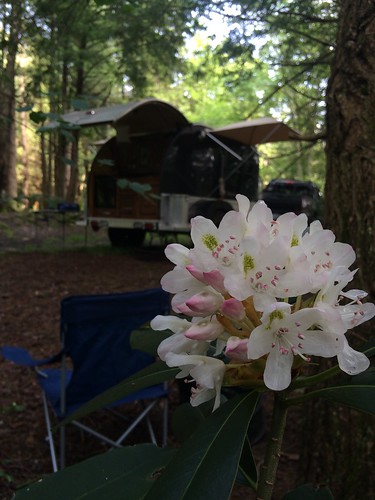
We set up camp and spent a great afternoon in the woods.


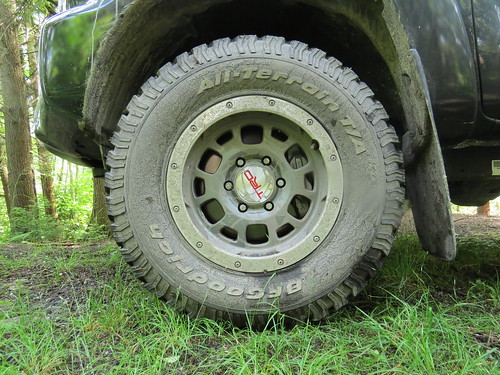
The road in was muddy and rough. The Baja suspension felt great though, and we finally got some dirt on the tires.


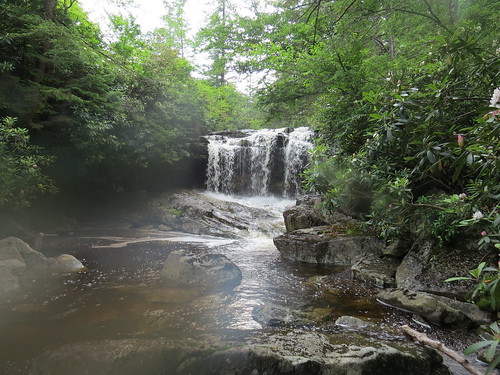
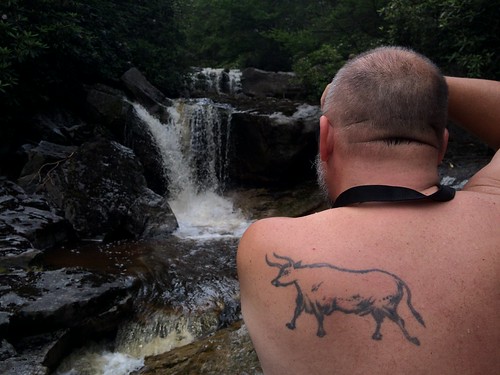
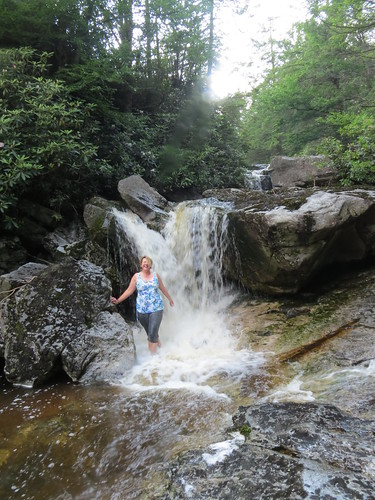
Forest road 18 is the home of a gorgeous waterfall, and we spent some of the afternoon messing around in the freezing waters.


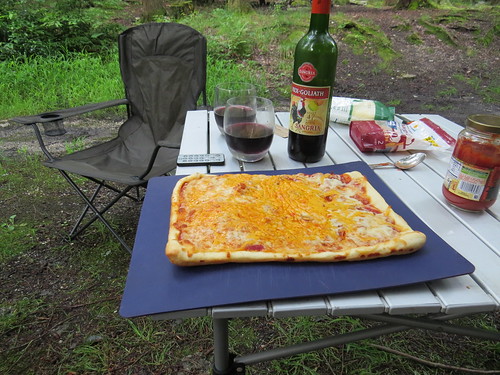
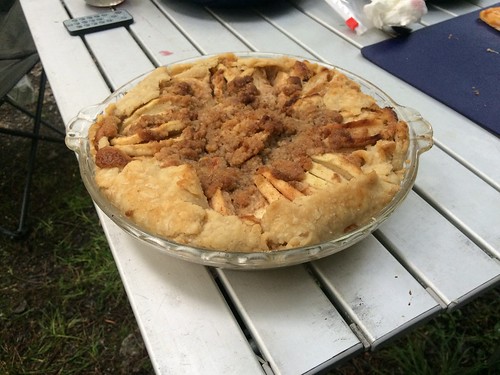
For supper, it was time for pizza, wine and apple pie. When you're equipped with an oven, you get some really good supper choices.


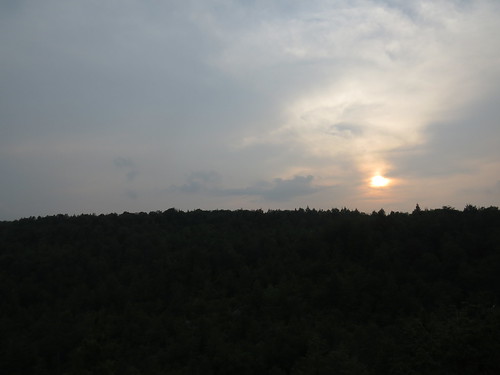
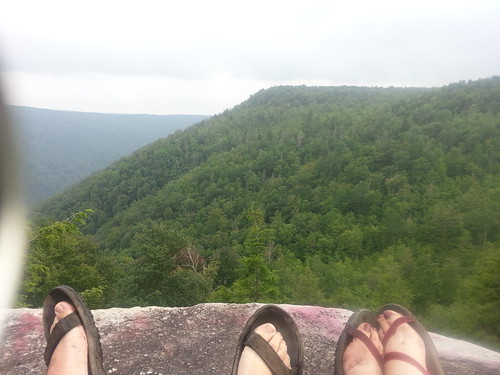
After supper, it was time for the sunset on Big Run Overlook:


On Sunday we headed for Parsons and checked out the launch sites and the Horseshoe Run Campground. Our waterfall site is better, but it's good to know potential camp sites.
We spent a lot of time driving the roads and forest roads - so much so that we neglected to take pictures.

We did stop by a grocery store in Parsons for some potato chips that my wife forgot to pack for our lunch. She found me a little gift while wandering the aisles.

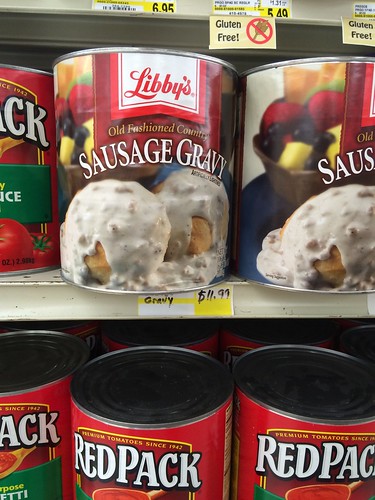
That my friends is a full gallon of sausage gravy. I've never eaten the canned version, but the home cooked stuff runs through my veins.....I'd drink this like water.....or wine.....but it's better over eggs and biscuits.

Those who know the area know of the Canaan Loop aka FR13. We checked out the campsites along it for future reference also.
The Loop was muddy and rough and let the Tacoma flex its suspension a little. I've had the Tundra through it, so this was a good chance to compare the two. The result: so damn similar it's scary. Both are wide enough to get scratches along the route. (Yes our brand new truck has its first scratch - but it was done "off road" and not in some stupid parking lot!) The Tacoma just rolled over all the roughest spots without complaint, but those mudflaps drag everywhere!

Monday came along too soon, and we had to pack up and leave...In the rain. It rained so much all the mud got washed off the truck. We took a quick video of our trip out FR 18:

We did stop in the pouring rain at one of the scenic overlooks. All we saw was fog.


Overall, I'm really happy with the Tacoma. It never once really struggled whether towing or crawling the Canaan Loop. Again, it is so similar to our first gen Tundra, you really don't notice much difference between the two. I'm diggin' the new truck.
 
Last edited:

deadbeat son

Explorer
Looks like a great trip!

Thanks for posting the info on the Firestone airbag kit. For some reason, I thought the only kit available for the Tacoma was the one where the bag sits forward of the axle, over the leaf, not centered on the axle. This is something I'm definitely considering now.
 

jim65wagon

Well-known member
Movin' right along - as my favorite Muppet Movie song goes - it was oil change day, and tire rotation day. I also added the Redline Tuning Hood Struts that I bought during the last sale some months ago. They've been sitting on the workbench while I enjoyed the summer, now they're on the truck.


All went as planned until I went to shut the hood and the struts bottomed out and the hood couldn't close all the way. I double checked my measurements with the instruction sheet. I had them right according to that. Quick and easy solution was to move the fender brackets back. Scooted it back until the forward hole in the bracket lined up with the rearward hole that is now in my fender. That worked like a charm. Hood closes, latches and then opens and stays that way as needed.
 

codename607

Adventurer
Awesome! I love the commentary. I still have several years before I'm able to do a trip like the one you are planning but I do enjoy researching all of the places we will go. What is the first stop on your future trip?
 

jim65wagon

Well-known member
First stop can be any one of several places We have a desire to visit relatively near here but it will depend on the time of year we sell our house
 

brianjwilson

Some sort of lost...
In that video it sounds like you're towing around off road in 4 high. I don't know if you have a scan gauge or anything to monitor transmission temps, but they do get high very easily. Particular with a load in 4 high, moving slowly over rough terrain. I have read that the temp light doesn't come on until 300 degrees which means you're in bad shape. Dropping it into 4 low will really help trans temps. Just FYI.
 

fike

Adventurer
I am intimately familiar with FR18 and Canaan Loop Road. Love that area. I spend 15-20 days a year up there. On Canaan Loop Road, did you do the whole loop all the way around to Blackwater Falls? There are some nice pulloff campsites back there where the isolation and quiet is protected by two moderately tough creek fords.

I heard you say FR18, and I couldn't figure out what that was until I looked at a map. I have always called that canyon rim road. That is a very nice area. There are some notable botanical oddities along that road. I hope you found them. They are shocking. http://www.trailpixie.net/general/a_highland_bog.htm Olson Tower is always fun too.

Another great route down there starts in Parsons and follows the Cheat River all the way down to the Stuart Recreation area. Nice river side campsites down there. There are some other nice river side campsites along SR72.

I like your trailer setup, and though I know you are being a bit comical about your "mods," sometimes its the little things that make a vehicle work. I have a very mundane looking Subaru that takes me to some crazy places and has lots of little tweaks and mods that make the stock vehicle do a lot more than it was meant for without doing anything too crazy..

053-canaan-barndance-e-m5-64302A-Panorama-thumb-900x1072-32.jpg
 

jim65wagon

Well-known member
In that video it sounds like you're towing around off road in 4 high. I don't know if you have a scan gauge or anything to monitor transmission temps, but they do get high very easily. Particular with a load in 4 high, moving slowly over rough terrain. I have read that the temp light doesn't come on until 300 degrees which means you're in bad shape. Dropping it into 4 low will really help trans temps. Just FYI.

Thanks for the concern. I do not yet have a trans temp gauge, but I know the road well enough - and the Tacoma tows very similarly to the Tundra (which I've monitored temps for years on) - so I'm confident the 200 feet of 4Hi crawl was of no cause for alarm.

I do plan on a scangage or Ultragage for the Tacoma as soon as I can get funds and time for one......
 

brianjwilson

Some sort of lost...
The transmission is nothing like the tundra. I'm only giving you a heads up because I've been monitoring trans temps with mine, even with 4.56 gears and a lighter four wheel camper in the bed it heats up very quick in that scenario. That's what 4 low is for, lower gearing reduces transmission slip and excessive heat. There is an immediate large temp drop switching from 4 high to 4 low in that situation. Higher rpm moves more air, more oil, more transmission fluid and coolant, reduces drivetrain stress.

I've watched a lot of people overheat their transmissions in smaller trucks doing exactly what your video shows, even on short hill climbs. No skin off my back if you overheat the transmission, I'm just trying to help by telling you what I've experienced and seen with my 2015 Tacoma as well. ;) Carry on.
 

jim65wagon

Well-known member
I am intimately familiar with FR18 and Canaan Loop Road. Love that area. I spend 15-20 days a year up there. On Canaan Loop Road, did you do the whole loop all the way around to Blackwater Falls? There are some nice pulloff campsites back there where the isolation and quiet is protected by two moderately tough creek fords.
We went in from Blackwater Falls. There's two sites we like: One has a big rock overlook behind it (the site was overgrown with grass making me wish for a weed whip) the other is in the hemlocks but it was not quite clean and possibly being used at the time.


I
Another great route down there starts in Parsons and follows the Cheat River all the way down to the Stuart Recreation area. Nice river side campsites down there. There are some other nice river side campsites along SR72.
We'll certainly be checking that out, thanks!
I
I like your trailer setup, and though I know you are being a bit comical about your "mods," sometimes its the little things that make a vehicle work. I have a very mundane looking Subaru that takes me to some crazy places and has lots of little tweaks and mods that make the stock vehicle do a lot more than it was meant for without doing anything too crazy..

Comedy is life - so all my threads get infused with a little.
And we love our trailer setup - makes us smile every time we go somewhere

As for the mods, it's being done just like the Tundra. Drive it, decide what it needs to be improved and change it. I can't afford to just throw money at it buying everything I want or that someone else thinks I need - that's money I can use on a trip.
 

jim65wagon

Well-known member
Time to (re)Cap!

The Sunday after Thanksgiving we had to take our kids (young adults really) back to their respective colleges. It was raining, and since we have no bed cover for the Wild Crow we loaded up the Sooby with said kids and their luggage. Down the wet road we went - stopping by VCU in Richmond to drop our daughter off, then rolling on out to VA Tech to unload our son.

By the time we got to VA Tech and departed ways with Chris it was about 3PM. I drove all the way out (about 4 1/2 hours) so my wife hopped behind the wheel and we started our long drive home. Along the way I was passing time searching CL for caps.

Because we are more than a little picky, (and a little frugal - not wanting to shell out the cash for a new cap) we've spent the past year looking for a used cap. Not that we've found many 5' caps at all - they seem pretty rare around here. Anyways, I'm scrolling along and there it is! Black, 5 ft, solid doors instead of windows, toolboxes, and even a Yakima rack setup!

"Awesome! Lets go see this today!" On my CL app this thing was listed in Asheville NC, a little over 3 hours from where we were. My wife spun the car around we headed south. On the way I was making the phone call. I was psyched! The dude spent some time telling me about it; it was still on his truck; listed it that morning; etc etc.

"So where are you in Asheville?"
"Asheville? I'm not in Asheville......I'm in Abbeville"
"OK, where's that, we're on our way"
"It's about an hour south of Greenville, SC"
"Ouch, OK, ....um I'll get back to you"

Seems the cap was almost 5 hours from us. We actually stopped, turned around and headed North again. While we drove we talked, about caps of course, but mostly the fact it was exactly what we have been looking for but so far out of our way. Still undecided, we stopped and went antiquing. I don't think we looked at anything antique. We walked through the antique mall and kept talking caps and looking at the pictures on CL. One lap in and the decision was made.

I texted the owner and said we'd be there in the morning. We plotted a course and took off. It was dark and raining, accidents were all over the crowded freeway and we crawled. And crawled. While we slogged through traffic Beth searched online and found a hotel in Greenville S.C. - we should be there by 9:30PM. We also looked up what it would cost to put a hitch on the Sooby and rent a trailer ($360 for the hitch install + $100 for the trailer)Nope ....too expensive and probably couldn't be done at the last minute anyway... and frugality won out as we hatched our plan to build an addition onto the stock roof rack that was big enough to fit the cap.

Traffic was bad, did I mention that? We made it to Greenville at midnight. Exhausted we fell into bed and slept until six. After eating a horrible free breakfast, the morning found us hunting a Lowes -Home Depot-Hardwareishlike place. A nearby Lowes provided us with 2x4s (they cut them down to 6 foot lengths), ratchet straps and eyebolts. Next a MomNPop True Value place provided some 4 inch square U-bolts (do they have a real name?)

With our rack ingredients inside the car we drove the hour to the cap's home. Pulling in the driveway the cap looked perfect on his truck. We climbed out of the car and the owner met us with a "How ya gonna haul the cap home with that?"
"We have a plan" I says, "Do you have a drill?"

With that we commenced building. Eyebolts placed in the ends of our 2x4s, then said 2x4s bolted to the Sooby crossbars with the U-bolts. Solid.


He backed his truck up, his tailgate almost touching the Sooby's liftgate and the three of us transfered the cap onto our extended roof rack. Ratchet straps going to and from the eyebolts held the cap down firmly. 2 more straps went front to back for extra support.


Money exchanged hands, the Yakima crossbars that went with the cap went into the Sooby, we all said thanks and goodbye. With a parting "good luck" from the now previous owner we rolled the 502 miles home - in the rain of course.


The most disappointing thing? I only saw one person pointing and laughing while we drove 70 mph up the highway......
 

jim65wagon

Well-known member
The Shell Game - Jason Work Force Cab Hi Premium

Our cap sat in the garage for a week after we bought it. It sat on sawhorses while I rewired the lights and Beth cleaned it up.

She washed and shined up the exterior and I made sure the brake light and interior light functioned correctly. I used a four flat trailer plug to connect the lights to the truck. It was easy peasy japanesey and gives me the flexibility to easily remove the cap if needed.

With our daughter's help we lifted the cap and set it on the truck. Carefully scooching it into position. As I was about to fasten it down with the brackets I realized we forgot to seal it.

Now with my daughter in the truck we tossed in sawhorses and milk crates. As Beth and I lifted the cap up Madeline stacked crates so the cap would be off the truck bed high enough to add the seal.

We used a rubber seal I bought from Amazon. Stuck it on the cap carefully fitting the corners to hopefully mitigate any leakage.

Set the cap back down on the truck, rescue our daughter trapped behind the milk crates and sawhorses, fasten the cap down. Done deal.

I caulked the corners where the front rail is lower than the side rails. I used the silicone sealant that we used on our teardrop. 3M 4200 sticky waterproof and lasts forever almost. Don't get it on your fingers. ....

Cap looks good though. Well worth the year long search and the 500 mile drive
3363312e6a7067.jpg


3635652e6a7067.jpg


3265312e6a7067.jpg


3134362e6a7067.jpg


jim65wagon

Well-known member
Why, oh why do they not sell trucks with rubber floors? Every truck I've owned has been carpeted and it takes almost no time at all for that carpet to be ruined by kids, mud, beach sand, coffee, watermelons, etc. Our Tundra's carpet got so bad we had to replace the smelly thing with a vinyl floor covering I found online. It was a pain to install, doesn't quite fit right (I think it was really for a T100) but it gets the job done on the old truck.

The new truck - again - carpeted. In an effort to not ruin the carpet, short of finding a vinyl/rubber replacement. We've added a full set of Husky Xact Contour floor mats. Not perfect in my world, but they should do the trick.


....and another thing: Mirrors. I love to see where I've been. And who's trying not to pass me by hanging alongside my rear fender. The Crows mirrors, while functional, seemed on the smallish side and the view could be improved. We picked up a set of EZ View Mirrors from Trail Toys. Until these, I had added the little stick on blind spot mirrors. OKish, but still hard to see out of.

Those EZViews? Awesome by comparison. The passenger side has a little more side view, but the real bonus is seeing so far down the side of the truck. I can see exactly how close the rear flare is to a tree - or another vehicle. The drivers side shows the biggest benefit. The view is greatly increased over the standard flat mirror. I can see vehicles that previously would have been missed. And I can see where the flare is - and the tire for that matter.

Yes the curvature takes a little getting used to, but only on the drivers side. Your passenger side eye is used to seeing the slight curve - so the slightly more curved EZView isn't really noticed looking to the right. The drivers side takes a little more to get used to it, but after a few drives you hate to go back to a vehicle without them.

The install went easy. Just follow his video instructions and badda bing badda boom you're reflecting on your reflection. I did use a heat gun on low - it was in the 40s outside, so I heated the plastic up before attempting to pop the old glass out - then reheated to pop the new in. Worked like a charm. These things get 4 thumbs up! (uh - my two and Beth's two - whadya think I am a freak?)


jim65wagon

Well-known member
This wasn't really on the priority list yet, but my wife found this thread from BensonX on Tacoma World on his home fabbed hi-lift mount (and tool mounts). We'd been discussing ideas on the organization we will need inside the cap for our year long trip.

With the truck and trailer being our home on the road everything we need has to have a place to maximize storage in the small space the truck bed provides. We were working on plans for an interior rack to hold our hi-lift, shovel, bow saw, kayak rack, kayak paddles and some other accoutrements.

During our discussion one night, Beth found Benson's thread. She asked "can you do that?" My reply was an instant "Hells yeah! I'd thought about buying someones prefabbed versions, but home made is in our price range and just as effective"

So, here we are: Hi-lift mounted out of the way and giving us a further plan for the rest of our gear. More to come on that story, on to the H-Lift:

We gathered up parts from the hardware store. Some of which you see here. Some of those are for more of the other mounts still in progress.


I took a few minutes on the grinder and made some thick washers into rail shaped guides.


Washers mounted onto bolts with lock washers and a jam nut; these slid right into the rails to provide a very sturdy mounting point for the brackets


The brackets: Well, what will be brackets. 2" x 1/8" aluminum stock


Each received a nice 90 degree bend to form the base of the bracket, and a hole 3/4" from the top to mate it to the bed rail stud.


I coated the feet with plasti-dip (red to match the hi-lift....and our Baja's TRD emblem), and added some 3" bolts (and jam nuts) for the mounting studs. The studs will be cut down to a more manageable length, I just had no idea how long they needed to be. A pair of open threaded knobs hold the hi-lift fast


The final assembly: The lift handle rests on the wheel well. We thought this would be a little more stable when the going gets rough. Mounted this way the jack is so sturdy, that I can't shake it. Of course, I'm old and may not be as spritely as you so YMMV on this.


I like the location and mounting style. It should be a little used item and it's tucked up out of the way nicely and leaves room for our other projects.
 

jim65wagon

Well-known member
With the Hi-Lift tucked up out of the way, we moved on to storage for other necessities:

Items like the shovel, the bow saw and the axe (seriously). These were installed in the passenger side tool box. The axe and shovel used the original sized Quick-Fist clamps, while the bow saw is held up with two mini Quick-Fists. We purchased an 8 piece kit through Amazon.


These items tend to find a lot of use while we are camping. The tool box access gives us easy access to them, while the Quick Fists keep them securely stored. The drivers side still needs work. I need to figure out its arrangement - which is currently tool rolls, an air compressor, snatch strap, jumper cables and various other items that get used on and "off" road.


Ultimately, I would love to address the range of the Tacoma (both with and without Teardrop) by adding either a long range fuel tank, or an auxiliary fuel tank. Until that time (and money) come along, we are stuck with fuel cans like normal peeple.

Luckily for us our gas cans fit under the drivers side tool box - barely. They slide snugly in with the tops of the handle brushing the tool box. There is no upward movement - awesome! Side ways is a differnt story. We discussed ideas of how to fasten the cans fast. Everything from the ubiquitous ratchet straps, to a fancy locking aluminum catch that swung open and closed tightly around them. What we eventually arrived at is the epitome of the KISS system.
The tailgate serves as the forward (rearward?) latch - as the rear most can is held in place by the tailgate when closed. The side movement is held in check by a piece of aluminum angle fastened to the underside of the tool box. The angle leg is deep enough to hold the tops of the cans firmly against the side of the truck bed, while allowing you to slide them right in and out.


What do you use your gun rack for?
I use mine for kayak paddles. Our Bending Branches take down paddles slide right into the gun rack.


Yes, we kayak. Mostly for fossil hunting in the winter and fishing in the summer, and the occasional mild white water. Currently, our kayaks are Future Beach Trophy 126's. A matching pair 'cause we are just that darned cute.


The kayak racks have also found a home in the bed of the truck when not in use. They store right next to the Hi-Lift. A couple of wide boards, properly fenestrated; some bolts, wing nuts, and PVC end caps make a rack to hold the crossbars is place just waiting for their chance to mount to the roof to haul some yaks to an interesting place.

Cutting and shaping
.......

Paint


The rear piece mounts to the bed rail


The front is removable and slides onto studs mounted to the side of the tool box.
kr

So far, everything is out of the way


Forum statistics

Threads
185,891
Messages
2,879,282
Members
225,450
Latest member
Rinzlerz
Top