So I am considering a 2016 Tundra purchase in the next few weeks and I love your build - keep up the good work! This is exciting stuff!
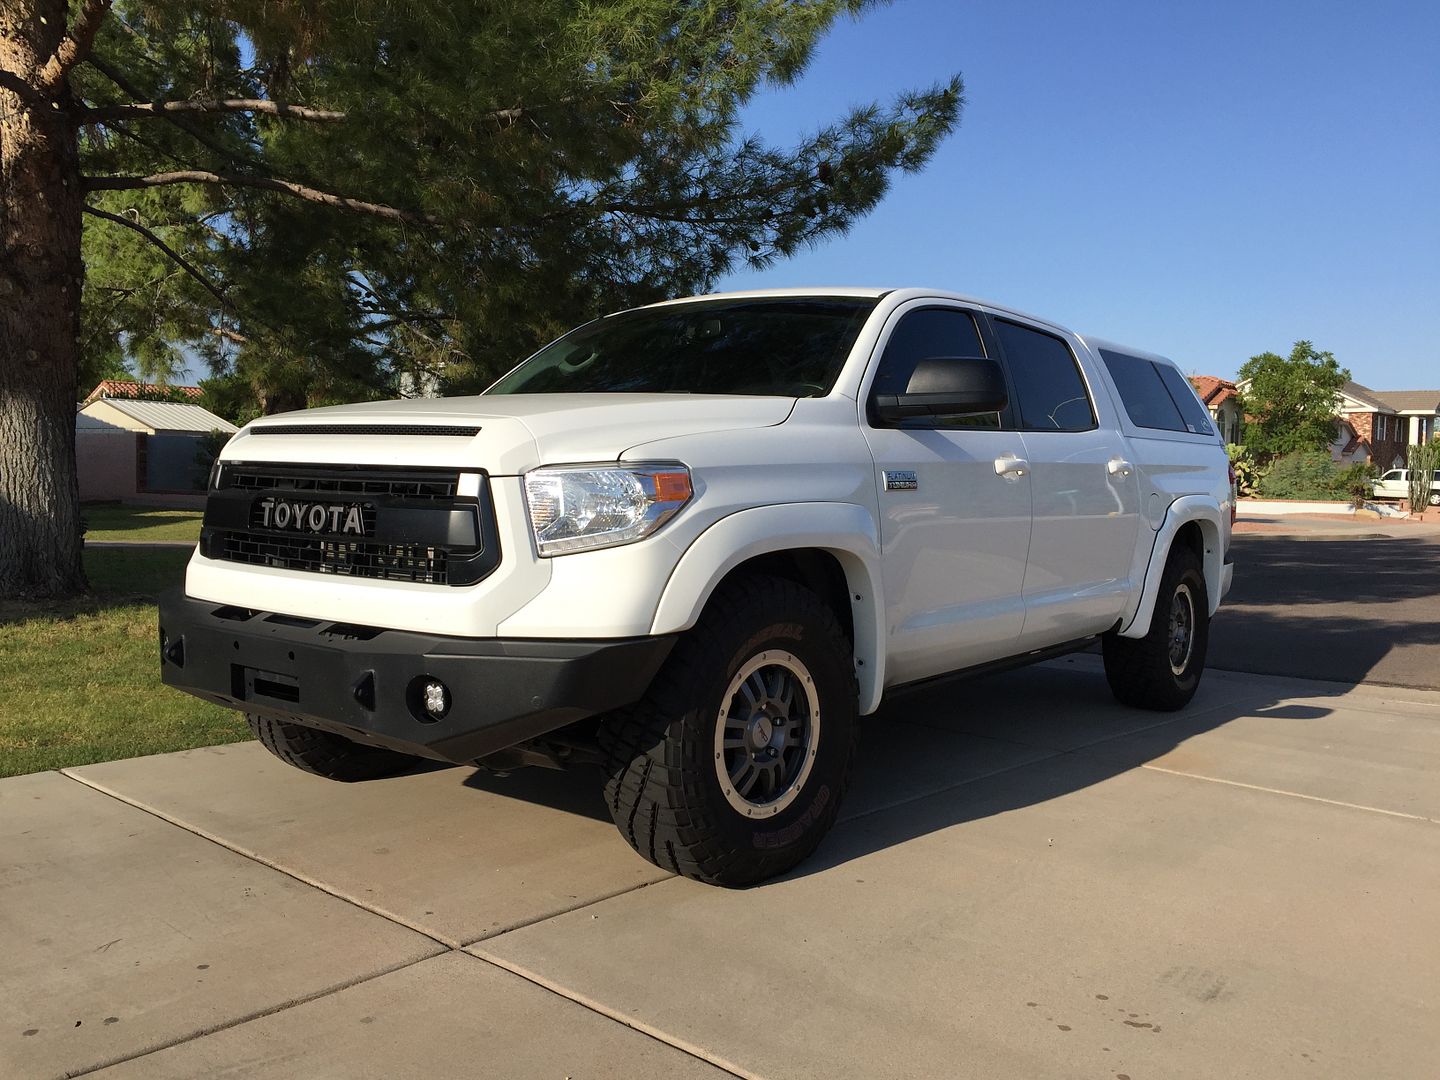
A finished pic of how I wanted the clean lines with the color matched door handles and fender flares
I will be getting busy this weekend, since I have lots of stuff to do. Now that I actually have more parts, it will come together more quickly
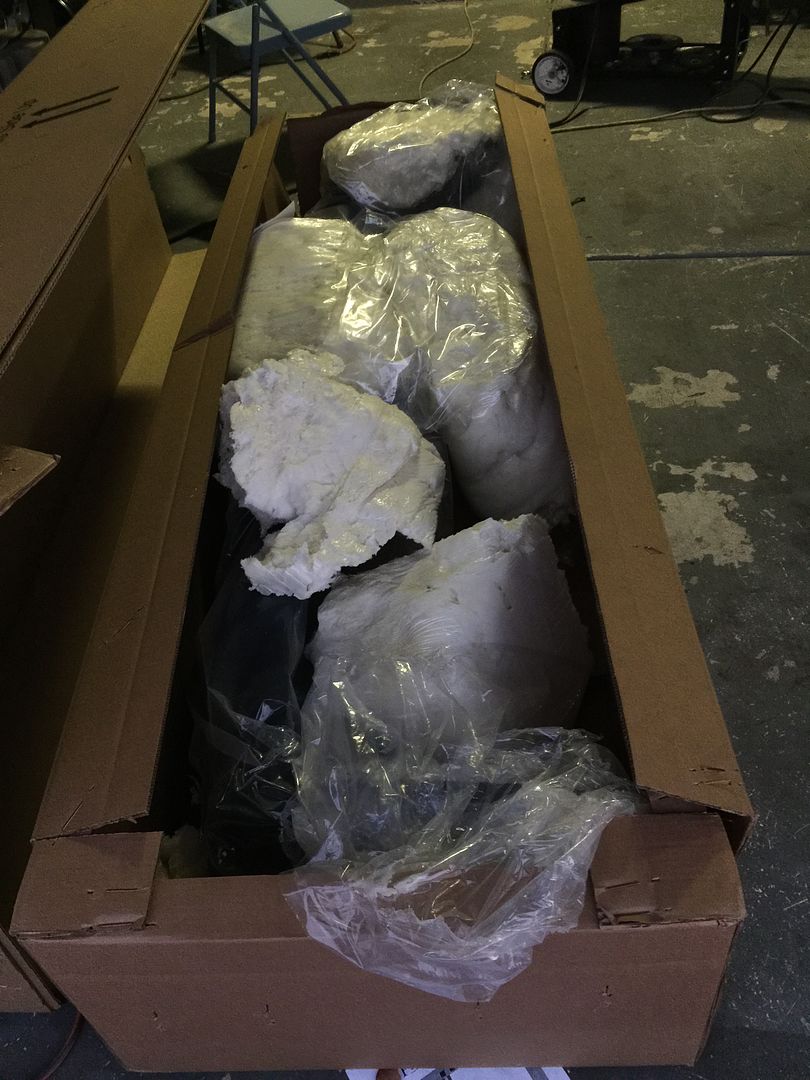
Expedition One rear bumper.
Tundra 2014 Bumpers | Expedition One
I cannot say enough about how this this is packaged up. It really takes the guess work on how to install it , plus whether it would be damaged in shipping. The top of the carton was messed up, but when I opened it up, everything was foamed and plastic to protect the entire bumper
It seems really stout too
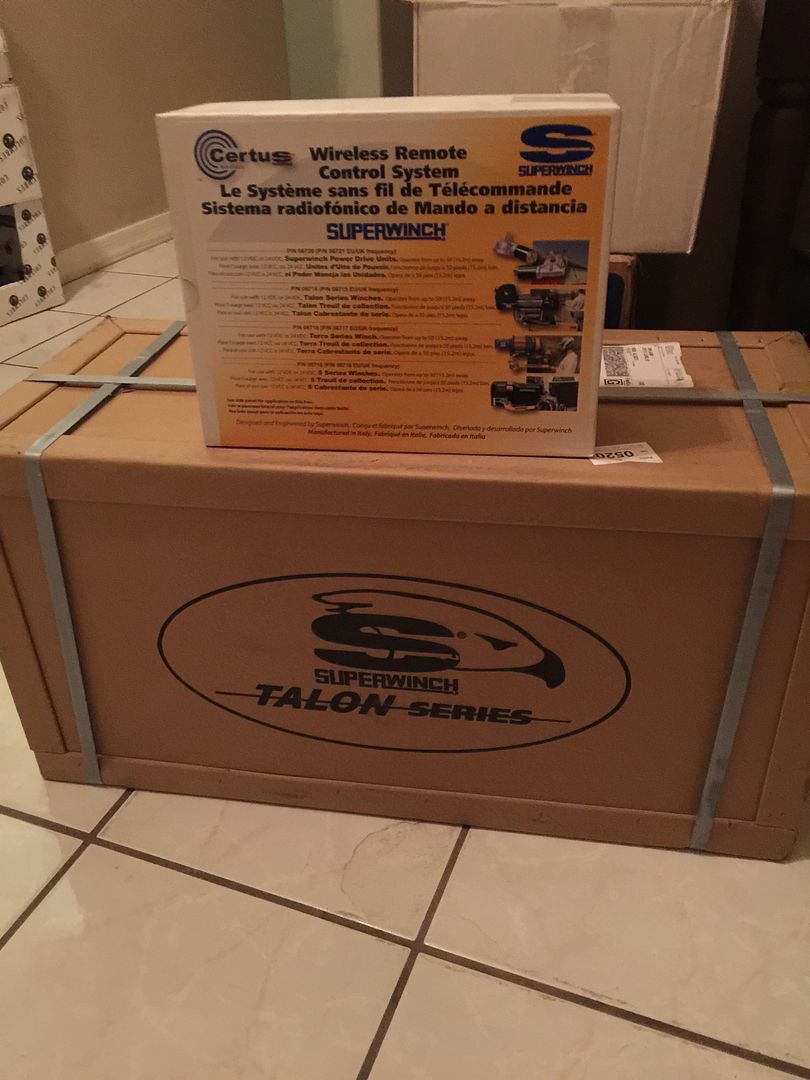
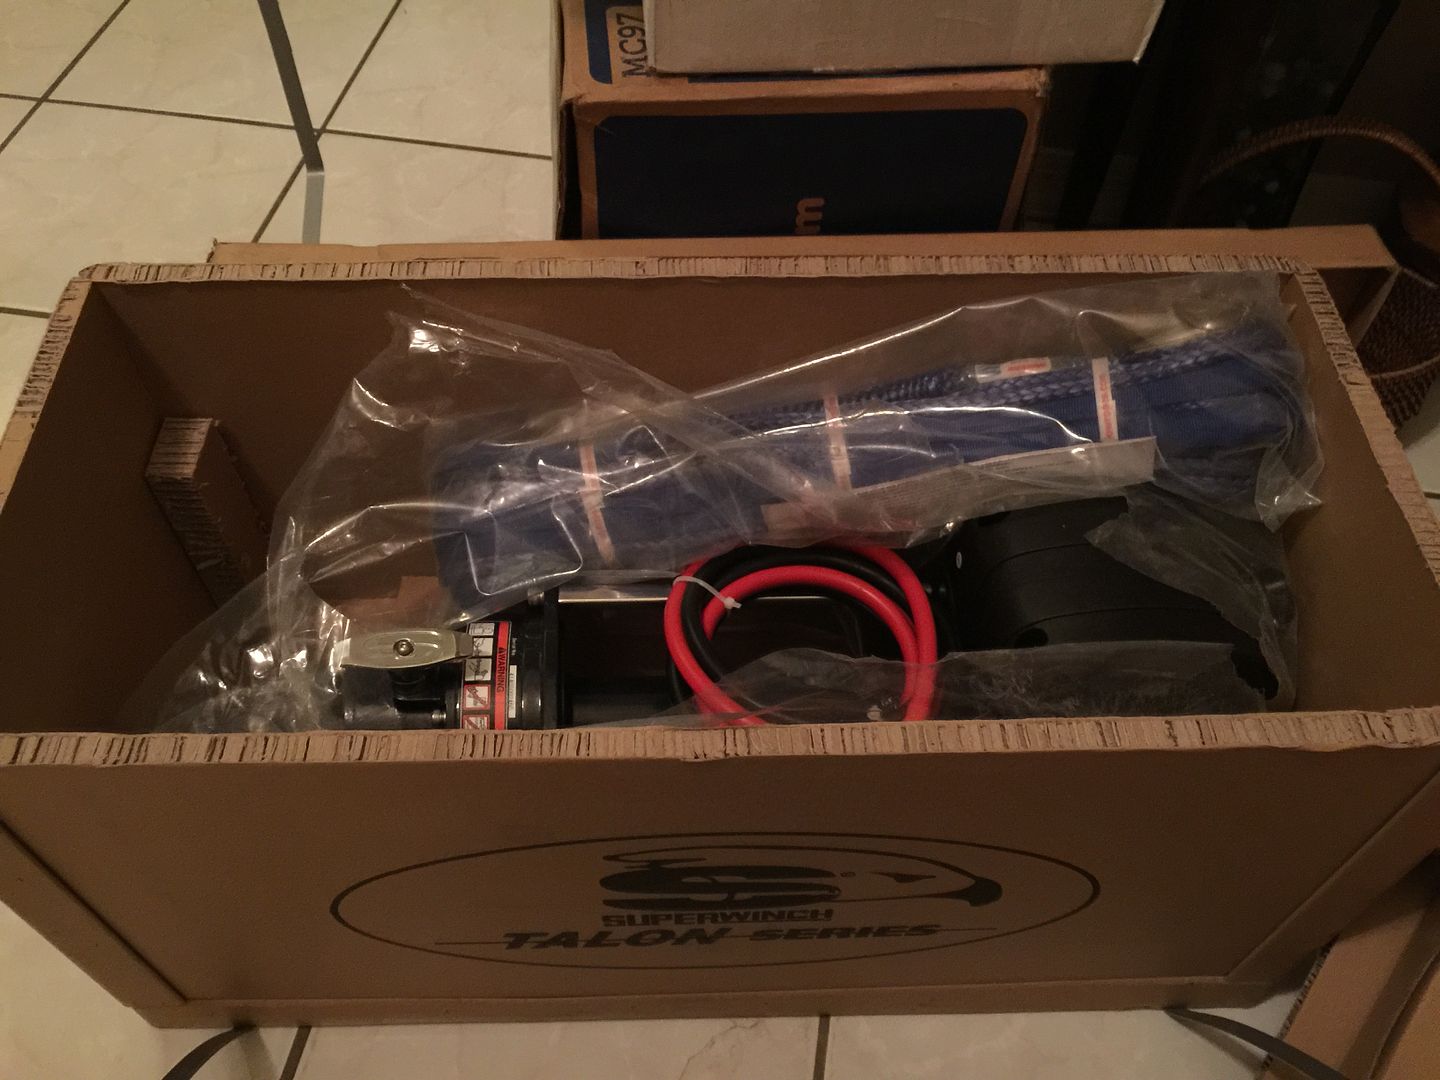
This also arrived today
Superwinch Talon 12.5
Superwinch, LLC - Talon 12.5 SR – 12,500 lbs/12V
This was also packaged well. It looks like a beast too. I am glad I got the synthetic rope. The top box is the wireless remote control
The rest of the roof rack was in and I drove to FED EX terminal to pick it up
I definitely have enough to do right now
Tomorrow morning I will be heading to GMG Fabrication, to finish installing and tweaking rack/battery box/lighting control/Extremeaire mount . Its almost there, but it needs some adjustments
I will get some pics after a few fit sessions
I went to GMG Fabrication (Joe) and made some progress on the platform, that will house the battery, Switch-Pro's, Dual battery controller, relay for the compressor and the compressor
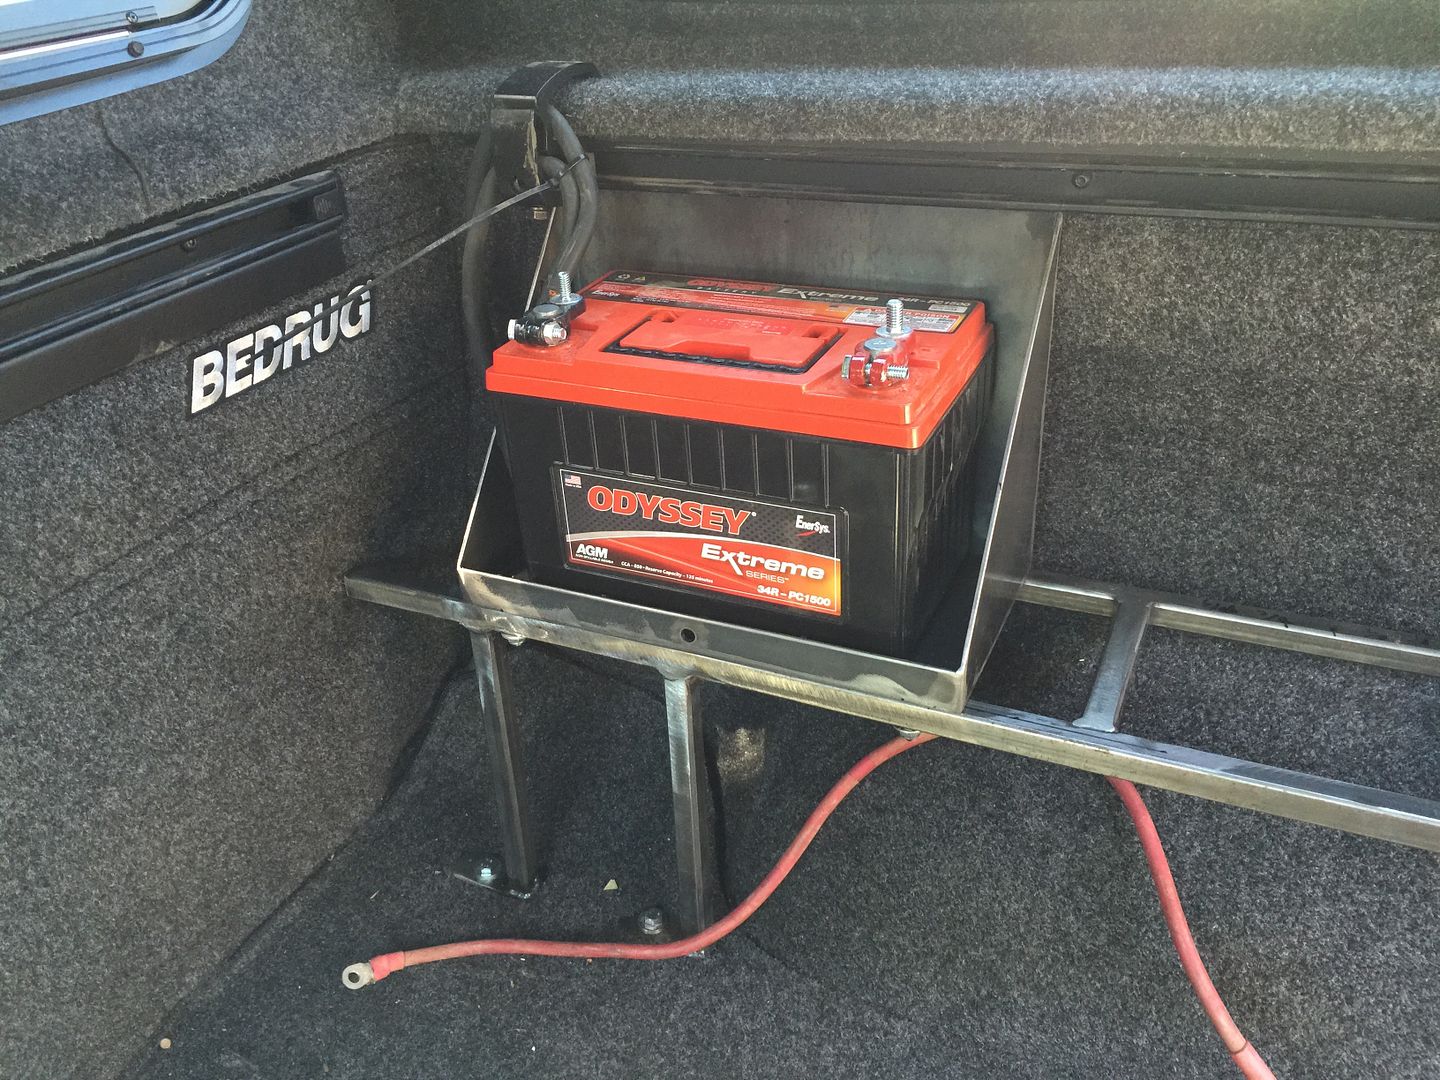
Here is the battery box and rest of frame, actually attached to the bed.
The center section will be the electronics and to the right , we are thinking of mounting the air tank, over the compressor . Then it will be skinned and finished of course
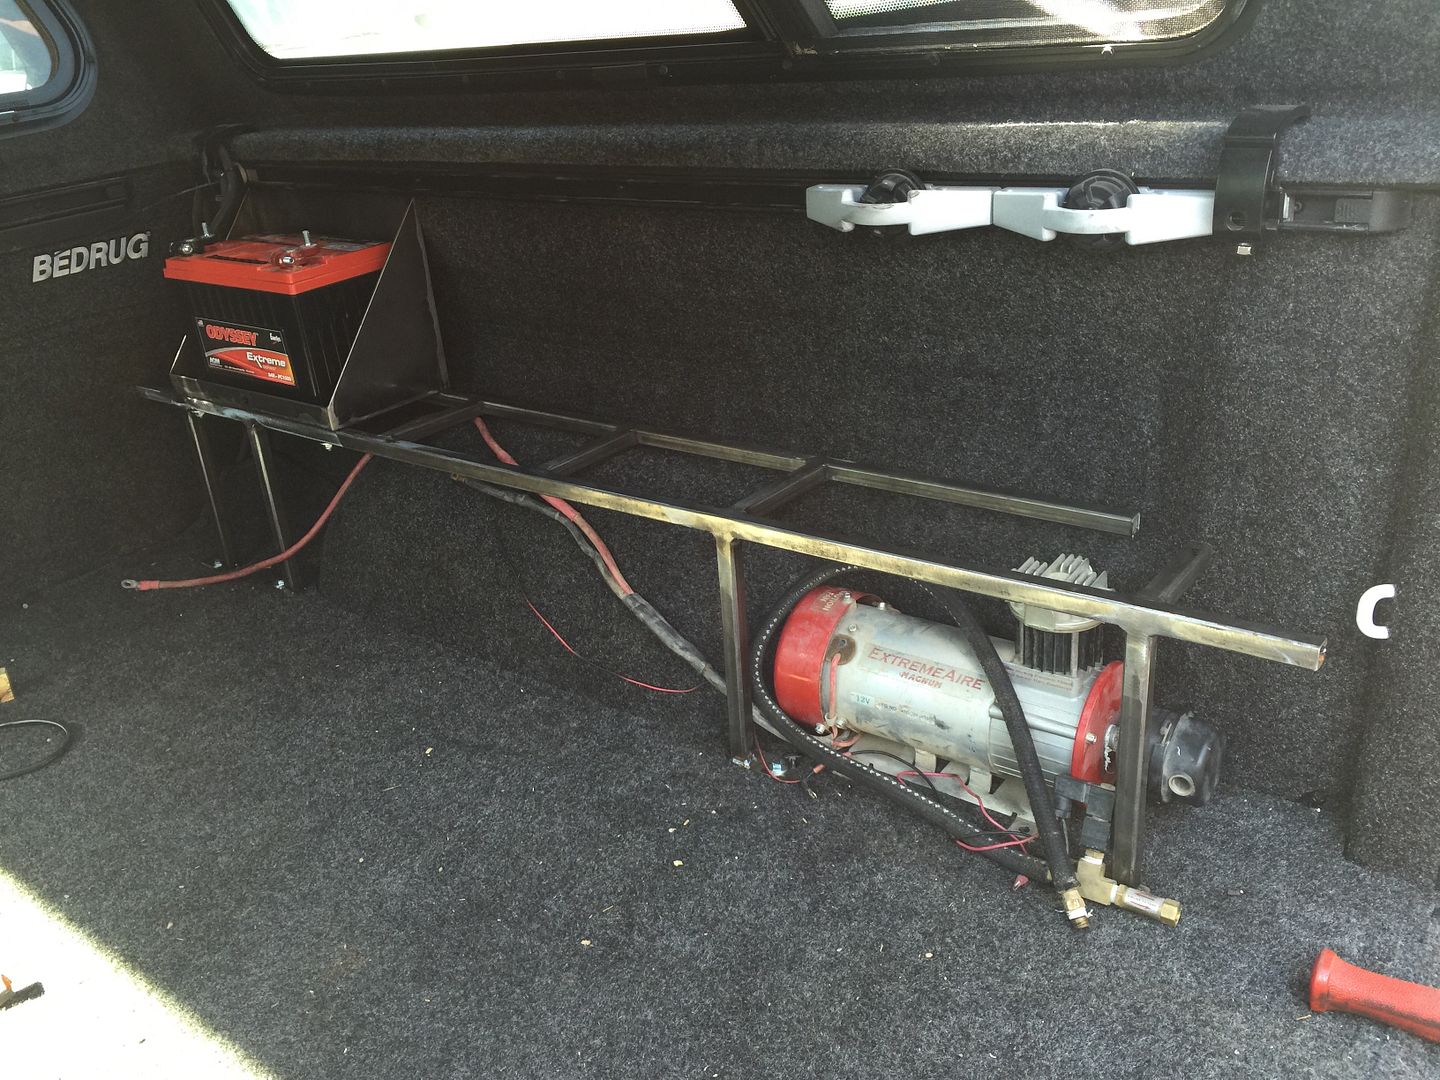
Battery box will have a mated cover .
It doesn't look like much right now, but it will come together quickly, now that we have the idea. We will probably make one on the other side for recovery equipment etc.
Left GMG , to picked up the spacers from 4Wheel Parts
Thanks Mark
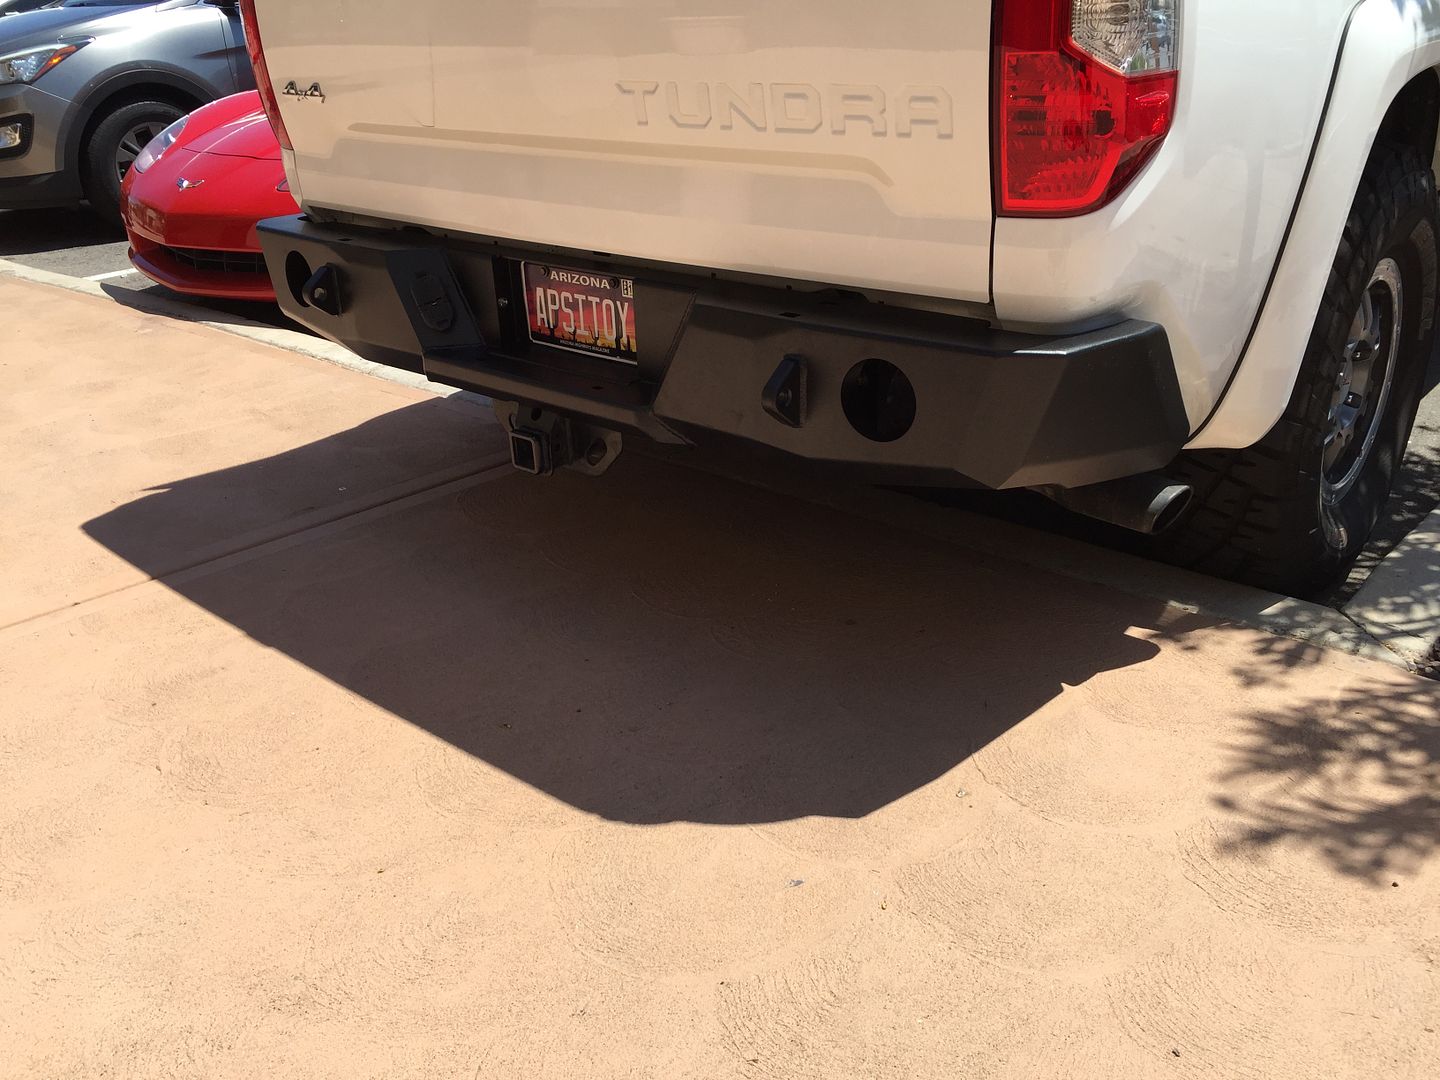
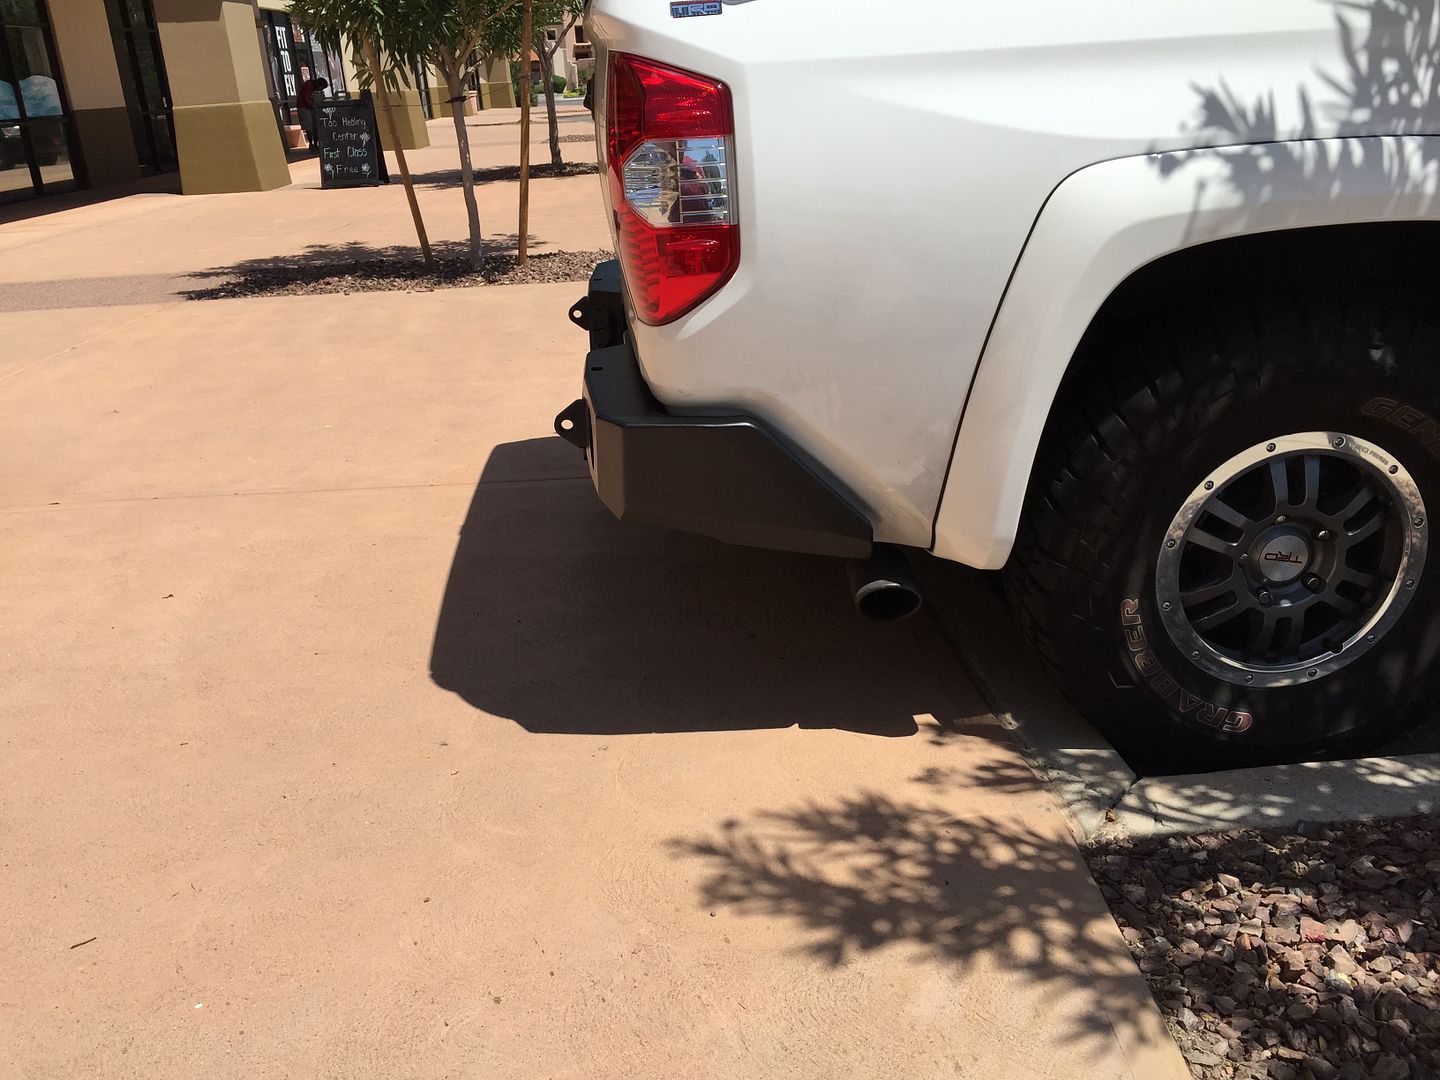
Went home and installed the rear bumper. A few things are not complete. License plate lights need to be wired in. Baja Designs Squadron sport wide driving lights will be installed in the pockets, for uber bright, reverse lights
")
Reverse sensors need to be drilled in too
The big scratch your head moment is that I no longer have blind spot monitors. The way they work in the stock bumper is there is actually a box, or module at fits against the tupperware trim piece on each corner. Since this one is steel, I bet it wont work through it . I may have to do something custom here, but my thought is to try and get them to work as designed. We will see what I can come up with for that
I love the look of the bumper . It mates to the body lines really well.
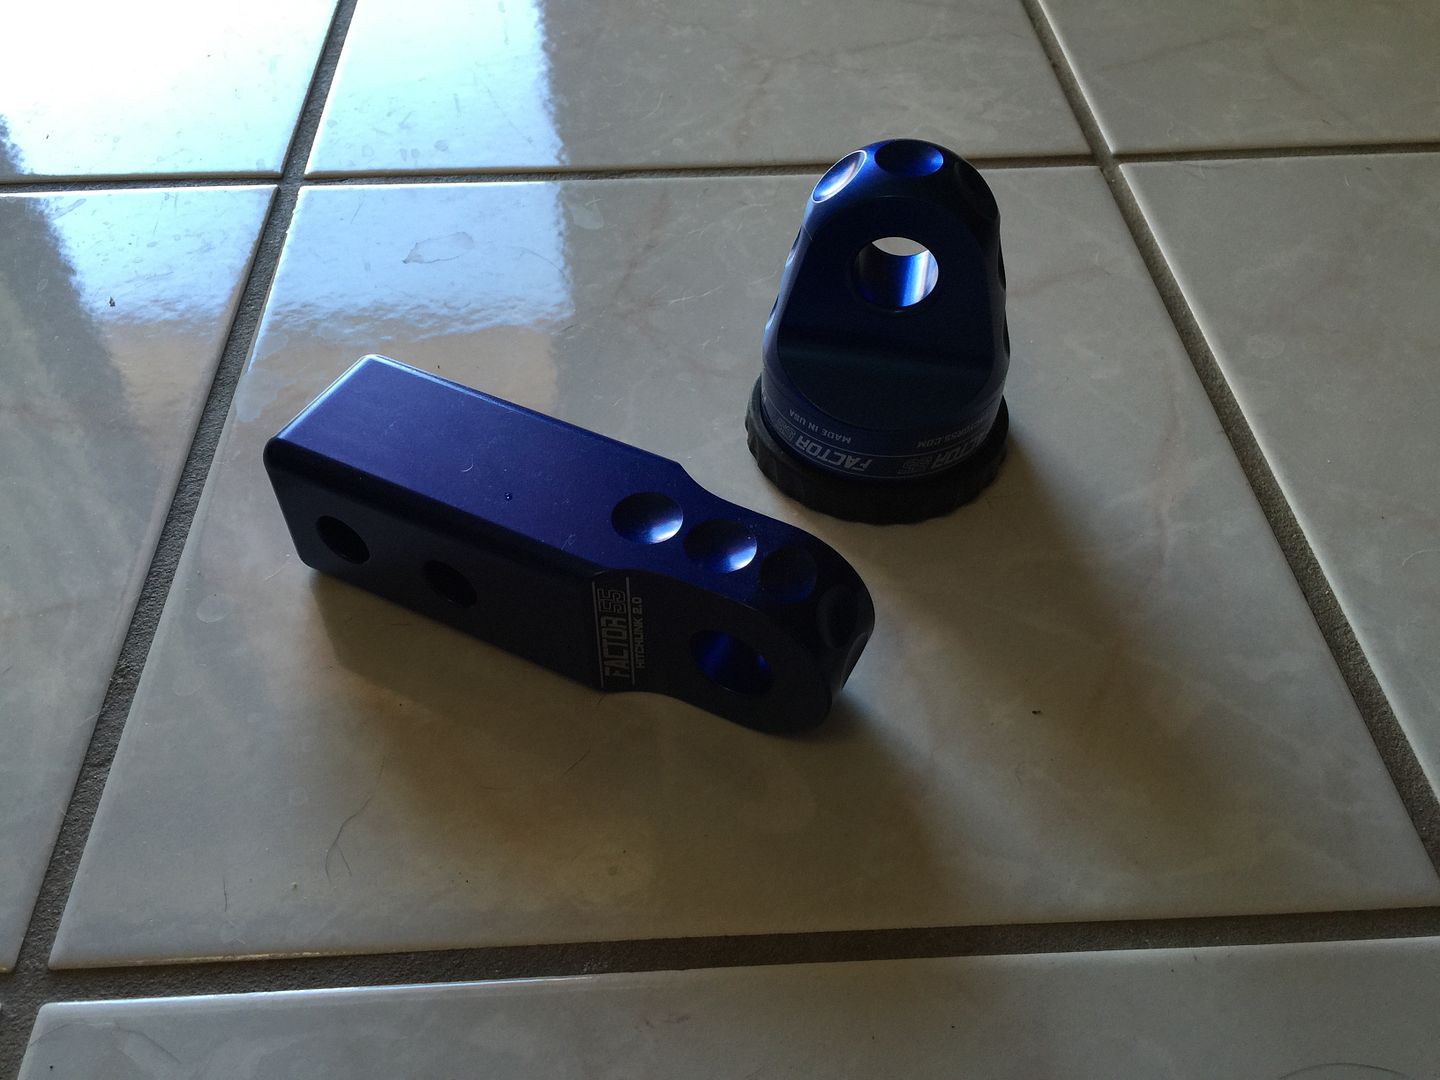
USPS dropped off a box from Factor 55
Now I have everything I need for the winch install
Last but not least
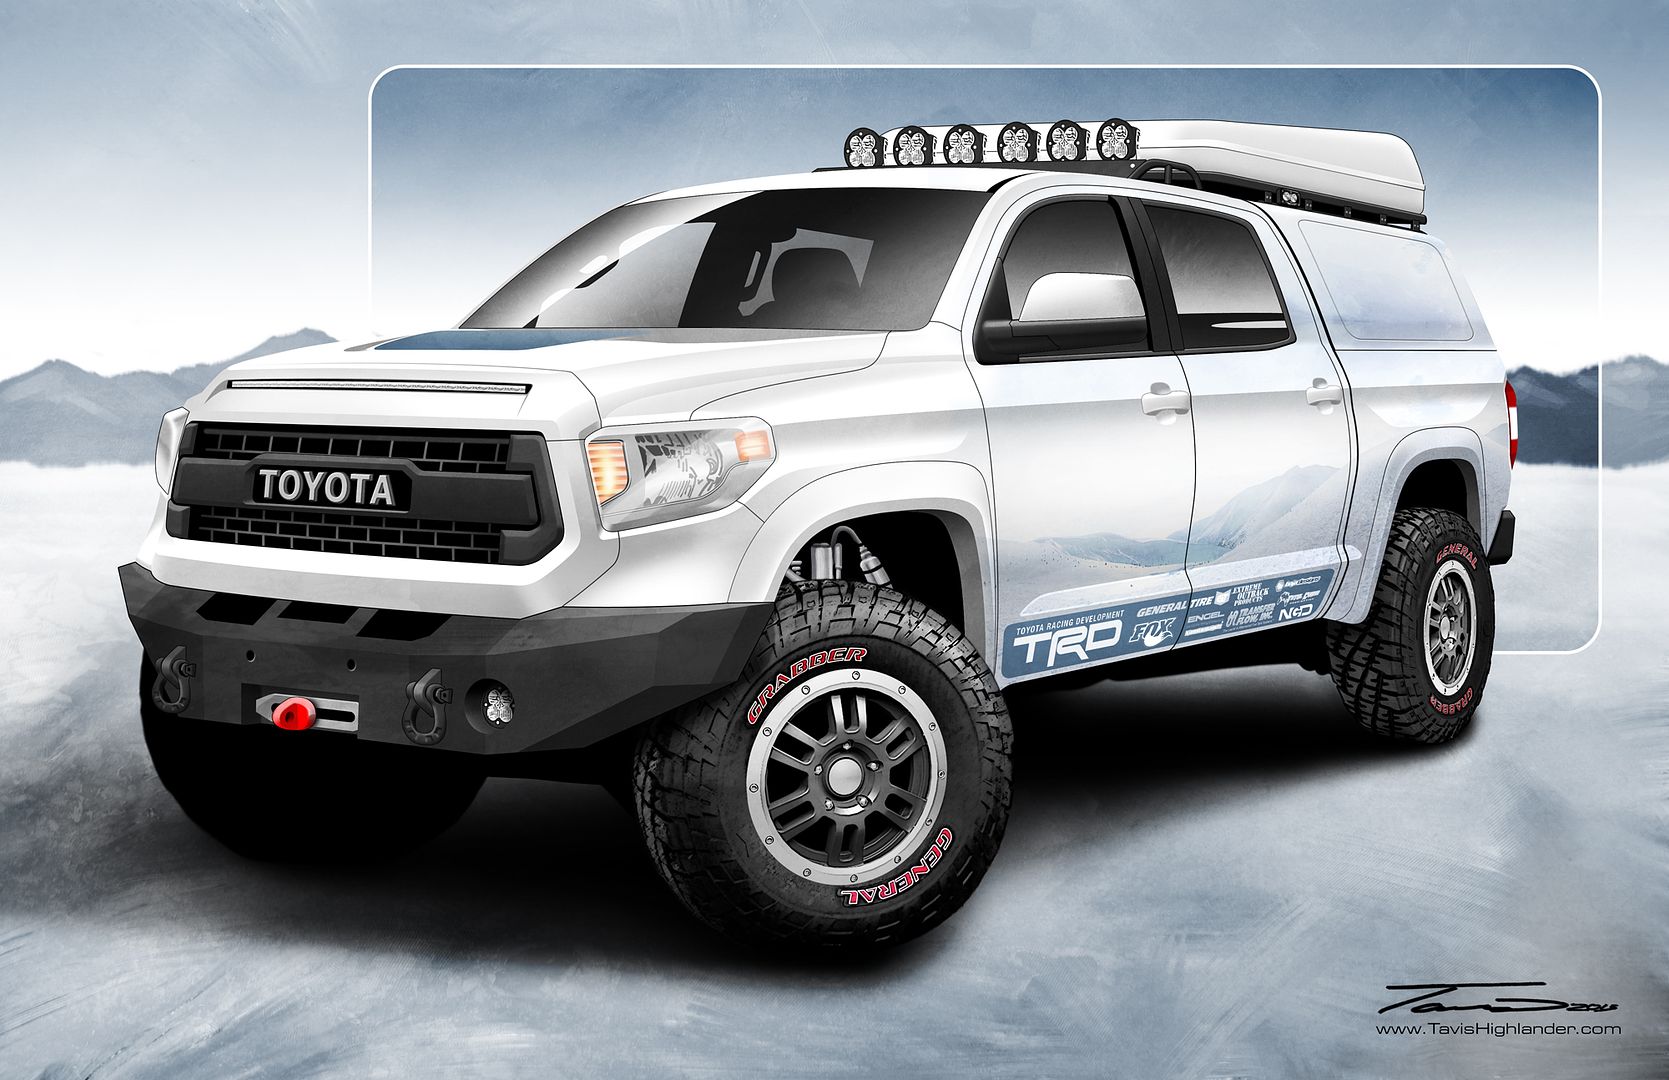
When I dreamed up this project, I hired Tavis Highlander Graphic Designs to create a rendering . He is amazing and put my thought to print almost exactly how I envisioned it . If you plan on building a project, that you want to set your goals for, this is the way to do it.
I debated about posting a pic of the rendering, but since it's starting to take shape, I thought it would be fun to get impressions, of how it follows my thought . The blue highlights you see are actually the wrap I designed. It is suppose to be subtle. I want the build itself be the focus. The wrap is just suppose to be a hint of Arctic landscape
There are some lights missing on the bumper, but I will have him add that to the rendering and get the final artwork from him when its complete
Here is the rendering. I may or may not leave it up, but for now ...