"Arctica" 2015 Crewmax Platinum Tundra Build

wikid

Adventurer
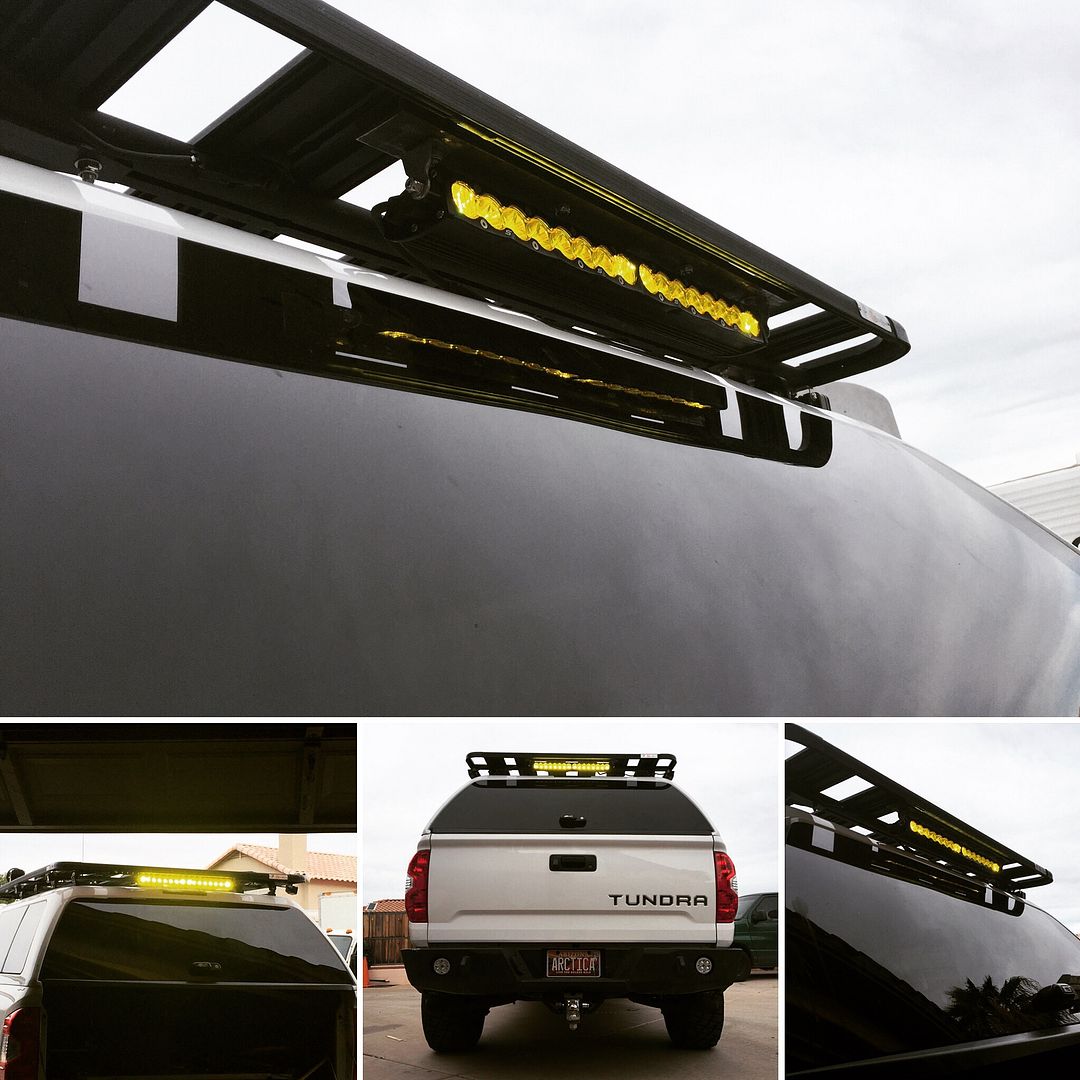
I took a few mounted pics of the rear light, before I sent it off to DBCustomz, for grill fitting. Since I got both lights and the 30" will be in the grill, I figured he could use the 20",to fit for a Taco grill, or something
He is making a grill for my truck. It may have a few special things. I may even have a TRD Pro grill for sale, if it works out ;)

Here are a few, but they are daylight, so they don't look that great

The mounting was easy, with the channels in the roof rack I just made a mount the width of the light brackets and used the slide mounts, to attach to the rack


Backlit feature
Again, its daylight, so it really doesn't do it any justice


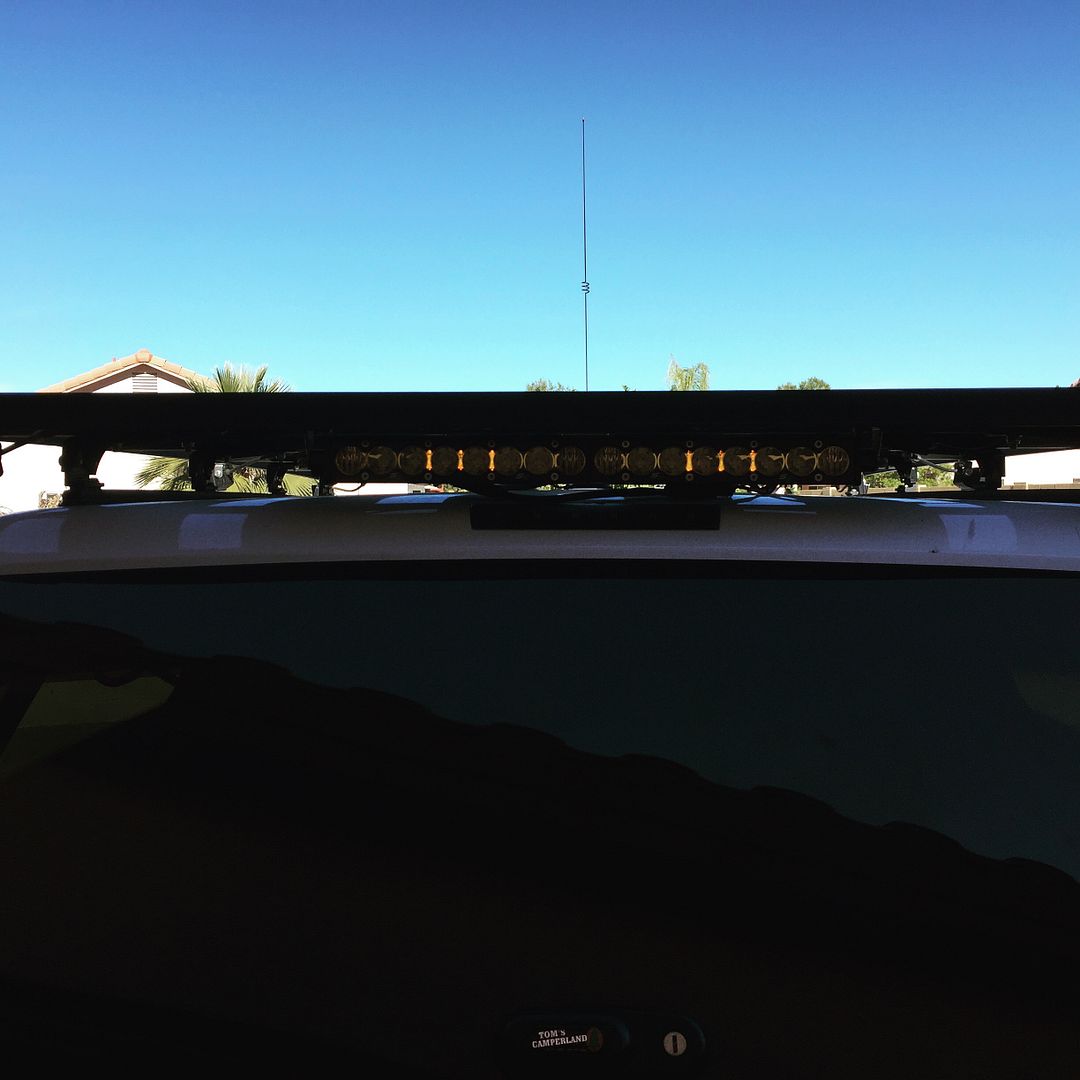
Looks good in the back , but when its mounted in the grill, it really should pop. Plus since it's 30" it will add 12000 lumens of amber light, to the front, with a 80/20 spot/beam, pattern
 

wikid

Adventurer
Wheels of progress have slowed with business stuff and delays, until last week. One of the projects that has been hanging out there is the front grill project that will house my 30" S8 . I have had that light in my office for an eternity, it seems, but I finally have something to show now.


It arrived Thursday Evening, but my truck was suppose to be displayed at the Super Cross Event in the pits on Saturday . Needless to say , since it was a custom install and the first one off, it took Friday and early Saturday to finish it up. Here is the direction I went with it


I love the back lit feature


A little montage, to show the different scenarios.


The fact that it accomplished getting my light, where I thought it should be, then added some flare to the project, was a bonus . The back lit feature is tied into the back lit circuit on the rear S8. I feel like it came out better than I pictured it. In the panic to get it done for Saturday and also wanting to see how the color layout would look. I painted it. When I decide if this is how I want to look, it will be removed and powder coated. I may anodize the aluminum face piece. I just don't know yet
 

wikid

Adventurer
There has been a lull in the action with my build. Business is crazy, so truck time hasn't been there. I wasn't settled with the rear suspension. it just seemed like it was too low. A little sag may have occurred as well . Without rebuilding the springs again., or using blocks, I decided to try out the coachbuilder shackles. After talking to David at Ekstrom and sending him a few pics we came up with a plan. 3+ Coachbuilder shackles and poly bushings, driveline spacers, Steering kit, 2 sets of shims for a little boost on the front. I may only use one set for .50 inch raise, we will see . I will post up pics after last weekends install, but I can already tell the difference in how planted the rear feels with the shackles. Love it
Here are a few pics of the products
I am impressed with the thought put into the packaging. says something about the products you are using


Sexy billet for the front. That will go on this week sometime


I will decide if shims are in order, by the height from back to front form the shackle install

here is a rough idea of the improvement
The before picture seems to be exaggerated, but maybe it was actually sitting that way or the driveway caused it to look worse than it was
 

wikid

Adventurer
We did our annual road trip to Colorado for the FJ Cruisers Summit

But then.... I wanted to take a side trip to Moab for a specific trail.
I did many searches on the internet to find a full size crewmax type truck on the precipice, at the Top of the World Trail . I couldn't find one..
So I thought maybe I should take that challenge to see if I could park mine up there. Maybe there have been others, but I couldn't find proof of it so ,,
After about 3.5 hours of technical driving to get up there, ..


Considering how heavy these things, especially mine, I got spotted up on the rock and stayed inside the truck, with my hands at 10-2, playing the scenario in my mind of hearing the rock begin to crack and how fast I could reverse to get off the rock :eek:


The most interesting part was the trip back down. Instead of going the way we came I decided to try the back side. It was almost mistake, because it was a lot harder and much more careful spotting was necessary . It took almost 4.5 hours to get back down

This trip will make print in TCT Magazine next issue

This was a difficult task. I don't know that I would recommend doing this with a trail limo ;)


wikid

Adventurer
Yeah Thanks
I will pull the flare a pull down the panel it should be fine

Next project, up to bat


I have been bugged by the TRD Dual exhaust exit pipes for a long time. I just don't like how it looks back there.
I have been working on figuring out how to have them redone
I went to Apache Muffler and first decided I couldn't pull the pipes to the corner like I wanted to, especially the way I wanted them to drop, so I was just going to exit straight back like all the pipes I see, but try to dump them down, from above the bumper line.
I searched the internet for something I liked and did a little figuring under the truck .
Then I found a way!!
I'm kind of an exhaust snob

Before


After


The Coachbuilder 3+ shackles were actually a big factor, why this would work out

There is actually enough room between the back near the shackle to slide the pipe between, without it getting crushed or even touching the spring.

I would be surprised if I ever had a noise from it

Here is the routing


This is the cleaner way I wanted to see it


The guys at Apache Muffler in Mesa AZ, are really good . I have gone to them for years with my projects
 

Forum statistics

Threads
185,911
Messages
2,879,531
Members
225,497
Latest member
WonaWarrior
Top