Redeth's Overland Trailer Build

Redeth005

Adventurer
Despite all the activities we did this weekend yesterday my girl and i managed to get some work done on the trailer. A few weeks ago we bought a couple of yards of general automotive weatherstripping material and some all purpose weatherstripping/gasket adhesive. And we finally got around to installing it to all the doors.
i think he was selling it for 14 bucks per yard give or take.
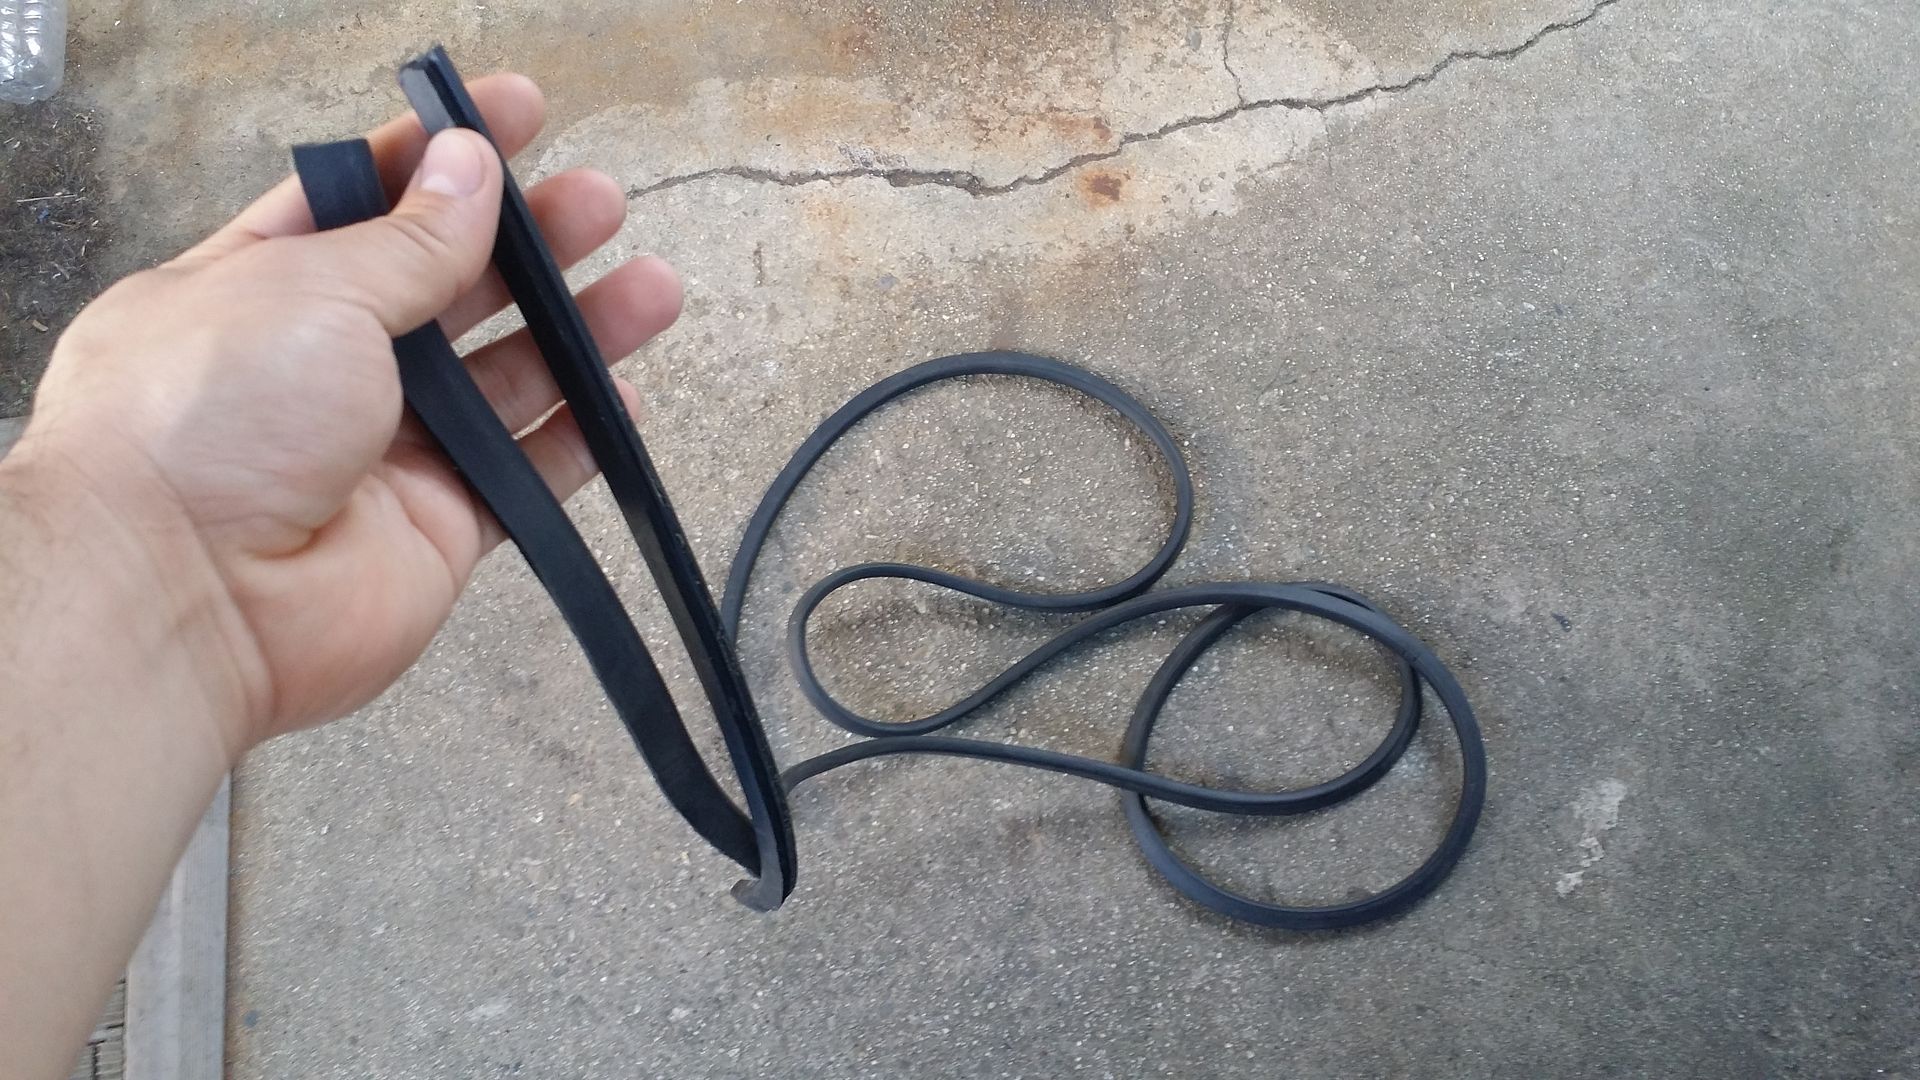
This is what is left of the Weather stripping. I forget how many yards worth i bought but it cost me about 60 or 80 bucks from a guy who sells this stuff at a local swapmeet.


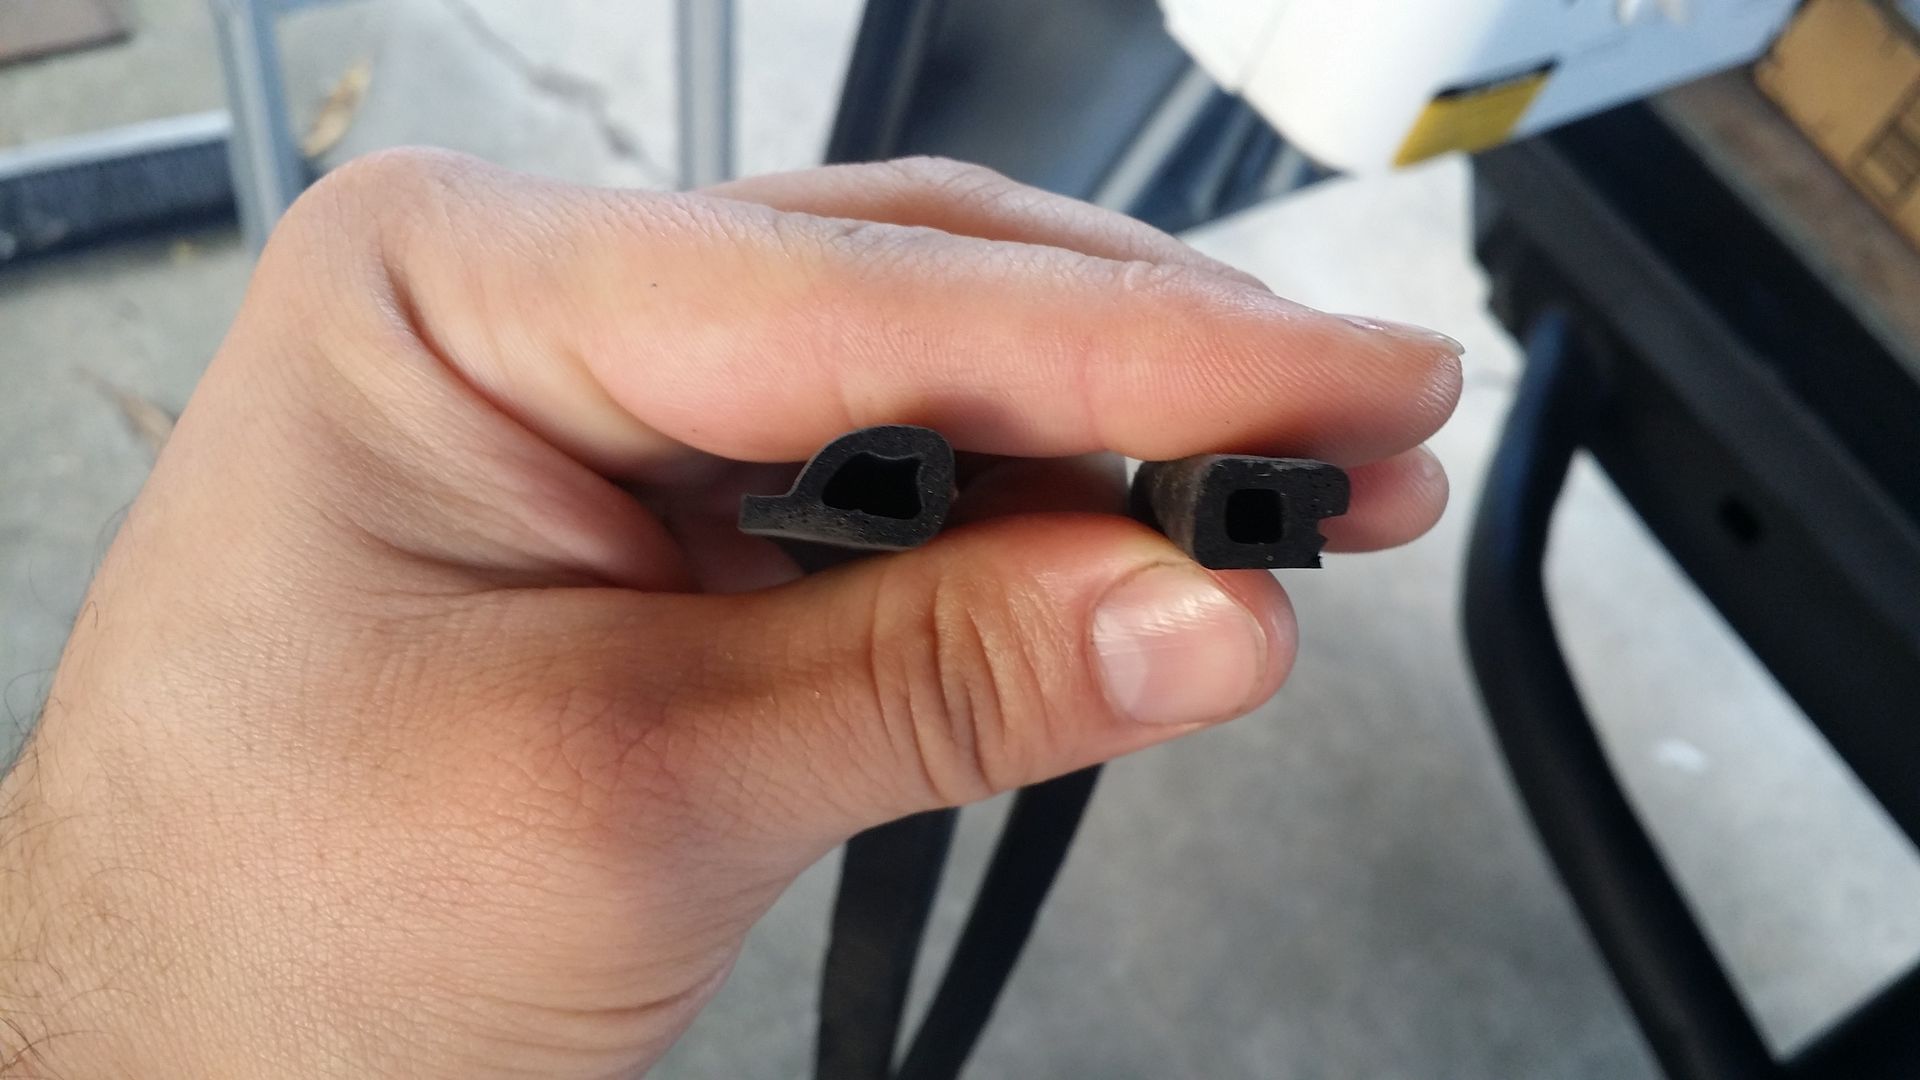
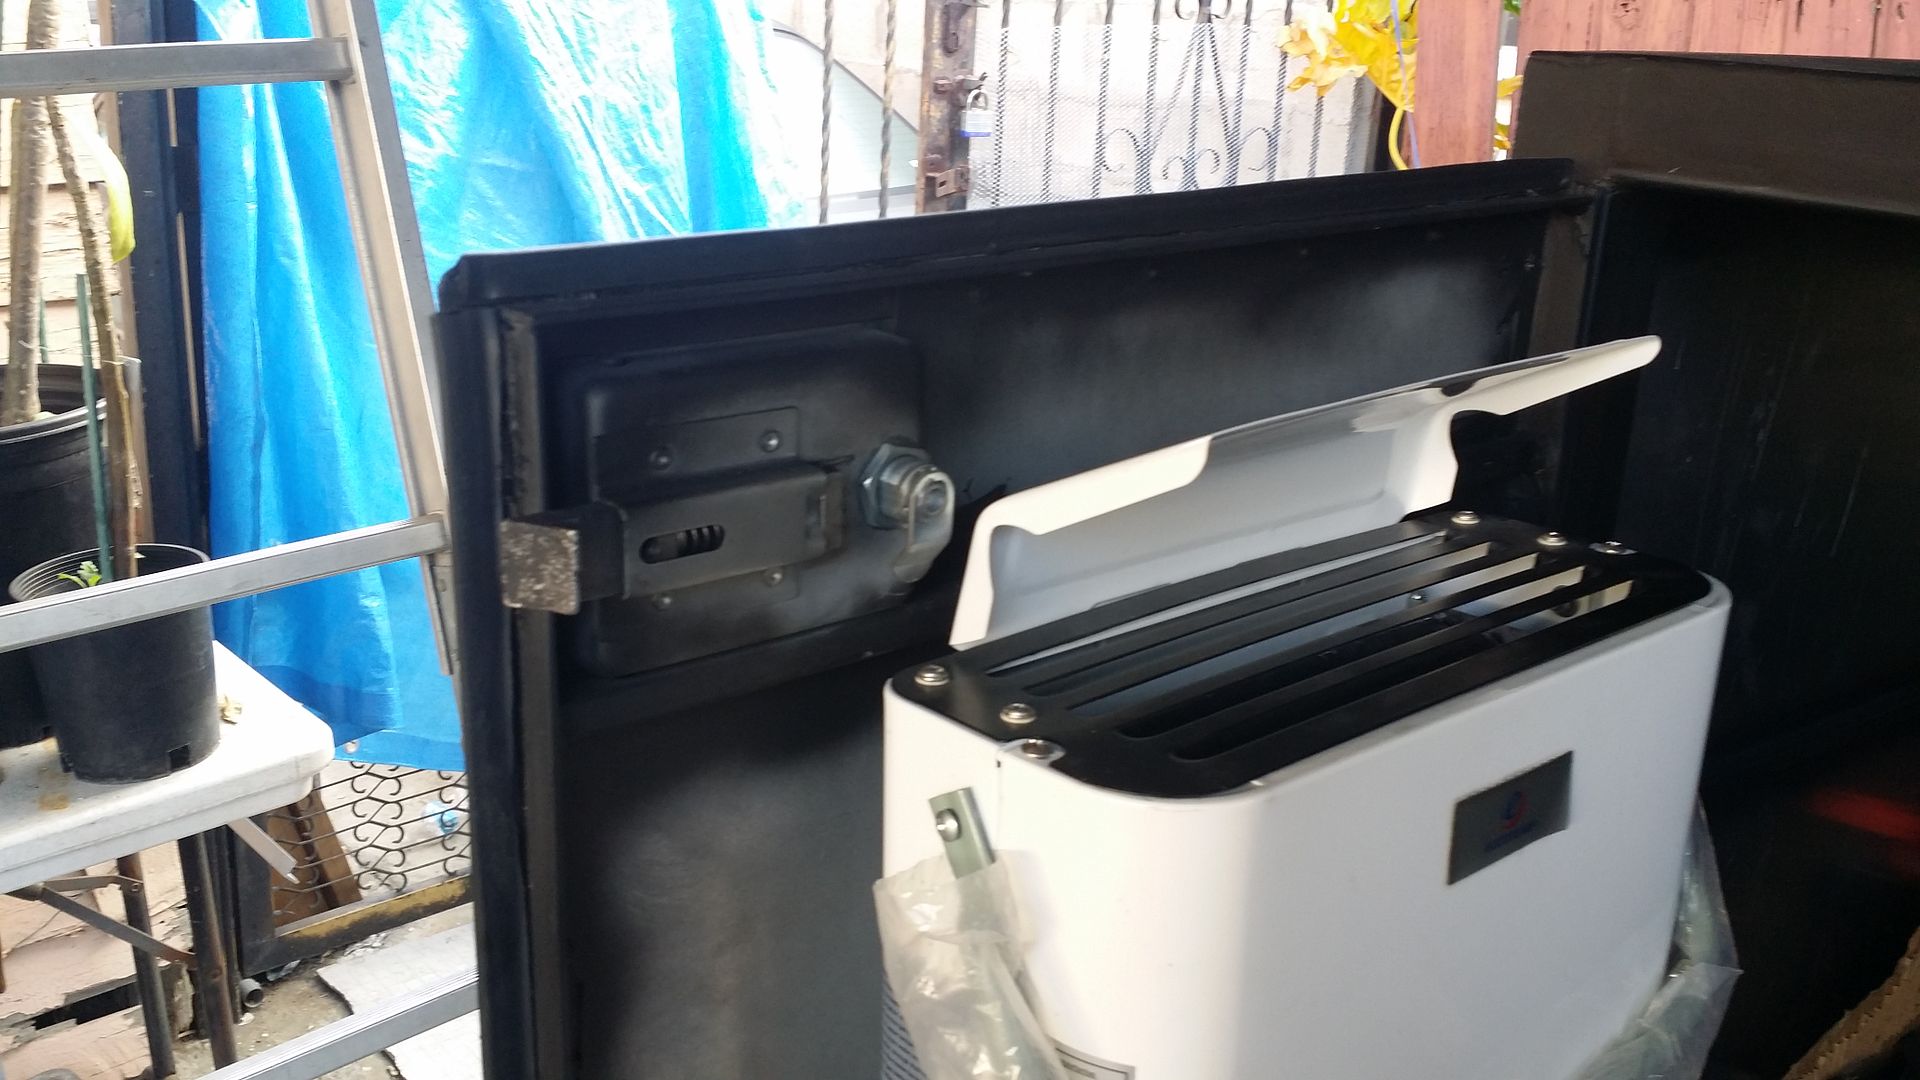
I Used 2 different shapes of stripping. the one on the left was used to fit in he smaller spaces where the hinges are. The right one was used for he remainder of he sides


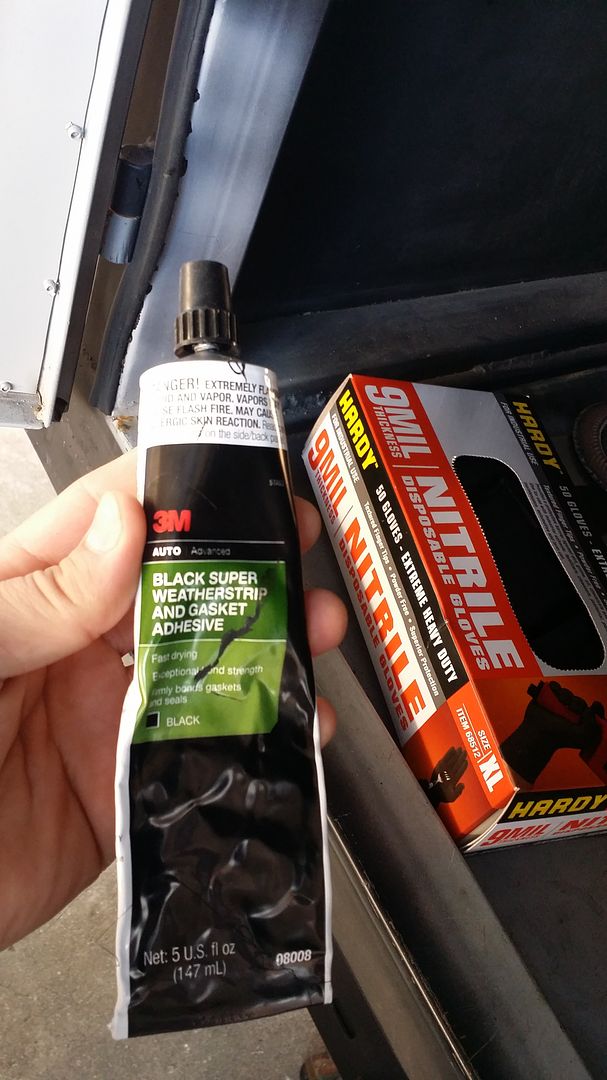
This is the Adhesive that is used for the weather striping. I bought it at autozone for about $6. If you have sensitive skin i highly suggest you wear gloves. my girl's fingers rashed and became slightly inflamed and itchy when it came in contact with her.


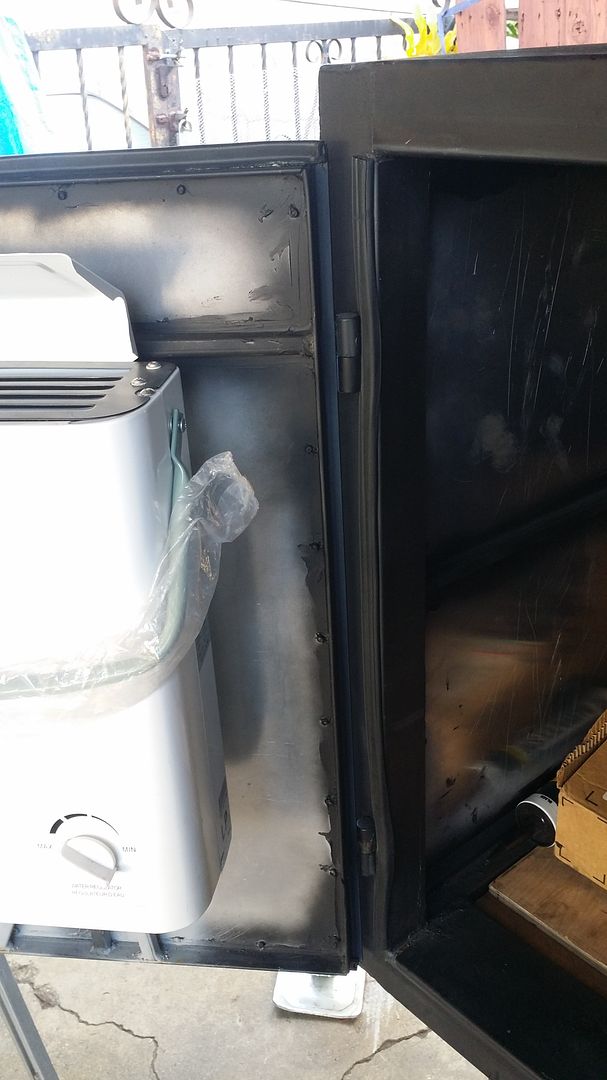
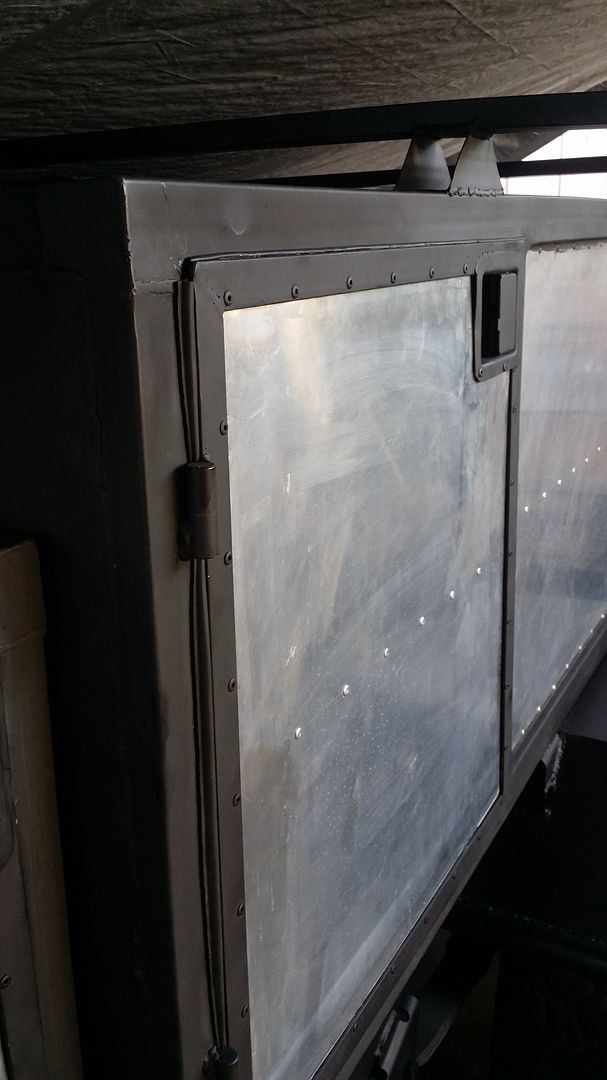
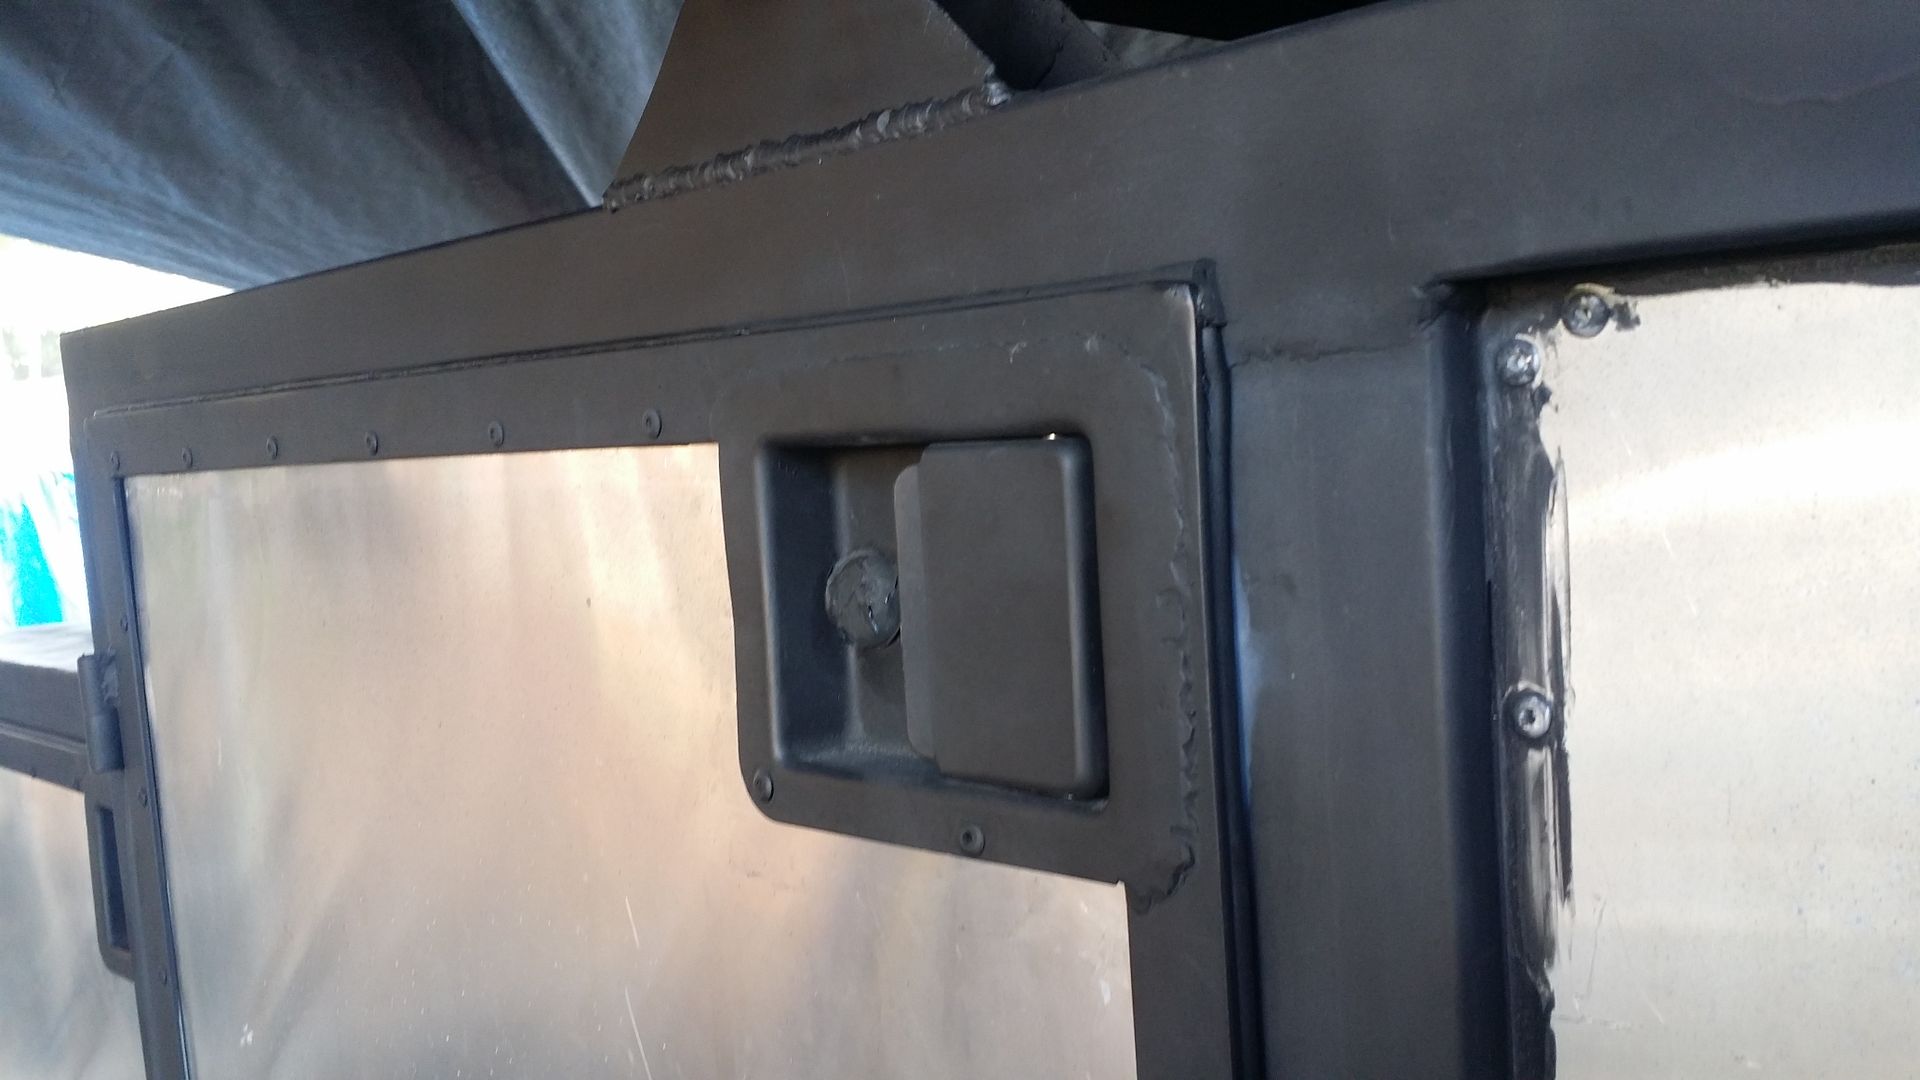
Here you can see it smashed along the door frame. That outta keep the water out when it rains! I'll have to test it put with a water hose soon.


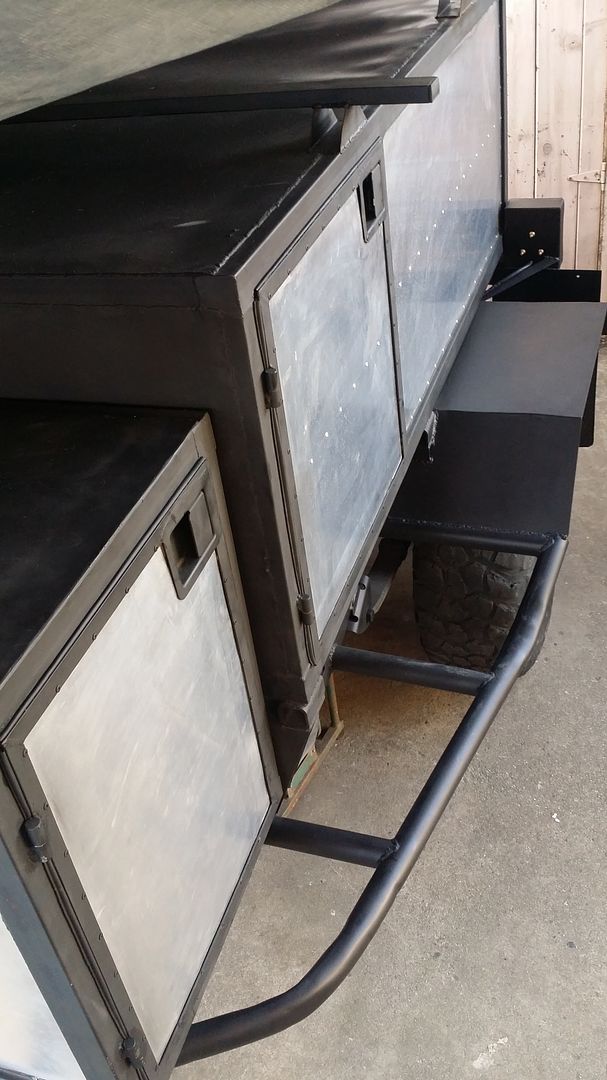
So i used one strip near the hinges on the trailer itself because i ran into issues with i mounting on the door side for that portion. But the rest of the 3 sides were all mounted on he door as you can see in the rest of the pix.


Last edited:

JandDGreens

Adventurer
Have you Taken the trailer to be inspected already? (done the MV-title-registration?). I am looking forward to just getting mine done far enough to do that part. Once it is street legal I'll add the luxury items over time.

It looks like your almost ready to take a trip to Moab!
 

Redeth005

Adventurer
Have you Taken the trailer to be inspected already? (done the MV-title-registration?). I am looking forward to just getting mine done far enough to do that part. Once it is street legal I'll add the luxury items over time.

It looks like your almost ready to take a trip to Moab!

Not yet, but I'm just as anxious! I still need to install the trailer wire harness with drum brake wires. And I have 4 amber trail gear running lights that I want to install on the sides of the trailer; I'm just trying to figure out what wires I need to tap in to for running lights. If i decide to turn them into running lights I know i definitely need to use a brown wire but I don't know what to tap into for ground. And if I want to use them as side turn signals instead I think i need to tap into brown/green and brown/yellow depending on which side I work on.

I'm still just a little confused over how a 7 pole wire harness works. Especially since color code is a bit different. I wish there were a simple explanation on how to wire brakes, running lights, tail lights and what the difference is between the 12v power and Aux power wires.
 

JandDGreens

Adventurer
Yeah Wiring Is not going to be fun for me either. And out of everything that is involved wiring and vehicles is not my forte, I am going to have trailer brakes for mine so even more complicated. Should be interesting. I don't know how I will do it but I would like to run a additional 4-prong harness to the rear so that if I get around to building a Motorcycle carrier for the rear of the camper I can have brake/turn signal lights wired onto it to plug in while it's mounted to the trailer.
 

Redeth005

Adventurer
Yeah Wiring Is not going to be fun for me either. And out of everything that is involved wiring and vehicles is not my forte, I am going to have trailer brakes for mine so even more complicated. Should be interesting. I don't know how I will do it but I would like to run a additional 4-prong harness to the rear so that if I get around to building a Motorcycle carrier for the rear of the camper I can have brake/turn signal lights wired onto it to plug in while it's mounted to the trailer.

i would only be 4 wires you would need to tap into i think. just the brown, yellow, green and white. You could actually just tap into the wires that lead into the tail lights and just ground a white wire to the chassis. That one sounds pretty easy to do. I would just go to a junk yard and pull a 4 prong connector with maybe 3ft of slack. I'm sure that would be enough.
 

Ovrlnd Rd

Adventurer
Just watched your video on the Propex 2000 heater. Now that you've had it a while, how do you like it? Do you use it enough to feel the cost was justified?
 

Redeth005

Adventurer
Just watched your video on the Propex 2000 heater. Now that you've had it a while, how do you like it? Do you use it enough to feel the cost was justified?
Well I have had the heater for over a year or so but I haven't gone camping for a long while. And I still haven't installed it to the trailer yet. The video I made was just to show everyone in more descriptive video how it works. I will be posting new videos whenever the time comes to install that heater. I'm really looking forward to testing it out during cold weather camping. I'm sure my girl will love it since she always gets super cold at night.
 

JandDGreens

Adventurer
Heater Review

I am looking forward to knowing your full opinion on how the heater works too. I am going to make the space to install one as my ultimate heat source. But a lot of things will come as the years go by. My main goal is to just make it usable as a sleeping area & camping gear hauler and add things as time goes by. Until then heat will be sourced with a little Buddy (limited) at lower (8,000) elevations. Like Moab and such.
 

Redeth005

Adventurer
I finally got my Tekonsha Prodigy p3 Brake controller and 20 amp circuit breaker.

I bought it off of etrailer.com for $120.95. Shipping was free since it was over 100 bucks.

Here is a link to it if you want to check it out or buy one for yourself:
https://www.etrailer.com/Brake-Controller/Toyota/4Runner/1989/90195.html?vehicleid=1989203477

I chose a proportional brake controller over the time delayed brake controller because i am more concerned with getting into an accident on the highway and/or street due to lack of braking power my truck has to stop the trailer. I already have an issue stopping abruptly with the weight of my 4Runner and rolling on 35" tires. So i read many reviews and most people favored the Tekonsha Prodigy P2 and P3 models. After Further investigation i liked the fact that the P3 has 5 storable settings so i switch between the trailer settings to give it more braking power during off-road use.

Wire Diagram


Here is all it comes with. (20amp circuit breaker not included) I ordered a 20amp inline circuit breaker for the positive lead on he prodigy P3. You need a 20 amp for running a 1 axle application such as mine.


I bought the breaker on Amazon for about $10.

I'm really hoping to get around to installing it on the truck so i can finally start doing a mock up of my trailer wire harness to make sure everything works properly before i permanently install it to the trailer.
 

Srpat

Observer
Good choice on the brake controller. I have the same one in my Tacoma that I use to pull my dump trailer for work and 2800 lb camper trailer. I like that the display tells you at a glance that the trailer wiring is connected to the truck. No worries about lights and signals being on. I really like the boost feature if your load changes in weight or you need some more power for really steep grades. And it has the manual brake lever you can use. Driving trails and interstate is no big deal, but some of the smaller highways in the mountains have crazy hills that can easily burn out brakes. Having the ability to use any combination of regular braking, boost, manual controller brake, engine brake, and my right foot are important to me.
 

Redeth005

Adventurer
Good choice on the brake controller. I have the same one in my Tacoma that I use to pull my dump trailer for work and 2800 lb camper trailer. I like that the display tells you at a glance that the trailer wiring is connected to the truck. No worries about lights and signals being on. I really like the boost feature if your load changes in weight or you need some more power for really steep grades. And it has the manual brake lever you can use. Driving trails and interstate is no big deal, but some of the smaller highways in the mountains have crazy hills that can easily burn out brakes. Having the ability to use any combination of regular braking, boost, manual controller brake, engine brake, and my right foot are important to me.

How do you have yours set up for trail/offroad use? and how do you like it?
 

Redeth005

Adventurer
It's been a busy week.
This past weekend i got to work on installing the Tekonsha Prodigy P3 brake controller. It actually wasnt very hard to install. the most pain in the butt part to do was definitely running all the wires within the chassis so its out of he way from the elements. But its done!
Here is the rear 7 pole connector. It pained me to cut into the custom rear bumper that my dad and I made a few years ago but i had to be done.


I wanted to install the brake controller on the right side but it was in the way of my E-Brake so i had to mount it on the left. It is still in clear sigh for me anyway so it's okay.


This past weekend i figured out the color code for my particular trailer. I used the regular BROWN, GREEN, YELLOW Colors with a BLACK and WHITE wire for electric brakes, and i ran a separate white wire which i colored red to tell the difference which was used to activate my reverse lights. I had a bit of a hard time at first figuring out which colors did what and what each should be connected to going from the SuperBrightLEDs trailer lights to my 7 wires. Not sure if you remember the picture from down below that i uploaded a while ago but the colors don't match the trailer color code so i just had to test each light individually while using a temporary ground. Here is the light color code:


Here is my successful test on the lights:
https://youtu.be/MhOaXVqTDe0

---------------------------------------------------------------------------------------------------------------------------------------------------------------------------------

Today was an adventure in itself trying to work alone to install all wires on the trailer as clean as possible and trying to route everything within the chassis to keep them safe from rocks on the trail etc etc... I asked for 2 days paid vacation from work to give me a super productive 4 day weekend since i haven't been getting as much time as i would like to work on it lately. So I'm really hoping to get everything knocked out of the way so i can take the paperwork to register this trailer once and for all!
This was in the morning: Just the beginning of the harness install. At this point i was trying to see which wires i had to tap into to make he running lights work.


Running lights and tail light installation success!


Here is a quick walk around video of my trailer and the light functions. I'm glad they work. I just wish i knew how to make these running lights work as Turn signals as well. I bought Diodes thinking they would work but it did not. (or i didn't test it right lol) And i am not an electrical guru so my knowledge is limited when it comes to getting the lights to function exactly how i imagine it in my head. So this is all i was able to do with my lights.
https://youtu.be/Ghd89Oj7DL4

----------------------------------------------------------------------------------------------------------------------------------------------------------------------------------

After all this My next step was to start prepping the inside of the rear compartment for another primer coat then painting flat black in all the corners where all the welds are. I want to get all this done by tomorrow because i plan to seal all the corners /joints where all the welds and rivets allow water to enter from outside. Last weekend i washed the trailer and discovered 3 small puddles. I saw most of the water accumulated in these locations. SO tomorrow i plan to finish painting the inside (i ran out of paint today) then once it dries, i'm going to silicone all the joints. And what i have not done on the 2 doors as well. Both doors need to be siliconed inside and out. No point in my doors having weather striping if its just gonna leak right through the rivets on he doors lol Especially since i plan to have wood floors on he trailer! I don't want it to get moldy inside. I gotta get this done tomorrow because we are expecting rain saturday.
 
Last edited:

Forum statistics

Threads
185,903
Messages
2,879,372
Members
225,497
Latest member
WonaWarrior
Top