You are using an out of date browser. It may not display this or other websites correctly.
You should upgrade or use an alternative browser.
You should upgrade or use an alternative browser.
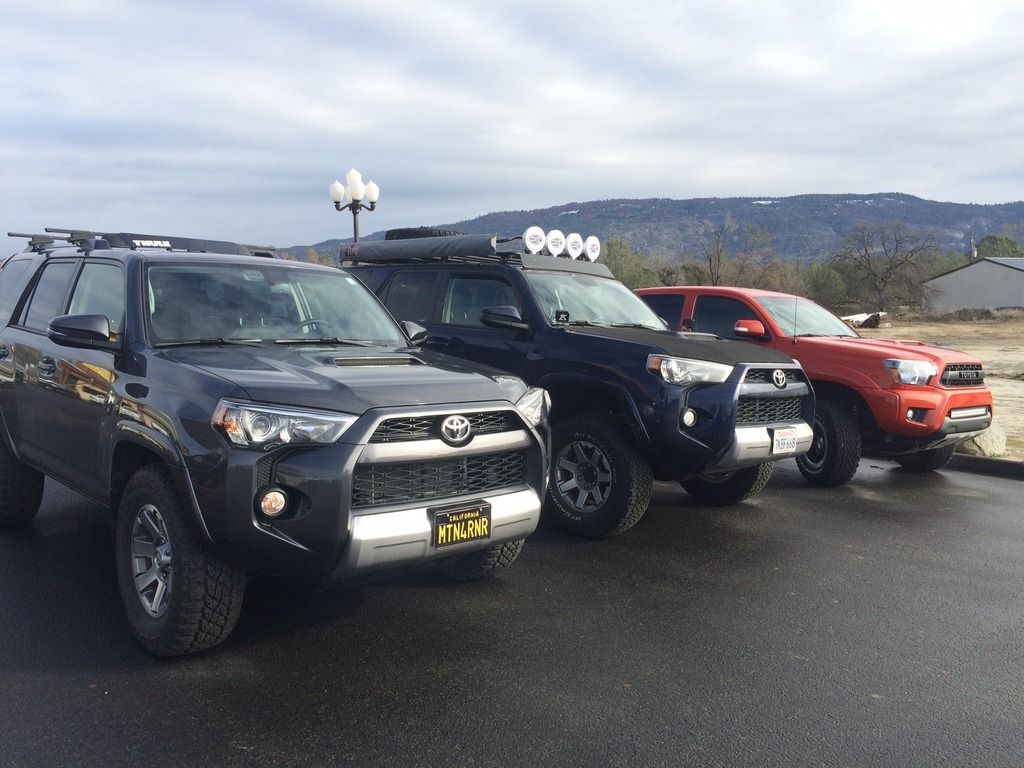
Building, Driving and Adventuring the MTN4RNR
- Thread starter MTN4RNR
- Start date
Stay Wild Outdoors
Observer
Great build. How is the road noise on the Maxxs?
What are you impressions of the Xtreme HIDs?
What are you impressions of the Xtreme HIDs?
98tcoma3rz
Observer
Sweet 4runner!!
MTN4RNR
Adventurer
Awesome build!
Thank you! It's a work in progress, and is likely to slow down here in the coming months, but I have one more big addition before the budget hits the wall.
MTN4RNR
Adventurer
Great build. How is the road noise on the Maxxs?
What are you impressions of the Xtreme HIDs?
Thanks! The STMAXX's are quiet in the 4Runner so far. I have had them on my work truck for 30k+ miles and they are moderately louder, but still very quiet for what they are. Nothing compared to a worn set of mud terrains haha. They are build like a tank, and my only complaint about them would be that they weigh a good amount. Acceleration hasn't really noticeably changed, but MPG's have dropped a bit. But hey, it's an overland rig (in the making).
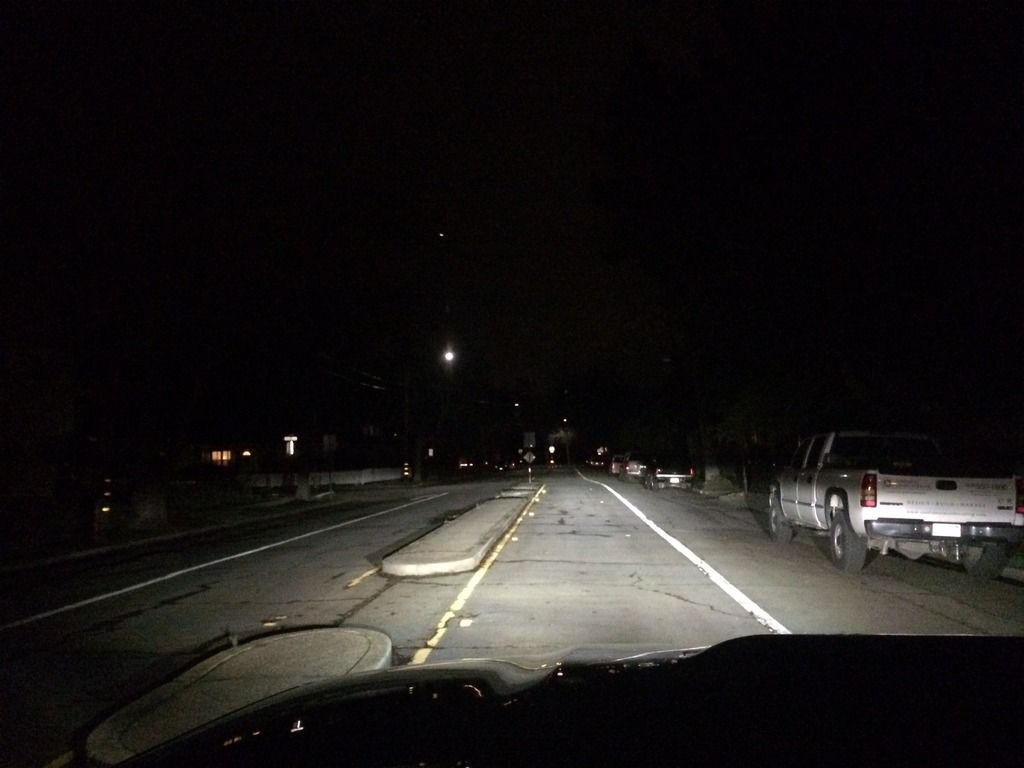
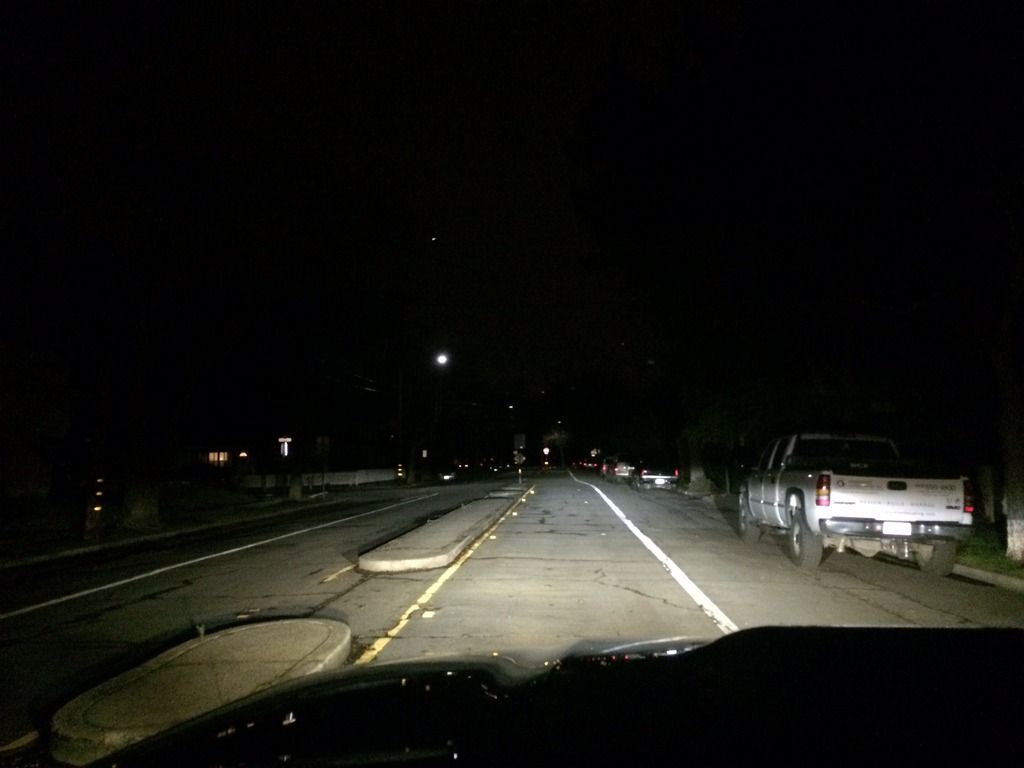
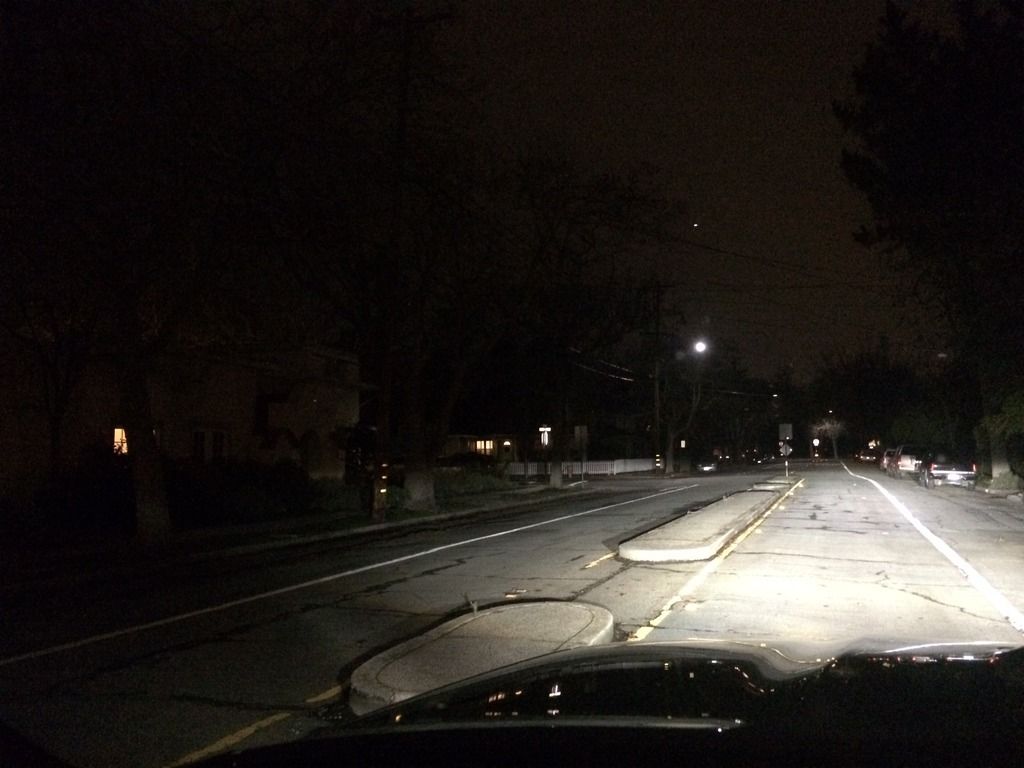
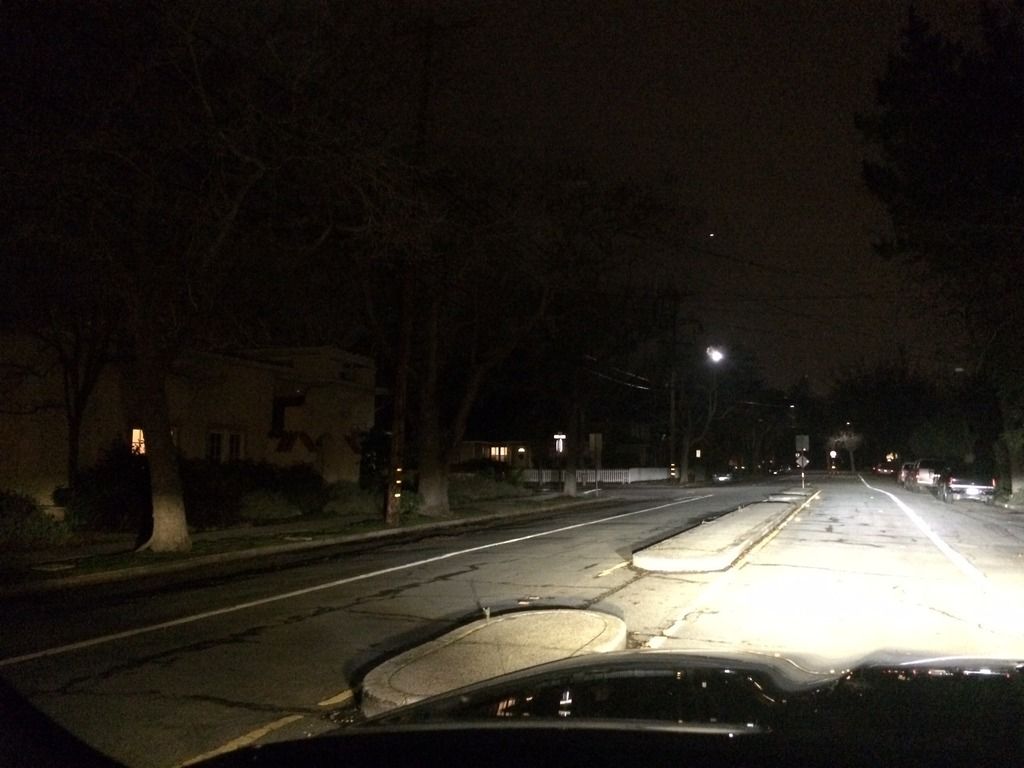
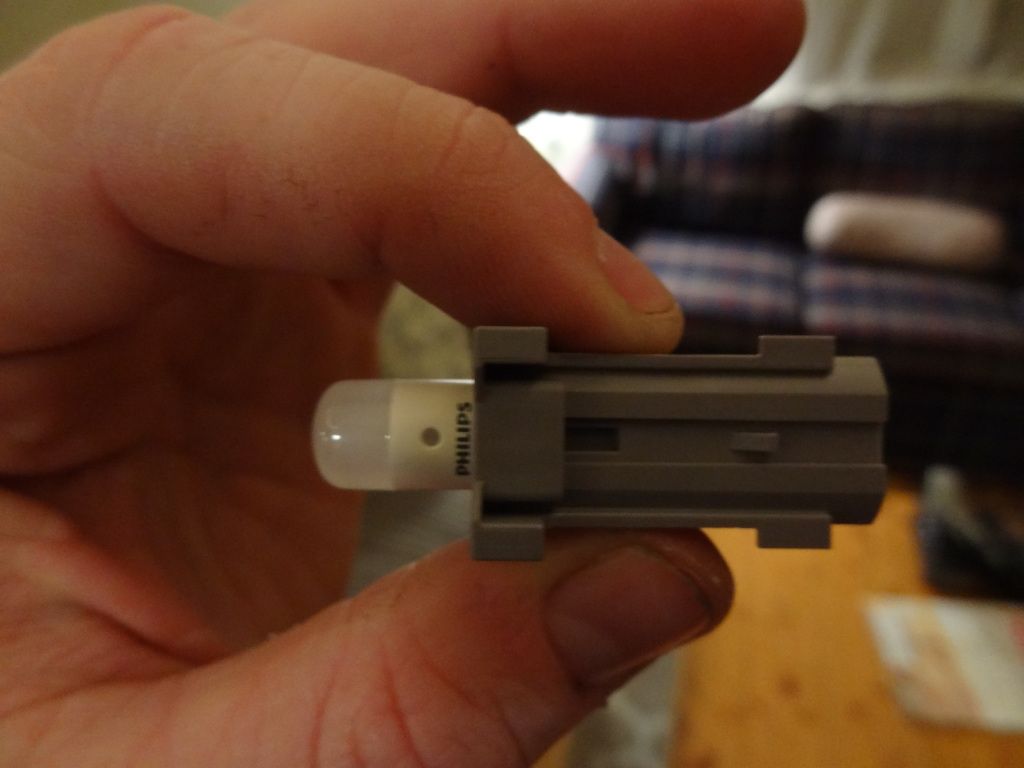
The Xtreme HID's in the stock projector housings are nothing short of awesome. Really a night and day transformation. The cutoff and pattern is unaffected and the light output and color is great. Not blue but a very nice white color. The Philips bulb at 4300K is well worth the upgrade. If you have any questions, please feel free to ask. Just don't mount them in anything but a projector housing, I had some idiot on the road this morning blinding me on the way to work in the rain with his late 90's Jeep with a 5-6000K HID bulb set up.
MTN4RNR
Adventurer
Sweet 4runner!!
Thank you! It has been amazing so far, and only seems to get better.... Now I just need to find some more dirt here in CA!
MTN4RNR
Adventurer
Crawl to the Top 2016
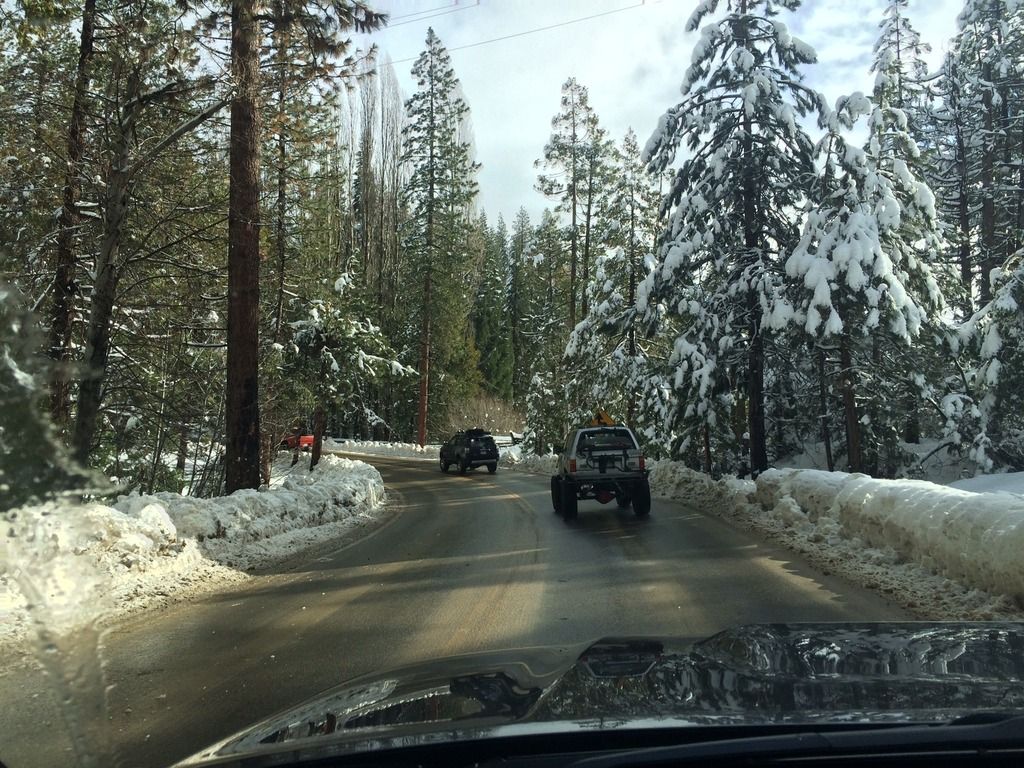
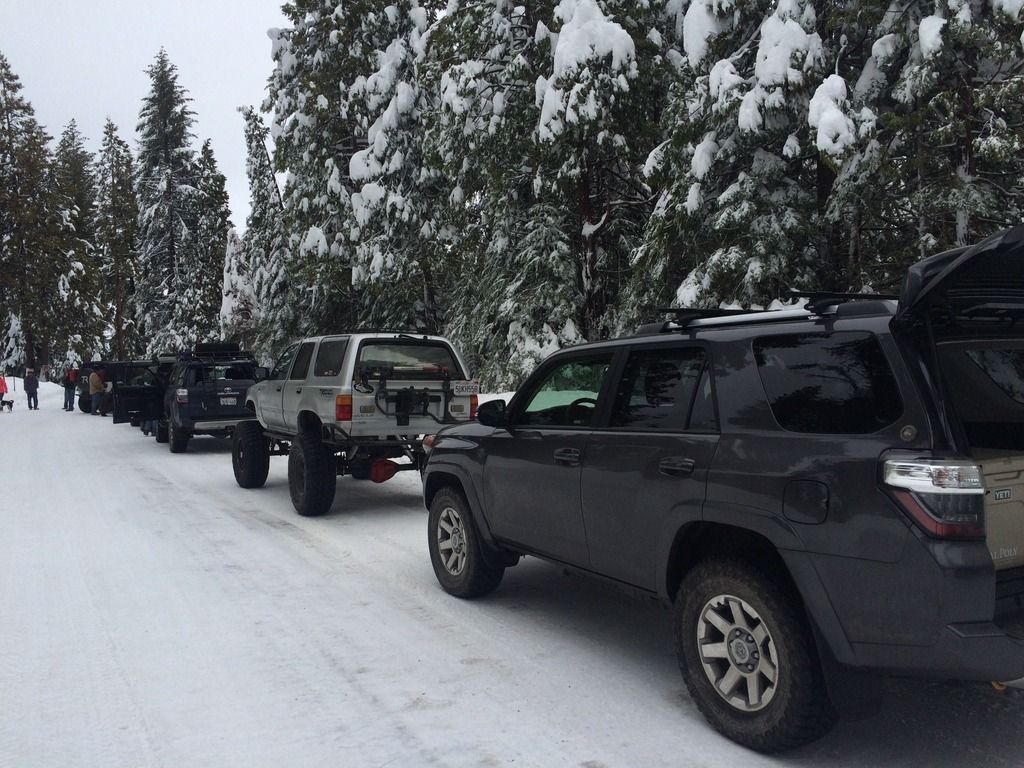
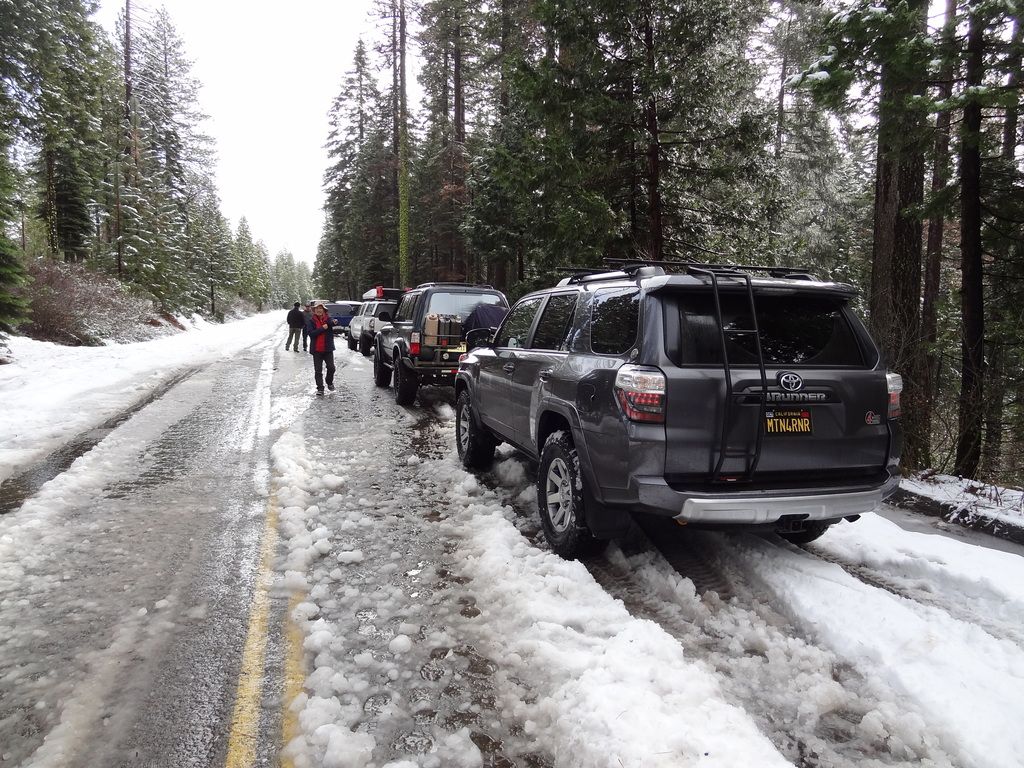
A few weeks back, I attended the first annual Crawl to the Top at Bald Mountain OHV. There were a total of 68 rigs there, a combination of Jeeps and Toyotas. Long story short, we didn't run the trail. A non affiliated party in a Nissan decided to plow the trail before we got there, and sunk the truck to frame in the middle of the trail. After some of the group spent a good amount of time trying to get him out and clear the trail, we were told to move off of the road by the Law Enforcement Officer. Many disbanded, but a group of Toyota guys hung out a bit longer up the road. A few hours passed, and we drove past the trail head. "Mr. Frontier" was still being recovered, so we decided to not try a second attempt with it being 2pm. I will be back to try again in the spring. It was great to meet other enthusiasts and to see their rigs. I can't wait for the next trail run!
I found my place in the meet up parking lot next to another 4Runner.
Hit the snow line behind @v_man
68 rigs airing down was awesome to see
The Toyota crew that stuck it out!
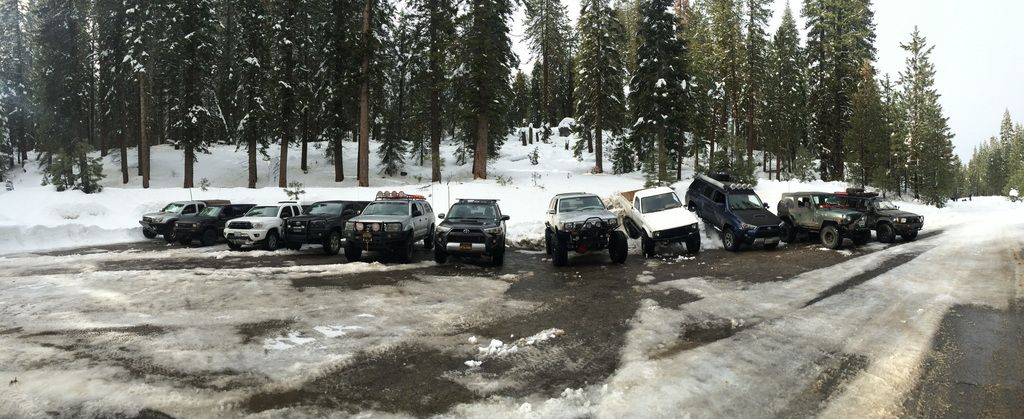
Overall a great day!
I found my place in the meet up parking lot next to another 4Runner.
Hit the snow line behind @v_man
68 rigs airing down was awesome to see
The Toyota crew that stuck it out!
Overall a great day!
MTN4RNR
Adventurer
Recovery Gear Update
Before the trip to the mountains for Crawl to the Top, I hit the local 4 Wheel Parts to stock up on a few recovery items. Because if I was to get stuck, I at least wanted to have the basics to get myself out. No one wants to be that guy.
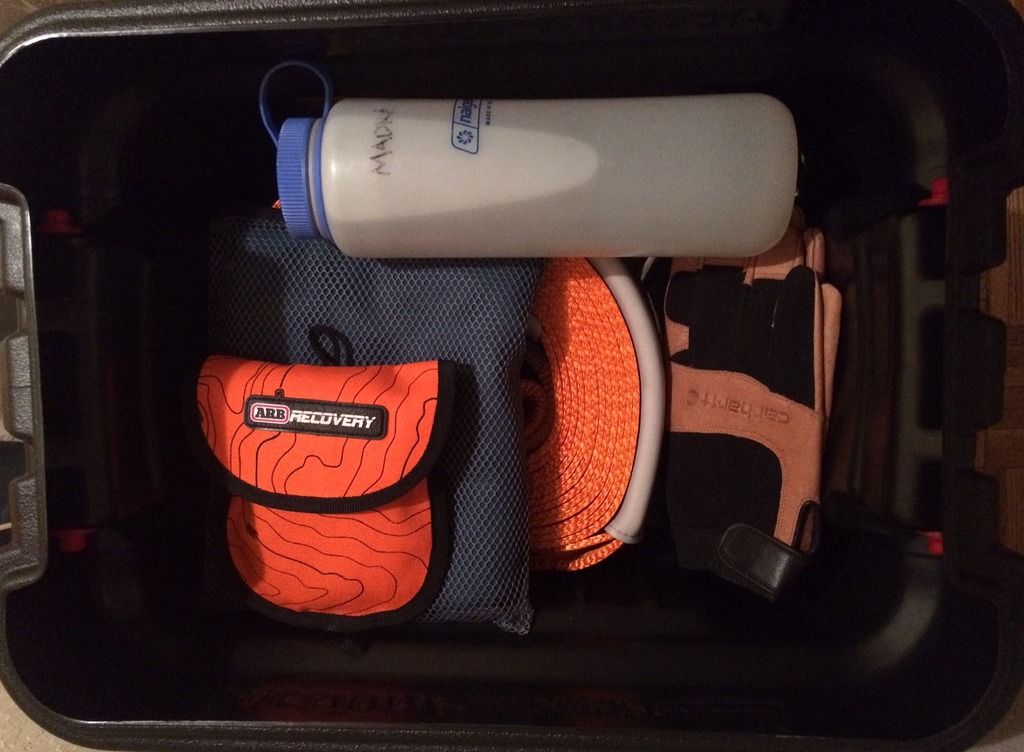
Items added:
- ARB E-Z deflator
- ARB 30' 24K lbs. snatch strap
- 4-3/4T shackle, painted school bus yellow because spray paint
- Hitch shackle recovery point I transferred from my old truck
- Gloves
- Towel
- First aid kit
All stowed away in an 8 gallon Action Packer
The deflator was amazing when bringing 4 tires from 42psi to 18psi in the snow. I knew it was a good purchase when every other vehicle out of the 60+ that were out there had one. That brings another item to the list, a compressor. What goes down must come back up, and next time a gas station might not be so convenient. The compressor just went up on the list. I didn't have the chance to use the snatch strap this weekend, but it will undoubtedly come in handy at some point.
Another 'recovery' item that I realized I was lacking was a communications system. I had to continuously jump in and out of the truck to check with other people who had radios to see what was going on and that's just annoying. So I am taking it on upon myself to get my HAM radio license and install a unit (TBD) in the 4Runner. Icing on the cake is that the girlfriend wants to get licensed too and have her own radio so we can stay in touch when I am in no cell zones, or if the zombies attack and cells are out of the picture. More on that in a future write up.
MTN4RNR
Adventurer
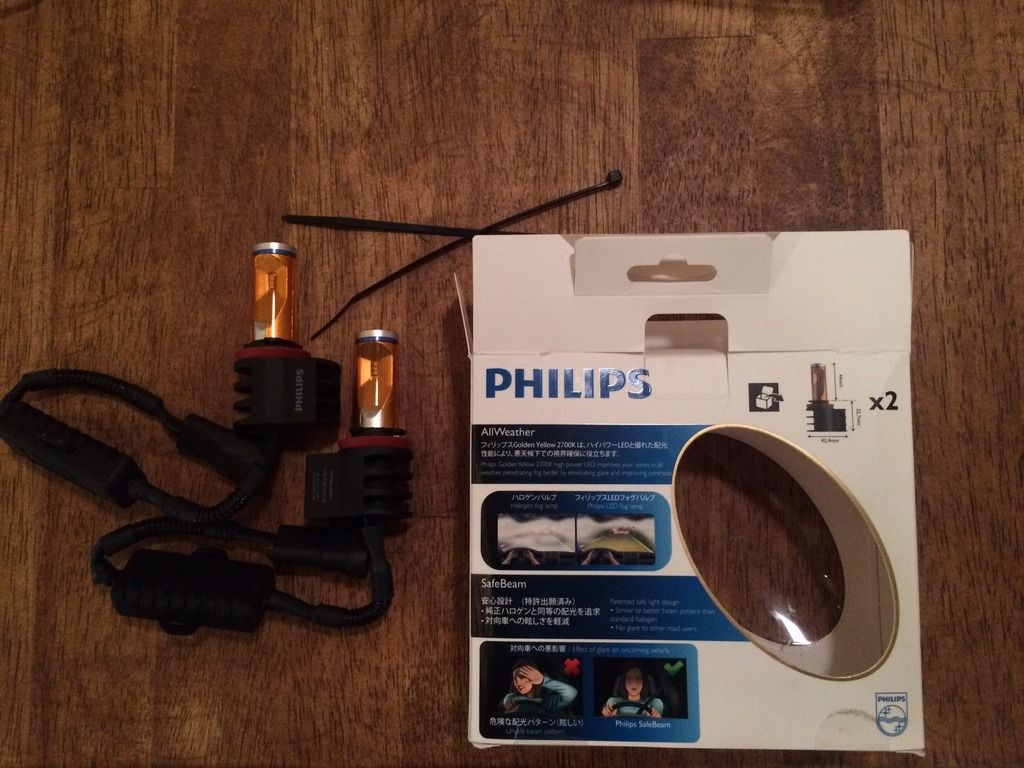
Philips yellow LED fog upgrade
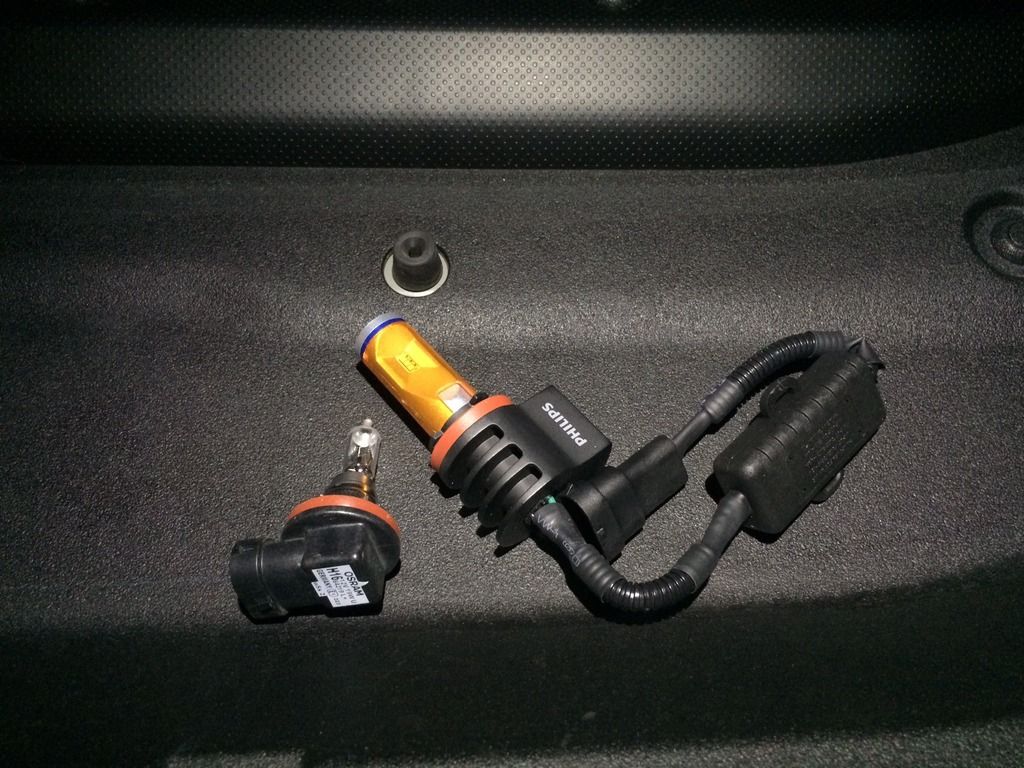
Parts Used:
-Yellow Philips LED fog lights from Xenon Depot
-Lagunitas IPA
I wanted to upgrade the stock halogen bulbs to an LED bulb following the HID upgrade from Xenon Depot. After working with Steve from Xenon Depot, I ended up with the Philips Yellow LED Fog Bulb. Although I wanted initially to match the color of the HID’s better with the white version of the bulbs, I had to remember that while matching lights look cool, fog lights are a functional tool when driving in adverse conditions as they help to cut through whatever is in front of you. The yellower lens helps to provide the best light temperature to cut through the debris on the road to light up road markers and lane lines.
Parts Used:
-Yellow Philips LED fog lights from Xenon Depot
-Lagunitas IPA
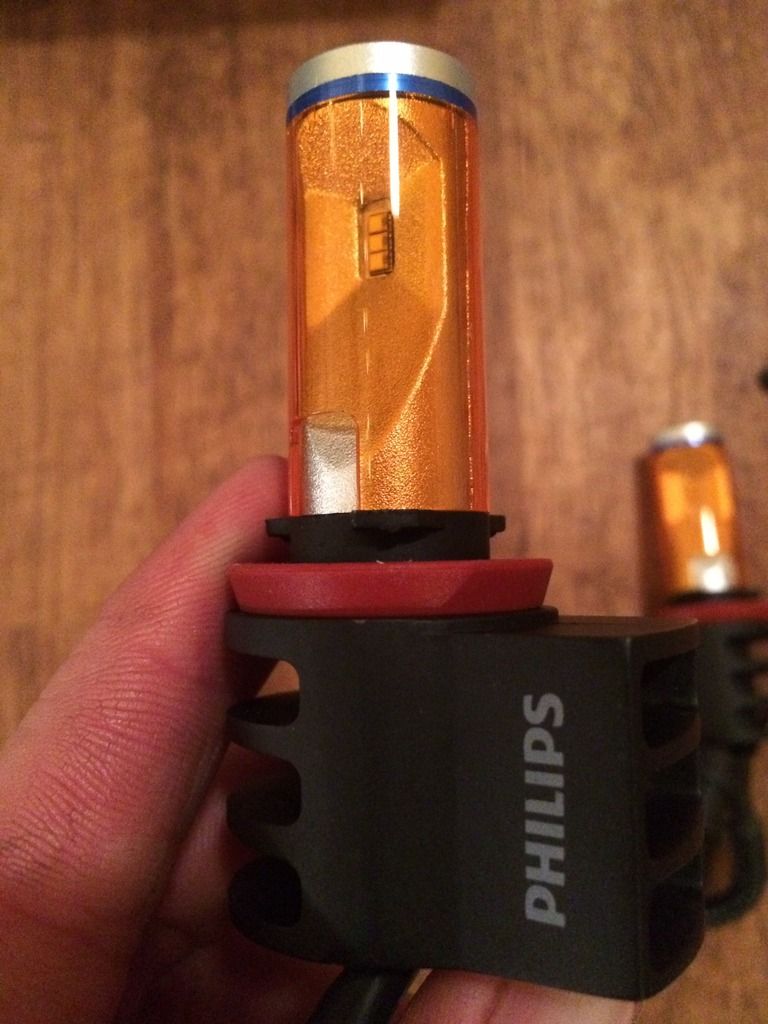
Lights out of the box
Yellow plastic film over the diodes. The bulb has a nice heavy feel to it and seems to be made with quality in mind.
Driver’s side
Fog lamp from below. In order to remove the bulb, you need to unplug the harness from the bulb to clear the plastic “stopper” piece on the housing. Turns counter clock-wise to remove
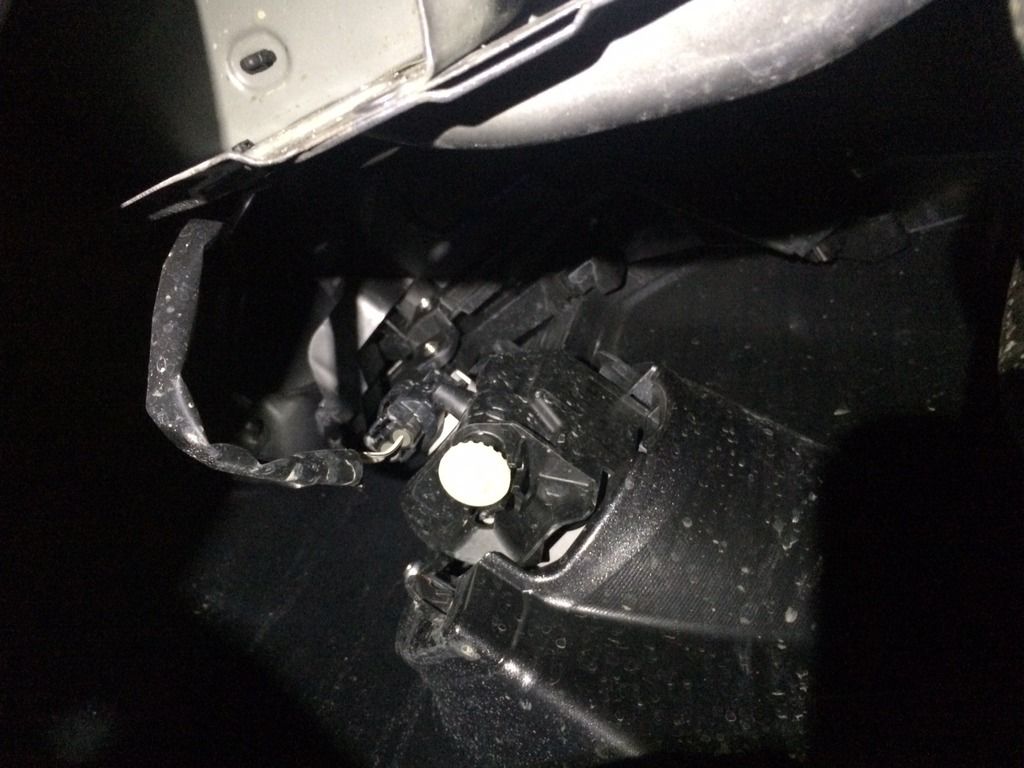
Harness un-hooked to clear the bulb.
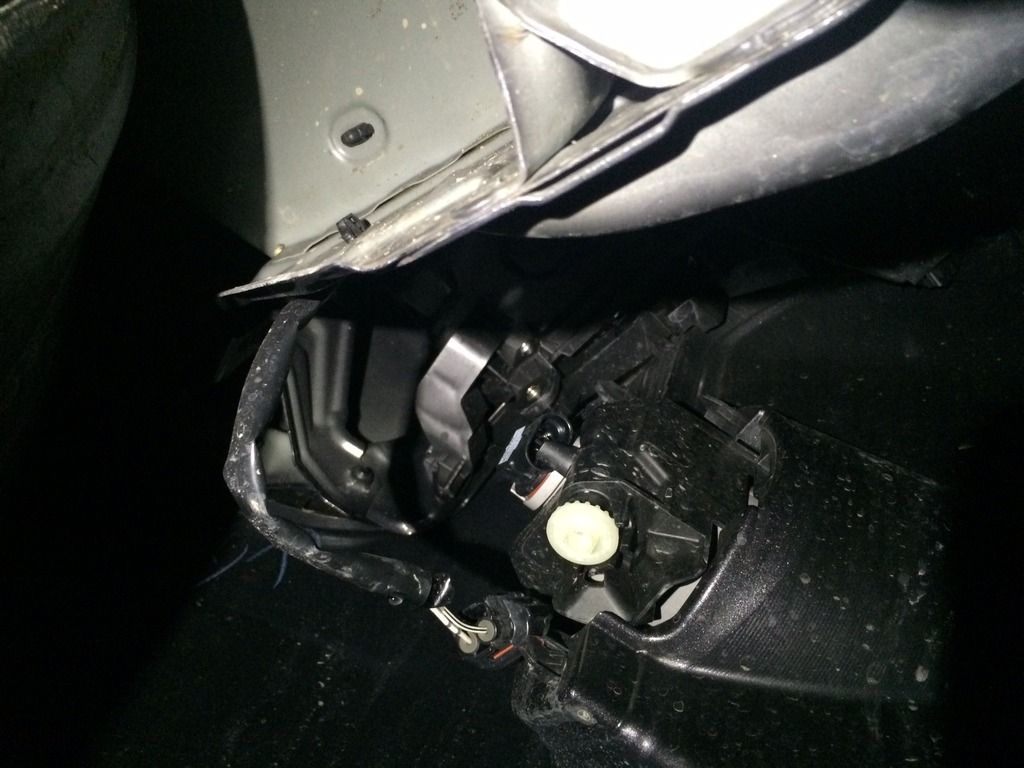
Old vs. new. The new bulb is larger, but will fit. You will need to come in as straight as possible to make it work well. The bulb is very well designed in that it clears the plastic “stopper” perfectly.
New LED installed. I used the supplied zip tie to tie the wires to the sheet metal in the top of the photo.
 DONE
DONE
Passenger’s side
The passenger’s side has a plastic shroud surrounding the bulb. Same process, unclip the harness, turn the bulb counter clock-wise, remove.
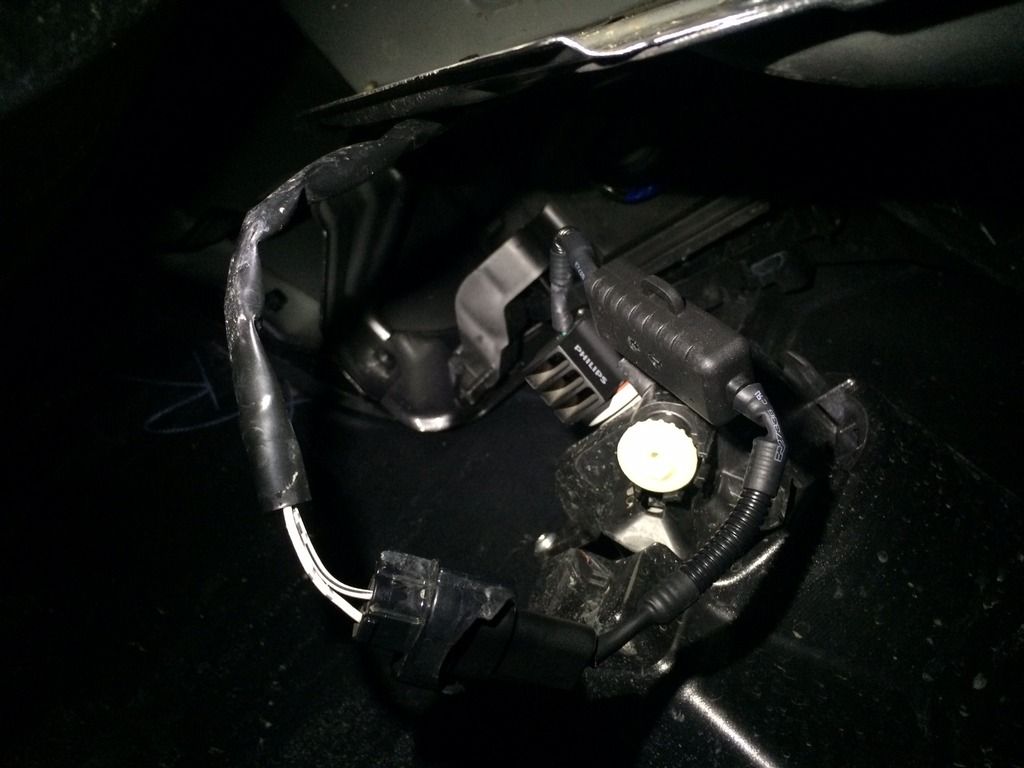
New LED installed. The trick with getting this one in, because the bulb is larger, and the shroud is on, is to hold the outer part of the bulb, the metal base, between two fingers at a 90º angle. Hold it so the heat dissipator is facing down. Reach up and get the tip of the bulb into the housing hole. Then you can adjust to twist the bulb into the appropriate position. The bulb will line up at the 4 o’clock position, and will lock in in the 8 o’clock position. Patience is your friend with this one. I used the supplied zip tie to secure the wire to the stock washer fluid hose shown on the right of the photo.
DONE
Before and After
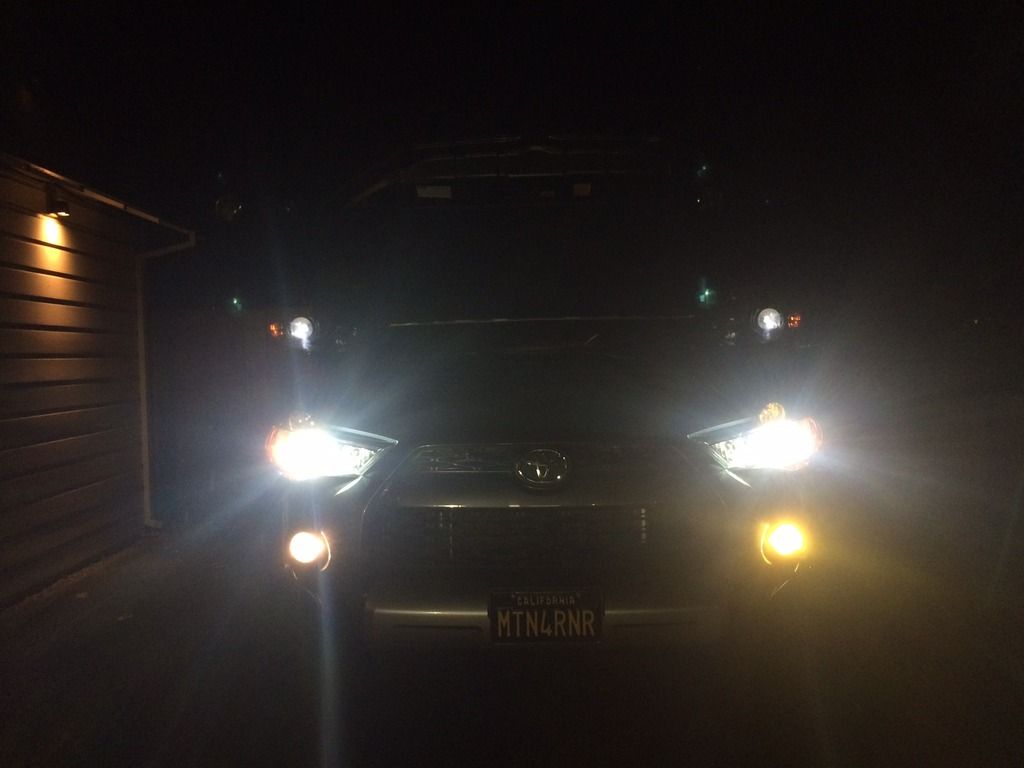
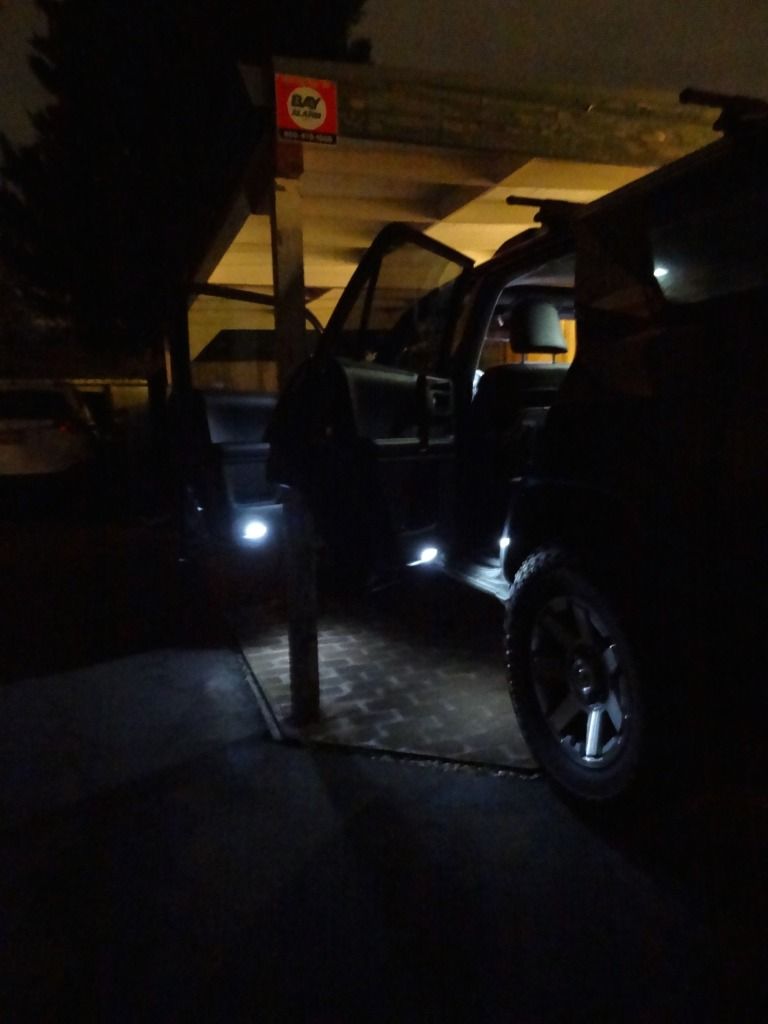
Low beam HIDs
Low beam HID’s with stock fogs

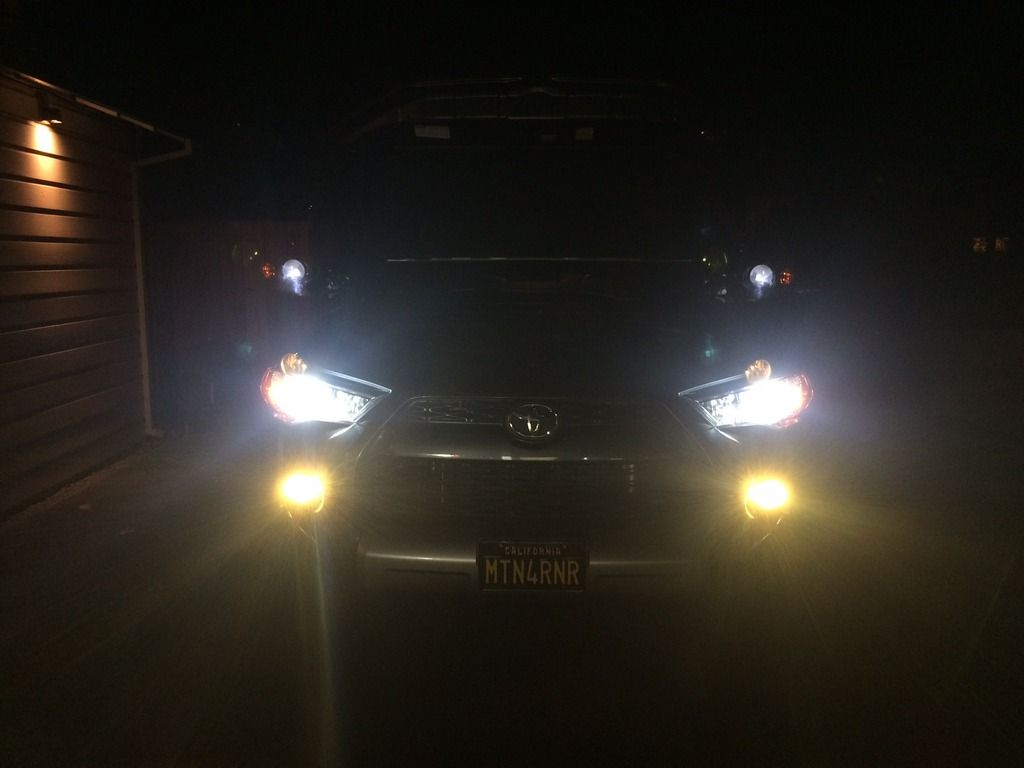
Low beam HID’s with Philips Yellow LEDs
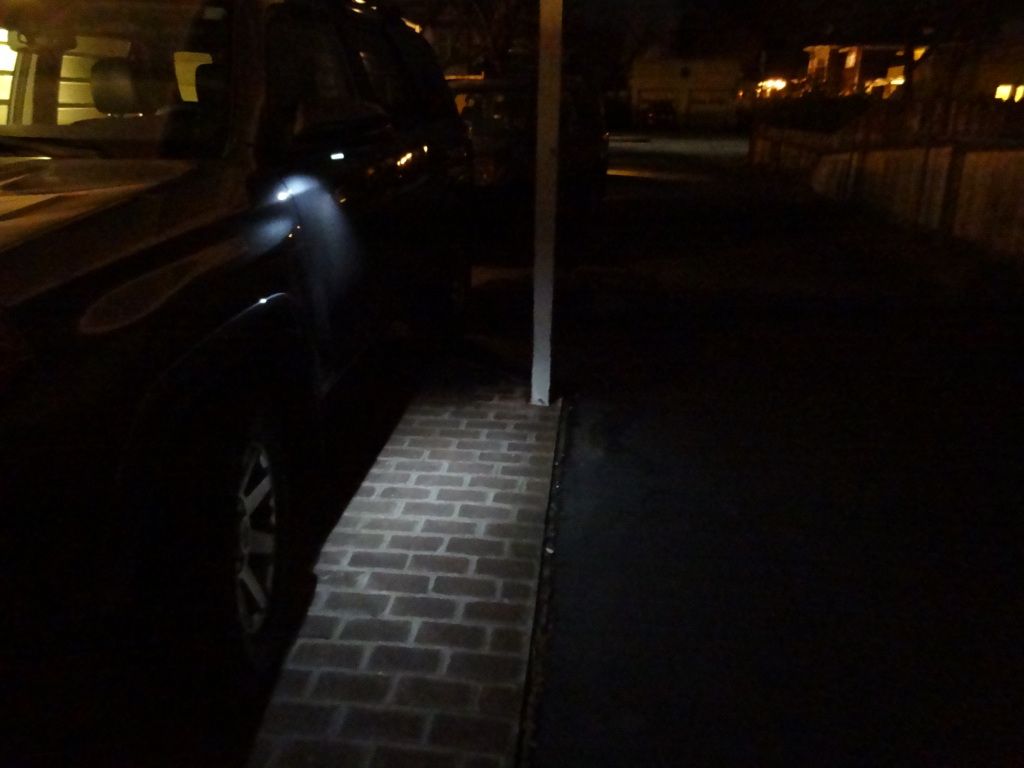
Here’s a really nice change though. The side visibility from the new fogs is greatly increased.
Low beam HIDs
Low beam HID’s with Philips Yellow LEDs
Left fog stock. Right fog Philips Yellow LED
Left and right fogs Philips Yellow LEDs
Impressions
I installed them last week and spent some time in the mountains over the weekend to test them out. In the rain and snow I encountered, the new bulbs put out enough light to make lane markers and the road easier to see. Much better than not having them on, and still better than the stock halogens. I will say that they are not as yellow as some of the guys running the yellow film on the stock fogs, but I think that the light delivered is better than a more pure yellow light. Function over form. I am pleased with the improved output of the stock fog housings with the upgraded LEDs. If I end up wanting or needing more light, I can add an amber LED light behind the lower grill for when visibility is very low.
Thanks to Steve at Xenon Depot for the product assistance.
More to come…
Yellow plastic film over the diodes. The bulb has a nice heavy feel to it and seems to be made with quality in mind.
Driver’s side
Fog lamp from below. In order to remove the bulb, you need to unplug the harness from the bulb to clear the plastic “stopper” piece on the housing. Turns counter clock-wise to remove
Harness un-hooked to clear the bulb.
Old vs. new. The new bulb is larger, but will fit. You will need to come in as straight as possible to make it work well. The bulb is very well designed in that it clears the plastic “stopper” perfectly.
New LED installed. I used the supplied zip tie to tie the wires to the sheet metal in the top of the photo.
Passenger’s side
The passenger’s side has a plastic shroud surrounding the bulb. Same process, unclip the harness, turn the bulb counter clock-wise, remove.
New LED installed. The trick with getting this one in, because the bulb is larger, and the shroud is on, is to hold the outer part of the bulb, the metal base, between two fingers at a 90º angle. Hold it so the heat dissipator is facing down. Reach up and get the tip of the bulb into the housing hole. Then you can adjust to twist the bulb into the appropriate position. The bulb will line up at the 4 o’clock position, and will lock in in the 8 o’clock position. Patience is your friend with this one. I used the supplied zip tie to secure the wire to the stock washer fluid hose shown on the right of the photo.
DONE
Before and After
Low beam HIDs
Low beam HID’s with stock fogs
Low beam HID’s with Philips Yellow LEDs
Here’s a really nice change though. The side visibility from the new fogs is greatly increased.
Low beam HIDs
Low beam HID’s with Philips Yellow LEDs
Left fog stock. Right fog Philips Yellow LED
Left and right fogs Philips Yellow LEDs
Impressions
I installed them last week and spent some time in the mountains over the weekend to test them out. In the rain and snow I encountered, the new bulbs put out enough light to make lane markers and the road easier to see. Much better than not having them on, and still better than the stock halogens. I will say that they are not as yellow as some of the guys running the yellow film on the stock fogs, but I think that the light delivered is better than a more pure yellow light. Function over form. I am pleased with the improved output of the stock fog housings with the upgraded LEDs. If I end up wanting or needing more light, I can add an amber LED light behind the lower grill for when visibility is very low.
Thanks to Steve at Xenon Depot for the product assistance.
More to come…
MTN4RNR
Adventurer
LED interior light swap completion
Parts used:
- Philips Vision LED 194
- Philips Vision Festoon LED 3022
- Stone Brewing Enjoy By Black IPA
This weekend I completed my stock interior lighting and puddle lamp LED upgrade. All of the bulbs that I have installed so far have been Philips brand, which carry the same light temperature of 6000K, and a 12 year guaranteed warranty. Bulbs were sourced from Xenon Depot
Parts used:
- Philips Vision LED 194
- Philips Vision Festoon LED 3022
- Stone Brewing Enjoy By Black IPA
I followed a tutorial from Precision LED on YouTube, which shows how to access all of the stock bulbs.
Map lights before
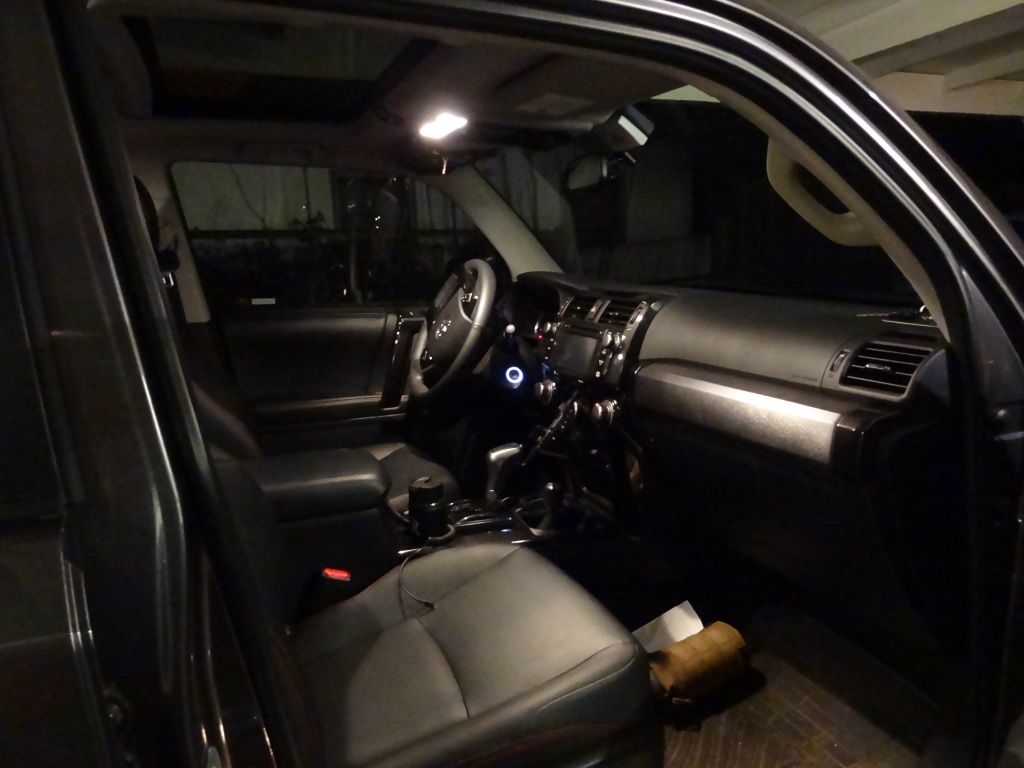
Map lights after
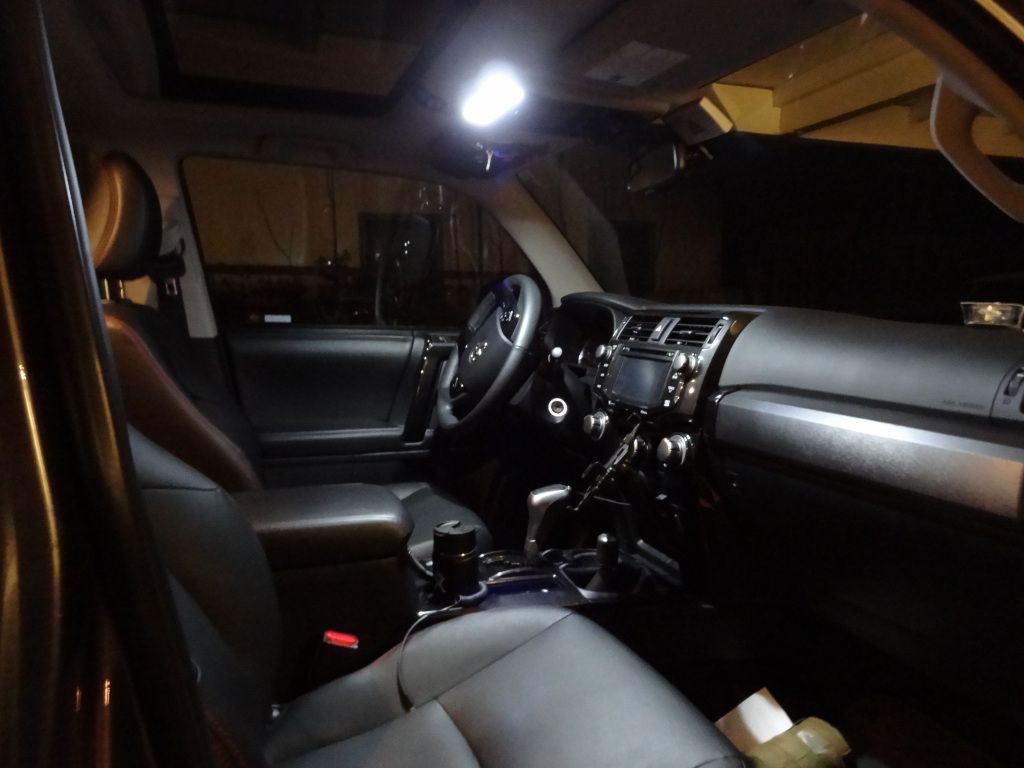
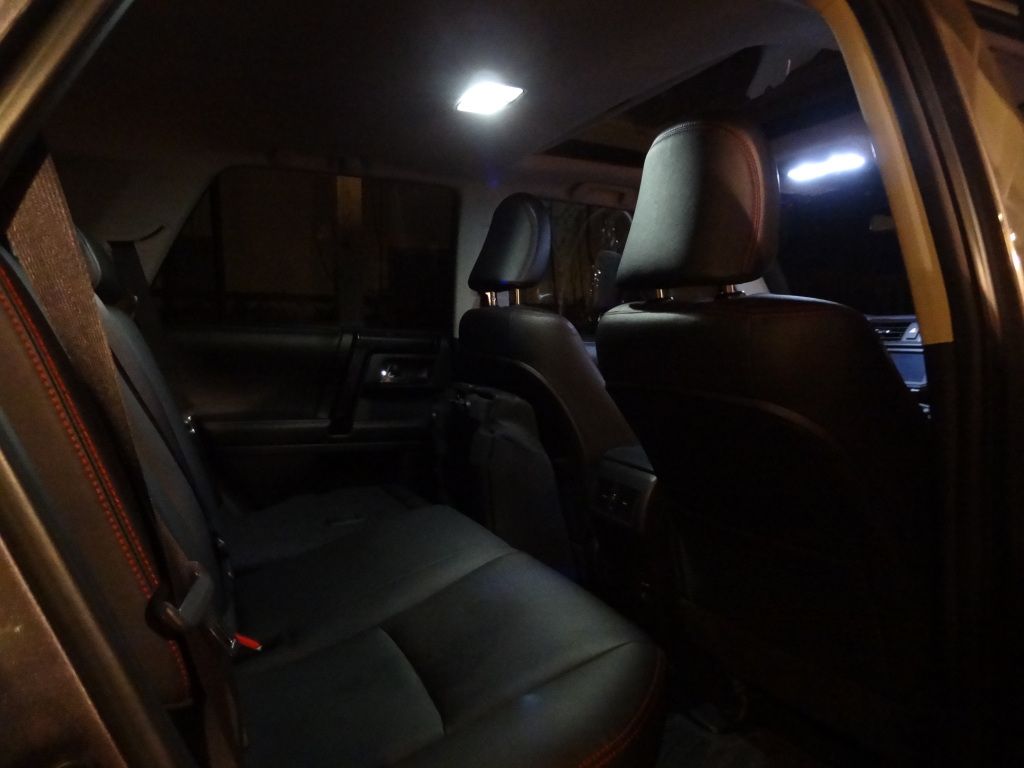
Dome light before
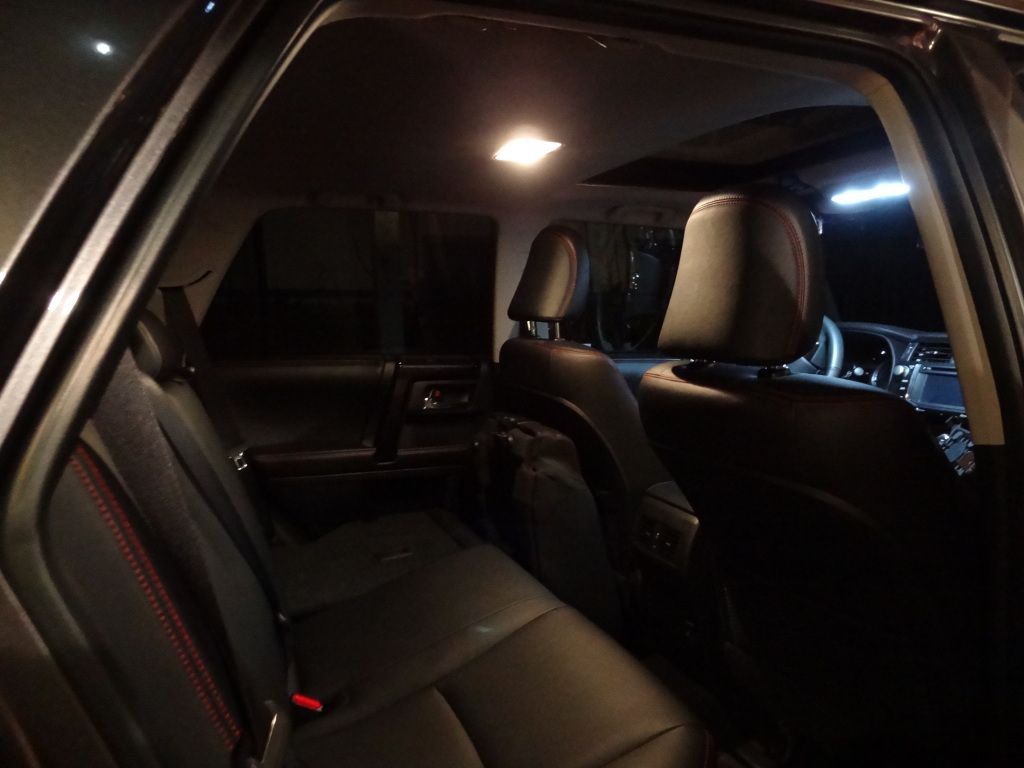
Dome light after
Door lights before
Philips bulb orientation in housing (so that they work)
Door lights after
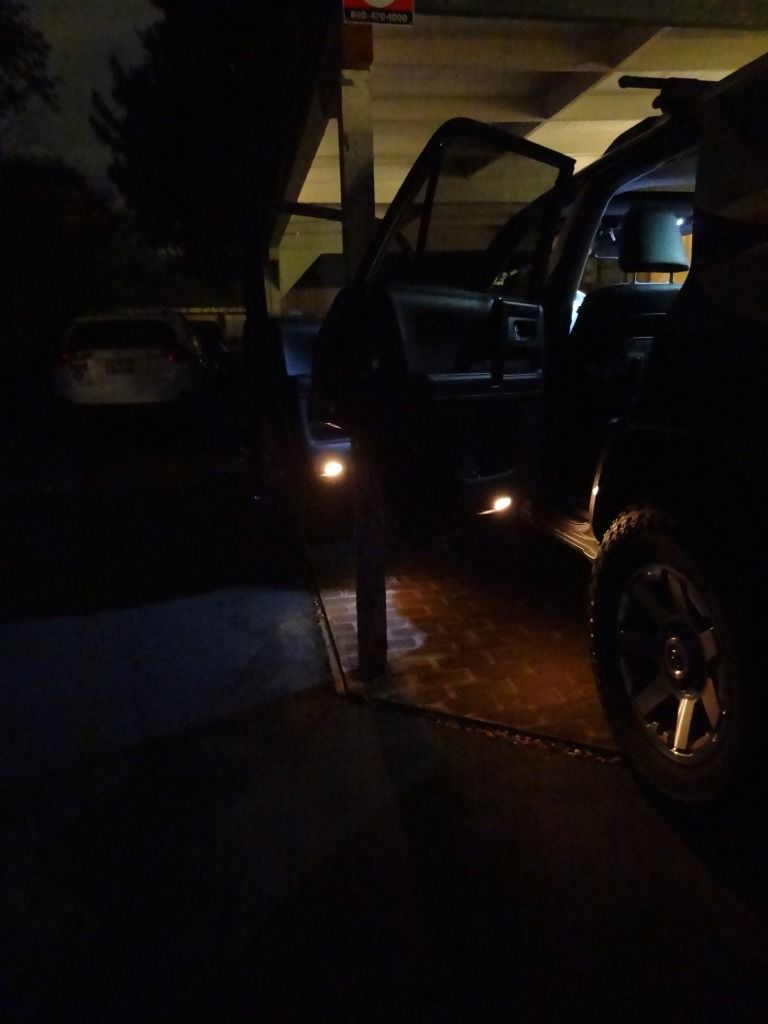
Puddle lights before

I followed this thread post to get to the puddle lamp bulbs.
Puddle lights after
Impressions
The 194's are great. Very bright, very well build with an even light distribution. I have been impressed by these, and will continue to use them as my go-to mini wedge. The festoon bulb, as I stated in my rear hatch LED upgrade post, is dimmer than I would have hoped for. The color matches the new lights perfectly though, and I don't think that I have lost any useable light over the halogens. I will give it some time and see how I like the output before deciding if I want anything brighter.
Next (and last) interior lighting upgrade will be an auxiliary led lighting set up for the cargo area.
More to come...
Map lights before
Map lights after
Dome light before
Dome light after
Door lights before
Philips bulb orientation in housing (so that they work)
Door lights after
Puddle lights before
I followed this thread post to get to the puddle lamp bulbs.
Puddle lights after
Impressions
The 194's are great. Very bright, very well build with an even light distribution. I have been impressed by these, and will continue to use them as my go-to mini wedge. The festoon bulb, as I stated in my rear hatch LED upgrade post, is dimmer than I would have hoped for. The color matches the new lights perfectly though, and I don't think that I have lost any useable light over the halogens. I will give it some time and see how I like the output before deciding if I want anything brighter.
Next (and last) interior lighting upgrade will be an auxiliary led lighting set up for the cargo area.
More to come...
MTN4RNR
Adventurer
Gobi Ladder Install
Installed a previously loved Gobi ladder on the rig this weekend before heading to the snow. Since I bought it used and the supplied adhesive strips were shot, I used 3M extreme fasteners (aka ************ Velcro) to secure the ladder top plate and the lower attachment point instead of double sided adhesive. The weight rating is the same as the 3M extreme double sided tape, but this allows me to remove the ladder if I need to by unbolting the lower bracket and pulling it off. So far so good! No flexing or moving while climbing! Three strips, 4" in length on the top plate and a strip that is the width of the ladder on the bottom of the hatch. Because the fasteners are thicker than the standard adhesive, the lower clamp BARELY fits over the hatch lip. Definitely an oh ******** moment when I thought it wouldn't fit. Whew! I got this in prep for the new full length roof rack, stay tuned for that!
MTN4RNR
Adventurer
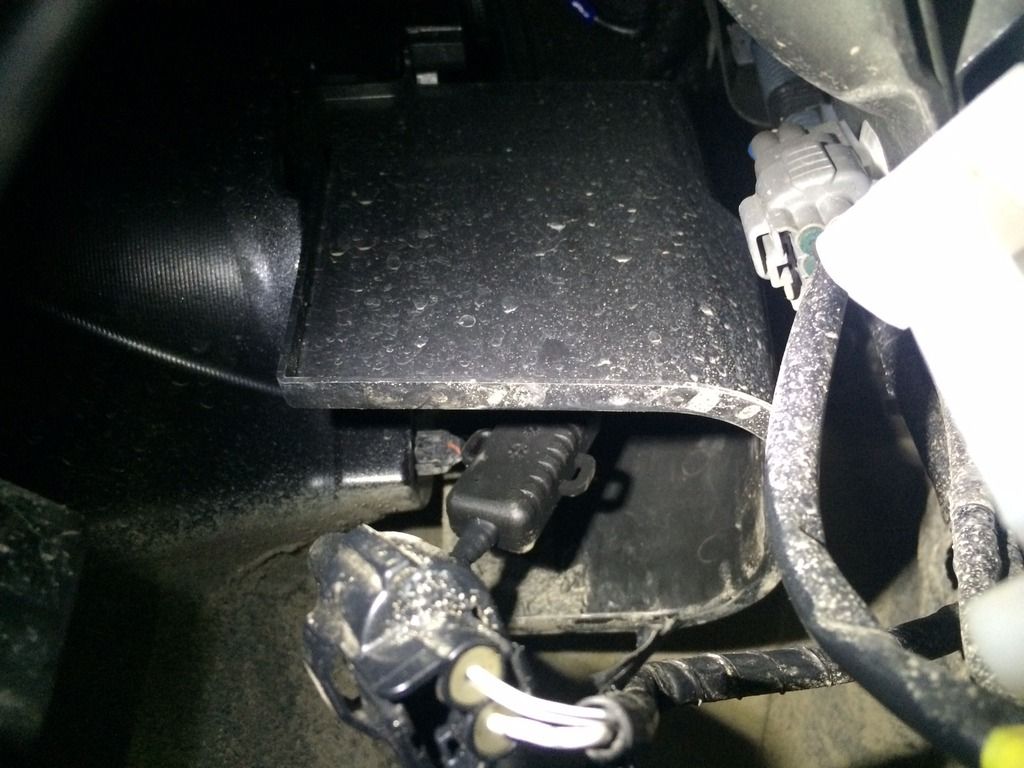
After reading of many members of this forum relocating their differential breathers to avoid inevitable milky gear oil, I decided to give it a go. A little cheap insurance later on down the road can't hurt, and if nothing else, I got some good one on one time with the rig, getting to know a little more about her. I have a trail, and thus a locker. So a separate breather for that as well, because overkill. I decided to use the T4R.org standard OEM Toyota front differential (2-way) breathers. Let's get into it:
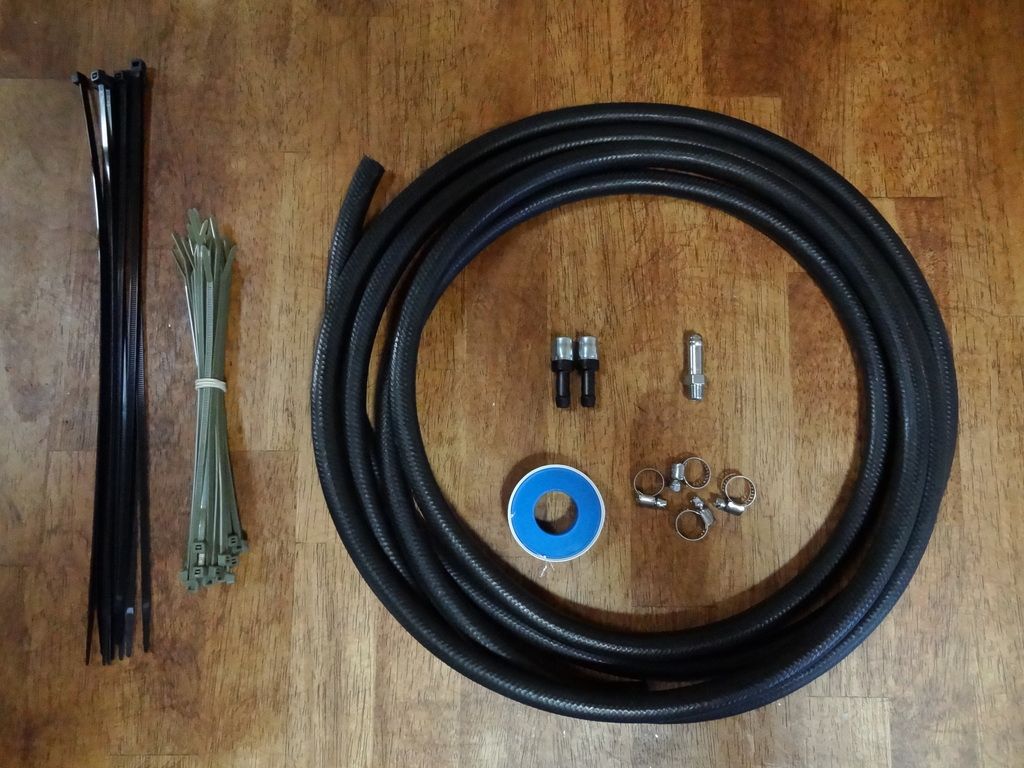
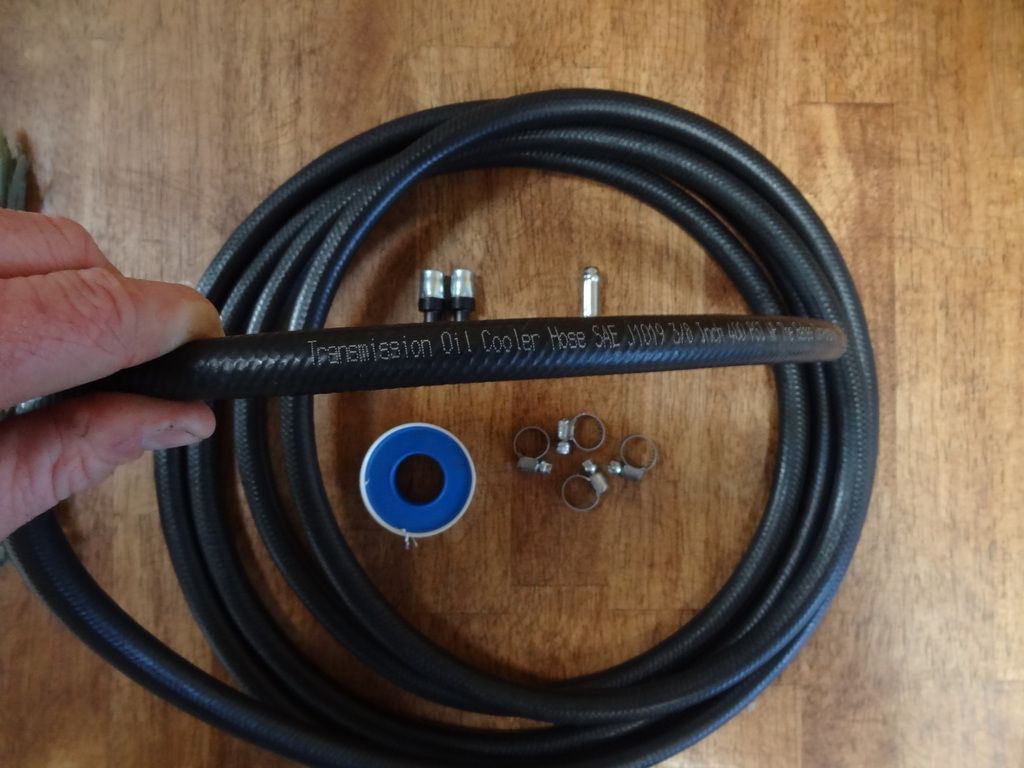
Parts used:
- 14' Transmission oil cooler hose, 3/8"
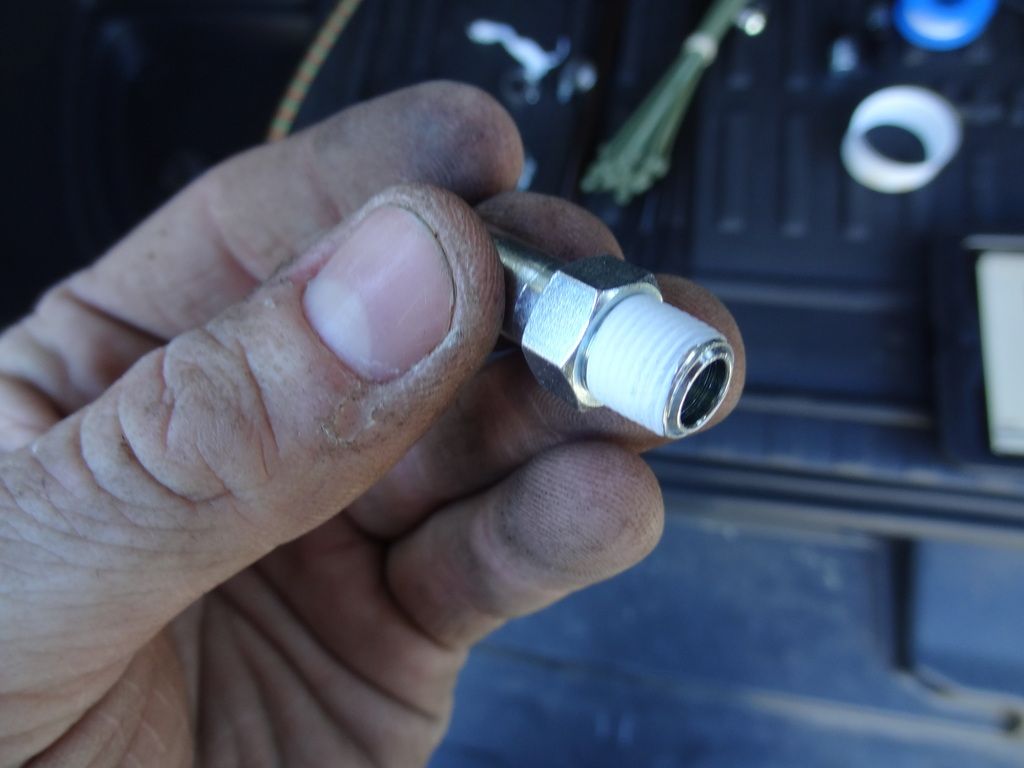
- Toyota part 90404-51319 (Union)
- Toyota part 90930-03136 (Breathers) (x2)
- Stainless steel hose clamp (x4)
- Enough zip ties to hold it all together
- Teflon tape
- Sierra Nevada Torpedo IPA
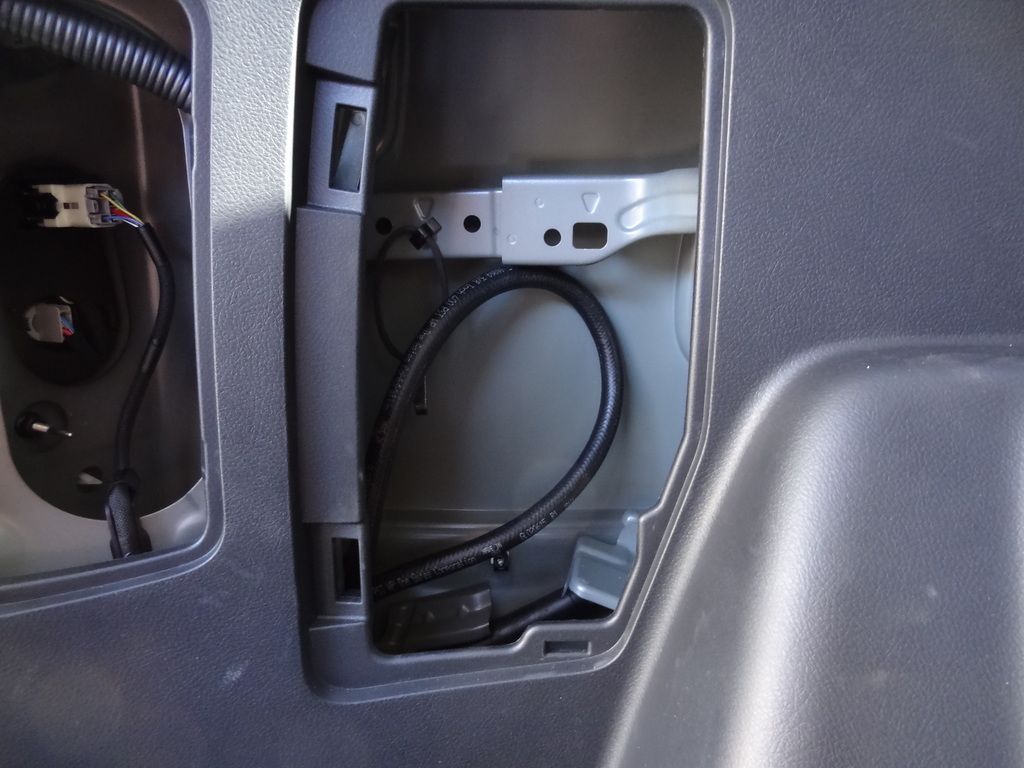
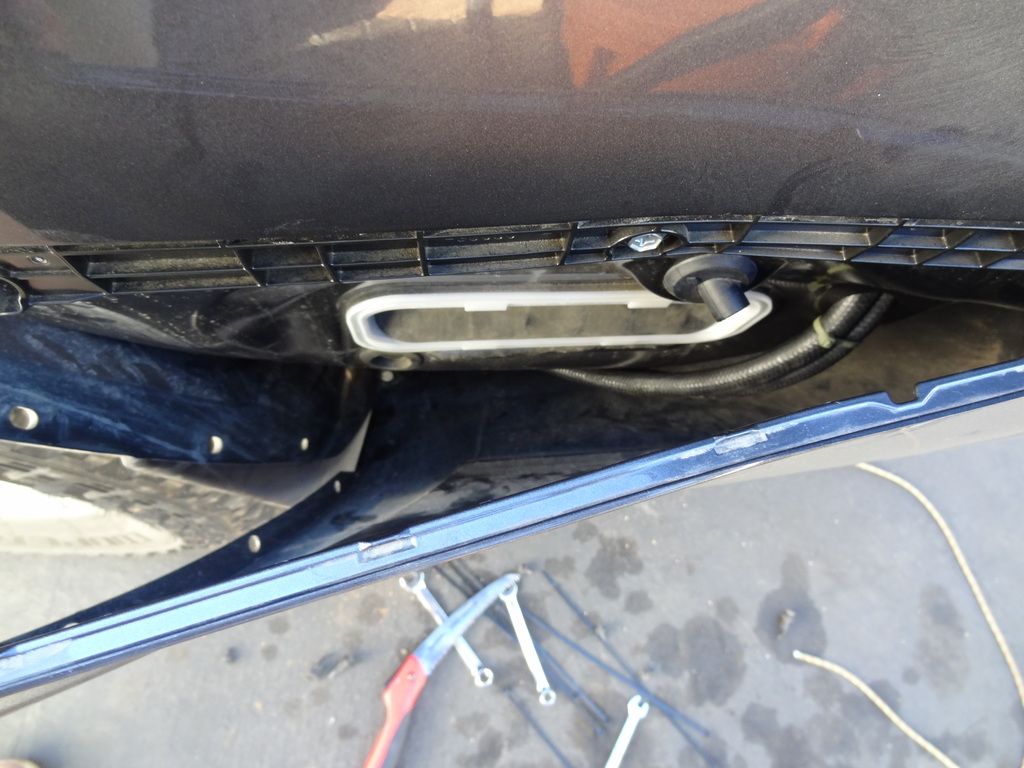
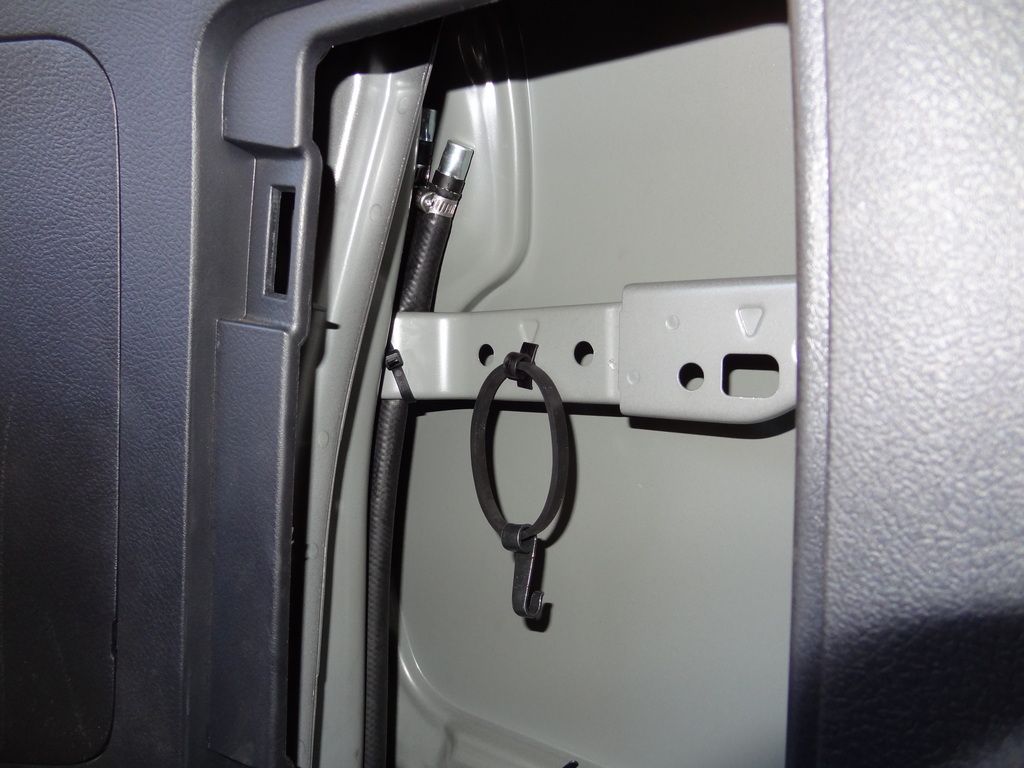
I want the breathers to end up in the jack/tool compartment on the driver's side of the cargo area. I decided to use the same route as a T4R.org member in his write up here. An unused grommet in the cavity below the jack/tool mount. First step was to remove the tools/jack and drop the spare. I located the grommet, removed it and fed my lines through.
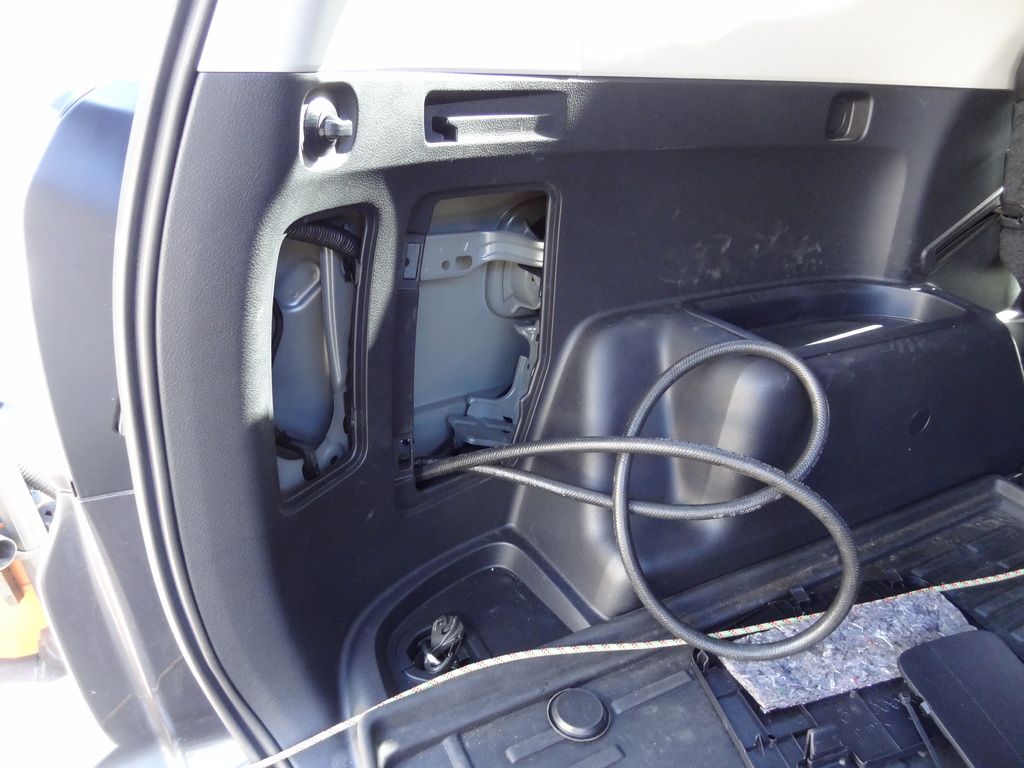
I stopped when I had a good loop in the compartment
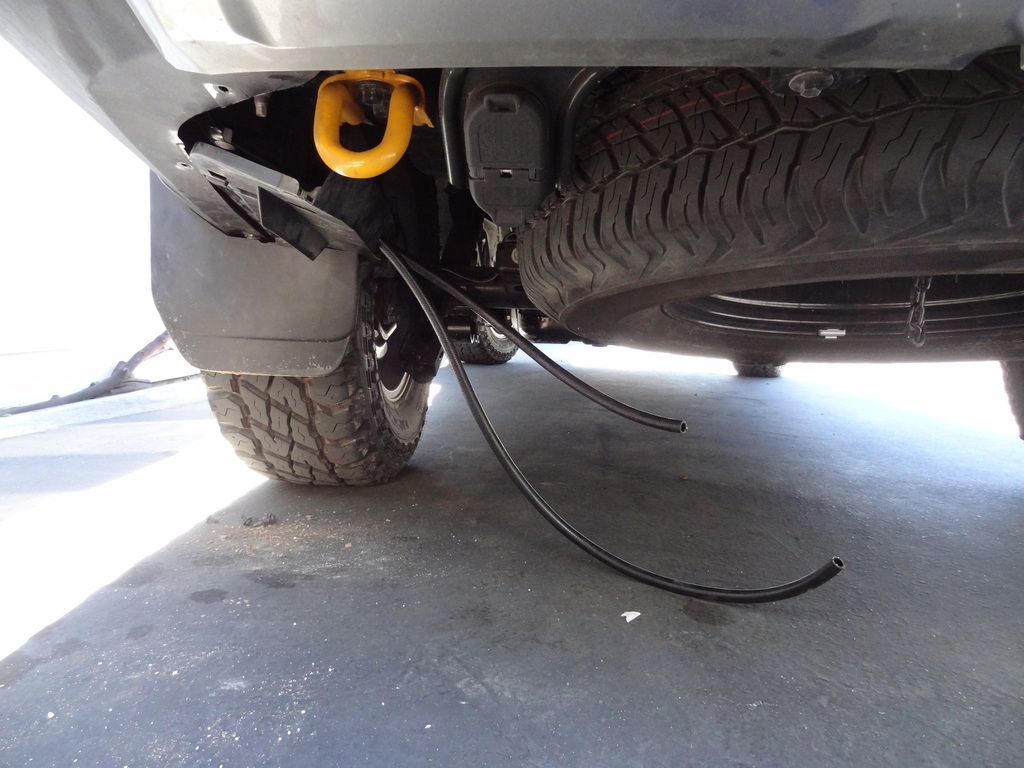
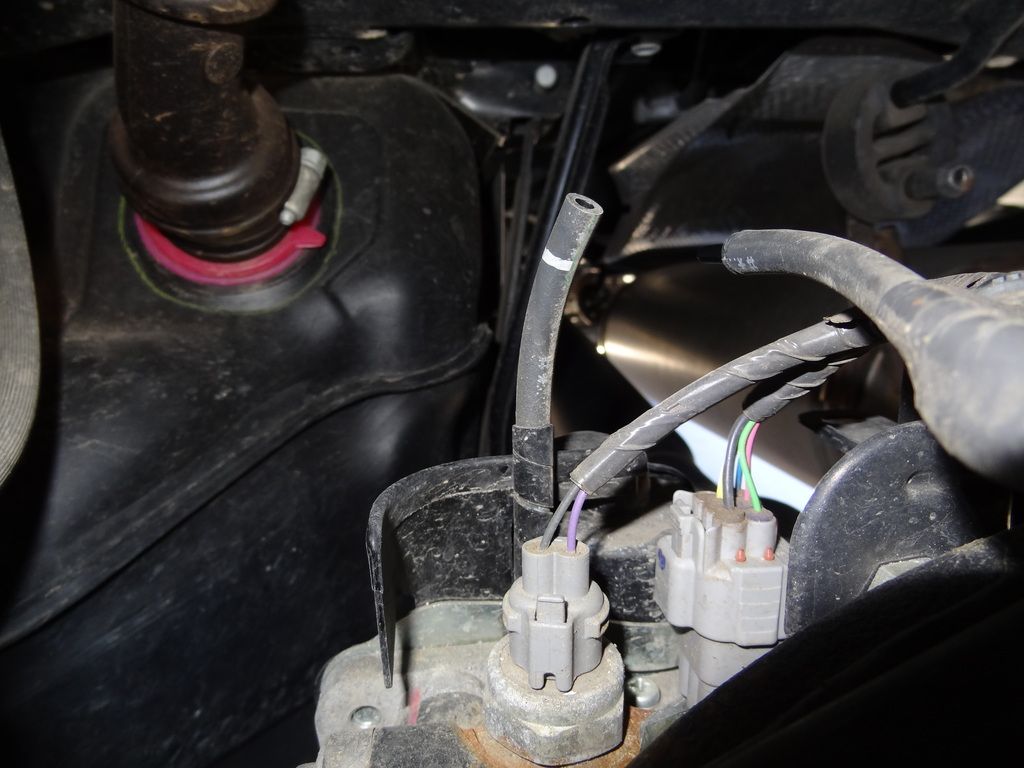
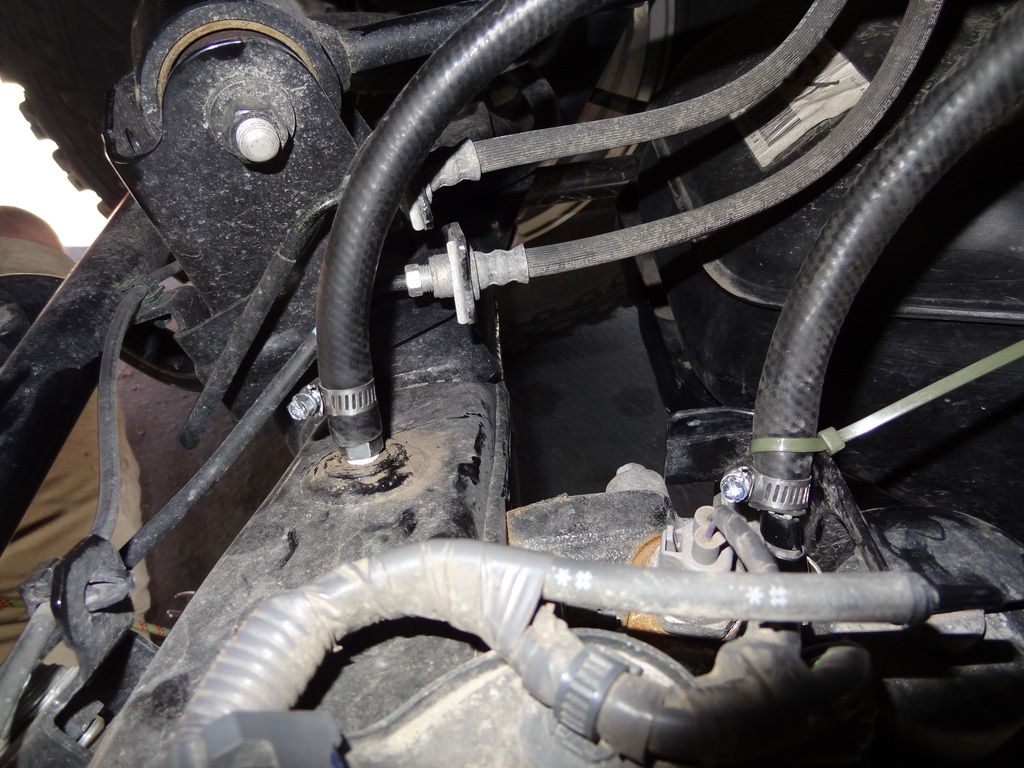
Removed the stock 1-way valve, added some teflon tape to the new nipple and installed it on the rear differential
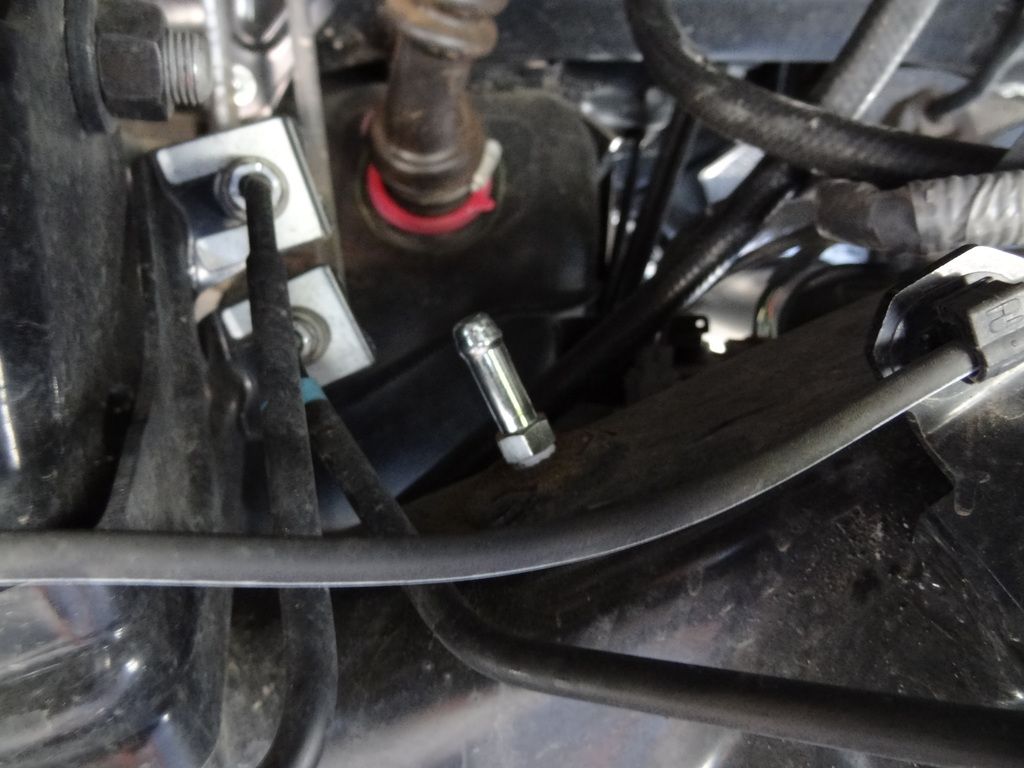
I then pulled the connector off of the e-locker breather hose, leaving the end exposed
Routed the lines from the fender to the axle along the fuel tank fill line
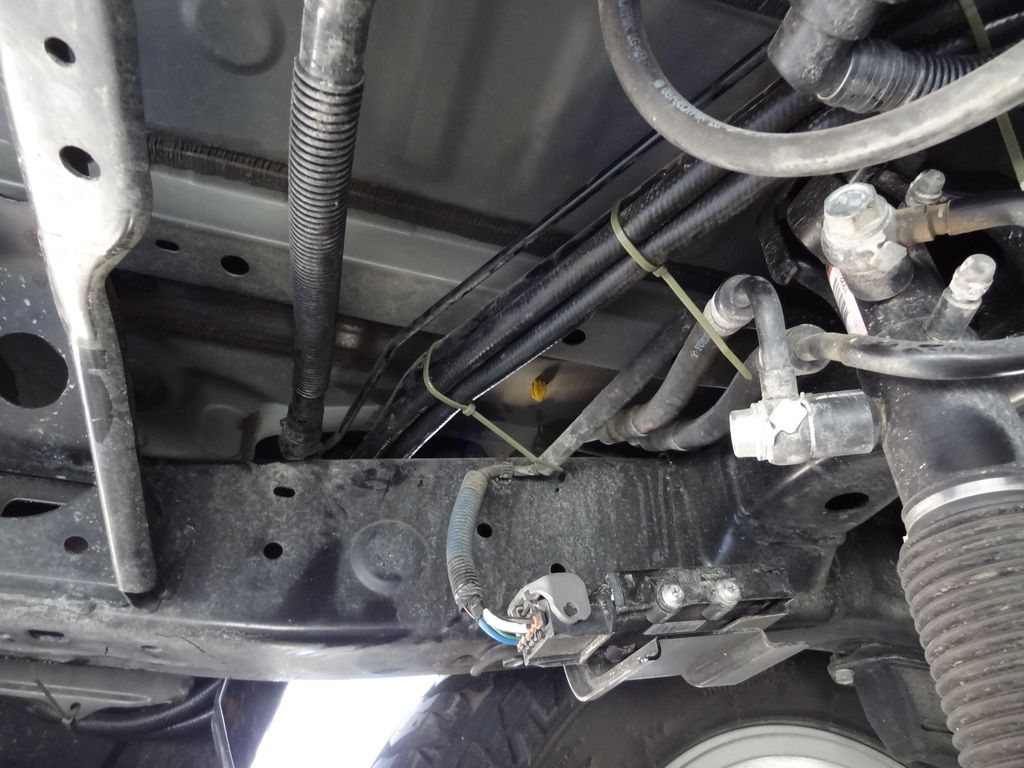
I left some wiggle room to account for suspension travel
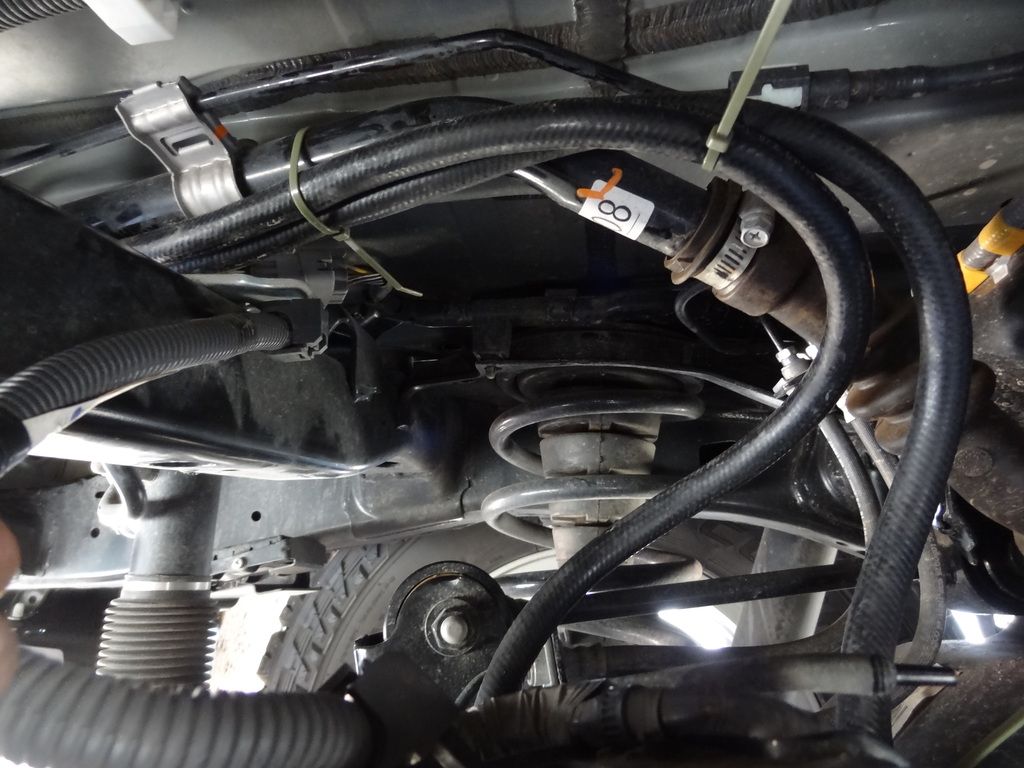
I attached the hose ends to the installed nipple, and the end of the e-locker hose using the hose clamps. The e-locker hose that is attached fits into the new transmission cooler line loosely, but will clamp down with the hose clamp tightly. I used a zip tie on the e-locker line to keep it from moving around too much. Be sure to route away from the exhaust, too close might get a bit toasty.
I cut the line in the cargo area, and cut the OEM grommet plug to fit around the lines.
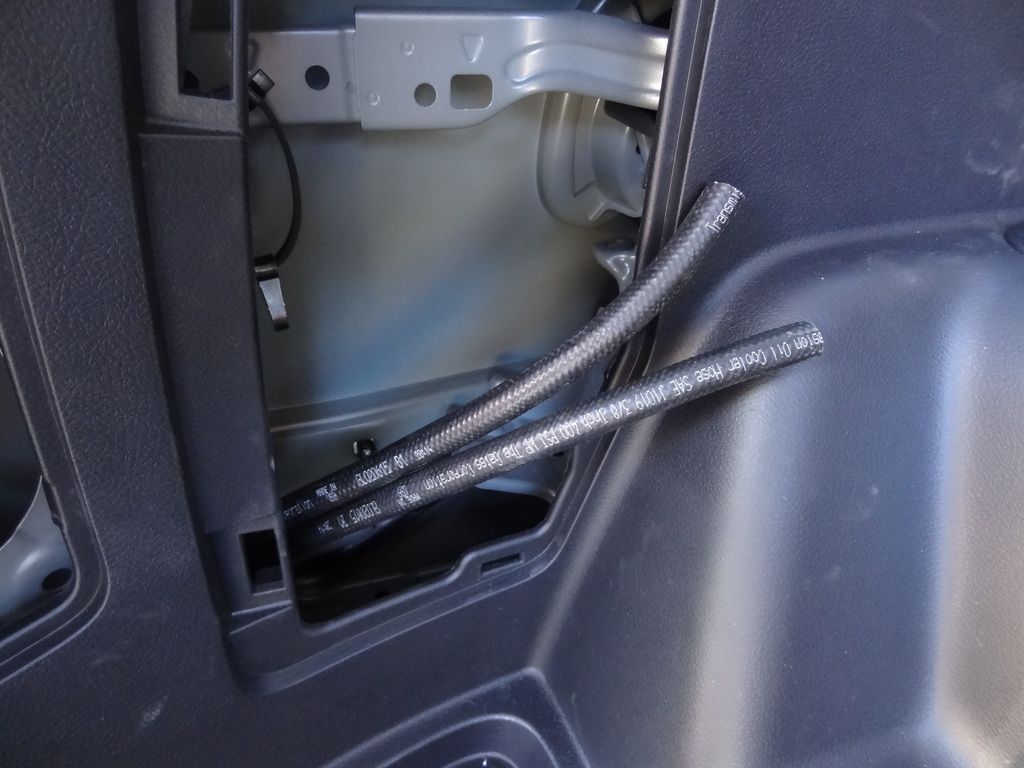

This is where things got a bit sideways. I spent the better part of an hour trying to seat the grommet plug in the hole to no success. I then took the rear fender bumper off to get a better look.
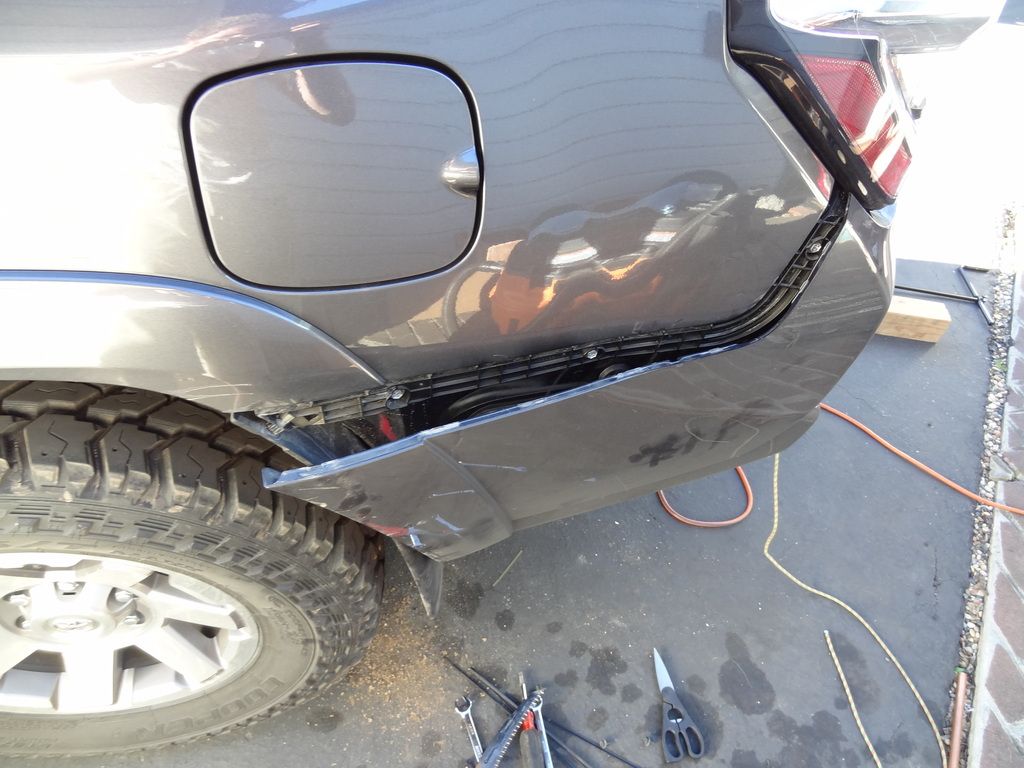
I decided to install the grommet plug from the outside. I cut the plug along the edge, and fit it around the lines. With a bit of soap, I was able to fit it in for a decently sealed fit. Hind sight, don't cut the plug, just remove the bumper edge first and feed from the outside. Done deal.

Install the breather valves on the hoses with hose clamps.
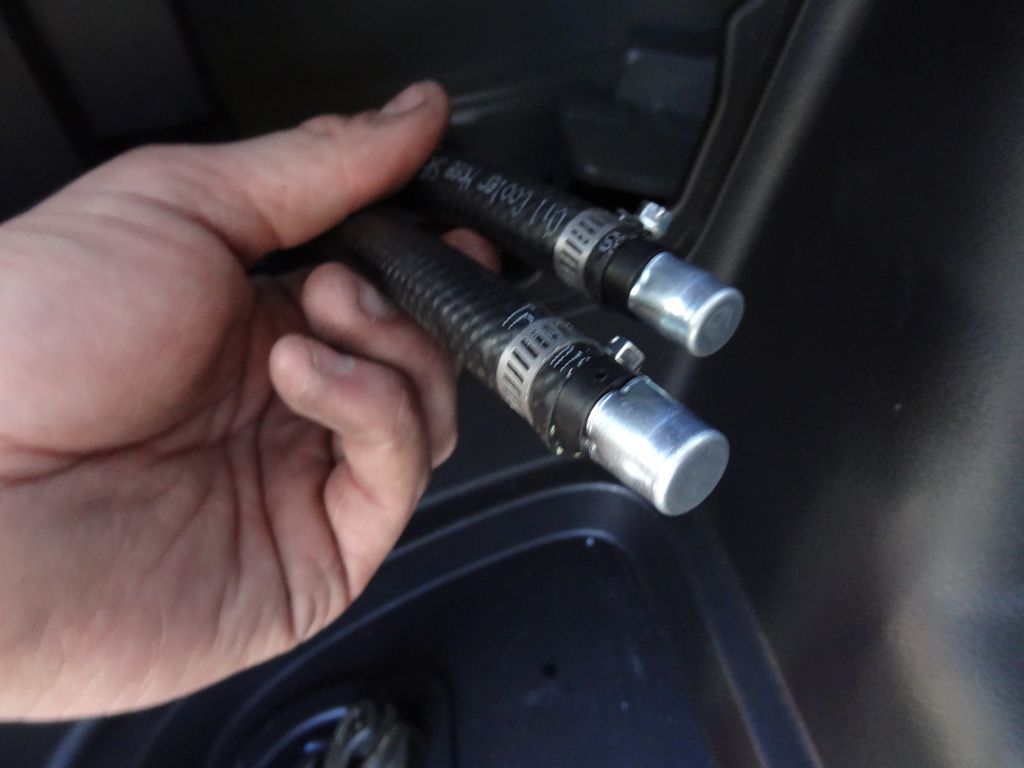
Zip tie the hoses into a spot that is convenient for you.
Reinstall the spare tire, put the jack/tools away, install the covers, finish your beer, done.
Now, to find a creek crossing... More to come...
MTN4RNR
Adventurer
Installed a previously loved Gobi ladder on the rig this weekend before heading to the snow. Since I bought it used and the supplied adhesive strips were shot, I used 3M extreme fasteners (aka ************ Velcro) to secure the ladder top plate and the lower attachment point instead of double sided adhesive. The weight rating is the same as the 3M extreme double sided tape, but this allows me to remove the ladder if I need to by unbolting the lower bracket and pulling it off. So far so good! No flexing or moving while climbing! Three strips, 4" in length on the top plate and a strip that is the width of the ladder on the bottom of the hatch. Because the fasteners are thicker than the standard adhesive, the lower clamp BARELY fits over the hatch lip. Definitely an oh ******** moment when I thought it wouldn't fit. Whew! I got this in prep for the new full length roof rack, stay tuned for that!
MTN4RNR
Adventurer
This weekend I completed my stock interior lighting and puddle lamp LED upgrade. All of the bulbs that I have installed so far have been Philips brand, which carry the same light temperature of 6000K, and a 12 year guaranteed warranty. Bulbs were sourced from Xenon Depot
Parts used:
- Philips Vision LED 194
- Philips Vision Festoon LED 3022
- Stone Brewing Enjoy By Black IPA
I followed a tutorial from Precision LED on YouTube, which shows how to access all of the stock bulbs.
Map lights before
Map lights after
Dome light before
Dome light after
Door lights before
Philips bulb orientation in housing (so that they work)
Door lights after
Puddle lights before
I followed this thread post to get to the puddle lamp bulbs.
Puddle lights after
Impressions
The 194's are great. Very bright, very well build with an even light distribution. I have been impressed by these, and will continue to use them as my go-to mini wedge. The festoon bulb, as I stated in my rear hatch LED upgrade post, is dimmer than I would have hoped for. The color matches the new lights perfectly though, and I don't think that I have lost any useable light over the halogens. I will give it some time and see how I like the output before deciding if I want anything brighter.
Next (and last) interior lighting upgrade will be an auxiliary led lighting set up for the cargo area.
More to come...
character zero
dangerfoot
Nice build and detailed write-up! Makes me miss my T4R Trail Edition a bit but I needed the additional dry storage.
Forum statistics
Members online
- EPO
- Nick66
- Toolbarscgo
- Natehd
- solitd3
- Bellpilot1
- steve_e
- rehammer81
- logicphoto5
- jaywo
- IdaSHO
- djtc
- Kevox
- The Impossipede
- Art Vandalay
- yousername
- 3IMOH
- bozzy
- blksubykid
- Velobrew
- mattmiccioli
- davidtzlu
- jbird1
- claymond
- PathNotTaken
- mtran
- silvrcummns
- BigSkySerf
- blupaddler
- Racer-X
- 2.ooohhh
- mark5280
- Alwaysstranded
- mmestek
- TKM101
- jboerneke
- ghostworker
- chopyourown
- yondermountain
- aaronsa3
- Naveronski
- Pishke
- Hoooogan
- Chef1612
- BajaSurfRig
- TexasSixSeven
Total: 899 (members: 49, guests: 850)