The DiscoDavis Discovery 3 Build Thread

A.J.M

Explorer
I didn't know about the different ratios of the diffs till i went searching for said mate.
Was a nightmare trying to A. Figure out if it was true or not. ( It is ) and B. Getting an auto diff.

As for the snorkel.
http://www.disco3.co.uk/forum/topic128594.html?highlight=Safari+Snorkel

Enjoy what is a very detailed guide and how to for fitting it.

Plus the shopping list at the top is VERY handy for what you need to be able to fit one. I have the snorkel in the garage and have been getting the bits together to fit it.

Now, if only i could get a day that i'm off work, to tie in with the Scottish weathers brief window of sunshine...
 

DiscoDavis

Explorer
My vot partner slept in his and had some jerry rigged mesh, a more refined version would be to get some screen and magnetic tape, glue gun the screen to the tape in appropriate dimension and there is some airflow. These also strike me as an even more elegant, if costly, solution: http://www.ebay.com/itm/Window-AIR-...covery-Pair-/171907320768?hash=item2806798bc0

Nakatenga...... :drool:. It. Looks. SO clean. Great another thing to add to the "to buy" list :)

For your spare tire conundrum, grab one of these http://www.amazon.ca/gp/product/B0036E9VB6?psc=1&redirect=true&ref_=oh_aui_detailpage_o04_s00

I tuck my 265/65-18 KO2 up in my spare well, and use that little guy to get it going, also nice for airing down etc.

Only complaint is its a bit of a bugger to get the tire up there I find i use a floor jack and it just pops it in there, dont want to blow up the little winch. Rear bumper and tire swing is on the "To-do" list.

Ooooh thanks for the idea, that might be a good solution in the near future, might need to throw the winch back. I am wondering how much more psi I can fit in the tire before it won't go in the slot (I have 265/60 instead of the 65, so ~13%? less sidewall.
 

DiscoDavis

Explorer
I didn't know about the different ratios of the diffs till i went searching for said mate.
Was a nightmare trying to A. Figure out if it was true or not. ( It is ) and B. Getting an auto diff.

As for the snorkel.
http://www.disco3.co.uk/forum/topic128594.html?highlight=Safari+Snorkel

Enjoy what is a very detailed guide and how to for fitting it.

Plus the shopping list at the top is VERY handy for what you need to be able to fit one. I have the snorkel in the garage and have been getting the bits together to fit it.

Now, if only i could get a day that i'm off work, to tie in with the Scottish weathers brief window of sunshine...

Okay good to know... let me pack that information away in the discodavis filing cabinet.

Stay posted ;). I already fitted mine... what an effort.
 

colb45

Observer
Ooooh thanks for the idea, that might be a good solution in the near future, might need to throw the winch back. I am wondering how much more psi I can fit in the tire before it won't go in the slot (I have 265/60 instead of the 65, so ~13%? less sidewall.


I just pull the core and letter go. I tried the first time to get it to fit but its a fat bugger to get in there. With less side wall might be able to squeak it up with 20psi?
 

colb45

Observer
Ooooh thanks for the idea, that might be a good solution in the near future, might need to throw the winch back. I am wondering how much more psi I can fit in the tire before it won't go in the slot (I have 265/60 instead of the 65, so ~13%? less sidewall.

I usually just pull the core on mine, need all the room I can get to squeeze it up there. But with a smaller tire you might be able to get away with 20psi?
 

DiscoDavis

Explorer
More new stuff

24489272044_4c50cb24f0_c.jpg


This last Christmas was the first one I got to actually spend using the truck. Christmas Eve 2015, Incline Village NV

25119980165_82eeb3ed10_c.jpg


B-side: very little beats taking off work for a Tuesday (in January I think) morning of trail exploring in the Santa Cruz mountains with a couple of discos (and ExPo members) :).

25154124975_b585fd636f_c.jpg


Found a set of the OEM option seat covers in Aspen. I thought they would be green but apparently aspen is a silver color? Okay well the only other option was sand and everything else is already tan so... they stay.

24849923979_55d0c41dc5_c.jpg


I cut a few holes in the decking for the Jerry can bracket bolts. Threw up the scrap pieces of polymax to give the front of the roof a little more protection (I live under some very large and very old trees that like to drop branches). Hilift plate lives up top too.

25099335642_784b696d2c_c.jpg


How the sleeping platform mounts to the drawers. Each piece has a little brass screw-in socket so that the platform can bolt on/off with a screwdriver.

25217588445_e50bb059e9_c.jpg


24921985410_292e52c089_c.jpg


25217586875_e098c5c825_c.jpg


24586935124_5269aea0fa_c.jpg


24921982330_489c41b621_c.jpg


I wanted it to support as much of the mattress as possible while still providing for the use of the side seat, just in case I needed to bring someone along outside of driver/navigator. That and coming from EMS work I like the idea of being able to transport a patient lying down, with the ability to have a care provider in the rear. Not that that would happen.
 

DiscoDavis

Explorer
Weird net thing behind the middle seats

You can see the netting that I got from a Lexus hanging out in the platform pictures. This is for stuff like the IFAK, fire extinguisher (when platform not in), shop towels for messy passengers, neck pillows, blankets, water, snacks, motor oil, etc.

it is tied down to the drawers with the hooks grabbing zip ties that go through holes drilled in the drawer lid (see pictures above), and plug into some swiss keychain sockets (see reference photo below) that the headrest poles go through

s-l300.jpg


These things ^ you can just pop them out with one hand.

24858454980_9a5cf56e8b_c.jpg


24786413829_389371e476_c.jpg


The net is a great thing for long trips with people back there. Easy to remove, might have a separate mounting for it while camping when all the seats are folded down. Easily on my top ten list of simple DIY.
 
Last edited:

DiscoDavis

Explorer
I usually just pull the core on mine, need all the room I can get to squeeze it up there. But with a smaller tire you might be able to get away with 20psi?

Hmm... sounds promising. In a perfect world I'd love 25psi but with a compressor that's almost a moot point.
 

DiscoDavis

Explorer
More Lost Coast (forgot to post)

24493202253_c929481090_c.jpg


Better angle of my mistake... this was the day I learned about sand, and how close or NOT close one should be to the surf... When I looked in the mirrors at the side of the car, I saw waves lapping at the sills (NOOOOOOOOOOO). Thanks Brenton (Disco2Guy) for capturing the moment. I was too busy shaking.

24549041013_48bcc4e24c_c.jpg


Once freed I vowed never to return to such a surface, without 50" super swampers and an 8' lift.

25094240366_e0bce9d48a_c.jpg


First recovery the disco ever did, within an hour of being recovered herself. To this day I still suspect he intentionally bogged himself down to make DiscoDavis feel better about his own driving shortcomings ;).
 

DiscoDavis

Explorer
The EAS disconnect switches

I have gotten several questions about the switch I run as a cutoff for the EAS. Here is a description. I use the switch(es) when putting it on a lift, a jack, my next river crossing, or whenever my next air leak springs up so I can locate the culprit area with the system depowered... I got a little tired of pulling fuses and I like switches so this has worked out well :)

24489411524_d1744f377c_c.jpg


When I first bought the truck and started routine maintenance stuff, I noticed the annoying and scary tendency the vehicle has to shift around at the most inopportune times. Any time it seems to sense a jack lifting it, the EAS system clicks on and will drop the truck as fast as it can. Your handy land rover glovebox manual will tell you that for safety reasons the EAS will not operate with the doors open. I am here to tell you (as I am sure many others can confirm), this is NOT the case. If it wants to the truck can and will drop all corners to the bump stops with every last door open. At best, this is a minor annoyance because you usually have to use two jacks to lift it up if you don't have a floor jack around (I did not), and it loves to trap bottle jacks because the frame will sit lower to the ground after the EAS has dropped. Discovery 3 owners get used to that weird feeling of the entire truck weight shifting on a jack by itself. At worst, the vehicle could move in such a way that traps you or someone around the vehicle under it, which would crush/maim whatever gets in the way. I have never put myself in that position, but it has been described to me that someone just finished working under his, and as he walked away from it it dropped to the bump stops (probably would have killed him). Scary moment.

I originally checked around for ways to mitigate this behavior. A few old forum posts kept turning up again and again. (these ones, http://www.landroversonly.com/forums/f41/lr3-air-suspesion-coil-spring-conversion-58584/, and http://www.landroversonly.com/forums/f41/what-air-suspension-disconnect-switch-58761/, among others)

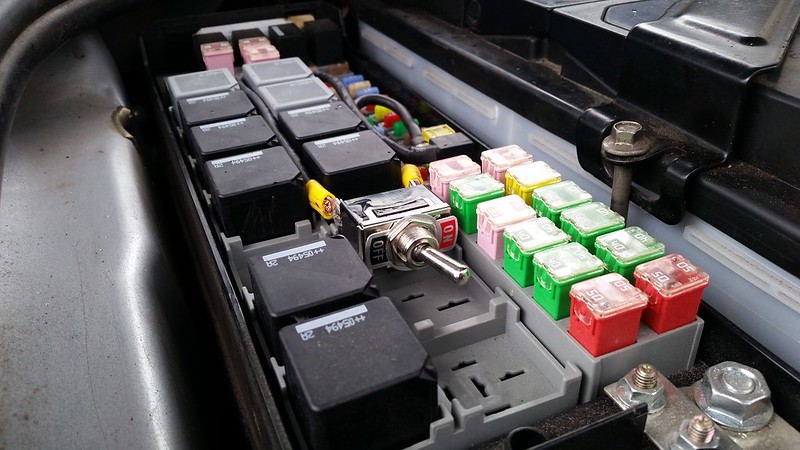
What I learned from months of casual forum digging was that three fuses (really two) control the EAS in the sense that if you pull them out, the EAS is inoperable. These are: F26E, F3E, and F35P. I would pull them anytime I had to jack up the vehicle, and they work great. With those fuses out, the truck will lift normally, not shift, and most importantly: not drop. Now I could have any mechanic or friend help me work on the vehicle without them being afraid of it moving or them breaking anything. I started to wonder how much wear and tear the pulling of fuses would be, and though I never did, I contemplated the annoyance of losing fuses during work.

When I had more time on my hands, and a few basic wiring tools, I wanted to replicate what I had heard someone had done to their D3. The guy who did it was Bruce Byer, AKA Bbyer, revered on the forums, and a veritable tech guru for Land Rover owners (namely Discovery 3 owners). He wired up a switch in the cabin that controlled the F35P fuse, which he describes as the best of both worlds since the EAS can still communicate but cannot fail or drop during normal operation. Things like sensors failing and whatnot. He did a lot of the groundwork investigating the wiring diagrams, which I later used.

You can view his gallery on the original switch here:http://www.disco3.co.uk/gallery/thumbnails.php?album=3778.

Bruce was kind enough to answer my many questions and clarifications on photos he took, and with his help I replicated first the F35P switch, but also used that to wire a second switch, controlling F26E. He continues to use his switch, and contemplated using F26E, but the fact that it is located in the engine bay poses problems if you want to actuate it from inside the vehicle.

HOWEVER


He (Bruce) wanted to clarify: "re the F35P, stress that it does not stop all movement, just inhibits some of it, some of the time." To my mind, it works as a sort of quick-fix insurance policy, since the F26E fuse is harder to get to as a driver alone, and the F35P fuse can be actuated from the safety of the cabin and actually does not throw a critical suspension fault.

In my testing I found that the F35P switch does NOT stop the dropping behavior on a jack. This is what lead me to focus my efforts on what Bruce describes as the primary fuse for EAS, F26E. F26E provides the power to the other areas of EAS, so that in theory if you cut power in that one area you disable the whole system. It freezes the EAS in its current state, useful for lifting/jacking, and running through obstacles you don't want to drop onto: like a rock garden or a deep water area. I have pulled this fuse several times when working under the truck before, so I can attest that it does disable the system. How did I make the switch? I used old photos and references made to the F35P swich from back in 2012 to sort of figure out what Bruce did, until he actually took a closer photograph of his fuse box for me. ;)

Materials:

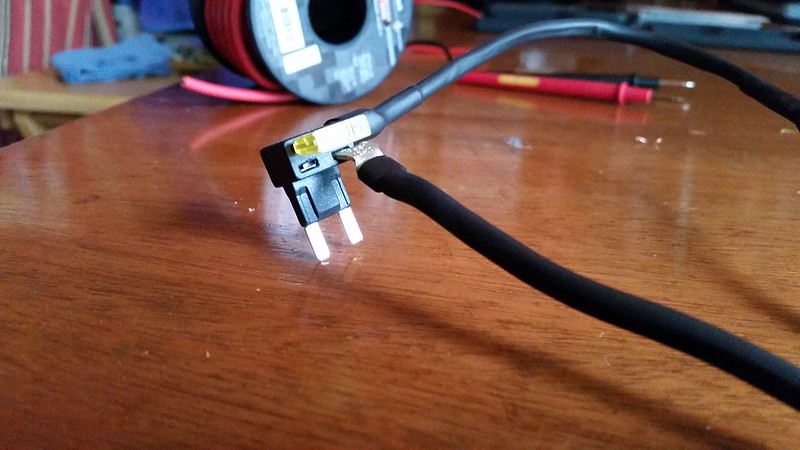
>add-a-fuse/add-a-circuit device. (example of where I got mine, here) This is so you can add a switch to a fuse while still having a fuse in that circuit.

>Some wire. I think this was 12ga, 600V wire.
>A multimeter (for testing which way the circuit paths go)
>wire crimps
>wire terminals like these ones (you clip one prong off so that it acts like a fuse blade to complete the circuit)
783250683086lg.jpg

>some shrink wrap
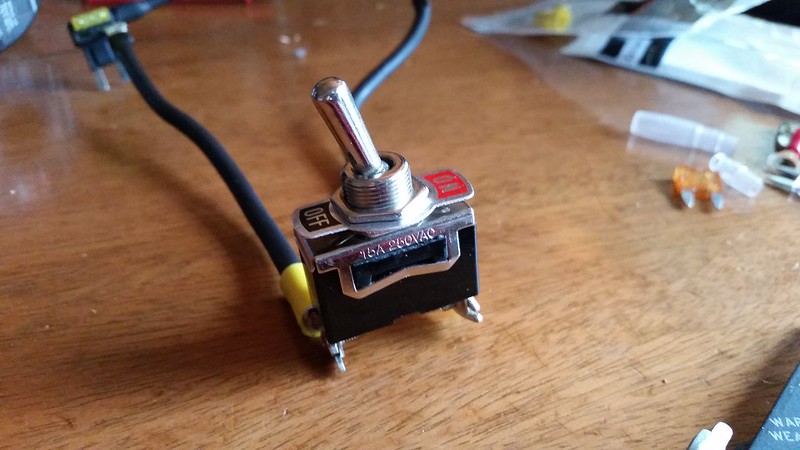
>switches (I would recommend a toggle, I looked for a 20A switch).


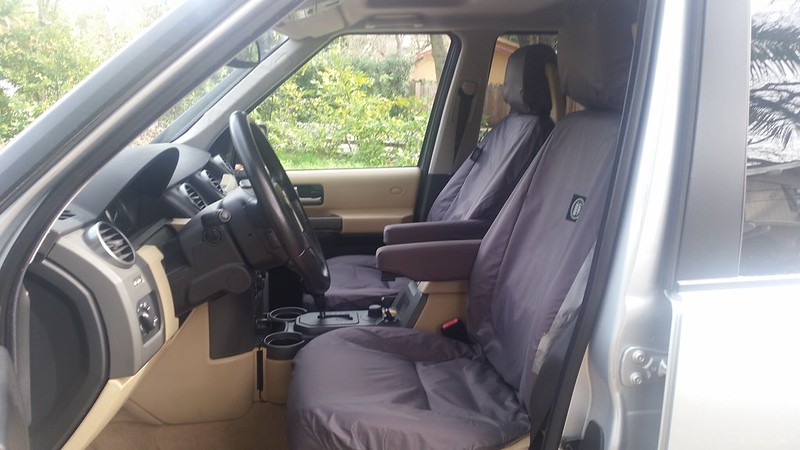
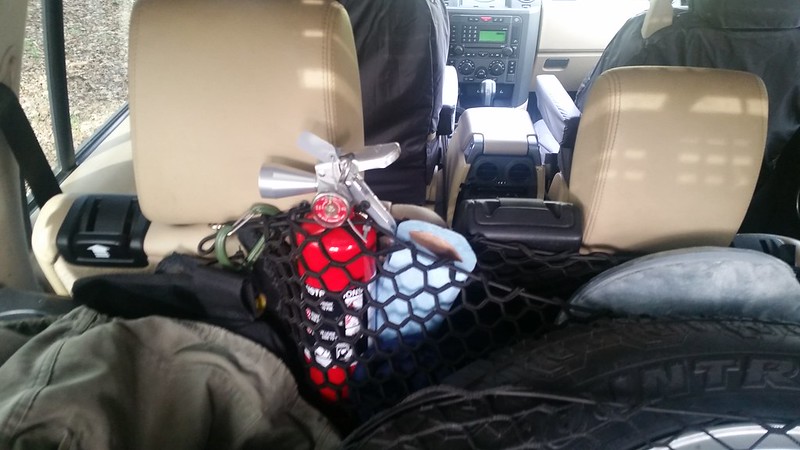
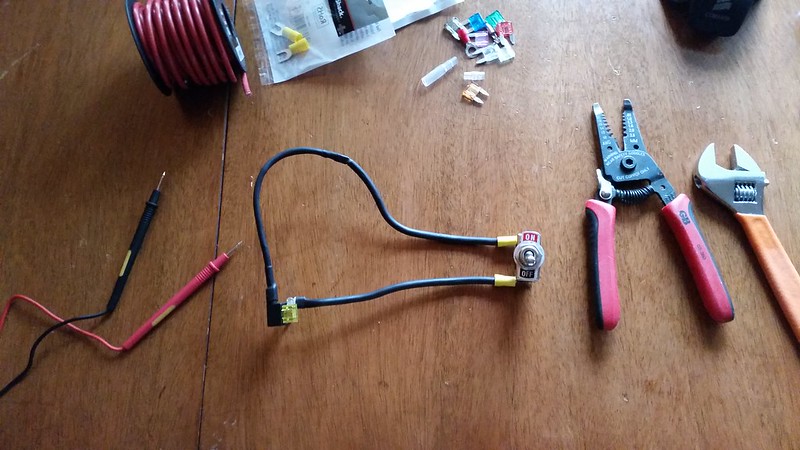
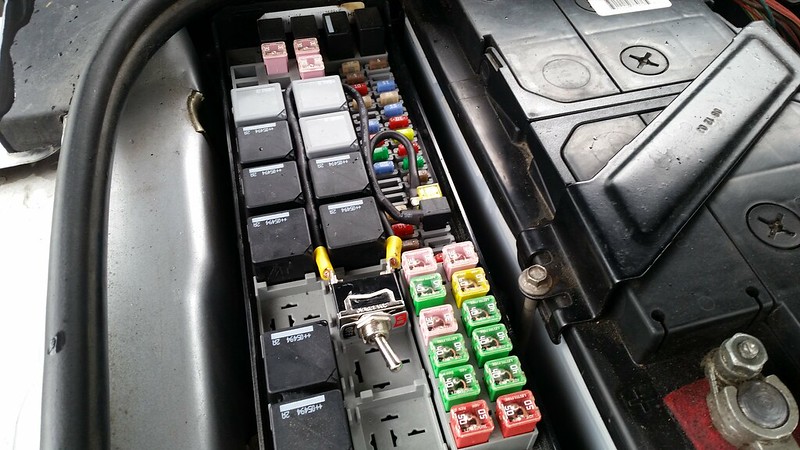
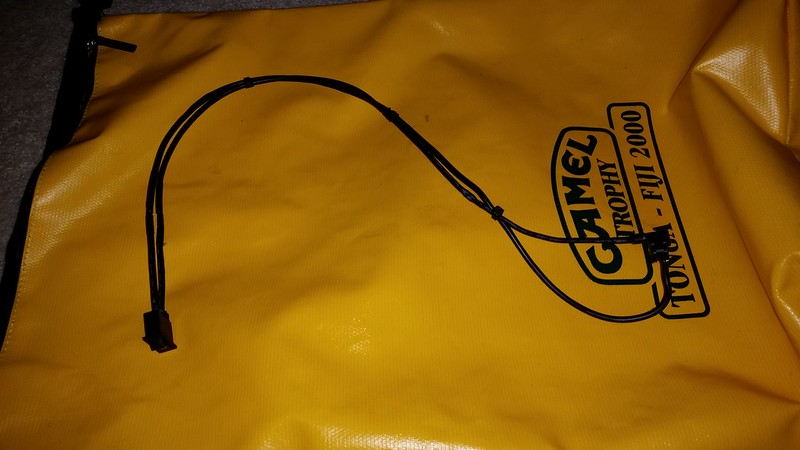
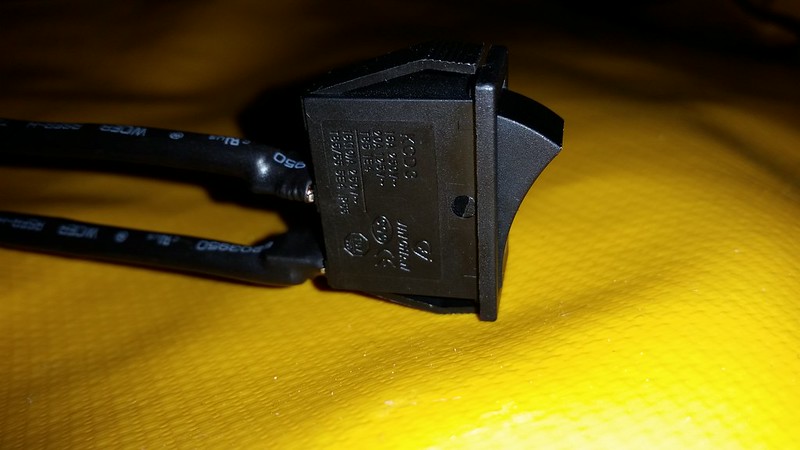
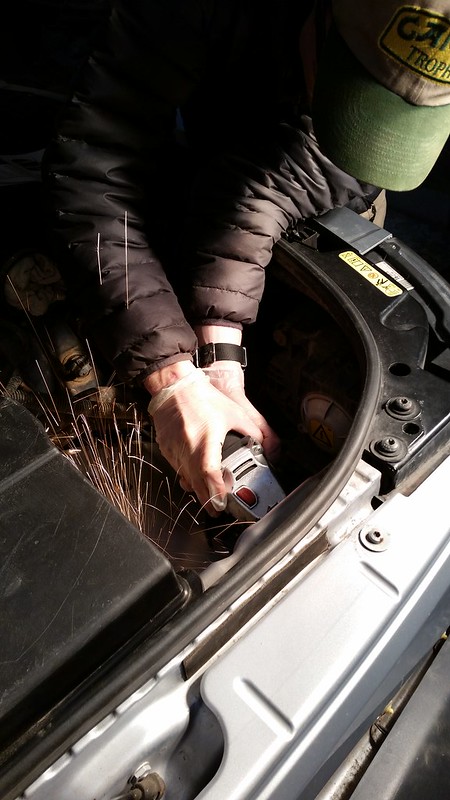
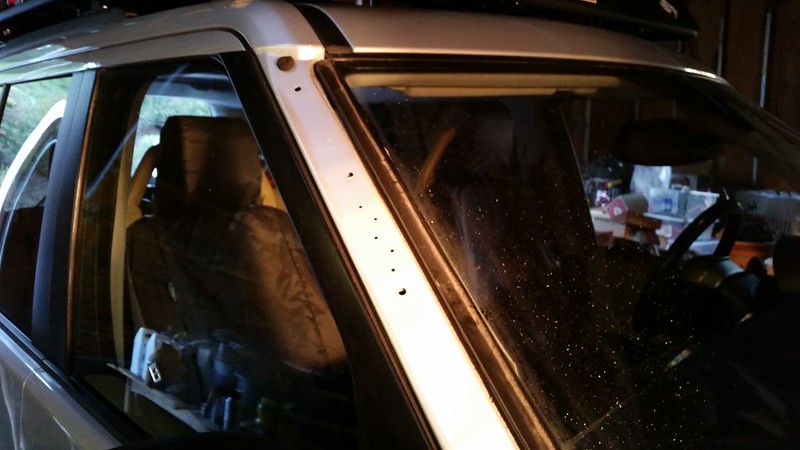
Pictured below are the two switches I rigged up. The toggle (F26E, 20A, engine bay) is the MAIN or master EAS disconnect. This I what I use when jacking up the truck or as an emergency cutoff if the system started freaking out, or to turn the system off overnight to check for corner drop (leak detection). The rocker style switch (F35P, 5A, glovebox) is the auxiliary (AUX) switch that depowers the ride height switch in the cabin and prevents errors from causing suspension faults.

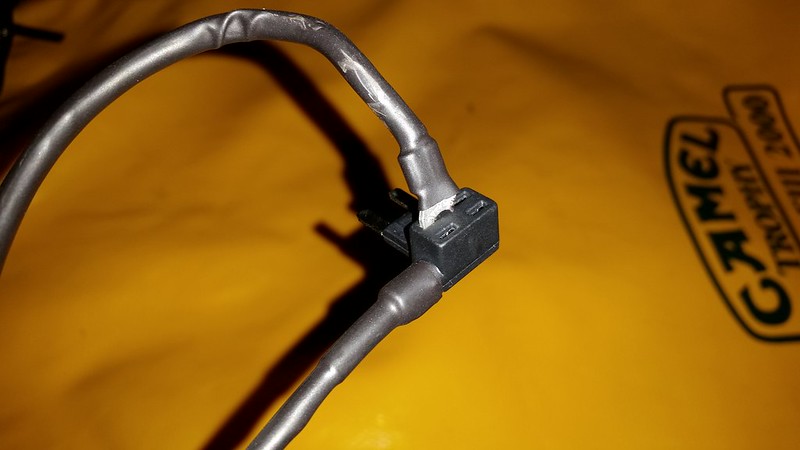
Pro-tip: the add a circuit/fuse device has a wire sticking out of one side with a little crimp. The gauge is smaller than what I used so I crimped the smaller wire to my bigger wire and went on my way. Later when I was rerouting the wiring I decided to cut the little wire and splice in some more length so I could move the switch. IMO don't do this. It is annoying to crimp a significantly smaller wire, just try to avoid messing with the existing wiring.

25026789831_eff8b97aa7_c.jpg


24489402764_bb08ff15c0_c.jpg


25120063145_622cc32b6a_c.jpg


24752399209_4c00b7ef80_c.jpg


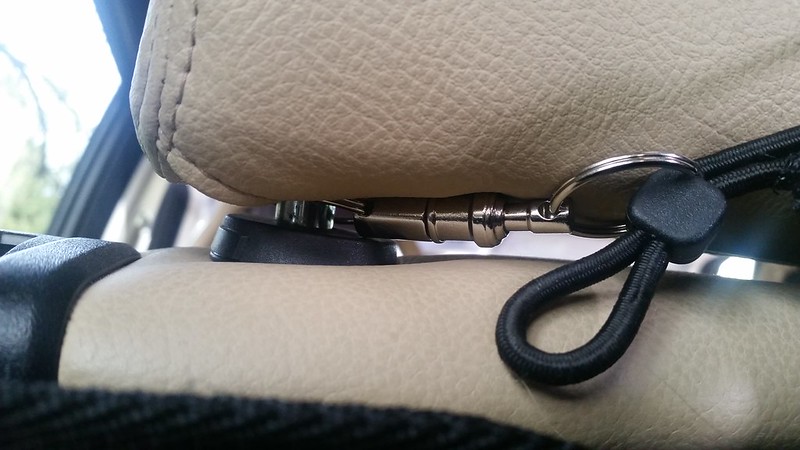
The rocker switch is cool but not as cool as a toggle. I ended up keeping this one around in the glovebox.

24752395189_3e3335e087_c.jpg


25001861192_015e766a2e_c.jpg


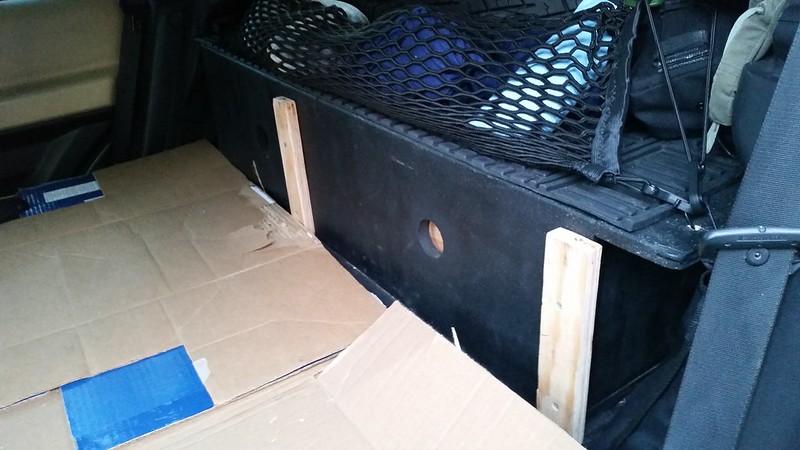
You can get a rough idea of how these things are wired up. One wire plugs into whichever slot completes the circuit. The empty fuse slot holds whatever amperage fuse you pull out and want to add a switch to.

24824428420_26aaf966ab_c.jpg


These were both rough mock-ups of how I wanted to prove the concept out. Finished update coming.
 
Last edited:

DiscoDavis

Explorer
Safari Snorkel Install

25303099331_87656e2e1c_c.jpg


24493758763_821e4109e5_c.jpg


After my previous encounters with an old airbox that used its drain valve to ingest mud and some water, I ordered a safari snorkel on a whim (no, really). I figured it would be an intensive install but nothing like what it actually turned out to be. Unfortunately I did not take as many photos as I should but I'll try to fill the gaps with some details. Total time was ~10-12 hours... (the instructions say 3 hours). Not pictured are the templates they provide you for marking all your cuts and drill-holes.

Now someone is going to say the LR one is easier. This I could easily agree with, BUT the Land Rover (mantec made/designed?) one is the RAI, and is not sealed. Apparently only two bolts in the fender instead of five, and no rubber hose between it and the airbox? I have yet to see one in person. If I had found one for dirt cheap I might have considered jerry-rigging a snorkel out of it.

25369957906_63167de86b_c.jpg


24752918819_87de72af20_c.jpg


First thing is take the air box out, the rubber elbow for the airbox, the air intake grille, and the rubber piece behind the air intake grill. The air box is as easy as taking the lid off, moving that stuff out of the way, and then pulling the box out (it sits on rubber grommets). The outside grille is somewhat the same but check my earlier photos on the sunroof drains if you haven't opened it up before. Take all this crap out and throw it in a pile. then you have to template this channel and cut.

25028545159_134a6e739e_c.jpg


24752920429_1c60192010_c.jpg


to this size opening. My buddy did this with a grinder and cutting wheel (the australian instructions apparently want you to use a sawzall? IMO bad idea), while I was doing the bolt holes in the fender. Why cut the fender like this? It is so you can connect the big rubber tubing from the snorkel to the air box and tighten/sikaflex up everything so it stays waterproof (hopefully). Try to get the cuts as smooth and burr-free as possible. Then paint the metal and put some tape over the edges so that the rubber tube isn't sitting directly on them and tearing.

25027311881_ae72ab41c6_c.jpg


24489932404_e5a1663158_c.jpg


3 holes 14mm, 2 holes 16mm.
Stepped bits in metric sizes are your best friend. I found a random chinese set that worked perfectly. I never knew how clean they made the holes!
Bare metal edges were painted with some silver rustoleum from the hardware store.

25027314251_f4fdcfd33d_c.jpg


Now to the worst part of the entire affair... The A-pillar. This piece of Ultra Hard Steel that sits under the trim and a thin aluminum panel is ridiculously tough to drill through. I had two 5mm bits for hardened steel, cutting fluid, and at least 10 other bits of various sizes, a steel punch (which deformed by the way), and a 3-pound hammer. We needed 5 holes, 5mm in diameter for the rivets to attach the steel bracket for the snorkel neck. We snapped several bits and spent 5 hours first hammering the pillar with a punch, then drilling it with tiny bits to get a hole we could ream out with better and larger bits. Cue 5 hours of cursing and head-scratching. I took breaks to beg forum members to tell me how they did theirs. If you are curious (and a masochist), this is a rough idea of what you need to do:

>take a steel punch (a sharp and beefy, yet skinny one)
>disconnect your battery. This is so the airbags do not go off in the pillar when you do what you are about to do.
>take the 3lb hammer and hammer a divot into each spot you need to drill. I mean HAMMER it.
>get a little maybe 2mm drill bit (or any size really smaller than 5mm) and start drilling. Go slow enough so that it will catch and dig in, if you go too fast it will burn the bit head and smooth out the spot which means more hammering
>if you are lucky and the bit bites, it will squeal for the next 20 minutes as you pray for it to go through the steel. Once your god of choice (or the devil honestly) has allowed this endeavor to succeed, you will get this tiny hole finished.
>spend the rest of the hour successively reaming out the hole with bigger and bigger bits until you finally get to 5mm.
>repeat 4 more times.
>throw away all the broken bits and maybe the punch if it got bad (ours got pretty beat-up).
>finish the install (5 easy rivets, some sikaflex on the bracket between it and the A pillar, and a slit cut into the trim for the bracket)

Be very careful with the hammer, as there is expensive glass on either side of your work area. One of the guys I asked who had done this install before got back to me later (after it was all over), and informed me that he had done the same sort of thing but the hammer slipped on a downstroke and smashed his windshield. I think we got lucky (thanks again Volkov).

25120595265_d5925c491e_c.jpg


I can leave the rest of the instructions to the safari guide. All I can say is be careful, and have someone around with tiny dainty hands like I have to do up all the bolts on the inside of the fender because I don't know how anyone outside of child laborers could fit their arm inside the fender without getting bloody. That took a while. That and use LOTS of sikaflex to seal everything. This is one area you do not want to revisit. I will try to find more photos.
 
Last edited:

A.J.M

Explorer
I fitted mine over the weekend as well.

The A pillar was a pig on mine. I got a mate to come over to help. He bought a £170 drill and impact gun set just for it. ( he needed a drill anyway so this was a great excuse ) we snapped 3 drill bits trying to get the holes sorted.

I drilled the wing holes to 12mm, have to say. There are no issues with the holes not being larger.
Set of ratchet spanners was a god send to get the nuts tightened up.

I have smaller hands and slim fingers so I could get all washers and bolts onto the threads relatively easy. No bloody or cut arms here.

Air box and pipe work all sealed with a GOOD helping of sikaflex.

Like you. I will never go back to it as it was a hateful job.


Edit to ask.

Does your snorkel head have rain drains shaped and cut into it?
I've seen some that do so rain doesn't get into the system, mine doesn't have it.

Going to email safari to see what the correct head for it should be..
 

DiscoDavis

Explorer
I fitted mine over the weekend as well.

The A pillar was a pig on mine. I got a mate to come over to help. He bought a £170 drill and impact gun set just for it. ( he needed a drill anyway so this was a great excuse ) we snapped 3 drill bits trying to get the holes sorted.

I drilled the wing holes to 12mm, have to say. There are no issues with the holes not being larger.
Set of ratchet spanners was a god send to get the nuts tightened up.

I have smaller hands and slim fingers so I could get all washers and bolts onto the threads relatively easy. No bloody or cut arms here.

Air box and pipe work all sealed with a GOOD helping of sikaflex.

Like you. I will never go back to it as it was a hateful job.


Edit to ask.

Does your snorkel head have rain drains shaped and cut into it?
I've seen some that do so rain doesn't get into the system, mine doesn't have it.

Going to email safari to see what the correct head for it should be..

Yup, sounds like you got the full safari "experience" :snorkel:. The hole sizes are interesting, I should have questioned them a bit but I guess they're like that so you can adjust the alignment of the snorkel body. Either way good to know.

I figure I can identify a safari snorkel guy by the permanent scowl on his/her face if I ask them if they installed it themselves...

RE: the snorkel head yes it has the rain channels molded in, and there are slits cut in the channels. I should get a better picture as a reference. Do you suspect you have an older model?
 

A.J.M

Explorer
I don't have those slits.
Shall take pictures and email safari to see about getting one with the slits.
I'm not sure how old mine is. No identity markings on it to age it, the website shows heads with the slits so must be a few years old at least but was never opened.

Yeah, I think it will be the 1000 yard state into the distance that gives them away.
Seen things that others haven't. Lol.

Yup, I think I could have went smaller still with the holes, say 10mm but it's on and I can rock the car with it, so it's proper solid.
Mine is getting its under armour fitted on the 18th.
 

Forum statistics

Threads
185,894
Messages
2,879,299
Members
225,450
Latest member
Rinzlerz
Top