Building a roof rack deck on a GMT800 Suburban Z-71

rayra

Expedition Leader
roofrackplotmedium.jpg


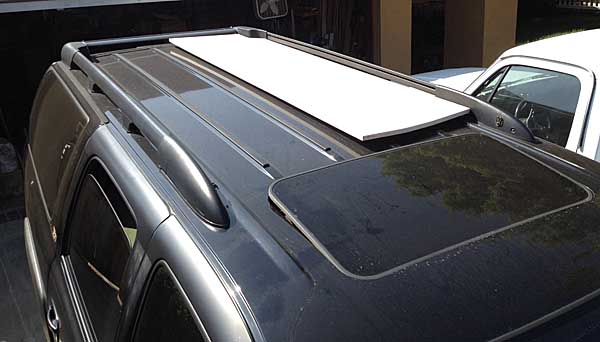
I've related a few ideas over the months, regarding trying to shade the vehicle in the brutal desert sun. Vehicle just gets too damned hot. Thought about trying to do a fabric deck like those on Hobie Catamarans. There were discussions here about painting the roof white and various other paint and material solutions. And mention of the old Land Rovers having a second skin / roof. I thought to use some aluminum plate, but we're talking about ~27sq' and that's just too expensive for me. So I'll be using plywood and looking to finish it in as weather-durable fashion as possible.

Got a bunch of work done today fabricating the metal hardware for the roof rack deck / 2nd roof.

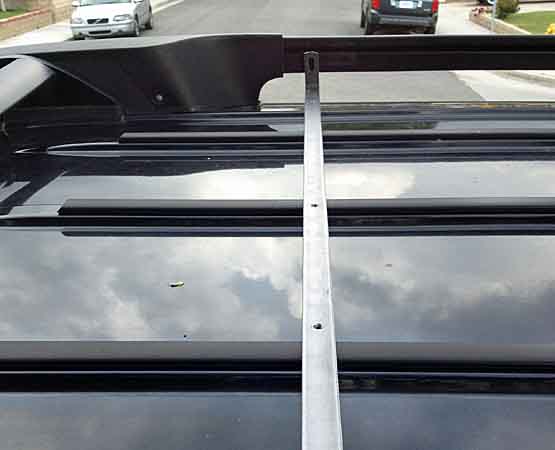
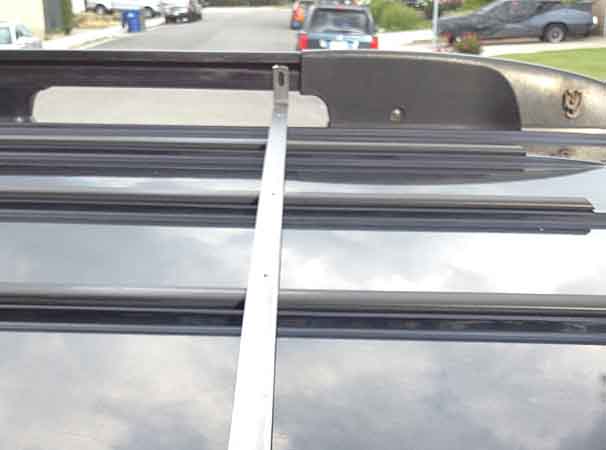
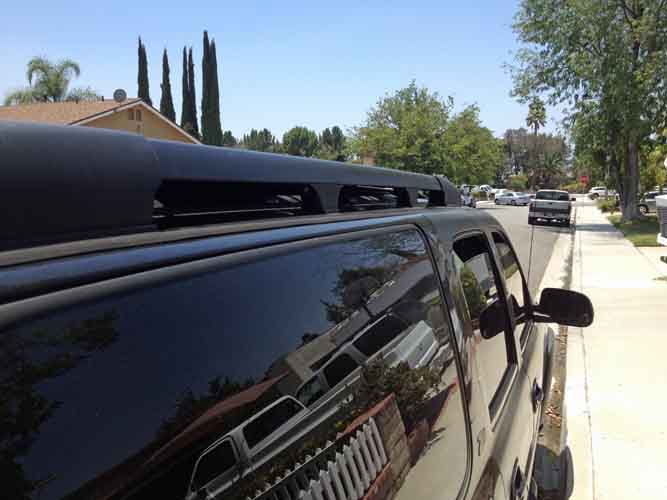
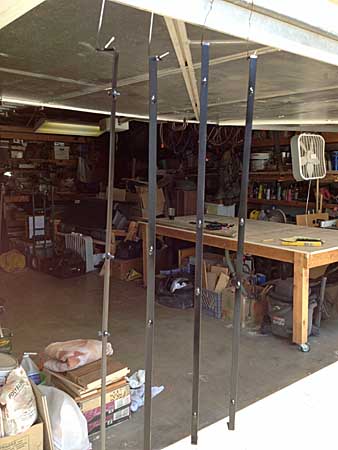
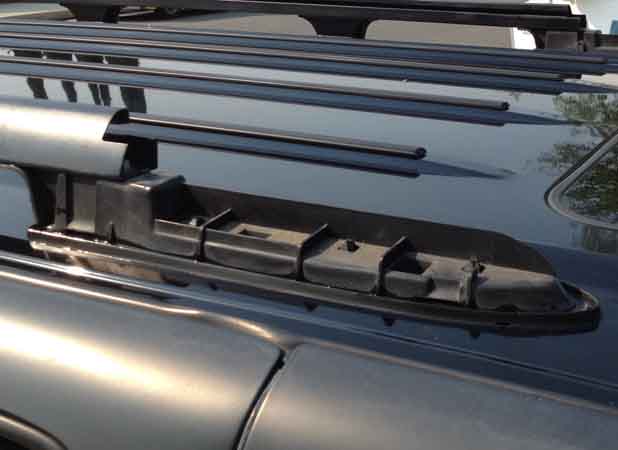
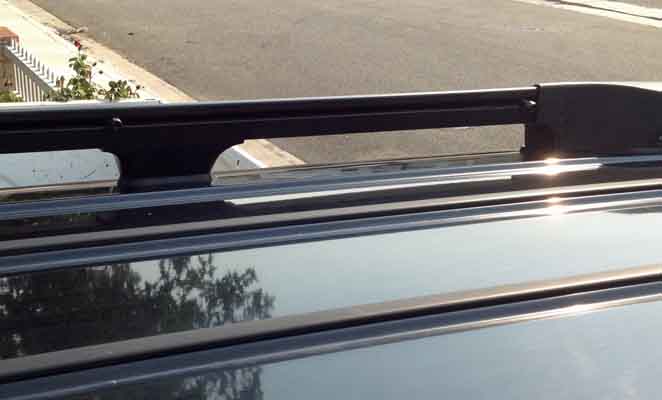
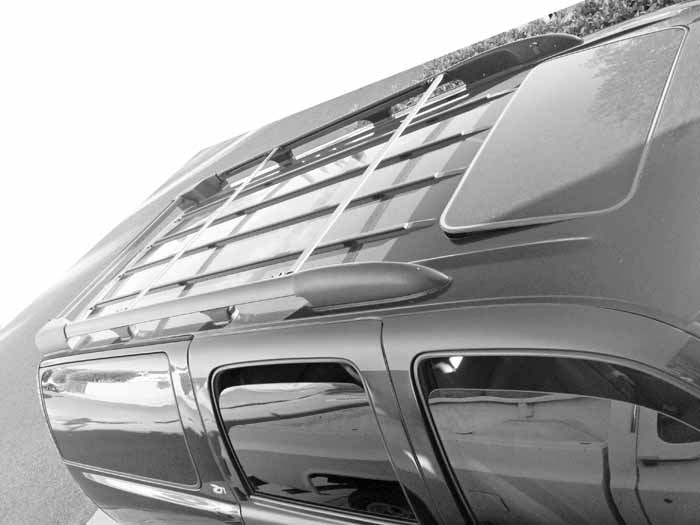
Turns out that despite the Z71 roof rack being 4" tall at the outer sides, there really isn't a lot of useful height / depth. The roof is crowned, plus there are 4 'luggage rails' shaped into the roof skin and capped with dense rubber strips. The rack comes with two cross braces, but they are arced / crowned much like the roof and structurally line up with the top of the side rails. Those factory braces are quite useful and will be retained in my design.

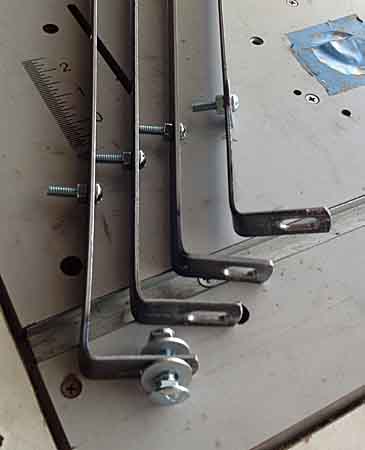
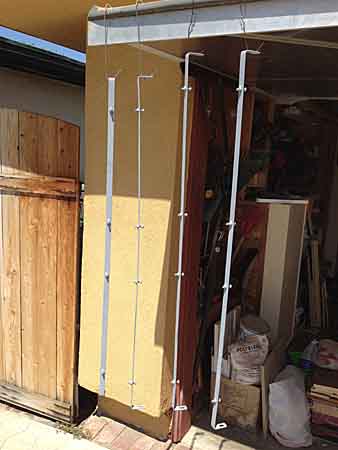
So I started figuring out clearances and how to suspend a solid deck from the side rails and have it clear the crown of the roof AND still sit low enough that the roof rack side rails still form a curb for items secured on the roof. I also am deliberately seeking to make the modifications unobtrusive. I initially though to use 1" square tubing or 3/4" for cross braces for the deck, suspended by end tabs from the side rails. But that combined with the thickness of the plywood deck ate up all the clearance. I also don't need / want a lot of weight capacity for this deck, as the primary purpose of the thing is to shade the vehicle, akin to the old Land Rover double roofs skin. So I chose to go with flat metal bars. This also simplified fabrication, as I was able to drill, grind, heat and bend the ends into mounting tabs, etc, no welding needed.

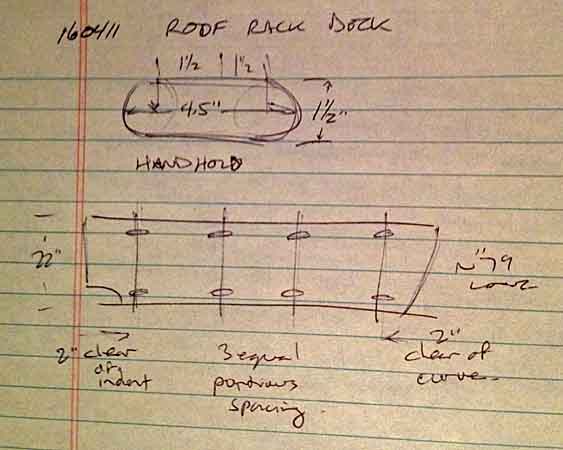
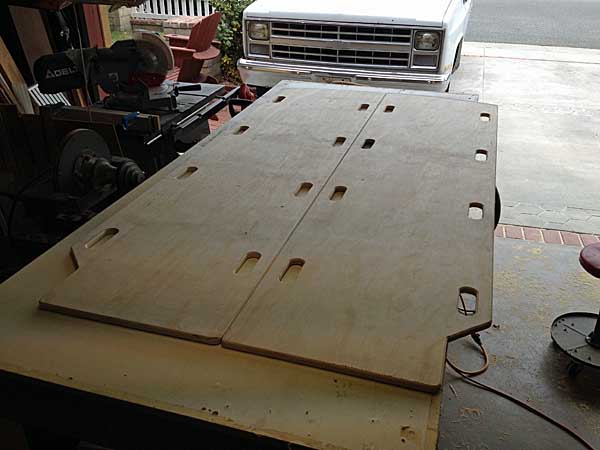
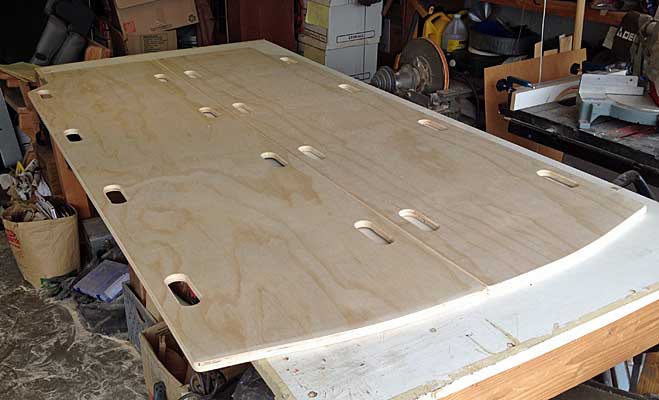
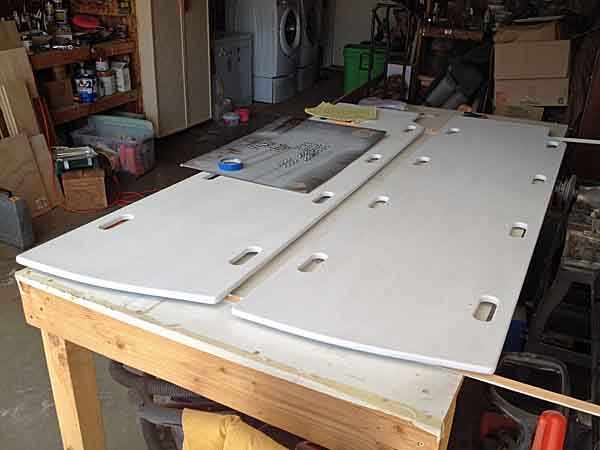
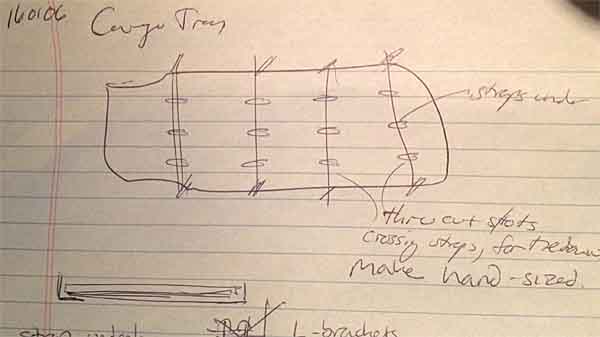
As I was sketching designs and deck shapes to blend into the vehicle curves and rack shape, I was looking for ways to incorporate tie down locations as well. I'd chosen to go with 4 cross bars. I started sketching ideas for cutting round holes in teh deck, centered over the cross bars, to form a tie down location similar to those used on carrier decks and airfields. It's flush to the surface / no obstruction, and you can just hook the crossbar. Then as I sketched a string of these around the outer edge of the deck it struck me that it looked sort of like a backboard / stretcher / carrier. The deck size is roughly 44"W x 78"L. So I decided to split the deck lengthwise and add another row of holes down the middle and essentially turn the deck into 2 backboards, side by side.
cargotray01.jpg
cargotray02.jpg
cargotray03.jpg
roofrackdeck27.jpg


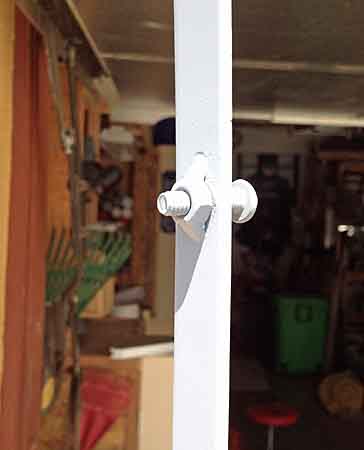
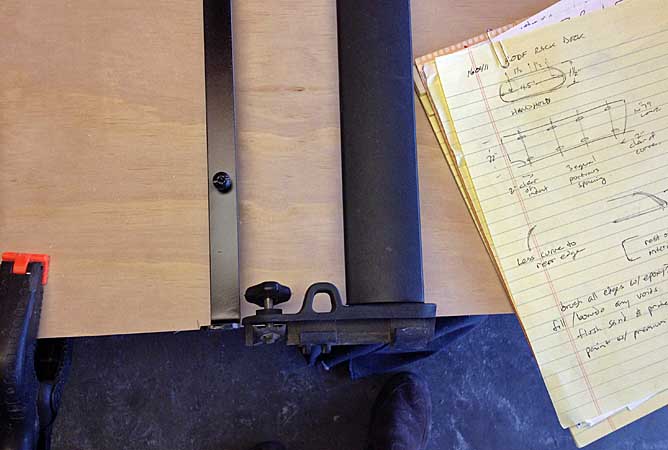
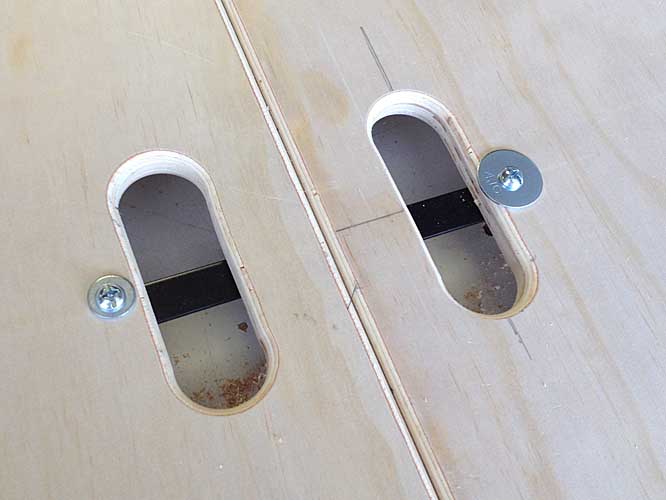
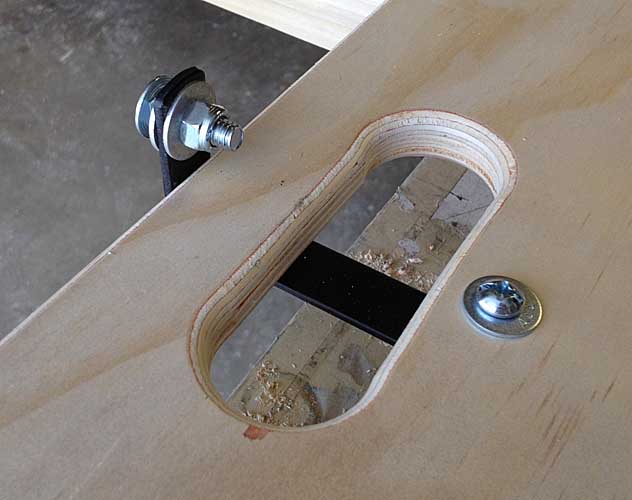
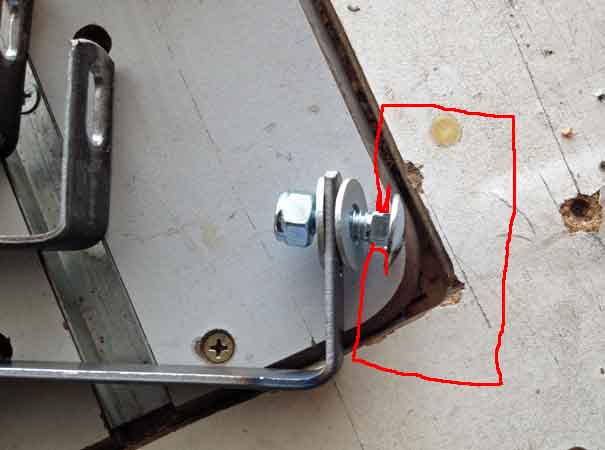
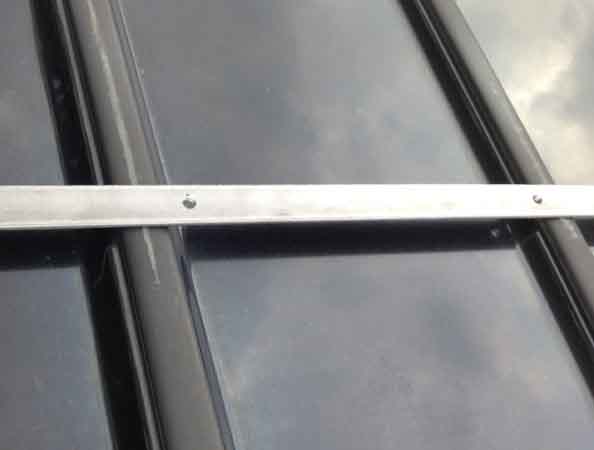
While investigating and measuring the Z71 rack and trying to figure out attachment hardware, I discovered that the square shoulder of a 5/16" carriage bolt fits snugly in the slot of the C-shaped extrusions that create the side rails. And the carriage head itself makes a good flange / retainer within the side rail.

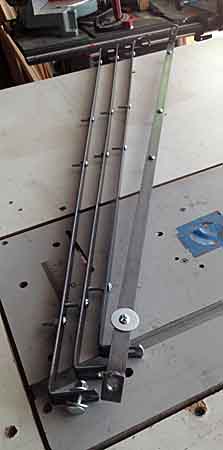
The plywood flats will be held with a pair or pan-head 1/4"-20 (1" long) into each crossbar. I wanted to use truss-head machine screws, which have a much broader and flatter head than a pan, but I couldn't find them locally and online the shipping cost more than the hardware. I'll use wide fender washers with the pan heads and get even better holding strength anyway.

So here's the crossbars -
roofrackdeck20.jpg
roofrackdeck21.jpg

roofrackdeck26.jpg
roofrackdeck25.jpg


How the carriage bolt will work in the side rails
roofrackdeck22.jpg


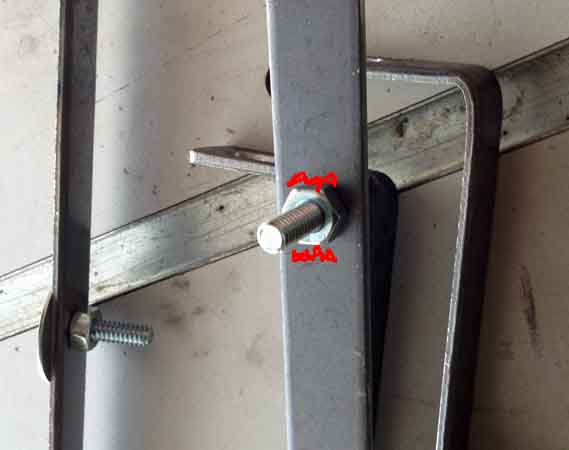
I tapped the holes in the flat bar, which is about 1/8" thick. It works but it's not enough for a vehicle flying down the highway. So I'm going to have some 1/4" nuts welded to the underside of the bar. Once the 1/2" ply is in place, the 1" bolts will only protrude a couple threads.
roofrackdeck23.jpg


The whole contraption is going to sit about 1/2" over the center pair of luggage rails. And at the side rails it will sit about flush with the bottom of the rails. All anyone should see from the ground thru the bottom gaps of the side rails is deep shadow.

Lastly, I started wondering about clearance between the bolts / nuts and the luggage rails. The rubber strips on those are about 3/4" wide and the 4 rails on 9" centers and also 9 inches in from the rack sides. I got lucky in the inner rows of bolts / nuts will just clear the inner pair of rails.
roofrackdeck24.jpg


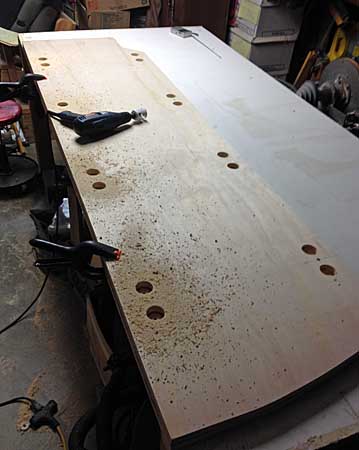
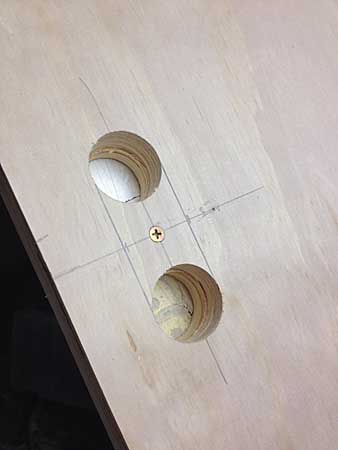
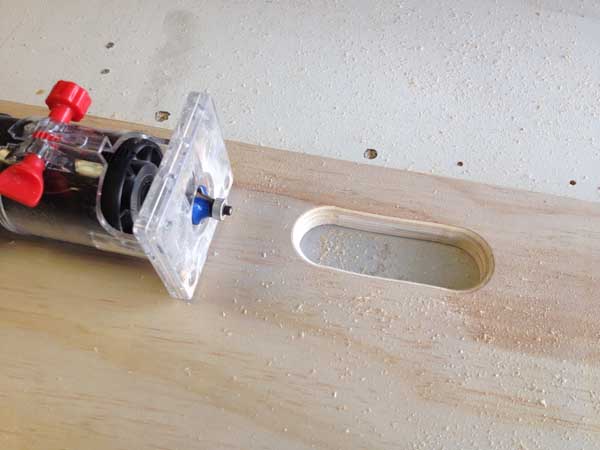
I'm using a 1-1/2" hole saw to make the handgrip areas, two holes on a 3" spacing, gives an oblong hole that's 4-1/2" which is good for anything but the largest hands. There will be 1-1/2" of wood between the hand hole and the edges of the boards. The leading edge of the deck is going to mimic / parallel the curve at the top of the windshield and extend about 2" forward of the luggage rails, about 4" short of the trailing edge of the sunroof. The leading edge of the deck will have a large radius on the top edge, which should help keep the nose of the platform down in the wind. At the middle of the curve it will be about 12" forward from the foremost cross brace. But well back from the bow wave coming off the windshield. The back end will also have a largish radius, so it drops off to the back. All the side edges and hand hole edges will have a 1/8" radius. The plywood will be 1/2".
I intend to paint / coat the edges with a strong epoxy to seal and bond the plywood laminate, as well as fill any voids, then the wood will get a good primer and a couple coats of premium exterior latex house paint. Probably satin but maybe a gloss finish. And it might just be black. Or a very dark gray. I really don't want to make it white. As I mentioned, I'm trying to keep most of my mods as unnoticeable as possible. To be determined.


I'll be updating this over the next few weeks as work continues.
 
Last edited:

KevinsMap

Adventurer
A suggestion...

... before you get too far in, consider "making" your own plywood. By this, I mean laminating your own sheet into a crowned shaped that might suit your fit, better than a flat sheet.

You get several benefits from this:

1) If you use the appropriate epoxies, your plywood will be completely weatherproof.

2) It can be made lighter and stronger than a flat sheet, since it can be thinner for the same strength.

3) It will shed water, since it will be crowned.

You would use marine or aircraft grade waterproof birch plywood. Two layered sheets is adequate, thickness determined by need.
 

rayra

Expedition Leader
Lamination is an interesting idea. I have a rolling work table in my garage that I use for a lot of things, it's 43"W x 8'L. It would be a simple matter to cut some 2x6s into curved stringers matching the roof curve, then use tie downs to lash down a sandwich of two 1/4" or 5/16" sheets so that they take on that curve. Butter a sheet with a slow-acting glue, lay the second sheet on it, screw one long edge together, put it on the forms and lash it down, leave it to dry.

Couple complications. The roof - and side rails - is also slightly arched from front to back. And I actually want the two flat halves / 'back boards'. I'm getting involved in HAM and CERT, some disaster prep (in earthquake country and lost my home to the Northridge quake), so a lot of my vehicle mods are dual- and even triple-purpose. 'Expedition' / camping, a resumption of the desert trips of my youth, and the disaster prep thing.

--

I'm also a little leery that I'm making it too lightweight and I have a propensity for speeding. So I'm thinking to also add a 'safety strap' that lashes the plywood sections to the foremost crossbrace in a way that the boards can't tear off at speed. That and the factory cross braces should keep things together.

I'm also considering putting some angle iron or C-channel up the longitudinal center, sized to fit the plywood, so the inner edges of the halves socket into a channel and the screws are only on the outer periphery. That would make it a good bit easier to dismount the 'back boards' if they are ever needed. The outer screws could be reached from the ground. Just lift up the outer edge and disengage the inner from the channel and slide out the board to the front or rear.

I'll also get a pattern and dimensions diagram for this project up before it is done, as a reference for other folks. Suburbans or no, the idea is adaptable to any roof rack.
 

KevinsMap

Adventurer
Angle the (straight) fore-and-aft pitch so that you create a mild "spoiler" effect, higher in the back and as low as practical in the front. This will "hide" the compound curvature of the roofline. It will not take very much of a pitch to achieve the right look. You can model it with a light wooden frame and doped fabric.

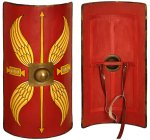
Strength is easy to achieve. More layers of thinner laminations, down to a practical minimum of about .1 inch per layer. By the time you build up to .3 inches, it will be very strong and very tough. A genuine Roman combat shield was not much thicker ;-) Go to .4 inches and it will qualify as armor plate. Really.
 

KevinsMap

Adventurer
Roman_shield.jpg

Yes, Really. Amazingly light, tough, rigid. Laminated wood, very sophisticated design. True composite material engineering.
 

rayra

Expedition Leader
I'm familiar. They were great engineering for their Age. The Greek starched linen was pretty effective against the arrows of the say, as well.

I put slots in the end of the mounting tabs, partly to correct for the front-to-back curvature, but also to cover any errors in my measurements. My intent is to mount it all loosely and then raise the whole deck as high as practicable when I tighten it down. But I agree with your suggestion to cant it down at the front. I may do so to the limit of the play in those slots. It may not be very much. Maybe I'll increase the downward end of those slots to allow me to raise it a bit more. There's not a lot of room with the ply in place. The tabs are 2" tall, I'm intending to use 1/2" ply. I might be able to gain another 1/4-3/8", max.

My only other sop to aerodynamics is planning to put a large radius on the leading edge, trying to add some downforce there. And a slight radius on the trailing edge, trying to spoil the air and curtail lift.

roofrackdeck28.jpg


I'm keeping the leading edge about 4" behind the sunroof. The sunroof when cracked open and up also acts to lift the air up over that leading edge. All of this is about 2' rearward from the top of the windshield. So no telling what the air is really doing up around there.

This will also be greatly complicated by my intent to put a ~40" light bar up there, nestled between the front fairings of rack and having a bottom glare shield as well as a tip-up cover / guard. Those things are going to totally spoil the airflow there. If I can shape and place it right, it may actually serve as an air dam for the deck. Or it might cause so much air lift that it tries to pull the deck up and off. I need to find a GoPro and suction mount I can put up there for some test drives. Tape some string bits all over and see just what the air is doing.
 
Last edited:

rayra

Expedition Leader
Well I've commenced construction in earnest. Was turning money into sawdust today. Got a local trailer hitch installer to tack weld the nuts onto my strap metal for a low price, they did an ok job of it. Primed and painted those straps today.

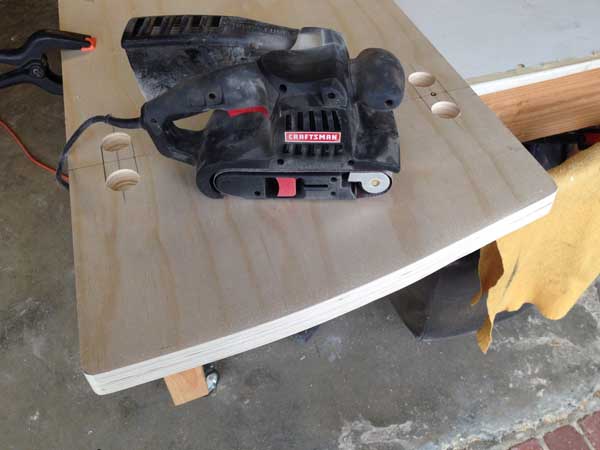
As it stands now, I have the two 'back boards' cut and I chose to sandwich them face to face and screwed them together. I'll use a belt sander tomorrow to shape the few odd relief cuts on both pieces at once, for symmetry. I screwed them together thru the waste material where the handhold holes will be. I'm drilling the ends of those out with a hole saw tonight. Have a small bucket full of various size hole saws, but didn't have one in 1.5".

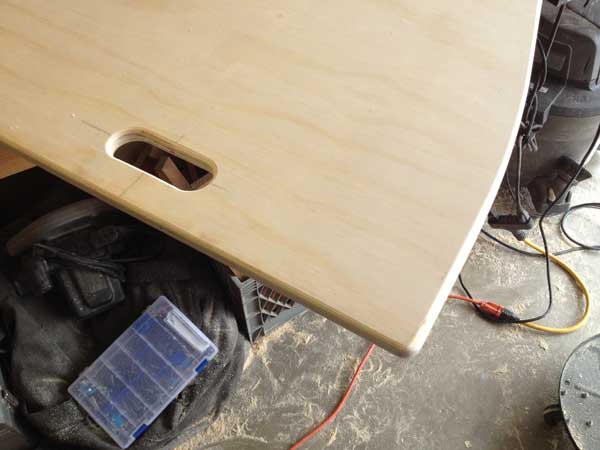
I expect to do most of the drilling and cutting tonight, belt sand the edges and corners tomorrow, then make the last handhold cuts and separate the panels. Then I'll use a handheld trim router and 1/8" radius bit to round over ALL the edges, and use a larger radius on the upper leading edges to help generate some downforce on the front lip.

The deck will sit higher within the roof rack side rails, up off of the vehicle's luggage rails. The edges of the panels should wind up mostly concealed by the side rails. The leadign edge of both panels together will form a shallow curve that mimics the shape of the top of the windshield.

roofrack20.jpg
roofrack21.jpg
roofrack22.jpg
roofrack23.jpg
roofrack24.jpg


I'm going to prime the wood, then I think I'm going to be using black hammer-finish paint. I want this thing to be unnoticeable. Even if that means black, even though I'm trying to block vehicle interior heat.
 
Last edited:

rayra

Expedition Leader
I kept the two boards screwed together for the hole saw work. I drilled/cut until I felt one board piece come loose. Then flipped the stack and drilled/cut from the other side, making the thru-holes with as little tear out as possible. But I will unscrew / separate the boards before I cut out the middle of the handholds, as I can't seem to wield a jigsaw worth a damn. Less thickness, better my cuts will be.

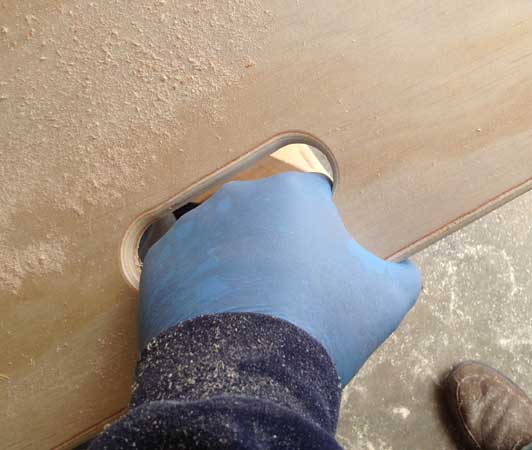
The handholds are 1.5" wide x 4.5" long and are inset from the outer edge by 1.5" (also). The two boards will butt together in the middle and I set the handholds on the middle edges 1-5/8" in from the edges. Keeping an option open for a change in the mounting system, which I'll diagram / explain later. Has to do with easier removal / use of the deck as backboards / stretchers. There will be four handholds spaced along each side of the boards, about 20" apart, and 10-12" from each end. The overall length is ~80", the widths are ~22". True backboards are typically ~72"x18". A few webbing straps in the first aid bear bag would further help in using these as backboards.

roofrack25.jpg
roofrack26.jpg


Odds of these being used as backboards is pretty low. But I do live in earthquake country, I'm a Prepper, I'm getting into HAM radio ops, and I'm signed up for CERT training in the Fall. And it all goes along with my design ideas of building in various capabilities in the vehicle, while maintaining a 'low profile'.


622
 
Last edited:

rayra

Expedition Leader
This morning I got the two boards in the shape I wanted.

I bit of work with a belt sander to smooth out the front curve and round the corners

roofrack27.jpg


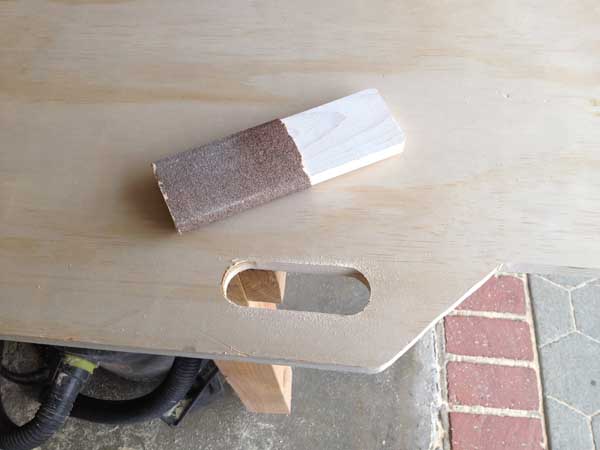
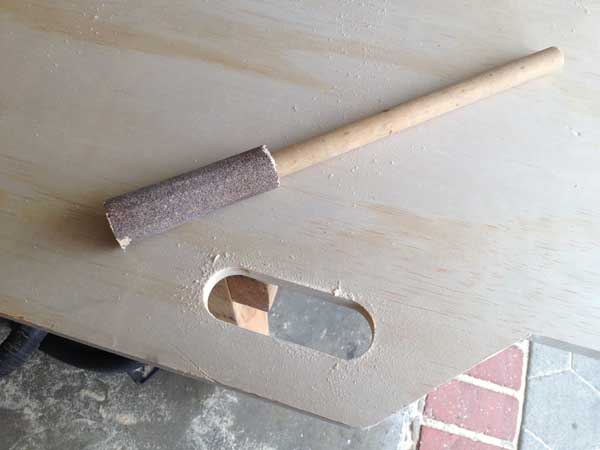
Some work with a wood block and dowel to smooth and even up the inner face of the handholds, after the jigsaw work to cut out their centers. I only used 150grit, sort of wanted some 'tooth' left to the wood, for the painting.

roofrack28.jpg
roofrack29.jpg


Then it was the trim router with a 1/4" radius round over bit, all the edges.

roofrack30.jpg


My hands are on the medium side of large. I think the handhold size works real well.

roofrack31.jpg


Nice rounded edges

roofrack32.jpg


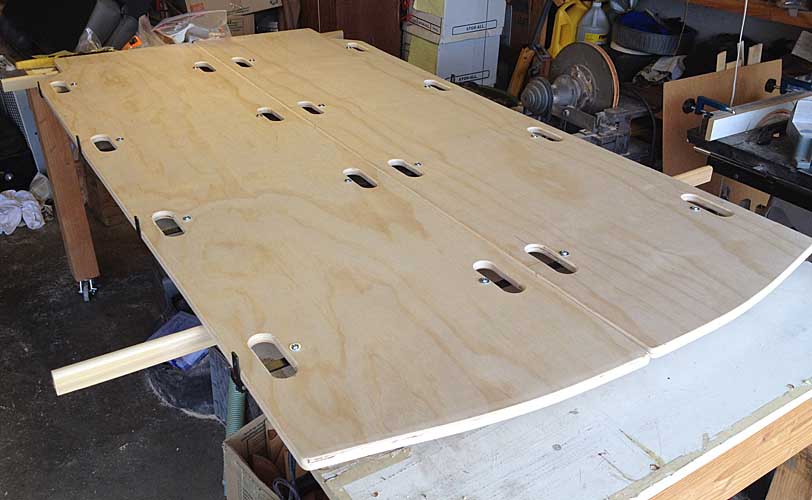
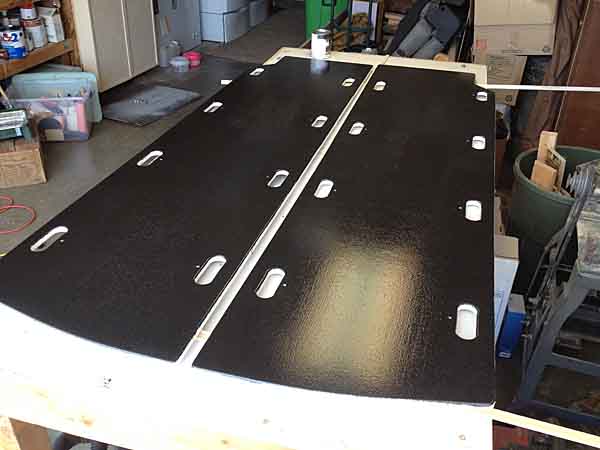
The two pieces as they'll be positioned on the roof.

roofrack33.jpg
roofrack34.jpg


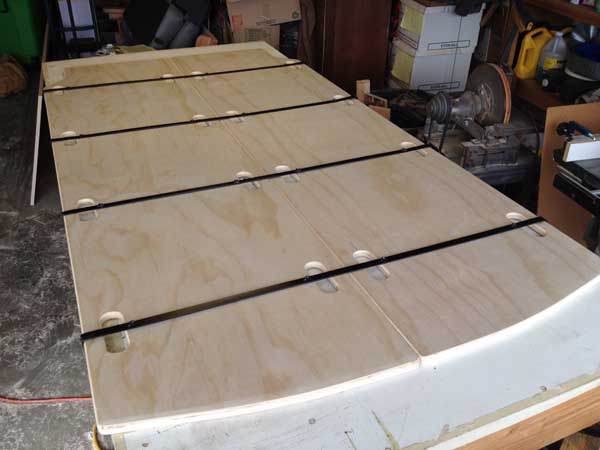
How the metal mounting straps will sit on the underside of the boards. Their end tabs will project up and hang the whole affair from the side rails of the factory Z71 roof rack. The rails are positioned in the centerline of the handholds, so goods can be secured on the roof by hooking to the strapping.

roofrack35.jpg


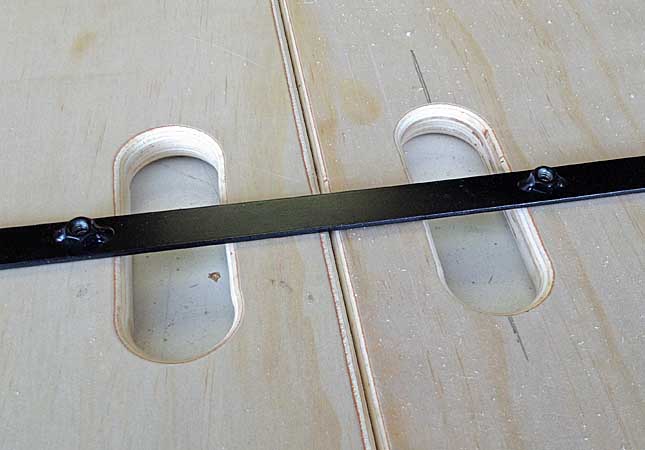
And a closeup of the midline arrangement.

roofrack36.jpg


Each board is held to each strap with two bolts. The tacked nuts are just inboard of the rows of handholds. I'm still trying to source some truss head 1/4"-20 x 1.25" machine screws in black oxide. in the meantime I'm using phillips-head cap-head machine screws and some 1/4" washers. I tried 4 stores today trying to find some 'aluminum black' locally, with the intent of blackening all the bright-finish hardware I'm using. I think I'm going to grind / taper the bolt tips and drill the holes in the boards a little oversized, to make it easier to bolt the boards down.

I'm putting both the middle and front factory cross braces back on and am also considering a 1" web strap arrangement looped thru the front-most and rear-most handholds as a safety strap. This combination should keep things in place when I'm speeding down the highway, as I am wont to do. I went with the flat strapping for both clearance and costing issues. Not sure it's going to be rigid enough. I'll go with square tubing if I have to, at a later date. Like most of the rest of my projects, it is an iterative process. I'll spend money when I HAVE to, and as the design evolves.

I am already thinking of a MkII design change, where I use either a small angle iron or C-channel down the midline, sized so each sheet can be inserted and trapped on the centerline and only be bolted down on the outer edge of the vehicle. That would better facilitate disassembly and use of the boards if they are needed in an emergency. The centerline bolt positions are only accessible via ladder, as it is now.


Time to drill the bolt holes and do a test full assembly, before moving on with painting things.
 
Last edited:
rayra

Expedition Leader
Love it when a plan comes together.


Here's an overall shot, assembled. You can just make out the screws / washers and the tab ends of the straps. It is a close fit, the wood panels to teh bends in the strap, as intended. Will be downright snug once it's painted.

roofrack37.jpg


Here's a closeup, showing how the strap crosses the handhold cutout. Real easy to hook a tie-down there. I need to get some goldilocks washers. The ones I have are either too small or too large.

roofrack38.jpg


And another closeup, this showing the tab and carriage bolt arrangement. I'll likely hang the whole platform and then adjust it upward to the limits of the slots I cut in the tab ends. I originally added the slots as there is a slight arch in the vehicle rood and the rack side rails, from front to back. So I wanted some play in the brackets.

roofrack39.jpg


now to go figure out an improvised chemical process to blacken my bright metal hardware, since I can't find any Birchwood-Casey 'Aluminum Black' locally and I'm too impatient to order some online.


Priming the boards tonight, I think.
 
Last edited:
stoverjoe

New member
Just a thought. .. have you considered coating it all with al's liner. Much tougher than most paint, uv stable, nice texture, and you can tint it about any color you want.

Sent from my SAMSUNG-SM-G870A using Tapatalk
 

rayra

Expedition Leader
Don't really have the budget for that right now, but thanks for the suggestion. Ideally I'd make it from aluminum plate, really can't afford that either..
 

rayra

Expedition Leader
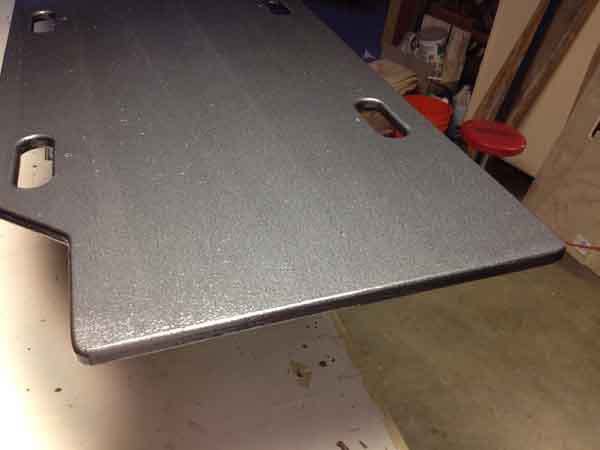
I again find myself wishing I'd bought a white Suburban instead of black. Or that I was willing to leave the roof rack deck in the white. I like the look of it. If the vehicle was just for beating around the desert, I'd leave it white, but it's my 'daily driver' and it cleans up real nice when I bother.

roofrack41.jpg


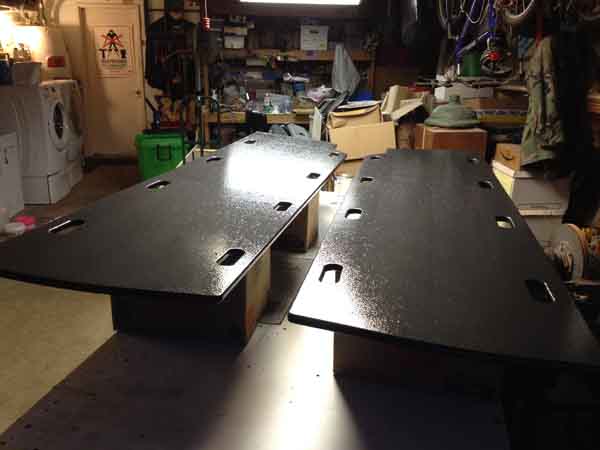
And here's the first roller-application of Rustoleam Hammered Finish paint in black. About 20mins I'm going to coat that side again. Then tonight I'll do all the edges and the top side surfaces. Left those for last, in case there were any application issues. And there is a bit, this paint is very 'stringy' when applied by roller in 78F / low humidity. Like cotton candy in a way. But it melts right back into the wet surface without leaving a trace.

roofrack42.jpg


Kind of rushing now, supposed to be 102F on Sunday, 107F on Monday
 
Last edited:
rayra

Expedition Leader
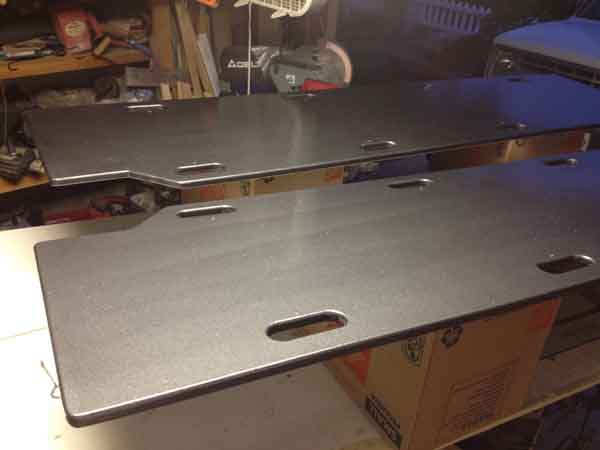
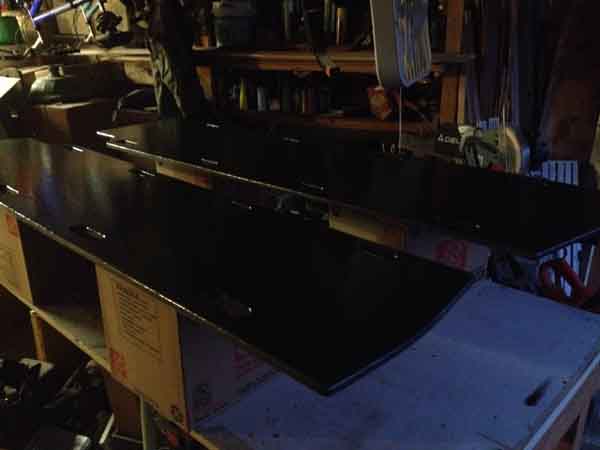
Last coats applied. Very 'gunmetal' under bright lights. Dries a bit darker and the directional roller marks weren't noticeable when the other side dried. And low light it looks black enough.
Hardware is painted too. Copped out, satin black enamel will do in the short term, until I can pick up some aluminum black somewhere. Online orders for it require hazmat, quadrupling its cost. Plus shipping.

Tomorrow morning I'll hang the brackets on the rack. The boards will go on when they seem dry enough for rough handling. Assembly is complicated. The carriage bolts have to be slid down the tracks and they're a snug fit at their square shoulders. And the middle rack crossbar goes in the same track, and the front crossbar too. But the plastic front shoes of the roof rack each have two lockdown screws (the shoes themselves snap-lock in place, the screws keep them there), but the rearmost screws are blocked by the decks, so I likely won't put those back in.

I have to loose-mount the four hangars and the cross bars. Then slide the decks in from front or rear, then position them and bolt them down. Planning to get everything together in loose formation, get the positioning nailed down and tighten up everything. Then hope it isn't all for naught when I get up to highway speeds.

roofrack43.jpg
roofrack44.jpg
roofrack45.jpg
roofrack46.jpg
 
Last edited:
rayra

Expedition Leader
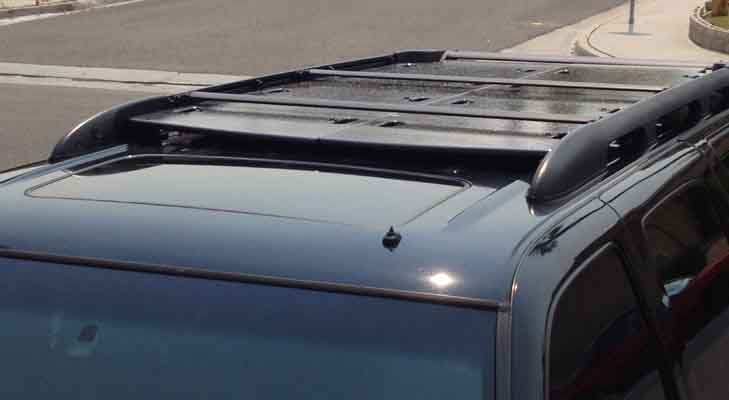
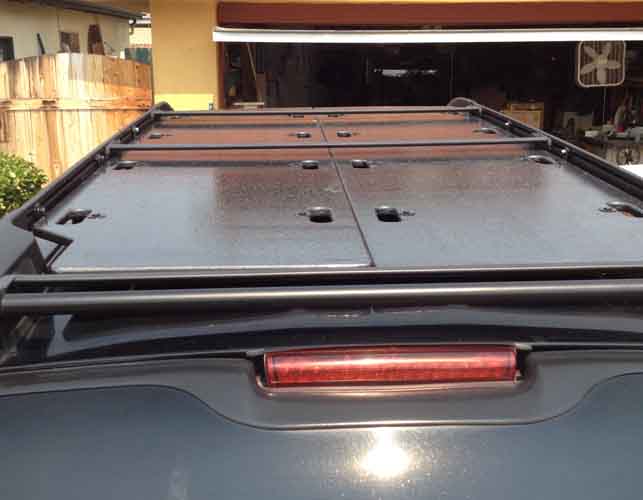
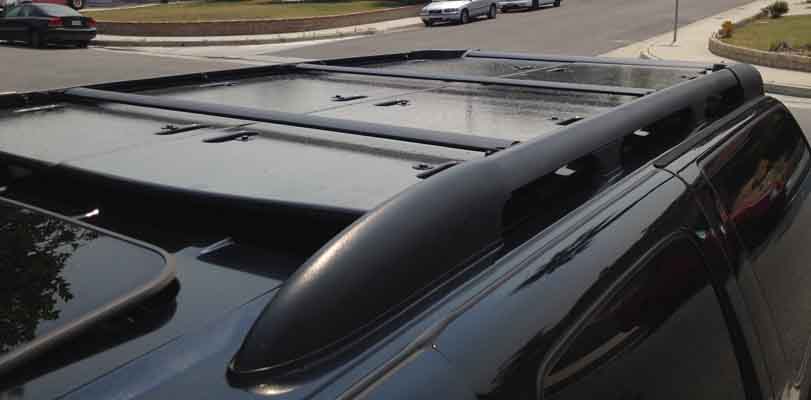
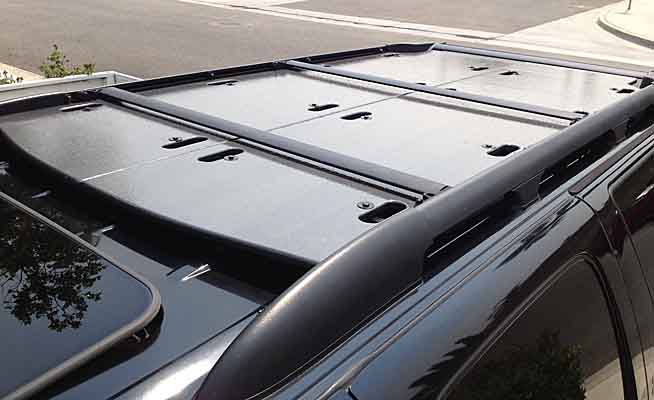
Initial install completed, road testing to commence almost immediately.


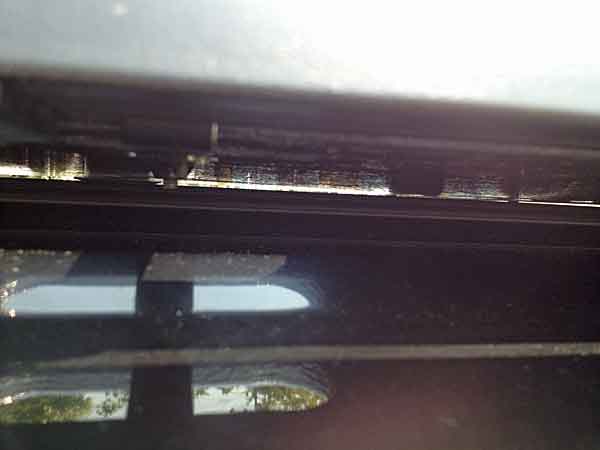
Here's the scene of the crime, the front and rear 'shoes' of the Z71 roof rack are quite overbuilt. I'll be taking advantage of this in the future as I intend to route my light bar, power outlets, solar panel wiring thru the roof rack channels and footings.
You have to remove the plastic end covers to gain access to the slot in the side rail extrusions.

roofrack47.jpg


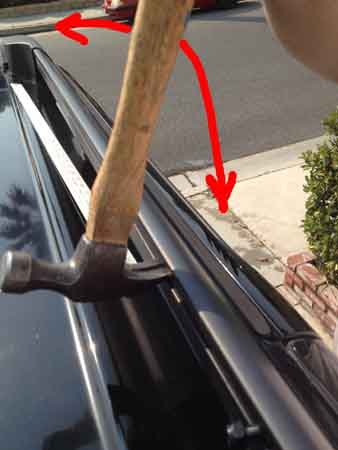
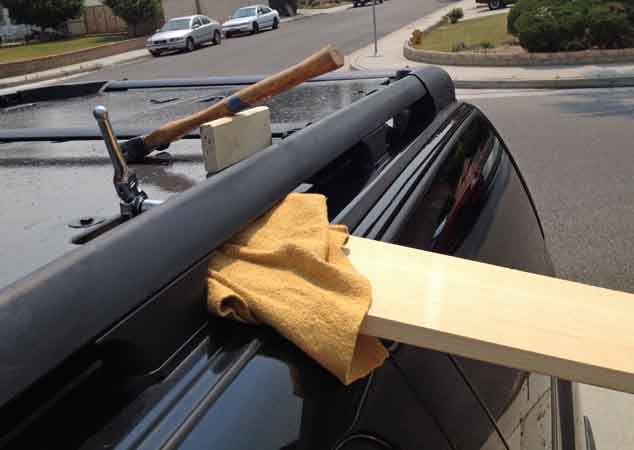
The 5/16" carriage bolts were a very snug fit in the slot, so to ease their install I used a little front to rear leverage with the claw of a hammer to slightly spring / pry the slot open a bit more. I moved the bolts to their rough mounting locations.

roofrack48.jpg


Here you can just make out two of the bolts / nuts slid into position in the rear half of the rack

roofrack49.jpg


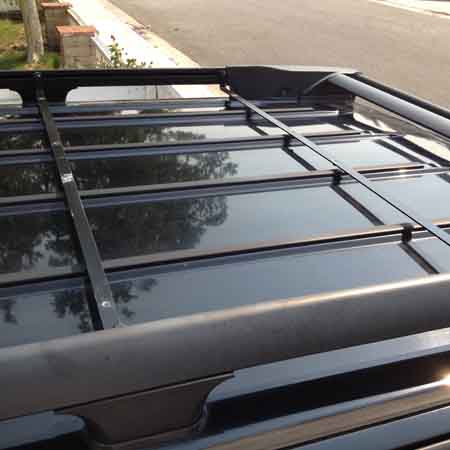
Then my fabricated cross straps were installed and loosely bolted in place. The strap tabs sit between a pair of washers, held on with a nylock nut.

roofrack50.jpg


I then got busy problem solving and forgot to take pictures as I jimmied everything in place. I hadn't thought it thru and putting the factory cross braces in certainly complicated mounting the deck boards. To top it off I'd mixed up whether the front cross brace went in before or after the front-most brace. I had to slide the first deck piece in from the rear, over the fabricated straps and under the factory cross braces. Then jimmying the straps fore and aft to line up properly and fully forward. I set the hold down bolts on that deck, also loosely.
But then I ran afoul of clearance issues. the rear width of the factory rack is several inches narrower than the rest, I had to incorporate that in my deck design. But I didn't figure on it for the install. And there was insufficient vertical clearance to just slide the 2nd deck over the first. So I had to go in from the front. And there were also issues of friction, the hammer paint was dry enough to touch, but as the morning was warming up, the deck boards in the sun, they really wanted to stick to each other. Letting them dry a week would have helped that. As it was I had a rough time getting things fulling place, a very snug fit.

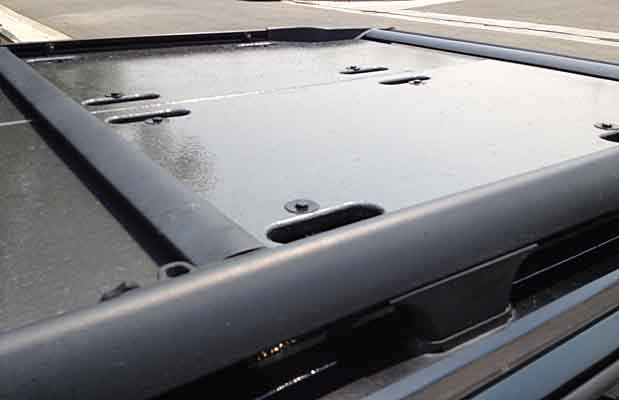
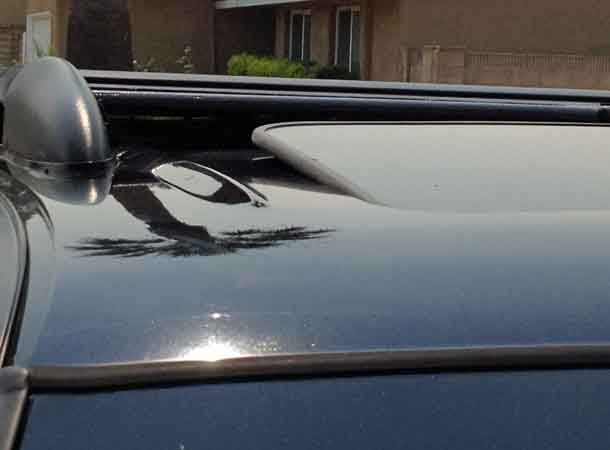
Once everything was positioned properly I tighted the bolts holding the decks to the straps. Then I levered upward on the underside of the mounting tabs, raising the deck to the limit of the slots I'd put in teh tabs. This puts it just about even with the bottom of the side rails of the rack.

roofrack53.jpg


And here it is.

roofrack51.jpg
roofrack52.jpg
roofrack54.jpg
roofrack55.jpg
roofrack56.jpg
roofrack58.jpg


There's about 3/4" clearance at the center, and nice total shade.

roofrack57.jpg


Looking to shanghai a neighbor for the high speed driving test, he can stick a camera up out of the sunroof and see how the deck is behaving on those flexible straps. I'm curious to see if it bows up at speed.

MkII designs already in my head. Likely using 3/4" square tubing as the support braces and deleting the factory cross braces altogether. A lot easier to isntall or remove the decks that way. And the aforementioned T or C-channel on the centerline.


890
 
Last edited:
Forum statistics

Threads
188,337
Messages
2,905,699
Members
229,959
Latest member
bdpkauai
Top