Meet the Trot'n Turtle - Unimog U1300L Build

Hodakaguy

Adventurer
Great tank !
Fwiw, Pollak 6 port fuelvalve was the "go to" valve for our dual tank jobs. But, dunno if its available in 24v...
But, It only needs momentary power to switch over. I suspect a simple resistor or regulator will allow its use otherwise.
Has built in switching for fuelgauge wiring too.

I think your OEM tanksender is 3k ohms... VDO makes 3k ohm adjustable height tanksender.


Thanks for the info, I'll check those out.

Hodakaguy
 

Hodakaguy

Adventurer
Update on the Ford LCF Fuel Tank. Apparently these tanks are known to De-laminate internally and destroy the injection pump, injectors, fuel lines etc. This looks to be a major problem with the LCF trucks, so even though the tank is the perfect size it's also a nightmare waiting to happen. I've considered having a local shop prep and coat the inside of the tank to prevent any delaminating issues...but I'm not sure I'm going to mess with it at this point....have to think on it for a while.

Had a few minutes tonight to play with the seats. Removed the drivers side seat to look at the base and see what it will take to mount up the new unit on the suspension base. The seat rails on the new seats are the same width as the base so that makes things easier, but the seat sits to low when mounted directly to the base so a spacer will be needed. After looking at the stock seat it looks like I can cut the adjustable portion off of that seat and use that to mount the new seat to the suspension base, this will give me the needed height and also allow me to adjust the height for different drivers etc.


Stock seat mounted on the suspension base.

P2221578.jpg


This is the adjustable section of the seat, you can adjust height and angle of the seat with these two black knobs. The lower clear dial is where you set the drivers weight for the suspension base.

P2221579.jpg


Seat removed

P2221591.jpg


Seat rails on the new seat

P2221599.jpg


Seat sitting on the suspension base. The seat is to low in this configuration.

P2221581.jpg


Underside of the stock drivers seat.

P2221584.jpg


The adjustable base is spot welded to the seat pan.

P2221585.jpg


P2221586.jpg


Disassembling the seat, carefully removed the stock cover to expose the base.

P2221594.jpg


Cover and cushion removed. I'll cut the adjustable base off the seat pan and fabricate some adapters to mount the new seat to this base.

P2221595.jpg


More to come.....

Hodakaguy
 

Wyuna

Observer
Looks like a liner breaking down like it does with that tank, could cause quite a few issues down the track, regardless of filters after reading those links.

I'm not sure on how you could reline it, as if the original liner breaks away then that would affect the new lining.

I'd like to see you or your dad weld up a new tank, only because i like looking at great metal fab work and welds.

i've been enjoying the build thread, and look forwards to more.

Cheers
 

Hodakaguy

Adventurer
Looks like a liner breaking down like it does with that tank, could cause quite a few issues down the track, regardless of filters after reading those links.

I'm not sure on how you could reline it, as if the original liner breaks away then that would affect the new lining.

I'd like to see you or your dad weld up a new tank, only because i like looking at great metal fab work and welds.

i've been enjoying the build thread, and look forwards to more.

Cheers

Reading through a few formus people have had good luck with re-lining these tanks. You acid clean them inside/out then chemically line the tank. Supposably something in biofuel slowly dissolves the factory silver lining and once properly sealed it stops dis-bonding. I spoke with a local radiator repair shop yesterday that seems familiar with the ford tanks and has cleaned/re-lined quite a few of them.

I'll think on this one a bit while I work on other projects.

Fabricating a stainless or aluminum tank does sound fun though :)

Hodakaguy
 

Wyuna

Observer
thebigblue,

If you have seen the welding on this build, there is no reason for Hodakaguy to buy something he can make better.
 

Cruiser79

Observer
The original Isringhausen seats are great, in my opinion even better than the air suspended seats in most new trucks! I had one in my U1000, and the only problem was that the springs started squeeking after a while :ylsmoke:
Good choice to place the new seats on the original base!

With the fuel tanks I wouldn't bother too much about some coating etc. I used the old diesel from harvesters and tractors that was contaminated by algaes and rust at the farm where I worked. I just used an old panty of my mother to filter the diesel, and made sure that I had a prefilter on spare in the truck. These engines are old school, when you just change filters quite often it shouldn't be a big problem. The common rail engines at that farm had every year problems with the sludge, after some filtering the Unimog drank it all without complaining :sombrero:

Your build is really awesome, I'm very jealous at the welding skills you have there...
 

Iain_U1250

Explorer
Most old school fuel tanks are not lined, none of the one I have were lined and most are over 15 years old, diesel is a good rust preventative. I have a Pollock valve for my two tanks, works great, has the feed line and the return lines, and also does the fuel gauge wiring as well. The only downfall they have is the plastic internal gears. If you have any dirt get into the valve, it can jam up and strip the gears. I fitted a Delphi CAV 296 filter on each feed from the tank, they keep the dirt out the valve, and keep the main filters clean. The CAV filters are $6 each here for the good ones, and the glass bowl lets you see if there is any water in the fuel. I also have a little electric FACET pump on the feed lines, so I can bleed the air out of the system easily. The CAV filters have saved us a few times when we have bought dodgy fuel from an outback service station.
 

Hodakaguy

Adventurer
Most old school fuel tanks are not lined, none of the one I have were lined and most are over 15 years old, diesel is a good rust preventative. I have a Pollock valve for my two tanks, works great, has the feed line and the return lines, and also does the fuel gauge wiring as well. The only downfall they have is the plastic internal gears. If you have any dirt get into the valve, it can jam up and strip the gears. I fitted a Delphi CAV 296 filter on each feed from the tank, they keep the dirt out the valve, and keep the main filters clean. The CAV filters are $6 each here for the good ones, and the glass bowl lets you see if there is any water in the fuel. I also have a little electric FACET pump on the feed lines, so I can bleed the air out of the system easily. The CAV filters have saved us a few times when we have bought dodgy fuel from an outback service station.


Thanks for the info, I'll look into those filters and valve. I still need to decide what I'm going to do with the exhaust system since it's in the way of the new tank. One mod always leads to another :)

Hodakaguy
 

Hodakaguy

Adventurer
Thanks for the ideas on the tank, I could fabricate one but it's a huge time savings to use an existing tank that meets the required dimensions. I've read about good success re-lining the LCF tanks so I still may go that route, Need to plug ahead with other mods right now so I'll come back to the tank issue at a later date.

Hodakaguy
 

Hodakaguy

Adventurer
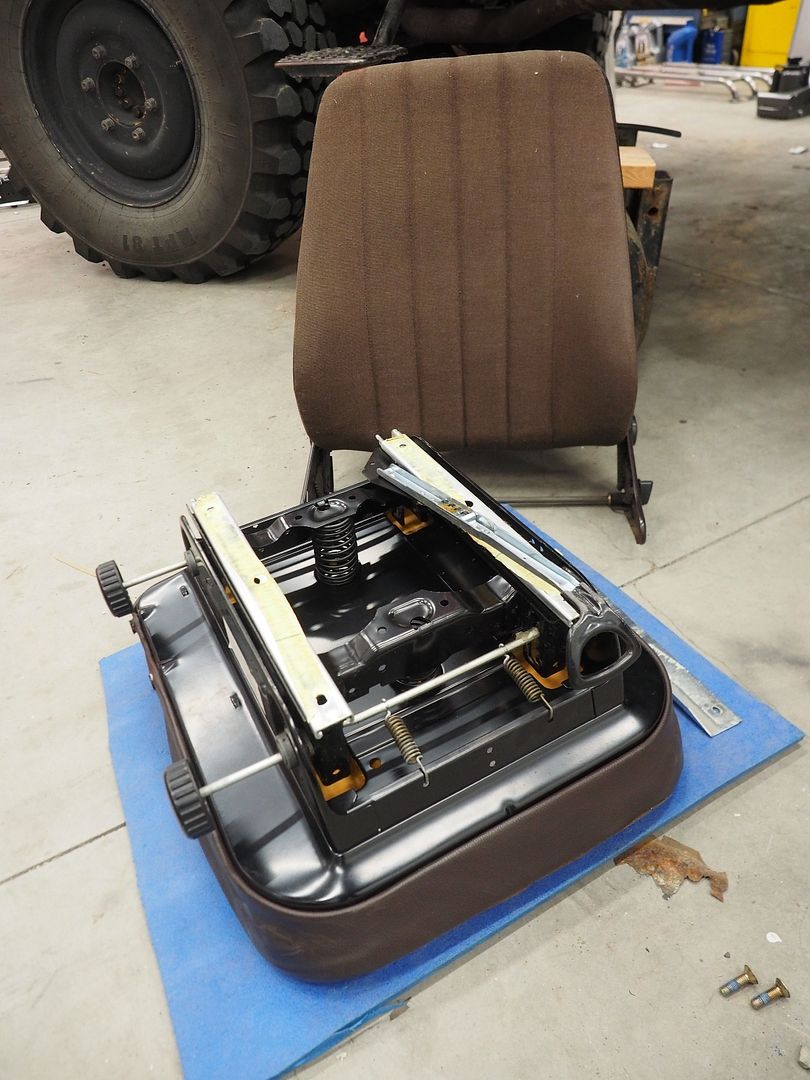
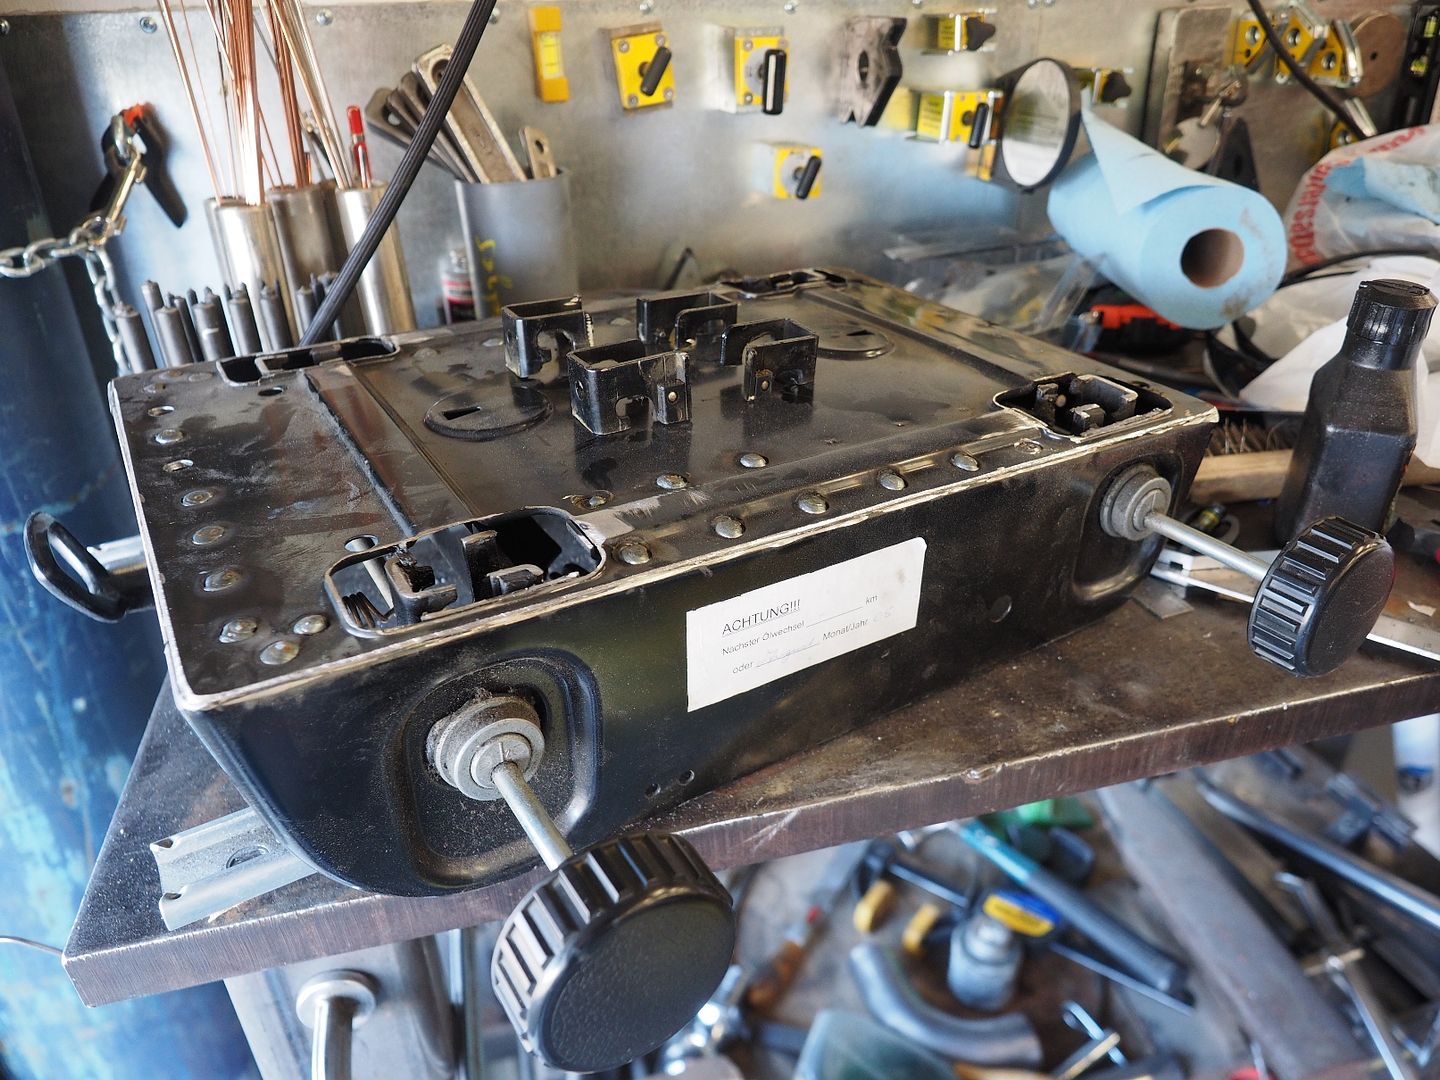
Well up early and ready to install the drivers seat today. To keep the adjustable base from the original seat and use it on the new unit the base and seat pan needs to be separated. I can either cut the pan apart using a skinny wheel or drill out the spot welds using a spot weld remover, after all of 30 seconds I decided removing the spot welds would be cleaner overall so I set out to separate the two.

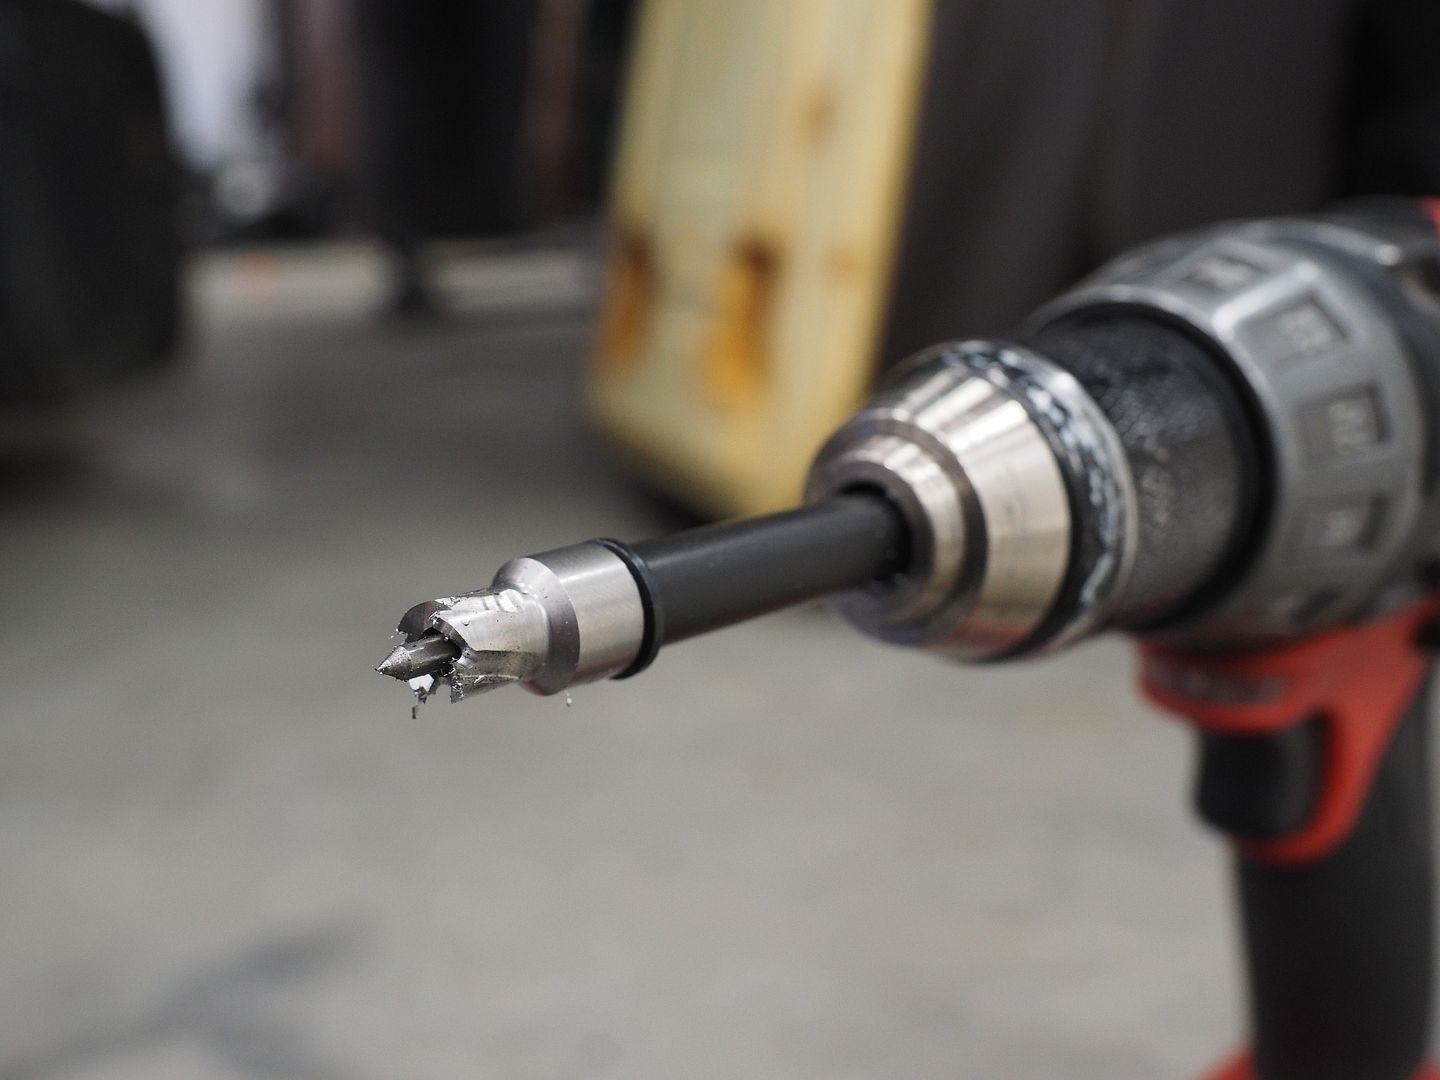
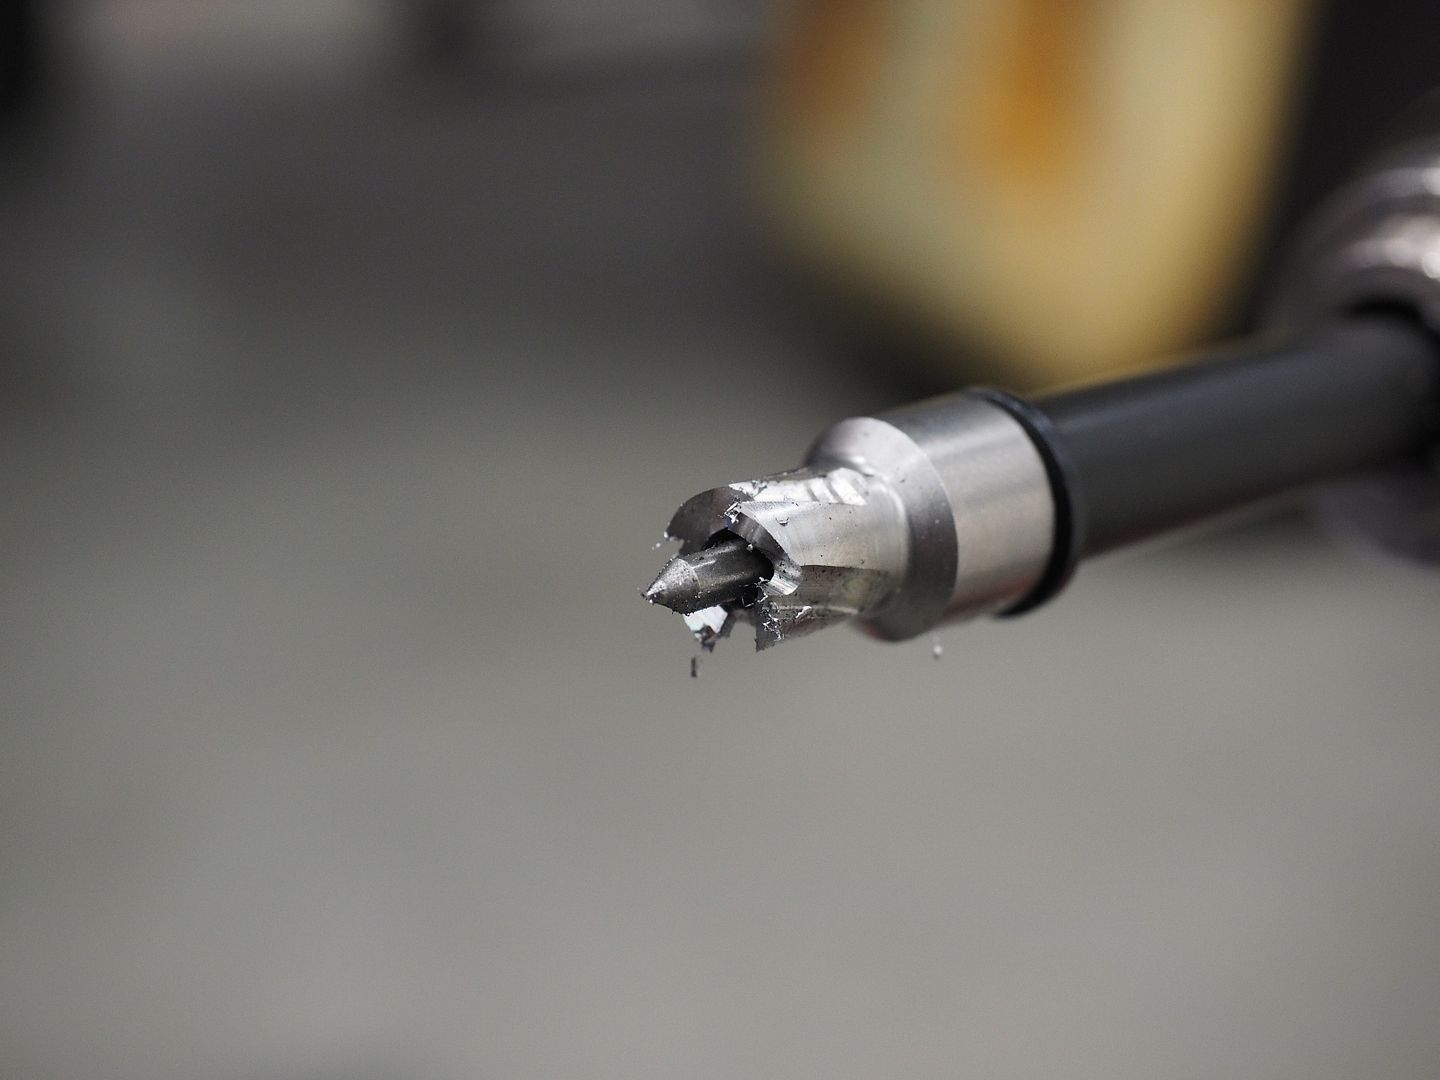
Here's the spot weld remover bit, it quickly chews through the first layer and separates the two pieces of metal. You use a center punch to mark the center of the spot weld then use this tool to drill the weld out, the center of the tool is spring loaded and retracts as you drill keeping the bit on coarse.

P2240484.jpg


P2240483.jpg


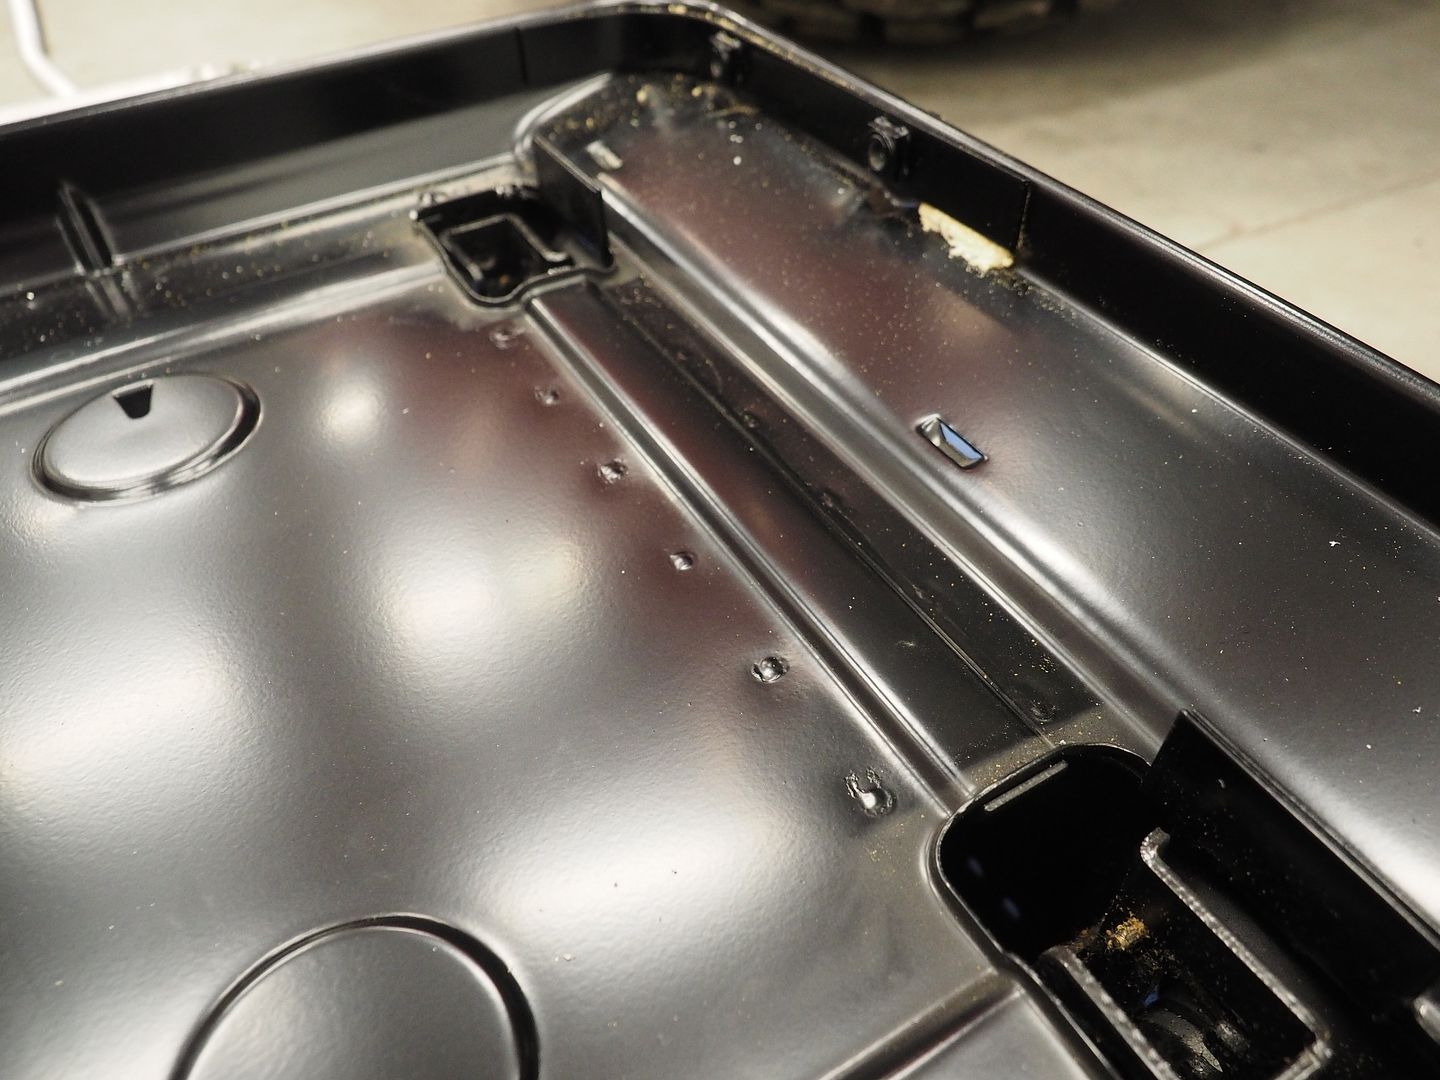
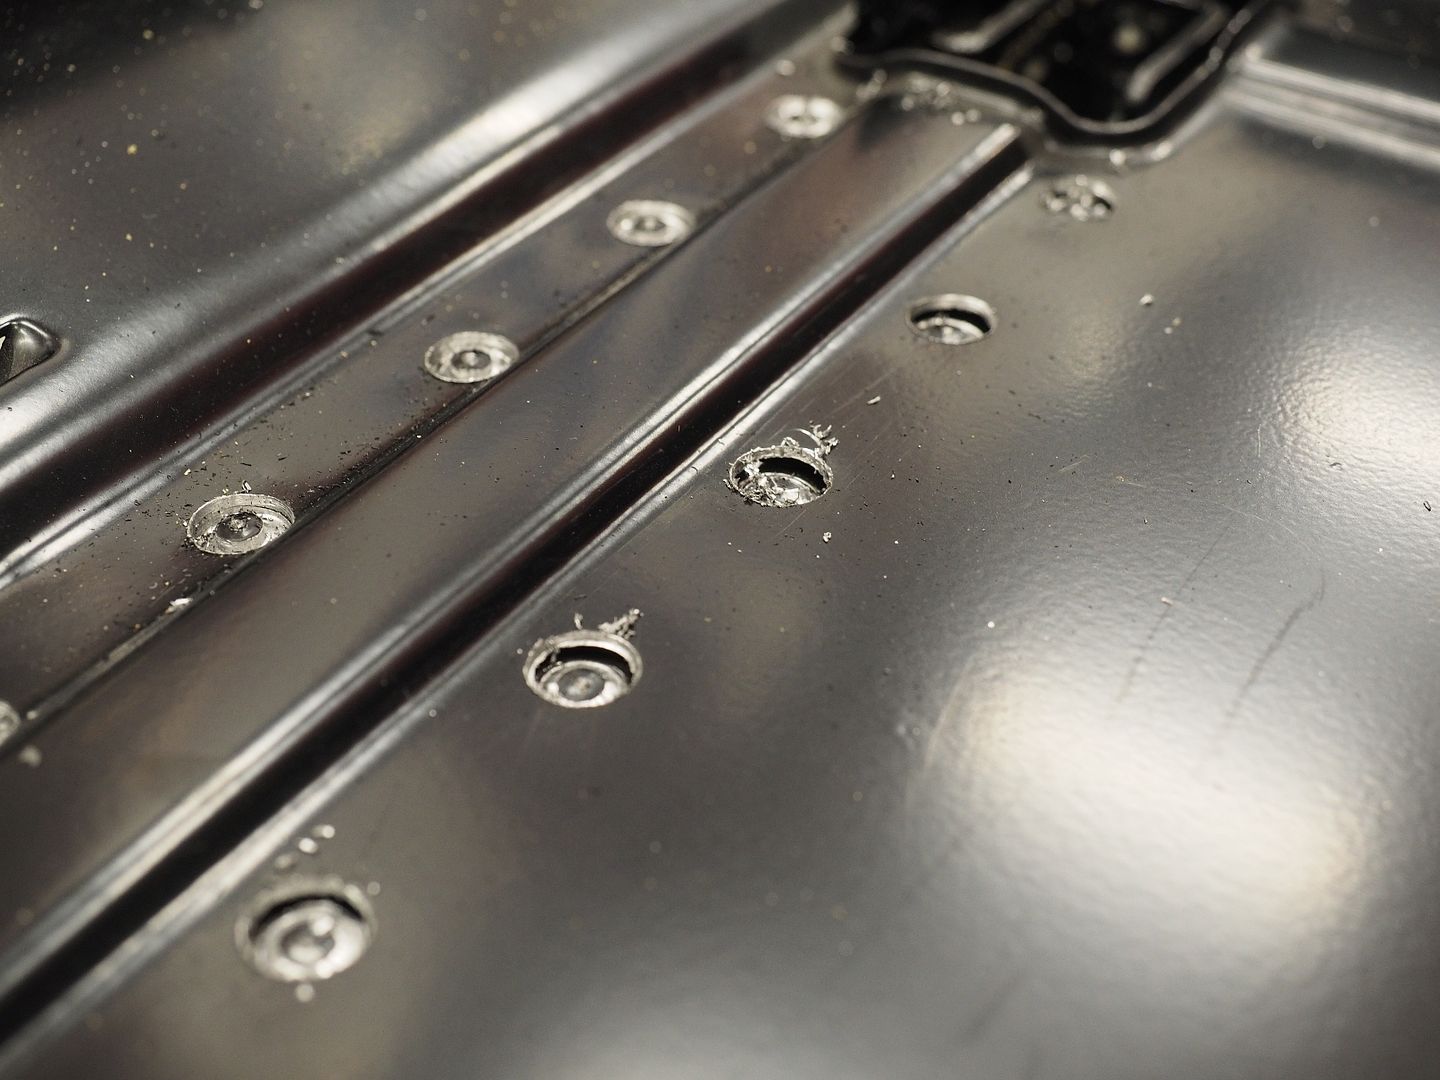
And the spot welds before and after drilling, you can see the two pieces separating here.

P2240480.jpg


P2240482.jpg


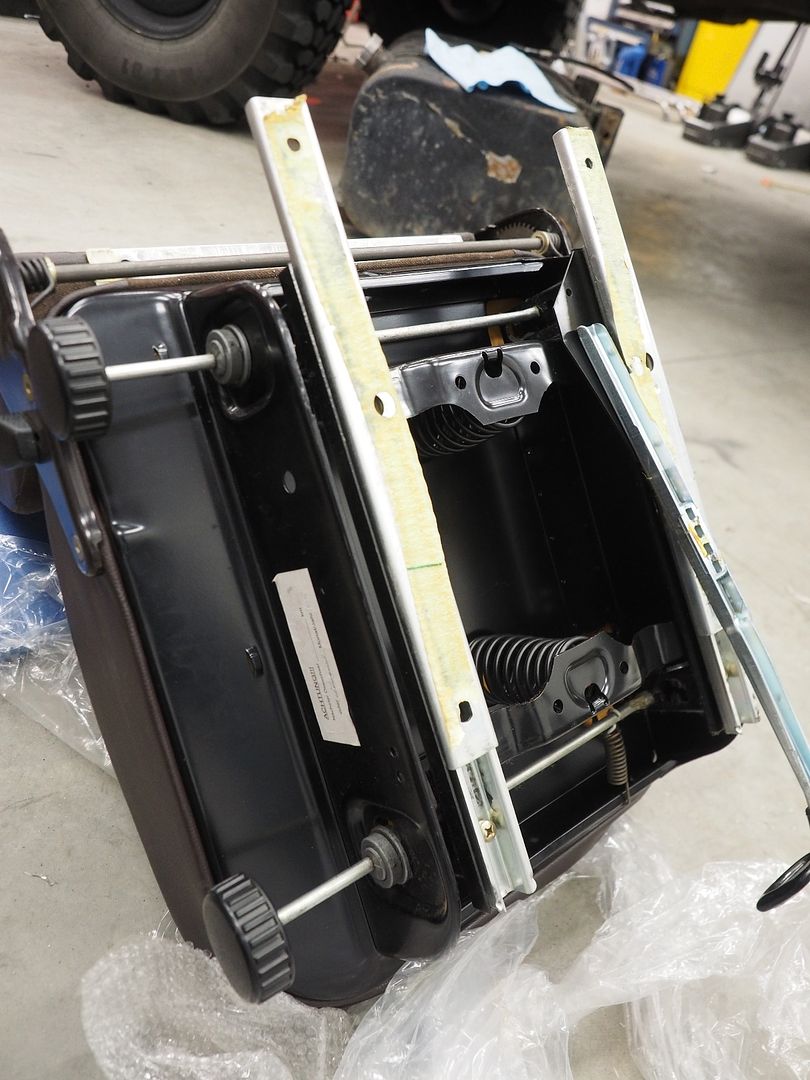
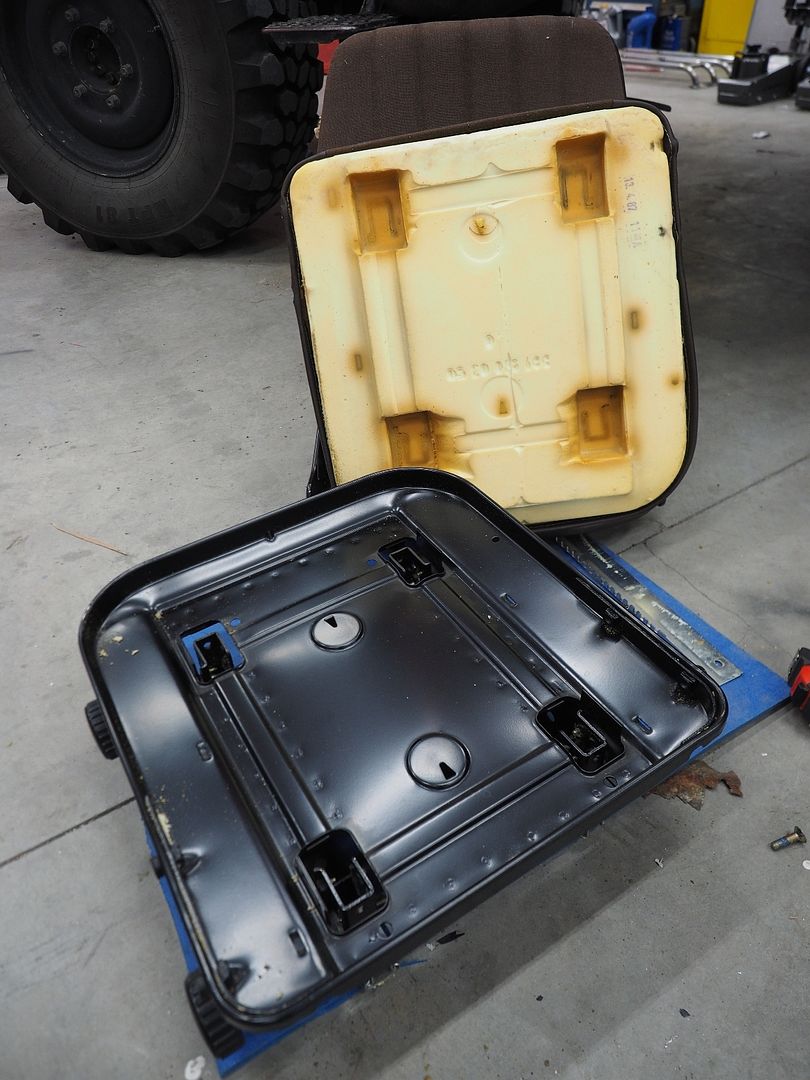
Soooo.....now we have a lesson in thinking things ALL the way through before you start working on something. There are two stiff springs on the bottom side on the base that keep tension on the adjustment mechanism, as I started removing the spot welds it became apparent that the seat pan was the upper restraint for the springs and removing the spot welds wasn't an option. Out came the Mig machine and a few minutes later the spot welds were put right back where they were when I started LOL. Time to get out the skinny wheel :)

P2240487.jpg


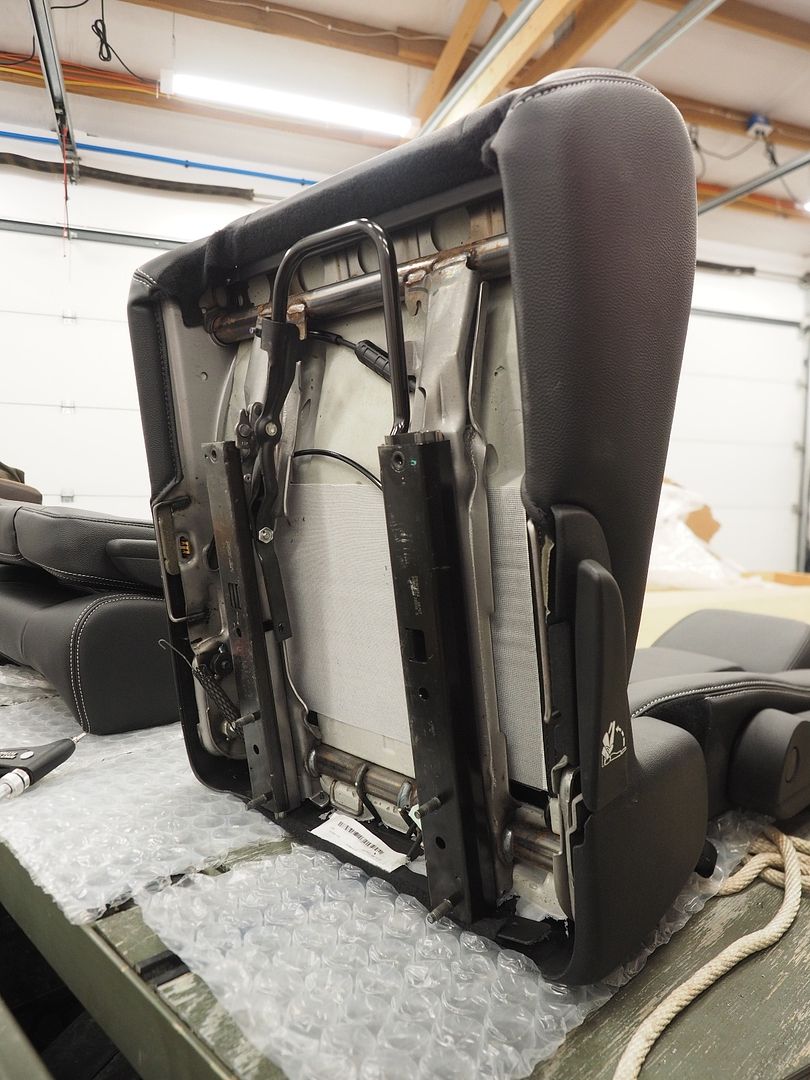
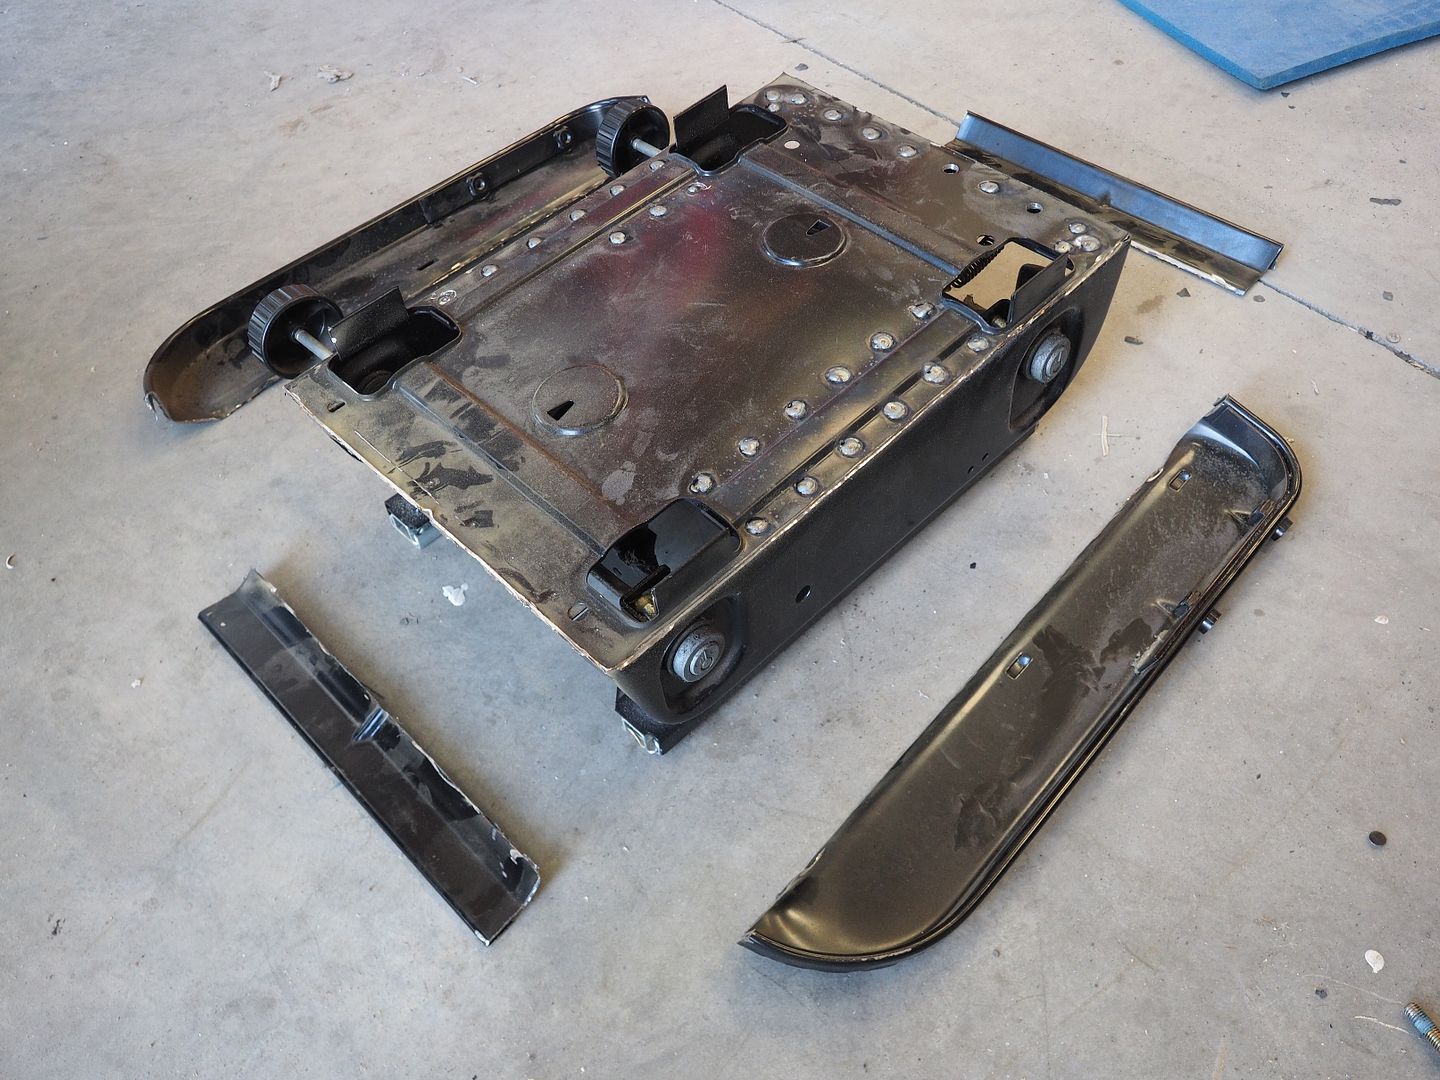
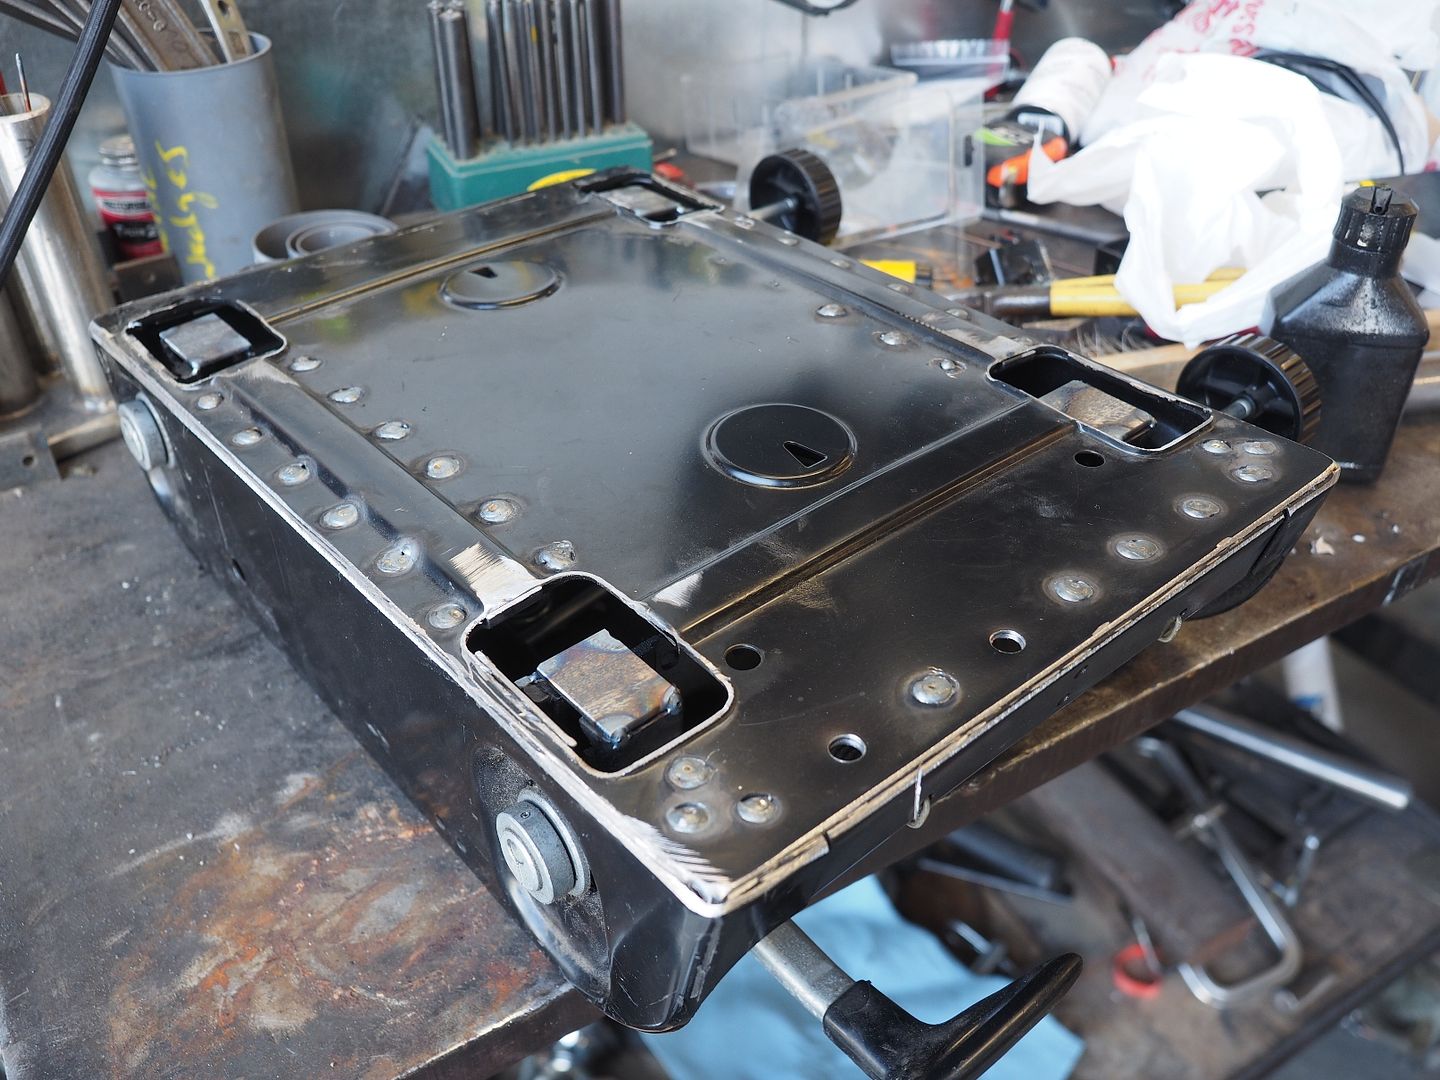
Here the tabs sticking up on top have been removed and I've shortened the adjusting bars on all 4 corners to allow clearance for the new seat to go lower, the new seat is slightly taller than the old one.

P2240495.jpg


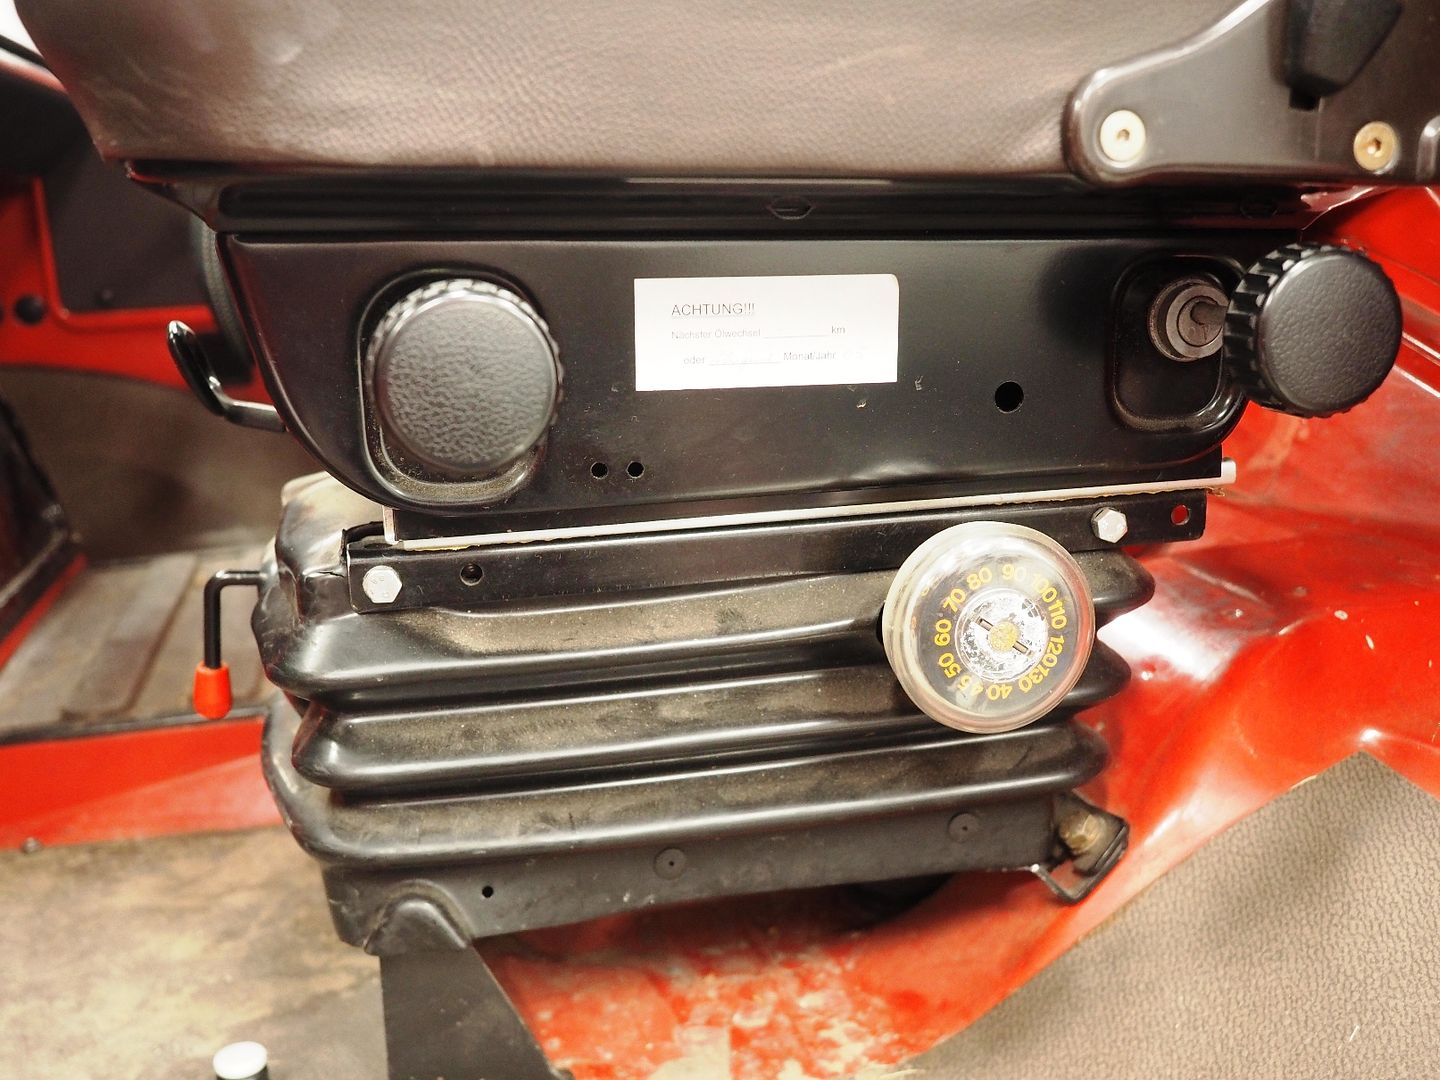
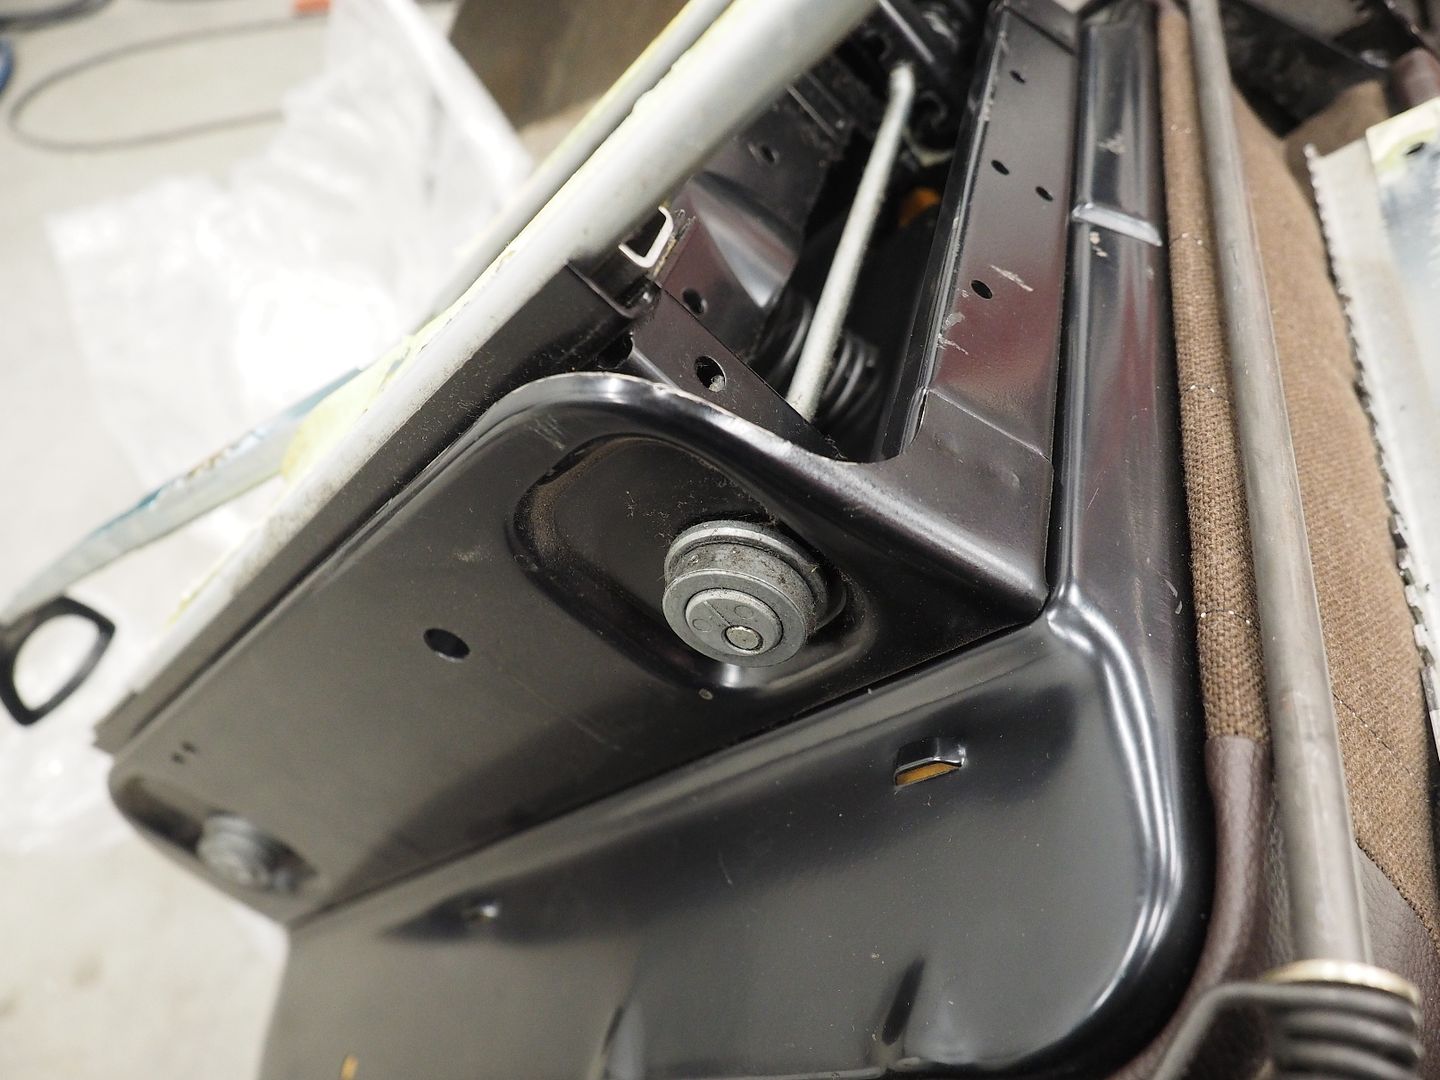
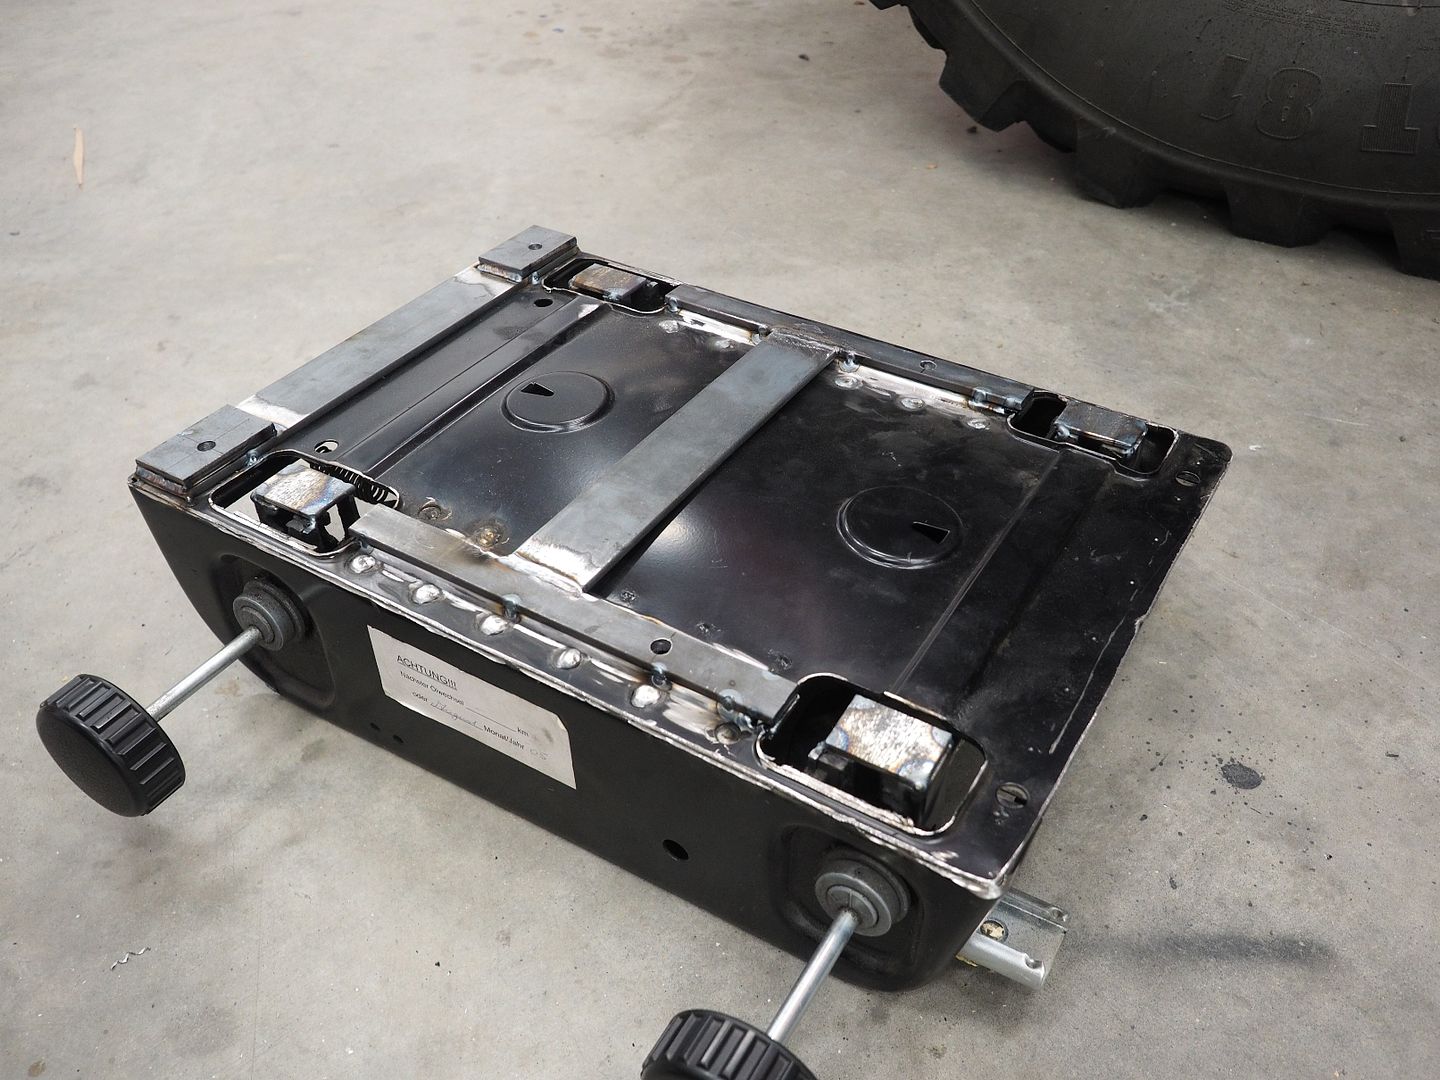
Stops tack welded in place to keep the adjusting mechanism from coming apart if the adjusting wheel is turned to far.

P2240507.jpg


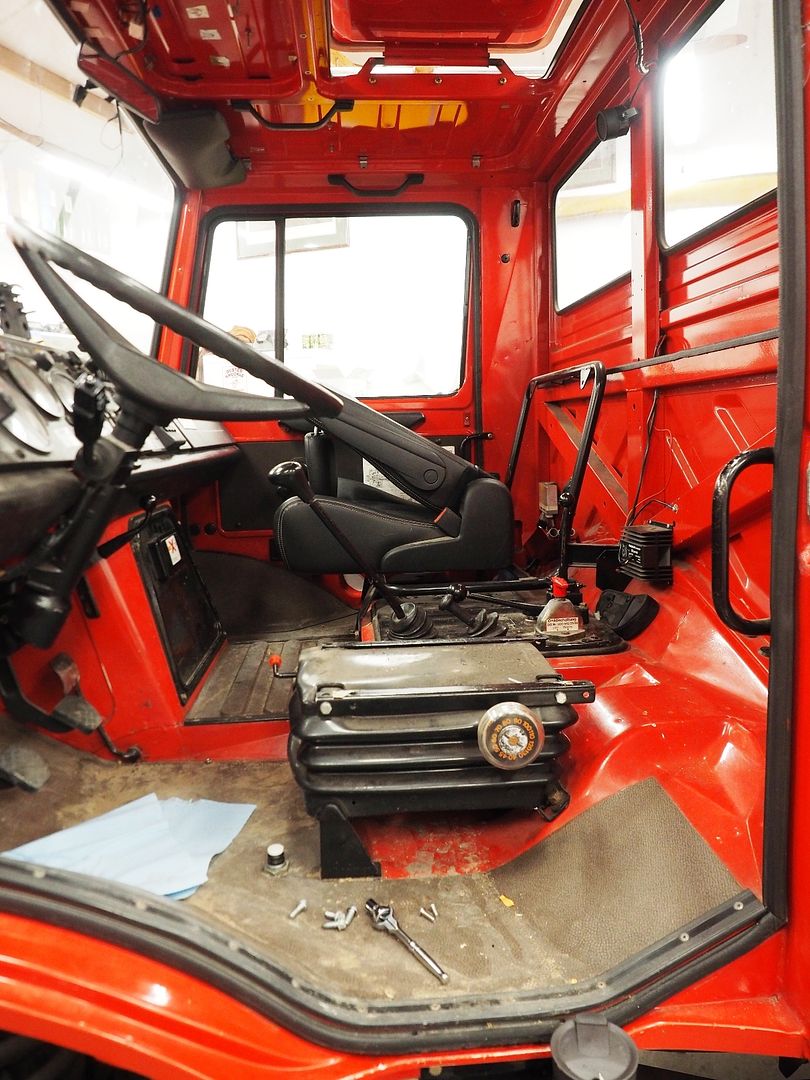
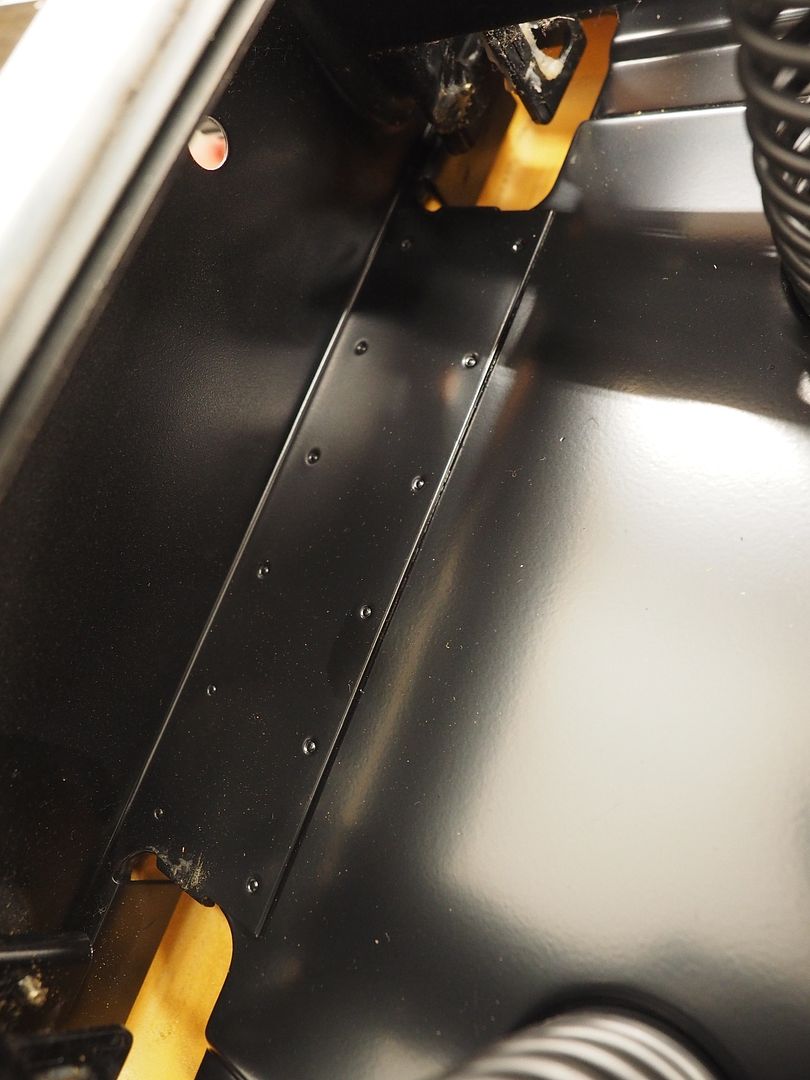
Mounting bars installed, these were needed for the new seat to clear the adjustment bars.

P2250518.jpg


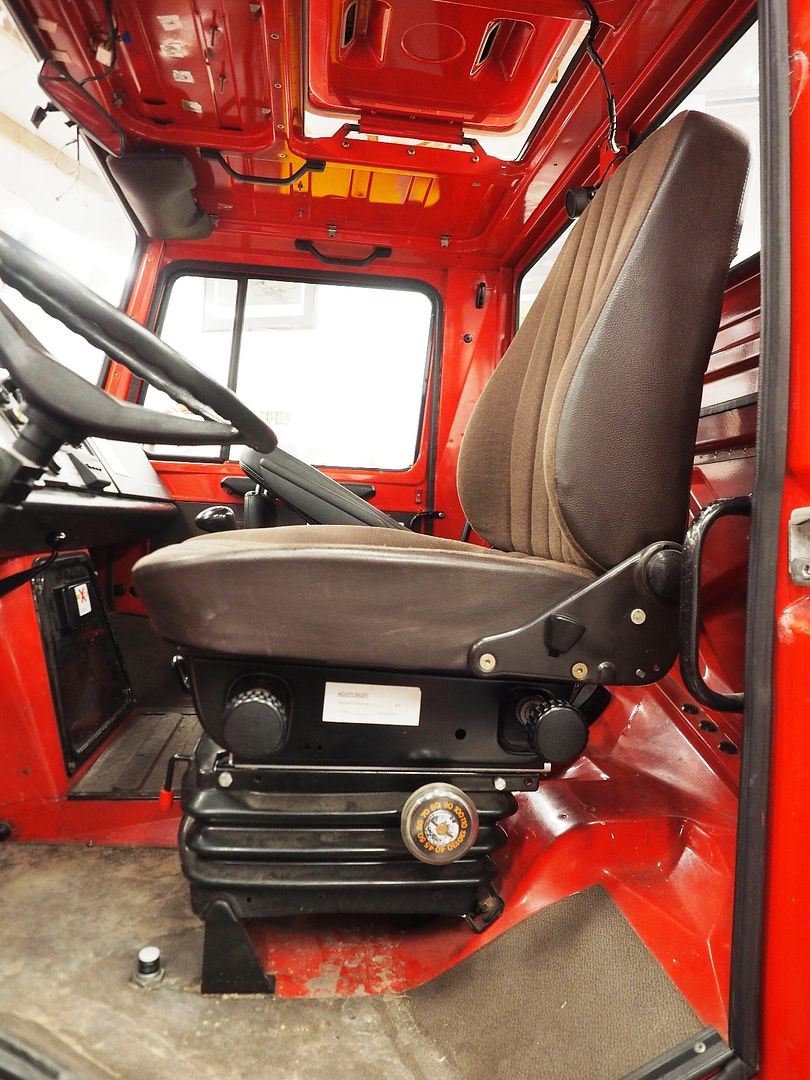
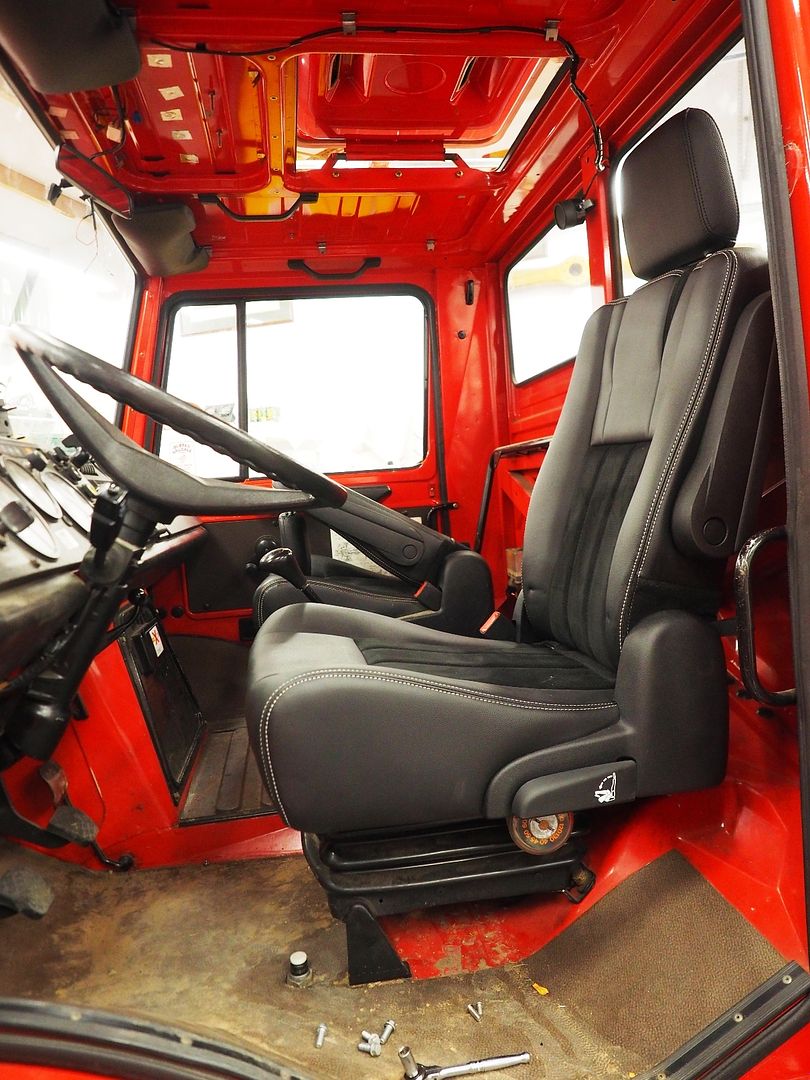
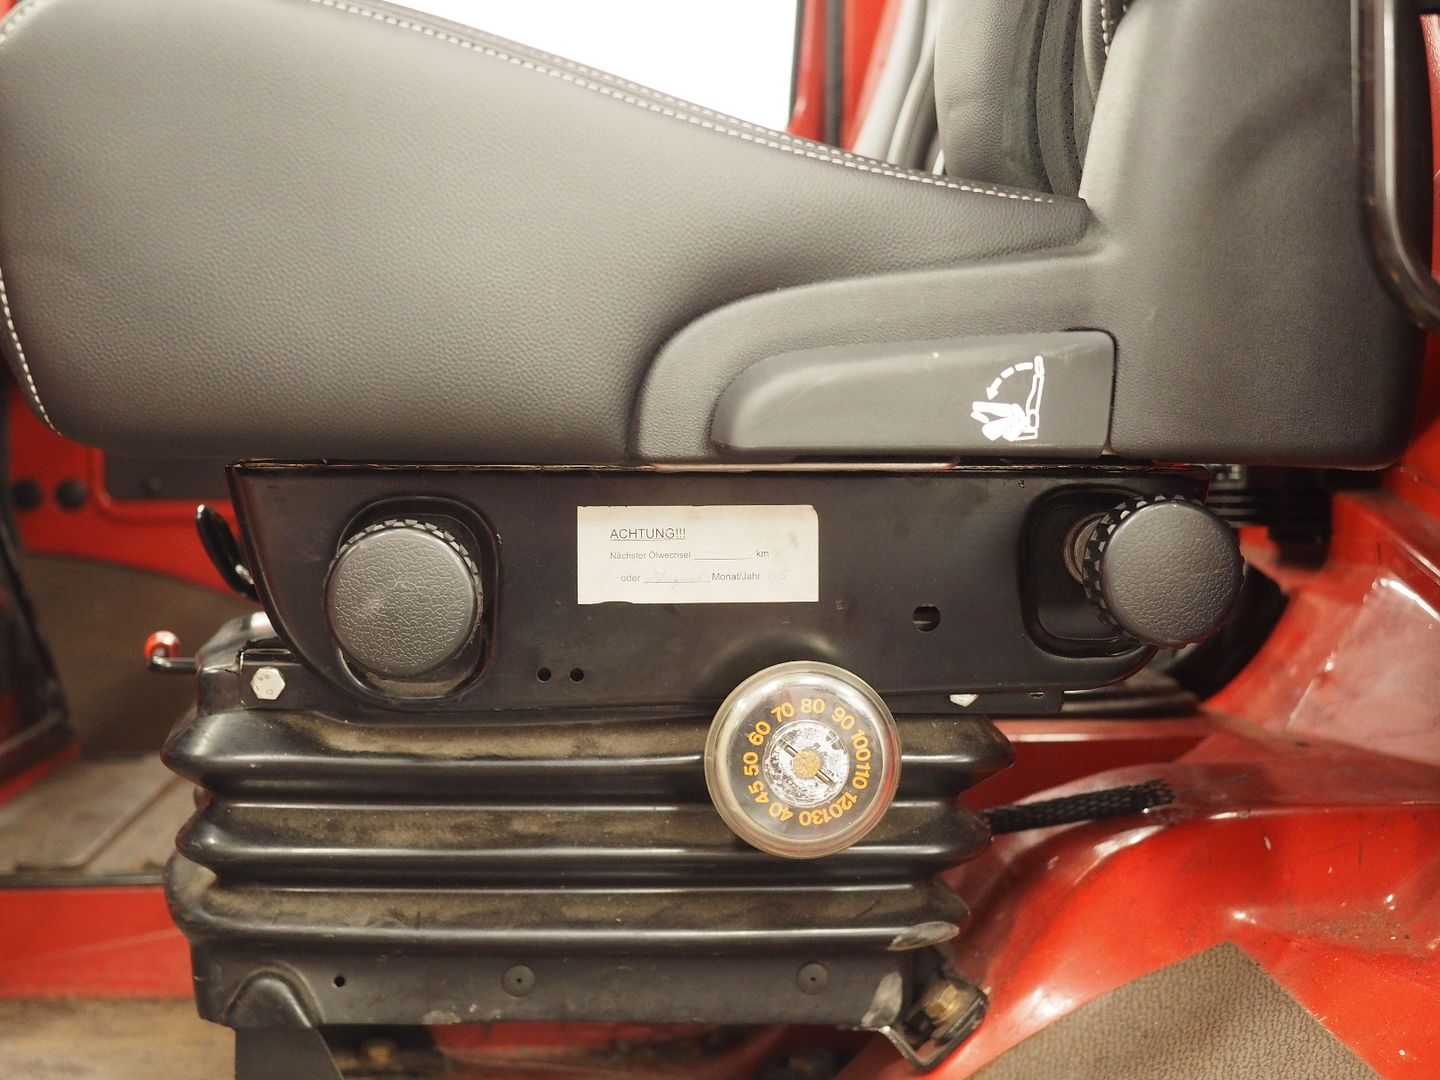
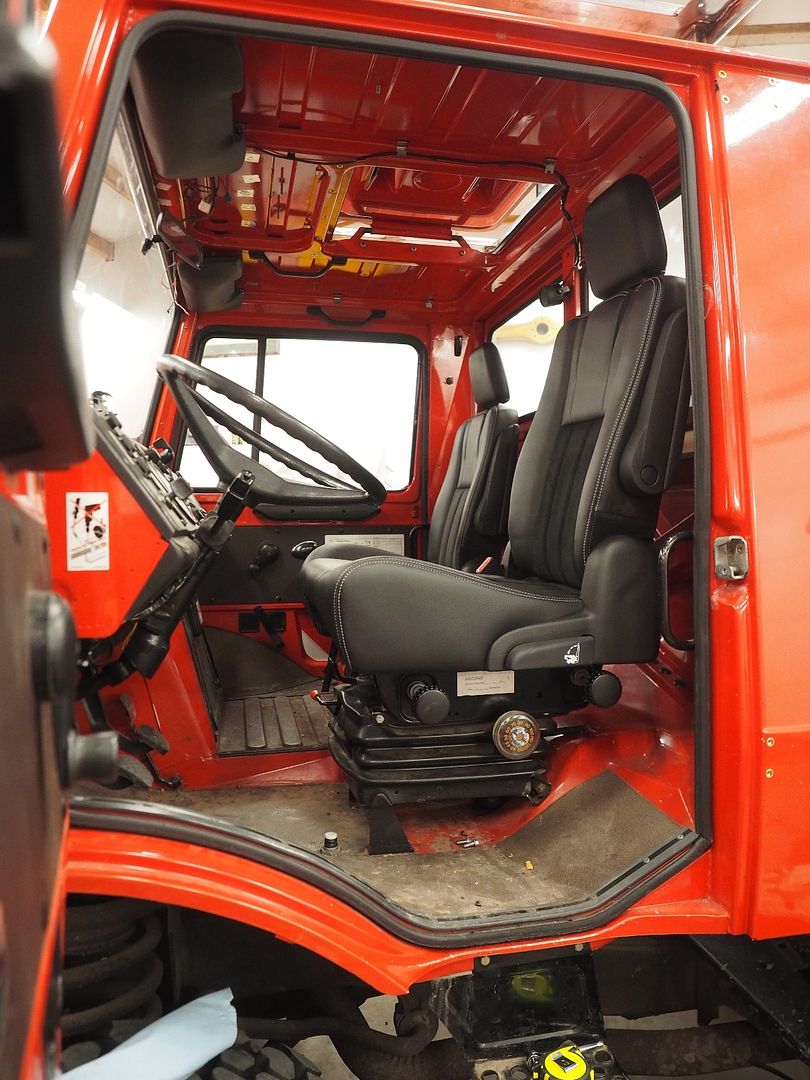
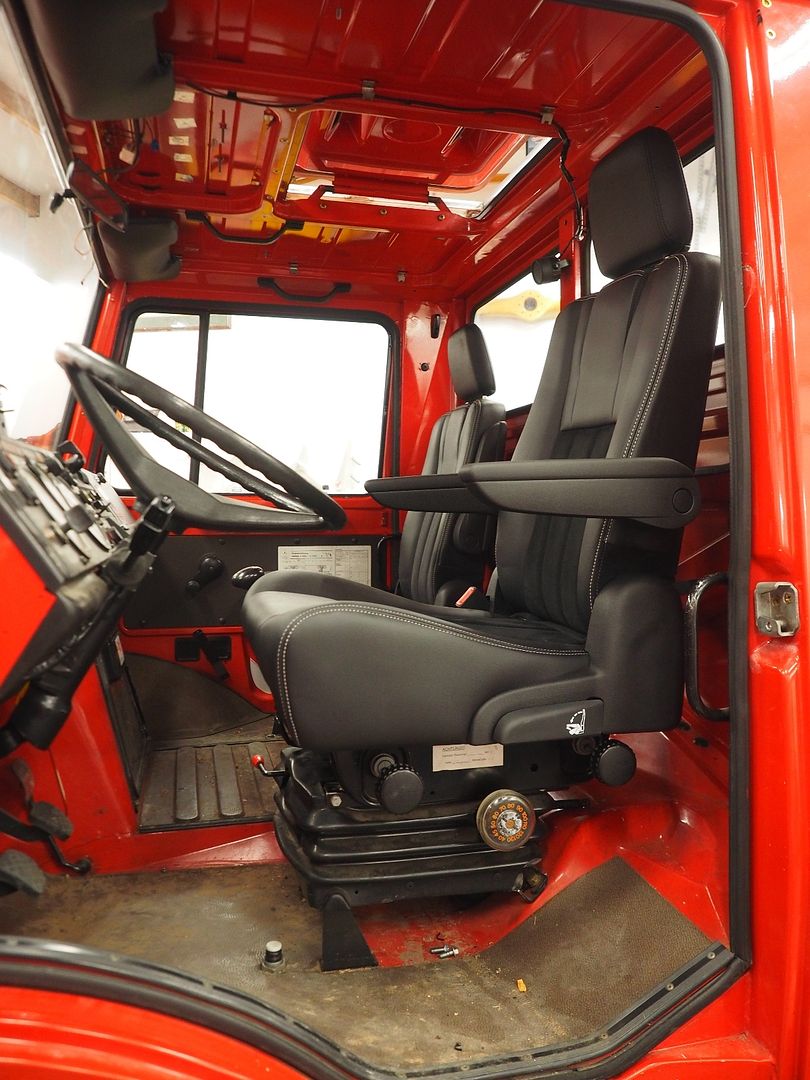
Installed in the truck. The seat is very comfortable compared to the OEM unit and adds a bit of modern look to the interior as well. Glad I kept the height adjustment as I like to run the seat up very high but anyone with a heavier build will need to lower the seat to drive it. When I pull the seat back out I'll blend down the edges and paint the needed bits.

P2250530.jpg


P2250529.jpg


P2250526.jpg


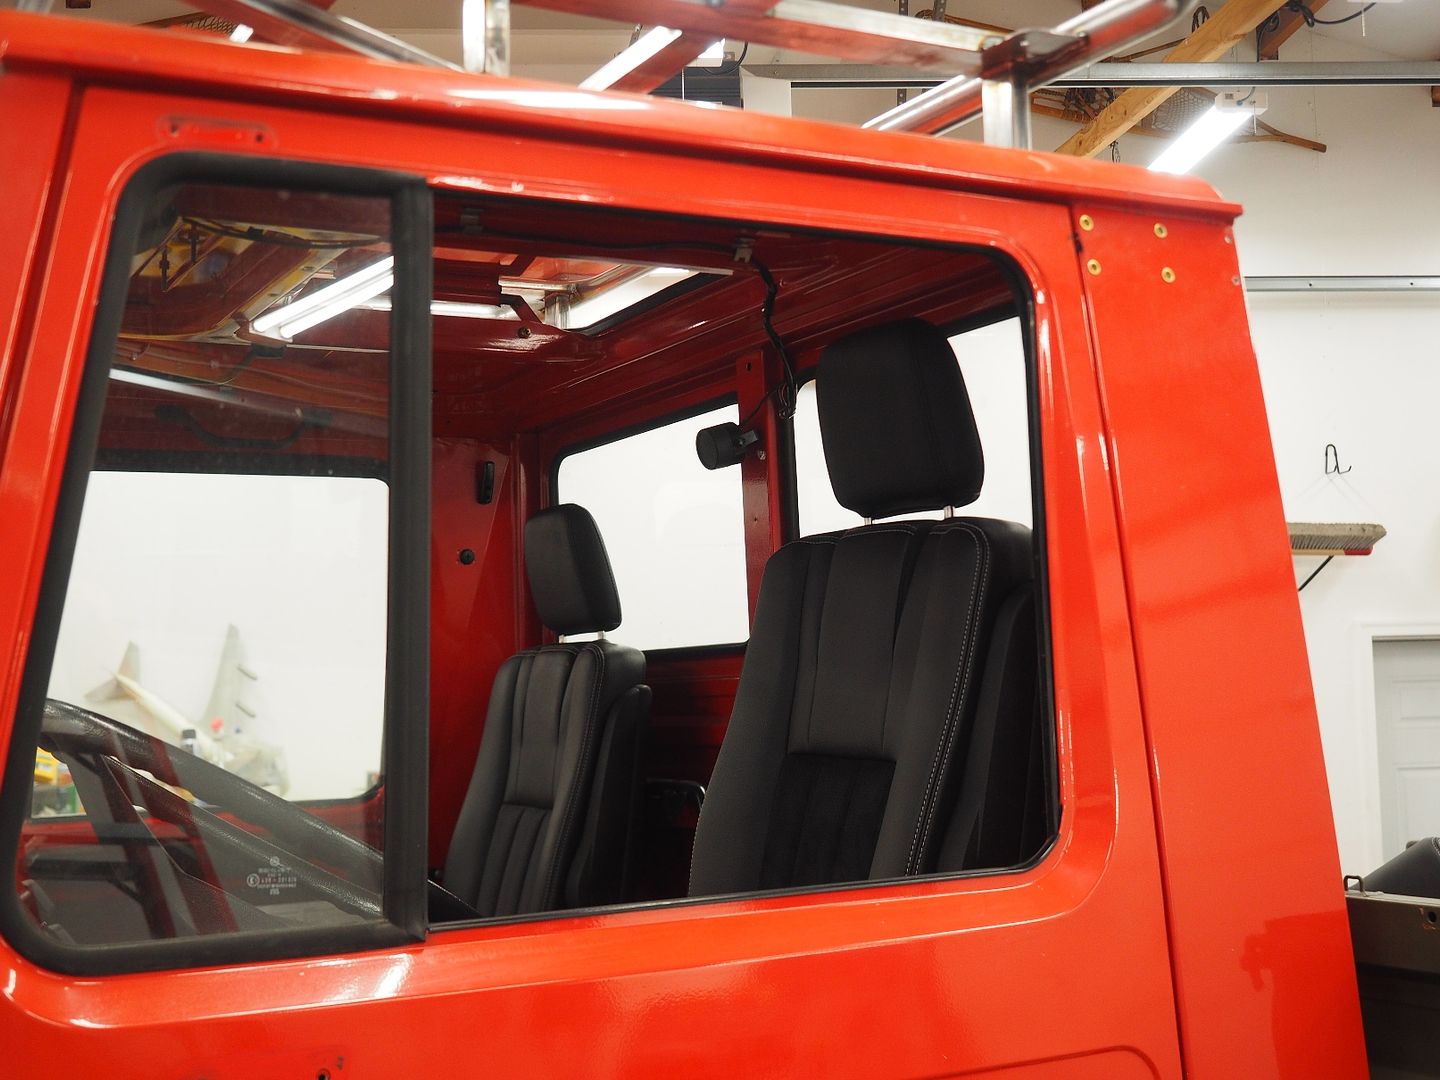
I ordered another suspension base to install on the passenger side seat as well, hopefully it will help out with my father bad back when on long trips. I also want to raise the passenger seat up to the drivers seat height, it feels like sitting in a hole when your riding on that side with the bench seat. You can see the current height difference in this pic.

P2250533.jpg


Started stripping the truck down for paint & powder coat prep that will hopefully start soon. Still have several holes to fill on top of the cab from the old radio antennas as well.

P2250535.jpg


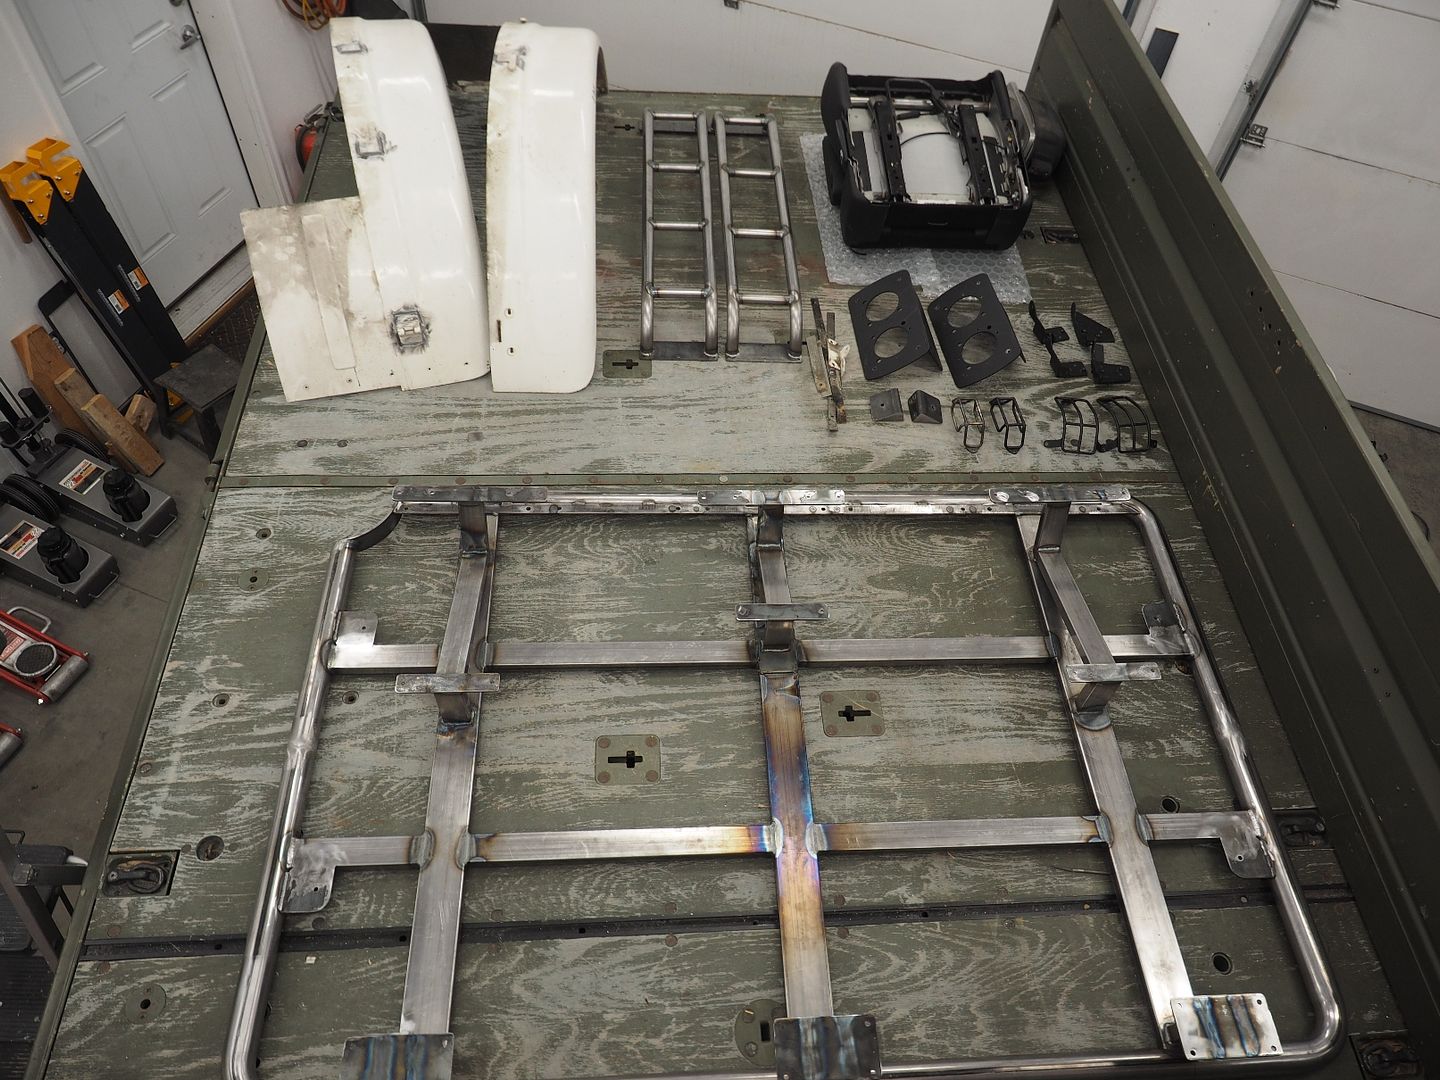
Parts that will be going out for powder coating soon. The mounting tabs on the front fenders had a thick layer of rubbery sealant applied under the paint all the way around each bracket to keep out moisture. We didn't want the powder coating place to warp the sheet metal trying to get that stuff out with a sand blaster so my father carefully removed it all with hand tools. There will be more to powder coat but this will be a start.

P2250538.jpg


Hodakaguy
 

patoz

Expedition Leader
Very nice. They look just like they belong there!

Are you planning on having any communications gear in there? You might need those antenna holes to mount new ones.
 

Wyuna

Observer
Not sure if you mentioned it in a previous post, (i think you might of, though i can't recall), but what colour scheme are you going?

Black fittings and ??????
 

Forum statistics

Threads
185,886
Messages
2,879,178
Members
225,450
Latest member
Rinzlerz
Top