Storage Drawers / Platform for my GMT800 Suburban - WIP

boll_rig

Adventurer
Rayra,

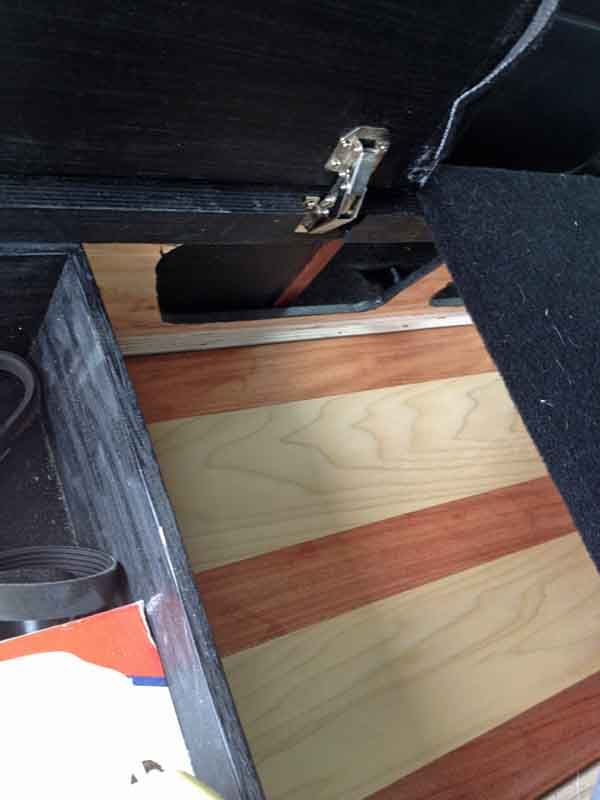
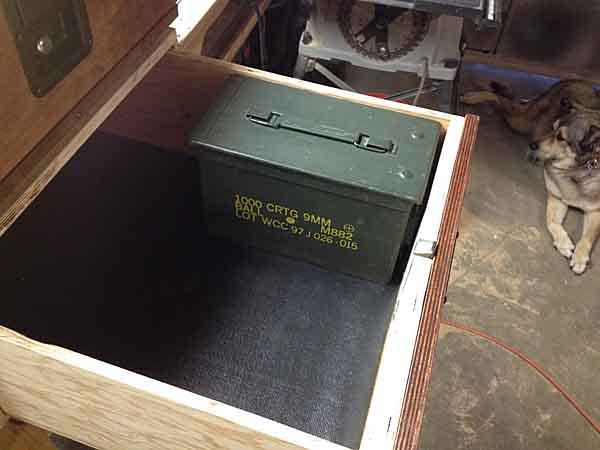
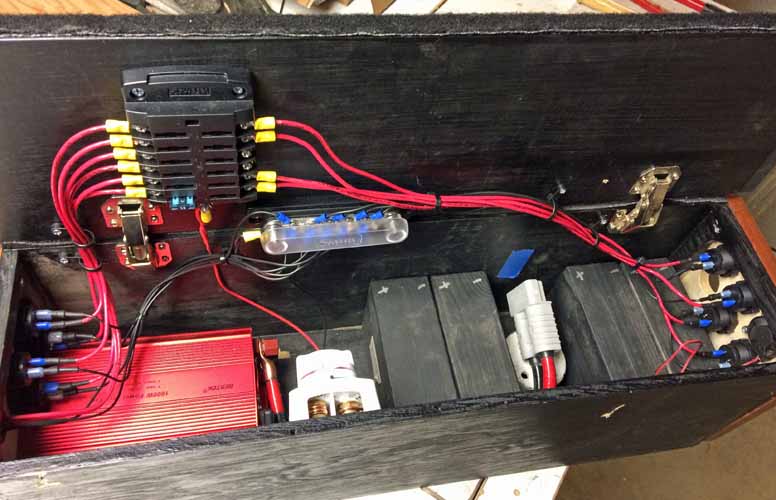
Just re read/finished this thread to the end. Incredible work on this project. Its truly a masterpiece seeing it come together all at once. Your setbacks/mistakes are basically wiped clean away in the end result. Really liking the black carpet, hardwood finished ends/latches, and of course the power module.

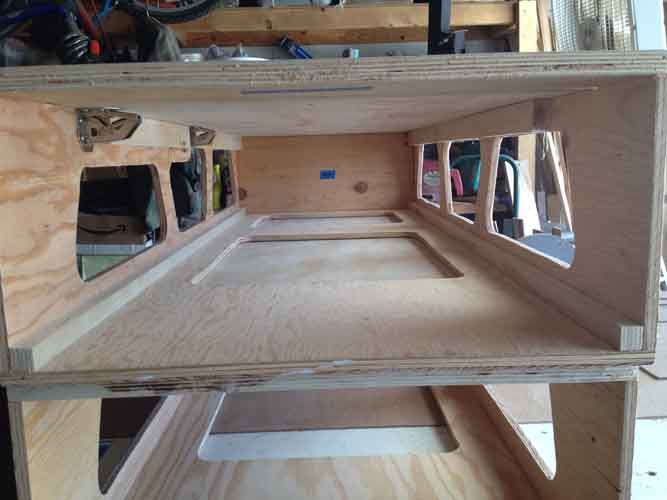
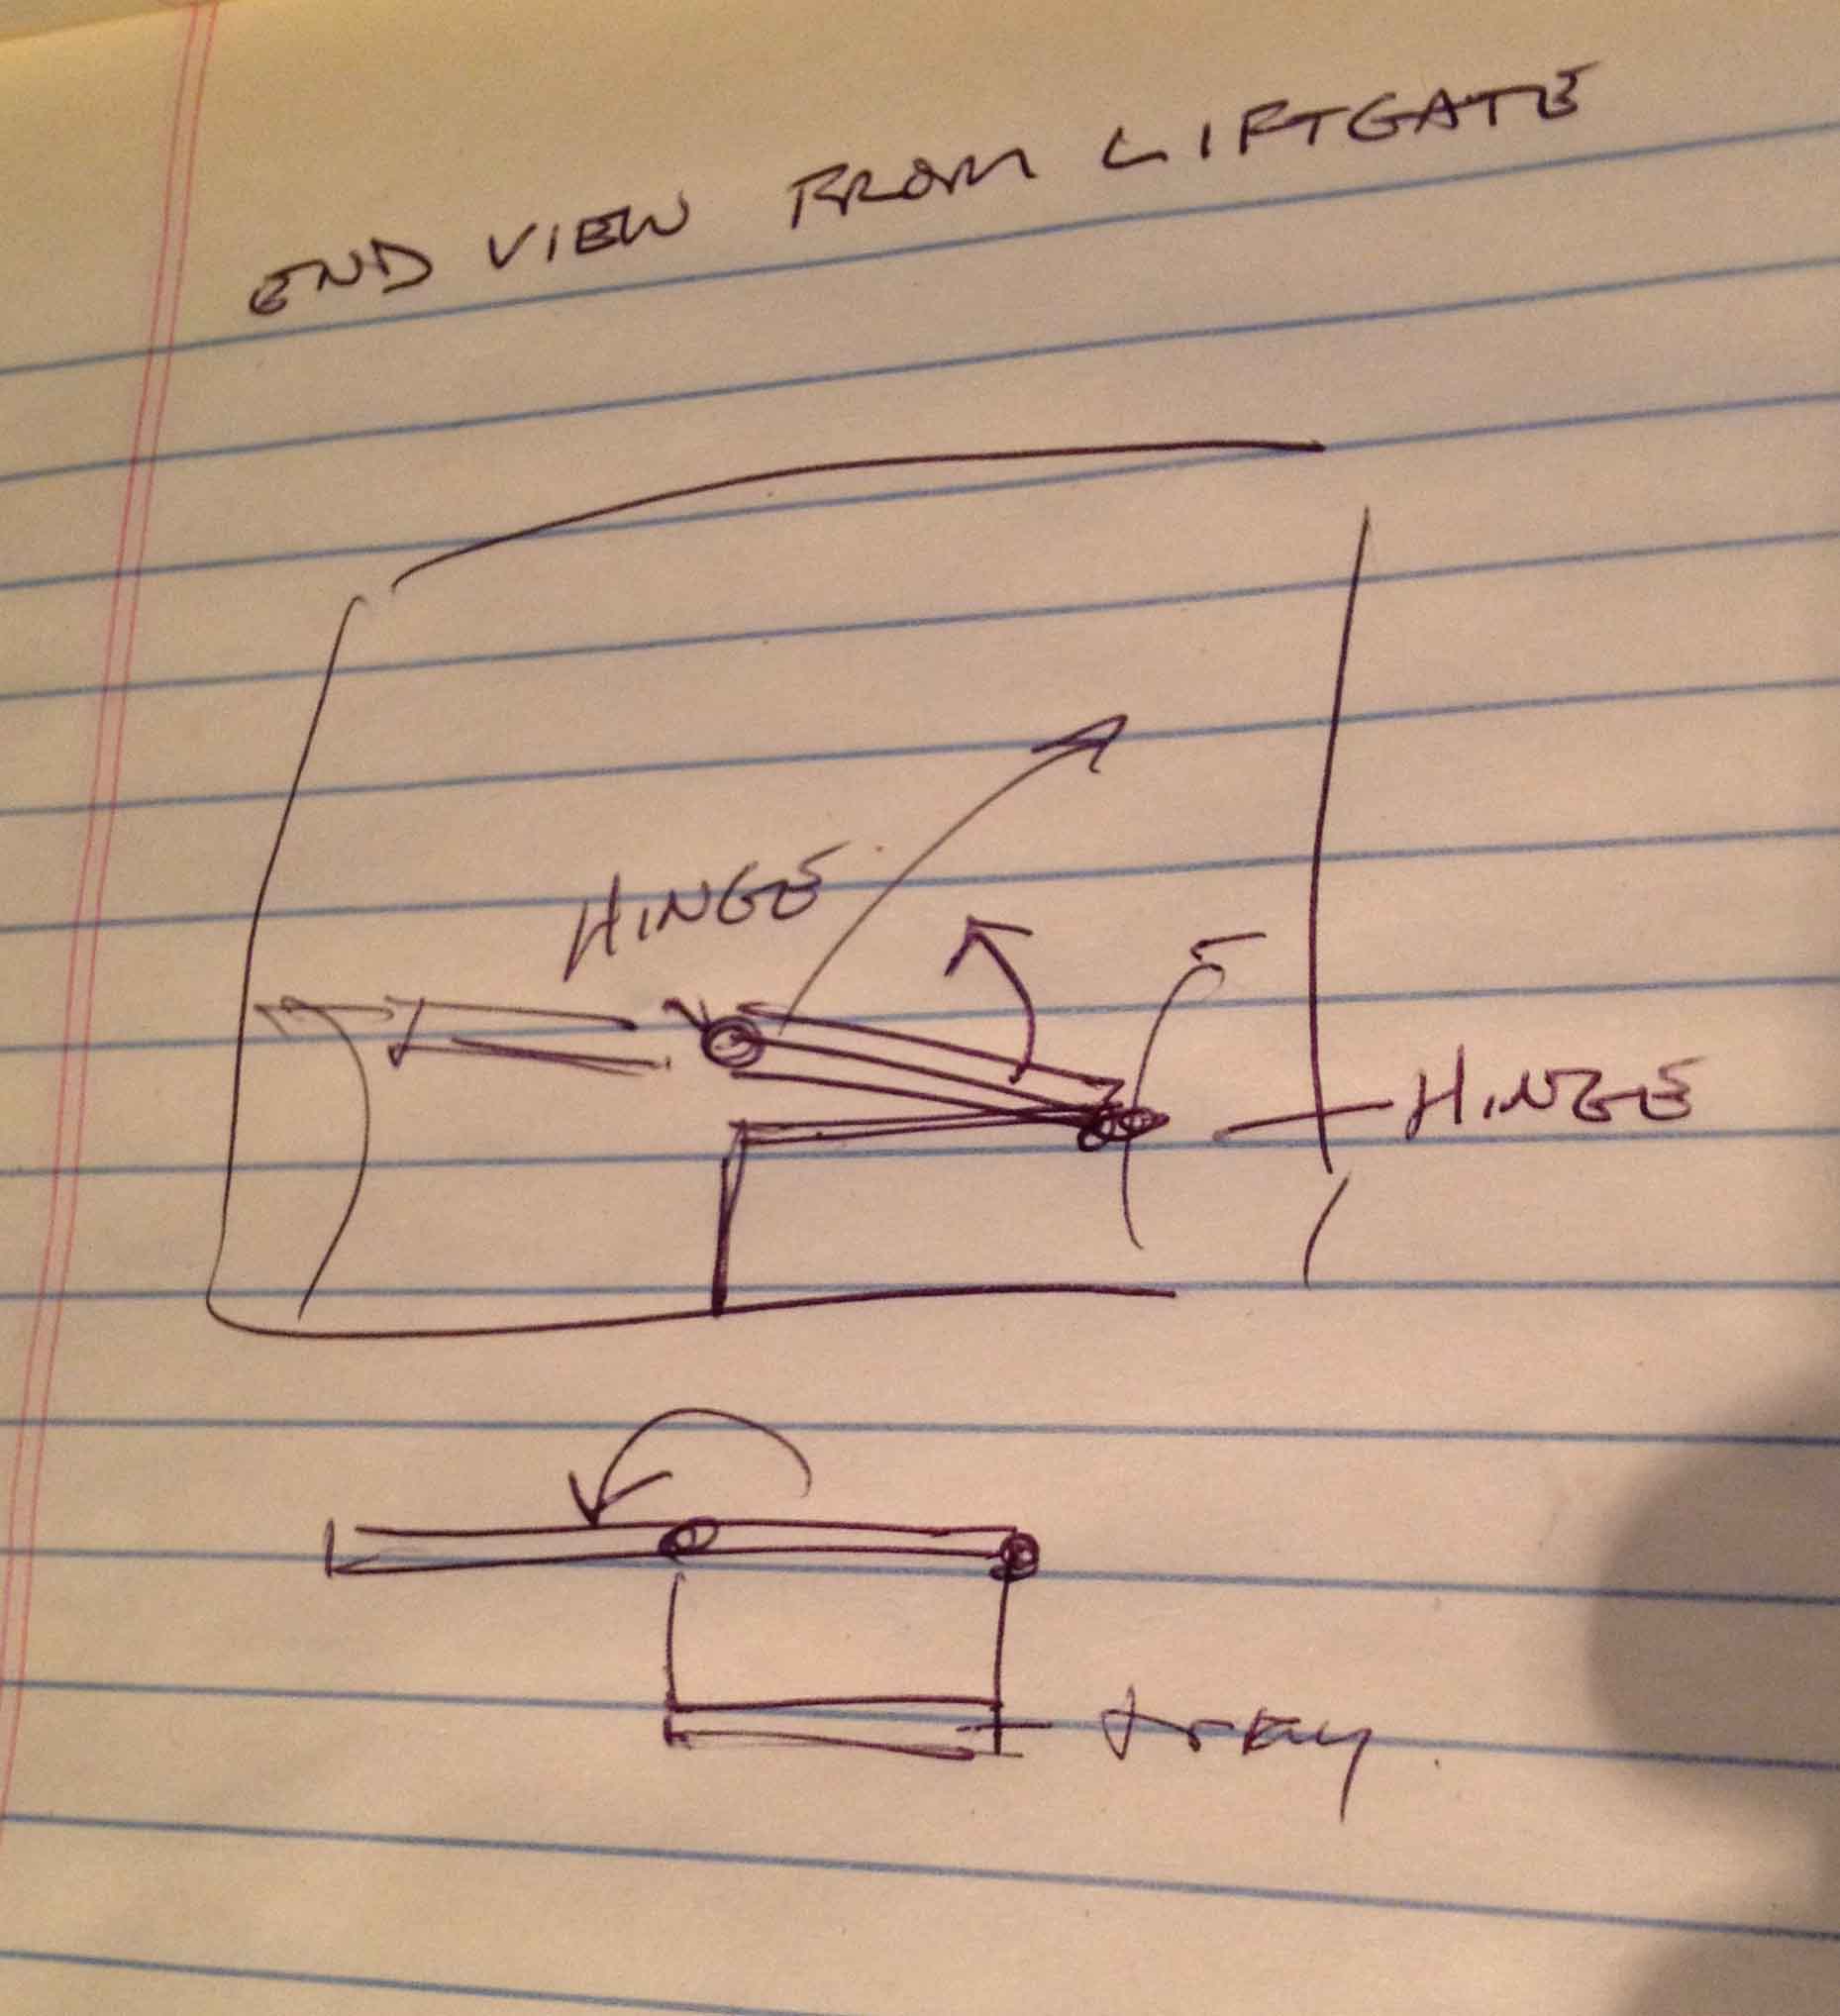
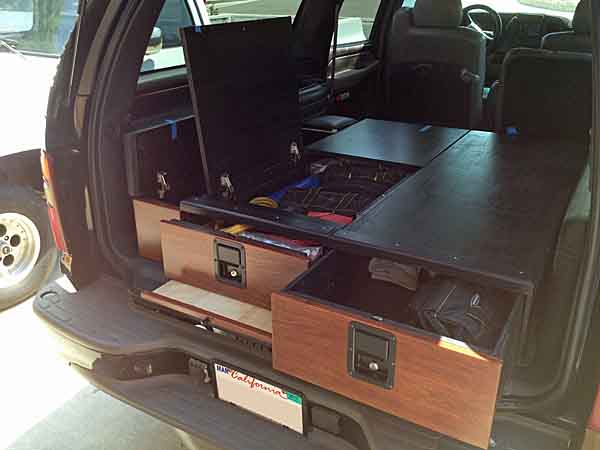
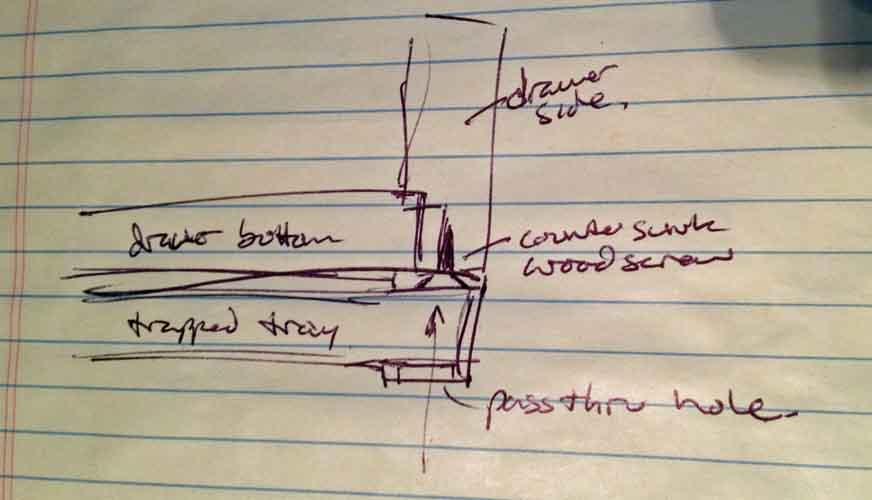
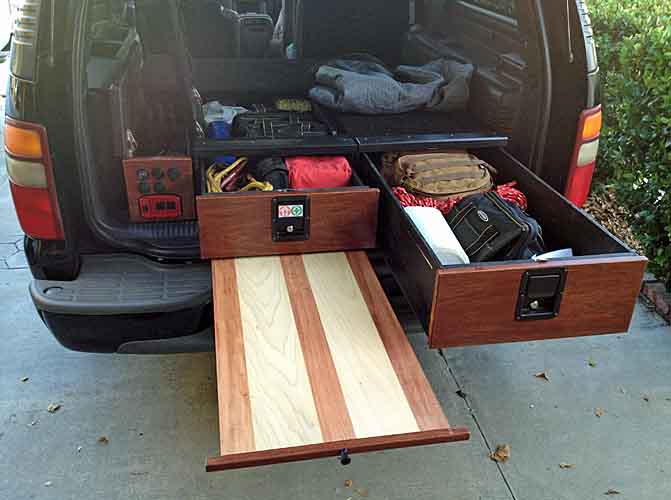
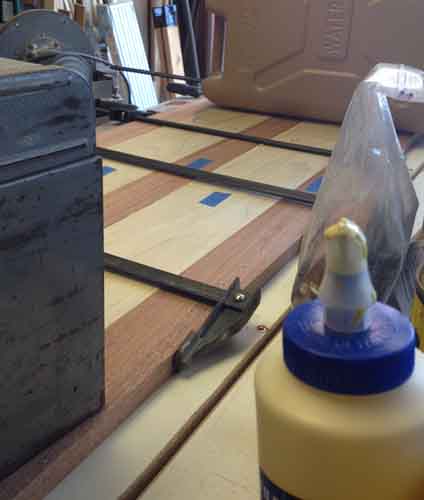
I am returning to my own drawing board for my bench seat/bed in the back, ac side, of my burban. My designs in my head resemble just one section of your drawer platform, perhaps a little wider. I can't get over the simplicity of the pull out table.. I was planning on having a pull out drawer with a top piece to work/cook off of but may go with the pull out table underneath instead. May very well purchase some clamps and copy your design, wondering how strong it would be at 26 in wide. Also wondering how you avoid pulling out the table when you pull out the draw above it?

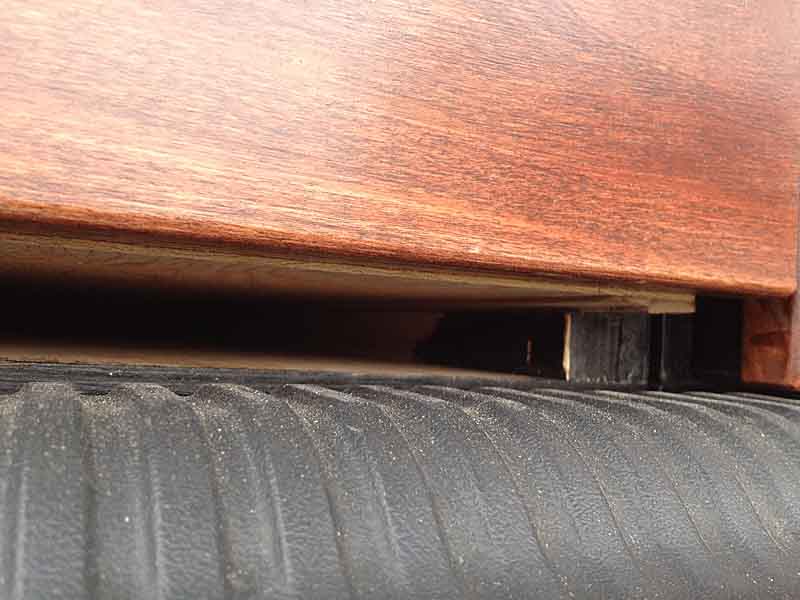
Also wondering if you have j bolted it down yet and if so how exactly you went about it. I was trying to get around the best way to secure mine to the floor beside sheet metal screwing ha.

Again, you continue to inspire ray!

My idea for this was going to be a quick, cheap, super fast made platform to sleep on just for this upcoming trip... now here I am drawing up elaborate designs, yet again.
 

rayra

Expedition Leader
Thanks again for the kind words.

Tune in after New years, I'm going to be gutting it all to finish several different wiring projects (roof solar, roof lighting, rear lighting in the roof rack end caps, rear / backup camera, the major cabling for the power box, maybe some more antenna cabling to the roof. A ceiling mounted fishing pole / antenna rack. And maybe replacing the back seat TV and tying it into the stereo / DVD player (we were drivign around last weekend looking at christmas lights, with LED lights on the Sub roof and A Christmas Story playing in the DVD player)

I'm going to be working up a J-bolt sort of hardware solution to bolt the forward end of the box(es) down to the floor mounts for the 3rd row seating. That will probably require a hatch in the top deck so I can reach thru to bolt it down. And I have to solve a clearance issue for the drawer itself sliding over that. Gonna be tough. Might have to put a double bottom on the modules, another layer of 3/4", to get some working depth to have the mounting bolt inset in the floor. But I am not adverse to drilling some holes in the floor and using carriage bolts with wingnuts underneath. Then the heads only have to be inset slightly and I don't have to add many more pounds of plywood.
eta but actually if I gauged it right, those inset bars that the front catches of the 3rd row bench lock onto should lay right under the front end 'breadbox' area of my drawer modules. So the J-bolt can just protrude into that that space adn be easily accessed. All that's need is a slot in the floor crossways to that mounting bars and I just hook it with the J-bolt and spin the wingnut down.

I'll also be beefing up the side to side attachments as well. It's just half-assed with some wood screws right now, until I get the internal layout in the power side decided. I have all the parts now and will soon be tinkering with arrangements, ahead of gutting the vehicle and laying in the fat andersen coupling at the forward end of the subwoofer.


On your single bunk / bench idea, how about something like a futon, a hinged double top deck that unfolds to make a full bed on the ground floor, in addition to your loft arrangement?
It could even be a 'Z' arrangement so the whole top hinges up and to the window side to access the drawer contents without opening the Liftgate or drawer, and unfolded the other way, you get a double bed platform. Easy enough to add screw-in desk peg-leg attachment brackets, store the feet in the drawer. Or affix a support edge on the other side, like the old pickup bed / camper shell platforms. Couple piano hinges and an extra top deck is all it would take / add.

eta oh on the slide out tray, I just made sure the bars the drawer slides on are ~1/8" taller than the tray itself. I'll take a picture of that tomorrow maybe, if I don't already have one. The drawer never touches the tray, it isn't laying right on it. And the drawer itself is only making contact on a 3/4" wide strip on each bottom edge. Very little drag that way. Right now it is just plywood on pressboard and slides well enough for all the weight in it. No bearings, no teflon no grease no graphite. Eventually it will need something proper like a nylon or teflon strip. But for now it's working fine. And there's actualyl enough friction that when I'm off angle the drawer just stays where I leave it. It isn't rolling open or closed on a slope.
 
Last edited:

rayra

Expedition Leader
Here's a shot that illustrates it. Those ~3/4x3/4 strips of plywood in the bottom corners of that top module are what the drawer is sliding on. IIRC I added corresponding strips of 1/8" pressboard on the bottom of the drawer. I only brad-nailed those strips in, so I can readily remove them and fit a better sliding surface on them. If I even bother to. I can readily get the drawer moving with one hand on the paddle latch, even stuffed full of my tools etc. And it's easy enough to grab the end of the drawer box / face with both hands once it's open and pull it as far out as I want.

storagebuild059_zps6wrind9f.jpg


I'll try and take a better picture tomorrow as things currently exist. I want to take a look at the wear, anyway. And my 'sacrificial edge mouldings' have certainly been getting sacrificed. Been doing a bunch of remodeling and handyman type stuff lately, been dragging portable workbenches and ladders and materials in and out of there, they're getting chewed up. As intended. I suppose the ultimate might be to mill some out of black delrin. Then they can get beat up and show little wear and if they get too abraded I can dismount them and flame-polish them.
And my carpet choice is 'suboptimum', no Suburban pun intended. It traps sawdust, dog hair, like a damned magnet. Shop vac all day and it still doesn't come completely clean. I may go more expensive loop pile auto carpet, or even a rubber mat.
 
Last edited:

rayra

Expedition Leader
Pics.


here's a shot looking down into the module thru the top hatch, with the drawer pulled most of the way out. You see the sliding tray nestled in the bottom, between the rails the drawer slides on

storagedrawers100_zps4o2slqxg.jpg


And another poor shot looking into the slot from the Liftgate end, with the sliding tray removed. You can see that the floor of the module JUST clears the plastic trim of the Liftgate opening. Reminder, I have a couple layers of sound-absorbing rubber sheet material under the carpet, too. Without it the module floor would need to a bit thicker to clear the sill. Or the tray would need to be elevated a bit.

storagedrawers101.jpg


I took a bunch of other pics while fiddling about with the components for the power module build, but I'll be posting those in my topic in the 12v subforum later this evening.

http://www.expeditionportal.com/for...on-my-inputs-and-ouputs?p=2217644#post2217644


9700
 
Last edited:

rayra

Expedition Leader
I diagram and a few more descriptive words on the 'Z' benchtop idea for boll_rig


My idea is sort of a storage bench like on a boat or patio, where the seat portion tips up and back for access to the interior. Then put another hinge on its front lip for a double deck top that unfolds to span the whole cargo area.

boll%20rig%20bunk%20bench.jpg


The double layer top reinforces the 'bench' so it serves as a step or landing platform for the pop-up loft space.

A slide out tray from teh top above the drawer makes some sense for comfort height BUT in that position it totally blocks access to the contents of the drawer thru any interior / deck hatches, or the tip-up seat diagrammed above.

I ran into the same conflict when designing mine. I wanted a top slide which was hinged across its middle, sort of like a safety deposit box lid, the drawer slides out then you open the top lid or have a solid work surface. And wanted to be able to pull out the sliding top, flip it over and use it as an easel for maps or comm info / notices in a 'search & rescue' / CP setup. But having that piece on top of the drawer means you can't get in the drawer thru a top hatch and not without having to open the liftgate and pull our the tray or the drawer. What if you are stuck or hemmed in or in a wreck and can't do that? Can't get to the stuff in the drawer. So on the bottom it went.

Marry Christmas to you and yours.
 
Last edited:

boll_rig

Adventurer
Thanks for the drawing Rayra, I keep going back and forth about whether I want to accommodate a wider sleeping option right now because Im single haha. Could always add a small pull drawer later on..

I guess it's always nice to have the option for a guest too though ha.

I was wondering how strong your pull out table is? Does the poplar and mahogany flex or bend at all when extended?

Also how deep is the drawer above it? Wondering whether I'd rather save that room for drawer height and nix the table.
 

rayra

Expedition Leader
I had a couple factors impacting platform height, not least of which a huge German Shepherd. I sized my right-side module / drawer to just barely accommodate a common 50cal ammo can. That made the overall module height 10" at the deck. Then the left side drawer module had the slidign tray on the bottom and the shims / rails at the top that trap the draw so it doesn't tilt or pry against the top hatch, which shrunk the interior drawer side height about 7-1/4" IIRC. With about 3/4" of headroom above the drawer, inside the module.
I don't think anything any more shallow would work with storage bags organizing things.

caninehighground.jpg
storagebuild064.jpg
storagebuild120.jpg
 
Last edited:

boll_rig

Adventurer
Thanks for that info. Right now Im thinking of a total height of 11.5-12 inches for mine. Mostly to get my 9.5 inch tool bag and water jug to fit.

And the table strength? And at full pull out?

I keep thinking of using that C channel below my drawer for the table. Wondering how well aluminum would slide on press board if I mounted the channel to the bottom of the drawer with epoxy.
 

rayra

Expedition Leader
It should slide fine and if you use some countersunk wood screws and matching hole on the side of the C-channel against the drawer bottom (with a corresponding larger hole in the bottom most face of the C, to access the screws thru the C channel, I think you'll find the C-channel will make a great skid for the drawer. A step drill bit would work great for that. At least getting things aligned.

As to wood strength on the pull out tray, I'm not sure about sitting or standing on it, but at ~40" extension mine seems plenty strong enough for anything else, certainly as a kitchen counter.
You might get better rigidity using solid hardwood. Plywood will bend much more. With softwoods in the middle of that flex range.

back in a minute with another diagram

c-channel%20diagram.jpg


Dont forget that 3/4" C-channel is the INNER dimension. The channel is almost 1" tall on its own, if you get the thick stuff.
 
Last edited:

rayra

Expedition Leader
That general style are called Paddle Latches. They came bare steel and I bought locking versions on purpose, but they come non-locking too. Usually on stuff like truck toolboxes, job boxes, big generators. I got mine mail-order from a company catering to farmers. Can't recall the name off the top o fmy head, I think I mentioned them earlier in the topic. It wasn't Stock Supply, but something similar.
 

rayra

Expedition Leader
auxbatt062%20current.jpg


Finally got to the point of tearing everything back out of the rear of the vehicle so I can do a bunch of wiring projects and complete the Power Module portion of the box. I'm updating that other topic in the 12V forum as I go.

http://forum.expeditionportal.com/t...on-my-inputs-and-ouputs?p=2225447#post2225447

powermodule124.jpg


I'm down to just needing to source my main power cables (40' of 1/0, I'm trying ot save a few bucks) and get them cut and soldered up and installed. I've already made my floor and cargo trim penetrations for the power coupling and I've got my 'Mk1' box rigged up. There's still room in it for the 10Ah scooter batteries and a solar charge controller, maybe by the end of the year, not gonna happen by summer.

Had to chop up / reduce the size of the factory subwoofer box to make room for my power cable intrusions.

powermodule160.jpg


Then went ahead and started making big holes in things.

powermodule168.jpg


So just a few more bits of wiring and hooking things up. And still need to modify the rear AC vent slots. And I need to deliver a piece of furniture / corner TV console I just got commissioned to build, need to whip that out within the next two weeks. And it won't fit in the Sub with the drawers installed. It's a big L-shaped piece, 50" x 45" by 30" tall. So everything should be done and operational by the end of this month. This phase of the project, anyway.

And I'll probably still re-do the hardwood drawer faces. I kinda chopped up the Power Module facing. Had to put the Inverter off-center to cover a power socket whole that was already drilled, and once I did that I'd didn't much care how close of a fit I made, since I was then going to replace the wood later anyway. But that's one of the things that will likely sit on a the back burner forever. And re-doing the wood gives me a chance to change the whole visual layout of the power connectors. And make changes / additions before 'Mk2'.


12,284
 
Last edited:

rayra

Expedition Leader
Spent some time before the rains started again this afternoon trying to make the mods to the cargo area trim panel for the rear AC return vent. Most of the flat face of it is obscured by the cargo platform / drawers. So my thought months ago was to extend the existing slots further around the curve of the panel, on the open end.

I set some tape, laid a marker pen on the flat extension next to it and traced a line as a max extension of the vent slots. Then drilled a series of small pilot holes.

storagebuild148a.jpg


Then I took a step drill bit and recalling the interior structures, tried to drill larger holes to serve as the finish of the new extended slots.

storagebuild148.jpg


But the bit started snarling of rag insulation. I couldn't figure from what, didn't recall there being any in that location. So pulled it apart properly. Ah. The whole back of the panel - even the AC return vent slots - had an (sound) insulator panel. It was loose behind the slots and lined with a black plastic, with enough slack to suck in when the AC runs.

storagebuild149.jpg


So I pulled that portion off (heat welded in place) to have free rein for working the slots. As I got to work completing the larger holes and trying to correct any irregularities, the more I looked at the factory slot louvered design, the more I figured i couldn't extend it in a neat manner. The RIGHT way to do the whole thing is cut it all out and make a complete new grill out of perforated metal speaker mesh, just like that used in the door speakers. But that was more work and time than I cared to add on to the project.

So I continued to clean up the holes and enlarge them and came up with this and called it quits -

storagebuild150.jpg


I might still also add a couple 2-1/2" - 3" soffet vent grills on the flat top surfaces of the trim panel. Depends how things sound / flow when I put it all back together. If it still sounds strained / sucking wind, I might add those vents near the rear, which is right above the squirrel cage fan of the rear AC.

And I might add some metal screen mesh on the back side of that louvered panel. Lot of German Shedder hair back there.


I also did some work in finally making some proper holes in the drawer / platform modules, so they could be properly anchored to the existing seat / cargo ring locations. The forward locations are 1/2"x2" slots that are perpendicular to the recessed bars which the 3rd row seat bench latches on to. I'm opening up some eye-bolts to form a J-hook, going down thru the slot and putting a fender washer and nut on the bolt, inside the 'breadbox' front portions of the modules.
The two drawer modules and the power module are then also screwed to each other thru their sides. carriage bolts and wing nuts would be better but I don't have room with the drawers fitting so closely.

I'm also modifying that long thin box that complements the power module, shortening its long dimension so it better matches the drawers. Sacrificing the two-MWC capacity of that thin box, previously pictured. I'll have a 3-MWC carrier box mounted by that AC vent on top of the platform, when heading into the deserts. And still have one in the thin box, for an 80L fluid capacity.

This about concludes the storage platform build.

I might re-visit this when I make a sleeping platform extension that ties into the breadbox front ends and bridges over the folded 2nd row seats.
I'm going to try and make a trip up the 395 before the heat of summer, re-trace some of Ansel Adams' photography sites of the east face of the Sierras. Will probably be sleeping in the vehicle.


12,898
 
Last edited:

Forum statistics

Threads
185,910
Messages
2,879,485
Members
225,497
Latest member
WonaWarrior
Top