I just added this build thread to the ADD forum as well, but it just links back to hear for anything posted before this date. I'll probably post in both forums for awhile with major mods since it only takes a couple extra seconds.
11/19/17: New Mod done! This one has been in the works for many months but I finally finished it up today: Heated Seats. This completes my Montero seats, there is nothing else that I can do to them to make them better short of swapping out entirely different seats from a different vehicle. They have what I consider all of the best features available from different Montero trim levels and years: Manual + Cloth + Bouncy + Heated.
The mod is pretty straight forward but I'm going to post detailed photos on how to do it because there are a few spots that were challenging since I had never done upholstery work before. Budget a solid 10 hours for this mod at the very minimum, mine took closer to 20 counting junk yard trips. Going with aftermarket heating elements would probably have been much easier and also they probably get hotter than 20 year old ones but I wanted something that was plug and play.
1. Find a donor vehicle. You will need to remove the heating elements from the seat back and bottom, seat wiring harness (that connects the back to the bottom), and complete center console wiring harness including 2 heated seat switches.
Rather than take the time to remove them in the junkyard, in the Phoenix summer, I just bought both seats in their entirety and just had to remove the center console to get the wiring. And plus, I wanted to dissect them carefully to learn how to do it to minimize the chance of messing up Betty's seats.
 IMG_8087
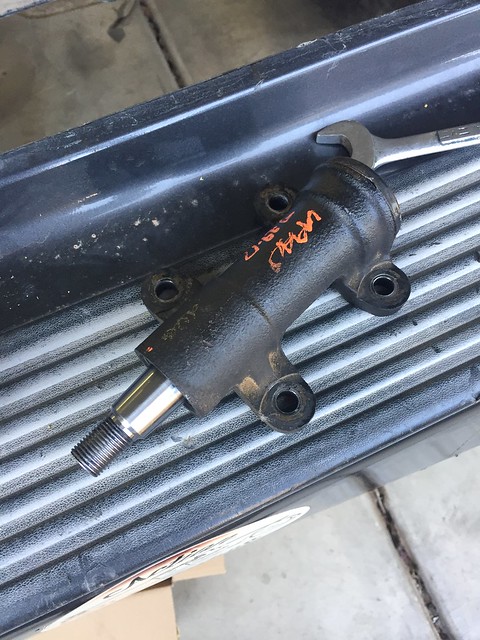
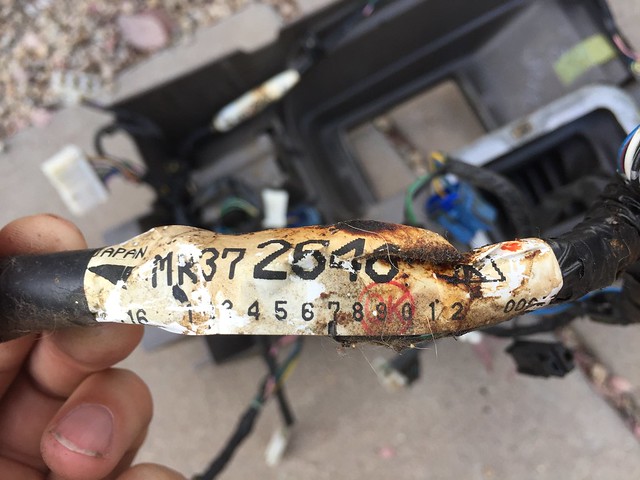
Here's the part number on the center console wiring harness (MR372546). It is identical to the one in the LS (MR372645) but with 4 extra plugs for the 2 seats and 2 heated seat switches:
 IMG_8877
2. Cut the heating elements out of the seats (carefully) or take them apart. I'll cover taking the seats apart in the following steps showing the install since it is the same.
3. Take the center console apart and replace the wiring harness and seat switches. (Here is a link to a post that covers how to take your center console apart in case you have never done it before:
http://forum.expeditionportal.com/t...ole-and-Interior-LED-Bulb-Replacement-Gen-2-5)
Plug in your newly acquired heating elements and test them out. The switches should illuminate in the Low and High position and of course, you should feel heat when touching the elements. Turns out that 1 back and 1 bottom element did not work so I had to go back to the junk yard a month later and pull another set of elements out of a different Monty. A pain, but I'm glad I tested the elements because it is a ton of work to install them for nothing!
 IMG_8933
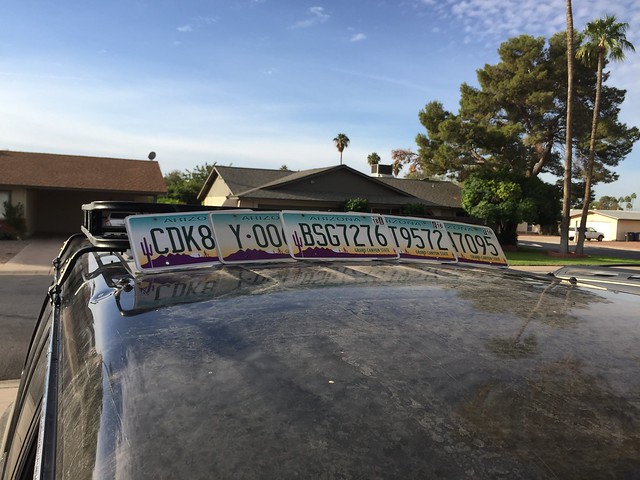
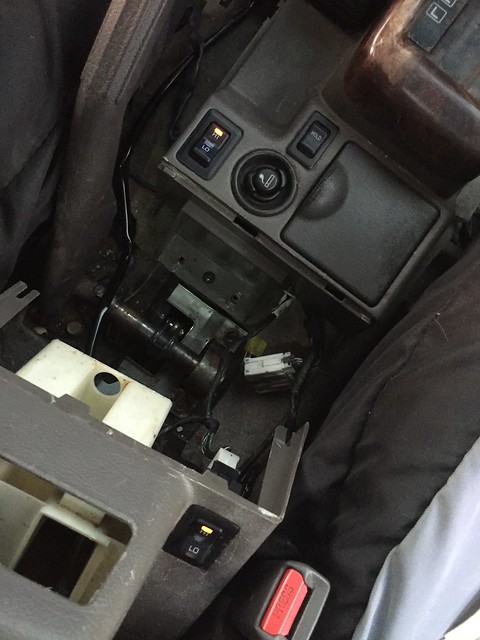
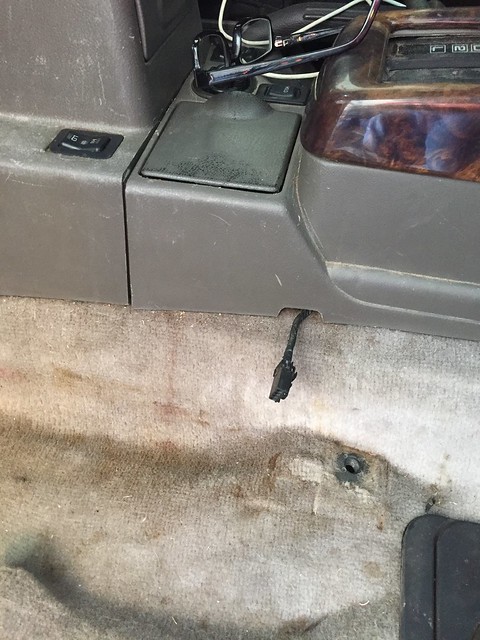
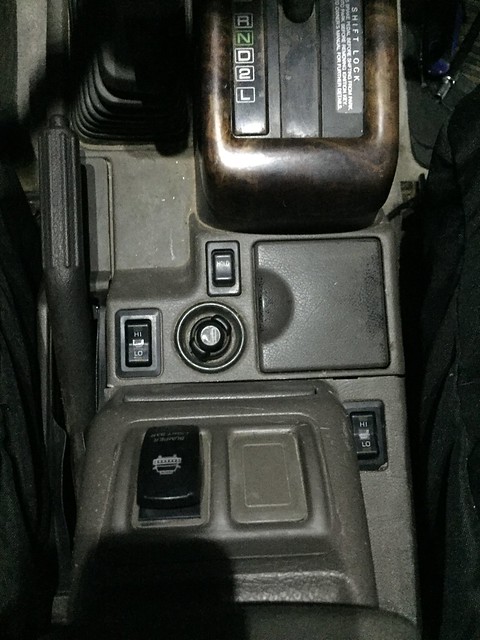
4. Pick where you want your heated switch buttons and reassemble your center console. You want to make sure you have the seat plugs sticking out their respective holes so that they are ready to go.
 IMG_9088
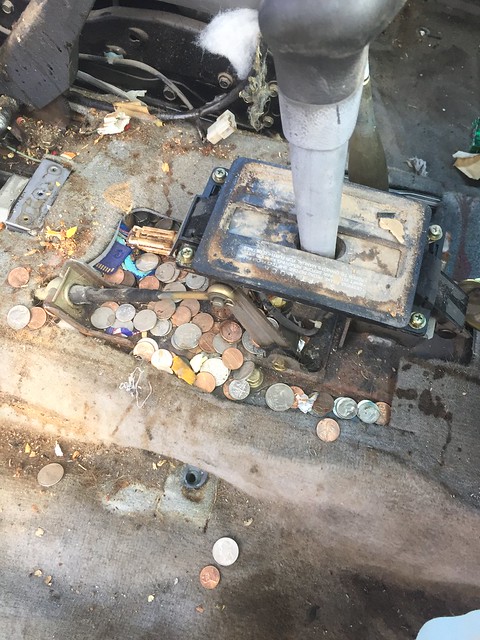
As you can see, I chose to remove what was my coin holder tray (which I never used) and put the driver side button there and then I put the passenger side in the front blank spot. Yes, I know that the factory location is where the rear console blanks are but that area is where my water bottle goes on long drives and I didn't want it to sit on the switch and accidentally turn it on. One day I'm sure I'll relocated the heated seat switches to the rear spots because I'll need their current switch locations for light switches. I also didn't put them up on top of the center arm rest because that's where I have my front bumper lights (which is super handy because you can just flick them on and off on the trail while driving with your left hand and not have to shift your body forward to reach the panel or look down to find them on the center console).
 IMG_8934
5. Now, beginning the heating elements install process. Start by removing the 2 plastic trim covers on the sides of the seat. One side simply has 2 screws and the other has 2 screws on the trim piece but first you need to remove the 2 screws holding the plastic handle covers and then the plastic covers themselves pull off.
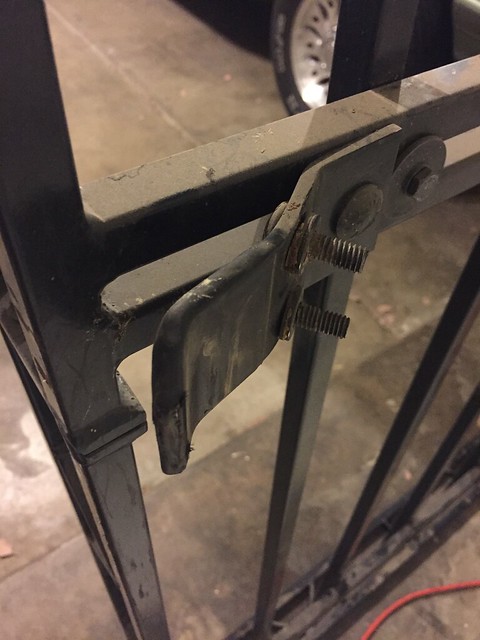
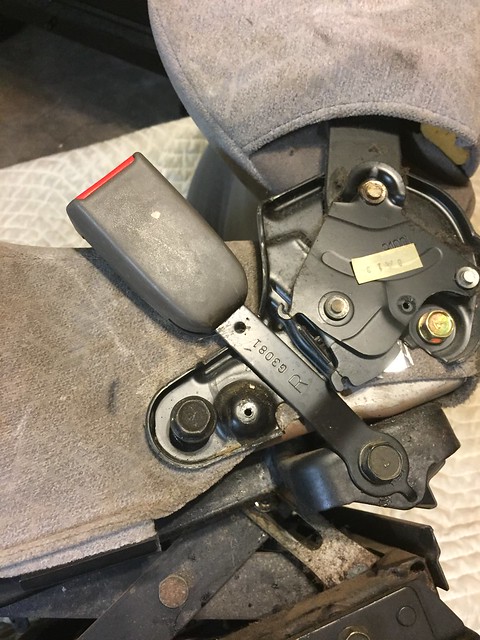
6. Remove the cables that allow the seat to recline. Just loosen one of the nuts holding them in place, and then the wire with square tip can be slid out of it's holder. Take note of which wire (grey or black) goes where:
 IMG_9060
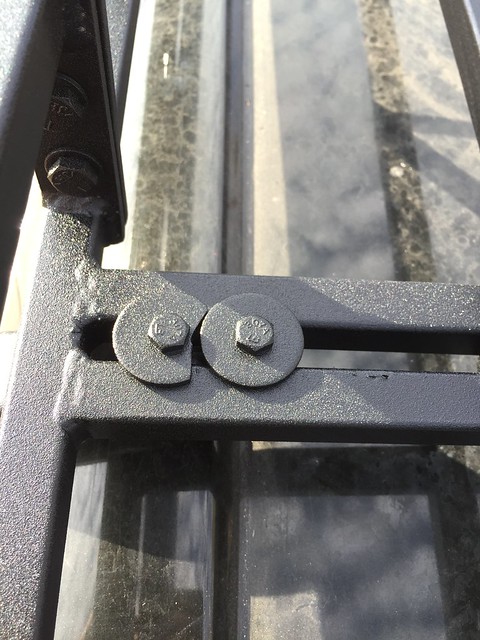
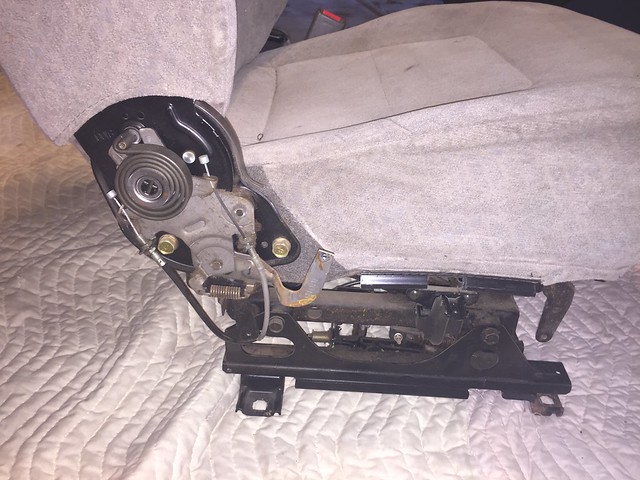
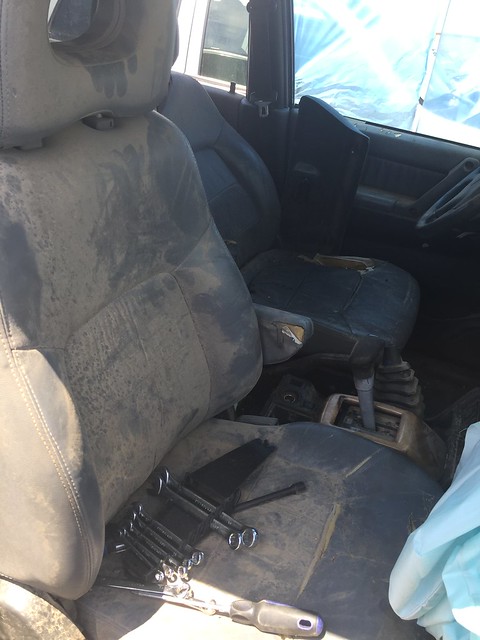
7. Remove the 4 bolts that join the back of the seat to the bottom. The rear bolt has no nut behind it, but the front one does so you'll need to get in there with a deep socket to hold it while unbolting it from the outside. You don't have to remove the seat belt bolt it's easier if you do.
 IMG_9064
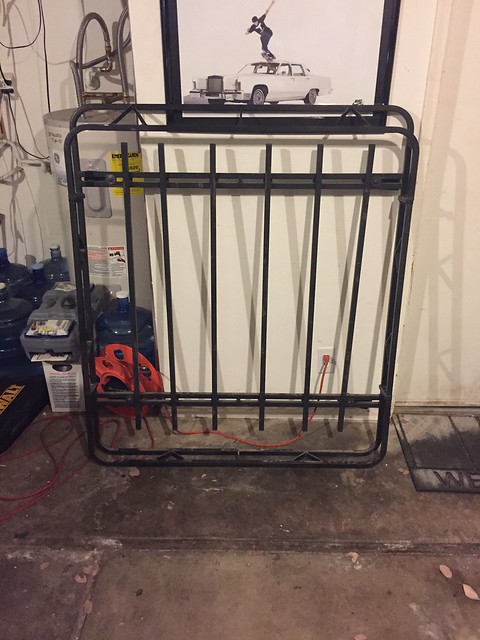
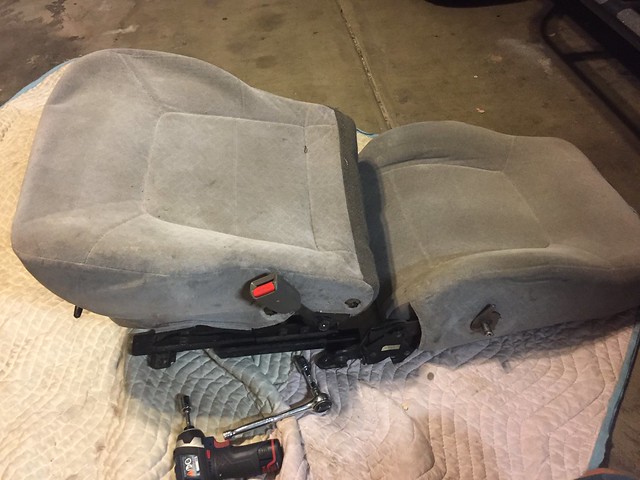
You'll have something like this at this point:
 IMG_9065
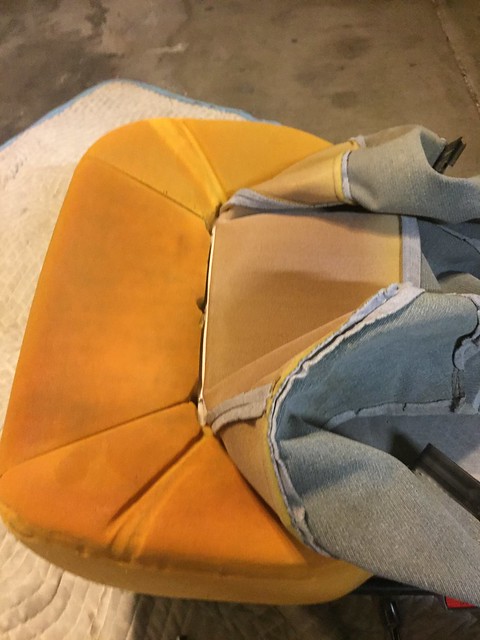
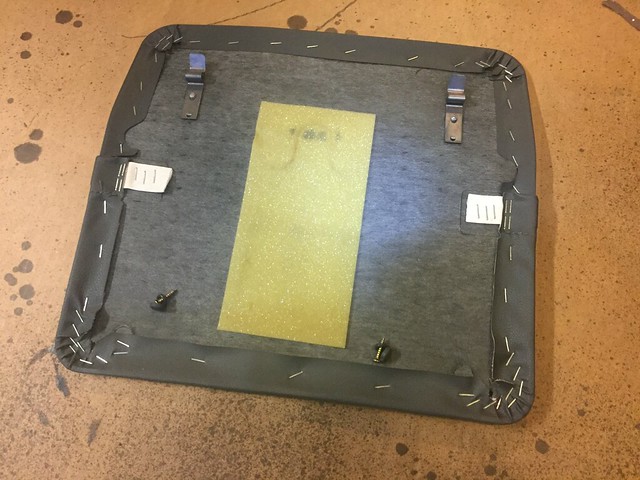
8. Starting with the bottom cushion. Turn it over and pry off the plastic retaining clips that keep the seat upholstery tight over the foam:
 IMG_9063
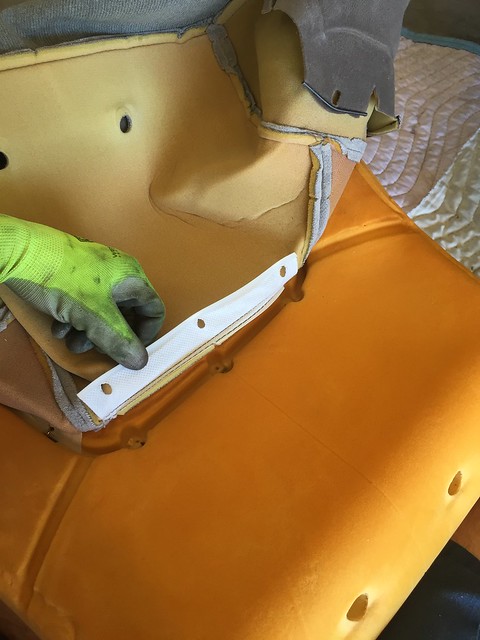
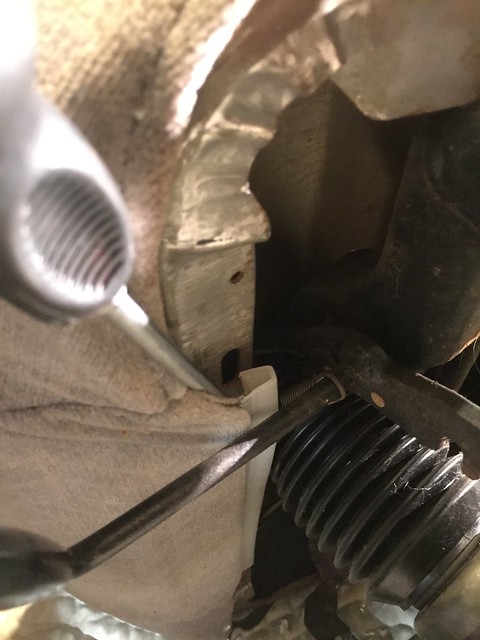
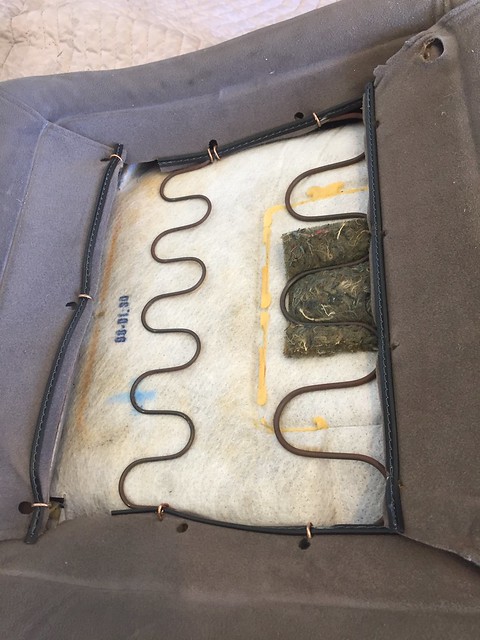
9. Now we get to the fun part. And by fun, I mean the not fun part. With a lot of cars, you can simply lift up the upholstery at this point and slide your elements underneath. But with the Monty seats, the upholstery is attached to the foam every 5 or so inches with metal hog rings.
Here you can see the location of the front set of 3 hog rings and just how far the cover can be pulled back initially:
 IMG_9066
 IMG_9067
From the donor seat for comparison:
 IMG_8370
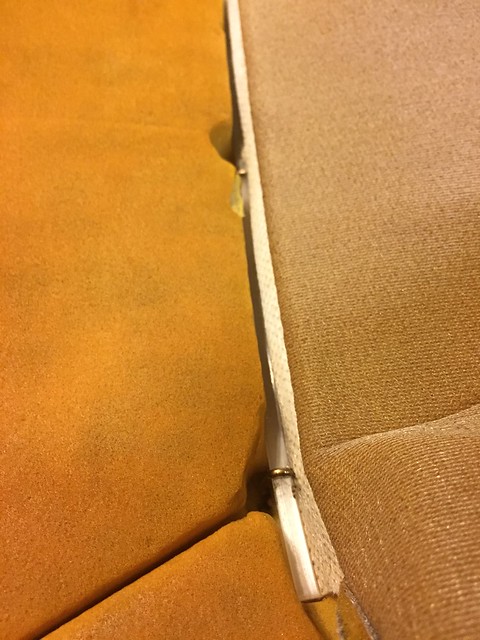
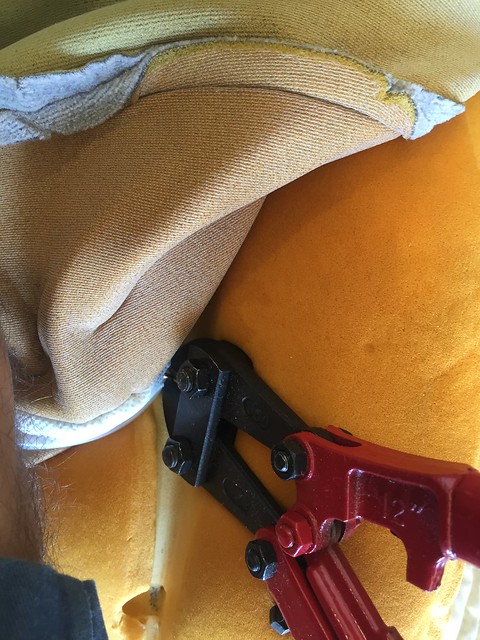
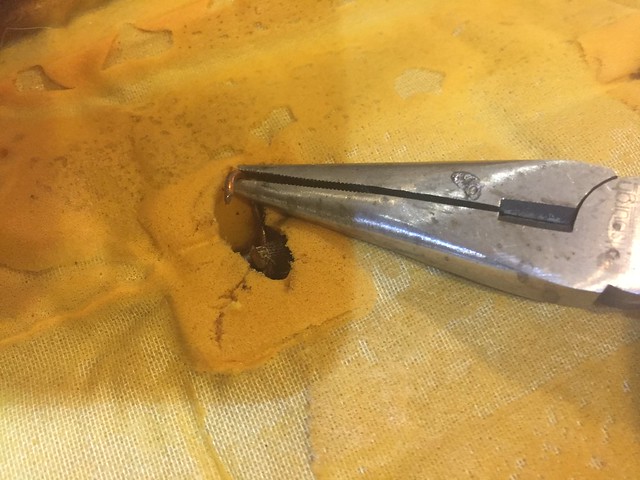
On the donor seat, the hog rings were not pressed on nearly as tightly as Betty's seats so I was able to get the tips of needle nose pliers inside the ring and pull them open to remove many of the rings without having to cut them. This is a pain in the butt and not easy and I would not recommend it. Instead, get yourself a small bolt cutter (I got mine for like $8 at Harbor Freight) and cut them off! Cutting them off is still somewhat challenging because there is not a lot of room to work with and you need to be delicate with the foam and upholstery so you don't destroy them. After cutting the metal with the bolt cutters, twist them to break the ring free.
 IMG_9083
Remove all the little left over bits of hog ring after cutting them so they don't lodge themselves in the foam and stab you when you sit on the seat.
 IMG_8375
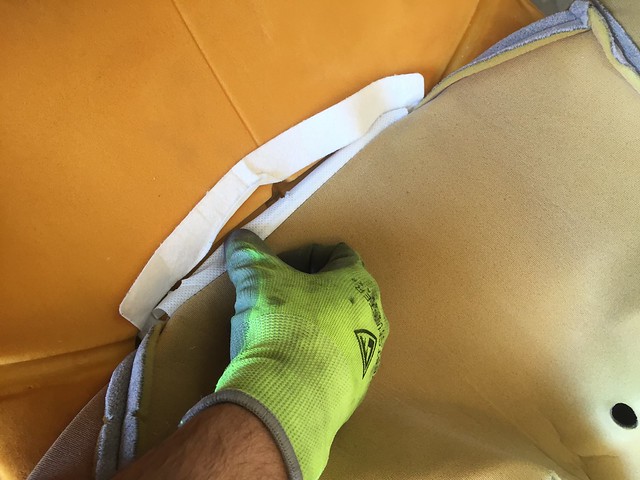
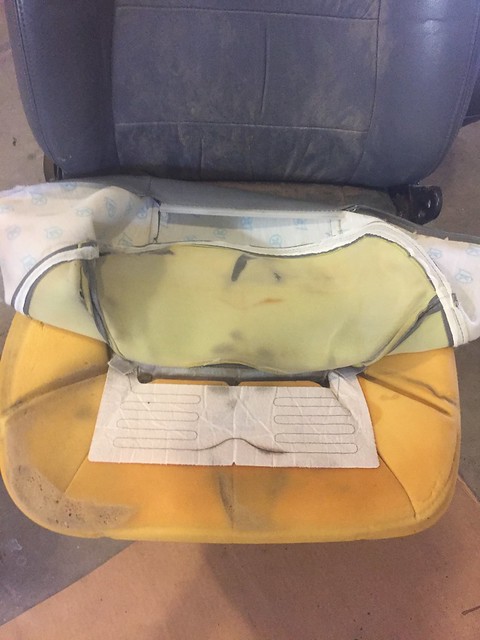
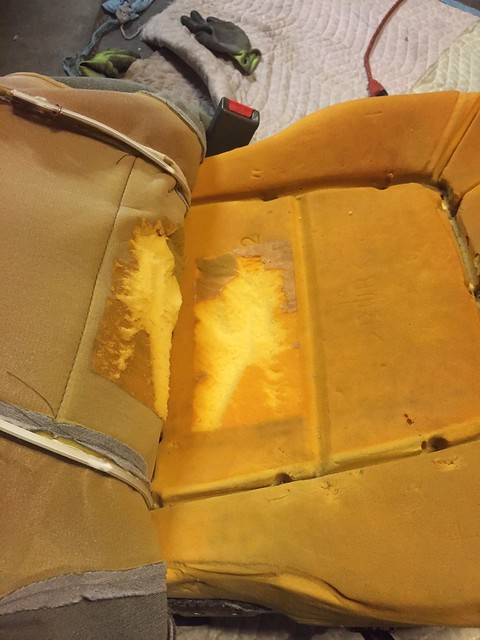
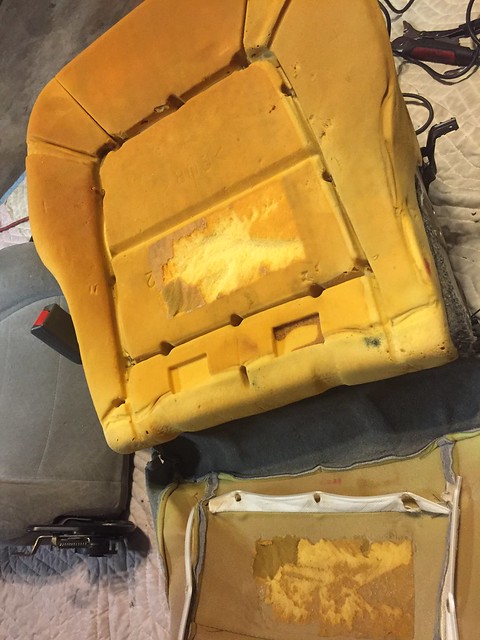
10. After cutting the front 3 rings, work your way down the sides. There are 3 more hog rings in the left channel and 3 in the right channel. Lastly, there are 3 rings in the rear channel. In between the front and rear hog ring channel my cloth cover had a big adhesive patch which was a pain to pull off from. It pulled up quite a bit of foam with it on the passenger side. I cut most of it off the cover with a razor blade so that it didn't create a bulge when the reassembled. I was luckier on the driver side and no foam pulled up.
 IMG_9068
 IMG_9070
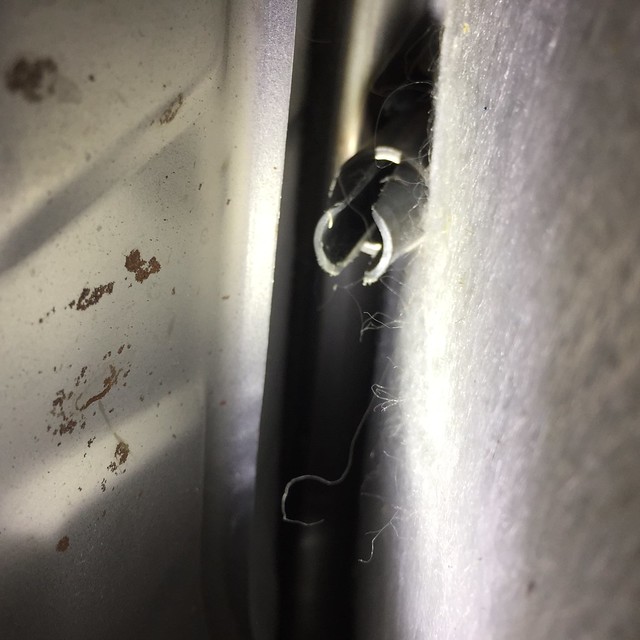
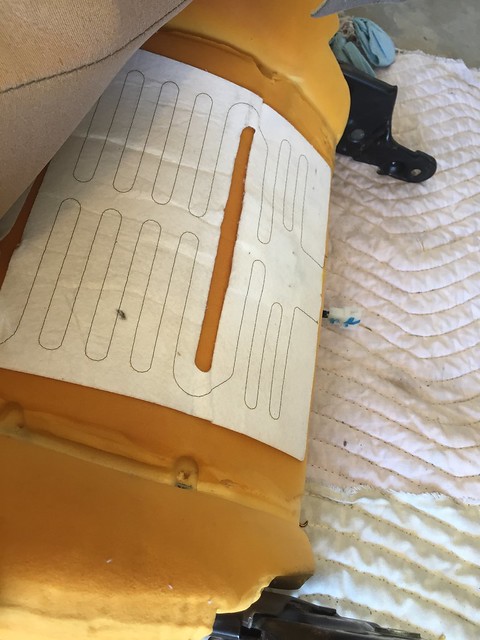
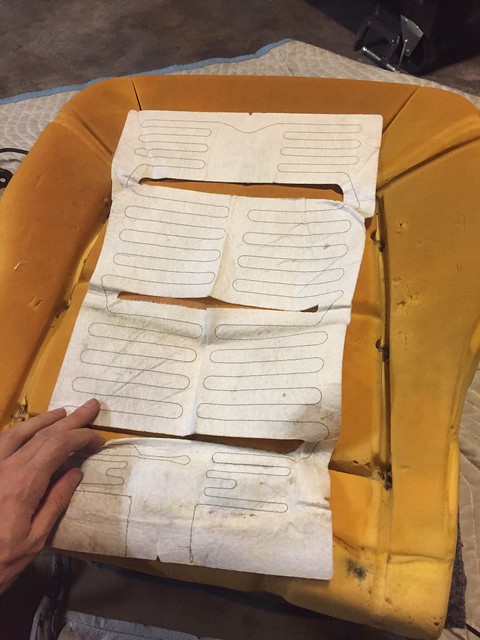
11. Place the heating element down, aligned with the hog ring channels and push the wiring harness down through the hole in the foam so that it comes out the back side. And then reinstall the rear set of hog rings. You'll need hog rings and hog ring pliers to accomplish this. Despite having both of these, I just couldn't get the rings installed. It was late at night, I was pissed off after having to go to Harbor Freight to get the bolt cutters after not being able to remove the hog rings with needle nose pliers or a dremel like I did on the donor seats, and I just couldn't make it happen. So instead, I opted for zip ties. I think this will be totally fine for many many years and if they ever need replacing, they are much easier to replace than hog rings. But I don't think they'll need replacing because they aren't exposed to sunlight and have very little, if any, tension on them. They are more than strong enough with 12 of them combined, plus all of the other things that hold down the upholstery and foam.
 IMG_9071
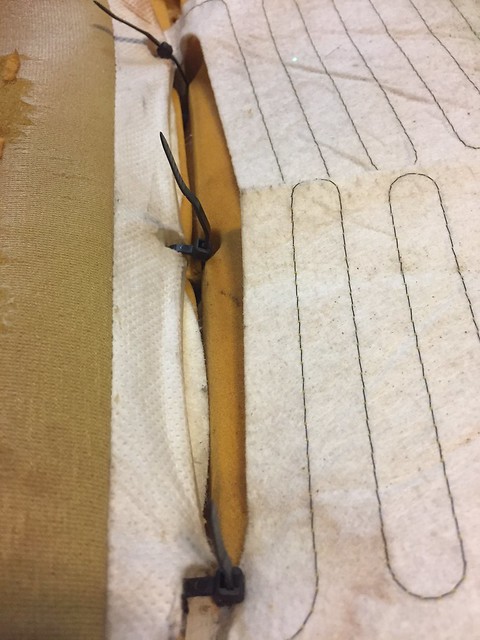 IMG_9072
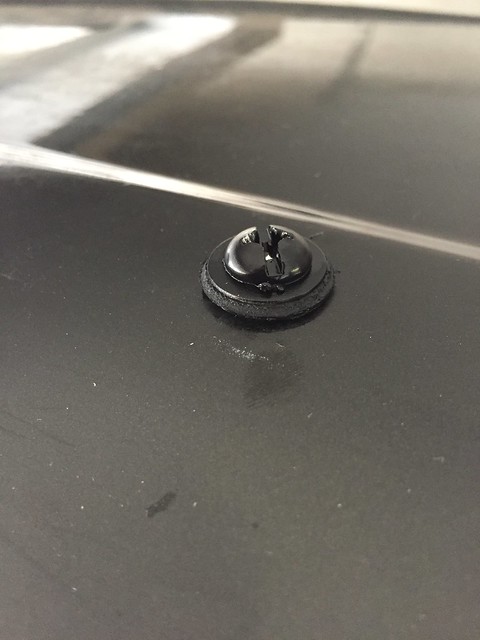
You won't feel the zip ties through the seat if you cut the excess and then spin the buckle so that it faces down into the channel:
 IMG_9073
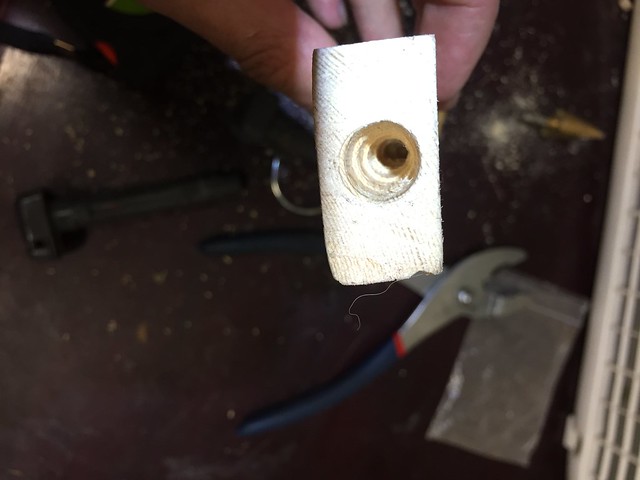
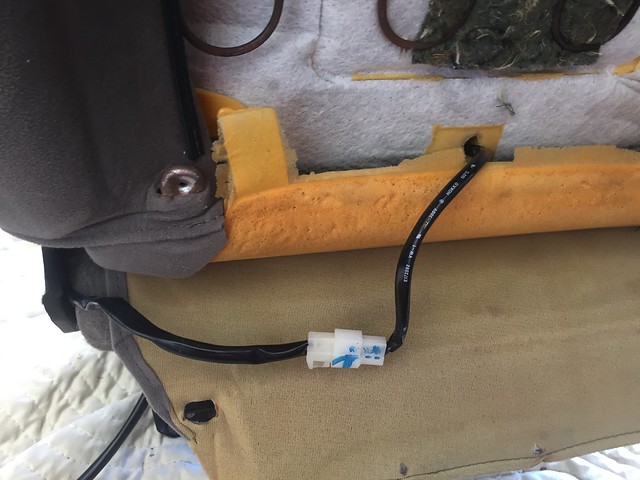
12. Proceed down the seat cushion with the sides and then the front. The sides and front were much easier to access so I used hog rings for some of those mounting points on the other cushions I did. When you're done, you'll have a bit front flap of element that was secured to the foam with 2 adhesive strips from the factory. I used some spray adhesive that I had leftover from my rear bed project to stick the fronts of the elements down to the foam:
 IMG_9075
 IMG_9076
13. Install the upholstery cover back on over the seat bottom, same as removal. Just be careful not to damage your foam base as a lot of them will be very brittle (especially driver sides) after close to 20 years of wear. Also, the heating elements themselves have very brittle wires by this point so be careful with those too. I would recommend not buttoning up the rear clips of the cushion covers yet until you know how the wiring harnesses will connect together which is easier to do when the seat back is completed and ready to bolt back to the bottom. Pay attention to how the wiring harnesses are routed when you do your tear down if possible. I don't have any photos to show of this process since my seat bases are bouncy and their covers and wiring routes are different than stock form.
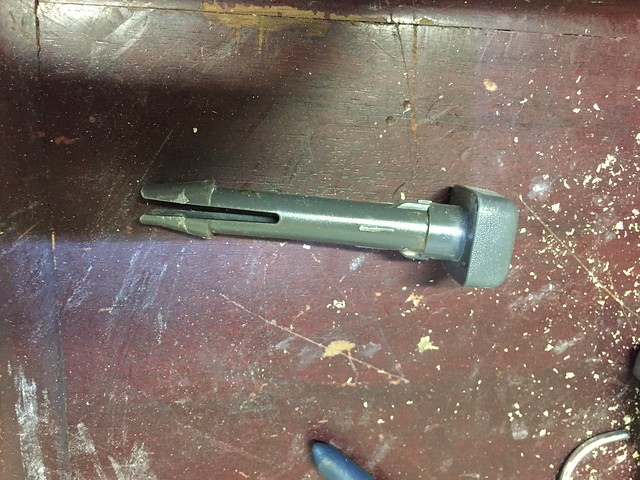
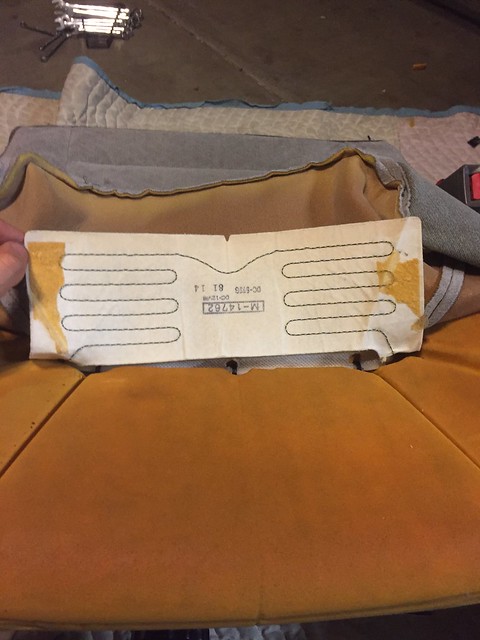
14. Moving on to the seat back - Pop off the plastic cover caps at the bottom of the storage pocket and remove those 2 screws. Then you just pull down firmly to pull the cover off as it is held on at the top by some metal clips.
 IMG_8387
15. After removing the cover, you'll see a similar sight: hog rings. Unlike the big plastic clips that hold down the seat cover on the base, the back cover is held on by hog rings. Cut those bastards off, they are at least easy to get to here with no foam to deal with:
 IMG_9079
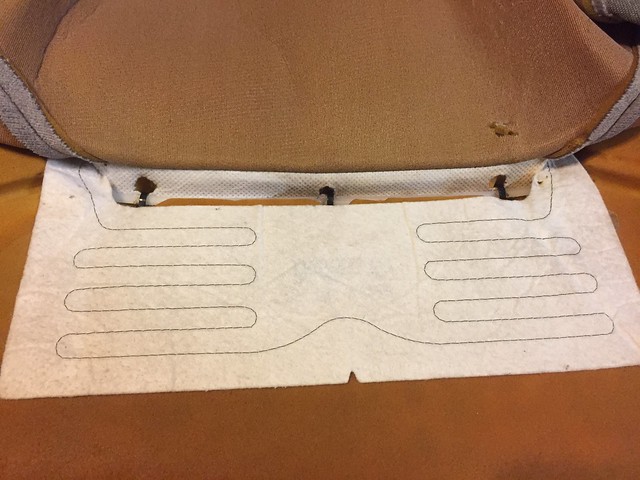
16. The cover is also pinned in place by the metal tabs that the rear seat pocket screws into. Pay attention to the order, there are 3 layers: Corner, Side, Bottom (starting from bottom to the top):
 IMG_9091
17. There are no hog rings holding the cover down at the front on the seat back so you'll be able to lift it up all the way to the seam about 3/4 of the way up. If you're going aftermarket heating element, you could probably just slide it and glue it in place here and be done. There are 3 hog rings on each side and then 3 at the back. Cut them off and then if you're really good you might be able to install the element and button everything back up. I wanted extra room and needed to get the cover all the way off the seat back. But you can't do this by simply removing hog rings alone because the headrest mounts hold the cover on at the top.
 IMG_3315
  IMG_7822 b
 IMG_7826


")