Building La Tortuga: 1983 Ford-Collins E350 4x4 ShortBus

KeyserSoSay

Adventurer
When you head that way down the road, make sure you hit me up. That would be a great place to hang out and camp for a weekend up on top of the mountains between Jarbidge and Charleston.

Will do- our first trip is going to be Carlsbad Caverns this summer, my wife and kids have never been there which is unacceptable for NM natives. Got a lot of work yet before I'll trust this old rig for such a trip with such precious cargo, but I trust she'll get there soon enough.
-
Along that line, there is- I guess- a little build for the build thread- I've got another big project going that's absorbing my time and I had to rebuild my pellet stove, but I did get some work done on the bus: I replace the starter solenoid, sanded and primed my battery box (I intend to paint the engine compartment as a whole at some point as I can't stand seeing any school bus yellow- it screams "half-Azzed" to me), new battery mounting bracket, and I replaced all my battery, starter, and grounding cables with new 2guage this weekend.
-
Didn't do a great job of photo documenting as it started snowing on me and I already had the flu.
-
Cables are done, and done right, also have auxiliary power terminal bus-bars on order, and will be mounting them up on the driver's side firewall to accommodate any future wiring from the starter battery (ultimately I'll have a house battery, solar panels, and CTek D250s charger controller, and an auxiliary fuse box somewhere in the bus), and my winch will be tied into the battery with triple-ott cable. In retrospect, double-ott should have been plenty, but I've already purchased the cable.
 

Attachments

  • IMG_0094.JPG
    IMG_0094.JPG
    19.2 KB · Views: 465
  • IMG_0096.GIF
    IMG_0096.GIF
    17.7 KB · Views: 463
  • IMG_0078.JPG
    IMG_0078.JPG
    350.1 KB · Views: 16
  • IMG_0077.JPG
    IMG_0077.JPG
    340 KB · Views: 20

KeyserSoSay

Adventurer
So I cleared my pallet a bit for the Tortuga build. last couple of weeks I've had to finish up an old project- building a fiberglass Spaceman statuette for the Intergalactic Cultural Relations Institute (i.e. group of artist friends of my wife). It was fun project, but a much larger chore than I thought when I started it and my passion for the project died the minute I found my vanbus.

http://intergalacticculturalrelationsinstitute.org/
`
Now it's all vanning, all the time!!!
 

Attachments

  • spaceman-03.jpg
    spaceman-03.jpg
    193.6 KB · Views: 17
  • spaceman-02.jpg
    spaceman-02.jpg
    255.6 KB · Views: 18
  • spaceman-01.jpg
    spaceman-01.jpg
    203.8 KB · Views: 17

KeyserSoSay

Adventurer
Speaking of spacemen- and I'm not sure how I ended up with the theme, but we are planning our first trip with the Tortuga Bus June 29-July4 to the Roswell UFO Festival (where my wife is going to be a vendor selling her gotoartcamp.com art kits) and then on to Carlsbad Caverns (about a 600 mile round trip)
`
The good news is that turns up the heat on my timeline for the Tortuga build, but the bad news is that turns up the heat on my timeline for the Tortuga build.
`
Making progress on my plan to create a level shop space for the van, sending much of my stored homesteading items with my uncle and his flatbed, and removing outdoor shelves and junk to the dump tomorrow. hope to have it nestled in it's spot for disassembly by this weekend.
`
first order of business is new power steering gearbox and pump for good measure, and a steering dampener. Will be getting new tires before the trip (the ones on it have plenty of tread, but are showing some cracks and rot), and an alignment. I have already purchased a back-up camera system as it's hard to drive in traffic.- so that needs to be installed. have collected some metal and components for my bumpers and winch, but that's not as critical to making sure the drive train is ready for long travel. Having replaced much of the wiring and electronic ignition components, I can't see any other reason why this truck won't pull 600 miles while yawning, the thing runs like a striped-***-ape. it' does have a small whap-whap-whap shimmy in the cab, but I've come to think that is less about a suspension or frame issue, and more about the fact that there is an issue in the cab itself where the bus door is attached. I'll be removing the interior paneling and may have to reinforce the cab frame around the door. While I'm at it, I may very well gut the school bus door system, and build a custom 1 piece door that seals better in the frame. this will solve a lot of problems for me and free up some space in the cab/dash area for other components. Any guidance on building a door for this is appreciated- I'll take some pics and put it out for your thoughts, right now I'm tinkering with the idea of a pocket door I recently saw on an Ambo build here on the EP.
`
I have found a 13ft aluminum boat for sale cheap locally, that I think would make a great pop-top type roof extension (although a little narrow at 45" wide) I may buy it at $300 just in case I can use it for this which saves much time and money in fabricating a roof extension, which is going to be a necessity as I cannot stand up entirely in the bus and that HAS TO GO! Also planning a bed lift that nestled my bed up into the roof using hydraulic door closers- I've bought a lot of 6 of these for cheap that are going to work great for this.
`
This build thread is about to start being a build thread- thanks for sticking with me so far!
 

Attachments

  • tortuga-bedlift-01.jpg
    tortuga-bedlift-01.jpg
    372.2 KB · Views: 26
  • 13ft boat.jpg
    13ft boat.jpg
    26.2 KB · Views: 22
  • hydraulic lift bed-jpg.jpg
    hydraulic lift bed-jpg.jpg
    166 KB · Views: 21
Last edited:

danifulltime

New member
Oh Baby, this looks like fun. I wanted a 4x4 bus like this, almost jumped on one on EBAY, decided they were too much of a hassle to drive and not worth the extra size.

Instead, I can sit here and admire you and your balls. Best of luck!
 

mezmochill

Is outside
So I cleared my pallet a bit for the Tortuga build. last couple of weeks I've had to finish up an old project- building a fiberglass Spaceman statuette for the Intergalactic Cultural Relations Institute (i.e. group of artist friends of my wife). It was fun project, but a much larger chore than I thought when I started it and my passion for the project died the minute I found my vanbus.

http://intergalacticculturalrelationsinstitute.org/
`
Now it's all vanning, all the time!!!

I can hear him either saying "What do you mean this is the wrong planet!!!" or "Ey! Dju wanna a peeza dis!"

Nice stuff and the bus is gonna be ************!
 

KeyserSoSay

Adventurer
I can hear him either saying "What do you mean this is the wrong planet!!!" or "Ey! Dju wanna a peeza dis!"

Nice stuff and the bus is gonna be ************!

yeah they made me give him a name, He's Datt-Mamon, stranded alone on the planet Sarm. My wife tells me they're wanting me to put together a build thread for it, luckily I took a bunch of pictures. A lot more work goes into something like that than it looks like. I've got a lot of fiberglass experience and it's been great practice for some projects I have in mind on the Tortuga- the "school bus" looking fiberglass caps on the cab will ultimately be altered to have a more custom campervan look, with integrated light-bars, and I also am thinking of a custom fiberglass snorkel intake on the passenger side. You can see in the pictures I just posted that I'm looking to carry jerry cans on the front bumper, and I'll be using snowplow lights out in front of that to replace the stock headlights (which would be blocked by the jerry cans). I'm considering building fiberglass caps on the front bumper to integrate all this aesthetically.
 

KeyserSoSay

Adventurer
Finally got the Tortuga up into a spot where I can realistically work on her. I'm ultimately going to replace the H-brace that holds that gate up (and restricts the work space) and build a new gate that's flush with the front of the house. Right now I've got a temporary gate around the corner keeping my dogs in the yard. I may ultimately buy one of those cheap harbor freight carport tents to enclose the space back there so I can continue to work on the van into the fall and winter (since it looks like my build timeline will obviously stretch through the summer).
`
Someone had asked for pics of the inside of the bus, so I throw one of them in here too. At some point relatively soon, all the interior bus paneling is going to be stripped out. leaving just a steel frame and external skin. Much of the existing exterior school-bus panels are fiberglass, and I'll likely remove and replace the rivets on many of those regardless. I'm kicking around the best way to build up the cab another 12". Still leaning towards a custom built square-tubing or full-fiberglass clamshell sealed down to the existing flat-top of the bus, but others who have seen the bus have suggested just extending up the side walls of the cab (lifting up the existing roof 12"), and then modifying or rebuilding the fiberglass (front and rear) end-caps that seal off the cab. I do have the fiberglass skills to do it this way, but obviously want to minimize the $$$ and effort it will take. I want to have an end product that looks and feels much more "custom rig" than "DIY redneck" . I have the skills and design eloquence to pull this off, but I'm learning that my intended monthly budget for this build is actually about half of what I thought it would be, which will mean about twice the time to complete. Luckily, I'm still very much in love with this rig so as long as that passion doesn't fade- or get focused on something new-- she'll get built as I envision.
 

Attachments

  • 20170415_102930_1492537322532_resized.jpg
    20170415_102930_1492537322532_resized.jpg
    355 KB · Views: 32
  • 20170415_101854_1492537289958_resized.jpg
    20170415_101854_1492537289958_resized.jpg
    288.7 KB · Views: 32
  • 20170409_103859_1492537246988_resized.jpg
    20170409_103859_1492537246988_resized.jpg
    477.4 KB · Views: 36
  • blueroom-gate move.jpg
    blueroom-gate move.jpg
    360.5 KB · Views: 34
  • 20170415_124518_1492537375811_resized.jpg
    20170415_124518_1492537375811_resized.jpg
    454.6 KB · Views: 38
  • 20170418_090312_1492537377885_resized.jpg
    20170418_090312_1492537377885_resized.jpg
    307.5 KB · Views: 36
  • 20170415_103440_1492537325479_resized.jpg
    20170415_103440_1492537325479_resized.jpg
    350 KB · Views: 37

KeyserSoSay

Adventurer
Been away from the build thread for a while. I've been waiting until I had something kinda fun and cool to post on this build, but the build has been a little boring so I figured I'd spare you all the minutia.
`
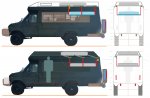
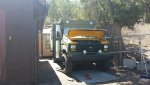
In a couple days we'll be taking this van on it's maiden voyage as the Tortuga. It'll be a 400 mile round trip to Roswell NM, temps about 110F, and a long lonely highway. I feel pretty good that she's road ready, and have come a long way to that end since I got the van. Vapor lock is my biggest worry, haven't had to deal with that in years (since the early 1980's) but assume these vans are susceptible more than most and the temps will be ridiculous.
`
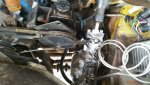
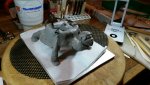
Since the last post, I have replaced the power steering gearbox and the steering dampener, in the past few months the steering has been so bad that I only drive the van on the local roads because the steering wasn't safe over 40MPH. I'm also getting the Centramatic wheel balancers, but they won't arrive in time for our trip. The steering is greatly improved and safe for highway speeds, although with the tires I'm running on her it's not going to be a speed demon anyway. This van was never intended to be a road-trip vehicle, and when we retire off-grid in a few years, we'll need all the clearance and tread on these tires just to get to the post office.
`
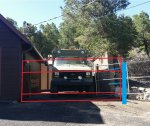
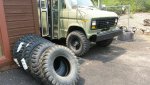
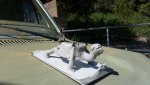
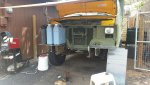
On that note, I bought some new tires and will have them installed tomorrow. They are 9.00-16LT military tires. I had thought about switching to a more conventional tire but did not want to give up my 36" height. These are particularly narrow tires and really there are not a lot of options for a 16" rim. I was afraid that a wider tire would cause me problems with clearance. I like these a lot, but we'll just have to see how they take punishment. The tires on the truck now (same as the new) have some sunrot and cracking, and it was a matter of when- not if- they were going to let me down.
`
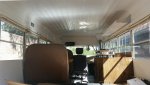
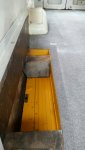
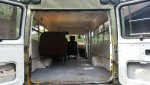
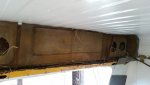
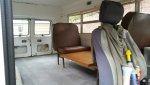
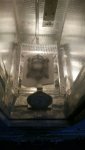
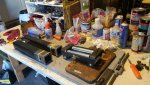
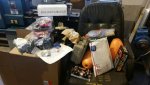
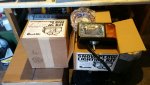
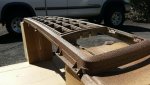
I stripped a whole lot crap out of the interior, mostly stuff the previous owner had put in as his red-neck version of a camper build. I left the bus seat table and the ad-hoc passenger seat for the time being. It has a cool little smugglers compartment where the van-door would have been, I'm working up a complete tool kit that I can permanently stash in there.
`
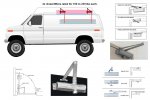
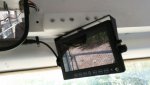
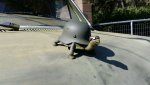
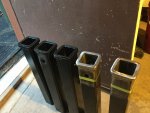
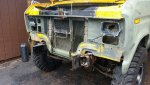
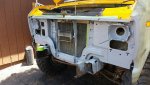
I also started with stripping some of the interior paneling out of the cab- mainly because I needed to to install my back-up camera system. Man this van is going to be a big chore! Bad news is, the school bus conversion is a pretty simplistic red-neck construction of metal tubing with metal and fiberglass panels riveted on. Good news is, the school bus conversion is a pretty simplistic red-neck construction of metal tubing with metal and fiberglass panels riveted on. I feel a lot less anxiety about the modifications I'll be making knowing it's not rocket surgery, if that makes any sense.
`
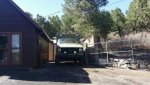
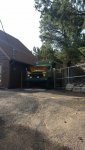
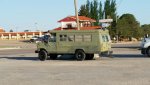
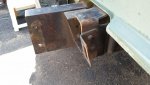
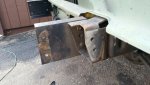
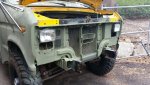
When we get back, I'll be moving right to my next project which will be much more fun to document here on the thread- building out my custom front bumper housing my 15k Ramsey Winch. So excited!! Think I'm going to stick with the olive drab green color and paint some nose art on her. My grandpa flew a B-25 Mitchell during WWII (490th Burma Bridge Busters) and he earned (Triple Leaf) Bronze Star(s) and the Distinguished Cross so I'm looking to honor his plane a little bit. His bomber was called "Lil' Suzy" after my aunt Suzy who was just born at the time. He had nose-art of a stork with a leather bomber helmet carrying a little girl who was hanging out firing a Tommy Gun. I told my wife, and she loves the idea, the van does resemble a military bomber in some respects, I may end up renaming her the Lil Suzy if it works out, but we'll see how it all plays out. May go another direction, and do some "Tortuga" nose art. Just kicking it all around a bit, but have settled on Olive Drab as I've grown to like the old school military look of the van and decided to just roll with it. I love that when I pull into my driveway I can't see my van through the trees and since this is my "Prepper" Bug-out-vehicle I find value in that.
`
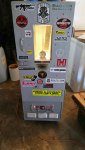
Also looking into an aftermarket AC unit- no AC is no Bueno in this part of the world right now!
`
So wish me luck. I'll check back in after our trip- hope this 35 year old rig doesn't leave me stranded in the desert. Drive train seems ready to rock, something breaks I'll just fix it and move on to the next.:smiley_drive:
 

Attachments

  • IMG_0134.JPG
    IMG_0134.JPG
    407.8 KB · Views: 19
  • IMG_0128.JPG
    IMG_0128.JPG
    306.1 KB · Views: 20
  • IMG_0131.jpg
    IMG_0131.jpg
    267.6 KB · Views: 24
  • IMG_0130.JPG
    IMG_0130.JPG
    375.5 KB · Views: 21
  • IMG_0141.JPG
    IMG_0141.JPG
    275.8 KB · Views: 22
  • IMG_0138.JPG
    IMG_0138.JPG
    270.2 KB · Views: 22
  • IMG_0142.JPG
    IMG_0142.JPG
    306.7 KB · Views: 22
Last edited:

KeyserSoSay

Adventurer
Ok so I've neglected the build thread a bit. First of all the trip to Roswell was pretty good as far as the Tortuga is concerned. It hauls a LOT of stuff, steering isn't great at highway speeds, but that is 95% because of the bias ply military mud tires are just not designed to go 80 miles per hour, there is very little touching the ground at that speed. I had replaced the steering gearbox and the steering dampener and solved the vast majority of steering issues. My wife can drive it now and does regularly for hauling her ArtCamp stuff around on the weekend.

Just as I predicted, I did have some vapor lock issues right at the end of our drive there. We had left later in the day than I wanted to, and it was 108F when we arrived in Roswell, so I just think it's a fact of life for a 1983 carbureted van under those conditions.

I have a plan in the works to add some small air scoops to the hood to help move hot air out of the engine compartment. Stay tuned for that project, I think it will be effective and worthwhile......

Some pics from our trip..
 

Attachments

  • IMG_0241.JPG
    IMG_0241.JPG
    348.2 KB · Views: 18
  • IMG_0239.JPG
    IMG_0239.JPG
    324.9 KB · Views: 17
  • IMG_0240.JPG
    IMG_0240.JPG
    427.2 KB · Views: 17
  • IMG_0238.JPG
    IMG_0238.JPG
    401.7 KB · Views: 22

KeyserSoSay

Adventurer
I think I posted some pics of my Tortuga hood ornament that I was working on. I had purchased a miniature WWII steel helmet but couldn't find the right turtle to mount it on, so I just built one.

I built a steel framed turtle with 1/4x20 insert nuts in it's feet. I also welded in some insert nuts to attach the helmet shell.

I then used Super-Sculpy polymer clay to sculpt my Tortuga (over the steel skeleton) to fit the helmet shell. This stuff is very cool. You sculpt it into the shape you want, bake it in the oven, and it's comes out hard plastic that is pretty hardy.

I baked it in my homemade cerekote/powder-coat oven that I made out of a filing cabinet and a toaster oven. It has a PID temperature controller which allows me to bake at exact temperatures with programmable ramping.

I then painted everything, including some oil paints for fine details, and mounted it to the hood using bolts through some semi-stiff springs that allows it just enough flex to keep it from breaking the clay/plastic if I hit a tree with it.

People seem to dig it, but this van didn't need any help catching people's attention.
 

Attachments

  • IMG_0237.JPG
    IMG_0237.JPG
    303.7 KB · Views: 9
  • IMG_0234.JPG
    IMG_0234.JPG
    320.9 KB · Views: 10
  • IMG_0232.JPG
    IMG_0232.JPG
    450.3 KB · Views: 9
  • IMG_0231.JPG
    IMG_0231.JPG
    351.6 KB · Views: 10
  • IMG_0228.JPG
    IMG_0228.JPG
    359.7 KB · Views: 11
  • IMG_0229.JPG
    IMG_0229.JPG
    328.2 KB · Views: 13
  • IMG_0230.JPG
    IMG_0230.JPG
    432.5 KB · Views: 9
  • IMG_0227.JPG
    IMG_0227.JPG
    369.4 KB · Views: 10
  • IMG_0225.JPG
    IMG_0225.JPG
    308.6 KB · Views: 18
Last edited:

KeyserSoSay

Adventurer
So, I'm finally to a point in the build out of this van where I get to make something fun and cool. My front winch bumper. It's my guess that many will not like my bumper design, it's pretty unconventional. But I've thought long and hard over it, and it's just exactly the bumper this van needs to suit my needs and desires, and I'm building it for me. :wings:

I have been stock piling parts and supplies for this build and finally have all the bits and pieces.
 

Attachments

  • IMG_0216.JPG
    IMG_0216.JPG
    459.5 KB · Views: 9
  • IMG_0217.JPG
    IMG_0217.JPG
    332.5 KB · Views: 8
  • IMG_0211.jpg
    IMG_0211.jpg
    533.6 KB · Views: 8
  • IMG_0219.JPG
    IMG_0219.JPG
    339.9 KB · Views: 9

KeyserSoSay

Adventurer
First thing I did was pull the stock bumper mounts off the frame, had to grind off the rivets. I pulled the grill and front body panel off and then sanded every inch of the front of the van, primered, and painted it.

I may likely change the color of this van when I Raptor-line it, but for the time being, I'm going back with OD green. The previous owner had spray painted over the Yellow bus paint, and did a piss-poor job of surface prep (if he did any at all) I used to do paint and body work in a welding/fab shop so at least my version of OD green is correctly applied.

I also sanded and scuffed every inch of my plastic grill and have painted on about 3 coats of texture paint (after a plastic primer) over a period of about 8 days. Rattle can texture paint is actually a pretty decent solution for plastic if you patiently build it up thick allowing each coat to dry. I may likely strip it and Raptor-line it down the road.
 

Attachments

  • IMG_0221.JPG
    IMG_0221.JPG
    311.7 KB · Views: 10
  • IMG_0220.JPG
    IMG_0220.JPG
    371.2 KB · Views: 9
  • IMG_0222.JPG
    IMG_0222.JPG
    491.7 KB · Views: 9
  • IMG_0218.JPG
    IMG_0218.JPG
    459 KB · Views: 12
  • IMG_0224.jpg
    IMG_0224.jpg
    251.4 KB · Views: 9
  • IMG_0223.JPG
    IMG_0223.JPG
    409.2 KB · Views: 9

KeyserSoSay

Adventurer
So that's kind of where we're at, I'll hold off on the bumper build until I get it a little more complete since it's such an odd bumper I think it will seem asinine until you can see it in all it's glory.

1/4" plate, 8" channel, 6" channel, 2x2x 1/4" angle, twin receiver tubes will house D-rings, lunnete rings, and a tow bar depending on my mood. I have dual sets of snowplow lights, some military black-out lights, and a Cree light bar that will mount out in front of the Jerry cans.

Here are a few teaser pics from today's fab work.....
 

Attachments

  • IMG_0214.JPG
    IMG_0214.JPG
    378.9 KB · Views: 13
  • IMG_0213.JPG
    IMG_0213.JPG
    421.7 KB · Views: 13
  • IMG_0215.JPG
    IMG_0215.JPG
    416.9 KB · Views: 12

Forum statistics

Threads
185,815
Messages
2,878,493
Members
225,378
Latest member
norcalmaier
Top