Halley - '17 WK2 Trailhawk Overland Build

2180miles

Endurance Adventuring
Ryan, how hard is it to remove your camera? looks scary just hanging out there by it's self.

It's 2 easily accessible bolts and a quick-disconnect harness... wouldn't be difficult at all, and would absolutely come off if I removed the fascia for wheeling or anything. As of now I don't plan to remove the fascia for the trips I have coming up, and luckily the available fascia skid plates come with steel guards to surround the camera with.
 

ReconZJ

Observer
Ryan, I think you're meeting your goals for appearance and function! Keep up the good work.

...I'd be interested to hear about how the Summit does in Moab... do you have any photos or trip write-ups? I'm T-minus 50 days or so until we leave for a nearly month-long overland trip through Canada. No severe wheeling/terrain as of yet, but I'm looking forward to seeing how the Trailhawk does as a mobile home-base kind of vehicle... really excited to use it for what I bought it for.

Although I haven't (and won't) run any difficult trails with it (still have my ZJ for that), the WK2 does surprisingly well "out of the box", and I love the 3.0 CRD. In 4 lo, I can just idle up inclines, and coming down steep, shale grades it brakes itself. The approach angle on it is the drawback, as I mentioned. Don't have any hardcore pics and don't want to clog up your thread here, but here's a comparison of a '14 Overland with the lower facia removed, and mine. Both are on the OR2 height setting; the Overland had some smaller tires on, temporarily, but you can see the difference:

standard.jpg


And on another trip, 3 generations of Grand Cherokees:
standard.jpg


I currently run my CB antenna cable in between the rear hatch and seal similar to what you have done, but be advised that dust will get sucked into your rear area (well, when you're in dusty areas!). Moab is known for its really fine, red dust; takes a couple of cleanings to get it all out. I think passing it through the body using a sealed rubber grommet, somewhere back there would be a better solution.

Looking forward to seeing your next mods.
 

2180miles

Endurance Adventuring
Ryan, I think you're meeting your goals for appearance and function! Keep up the good work.

Looking forward to seeing your next mods.


Thanks for the kind words Gary!

Totally get what you mean about having the "ZJ for that", I've still got my '99 TJ lifted locked and loaded for that kind of stuff. I drove the Trailhawk off the lot and immediate took it through a trail up in NH, though I was a bit hesitant to wheel a $50 truck straight from the dealership. Did well, and I'm looking forward to seeing how it does this summer.

The photos of the Grand Cherokees lined up look great. What tire/size are you running on the summit? I'm not in a spot to put different ones on for this summer, but I'm taking notes across the forums for what sizes people are running stock with the QL suspension without rubbing. Interesting point about the dust, too. I'll be keeping an eye on that, and will put some extra care into wiring upcoming lighting modifications to go through grommets more than door sills in the back.
 

2180miles

Endurance Adventuring
With less than two months until my girlfriend and I load this Trailhawk up and take it nearly 7,000 miles across Canada, I'm kind of under a time crunch to get the modifications installed (and fine tuned) before we roll out. One of the things that I've wanted to do for a while for a multitude of reasons is install roof rack cross bars. While I'm hoping to not need to run a cargo basket or roof rack for this specific trip, I'd like to have these bars in place to potentially get a roof-top tent in the distant future, carry extra gear if need be, and provide a mount for some auxiliary lighting.

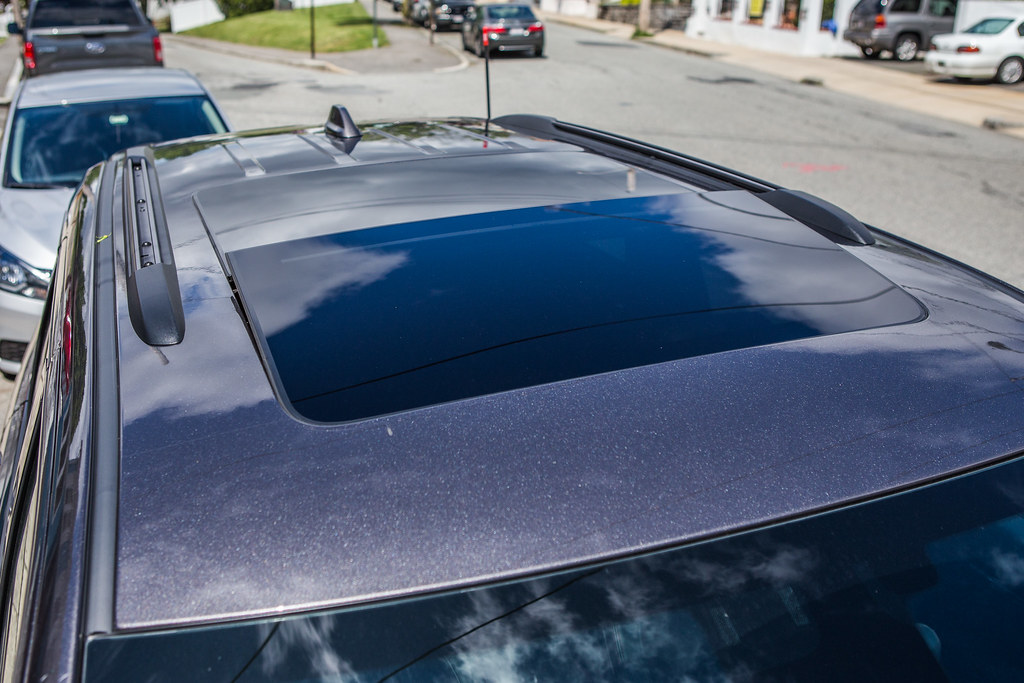
I was scanning eBay a few weeks ago and saw that there was an “open box” set of Rhino Rack RSP-27 cross bars for about $50 under the Amazon/E-Trailer website pricing. These were the bars I wanted, as I believe they're the sexiest of those available… yeah, I just used sexy to describe a roof rack cross bar, but these taper off to the roof rail height whereas other models end in a T shape, sticking off the ends further than I need them to. At $225 delivered, I wasn't sure what to expect from the whole open box labeling, but despite a few dents in the OEM box and a bag of hardware open and spilled throughout (the seller included a new bag of hardware in addition to the original, so no hard feelings there) it was a pretty simple process to install the bars, just a few T-25 torx bolts to tie it together and into the factory rails… Couldn't have taken me more than 20 minutes to get it done.

I was able to drive with them on over Memorial Day holiday as we headed up to Vermont for a friend's weekend-long BBQ party, and was happy to hear minimal whistling from the bars. I make a living as an audio engineer, so I'm sure it was my hypersensitivity to sound that made me pick up on it, as Dani didn't mention hearing it at all, so we're good in that regard. The bars look great up top, and it gives it a bit more of an overland-y aggressive appearance in a subtle way.

I'm looking forward to getting home tomorrow from a week and a half in Northwest Arkansas working on the production of Wal-Mart's gigantic Shareholder Week events, and spending some time doing electrical work to move forward with furthering the switch panel installation by getting the relay/control box installed, having made some progress with it in the past few nights in my hotel room… the housekeeping service lady probably thinks I'm wiring some kind of bomb detonating device.


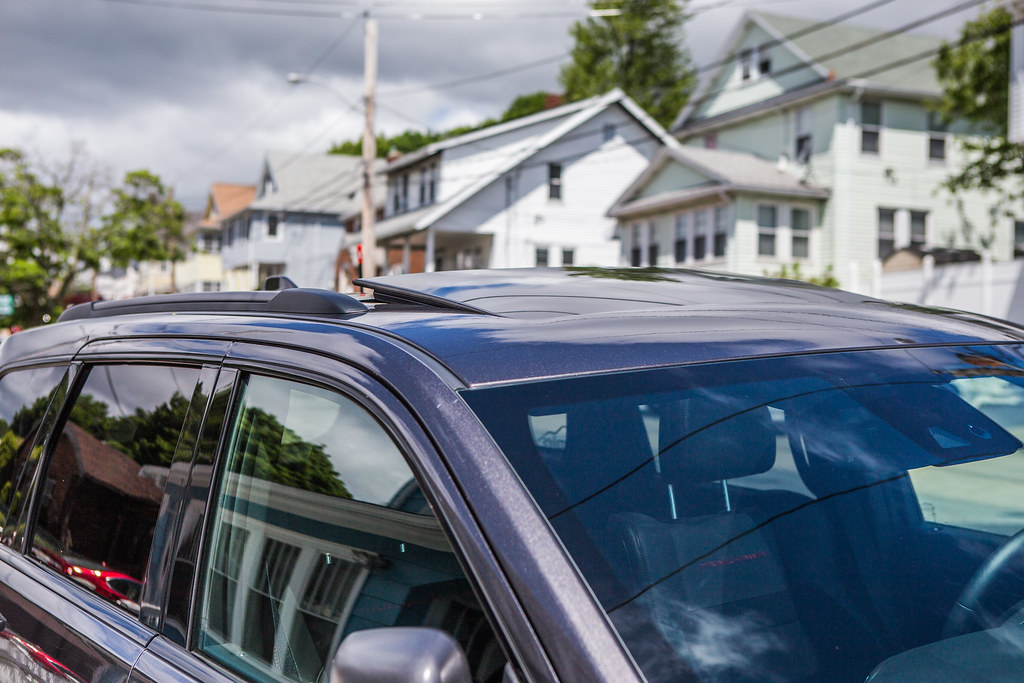
OEM Roof Rail - Top View by 2180miles


OEM Roof Rail - Side View by 2180miles


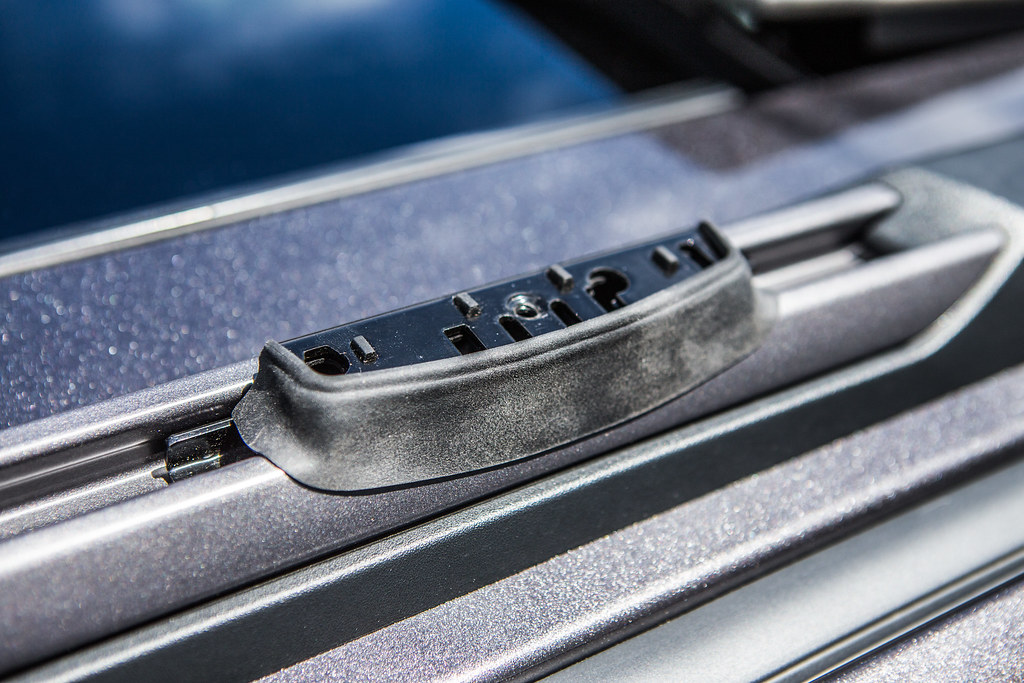
Rhino Rack Rail Mount by 2180miles


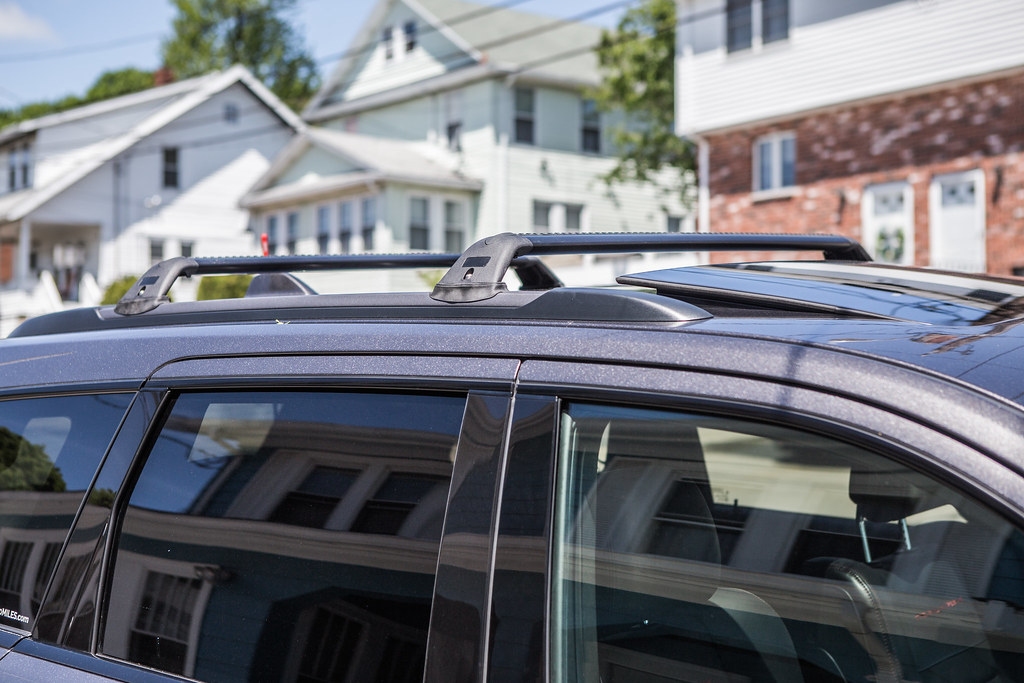
Rhino Rack - Side View by 2180miles


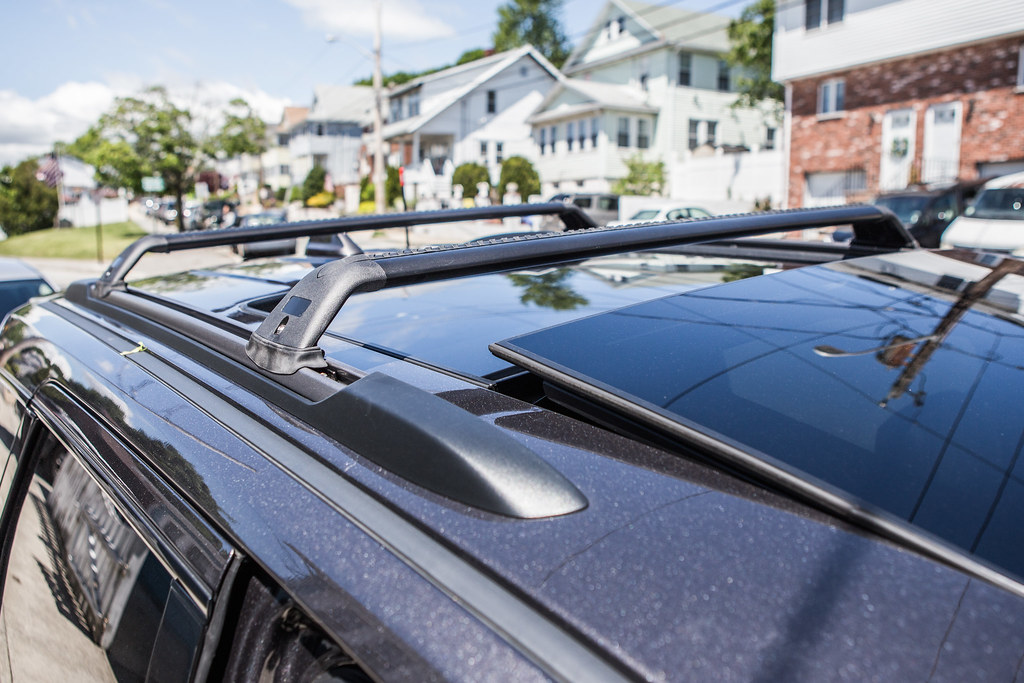
Rhino Rack - Top View by 2180miles
 

2180miles

Endurance Adventuring
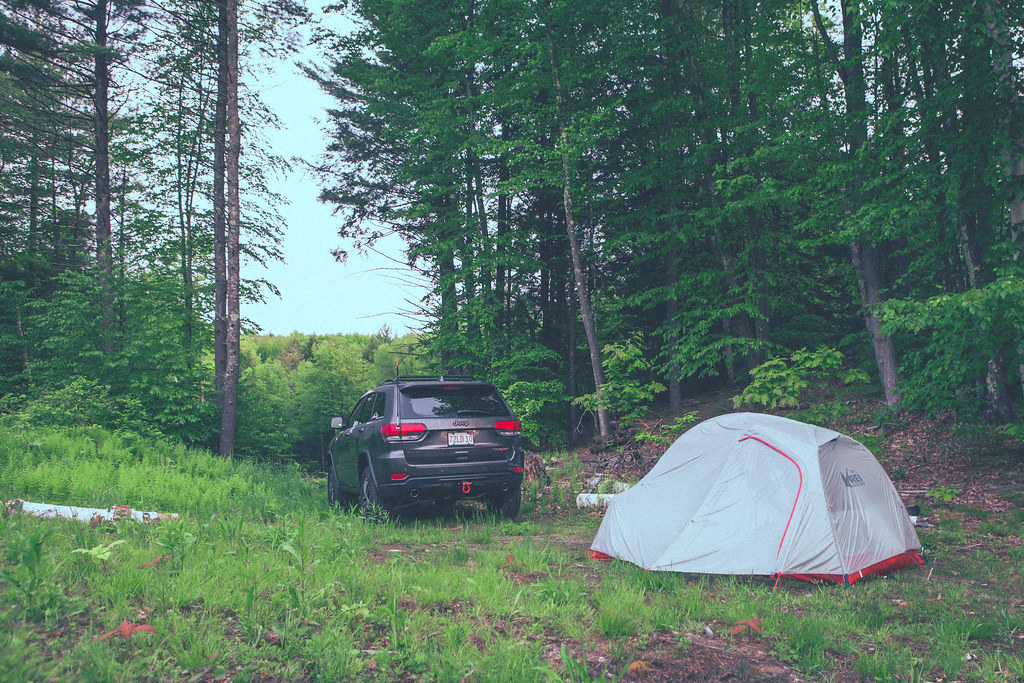
And most importantly, my favorite photo from Memorial Day weekend in Brattleboro. This is an approximation of what our campsites will be like (plus camping chairs) for our Canada trip.

I'm really looking forward to this summer.


Memorial Day Camping by 2180miles
 

2180miles

Endurance Adventuring
I had some time home last week (and decent weather!) to work more on the auxiliary electrical system for the WK2. As you've seen previously, I built and installed a 4-switch panel in the driver dashboard area to control lighting throughout the Jeep. With 18-7 fire alarm wire I made a loom to get back to a control/relay box that I was building for the rear trunk area to house the electrical components of the system. I ran out of time to work on the control box until a recent work trip, so I had products delivered to the hotel and began constructing the main brain of project.

Hardware used:

- PI Manufacturing Project Box (ABS) – 7.6” x 4.51” x 2.95”
- Blue Sea Systems 5025 6 Blade Fuse Block
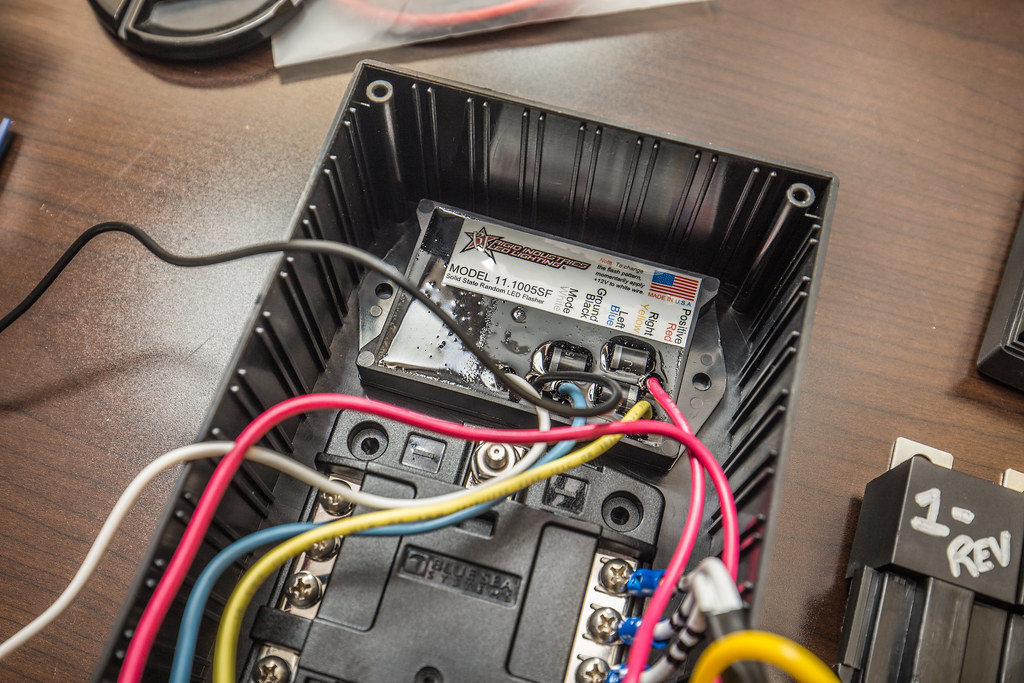
- Rigid Industries 40312 Strobe Flasher
- 4x 12v Relays (30A)
- 6A Blue Ox Saturn Diode Pack
- Misc. heat-shrink connectors

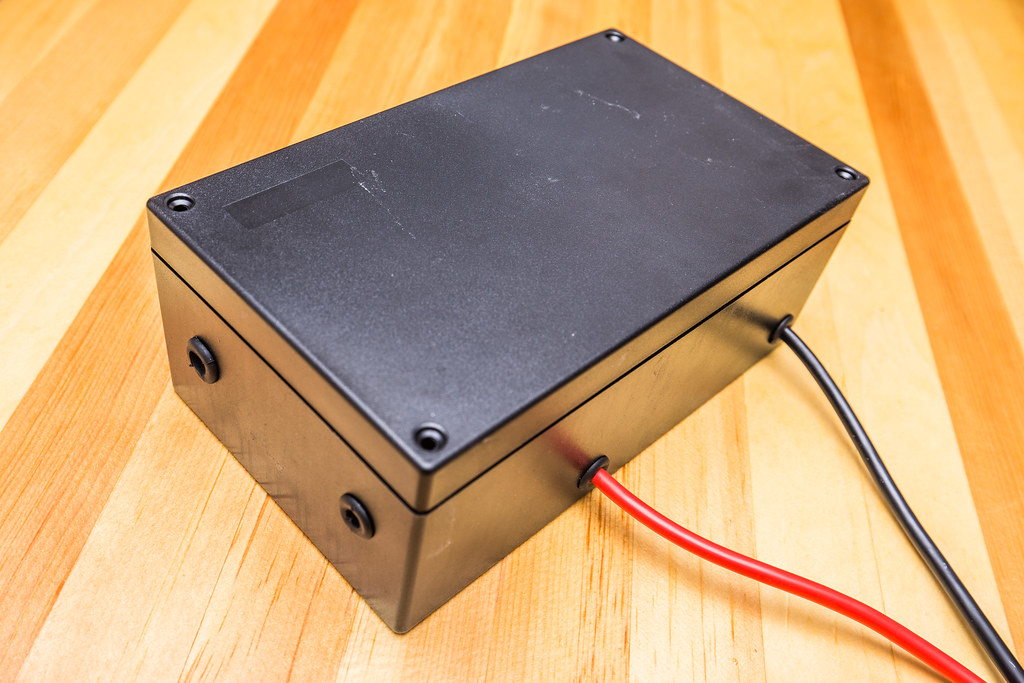
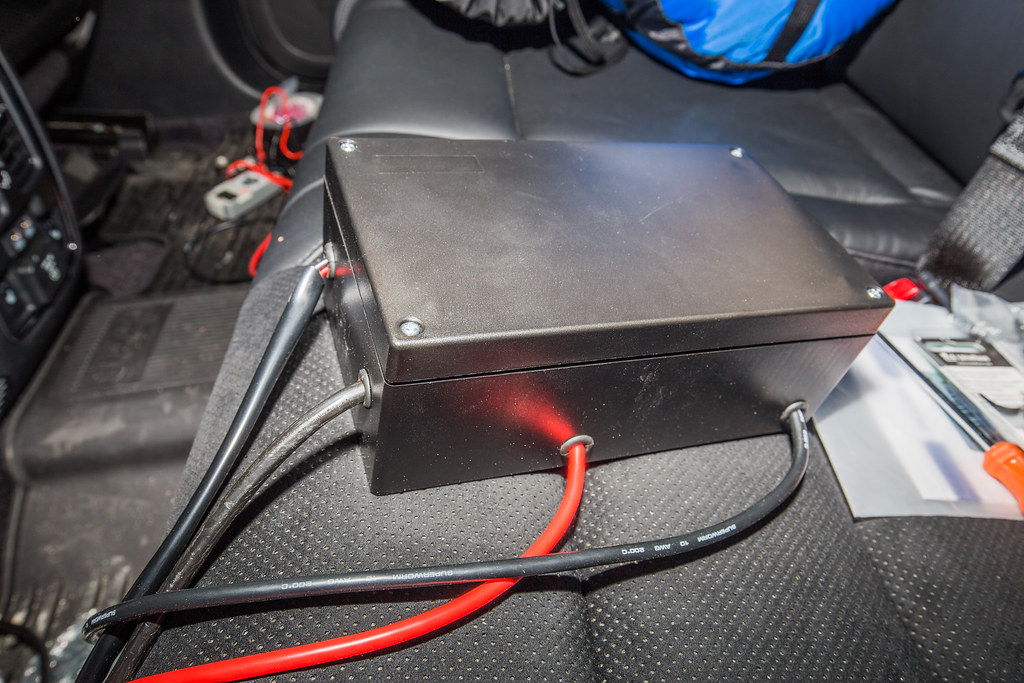
It was a tossup as to what project box would fit my components, but using Google SketchUp I built a few examples to see what the right option would be; even despite doing this I was still nervous that I got it right. Upon the delivery I breathed a sigh of relief as everything fit. Trimming and labeling the wires of the relay harnesses, I crimped my connectors and installed them to the Blue Sea Systems fuse panel accordingly. Labeling the “trigger” and “+12v” lead of the harness, I got everything ready for the installation of the lights themselves. With the interest of being able to remove the fuse panel, strobe controller, and relays from the box, but have them be secure and organized in the mean time, I used 3M adhesive Velcro to hold them to the project box itself. With everything installed and fitment checked, I removed the components and drilled out the sides of the project box for the 8AWG wire leads from the battery, and left two holes in the side for the 18-6 control loom and aux. lighting wiring.

The Project Box:
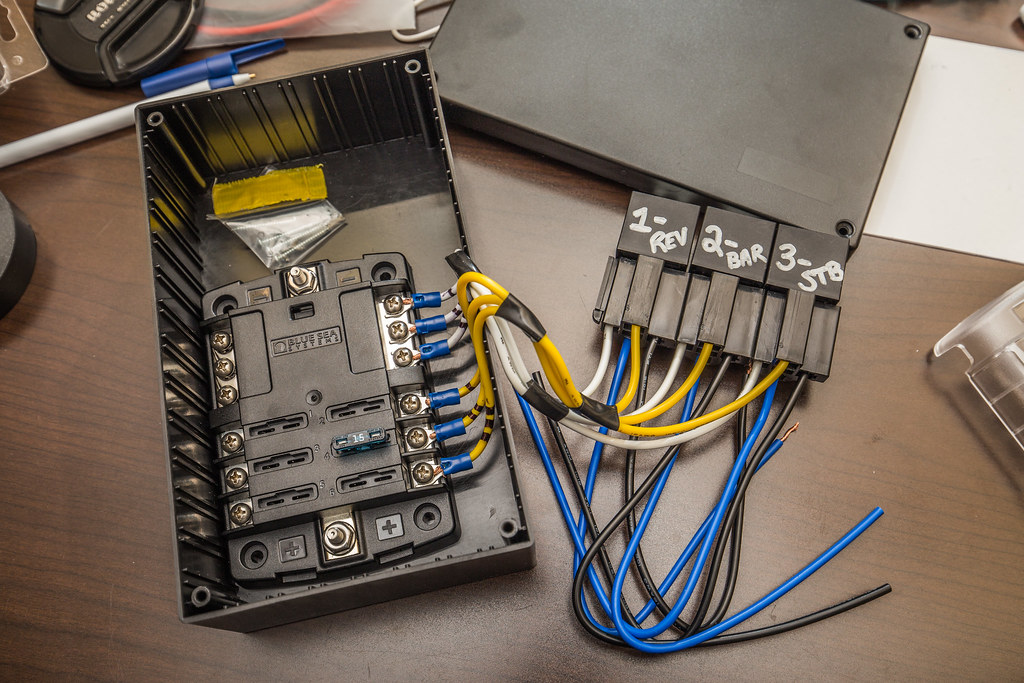

Project Box / Relays by 2180miles


Rigid Strobe Controller by 2180miles


Project Box w/ Power Leads by 2180miles


Once it had the grommets installed and the leads were crimped and heat shrunk, I brought the box out to the Jeep and fished the fire alarm wire out from under the rear bench seats where I had stored it in April when the switch panel was installed. Pulling the 18-6 wire through the grommet in the side of the project box, I went to work crimping and heat-shrinking the switch wires to the relay trigger leads and the +12v and ground switch wires to the Blue Sea fuse system, thereby activating the power and LEDs on the switch panel itself.

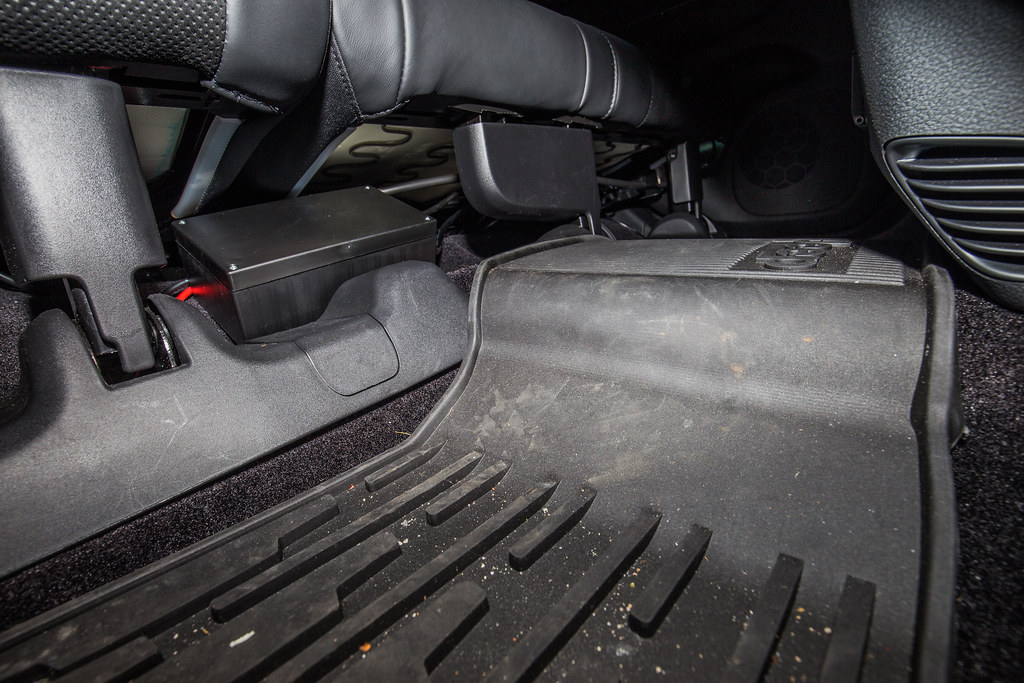
Once the switch leads were heat shrunk and everything was tucked away, I nestled the box itself under the rear bench and used HD Velcro to hold it in place. It ended up being a little further to the passenger side than the photo shows, but it is in a place and is small enough that the bench portions can fold completely flat without coming into contact with the control box. I ran the +12v lead/ground from the battery under the bench hardware trim piece, then under the OEM floor mat and into the battery compartment. It worked flawlessly and is VERY hard to find if you're not looking for it. I might someday heat shrink that cable too, but for now they're simply red and black as they run under the flooring. I ran some wiring out of the control box to my multimeter and then the light bar that's going on the roof (install write-up to come) and was pleased to see that the switches activate each relay appropriately, and the light functions without issue.

One step closer! Next up will be the aux. lighting installations themselves.
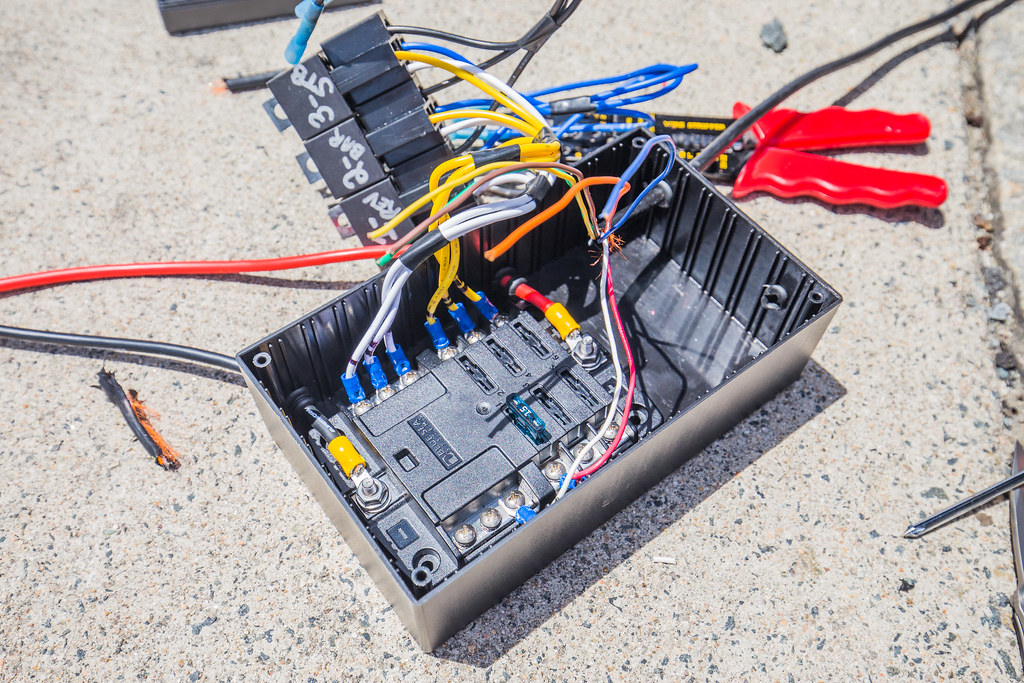


WK2 Electrical Box Wiring by 2180miles
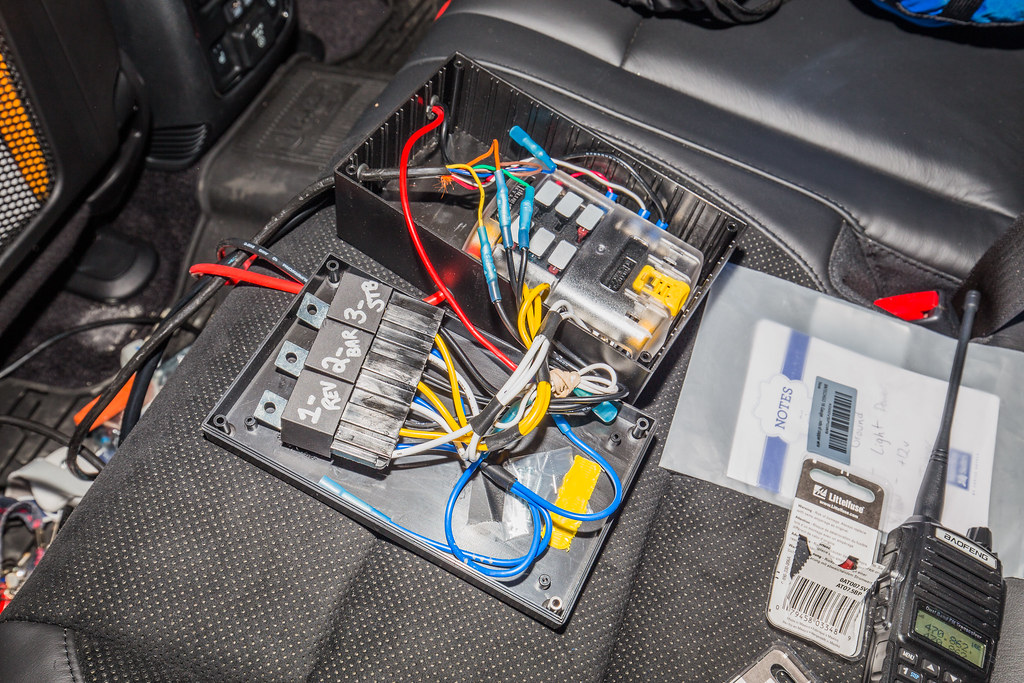

WK2 Project Box Components by 2180miles

WK2 Project Box Sealed by 2180miles


WK2 Project Box Under Bench Storage by 2180miles
 

2180miles

Endurance Adventuring
Ryan, it's hard to tell from the photos but is the box water tight? jeeps coming along nicely, when do you go on your trip?

Greetings my friend..

The box is not water tight, though I doubt it'd take much effort to make it so once it's all set and wired. The grommets are simply to clean it up and reduce wear of the drilled edges on the insulation of the wiring. Honestly though if the control box got wet, the battery would already be wet and I think I'd have bigger problems. Might be worth putting some sealant around the grommets and the lid once it's said and done.

Thanks for the kind words. I'm quite pleased with where it's at, and where it's going. We'll leave for our Jeep club overland trip on July 27th, spend 5 days in Ontario on a ~550 mile route, then Dani and I will say goodbye to everyone and turn west towards Jasper/Banff Nationak Parks.
 

2180miles

Endurance Adventuring
I was thinking water-proof for mine {I don't have the best track record in water}:) and I'm jealous of this trip,
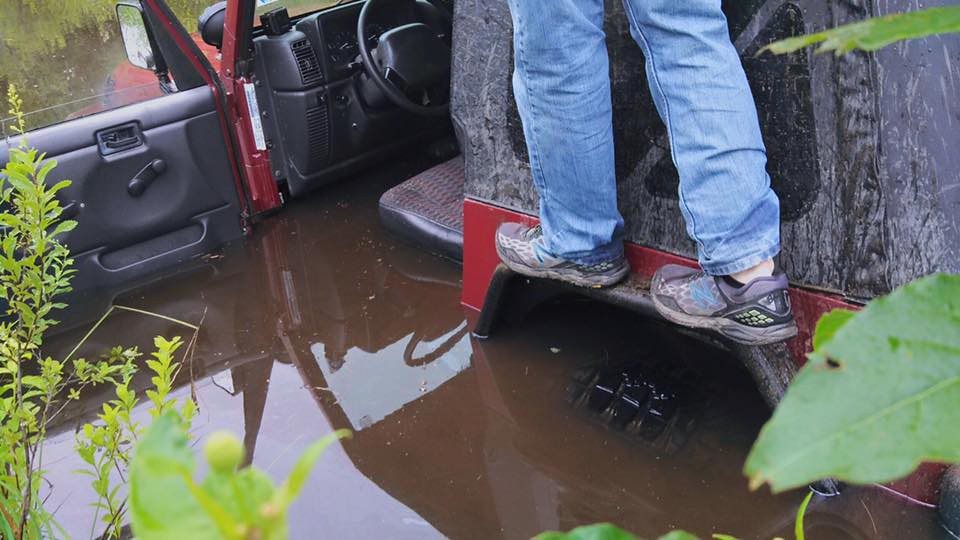
I can relate.... Drowned the TJ two years in a row, with it taking almost 6 months after this photo below's swim to troubleshoot a fried upstream O2 sensor that was causing the roughest idle I've ever heard. Replaced nearly every part in the engine/ignition and the stupid thing wasn't throwing a single code. Big Red is running 35" MTR/Ks to give you a sense of how deep the water is, and the front of the hood was under water, leaving the water level up to nearly the top of the seats inside.

Trip should be awesome. As soon as I get the Trailhawk in a good spot I'll turn my writing towards the trip planning on here...


Big Red - Summer 2016 Swim by 2180miles
 

Cottontail

Easy Street on Mud Tires
That receiver tow hook is $$$. I wonder if you should put any grease inside the key slot on the pin lock. I see it has a nice cover, but if you don't touch it for a year or two it would suck if it seized up on you.

Why is this even a concern? Why wouldn't you just keep the receiver tow hook inside your truck until you need to put it on for an overland/off road trip. No real reason to keep it in the hitch 24/7/365.
 

2180miles

Endurance Adventuring
Why is this even a concern? Why wouldn't you just keep the receiver tow hook inside your truck until you need to put it on for an overland/off road trip. No real reason to keep it in the hitch 24/7/365.

Cottontail - I've got a few reasons...

1) I'd rather have something in the space it's designed for than to have it taking up space inside the vehicle unnecessarily. I've got other recovery stuff stored inside, but I prefer to have this in place on the back.

2) I live in Boston, and while the WK2 is garaged most of the time, it does see some time parked on the street in the city. Having a piece of aluminum and steel back there protruding from the bumper means the m@$$holes who don't know how to parallel park is going to hit steel before s/he hits my painted bumper. And it's a lot sexier than one of the plastic sheets called "bumper buddies" that people hang off the trunks of their Mercedes sedans.

Last thought, though somewhat superficial, I like the was it looks and the way it separates my GC from the soccer-mom GCs. And with the majority of my Jeep club friends driving Wranglers, I've gotta fit in however I can ;)
 

unkamonkey

Explorer
Do what you wish to do. I used to leave the hitch on in my work van and every time I went out to get a tool I would bash a shin on it. Put it in the van and I would have to dig it out in a few days to tow something. I had it in the receiver one morning on the way to work and a young lady tried to corn hole the van. Her little road lice truck had to be towed off and the van had a few bruises and everything in the rear worked. The hitch and related structure saved me from most of the possible damage.
 

Forum statistics

Threads
188,028
Messages
2,901,390
Members
229,352
Latest member
Baartmanusa

Members online

Top