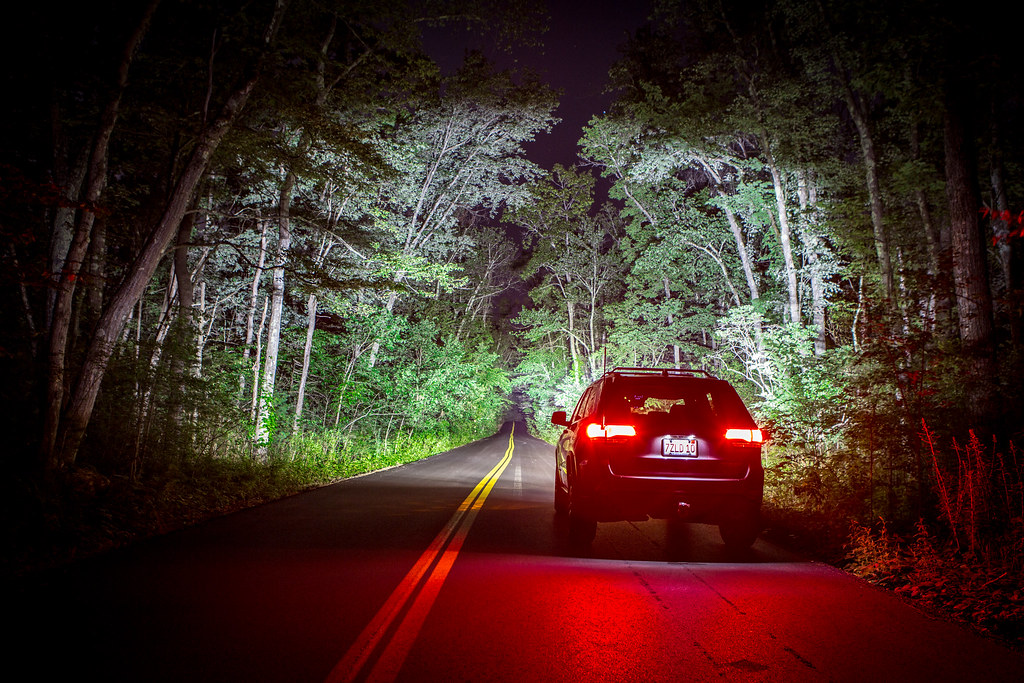
Halley - '17 WK2 Trailhawk Overland Build

2180miles

Endurance Adventuring
Do what you wish to do...The hitch and related structure saved me from most of the possible damage.

Luckily there's no ball hitch to catch my kneecap on, but my hope is that the D-ring and Hitchlink will serve that exact purpose when not serving for recovery.
 

rob cote

King in the Northeast
Storing a tool in its useful location just makes sense. There's no advantage to keeping the receiver empty when you're not using the shackle. Except for maybe you don't walk into it I guess? But my thoughts on that are simple. Either a) it didn't hurt enough to learn when you did it the first, second, third, etc. time OR b) you just don't learn quickly. :ylsmoke:
 

2180miles

Endurance Adventuring
Less than a month till we hit the road… With the switch panel installed in the dashboard, Rhino roof rack in place, and electrical control box wired and mounted under the back seats, the time finally came to order and install the LED bar that I planned for the roof.

While I've always been a Rigid Industries guy (full disclosure, technically this vehicle will have one pair of their lights), a friend turned me on to a company called Black Oak LEDs out of Florida while he was working on his Tacoma build. I'd never heard of them before. I saw the quality of the product first, as Rob had 2x 4-LED pods on his front bumper, and learned of the incredible price point second. While the market for LED fixtures has quickly become flooded with cheap knock-offs and poorly assembled units at “affordable” prices on Amazon and other web portals, Black Oak manufacturers one impressively solid and powerful product. I reached out to their products team back in March and began speaking to them about my Trailhawk build, my interest in modifying the WK2 Grand Cherokee line in a way that not many others had done yet, and my intrigue into their larger scale LED product offerings. I was put in touch with a guy named Chris who was equally as interested in getting me on their list of sponsored vehicles, and after a month or so of talking, we got the ball rolling. Quick aside, if you're interested in checking out Black Oak LED products for yourself, you can take an additional 10% off their web prices by applying the code “2180miles” at checkout.

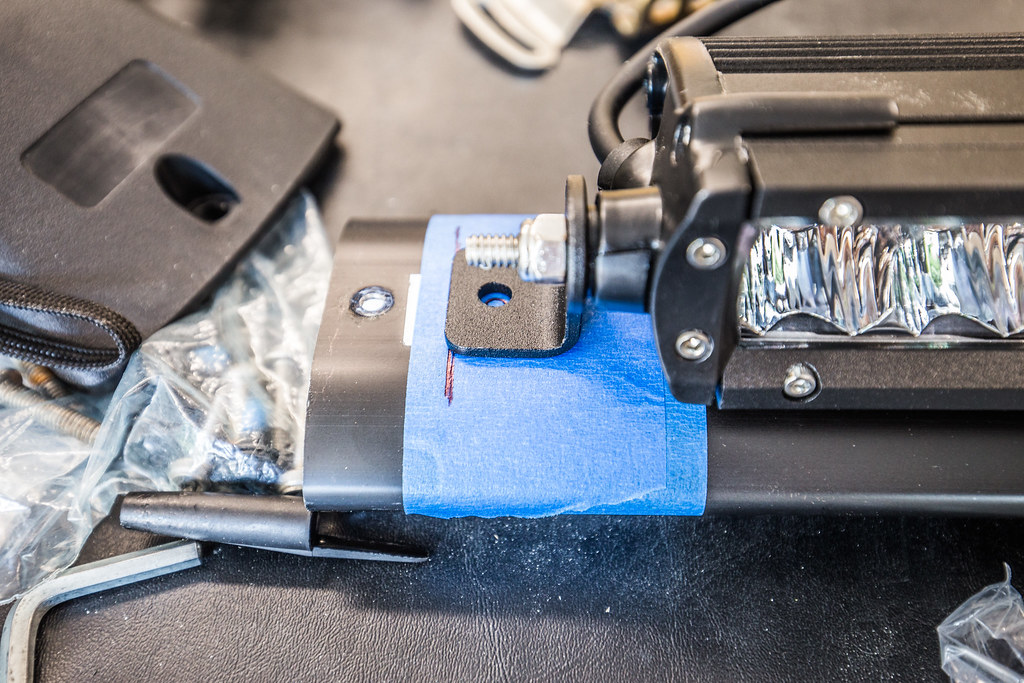
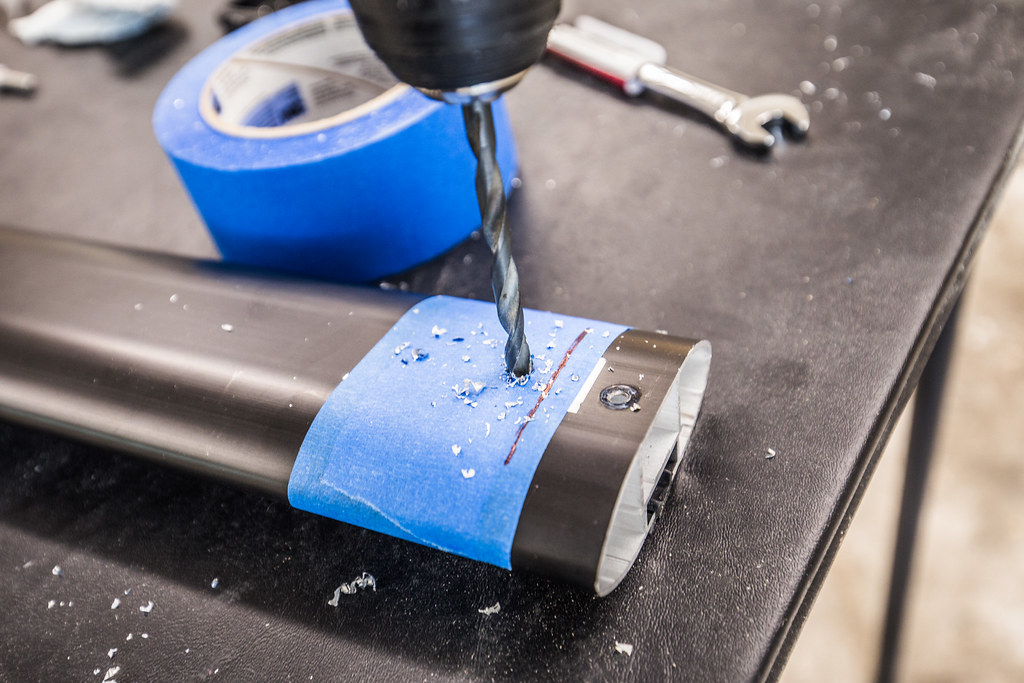
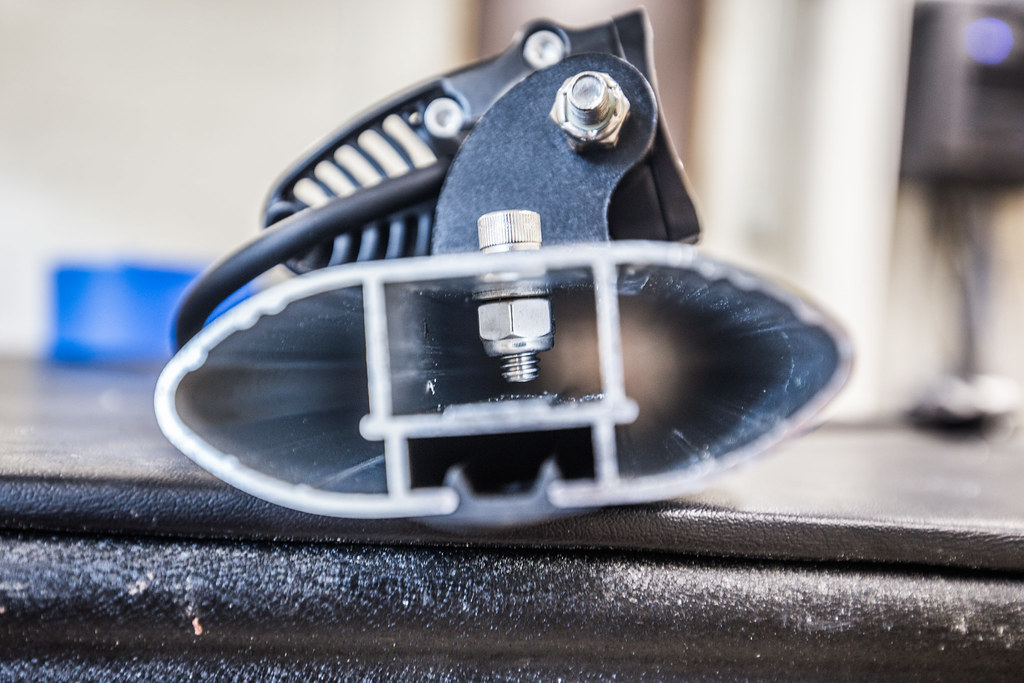
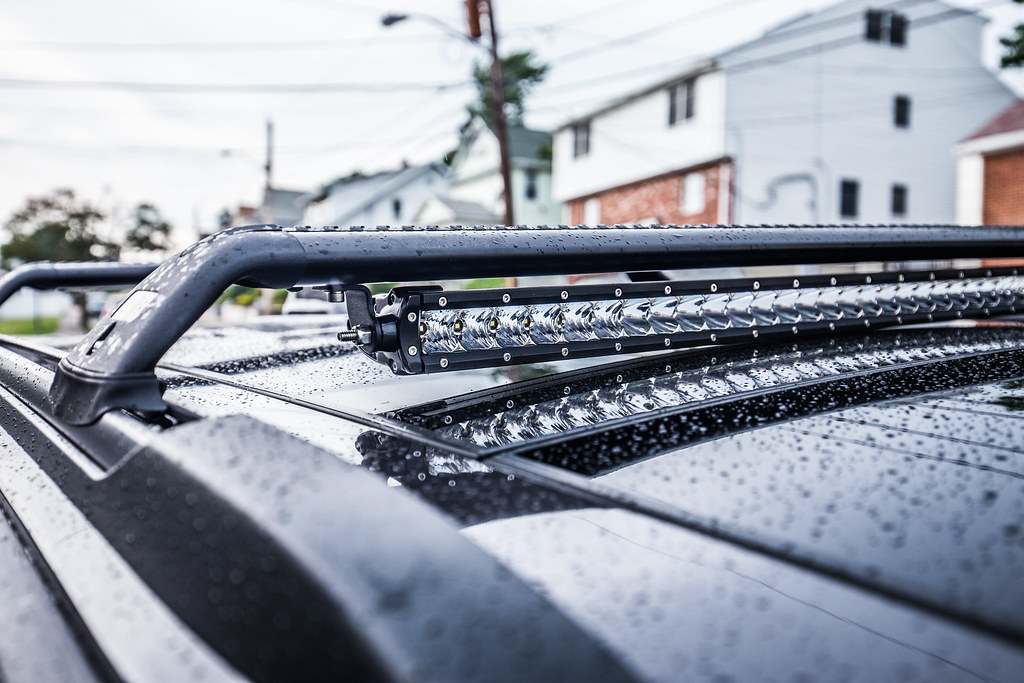
Despite quite a bit of research into previous WK2 owner mounts/installations, it didn't seem that anyone else had ever put a light bar on the roof. Plenty of other owners have done small light bars and pod fog lights in the lower fascia on either side of the ACC camera, though save for one minimally documented roof bracket, it seemed that I was again in uncharted territory for my installation. My plan/hope was to get as wide a light bar as possible, packing in as many lumens as possible, into a very sleek and minimally invasive housing. This without question limited me to a single-row kind of fixture at whatever width the roof rack crossbars would allow. My plan was to tap and drill the cross bar piece to the mounting pattern of the light bar brackets, and cross my fingers it would fit between the cross bar and the glass of the roof. In measuring out the Rhino Rack cross bar to 36” wide after installing it, I then went to work checking out Black Oak's single-row series of lights, finding their 30” to measure in at 34” with the mounting brackets attached… perfect!

Placed the order on a Tuesday, the light bar shipped on Wednesday and was delivered on Friday with a hand written “Thank you” on the invoice. So far, Black Oak was winning my vote a hundred times over. I eagerly unboxed everything upon returning from a work trip and discovered that despite my attempt to pre-measure everything, there simply wasn't enough height under the cross bar to allow for the light to fit. Ugh… dead in the water. So after some thought I took it to the local fabrication shop and had them shorten the height of the Black Oak stainless bracket by 3/8”, but that didn't work either. So I called Black Oak and asked if they could custom make me a bracket, and after speaking with John on the other end he suggested I try their super-short-low-profile-fits-anywhere-awesome-bracket… for an easy to reason $15. It was delivered in 2 days and worked perfectly.

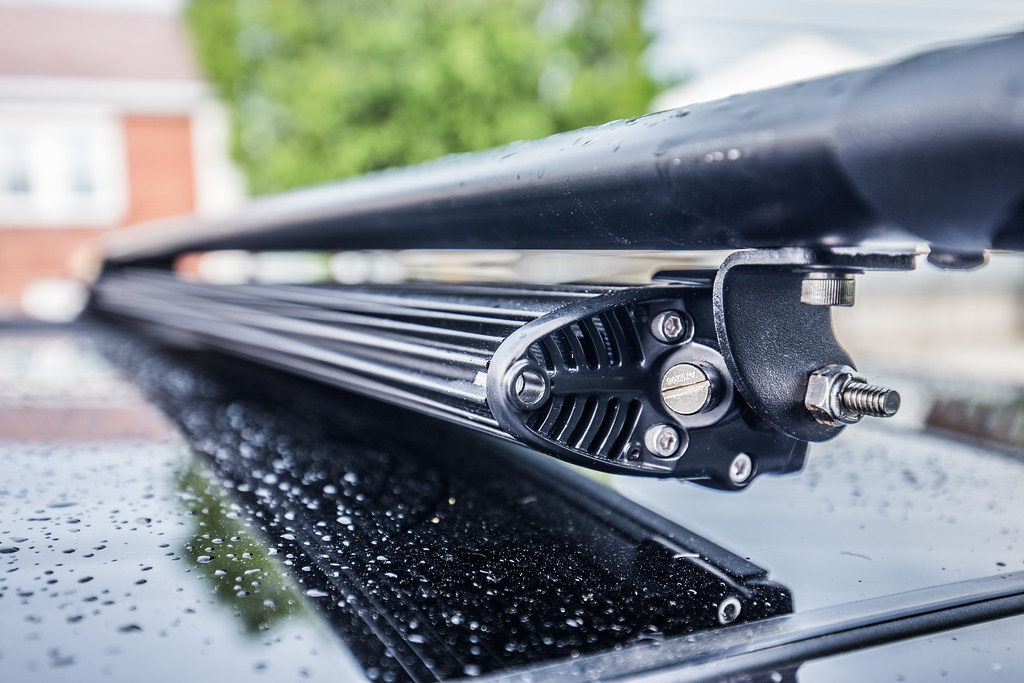
After all these pieces were in order, it took all of 20 minutes to get the cross bar tapped out and finagle my trimmed mounting hardware into the exceptionally narrow tolerance height of the cross bar.


Marking Center Measurements by 2180miles


Drilling Rhino Rack Crossbar by 2180miles


Narrow Tolerance Inside the Crossbar by 2180miles


LED Bar Mounted by 2180miles
 
Last edited:

2180miles

Endurance Adventuring
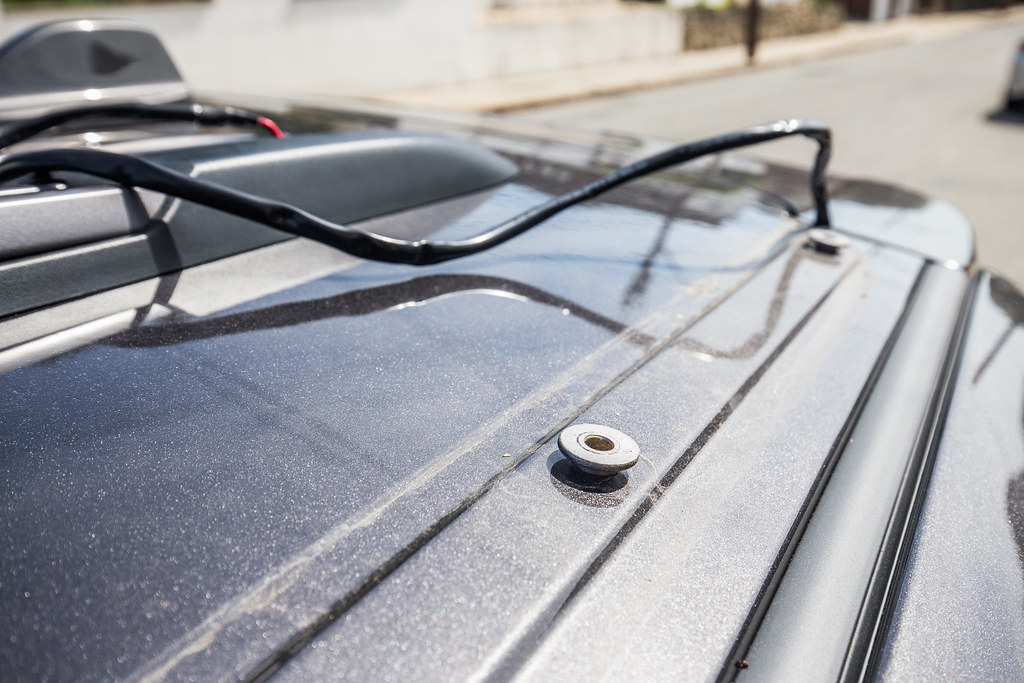
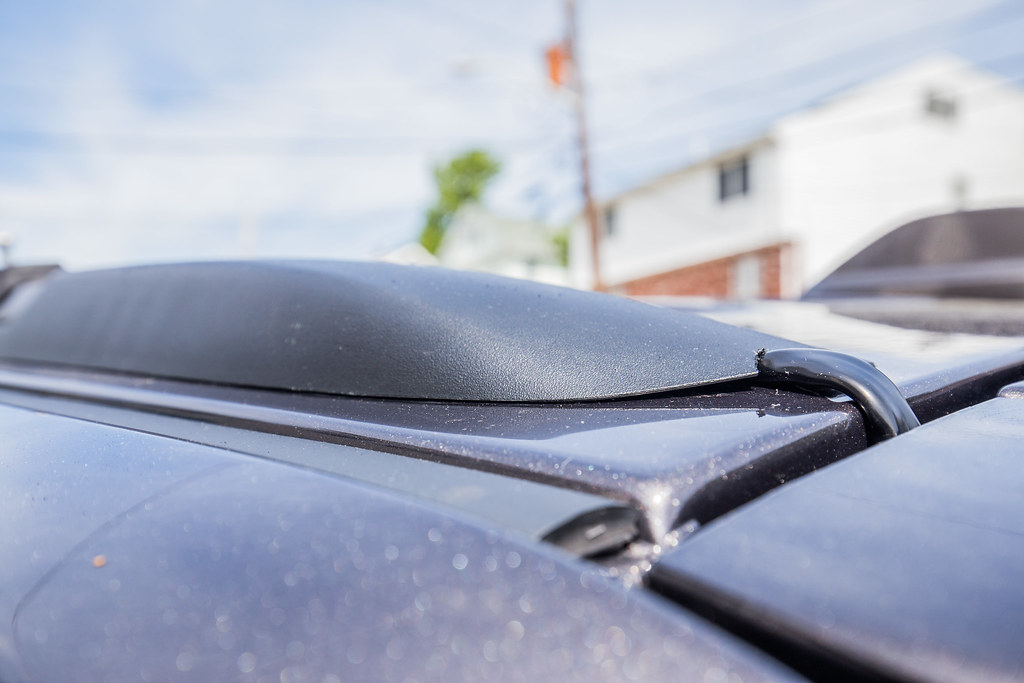
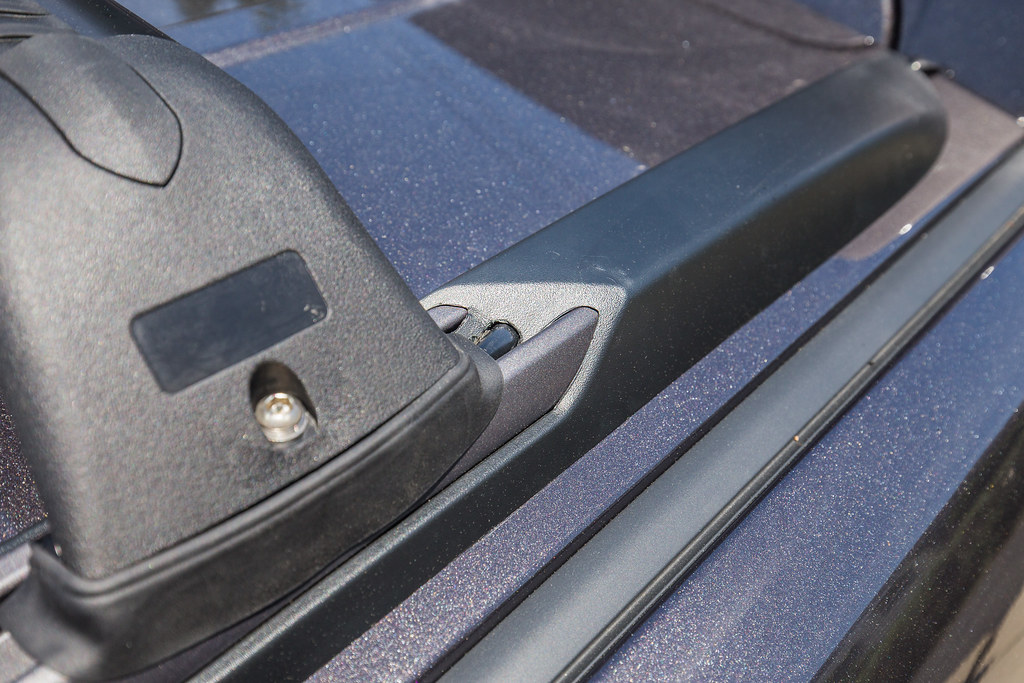
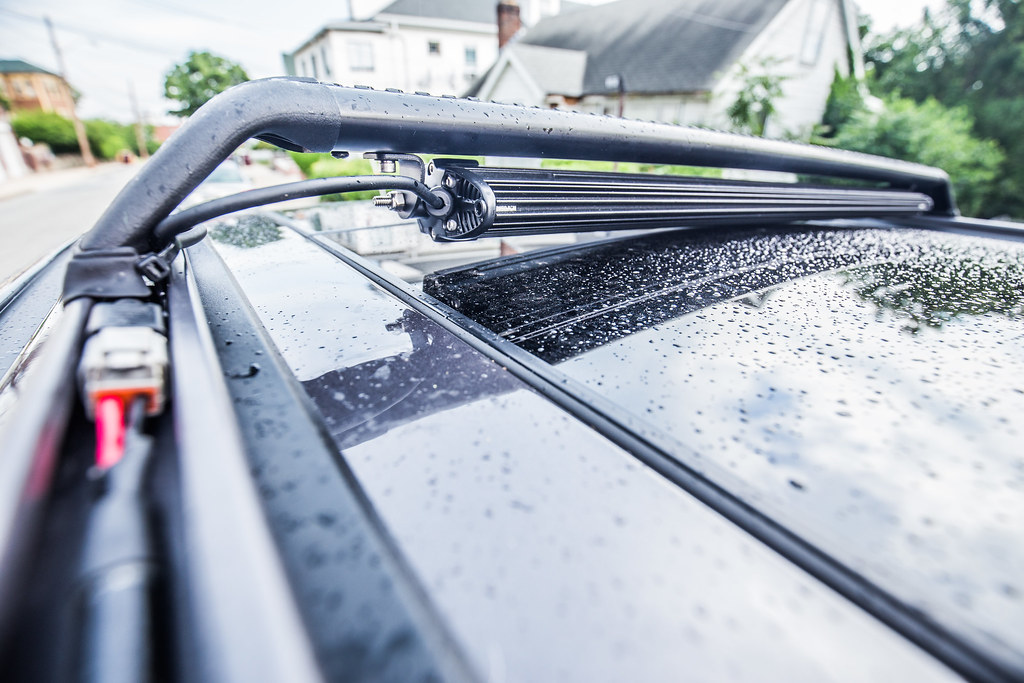
One of the more thought provoking parts of this project was figuring out how to cleanly get the wiring into the vehicle. I had almost no interest in drilling through the roof, nor removing the headliner for access to anything, so I moved on to Plan B. Utilizing the placement of the OEM roof mounting rails, I removed the factory rail and plastic trim pieces from the top of the Grand Cherokee and laid the Black Oak wire loom out along the length of the roof. By snaking their proprietary water-tight connection through the end of the roof rail trim piece, I was able to fit it down the length of the roof rail itself, right up to the point where the Rhino Rack cross bar bracket fastens down.

This will be easier to show with photos than to describe with words:
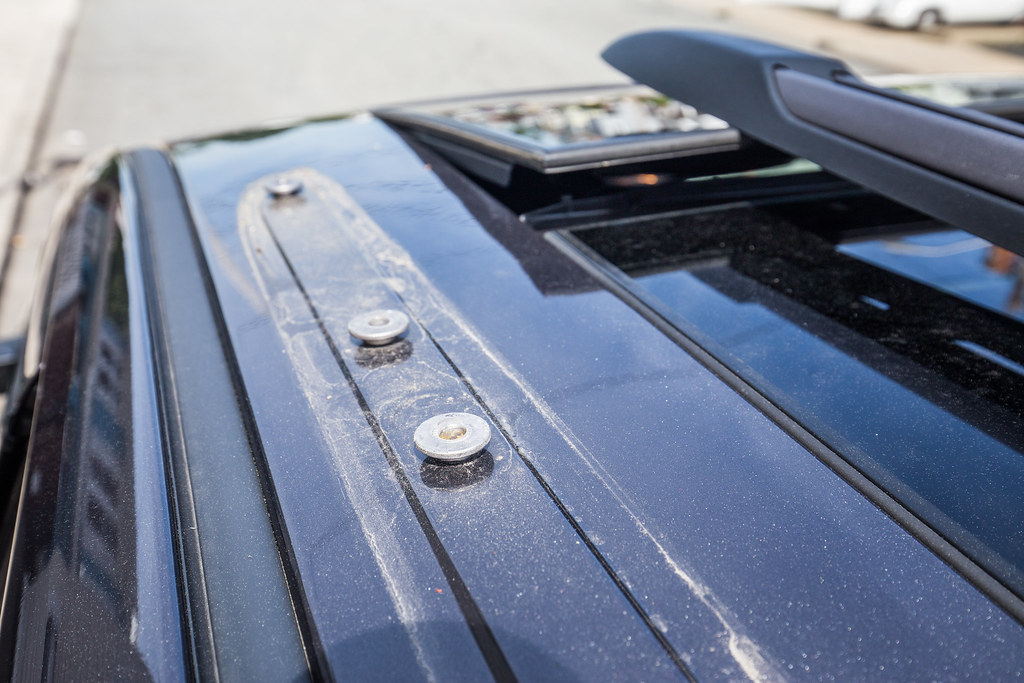

WK2 Roof Rail Removal by 2180miles


Black Oak Wire Harness Routing by 2180miles


Taking my trusty Dremel with a circular sanding bit at the end, I wallowed out a hole at the tailgate end of the plastic roof rail trim piece, just enough to let the 14-2 wire loom through without giving it too much room to play. I re-fastened the roof rail and trim pieces back to the driver's side (I had decided early on that I wanted all the wiring on that side as that's where the control box was living… less wire to run, less work to do, happier me)… By running it down the OEM metal roof rail piece, I was able to tuck it in there and secure it with the roof rack hardware pieces, eliminating any need for additional fasteners. It tucked away perfectly, and left me with the wire harness clip to live just behind the front of cross bar mounting bracket, right about where the light would drop it's connection point.
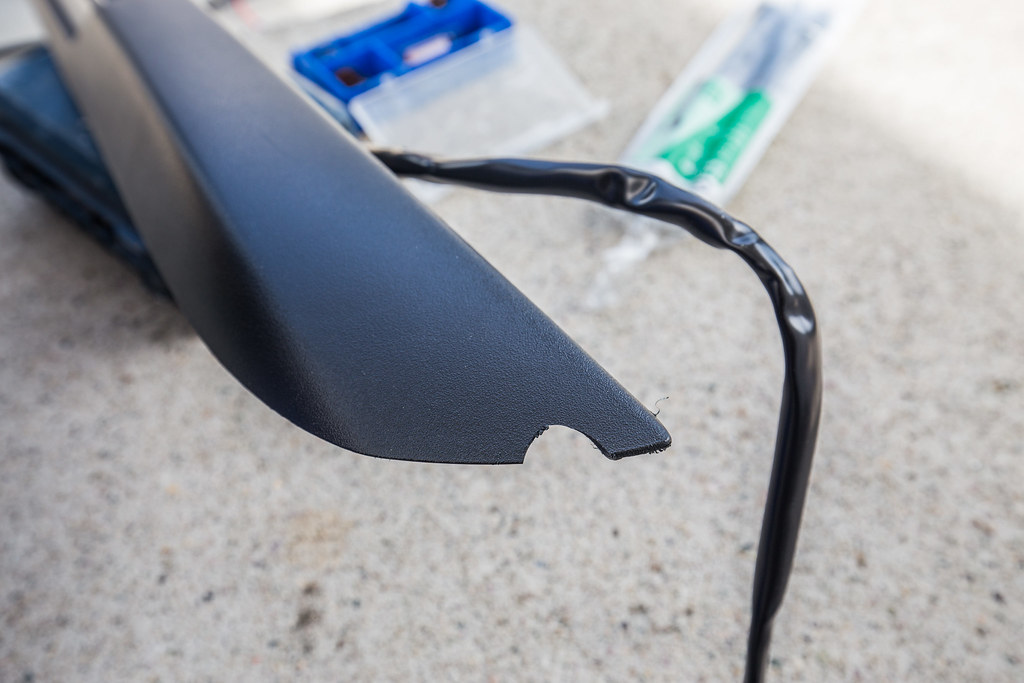

Roof Rail Trimmed by 2180miles


Roof Rail Installation by 2180miles


WK2 Wire Harness Routing by 2180miles


Wire Harness Routing by 2180miles


Once the wire was run through the new exit point from the trim piece, I began removing the rear upper trim pieces from the inside of the Grand Cherokee. I have to come to <i> very much </i> dislike removing trim pieces, but it's the only way to do things cleanly and have myself feel like I've done a professional install job, which has become important to me while modifying this vehicle. I toyed with how to get it into the cabin, and ultimately decided to pull out the gasket that houses the controls for the hydraulic tailgate piston. It's a gigantic gasket, and upon removal I saw that there was plenty of room to sneak the shrink-wrapped Black Oak harness inside of there.

I took the same dremel sanding bit and carefully trimmed back just enough of the gasket's outer edge (lower edge, ideally to alleviate excess water from getting near it) and fed the wire harness through to the inside of the d-pillar. It's important to note as you look at the photo below, that I went back later with clear silicone sealant and liberally applied it around the gasket to seal up whatever tiny openings may have arisen from my adjustment to the OEM seal. From there I ran the wire down the d-pillar to the bottom of the tailgate, unscrewing the factor internal cargo hook and running the wiring under the trim pieces and along the length of the spare tire trunk trim piece towards the middle bench.

You can see in the photo below that I highlighted the wiring harnesses external stretch in red, then the pink portion shows where it's being run inside the vehicle.
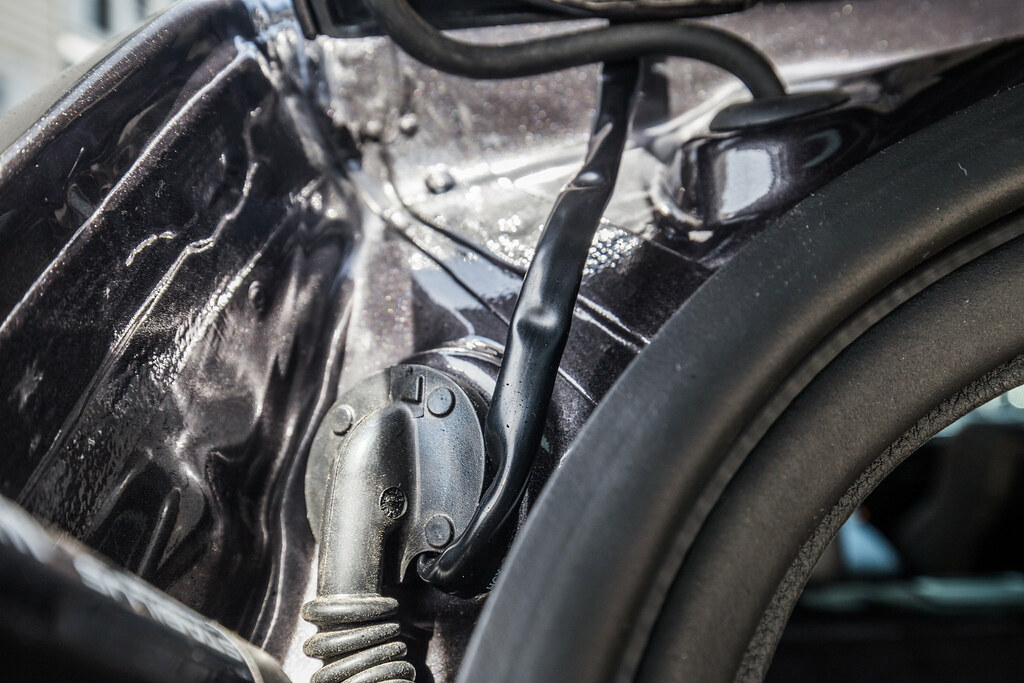

Black Oak Wire Harness Routing by 2180miles


WK2 Roof Light Bar Wire Routing by 2180miles


The final bit here was tying the Black Oak harness into the control box I had just built and installed a week or so prior. FYI, for anyone trying this, I ordered one of the Black Oak 8' extensions for the wiring harness, which I was VERY happy to have for this installation. Once the grounds and +12v leads were connected to the appropriate ground bus and relay, I tied the light bar into the waterproof connection point on the roof and tested the dashboard installed switch panel to activate the light.

HOLY BRIGHT.

That's about all I can say. The specs on this 30&#8221; bar using the available 5w CREE LED's is roughly 16,500 lumens. Let me tell you, even in broad daylight, this thing is blinding. I'll be taking it out next week for a nighttime photo shoot to really show it off, but for now let me report that this thing is one of the brightest light fixtures I've ever seen&#8230; and that's as someone who works in the concert production industry with some serious lighting systems. I'm exceptionally impressed with the build quality, customer service, and actual power of this light bar, and look forward to ordering more products from Black Oak in the future.

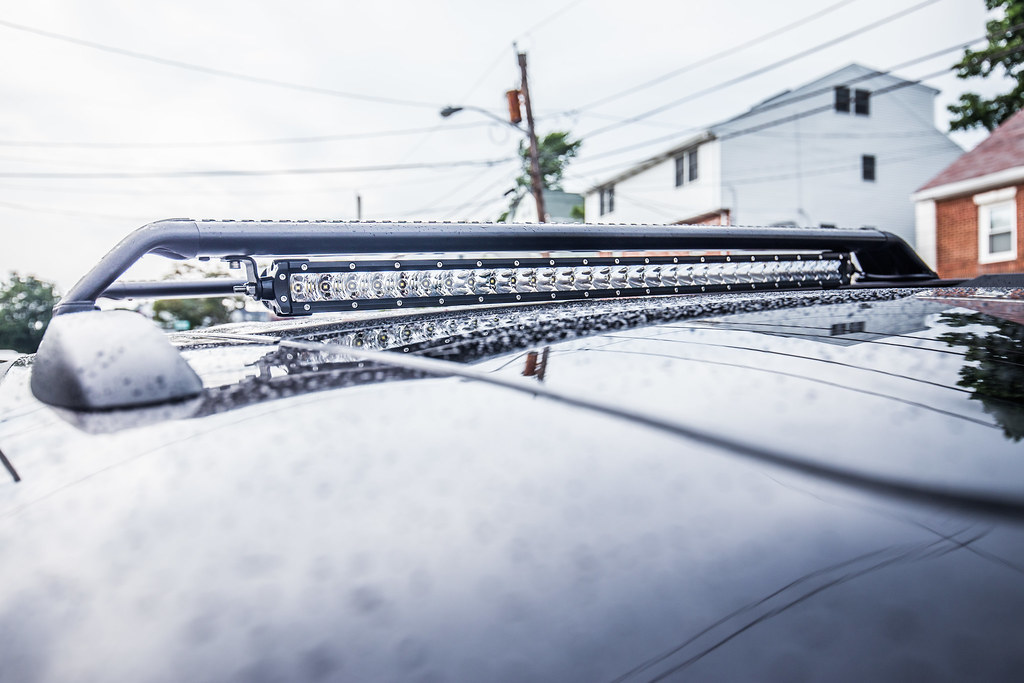
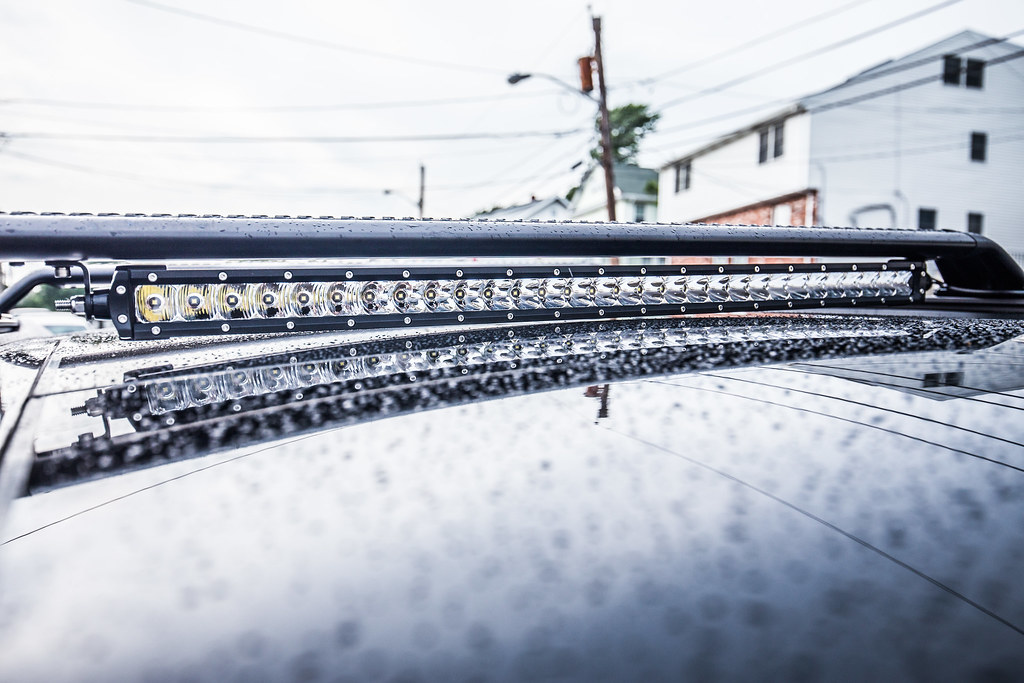
Here are the final close-up installation photos... more to come to show off the actual power this thing packs into such a small form factor. In the end, it wasn't a huge pain to get this installed in what I truly believe is a very clean form, barely noticeable unless you're really looking for it up there. Thankfully there's a few millimeters of space under the light above the glass, and also enough room between the light and the cross bar to fit a mounting bracket for a RTT in the future if my path goes that way :)

That's all for now &#8211; talk soon about some other neat stuff.

Mounted on WK2 by 2180miles


Black Oak 30&#8221; Single Row Wide by 2180miles


Black Oak 30&#8221; Single Row - Rear by 2180miles


Black Oak 30&#8221; Single Row - Rear Wide by 2180miles


Black Oak 30&#8221; Single Row by 2180miles
 
Last edited:

2180miles

Endurance Adventuring
As promised, night photos of the 30" Black Oak LED light bar.

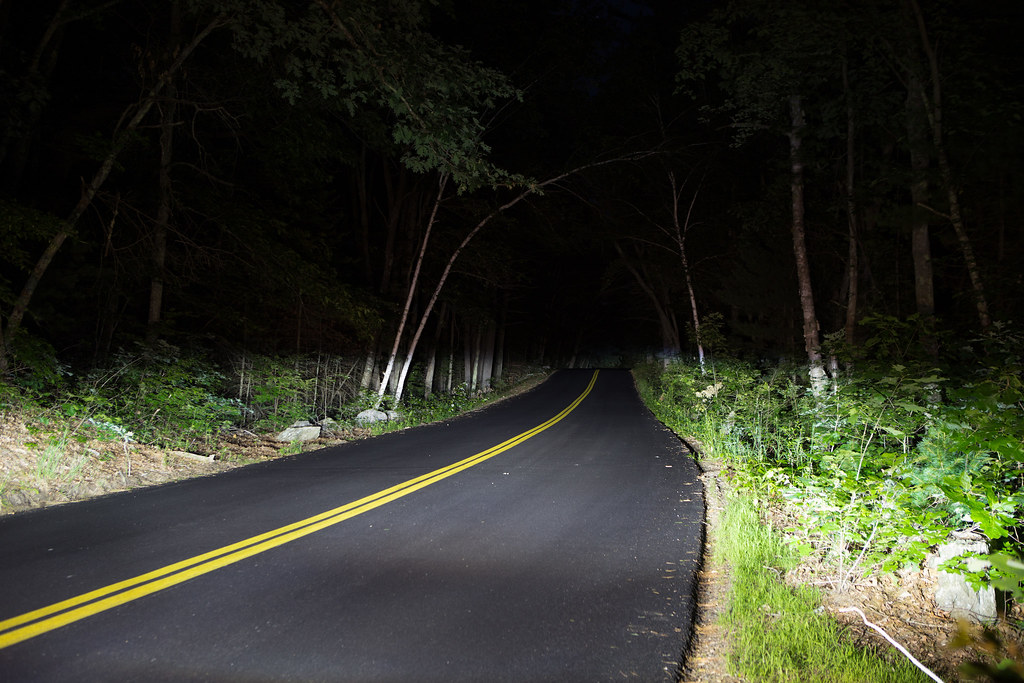
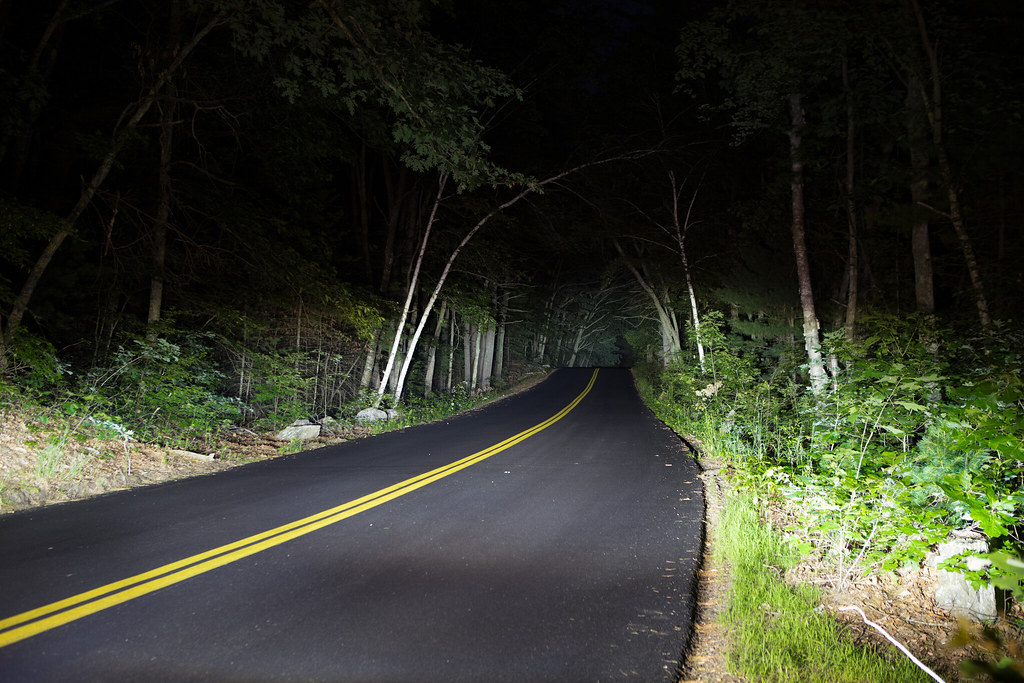
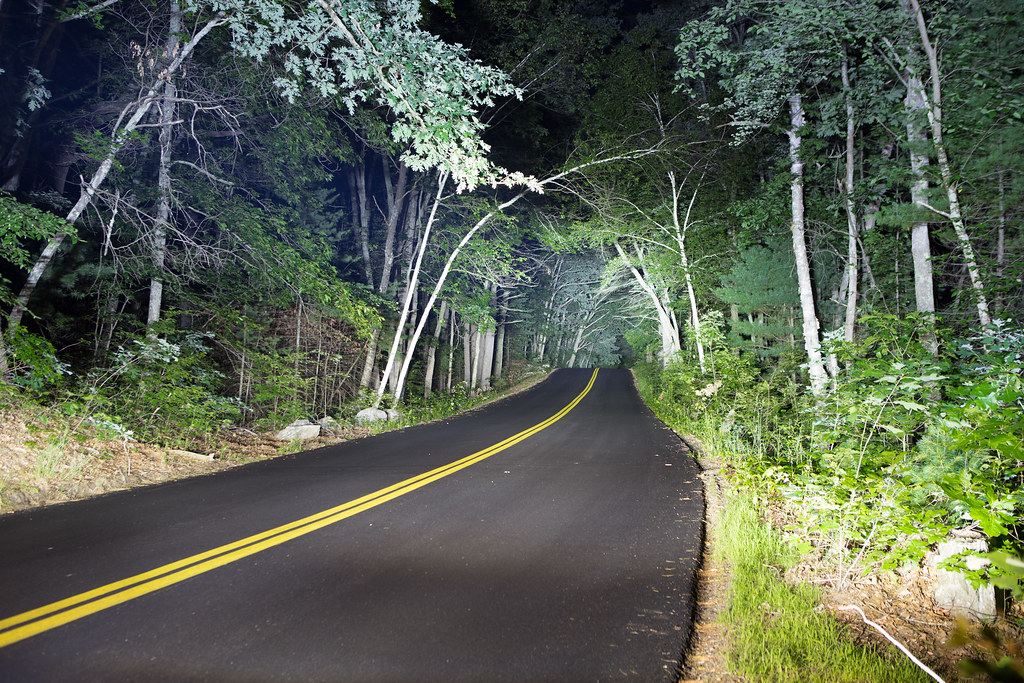
I unfortunately wasn't able to get a super long-distance shot, but these photos should adequately convey how bright this thing is. For those who are photo-friendly, these were taken at identical exposure settings... f/4, ISO100, with a 6" exposure time on a Canon EOS6D with a 24-70 f/2.8L lens.

Pic 1: Low Beam
Pic 2: Low + High Beam
Pic 3/4/5: Low + High + LED Bar Combined


WK2 Low Beam by 2180miles


WK2 Low Beam + High Beam by 2180miles


WK2 Low/High + Black Oak 30" LED Bar by 2180miles


Trailhawk Auxiliary Lighting - Front by 2180miles


Trailhawk Auxiliary Lighting - Rear by 2180miles
 

CFD614

New member
Love the pics Ryan, definitely one of the cleanest installs...looking forward to the rear cargo build :sombrero:
 

bobholthaus

Observer
Guys: can any of you tell me if I can remove the lower facia on a 2014 GC Overland, or is the bumper a one piece unit? If it's possible, and you have a link with instructions, I would surely appreciate it.

2180miles, your rig looks amazing. When will the Chief products be readily available? Thanks for your attention to detail in your write up. This is a great thread!


Sent from my iPhone using Tapatalk Pro
 

bobholthaus

Observer
I got my answer in my other post. This is possible, FYI. Thanks guys.

Aaaand, I just realized that's on another forum, ha! I'll post a link.


Sent from my iPhone using Tapatalk Pro
 
Last edited:

2180miles

Endurance Adventuring
Guys: can any of you tell me if I can remove the lower facia on a 2014 GC Overland, or is the bumper a one piece unit? If it's possible, and you have a link with instructions, I would surely appreciate it.

2180miles, your rig looks amazing. When will the Chief products be readily available? Thanks for your attention to detail in your write up. This is a great thread!

I got my answer in my other post. This is possible, FYI. Thanks guys.

Aaaand, I just realized that's on another forum, ha! I'll post a link.

Appreciate the kind words! I'm glad you find benefit in the long and detailed write-ups. It's hard sometimes to write it for what seems like a small audience, but I think the information is beneficial for people to have, especially as many of these mods have not been done before. Had there been info on removing this trim piece or that part, I'd have certainly been grateful to know it ahead of time instead of discovering as I go, so I hope that it helps others.

As you found, yes, it's possible to remove the lower fascia. I did a thorough write-up for Chief, which they've recently reviewed, and ideally I'll post on here when they're good and happy with it. Per discussions with the Chief team, I think they're about ready to be gearing up to sell the winch mount... as soon as they do I'll be sure to post it here or PM you if you're interested. There's only about 4 quarter-turn plastic "bolts" underneath the front valence, then two pop rivets on each side if I remember correctly. It should be detailed in my write-up of the winch installation with photos.

Good luck!
 

bobholthaus

Observer
I got the info from the link on Chief's site, which was referenced by another forum user.

Bill Mackin from Chief emailed me last night, as I ordered the lower guard at their "pre-order" price and am trying to expedite its shipment to Missouri for my trip to Colorado in a few weeks. If he can't help, I may just need to buy one at full retail price from someone who has one in stock, and then I will likely resell it at a loss (with only bugs removed from it), if anyone out there is looking for a very lightly used piece. BTW, I mentioned you and this thread to him in my email correspondence with him. Thanks.


Sent from my iPhone using Tapatalk Pro
 

bobholthaus

Observer
Update on Chief products from a guy at KevinsOffroad:

Kevin's is one of the only distributors of this product in the US (They may be the only, other than through Chief directly). There is a container-load of product arriving in the US on August 5th; whatever Chief hasn't sold directly as "pre-orders", Kevin's will be able to sell (they warehouse the product for Chief). Kevin's doesn't know of anywhere else in the US I could buy one. The CEO of Chief replied to my email last night and said that I could buy one directly from AU, but that the shipping would be expensive. I asked him how expensive, and he hasn't replied yet. That's my update.


Sent from my iPhone using Tapatalk Pro
 

2180miles

Endurance Adventuring
Man... those stock lights really are as good as some people with fifty light bars lol

Aggie- you're not wrong... The OEM headlight/fog light combos on these things are insanely well designed.


Update on Chief products from a guy at KevinsOffroad:

Kevin's is one of the only distributors of this product in the US (They may be the only, other than through Chief directly). There is a container-load of product arriving in the US on August 5th; whatever Chief hasn't sold directly as "pre-orders", Kevin's will be able to sell (they warehouse the product for Chief). Kevin's doesn't know of anywhere else in the US I could buy one. The CEO of Chief replied to my email last night and said that I could buy one directly from AU, but that the shipping would be expensive. I asked him how expensive, and he hasn't replied yet. That's my update.

Glad that Bill (Chief's CEO) was able to get back to you. The ship time for my winch mount took a little longer than planned, and I believe cost them about $200 with DHL. I'm not sure of the weight difference between that unit and the front fascia. Hopefully you'll be able to get it, one way or another, before you trip. Their products are robust as anything and pretty freakin' impressive as a whole.

I've been considering the fascia replacement as well, but I love my OEM tow hooks, which their kit is not compatible with (full kit, that is... can't have the winch mount + fascia + oem hooks). So I'd need to run their tow hooks as well. Maybe a little down the road, but we shall see. Keep me updated, and feel free to throw pics on this thread once you get it installed... Us WK2 guys have to stick together!
 

Forum statistics

Threads
188,028
Messages
2,901,390
Members
229,352
Latest member
Baartmanusa
Top