Custom Rear Deck / Dometic CFX-35 Installation
So there are a few updates I never got a chance to catalogue before we departed for the Trans-Canada trip this summer. One of the most integral additions of gear to the Trailhawk was the Dometic CFX-35 fridge/freezer… I had hesitated at the cost initially but the value this thing brought to our trip as a whole cannot be conveyed. Once I had decided to purchase one (ended up just getting it on Amazon, paid something in the range of $550.00) it became a task of designing a way to have it held down. While I had initially wanted to put it on a slider, spending the extra $200 to buy the kit from Dometic just wasn’t in the budget that close to our departure, so I decided to flat mount it directly to the deck. This is where the need for some kind of secure deck came from.
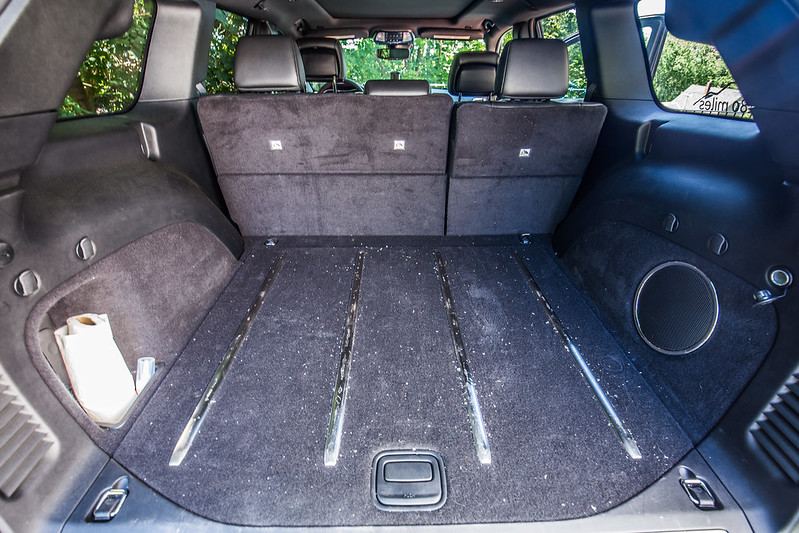 OEM WK2 Trunk Deck
 by
2180miles
*please excuse the mess... it's the plastic wrap from the OEM deck that started falling apart
A while back I had seen a thread where a guy used his OEM deck cover and attached mounting hardware to it to tie things down. While the idea was great, I didn’t necessarily want to attach all that weight to the plastic deck that simply “clipped” into place in the back of the Jeep. Measuring the OEM deck to roughly 7/8” tall, I decided that ¾” cabinet plywood would come close enough to be nearly flush. Thinking out the layout I wanted to achieve, I ordered some aircraft L-Track tie-down hardware from US Cargo Control with round tie-down points. These are great because they can slide anywhere on the track and fasten in every 2” as you move down. Total cost from USCargo was $89 delivered.
Parts List:
[*] 4x8’ sheet of ¾” plywood cut to size
[*] 2x 24” Airline Track
[*] 2x 12” Airline Track
[*] 8x 2” Round Stud Fittings
[*] 6x Home Depot Fastener Straps
First up in this process was to remove the OEM deck and trace it against the plywood. Discussing this design with my buddy Shaun who is also a WK2 guy, I offered to make him one as well while we were at it. I used my jigsaw to follow the curvature of the deck, and an orbital sander to clean it up and take down extra material where necessary. It took two or three test fittings before things were great, then we repeated the process on the second deck.
 Tracing OEM Deck
 by
2180miles
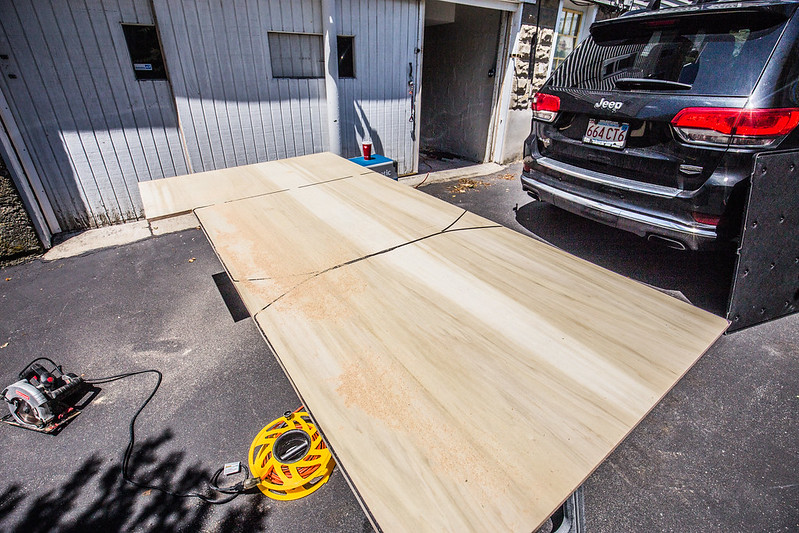 2x Deck Stencils
 by
2180miles
Shaun’s Dometic was living on the sliding deck, so we built a riser out of 1x3s to get it up enough to clear the rear trunk lip. While he went to work bolting the fridge into the tray - a heck of a process, it seemed - I began laying out my L-tracks. My initial thoughts were to have the fridge be on the 40% fold side of the rear bench, as it’s exactly the same width of the fridge itself. This would obviously allow me to utilize the 60% side if (when) I need to sleep in the back, add some lumber, or store whatever needs to be stored. On the left side of the rear deck I spaced the L-Track far enough apart to fit in stacked Pelican 1610 and 1620 cases that store our camp and cook gear during overland trips. *This may eventually change, as Dani and I have discussed a move towards a drawer system for wherever we go next.
I took some time in the week after to add a bed-liner paint job to the new deck, using a rough, sandpaper like base to it to help things not slide as much. The paint held up pretty well over the course of the summer trip, but wore down a little bit from the Pelicans sliding here and there underneath their ratchet straps.
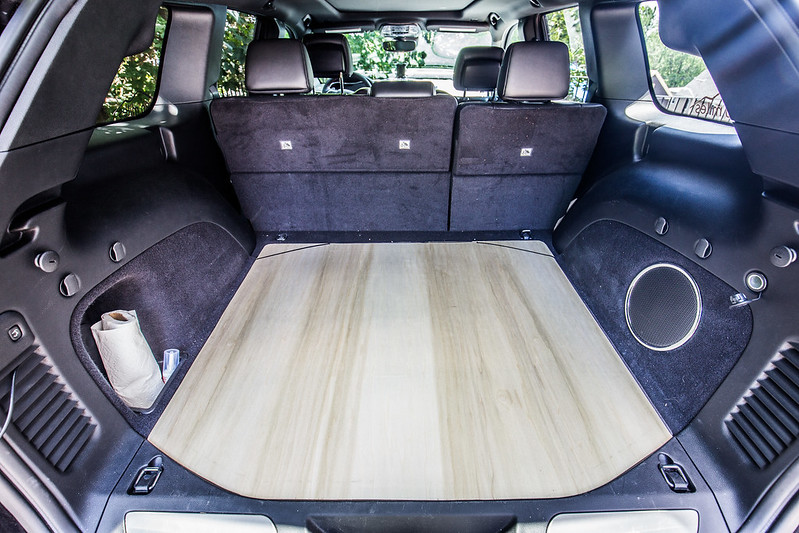 Test Fitment
 by
2180miles
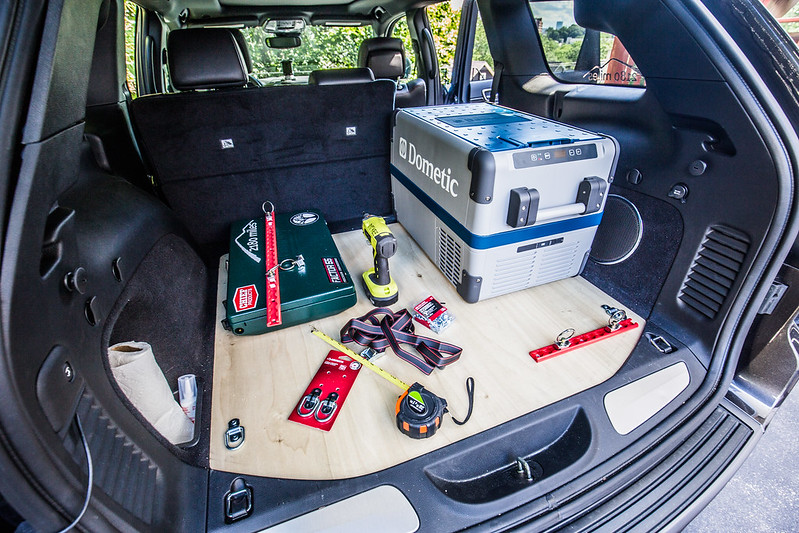 WK2 Trunk Deck Layout Test
 by
2180miles
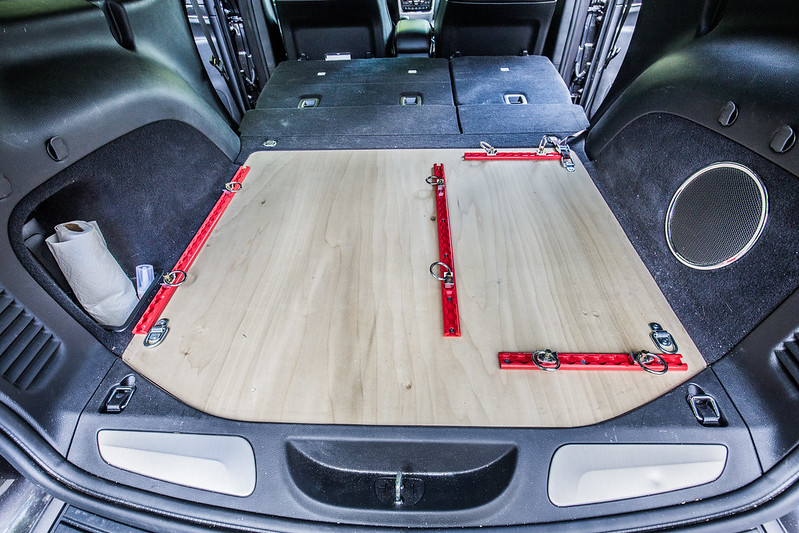 Hardware Fastened
 by
2180miles
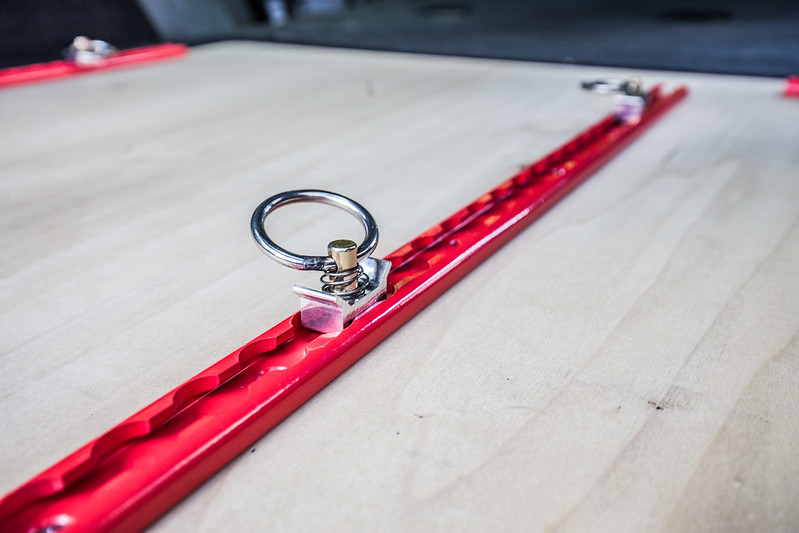 Airline Fastener Rails
 by
2180miles
I ran power for the fridge through the trunk trim and down to my auxiliary control box under the rear bench, and it functioned absolutely flawlessly during our trip. I had hesitated initially to drop the cash on it, but cannot imagine doing what we did without having the Dometic for fruit, veggies, meats, cheeses, and the occasional cold hard cider. The Pelican cases would move an inch or two over the course of an overlanding day, but the occasional yank on their straps would fix that for a few hours. The fridge never moved an inch, and ran 24/7 from a few days before our departure until I thawed it out upon arriving back in Boston. For the $110 investment into a solid way to secure things down, this plan worked perfectly for both my Trailhawk and Shaun’s Summit.
The final photo below is how the Jeep looked fully loaded, the morning we departed for the QB-5 Overland Adventure in Ontario/Quebec back in July.
 Dometic Test Fit 2
 by
2180miles
 Loaded & Strapped Down
 by
2180miles

