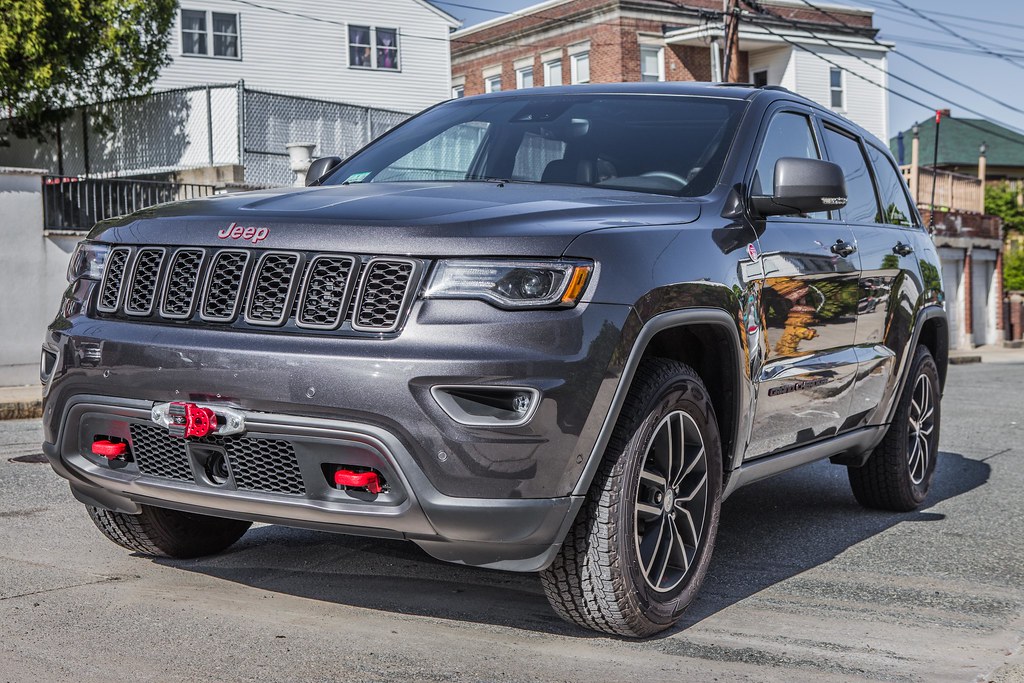
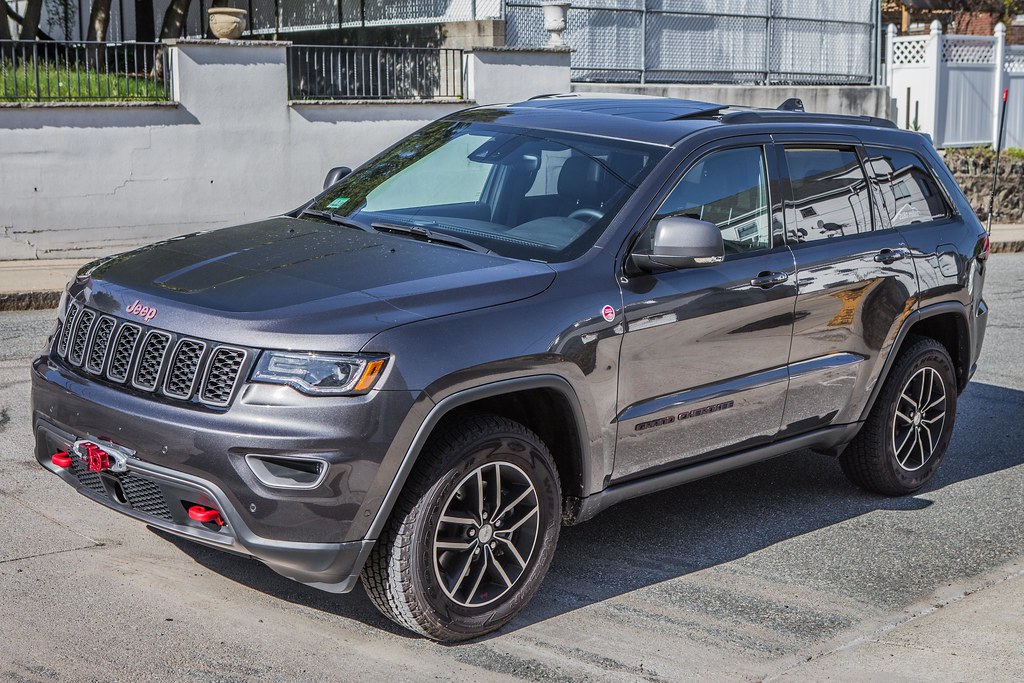
Halley - '17 WK2 Trailhawk Overland Build

2180miles

Endurance Adventuring
Continuing with the switch panel install…

I apologize in advance for some of the photos seeming blurry, I was shooting this outside, handheld, with a very narrow depth of field to avoid a high/grainy ISO, and had nowhere to really bounce the flash off of in these tight spaces. I know most of you won’t care, but for the photographers in us, I wanted to preface by saying I know there’s a lot of unintentional bohek/obvious DoF.

Next up came the actual dash install of the switches. This part was a bit unnerving, as removing the knee air bag panel from under the steering column required the removal of a fair bit of parts, and the FSM’s Interior Panel Removal section wasn’t really great at depicting exactly what I needed. I took a ton of photos for you to see, but I’ll detail this a bit more.
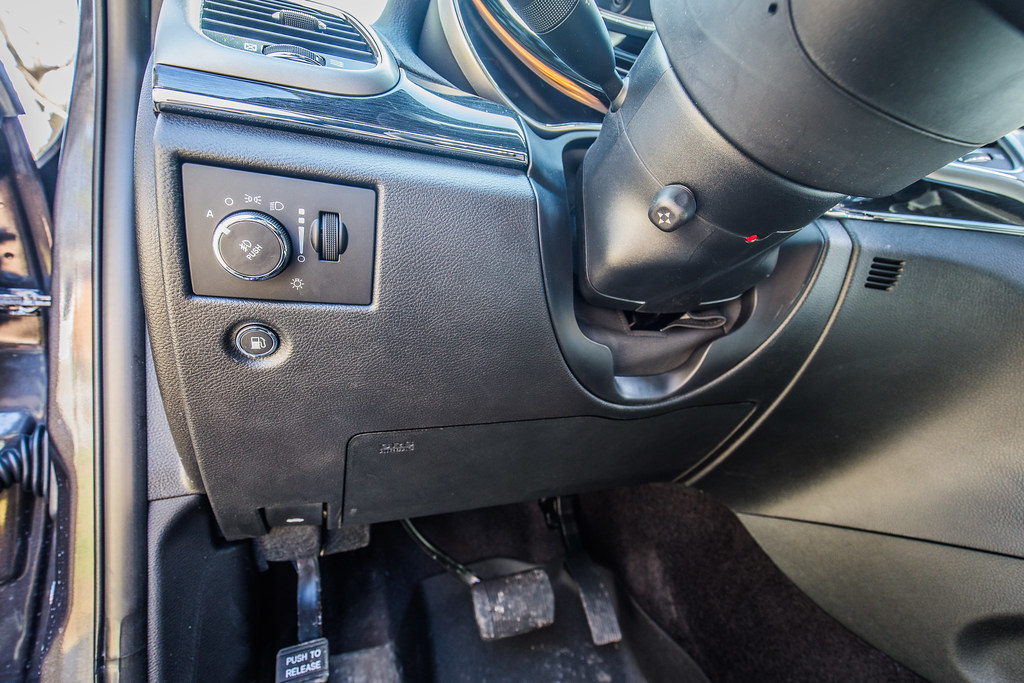

WK2 Lower Steering Column by 2180miles
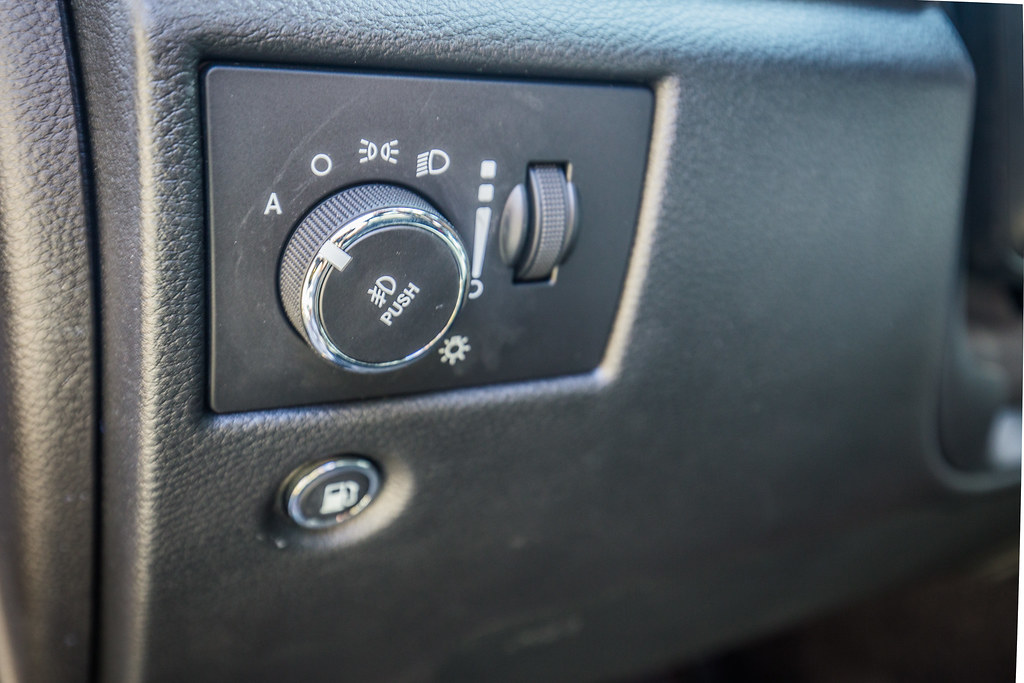

WK2 Left Headlight Panel by 2180miles
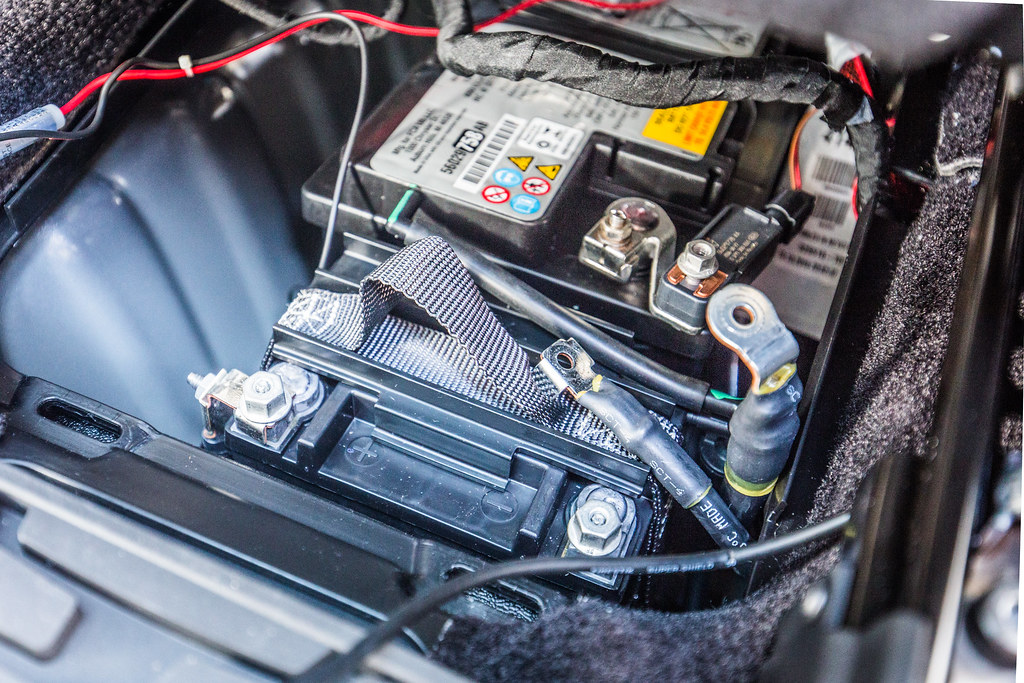

Battery Disconnect by 2180miles

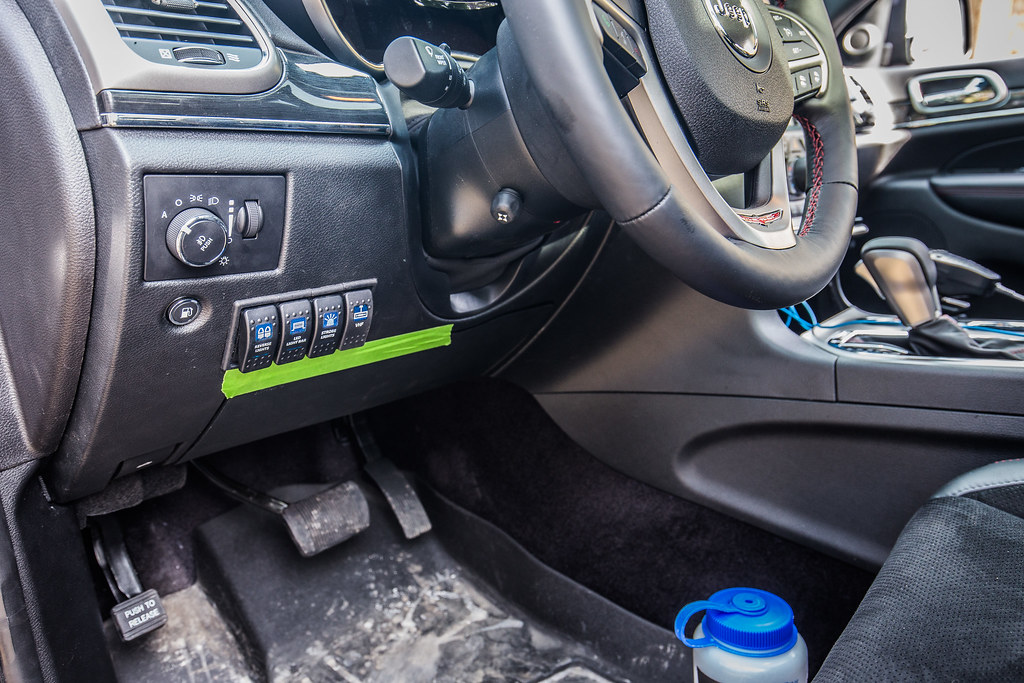
You can see the panel in the photos above that I’ll be working with, and the approximate area the switches will go into, below and to the right of the headlight selector switch and fuel tank door switch. *** DISCONNECT THE BATTERY TERMINALS BEFORE DOING THIS AS THERE IS AN AIR BAG UNDER THE STEERING COLUMN IN SOME MODELS! ***

The required tools here are a ¼” socket set, a Phillips head screwdriver, and a small interior trim pry tool.

1. Pry off the plastic cover to the left of the dash, between the door and dashboard
2. Pry off the steering column surround bezel till it’s loose at the top of the wheel
3. Remove the Phillips head screw to the top left of the steering column
4. Pry back the upper left and right of the large trim piece that covers the lower steering column from where it meets the upper dashboard (there are a few retaining clips, the tool will help)
5. Remove the plastic pop rivets holding the rug piece over the gas/brake pedal
6. Underneath the dashboard, remove 4 Phillips head screws (they’re roughly highlighted in the photo below)
7. At this point you should be able to pull the upper piece of the trim far enough off the dash to remove the airbag trim piece from around the airbag itself.
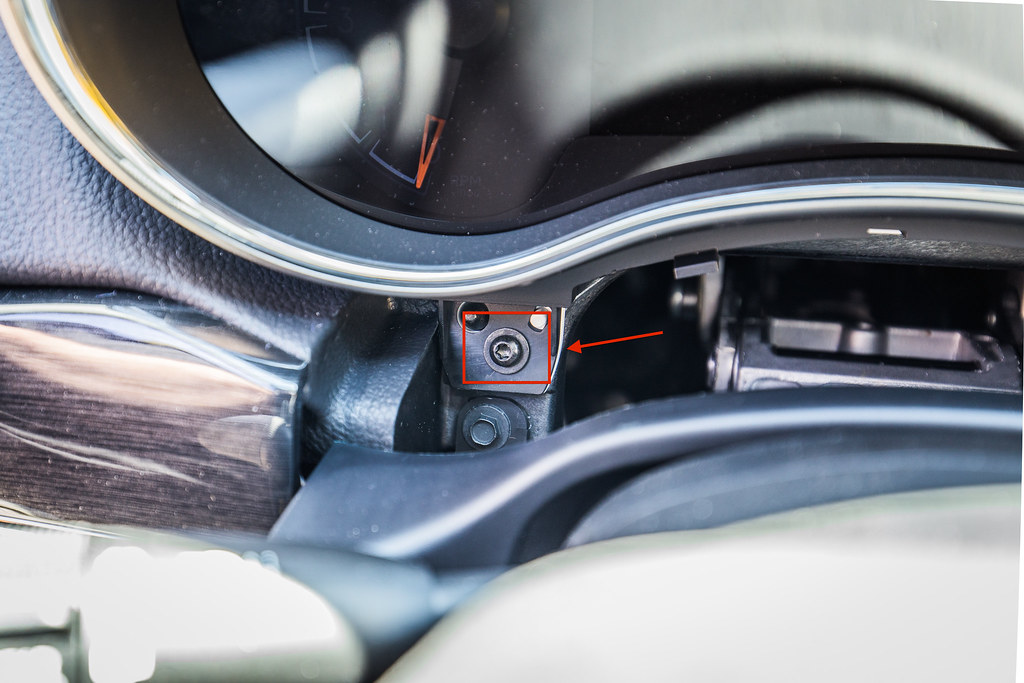


Lower Speedo Fastener Removal by 2180miles
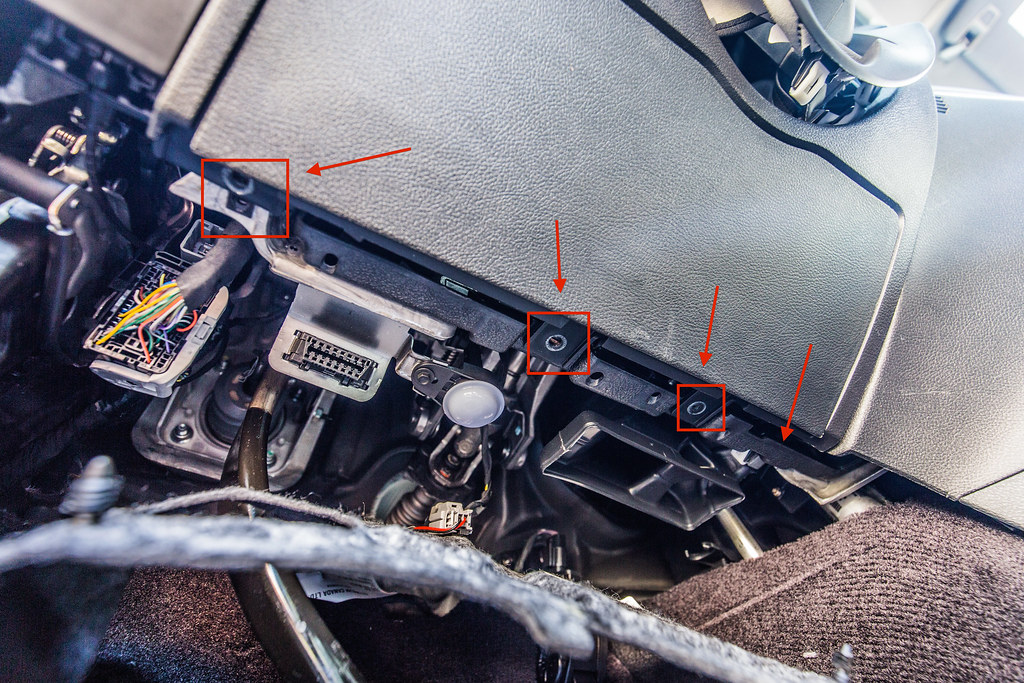

Under Steering Column Fastener Location by 2180miles


At this point you should be able to pull the upper piece of the trim far enough off the dash to remove the airbag trim piece from around the airbag itself. If you do have the airbag, you might struggle here. I decided against removing the airbag itself, and instead just removed that trim, but only after I made the mistake of trying to remove the air bag panel with the pry tool (you’ll see tape in the last photos, I have to re-glue it back together……)

Once I got that done I was able to pull the panel forward and down enough to access the left side, removing the wiring harnesses from the fuel door button and headlight selector. I removed the headlight panel completely in order to better get the Dremel tool in there for trimming.
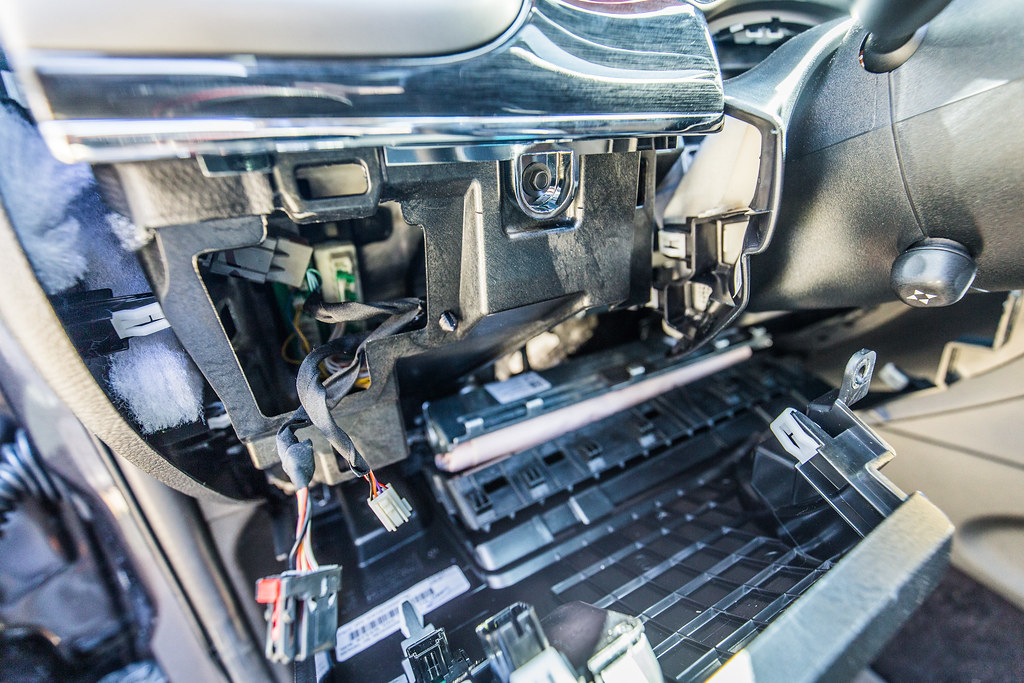


Removing Steering Column by 2180miles


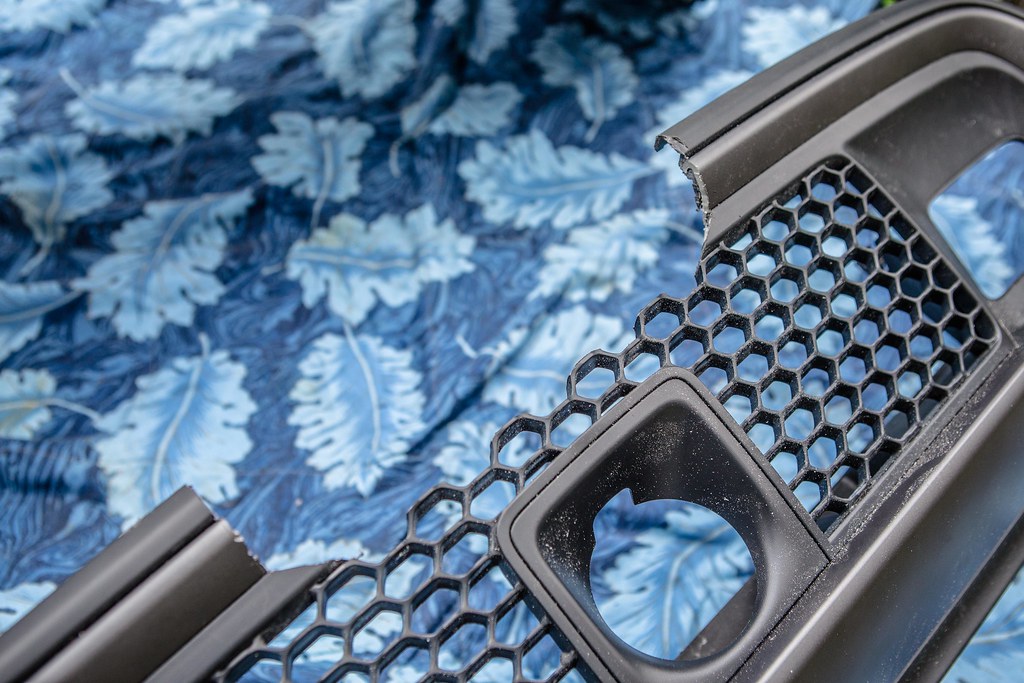
After measuring the switch panel and comparing it to the rear support plastic behind the dash panel, I cut out an appropriate section to fit the depth of the switch into the dashboard. After that came making the template for the switch assembly itself, and then taping off the region in the panel in which I’d cut the hole. This was the most nerve-wracking part of the project, as I wanted to make sure that if anything, I undercut the hole so that I wasn’t trying to fill any extra space in if I cut it too large. With the painter’s tape in place, I used the honeycomb print in the dash plastic to make sure the Dremel cut was level and even.
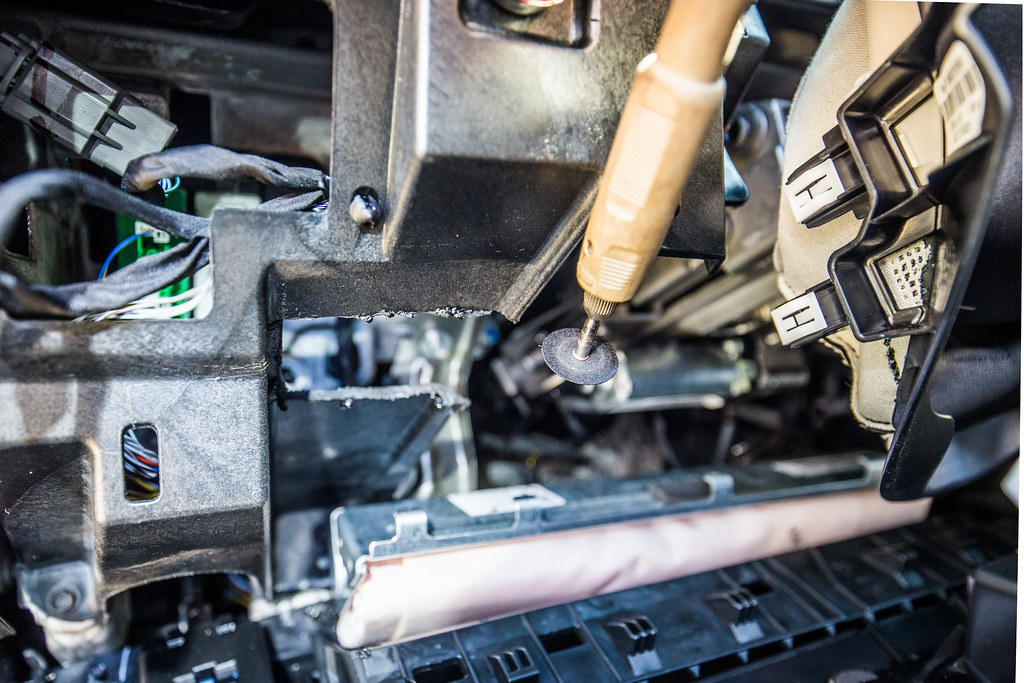


Cutting Dashboard Trim by 2180miles
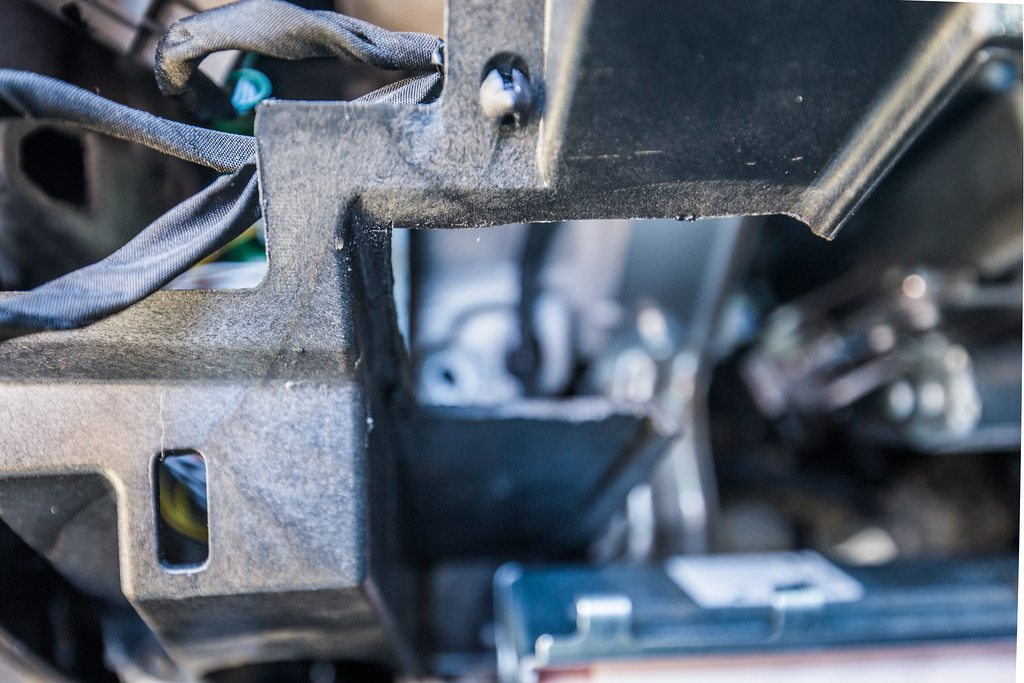

Trimmed/Cleaned Up by 2180miles
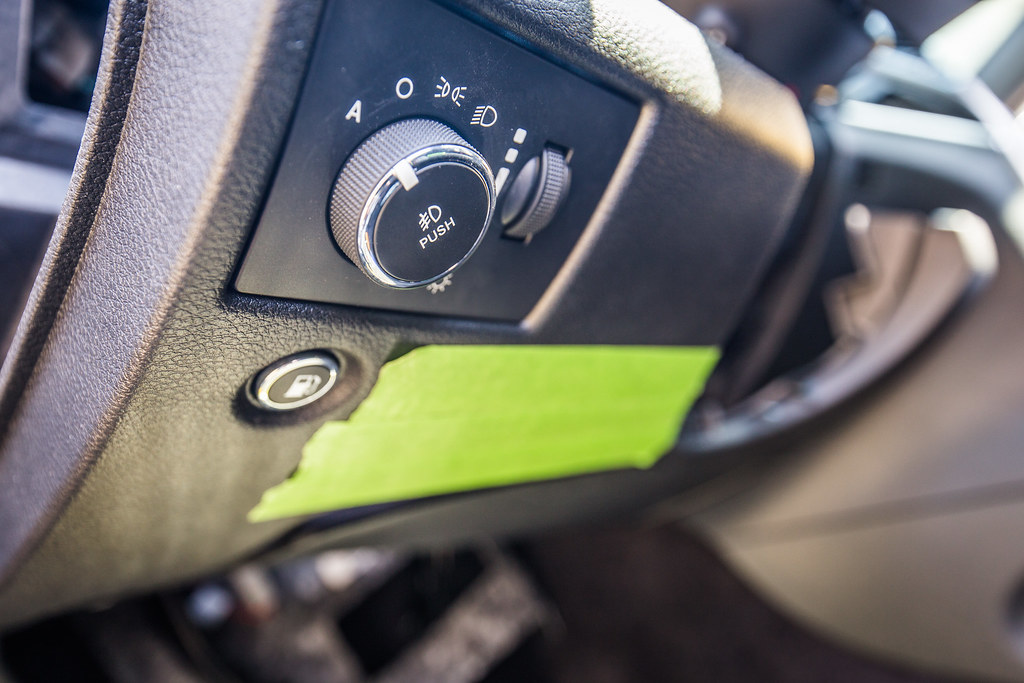

Steering Column Prep by 2180miles
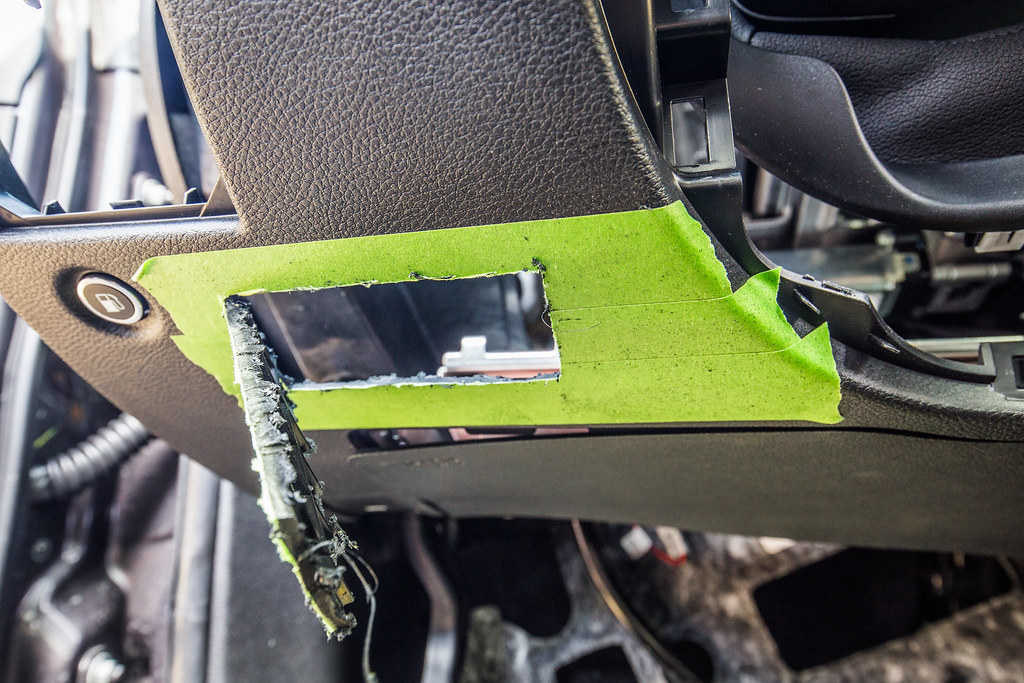

Mid-Cut by 2180miles
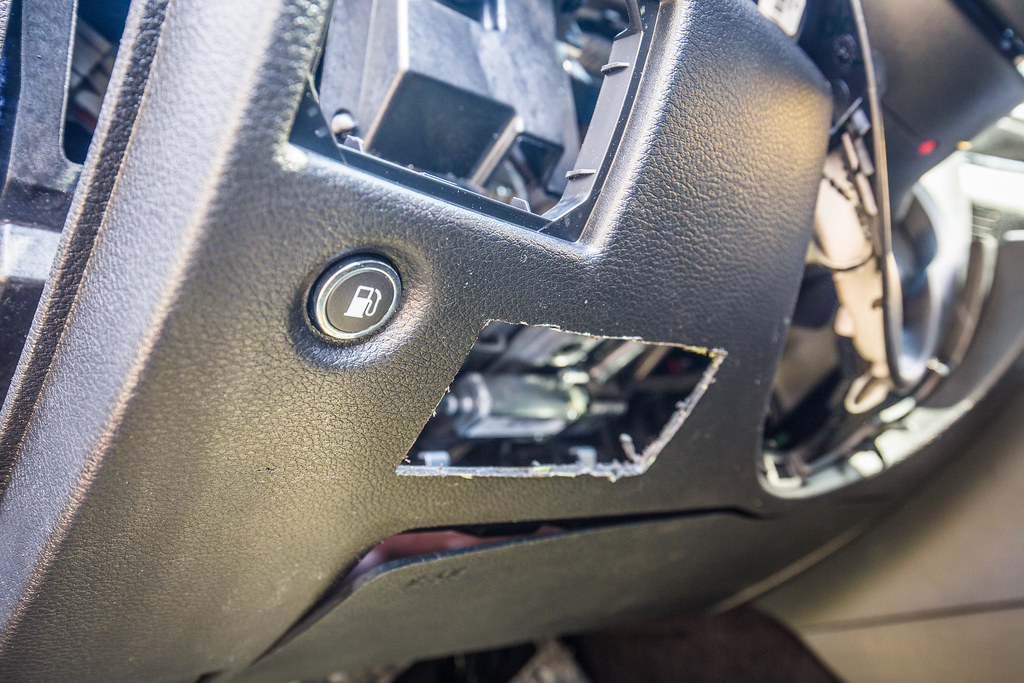

Final Steering Column Cut by 2180miles


After the 2”x4” hole was cut I used a file to get the edges even and less rough, then did a few test fittings to make sure the switch panel itself would fit exceptionally snugly, which it did after a couple adjustments to the plastic of the dash. At this point I ran the 7-strand sprinkler wire harness through the Jeep and began plugging the crimp connections onto the switch panel to create the final product, leaving the +12v lead for the ignition lights coiled above the dash panel for me to work with at a later date.
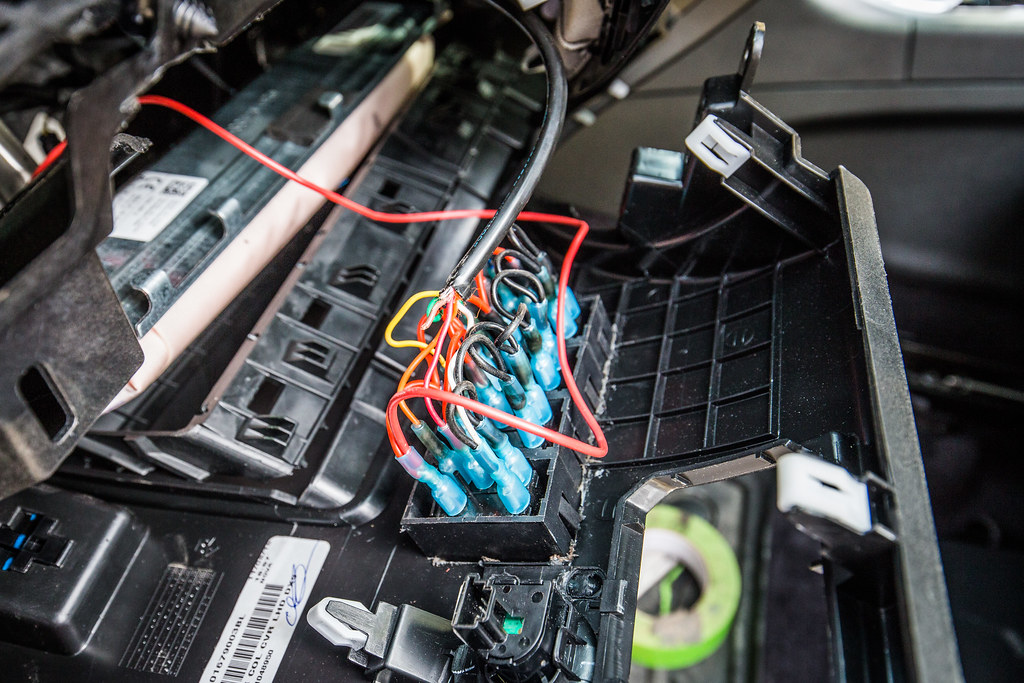

Switch Panel Placed - 1 by 2180miles
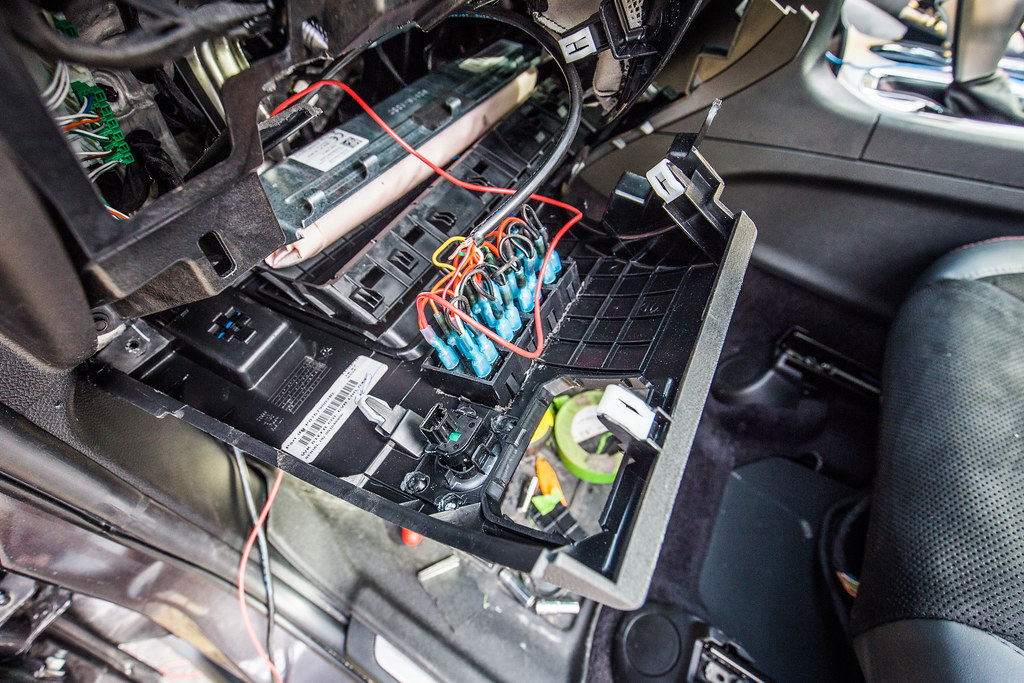

Switch Panel Placed - 2 by 2180miles


I reassembled the harnesses for the headlights and fuel tank, then began piecing the dashboard back together by reversing the above disassembly procedures. Once everything was back together (note the green tape on the air bag panel that I’ll glue back together), I ran the 18-7 wire harness through the trim pieces along the driver’s doorsill, back behind the B-Pillar, and up to the rear bench. I’ve yet to decide where the actual control box for this will live, so at the moment the remaining 10-feet of loom is spooled under the rear bench until I get around to the final assembly of the control box and relays.

So that’s that… the incredibly nervous process of putting a gigantic hole in the dashboard of a brand new vehicle. I don’t know how the XOverland guys do this all the time, but here I am one step closer to getting this Trailhawk to where I want it to be!

Final install pics once everything was re-assembled, which I’ll replace with newer images once the dash has been fixed.
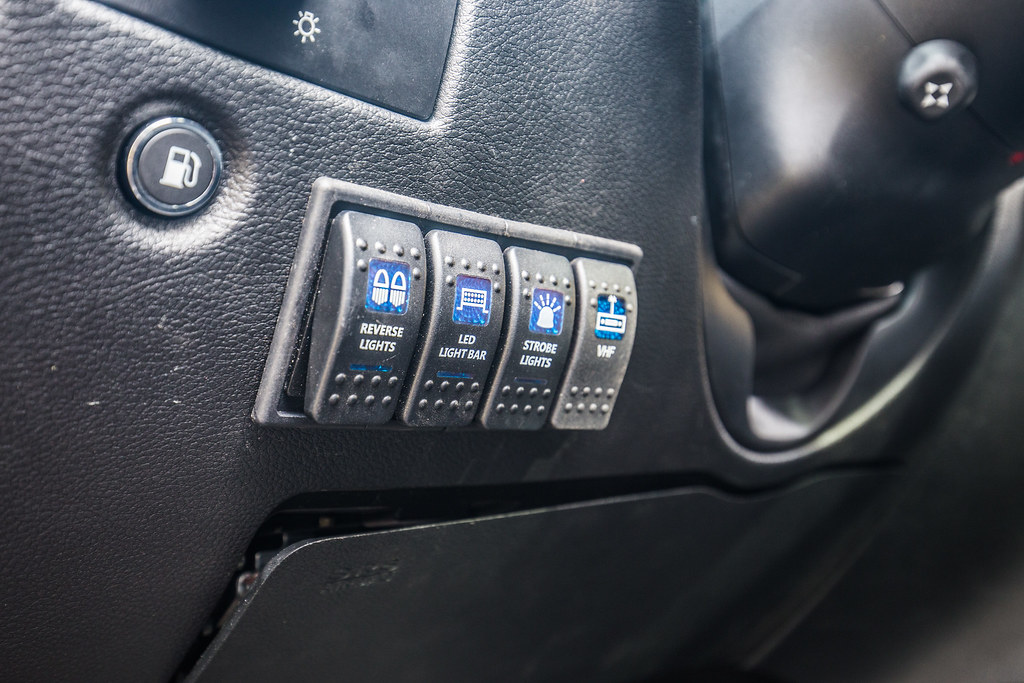


Switch Panel Installed by 2180miles

Wide Driver Compartment View by 2180miles


Switch Panel Installed by 2180miles, on Flickr
 
Last edited:

2180miles

Endurance Adventuring
Nice build, only non-wrangler I am following so far! Would love to talk to you about how you managed the sponsor pitch as I am currently about to start my 17' JKU build and am actually looking at the same winch! Have a blog and social following with plans to travel around Europe for at least a year or two before possibly vanlifing with it in the states when I get out of the service so I don't think it will be to hard to pitch but help is always better!

Clean build looking forward to where you take it and awesome blog as well!

Hey Thomas!

Thanks for reaching out.Glad to be the only non-Wrangler build you're following haha! Definitely not a lot of WK2 builds. Feel free to shoot me an e-mail, 2180miles@gmail.com, and we can chat about the sponsorships. thanks for the encouragement, look forward to seeing your JKU build and adventures!

Ryan
 

bbbflash

Observer
Hey Thomas!

Thanks for reaching out.Glad to be the only non-Wrangler build you're following haha! Definitely not a lot of WK2 builds. Feel free to shoot me an e-mail, 2180miles@gmail.com, and we can chat about the sponsorships. thanks for the encouragement, look forward to seeing your JKU build and adventures!

Ryan

Agreed. Not many GC expedition/overland builds around. I have a 04 GC CRD and am looking at getting another 13-15 when we find one that suits and tow our van. I'll then build up my 04. I met some of the boys from Chief Products at Camp Coffs this year. They do a lot with Michael at Jeep Action Magazine here in Australia. Great lot of guys. They are into Jeeps and Photography two of my three expensive hobbies and two of yours from the looks of your blog. Keep up the great work and I will be reading along.
 

Comanche Scott

Expedition Leader
Great details on the switch install. I like the switch surround plate. Makes for a nice clean look. :beer:

Being the "first" at this stuff can be nerve wracking. Way to jump in and "just do it!"
 

rob cote

King in the Northeast
Switch install looks great! You're definitely in charge of wiring detail when I get around to adding some circuits to the truck.
 

2180miles

Endurance Adventuring
Great details on the switch install. I like the switch surround plate. Makes for a nice clean look. :beer:

Being the "first" at this stuff can be nerve wracking. Way to jump in and "just do it!"

Hey Scott-

Thanks for the compliment! I do try and go heavy on the details and photographs in hopes that if someone else follows up behind me they have enough detail to get a project done comfortably. It's definitely a bit scary to delve into these projects the first time and figure it out as I go... appreciate the encouragement.


what's that gas button for? is there a reserve tank?

As noted, it's the gas tank door opener. The OEM tank is 24.5 gallons (maybe 24, I forget exactly) and is comprised of two separate tanks under each rear door on driver and passenger side.


Switch install looks great! You're definitely in charge of wiring detail when I get around to adding some circuits to the truck.

Thanks for your help brother... and yeah once we get the fixture and equipment placement figured out we're definitely going to make the trailer and truck clean!
 

2180miles

Endurance Adventuring
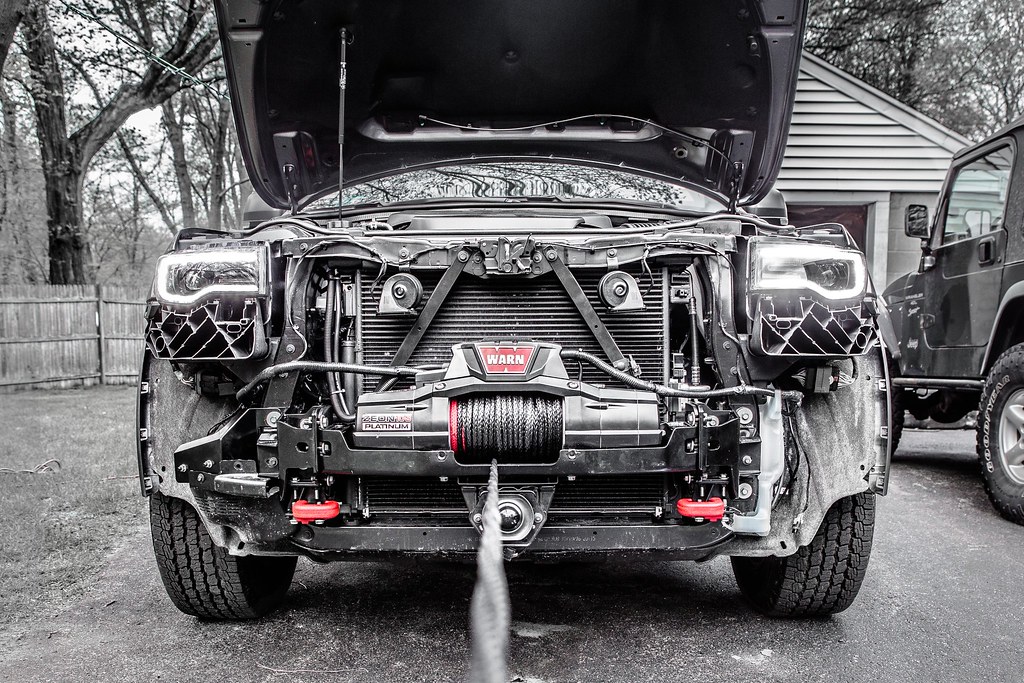
So after a quick trip to Italy last week, I came home and finally got to install the Warn Zeon Platinum 10-S on the Chief Products Hidden Winch System in the WK2. My buddy Rob and I spent about 10 hours total on the installation split between two nights, with a lot of the time taken up simply because we were doing this for the first time, taking a LOT of photos, and making notes for the team at Chief Products for their refinement of the product in 2017 / Trailhawk model Grand Cherokees.

I just finished editing the photos, and now Rob and I are going to begin the process of a write-up, which I'll be posting when we finish. For now, I thought I'd leave a teaser picture.

More to come...


Chief Products/Warn Install Teaser by 2180miles
 

2180miles

Endurance Adventuring
At the beginning of the month, over the course of two afternoons and evenings, my buddy Rob and I dove into the installation of the Chief Products Hidden Winch system in the front end of my WK2 Grand Cherokee Trailhawk. I had been speaking with Bill Mackin, the owner of Australia-based Chief Products, since the beginning of March in regards to getting one of their mounts test-fitted in a 2017 Grand Cherokee to see what kind of adjustments, if any, would need to be made for the new generation grills and front-ends. I reached out to Warn to inquire as to sponsorships for a winch, and after speaking with someone from their Sponsorship team, was offered a steep discount on the 10-S Platinum for installation on the Trailhawk.

*It's important to note that this installation is not representative the Chief Products final version of the Hidden Winch system, as they were still getting information from me about what does and does not work with the 2017 GC model I installed it on. This is especially important as it pertains to fitment and trimming. As of my writing this they're reviewing the notes/write-up and seeing what changes may need to be made to the assembly*

-----

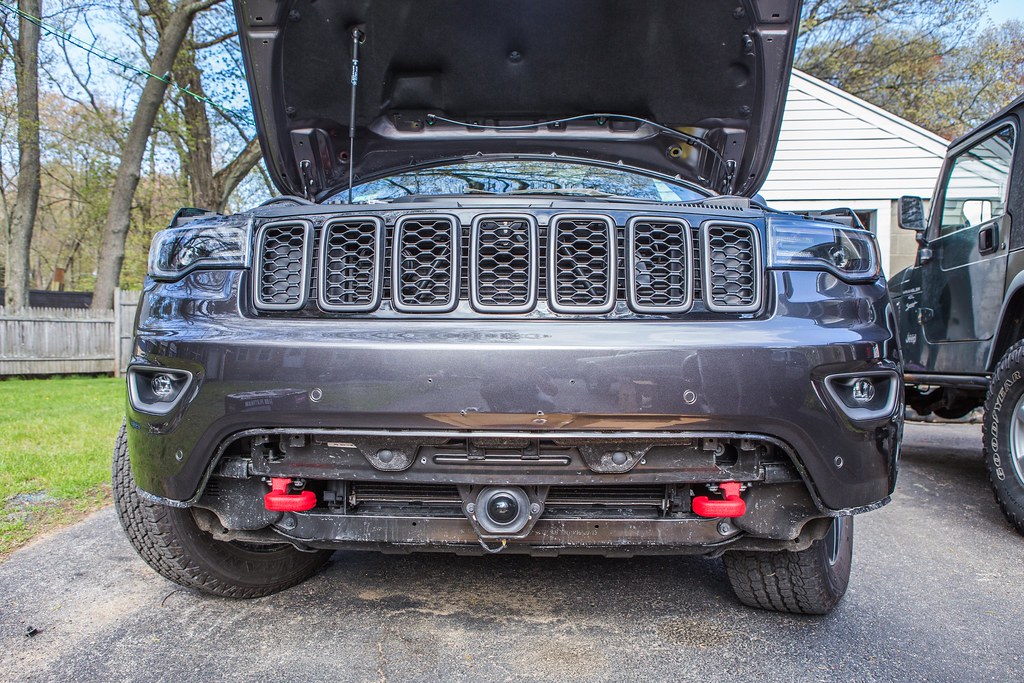
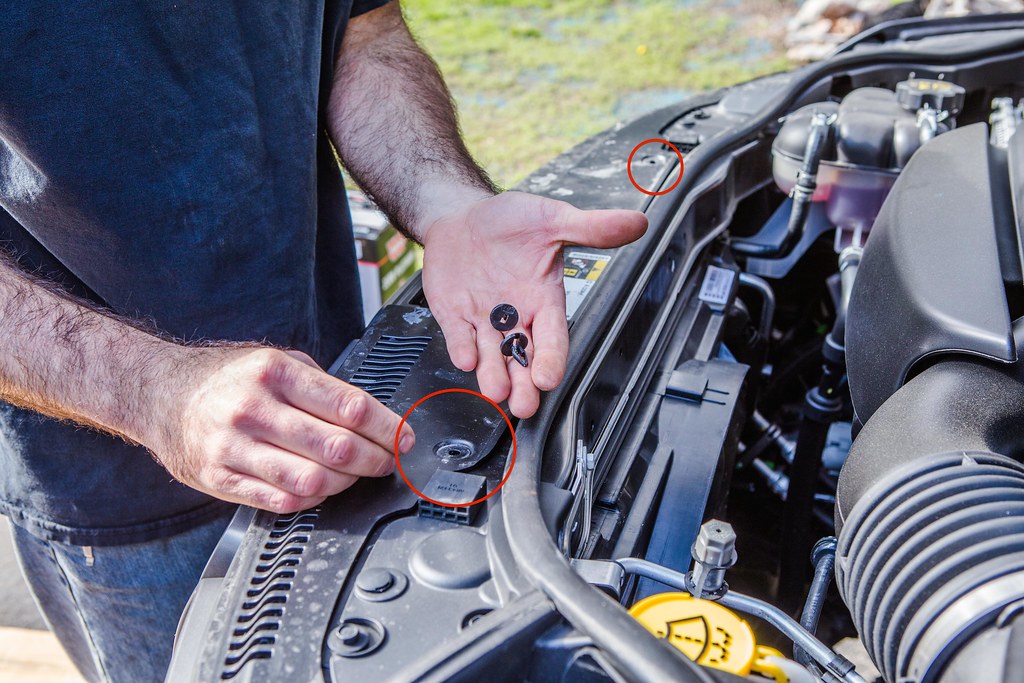
Having never taken the front end off of the Jeep before, and being used to the much more accessible front end of a Wrangler, I did some research as to what went into taking the lower fascia and the upper bumper off. Chief Products had a good write-up for the fascia, and a quick YouTube video showed how simple it was to remove the bumper… we were in business. It's easy enough, with a few quarter-turn screws under the fascia, two plastic rivets per side in the wheel well, the fascia then pops off from the bumper. The bumper itself requires removing a small hex-head nut in each wheel well, and two small plastic rivets along the top of the radiator brace bar.

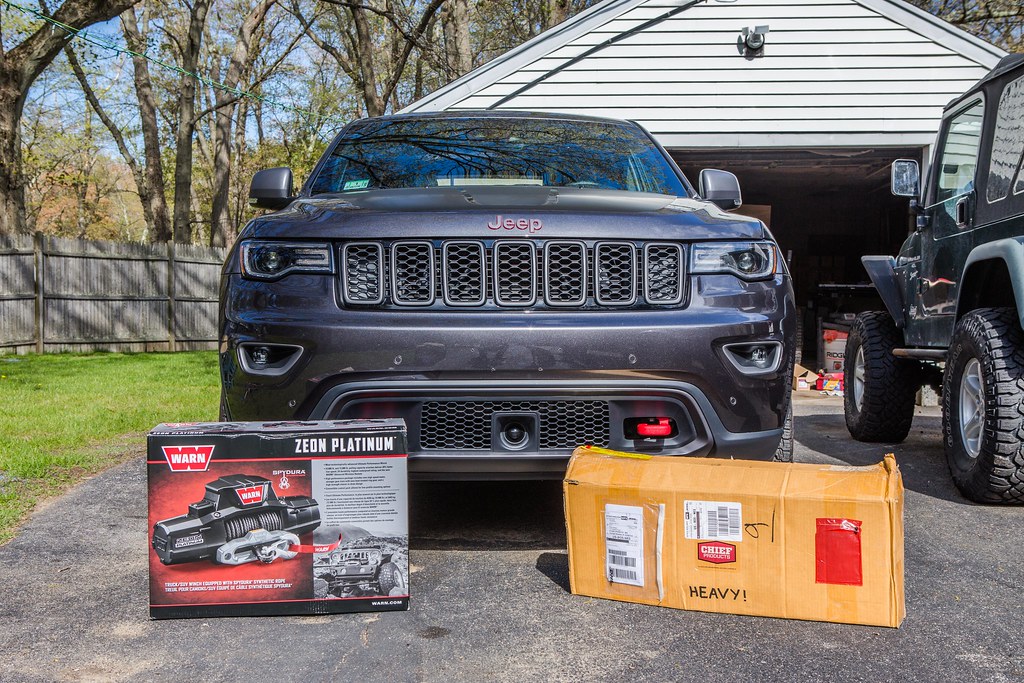
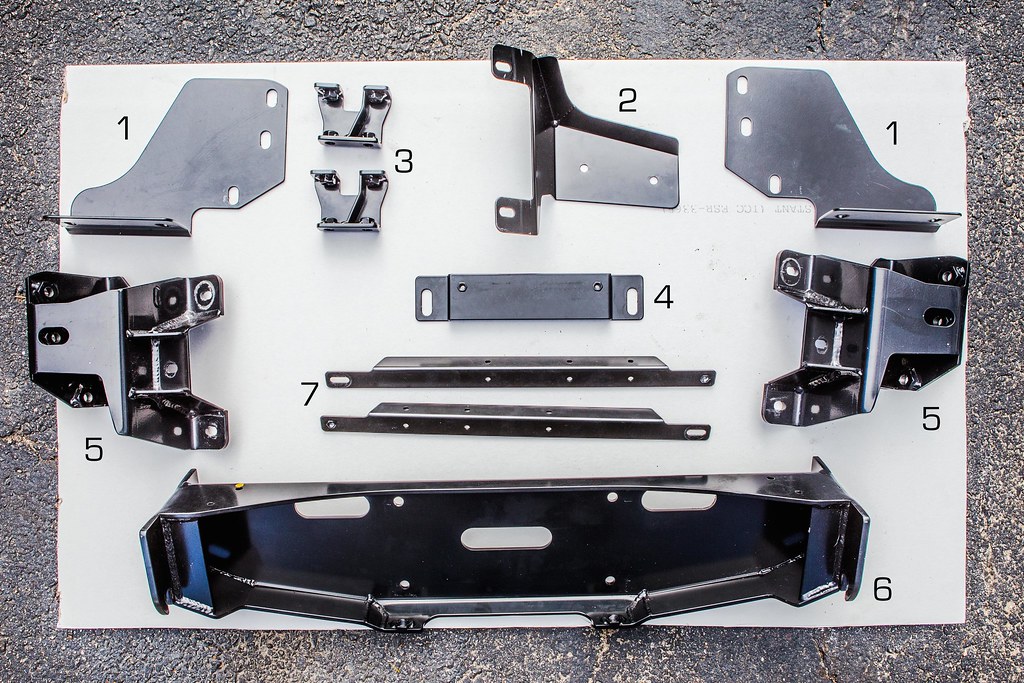
We decided to do the installation at Rob's house, as I'm still in the process of getting my garage at home organized enough and he has a large driveway that easily accommodated our needs. I opened the shipping boxes and laid out our components on an old section of drywall he had in the shop, and we took inventory of what we had to work with.


Chief Products & Warn Zeon Platinum by 2180miles


Chief Products Parts List by 2180miles

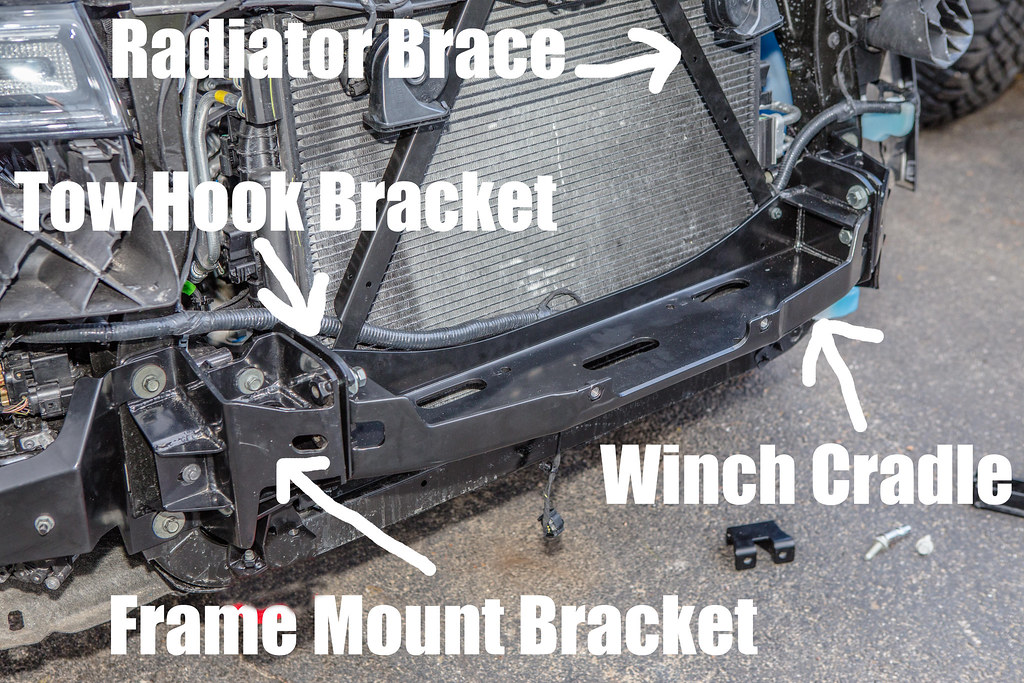
1. Left & right tow hook mounting bracket
2. Air compressor guard bracket
3. Left & right tow hook spacers
4. ACC camera mount bracket
5. Left & right frame mount brackets
6. Winch cradle
7. Left & Right radiator brace brackets


Lower Fascia Removal by 2180miles


Upper Bumper Fastener Removal by 2180miles


Bumper & Fascia by 2180miles


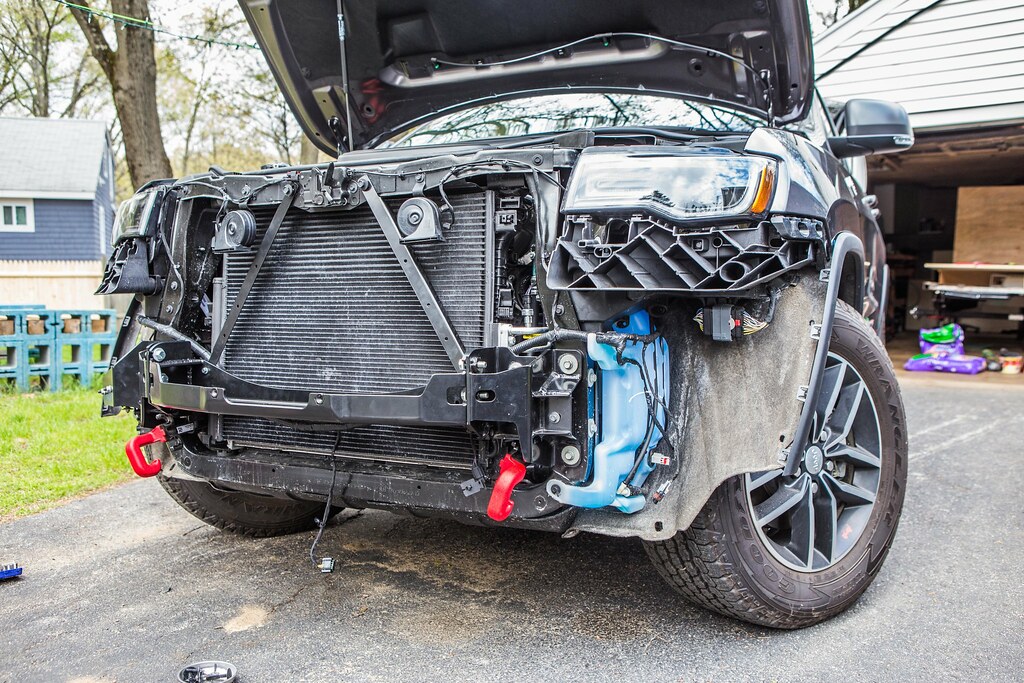
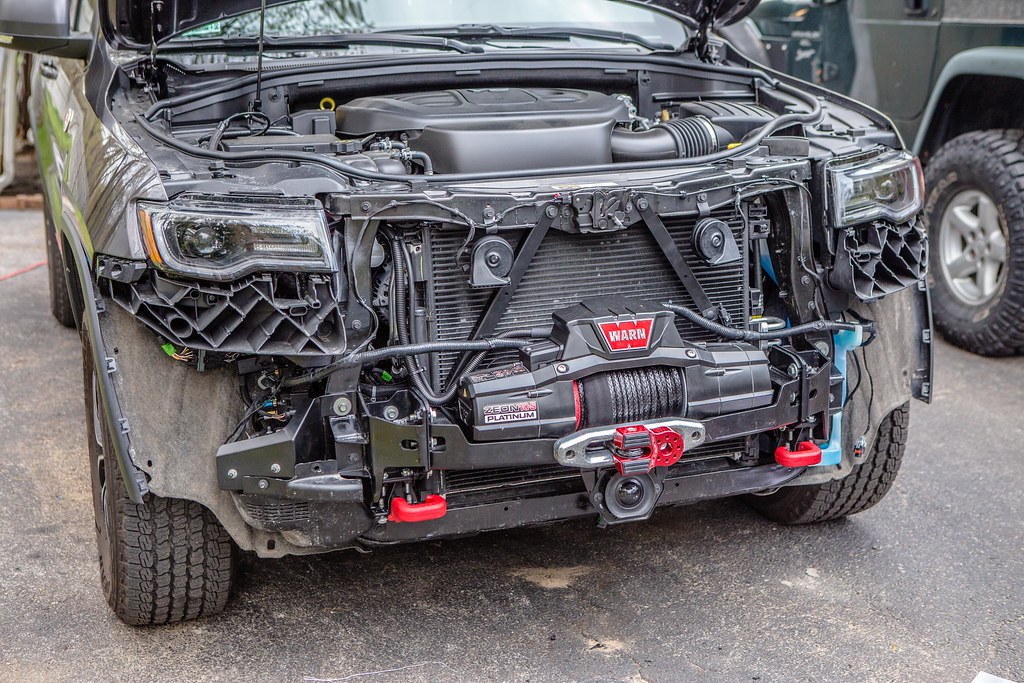
Front End Removed by 2180miles

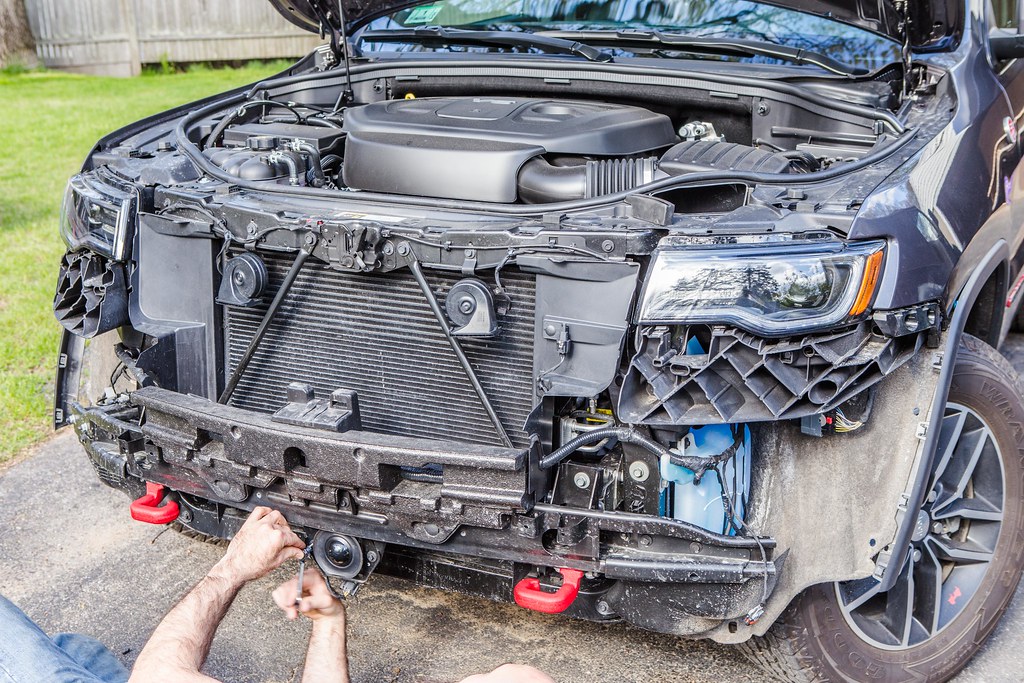
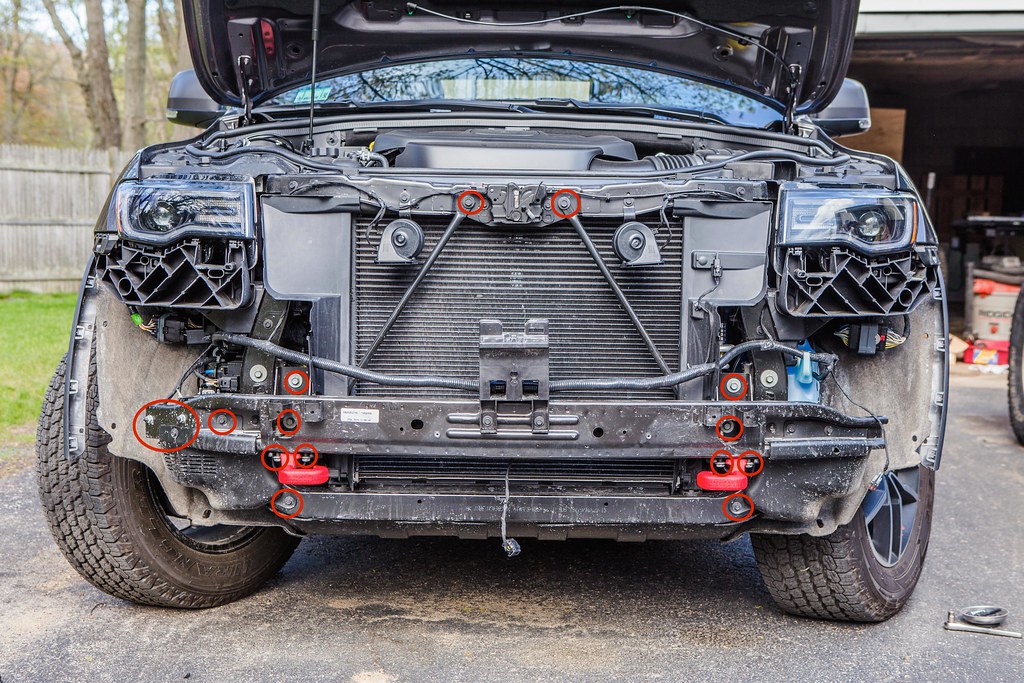
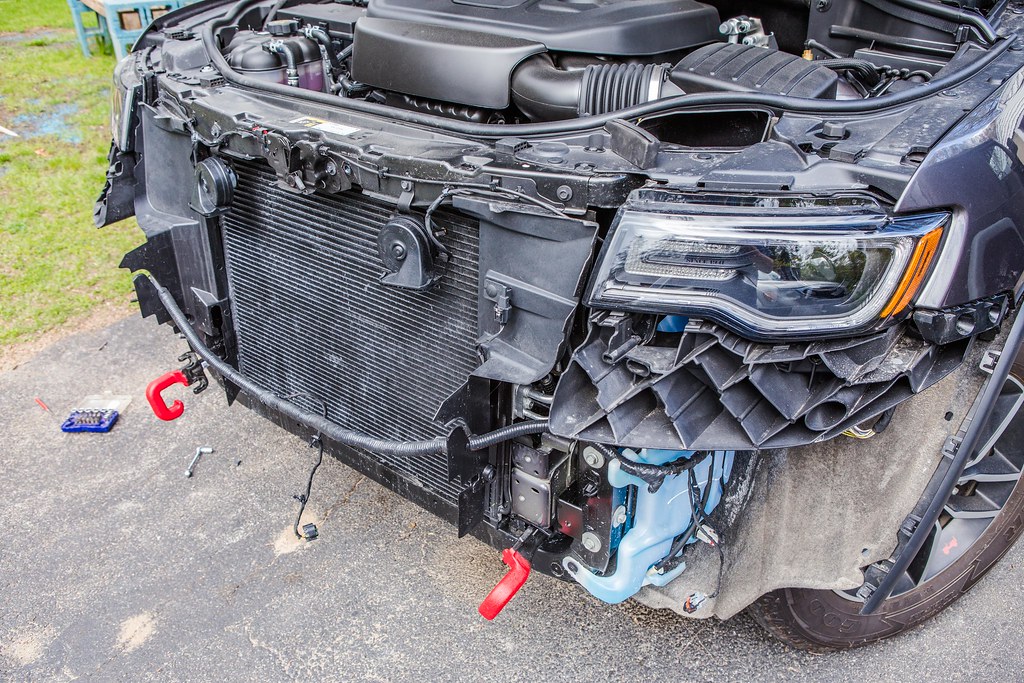
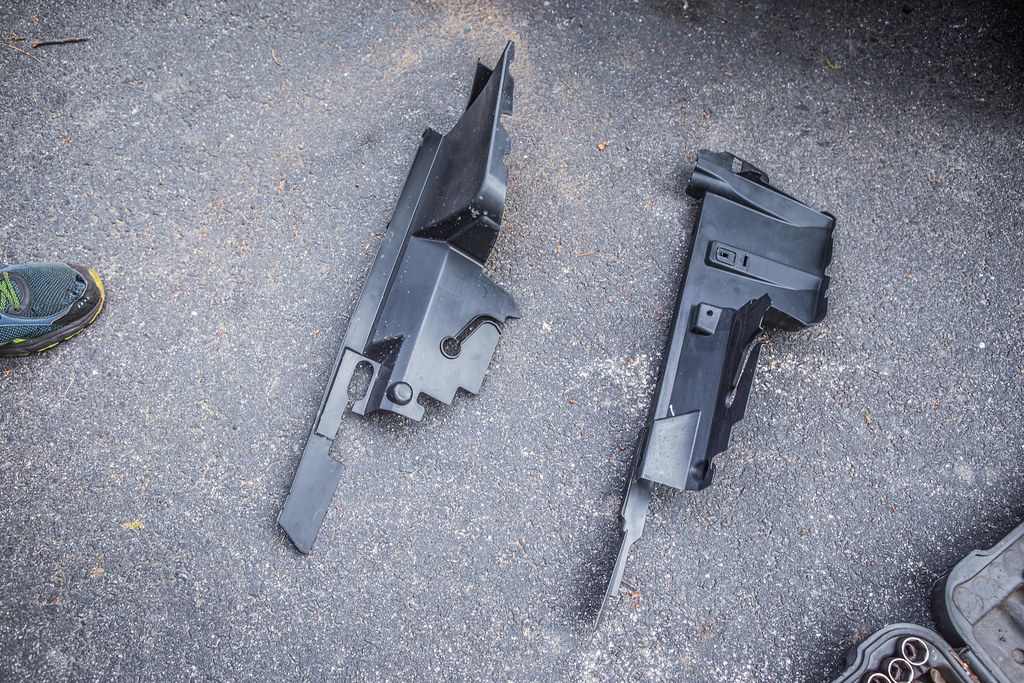
From there we disconnected the ACC camera via the two fasteners that hold it to the bottom of the OEM bumper. There's a small wiring harness that needs to be unclipped, then it was placed to the side well out of harms way (I don't want to know how much that camera costs). We then went about removing all of the fasteners that hold the OEM bumper to the Jeep itself, as highlighted by the red circles in the photo below. With the Styrofoam bar and metal backing removed, we took off the plastic protecting pieces from the air suspension system and the windshield washer fluid reservoir. Last to do here was remove the air duct pieces from in front of the radiator, and move the wiring looms as far out of the way as possible for access to the front end.

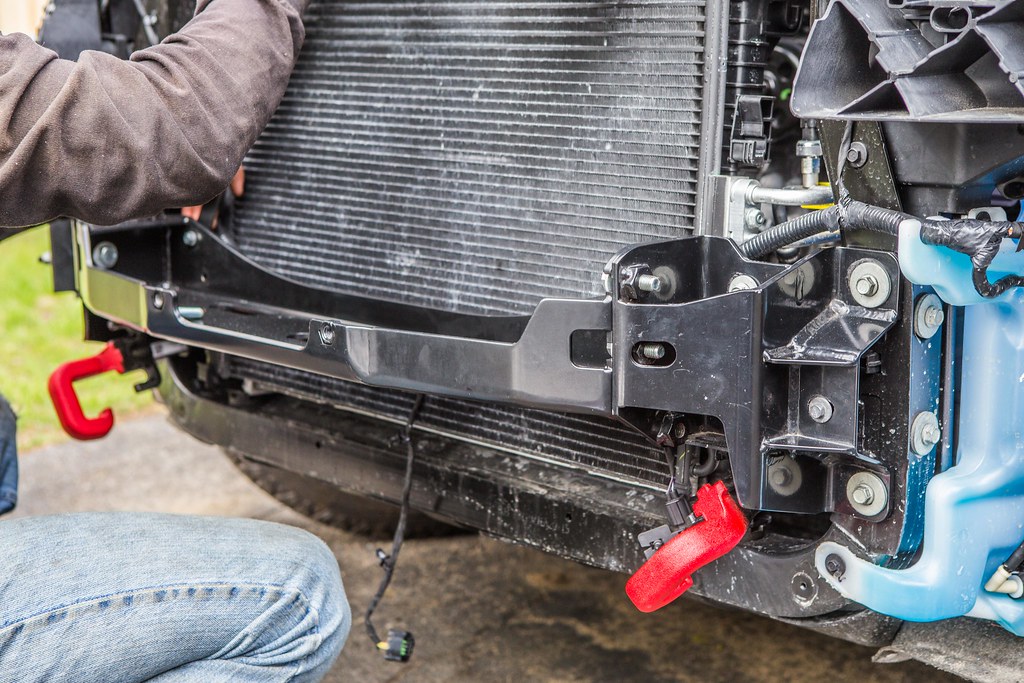
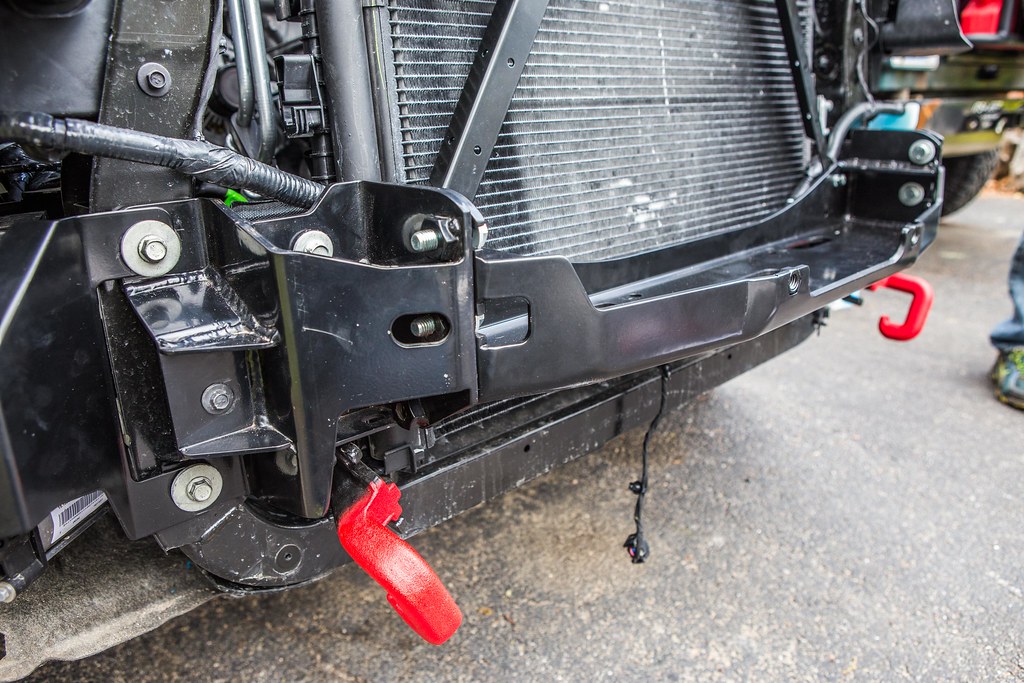
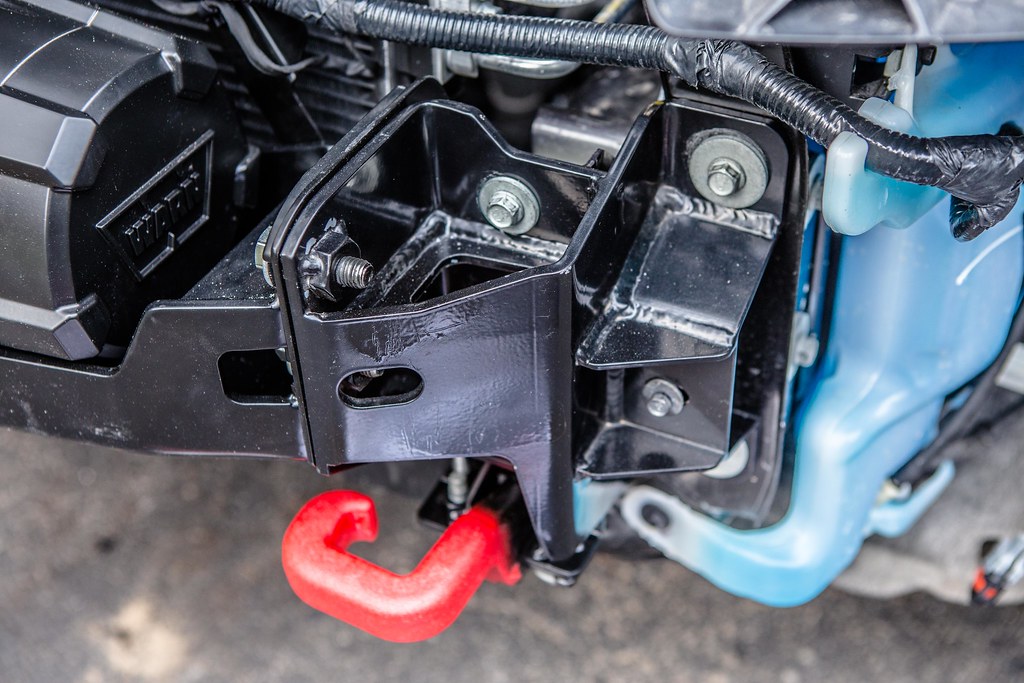
The majority of the Chief Products Hidden Winch system is comprised of 3 main pieces (comprised of 5 individual parts). The winch cradle spans the mid-section in front of the radiator, and holds the winch in place. There are two frame mount brackets, one for each side, and finally two tow-hook mounting brackets that sandwich between the cradle and frame brackets. By starting with the frame brackets, installing the mounting fasteners without tightening down, we were able to then install the tow hook pieces and the winch cradle without issue, putting the hardware in to hold the entire assembly together while we figured out how the other pieces assembled.

This was getting towards the end of our first day (night, actually… we were working by the light of the flood light in the driveway) and we were both pretty tired. We struggled for a while with the tow hooks before I called Bill at Chief Products and asked him if we were missing something. In hind sight, had we played around a bit more with the pieces we would have realized that the OEM tow hooks need to be swapped to the opposite side of their original installation location, and flipped over to work with the new brackets. Laymen's terms: move the driver hook to the passenger side, passenger hook to the driver side, flip 180 degrees, and install to Chief Products tow hook spacers.

At that point we called it a night, put the front bumper and ACC camera back on without the lower fascia, and I drove home without incident or any pieces falling off.


Fasteners to Remove by 2180miles


OEM Bumper Removed by 2180miles


OEM Air Ducts Removed by 2180miles


Chief Products Cradle Installation by 2180miles


Chief Products Cradle by 2180miles


Cradle with Tow hooks by 2180miles
 
Last edited:
2180miles

Endurance Adventuring
When we picked up on day 2, we were determined to finish the project before it got late again. It was around 16h00 by the time Rob got home from work and we got started, but we made solid progress as the sun made its way across the sky.

Now that the tow hooks had been figured out, we were able to move forward with tightening the entire Hidden Winch system down, and began the process of test-fitting the OEM Trailhawk bumper. In comparing it with the Limited / Overland / Laredo bumpers it seems that the grills is much more sloped back. I can’t comment specifically because I do not own any of the other models, but I do know that the guy who installed my clear bra on the WK2 made a comment about it being different from any other grille he’d ever seen. As such, Bill and his team were intrigued to know whether or not this system would work on the new model.

As we re-installed the bumper and fascia, we noticed that there were parts of the winch cradle that were pushing out against the both trim pieces, to the point where they would not fit back into place. We looked at our options for trimming the back side of each piece, and “modified” the bumper by bending the mounting tabs for the parking sensor looms upwards, essentially lightly breaking them to alleviate some rubbing on the winch cradle. The cradle is fit with 6 mounting points for the bolts that attach to the frame mount brackets, with each of those 6 points being U shaped, opening towards the front of the Jeep. Due to the space in the U-shapes, Rob and I decided to push the entire cradle backwards ½” or so to fit better behind the bumper and fascia. In talking to Bill at Chief, their 2015 model did not have room in front of the radiator to move back the way that we were able to in the 2017.

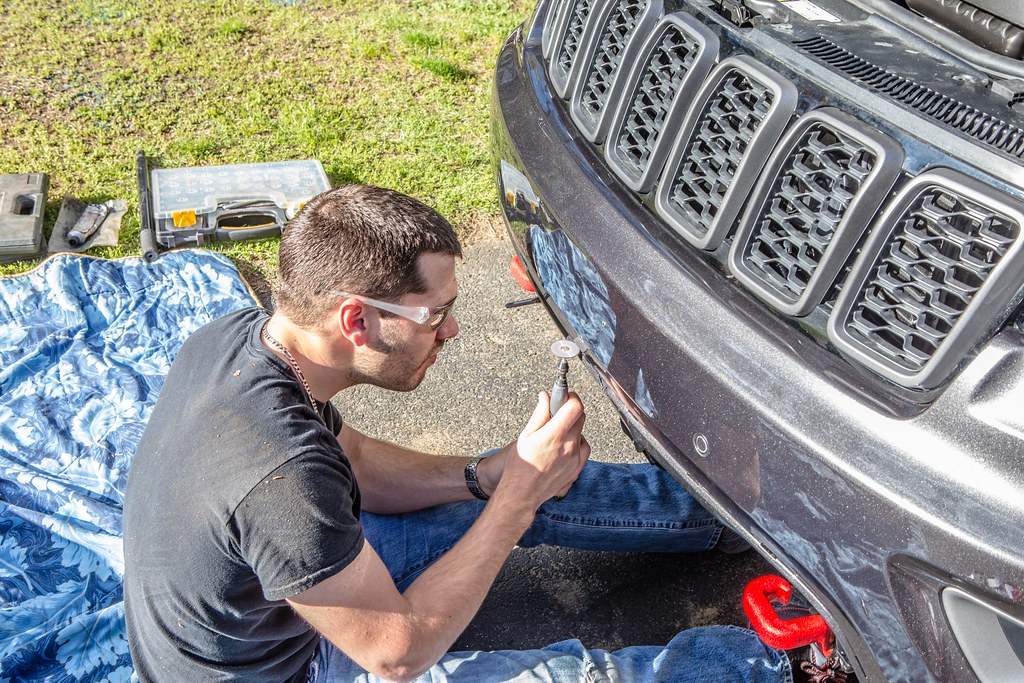
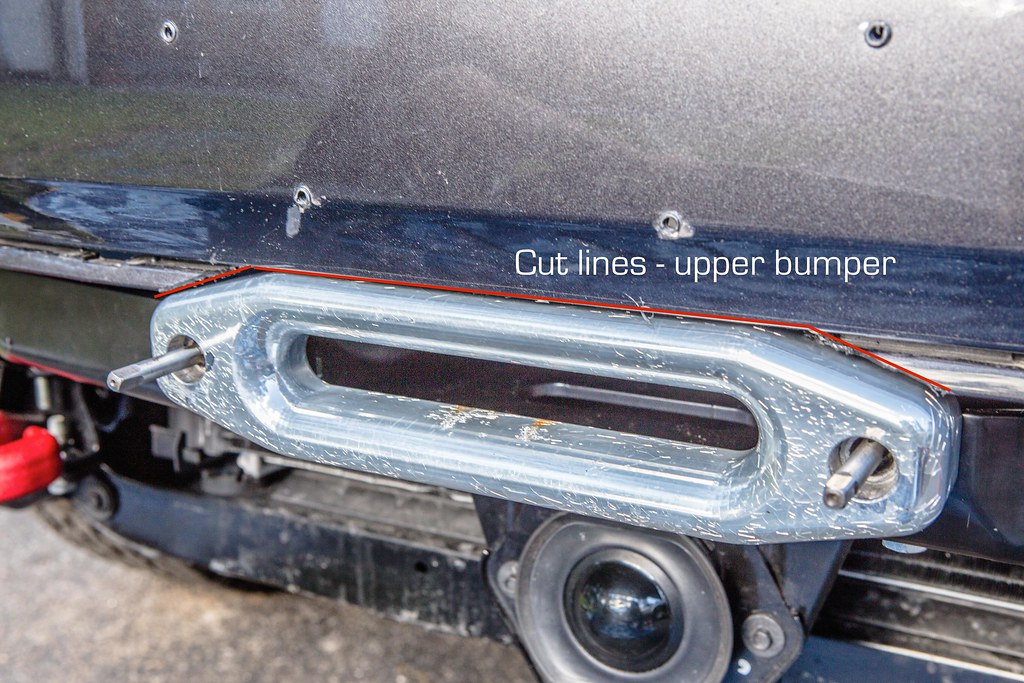
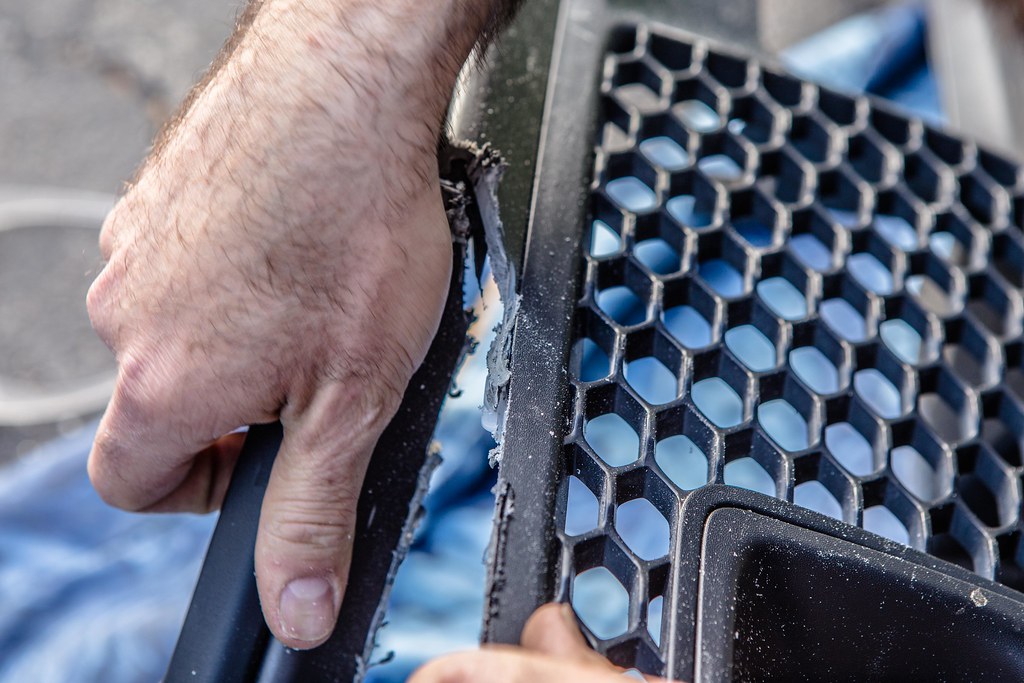
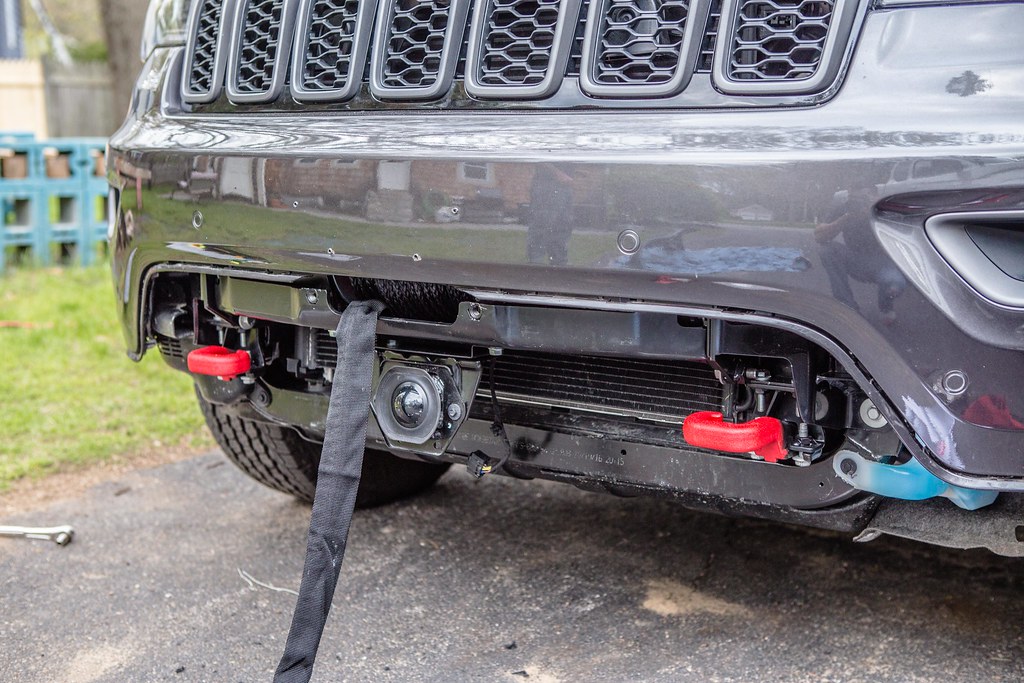
Once it was pushed back, we re-installed the bumper without issue, and popped the fascia back in as well. Knowing it would all fit, we turned our sights towards trimming out space for the fairlead to rest against the winch cradle mounting points. Initially, I was under the impression that this would be alike the other Rocky Road winch mount, with the fairlead being in the middle of the bumper by the license plate bracket. To my delight, it barely touched the bumper, and instead the majority of trimming came out of the fascia. I made a small cut, maybe ½” tall into the bottom most portion of the bumper itself, and then went to work tracing the fairlead to the fascia. When they have a final fairlead design, Chief will include a template for future installers to use when making their cuts.


Chief Products Parts Labeling by 2180miles


Bumper Trimming by 2180miles


Bumper Trim Lines for Fairlead by 2180miles


Fascia Cuts & Removal by 2180miles


Final Fascia Cuts & Removal by 2180miles

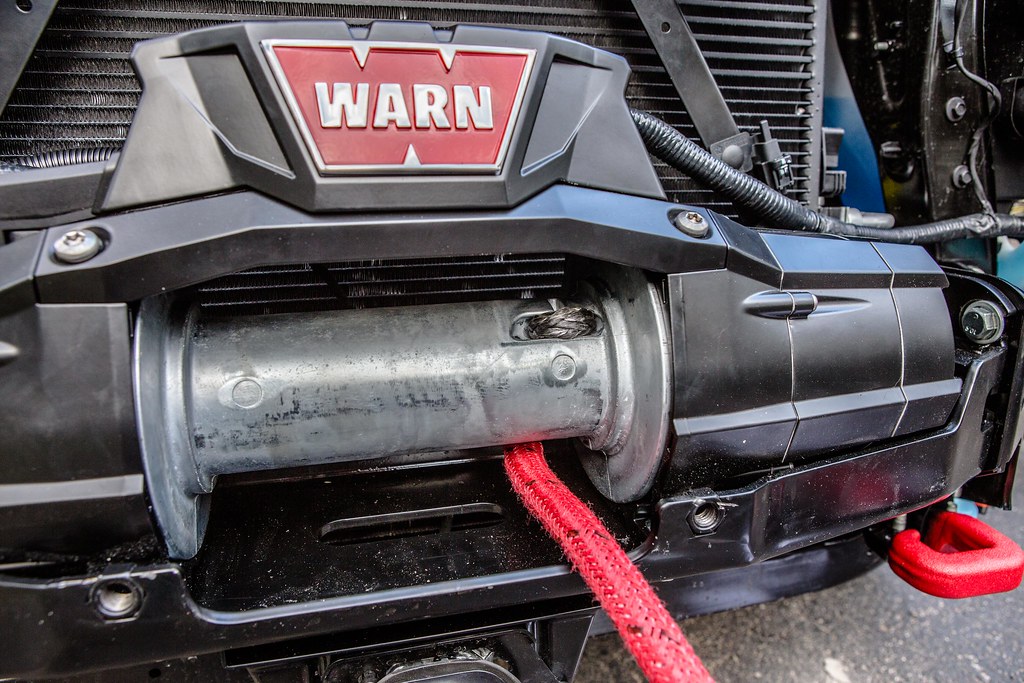
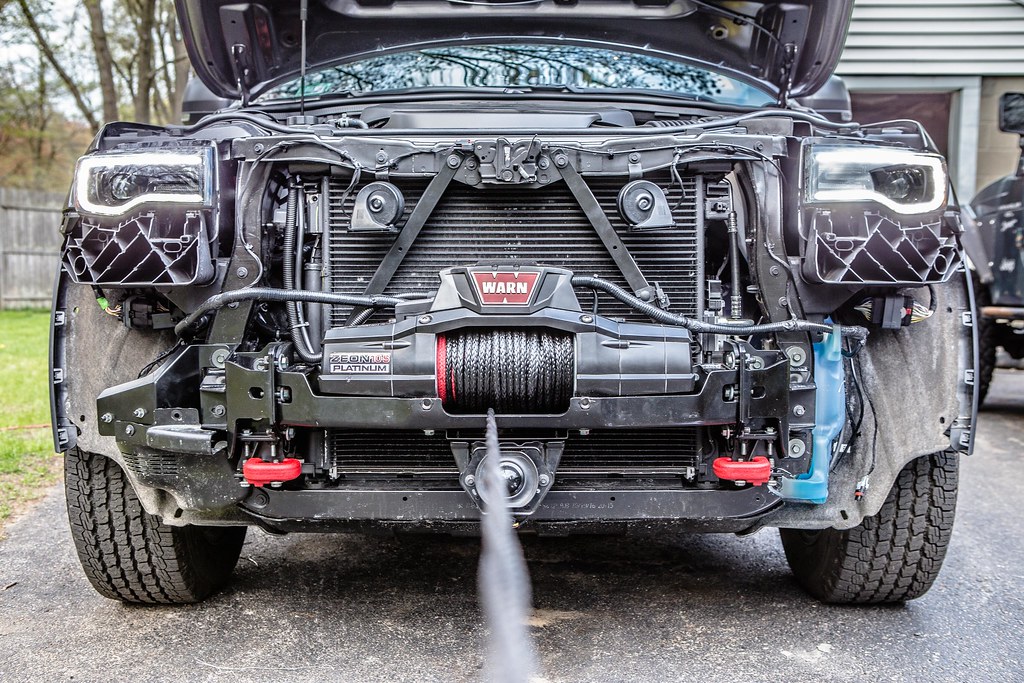
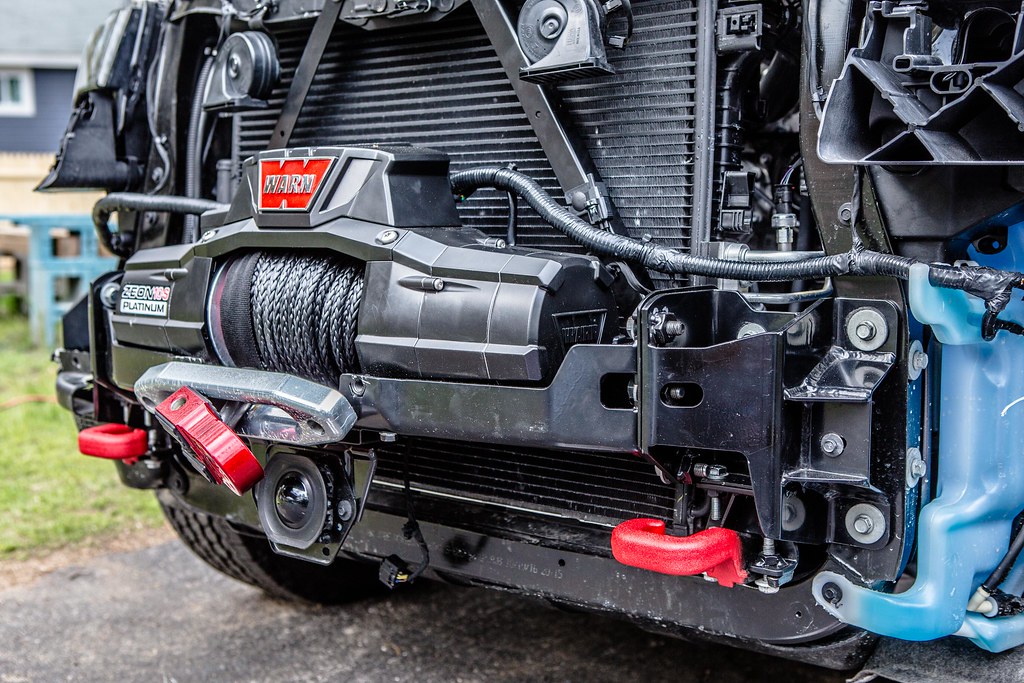
Once we were comfortable with the trimming, we moved on to the installation of the winch. The Zeon 10-S Platinum is described by Warn as being “built for those who push the limits-with double the durability, 20% faster line speed, and extreme IP68-rated waterproofing. The Advanced Wireless Remote controls not only the winch, but also the clutch and other accessories. With a 10,000 lb. pulling capacity, high-performance motor package, and Spydura® Synthetic Rope, you'll be equipped to go places others only dream about.” – for this application, it’s perfect, especially with the electrically controlled clutch. Whereas my other winch sits on the open front of my Wrangler, I don’t have access on the WK2 to engage and disengage the electric vs. free-spool setting. With the remote, this makes the hidden factor of the winch all that more feasible.

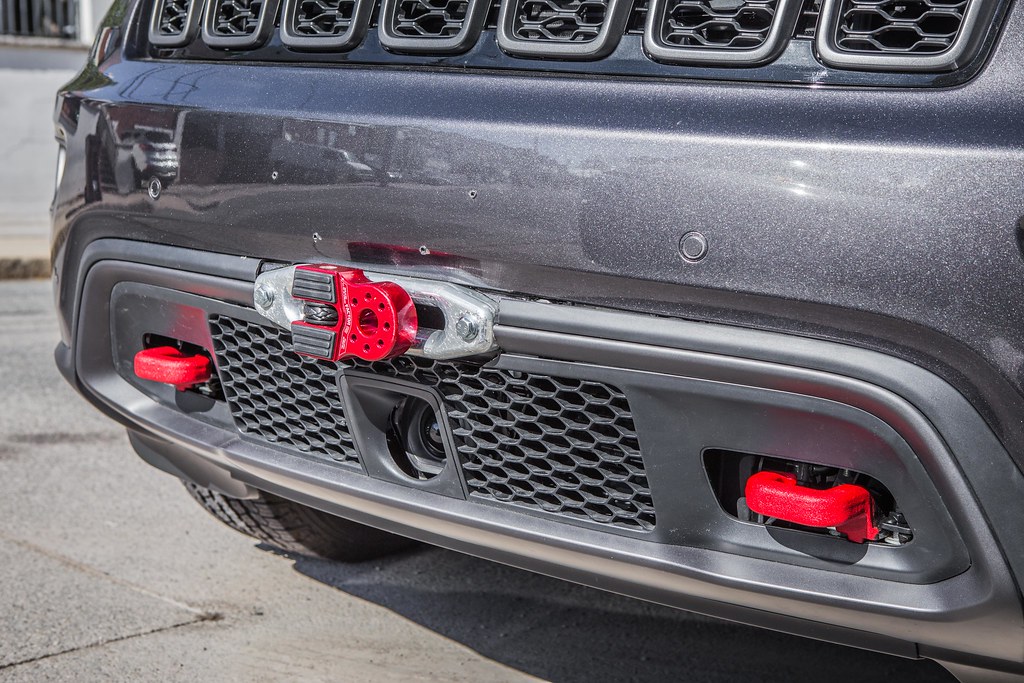
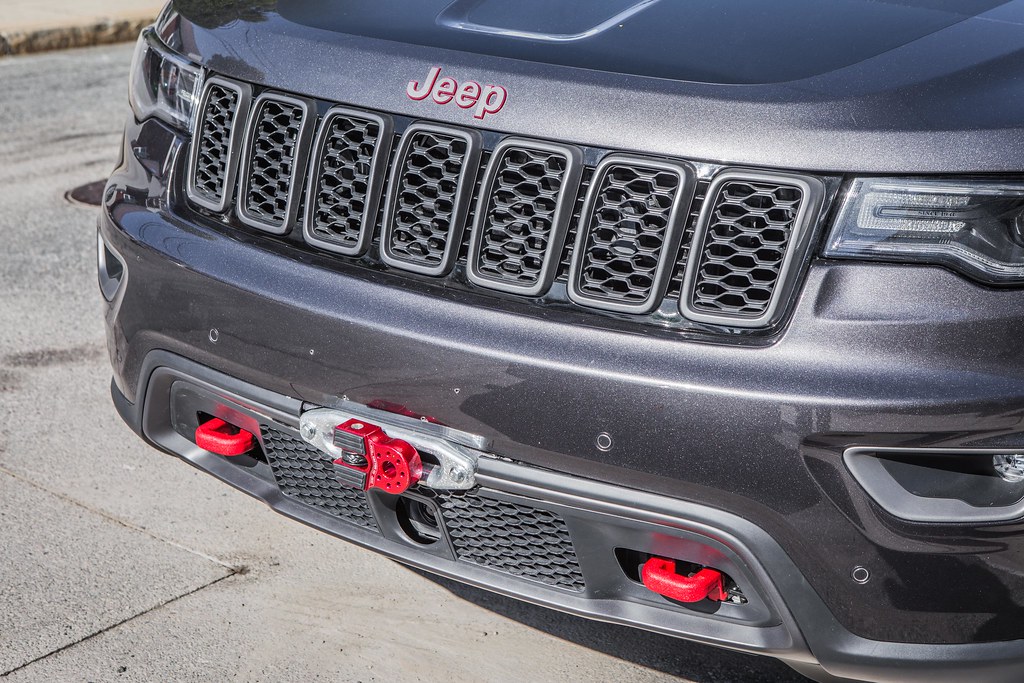
We followed Warn’s instructions for mounting the winch and spooling the Spydura line, outfitting the end of the synthetic rope with my new Factor55 Flatlink winch hook. Rated with a breaking point far beyond what I’ll ever be utilizing, the easy D-ring attachment point and red powdercoating make it a sleek addition to the front end of the Grand Cherokee. Once the line was appropriately attached we spooled it in, maintaining tension on the line by hand and wrapping it cleanly. While I don’t currently have any auxiliary lighting planned for the grille of the Trailhawk, the Zeon Platinum offers 2x 12v ports to plug auxiliary lights into, to then be controlled on/off by the wireless remote. I may someday add some lights in there, at which point this will be a phenomenal way to avoid running wiring through the firewall.

I took a couple dozen shots of the front end from every angle I could think of, and then we moved forward with re-installing the ACC camera on a Chief Products supplied bracket to the rear bolts holding the winch into the cradle. We had to wallow out the mounting bracket holes a little bit to fit what I assume is a revised camera mount dimensions, but notes and photographs were taken to show the guys at Chief.

Once the camera was good to go and re-harnessed, we re-installed the front bumper securing it back into the wheel wells and above the radiator by reversing the removal process. Putting the fascia back on we realized we had a little more trimming to do to get the outer edges by the wheels to fit appropriately. We got it to fit that night, but after driving last week with regular use, I realized I have to go back and re-trim some of the area in front of the fairlead mount to get the clips to sit properly back in the bumper above the fascia.


Warn Zeon Platinum 10-S Install by 2180miles


Spydura Synthetic Line Installation by 2180miles


Warn Zeon & Chief Products Hidden Winch by 2180miles


OEM Tow Hooks Re-Installed by 2180miles


Chief Products Front End View 1 by 2180miles


Front Bumper Re-Installed by 2180miles
 

2180miles

Endurance Adventuring
In the weeks after installing the Chief Products Hidden Winch system, I've had no issues other than craning in my neck every time I turn around in the grocery store parking lot to check out the Jeep as I walk away. The pieces are secure, and the front end looks sexy as all get-out with the Factor55 FlatLink hinting that there's a lot of pulling power under that front bumper.

I had an opportunity over Memorial Day Weekend to hook a tree-saver up to an Oak in my friend's driveway and pull the WK2 uphill. While it wasn't a stressful situation, the system, comprised of the mounting bracket, winch, hook, and remote performed flawlessly. I will go forward feeling more confident in the Jeep's capabilities with this new self-recovery capacity in place. I still have some more trimming to do, but here are the photos taken in the days after we finished the installation. I'll be sure to report back with notes from Bill and the great team at Chief, and will be sure to photograph the first opportunity I get to really put some stress on the system in a self-recovery scenario… not that I'm looking forward to that or anything ;-)

More photos to come in a less urban environment, but these will have to suffice for now.


Chief Products / Warn / Factor 55 Installation by 2180miles


Chief Products / Warn / Factor 55 Installation by 2180miles


WK2 Trailhawk w/ Chief Products & Warn by 2180miles


WK2 Trailhawk w/ Chief Products & Warn by 2180miles
 

ReconZJ

Observer
Great looking TH and mods! One question, though: with the fairlead mounting through the lower facia, can you still remove the facia when you off road? That's the biggest negative I have on my Summit - the lower facia isn't meant to be removed like that, and I have scraped it quite a bit over 3 Moab trips.
 

2180miles

Endurance Adventuring
Great looking TH and mods! One question, though: with the fairlead mounting through the lower facia, can you still remove the facia when you off road? That's the biggest negative I have on my Summit - the lower facia isn't meant to be removed like that, and I have scraped it quite a bit over 3 Moab trips.

Hey Gary -

Thanks for the kind words. Certainly trying my best to keep it looking good while staying OEM+ in appearance and being functional! To answer your question, yes I can remove the lower fascia. The fairlead mounts to the winch cradle behind the bumper so there's nothing the fascia is doing to hold it in place. I attached a picture below to show what it would roughly look like w/o the fascia. Chief Products also makes a lower fascia skid plate that you should look into if you're interested... I might eventually move that way, but wanted to keep it like this for now.

I'd be interested to hear about how the Summit does in Moab... do you have any photos or trip write-ups? I'm T-minus 50 days or so until we leave for a nearly month-long overland trip through Canada. No severe wheeling/terrain as of yet, but I'm looking forward to seeing how the Trailhawk does as a mobile home-base kind of vehicle... really excited to use it for what I bought it for.


Forum statistics

Threads
188,020
Messages
2,901,230
Members
229,411
Latest member
IvaBru
Top