Unimog U1300L Espar D5 install.

sapper

Adventurer
I will be helping a friend this weekend install an Espar D5 heater in his truck. I tried to search online to find some helpful information but was surprised to find very little.

I thought I would create my own record to assist others in the future if needed.

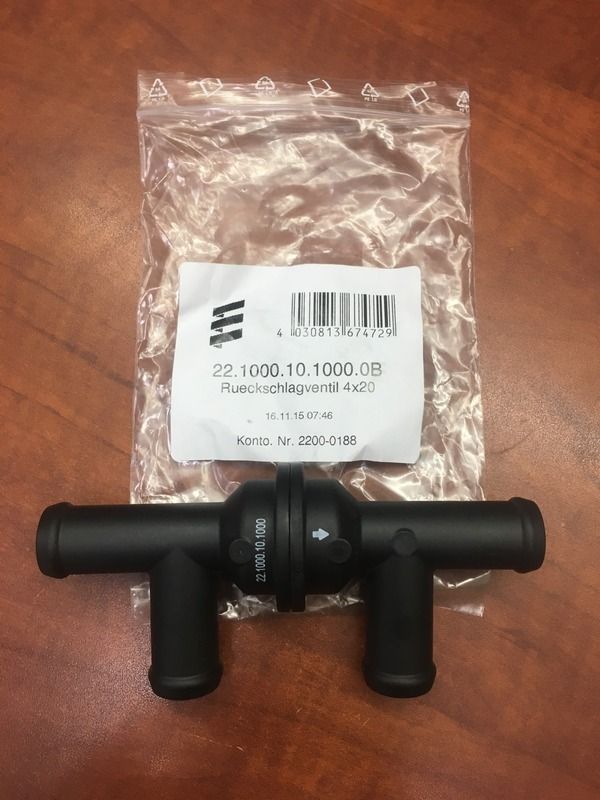
After review of the Espar manual I found a check valve which should make the install as unintrusive as possible and prevent unnecessary connections and fittings. I looked the unit over previous and found no ports/fittings on the engine which would be useful so it will need to be in parallel with the heater core.

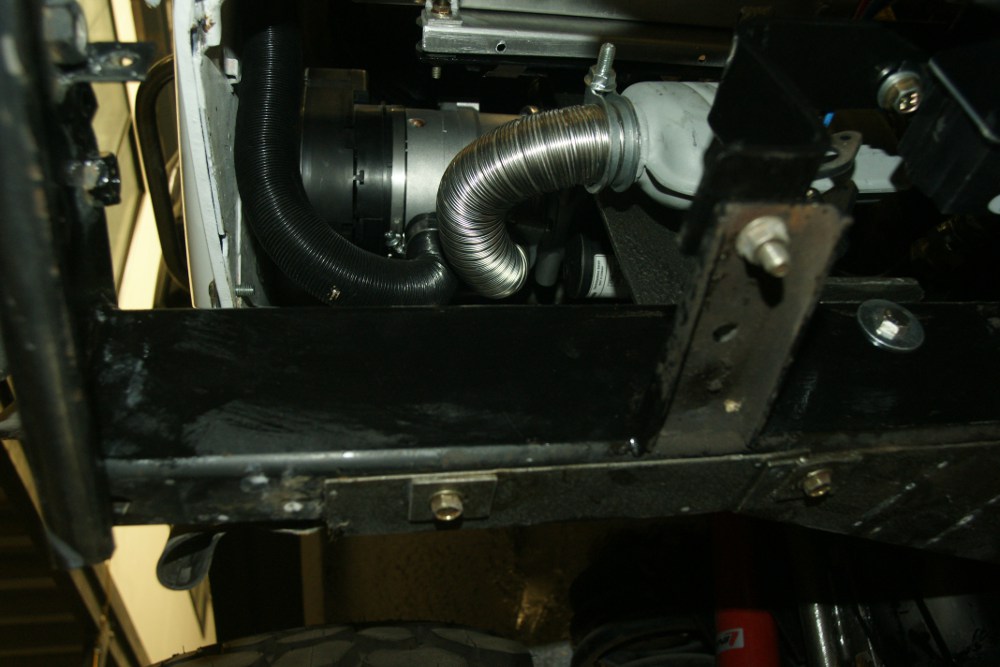
I plan to mount the D5 under the air filter housing as I has seen someone else on here do to also still allow for the cab to tilt when required.


I am still trying to prevent drilling the factory fuel tank for the stand pipe is possible and hoping I may be able to tee into the factory fuel line.

Any other guideance before we start tomorrow?

I will update the pictures once everything is completed.
 
Last edited:

Iain_U1250

Explorer
I have the Webasto equivalent in my U1250. Are you planning on fitting a hot water tank, if so, then you will want to enable the engine coolant loop will provide heat to the hot water tank as well. My coolant loop system is extra complicated as I have a water cooled turbo as well.

This is my system.

DSC05599.JPG


I have fitted it under the air filter as well.


DSC05651.JPG


Regarding the fuel system, I would put in the fuel spike. On mine, the tube is very small diameter as the pump does not have much suction power and if you get an air bubble in the T, bleeding the engine fuel system won't clear it. and I don't think the little fuel pump could lift the fuel with a larger diameter pipe. If you get an air bubble the system will shut down and after a number of attempts of starting, it won't restart until you disconnect the power completely. I spoke to Webasto technicians about this, and they explained that the fuel pump was designed to work with the fuel spike and very thin lines.

The fuel spike is very easy to install, you drill the right size hole and can push the rubber washer through from the top, no need to have access to the inside. I used magnets to catch the metal bits as I was drilling the hole, and fished out any bits that fell into the tank using a magnet on a stick. Just to be safe, I dropped in a few little magnets into the tank near the fuel spike so any bits floating around in the diesel doesn't go up the pipe. I run the heater and the X100 Diesel Stove off the same fuel spike, and each supply has it's own tiny fuel filter.
 

sapper

Adventurer
Well we got it in on Saturday and within 45 mins or so if run time the engine temp was up to 80deg.

We were fortunate that the fuel tank had an extra fuel draw, which I suspect was for a FM1 shelter as some point.

The Espar check valve also made it much easier to complete. About 6 hours total to install including raising the cab a couple of times to fix the seal around the bottom of the cab, fixing the signal lights.

Were using a friends shop and really needed to have it completed in the same day. I didn't get as many pictures as I was planning but I will try to get more in the future.

Biggest pain was the supplied pins for the control, pump, and battery connection. I have quite a few crimping tools. It none seemed to be correct so the did the best I could and then soldered for good measure.

The instructions being all separated made life a bit more interesting as well having to hunt for everything.


Forum statistics

Threads
185,842
Messages
2,878,776
Members
225,393
Latest member
jgrillz94
Top