Pro-Rig V2.0 - Home Built Compact Composite Pop-up

CoyoteThistle

Adventurer
thanks for all the comprehensive replies! So how far have you gone with testing now? Are you happy the system works as it should?

I've looked at orion jr bms, but its pretty expensive for what it does. I've got sterling battery to battery charger in our current van, and had spec'd an alternator to battery charger for the new build. However, there are no Lifepo4 charging profile options, and so far have found no evidence that the charging profiles can be customised with the remote controller. Not sure if anyone as info to confirm or deny this though? It would be an easy way to protect the alternator though.

Very, very early. It's mostly theory for now on this setup, stay tuned...

Yeah, I couldn't figure out how the Sterling was working for people but some swear by it. Could be that they have figured out a way to program it or it could be that they are slowly killing their batteries. :eek: Not too many folks out there testing their capacity after lots of charging cycles and reporting them. Not saying the Sterling is a bad idea, just that the data maybe isn't in yet.

If you don't mind me asking, would you provide a breakdown of component and total cost for this system? Would be good to compare to cost of Victron Gel batteries which was my first choice until I settled on lifepo4 setup

Here's the costs of the main components (minus shipping and tax as this will vary):

Battery cells - four CALB 100Ah: $525
BMS and cell balancers - Clean Power Auto: $128
Battery protect - Victron BP120: $52
Battery monitor - Victron BMV 700: $147
Battery combiner - Victron Cyrix Li-ct 230a: $167
Victron bluetooth dongle: $50
Main solenoid - Blue sea 9012: $142
Solar charge control - Victron MPPT 75/15: $91
Total of major pieces: $1,302

Not cheap. I would have been happy to use the 120amp version of the combiner but couldn't find it in the states (would have been ~$90 savings). Dongle is obviously optional but I love it!

Have to consider too, that all but the first two things on that list you might expect to spend on any complete system for any battery chemistry (they're admittedly more important on a lithium system) but that's $649 of the cost. Battery and BMS is $653 of the cost.

- 200Ah of AGM might be $350 at the low end and close to $600 for name brand (e.g., Trojan)?
- Gel is a good value but apparently they need a different charge profile than AGM/flooded lead acid anyway?
- 100Ah "drop in" lithium (e.g., Stark Power) would be about $1,000 and no one knows what they have for a BMS or how long they will last as drop ins.
- 90Ah Victron lithium with BMS would be $1,250

So, probably a good argument for any one of those option under the right conditions (except maybe the drop in lithium). DIY lithium is getting towards cost-competitive though.
 

Anton2k3

Adventurer
Great, thanks for that breakdown. I think I'm going to go with the following setup:
300ah Sinopoly cells
SmartBMS123 - has Bluetooth connection and ipad app to monitor cell voltage, alarms etc live.
Bluesea 9012 for BMS cell level protection on load and charge side
Battery protect 120 LV protection
Victron Li Ct for high voltage alternator charge protection.
Easysolar unit for battery charger/inverter/mppt control - all parameters set correctly to protect bank from over charge - not sure if I can tie this in to Li Ct somehow for ultimate OV protection
Victron BMV-702 battery monitor with the awesome setup you've come up with to control the Li Ct

All connected to Victron color control GX (which will be connected to 4G router), for continual monitoring even when not using the wagon.

Think that should cover everything and be a pretty robust system. See any problems with that setup?

Sorry to hijack your thread...i'll start a new one when I start the next build!

Cheers,

Anthony
 
Last edited:

CoyoteThistle

Adventurer
Great, thanks for that breakdown. I think I'm going to go with the following setup:
300ah Sinopoly cells
SmartBMS123 - has Bluetooth connection and ipad app to monitor cell voltage, alarms etc live.
Bluesea 9012 for BMS cell level protection on load and charge side
Battery protect 120 LV protection
Victron Li Ct for high voltage alternator charge protection.
Easysolar unit for battery charger/inverter/mppt control - all parameters set correctly to protect bank from over charge - not sure if I can tie this in to Li Ct somehow for ultimate OV protection
Victron BMV-702 battery monitor with the awesome setup you've come up with to control the Li Ct

All connected to Victron color control GX (which will be connected to 4G router), for continual monitoring even when not using the wagon.

Think that should cover everything and be a pretty robust system. See any problems with that setup?

Sorry to hijack your thread...i'll start a new one when I start the next build!

Cheers,

Anthony

Not a hijack at all! I like the discussion.

Only question I would have is if the Battery Protect is redundant given the BMS-controlled 9012 on the load side. Maybe you want two different tiers of disconnect though? Other than that, it all makes good sense to me.

That SmartBMS looks like a nice little unit. Lots of customization available and the bluetooth is a very useful feature (I was just pondering adding a cheat sheet to the battery compartment with a key to all the meanings of all the different led flashing patterns for all the different gizmos - sure would be easier to just open the app on my phone).

The relay on the Li-ct wants to see 12v to stay closed. It will open the relay when the trigger voltage goes to 0v. So if you had two different units talking to it (BMV and EasySolar) seems like both would have to drop to 0v for the relay to open - not sure if that's good or bad for what you're thinking.

Look forward to your build thread!
 

CoyoteThistle

Adventurer
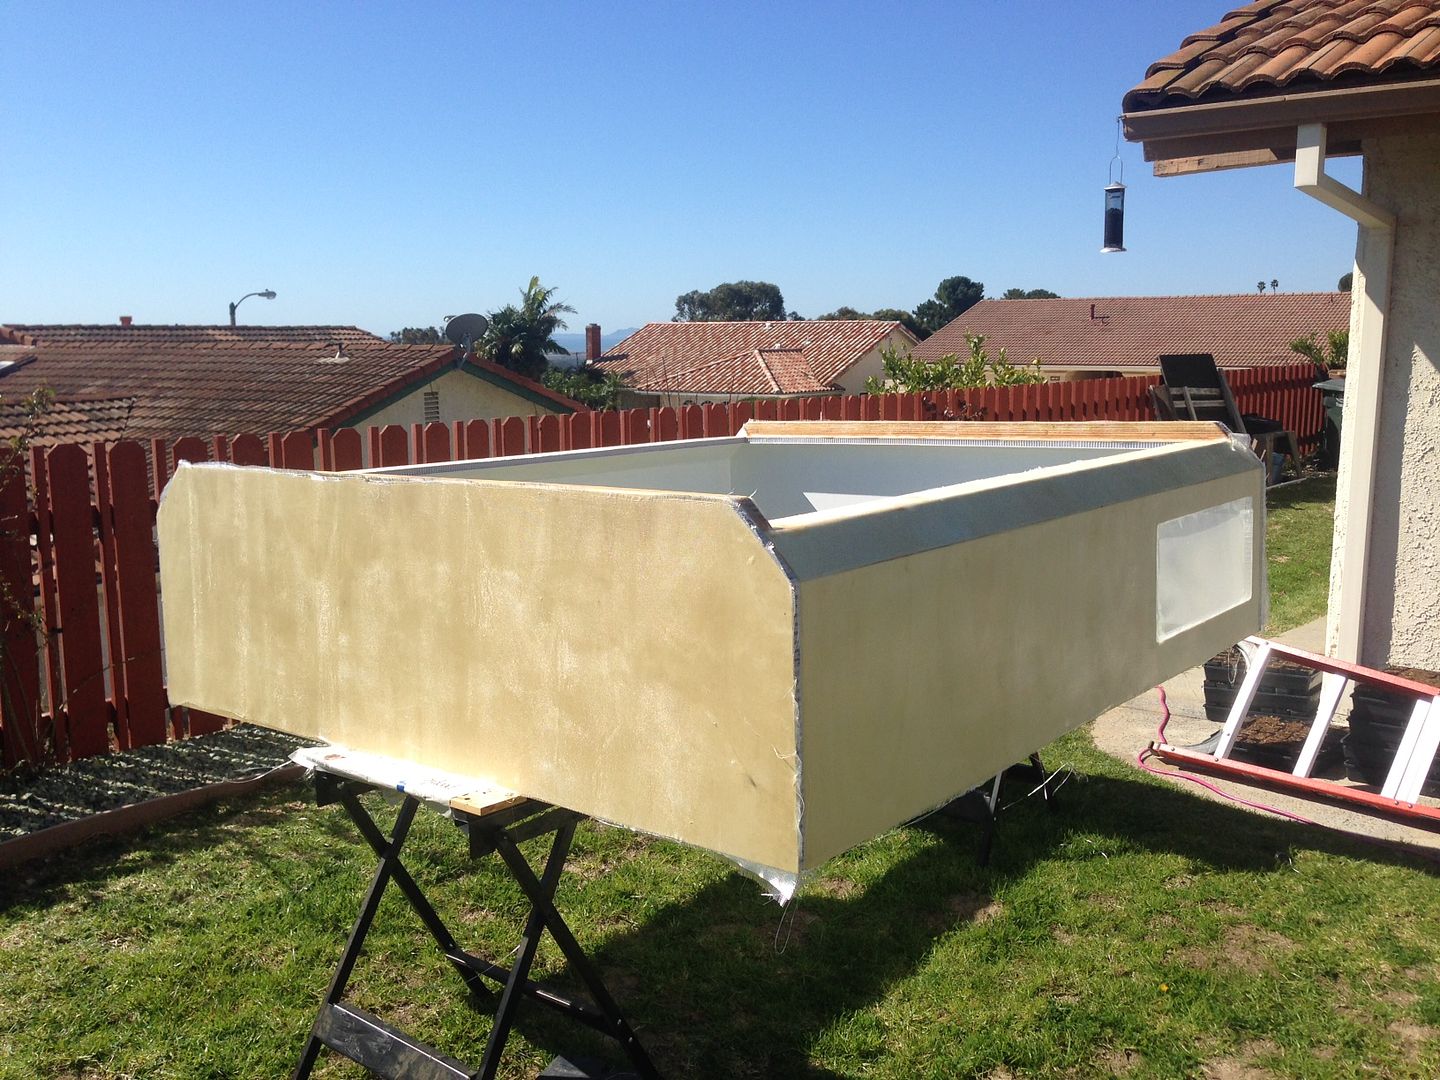
Okay, a little actual progress to report. Got the slide-up out and got a layer of fiberglass on it.


Other than a big Santa Ana wind kicking up just as we were getting started, it went okay.

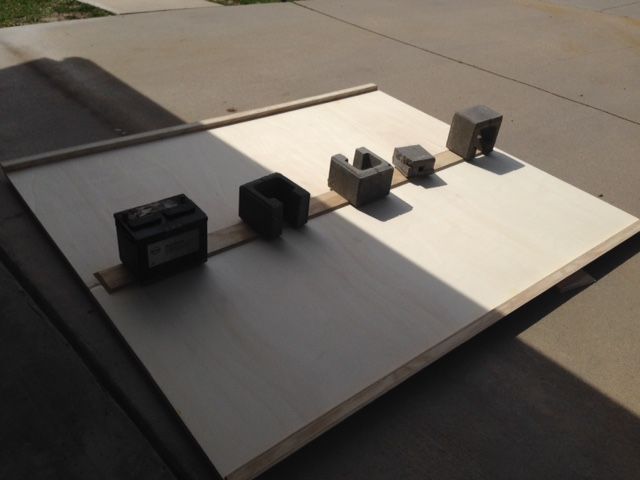
For battery geeks like me: I did a little testing on the battery setup. After a full charge, it took about 24 hours for the battery to come down to a resting voltage of 13.41v with no load. With a ~0.1A load it dropped to 13.30v at 99% SOC after several hours and, as designed, the BMV tripped the relays back on. I didn't charge and let the parasitic load of the relays (~0.3A) draw it down until it hit 13.20v at about 94% SOC. So, I think I'll set the BMV to re-engage charging at 13.2v. So far so good!
 

Anton2k3

Adventurer
Yea good point about the low voltage. It's just a belts and braces approach...and I haven't read the BMS manual properly either, so not sure if it will trigger at both cell low voltage, and pack low voltage on the same trigger connection. I was assuming BMS would do cell level, Battery protect pac level.

So whats the finish date of this build? Any more testing of alternator side of things?

Cheers
 
Last edited:

CoyoteThistle

Adventurer
Yea good point about the low voltage. It's just a belts and braces approach...and I haven't read the BMS manual properly either, so not sure if it will trigger at both cell low voltage, and pack low voltage on the same trigger connection. I was assuming BMS would do cell level, Battery protect pac level.

So whats the finish date of this build? Any more testing of alternator side of things?

Cheers

Depends on what the cutoff level of your BMS is I guess too. My BMS kicks in at "you're about to permanently destroy your battery" level, not at "you shouldn't really go lower than this or you might damage your battery in the long run" level. BP is for the latter in my system. Similar approach could very well make sense for yours too depending on your BMS.

Finish date? Well, I'm getting really antsy and want to get this thing on the road. In my most ambitious vision it might be ready for a test run by the end of this month. That's pretty optimistic. You never know though, I was expecting to be out in the desert exploring on two wheels this weekend but discovered a leak in my new gas tank :mad: - and instead made some good progress on the camper.

I do want to do an alternator charging test of the high voltage cutoff with my jumper cable hook up. Might do that this coming week. Will report results for sure.
 

CoyoteThistle

Adventurer
Some good progress this weekend.

Roof halves being bonded together:


Came out nice and rigid and not too heavy. Ready for a layer of glass on the outside and paint on the inside.

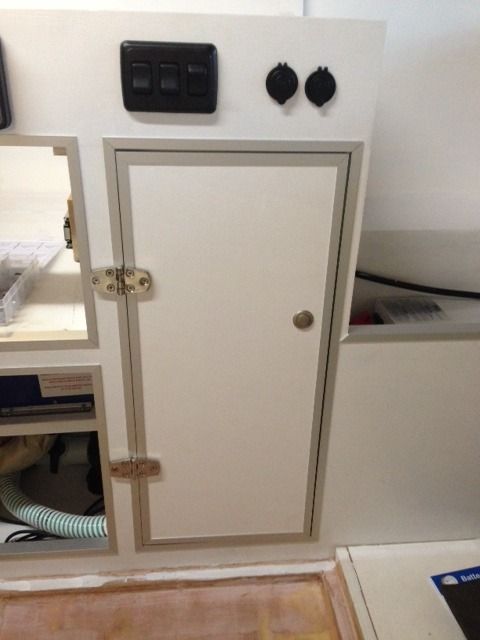
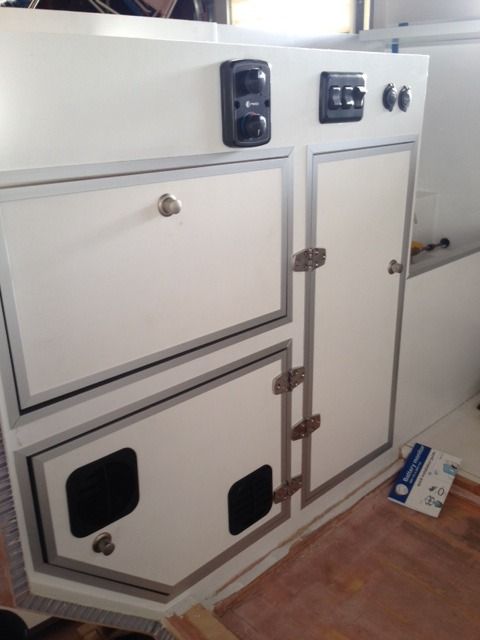
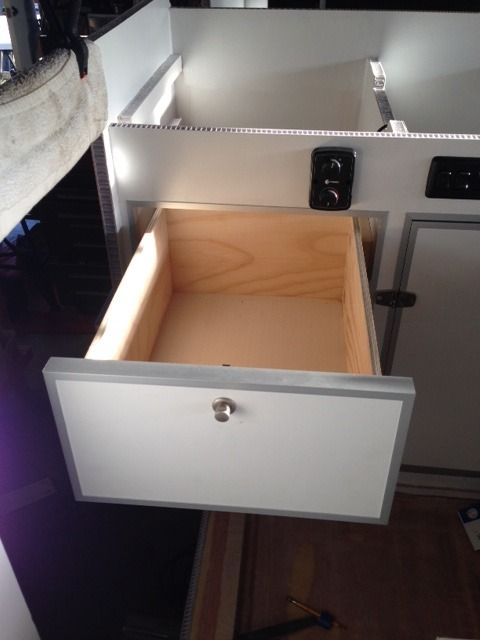
While I had the tube of epoxy out I glued in all the aluminum trim for the interior cabinets and today installed the first two cabinet doors:


I truly suck at making things line up perfect but they came out okay.

Also glued in the face of the "vanity" in the "bathroom"


That's the latest. Okay, off to watch some you tube videos on applying wood veneer. :coffee: Will soon be adding that to the list of "firsts" for me on this build...

matt
 

Gunner207

Observer
Don't sell yourself short Matt, it looks great. Sometimes we beat ourselves up over all the little things that aren't absolutely perfect and forget to step back and look at the totality of what we have accomplished.
 

java

Expedition Leader
Yeah I agree, those doors look awesome! your welcome to come do mine! :sombrero:
 

CoyoteThistle

Adventurer
Busy, busy, busy...

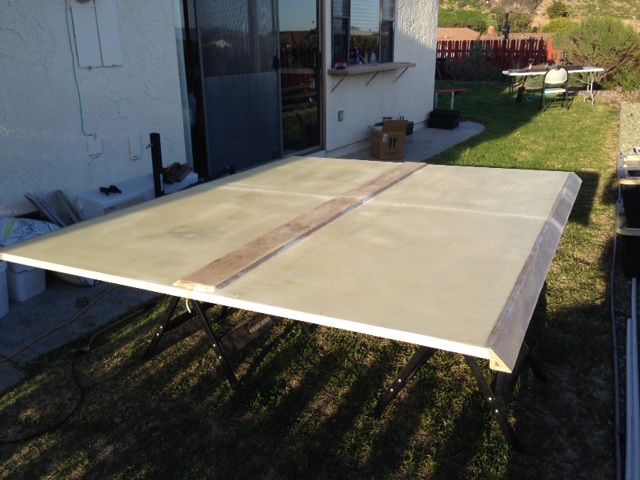
Yesterday got the roof out and sanded it down.


Today, I busted out the epoxy and glass cloth and got a layer on. Brace yourself for the stunning transformation :sombrero:


Ta da!


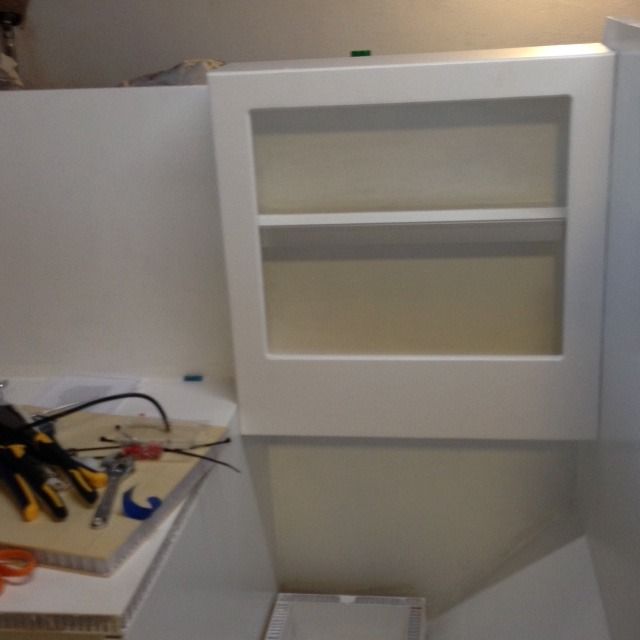
While that was drying I wrestled some more with the interior cabinets. Progress was made.


And I thought rectangular doors were a pain! Ah well, it's together and functioning. Should look good with the dark counter top and floor, which are (hopefully) coming soon...
 
Last edited:

java

Expedition Leader
Looks GREAT!

What are you doing for floors and counter?

Sent from my SM-G900T using Tapatalk
 

CoyoteThistle

Adventurer
Floor will be some sort of faux-wood vinyl planks. Liking the distressed looks but final decision goes to my vice president of interior design, AKA Sheri; AKA the girlfriend :)

Counter top is 3/4" plywood with a DIY granite finish (natural sponges and hobby paint). Got the paint on, it's looking surprisingly good, need to get a layer of clear epoxy on it to finish it off.
 

java

Expedition Leader
Floor will be some sort of faux-wood vinyl planks. Liking the distressed looks but final decision goes to my vice president of interior design, AKA Sheri; AKA the girlfriend :)

Counter top is 3/4" plywood with a DIY granite finish (natural sponges and hobby paint). Got the paint on, it's looking surprisingly good, need to get a layer of clear epoxy on it to finish it off.

Very cool, we settled on a vinyl plank from Lowes, they had a few in stock to choose from. Im interested to see what your counter looks like! Im likely going granite tiles...
 

Forum statistics

Threads
188,217
Messages
2,903,949
Members
229,805
Latest member
Chonker LMTV
Top