ImNoSaint's 2.5 Thread

Imnosaint

Adventurer
The Franklin Rack

FullSizeRender_9.jpg


This build will have more to do on the interior than the exterior and I'm trying to apply lessons learned from previous builds, one of which for our purposes, is that we don't need a huge roof rack, nor do I want to block the sunroof, ill-placed as it is. This being the case, I went economy on top to put more money to the interior (drawer, stove and fridge system) and picked up a Rage Powersports low profile cargo basket for $104.99 on Amazon - the reason I'm calling it the Franklin Rack. That being said, it is an easier alternative to the GEN 3's wood roof rack.

FullSizeRender.jpg


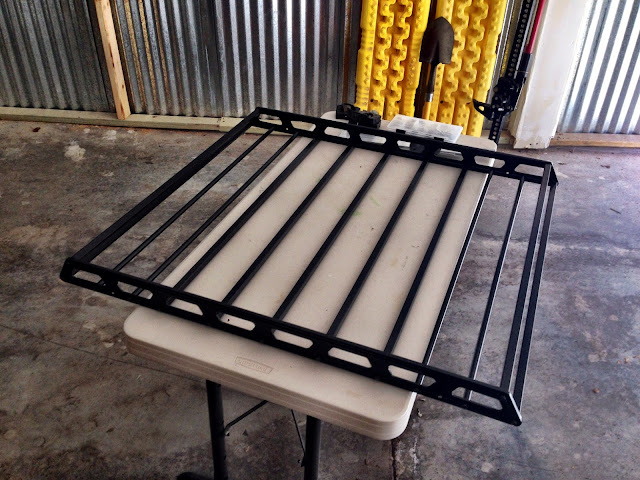
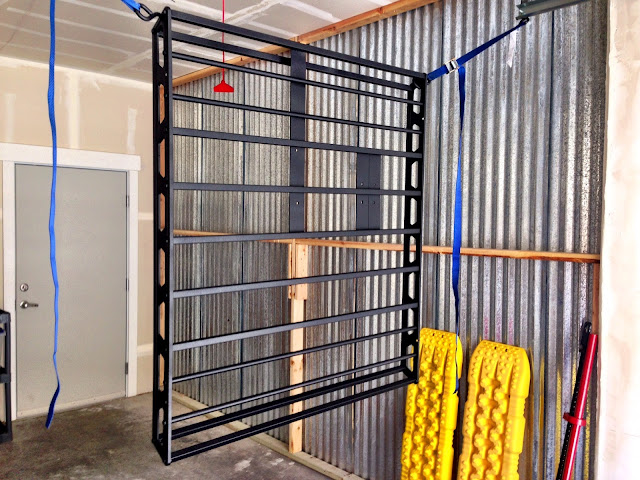
All assembled there's not much more structural integrity than an erector set, getting less than what I paid for perhaps. Its intended use, like on the H3, is to have a place for recovery gear; shovel, TREDs, HiLift and a three-gallon Rotopax can. It's 39.5x36 inches, allowing a little under ten square feet of space. The Garvin Sport Rack on the H3 allowed 14.4 square feet - thirty percent less room - plus this little basket won't hold an awning. But I have other plans for that.

FullSizeRender_1.jpg


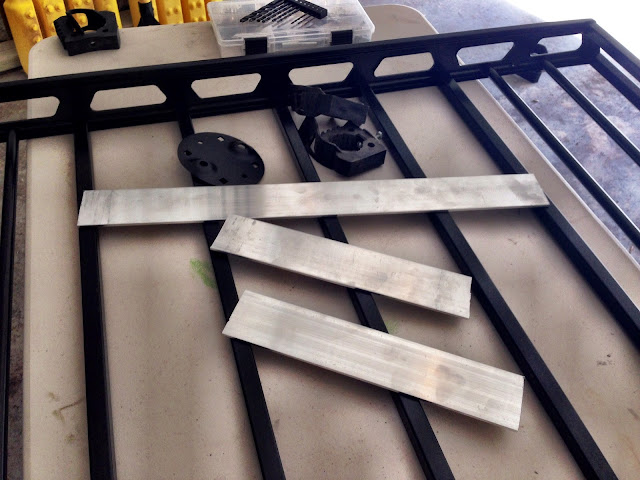
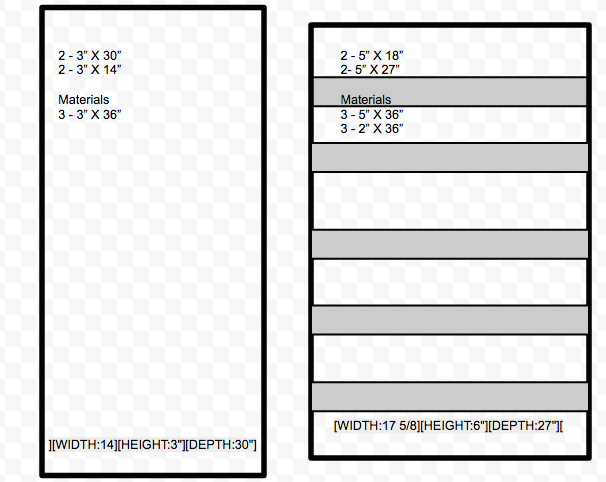
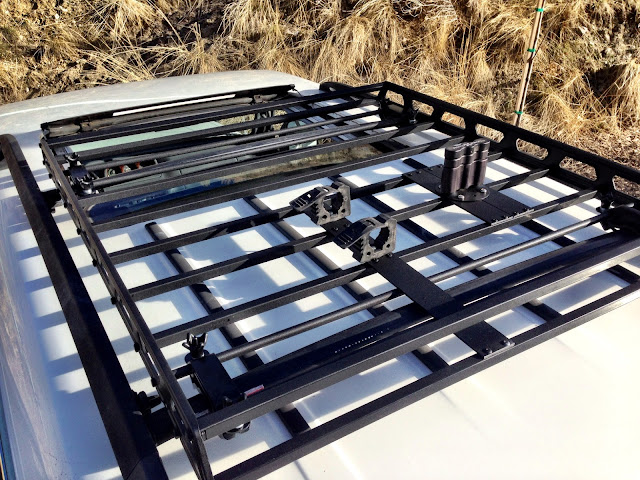
To make the best use of this real estate, and to reinforce the rack a bit more, I added 2" aluminum flat bar, a 20" piece to provide mounting area for the shovel, and two 10" pieces to do the same for the Rotopax.

FullSizeRender_3.jpg


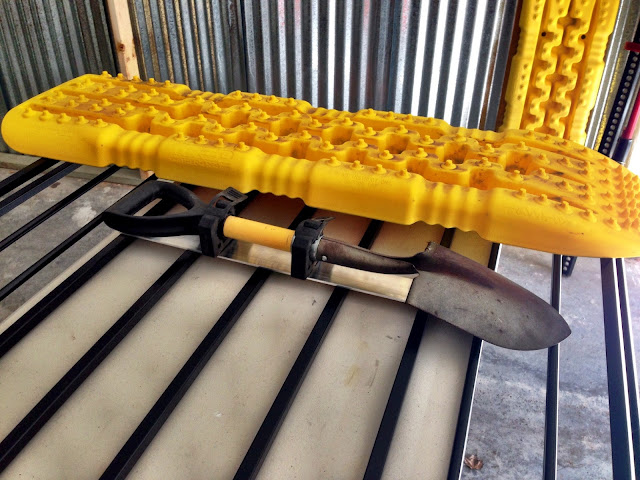
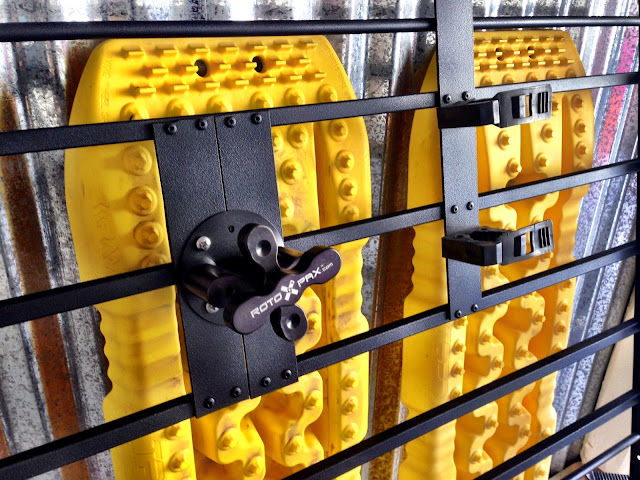
I did a test fit with the a TRED in place - it will be mounted with a cable lock like on the Garvin rack.

FullSizeRender_4.jpg


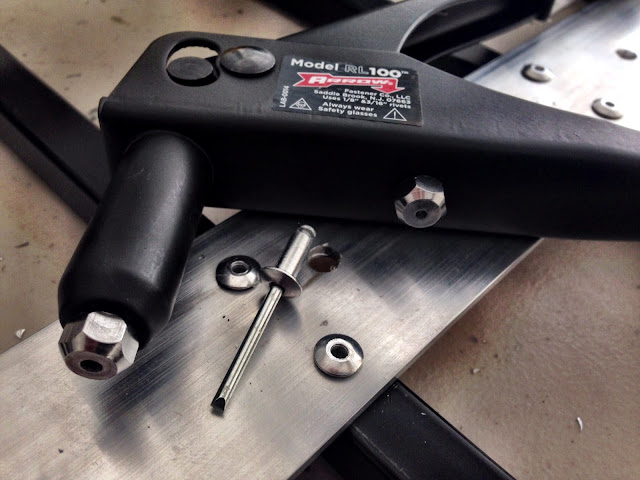
And then drilled holes and mounted the slats with 3/16" aluminum rivets.

FullSizeRender_5.jpg


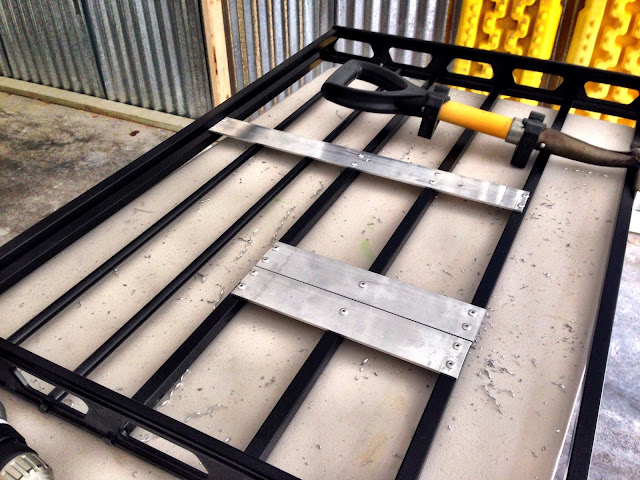
My cuts leave much to be desired, but considering what I'm working with - a B&D jig saw with a metal cutting blade - I'll live with it. I won't be standing on top of the Monty eyeballing my shoddy craftsmanship.

FullSizeRender_6.jpg


With the slats attached I shot the whole rack with Duplicolor's bed liner.

FullSizeRender_8.jpg


Once the paint set I added the hardware,

FullSizeRender_10.jpg


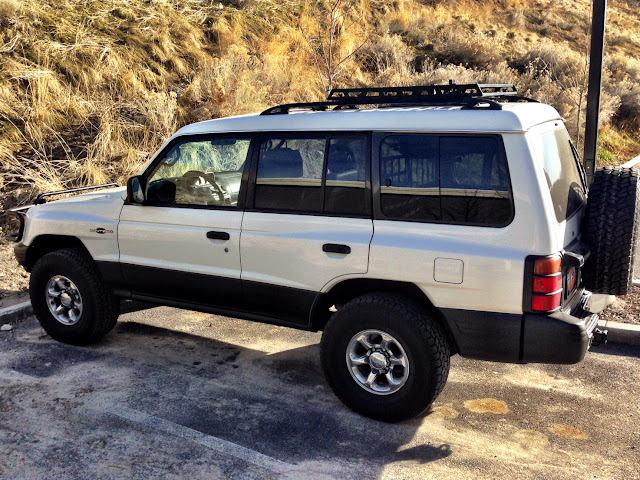
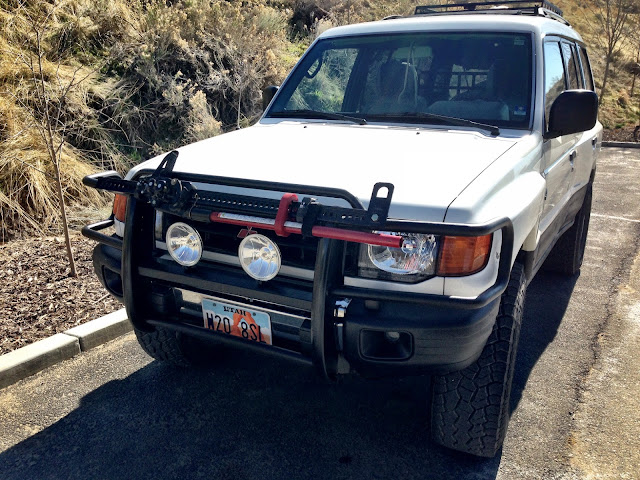
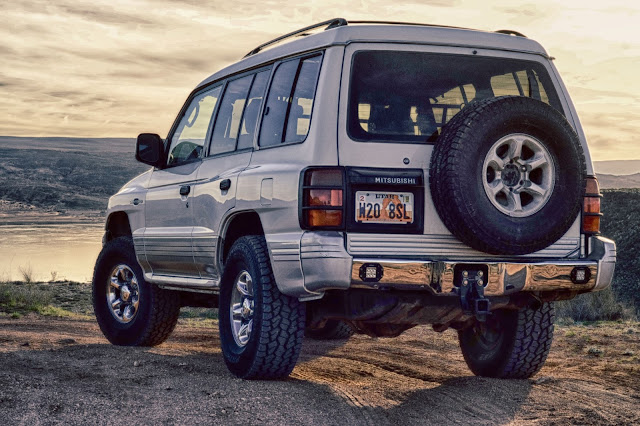
...and mounted the rack on the Montero. I'm giving it 24 hours before I mount the gear. It kind of has a factory feel to it with the cut-outs on the basket mimicking those on the stanchions of the factory rack, if you squint a your eyes a bit.
 
Last edited:

jeep-N-montero

Expedition Leader
That and Spring break. We're looking for out-and-back day outings up here - I've checked out UtExped and other trail sites. Interested what you might recommend.

There are a few that are worthwhile but most are snowed in at the moment, really feeling the itch to get to Moab lately though.
 

Imnosaint

Adventurer
Folding Utility Shelf No.3

Attachment-3.jpeg


One interior mod we've used the most is the folding utility table mounted on the rear door. This being the third, I thought it'd be pretty straightforward, borrowing from the Gen3's use of an off-the-shelf 1"X12"X24" plank (this one being pine) and the hardware approach from the H3. As we both know, nothing is pretty straightforward when you think it's going to be.

Attachment-1.jpeg


The stock plank was sanded and shot with MinWax PolyShade in the oak finish. Six or seven coats, I lost count.

Attachment-2.jpeg


I added the same type of stainless marine hinges used in the H3 (had another pair knocking around for some reason), and started using stainless hardware to mount to the door through the trim plastic and to sheet metal beneath. I drilled pilot holes and set the hardware, snapping the head off one of them. At the risk of Swiss-cheesing the rear door facia, I decided to live with it.

Locating the shelf on this door was a compromise at best. I didn't want to obstruct the tool kit locker that I'm planning on repurposing as a kitchen utensil locker, I wanted to have a short reach to the sheet metal for the hinges, ending up with this spot, about three inches too low for me.

Attachment-4.jpeg


I repurposed two of the security blind holders from the cargo area to have them do double duty on the shelf; one to secure the paracord that suspends the table and the other to secure to the WebDominators that keep the table closed.

Attachment-5.jpeg


The supports need the ability to be disconnected to access the tool kit, at least on the one side, so I used a pair of Nite-Ize s-clips that hook on to small d-rings, picture hanging hardware. The knot is of my own invention. There's a do-over in the works.

Attachment-6.jpeg


Stowed, the table's backside is home to the MOLLE panel from the H3 which holds the First Aid and trauma gear as well as the WebDominators that attach the panel to the security blind holders, keeping it all snug and rattle-free.
 

Imnosaint

Adventurer
Hi-Lift Jack Mount

Attachment-2.jpeg


Necessity being the mother that it is, the Hi-Lift Jack had to go somewhere else other than on the Franklin rack. I think it soiled itself when I lifted it up for a test fit. The next more likely spot was on the brush guard.

Attachment-4.jpeg


I drilled a hole through the cross members of two u-bolts, 5/16ths, stainless, through which I inserted the bolt and mounted the assembly to the crossbar of the brush guard. I then slipped a QuickFist clamp on each bolt, fitted the Hi-Lift jack and cinched it down with stainless wing nuts. I added a strap to keep the jack handle from vibrating. It all fits up snug against the vertical push bars.

Attachment-3.jpeg
 

nwoods

Expedition Leader

If you are going to do this, I strongly suggest getting a boot or cover for the action part of the Hi-Lift. A HiLift exposed to elements will go up, but won't release and go back down. Very hard to get the car off the jack if the jack won't go back down! Lubricate with a dry silicone lube used for bike chains, and then protect it with a boot.

I had one of the Neoprene covers on my Jeep, and it really didn't work as good as hoped. I like the PVC ones from JackCovers.com
NENFQUM4RTNFMEZDN0RGQUI4NzM6NDRiNzYzNThiODhlODI2MzcxNGM3YTVkZTI3NmIzNzA6Ojo6OjA=
 

Imnosaint

Adventurer
If you are going to do this, I strongly suggest getting a boot or cover for the action part of the Hi-Lift. A HiLift exposed to elements will go up, but won't release and go back down. Very hard to get the car off the jack if the jack won't go back down! Lubricate with a dry silicone lube used for bike chains, and then protect it with a boot.

I had one of the Neoprene covers on my Jeep, and it really didn't work as good as hoped. I like the PVC ones from JackCovers.com

Right. This one's been atop the H3 for three years. I use it often pulling posts and despite its patina, I keep it up with WD. I was wondering about boots as I was putting this together. Thanks for the tip.
 

SONICMASD

Adventurer
Very cool, mounting spot and write up. But where do you jack from? I didn't see sliders on your rig, do you have some kind of hitch in the rear that accommodates the hi lift?
 

Imnosaint

Adventurer
Very cool, mounting spot and write up. But where do you jack from? I didn't see sliders on your rig, do you have some kind of hitch in the rear that accommodates the hi lift?

Good question. I have a Lift-Mate that attaches at the wheel. Outside of that and without sliders or custom bumpers with the keyholes, there's not much else to choose from as attachment points. I do have a receiver hitch that could be used as a jack point, but I want the departure angle back, so I'll be removing it.

RearEst.JPG
 

Offroadmuch

Explorer
Good question. I have a Lift-Mate that attaches at the wheel. Outside of that and without sliders or custom bumpers with the keyholes, there's not much else to choose from as attachment points. I do have a receiver hitch that could be used as a jack point, but I want the departure angle back, so I'll be removing it.

RearEst.JPG

Maybe you could flip that bolt on hitch and still use it for jacking (not sure if it will clear the back door or tire) or have a replacement piece fabricated and bolted in place that provides a good notch for the jack to grab...
 

Imnosaint

Adventurer
Platform and Drawer System

EstPlatform.JPG


If you've been reading along on this build you know that there was a dog deck and a folding utility shelf installed, neither of which worked as well as I would have liked. Add to that one of the reasons I went with this 2.5 is its room to create a sleeping platform, and I decided to do a do-over, making this Interior Modification, Part 2, combining a platform with a drawer systems.

Attachment-2.jpeg


I studied a number of DYI systems on Expo and other build threads, making decisions on materials and dimensions, but keeping all this driven by our overland history of what has worked and what we wish we had. The driving need here for us was to have the ability to pull over, level out, roll out pads and bags and go to sleep.

We've done the RTT route and have a Kodiak ground tent, both with pros and cons. Being able to sleep in the Monty seems to be the best compromise for us; easy set-up and access, great weather protection and climate control, off the ground away from critters and more of a challenge for predators to get to us.

We didn't want to compromise storage, and given we've turned this Monty into more of a Nomad (its new nomenclature) by removing everything aft of the front seats, a platform with a drawer system and storage hatches would be the way to go. The system would provide a cooking and cleaning workspace and a large drawer.

And then there's the fridge dilemma. Every fridge system, save for a couple small ones, exceed the platform height requirements I established for this build; 12" high from the cargo floor, giving us and the canines enough room above board to sleep and travel comfortably. That equates to 18" in the middle seat passenger-side footwell, but the well itself is just a bit too small to accommodate an Engel or ARB fridge, so I originally considered a smaller 12V fridge.

With these considerations in mind, I hit the drawing board.

Platform%2BDrawer%2BLayout.png


This shoot-for-the-moon design featured a stainless drop-in propane two-burner stove and a drop-in stainless sink in a slide-out drawer. A 23"W by 30"D drawer would store mess and cap stuff. There's room for a ten gallon water tank and a Luna Dual Battery system to power the fridge and isolate the 2.5's main 12V system.

I calculated around 170 pounds was removed from the interior and I didn't want to exceed that in this build. I compared MDF, plywood and particle board in terms of weight and strength and decided to go with particle board. (Welding a frame together was out of my scope.)

Attachment-1.jpeg


Attachment-1%2B2.jpeg


The first alteration to the original plan was to flip it, putting the kitchen slide-out on the door side using it as a wind break to shelter the cooking area.

Attachment-2%2B2.jpeg


I went four inches shorter on the outer uprights to allow easier access for storage under the platform.

Platform%2BDeck%2BLayout.png


The platform was originally designed with three hatches; two wings on the sides flanking the drawer cabinet, and one long hatch to access the space in the cabinet ahead of the drawers to store gear. I took care to make certain the interior dimensions of the cabinet were square from to back, top to bottom.

Attachment-3.jpeg


A fourth hatch was added just aft of the front passenger seat to provide access to the fridge. With everything cut, it was covered with Select Elements Foster Gunmetal Indoor/Outdoor carpet and Gorilla Glue.

carpet.jpeg


With the cabinet and platform built, installed and covered, I took dimensions for the drawers, keeping in mind that the drawer sliders would occupy an inch of the width dimension of each drawer.

Platform%2BDrawer%2BPlans.png


The original plan was to contract out the drawer construction, but for the time and cost involved I decided to build them myself. I went with one-by-two inch milled pine for the stove/sink frame instead of what I specified in the plans and 5.5" milled pine on the storage drawer.

Attachment-1%2B3.jpeg


The next big plan alteration was the hardware for the kitchen slide-out. I decided to go the budget route and use what I had on hand. I found a great little collapsible sink made by Ultimate Survival Technologies and have on hand a Camp Chef single burner butane stove and made changes to the layout.

Attachment-3%2B2.jpeg


I rotated the stove 90 degrees to make it easer to load the butane, access the controls and give it more space away from the edge of the platform.

Attachment-4.jpeg


Snap hardware was used to mount the stove to the pull-out surface, keeping it firmly in place but capable of being removed for cleaning. The collapsible sink creates space to store a dromedary bag underneath. The drawer glide for this pull-out is a 30" Firgelli Automations Full Extension Drawer Slide rated up to 400 pounds.

Attachment-5.jpeg
 

Imnosaint

Adventurer
Platform and Drawer System Part Two

With all these design considerations and alterations, this is what we ended up with:

est.jpeg


The drawer pulls are lockable Amarine 2" Flush Pull Slam latches.


sink.jpeg


dromedary.jpeg


geardrawer.jpeg


Accuride 28" Full Extension Drawer Glides support the gear drawer rated it 100 pounds.

12V%2BPanel.jpeg


The Monty has a 12V power plug on the LH side of the cargo area, so I pulled power from it to feed this 12V panel.

CenterStorage2.jpeg


PlatformCoolerHatchEst.jpeg


In our travels we never once said, "Wouldn't it be nice to have a fridge?" Our Coleman 54qt. cooler never let us down. But, it, too, was too big to fit in the space behind the front passenger seat.

CoolerHtchFront.jpeg


Engel makes a 30qt. cooler that fits perfectly in this spot as seen from behind the passenger seat. The center support stanchion is made from 1" PVC.

CoolerHatchClosed.jpeg


To access the cooler, I created the fourth hatch that lands on a collapsible bracket on the right.

CoolerHatchOpen.jpeg


When open, the underside of the hatch has a white plastic cutting board food prep surface.

WorkSurface.jpeg


BracketUp.jpeg


The support brackets (on both B-pillars) are an 8" folding spring-loaded support made for microwaves.

BracketDown.jpeg


SlideLockDetail.jpeg


The hatch has a second support, a sliding latch that locks into the platform at the head end.

PlatformUnderDetail.jpeg


GearStorageDrver.jpeg


The driver's side passenger door storage area accommodates two camp chairs, our Volcano grill, portable lu, folding table and other gear.

Drawers.jpeg


The leading edge of the platform is protected with a strip of aluminum stair edging.

PlatformEdgeDetail.jpeg


And the other three sides of the platform are finished with white vinyl wire channel.
 
Last edited:

AZPAJERO

Observer
:Wow1:

Outstanding work. Very impressive. Not to distract from your work but do you know how closely you came to the 170 lb mark??
 

Imnosaint

Adventurer
:Wow1:

Outstanding work. Very impressive. Not to distract from your work but do you know how closely you came to the 170 lb mark??

Thanks. Good question. At 3.44 pounds per square foot, the particle board comes in at approximately 180 pounds.
 

Forum statistics

Threads
185,914
Messages
2,879,585
Members
225,497
Latest member
WonaWarrior
Top