S10 Build getting started

Meili

Adventurer
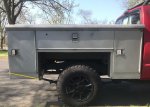
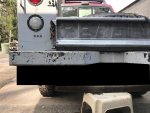
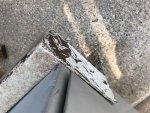
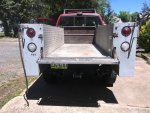
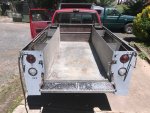
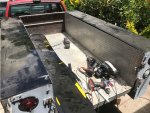
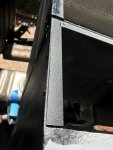
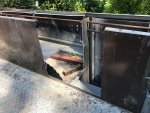
Cleaned up the rear a bit today.

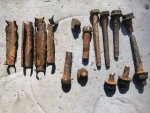
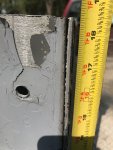
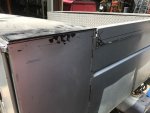
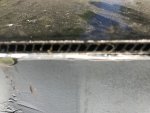
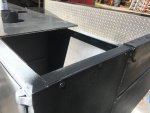
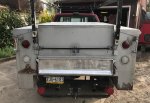
Removed the taillights and a lot of excess brackets. Filled the empty holes with bolts.

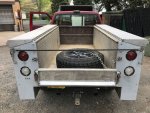
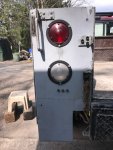
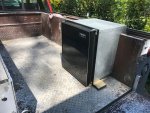
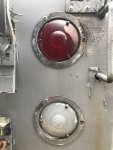
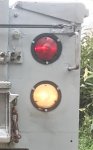
Rebuild the tail lights, hit them with some textured paint to hide the pits. Was able to sand out most of the burn in the one brake light.

Now they are working, I no longer have to keep an eye out for "the man".

Interesting, the backup lights have dual filament bulbs, just the low side was not used. I ran an extra set of wires to the low side for later.

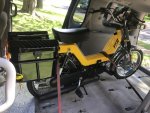
Once the camper is on, I am going to wire them to the house power and use them as nite lights.

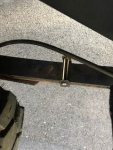
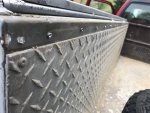
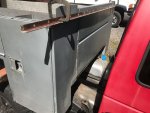
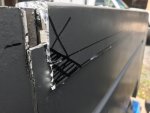
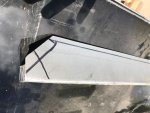
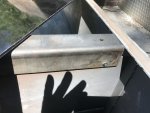
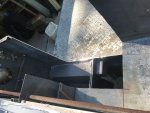
Had to beat some areas flat with a 5 pounder.

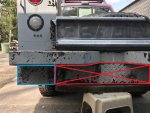
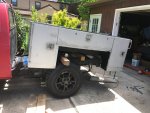
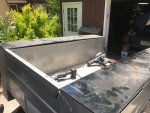
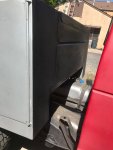
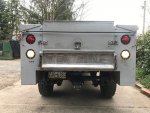
With the excess/damaged crap gone, light bar gone and a quick spritz of primer it looks much cleaner!

5348
 

Attachments

  • s10 tail 1.JPG
    s10 tail 1.JPG
    163.8 KB · Views: 18
  • s10 tail 2.JPG
    s10 tail 2.JPG
    91.4 KB · Views: 19
  • s10 tail 3.jpg
    s10 tail 3.jpg
    91.4 KB · Views: 19
  • s10 tail 4.jpg
    s10 tail 4.jpg
    105.9 KB · Views: 17

chilliwak

Expedition Leader
Truck is looking good with the rack removed and the quick spritz ya got there. Nice work. Are you not happy you went with this new box Meili? Cheers, Chilli..:)
 

Meili

Adventurer
Honestly, my feeling are mixed.

I did originally want to build on a utility bed but now I have to redo and/or throw away a bunch of work I have already done. Hate that!

My other concern is center of gravity. The first set up was as high as I wanted to go.

Sure it will a better setup in the end but a little overwhelmed. I'll get there!

Plus my mind is a bad thing, thinking about trimming the rear for a better departure angle since it gained length.

Gonna head to bed early, getting up at 3 am to take my daughter to the airport.
 

Attachments

  • s10 ute 22.jpg
    s10 ute 22.jpg
    79.8 KB · Views: 19

chilliwak

Expedition Leader
As long as you are light up top then the center of gravity is actually just a visual illusion. My truck is almost 12 feet high but all the weight is in the bottom. People think it will flip over if I get on any sideways angle. They are always surprised to see that this is not the case when I am out wheeling. Its the same with your rig as you only have a light weight tent at the top. As to the departure angle, just take the truck out on the trails you want to drive as is and see if you snag anything going over. If not then there is no need to trim. Trial and error is your best friend. I hope this helps. Cheers, Chilli..:)
 

02rangeredge

Adventurer
Honestly, my feeling are mixed.

I did originally want to build on a utility bed but now I have to redo and/or throw away a bunch of work I have already done. Hate that!

My other concern is center of gravity. The first set up was as high as I wanted to go.

Sure it will a better setup in the end but a little overwhelmed. I'll get there!

Plus my mind is a bad thing, thinking about trimming the rear for a better departure angle since it gained length.

Gonna head to bed early, getting up at 3 am to take my daughter to the airport.

If it's not going to take reengineering that rear box, I'd cut it for clearance
 

Meili

Adventurer
I have built, raced and crewed for various types of automotive racing so I got a handle on COG. ;)

The bottom 3 maybe 4 inches of the area I posted will most likely get some type of a rework. I would rather hit the hitch then the thin aluminum.

Today did a leaf spring rebuild and poor mans AAL.

Not sure of its original use but added the spring while rebuilding the leafs.

The first couple pictures are hardware I made using unused sway bar link parts I had. The parts are from the S10 Blazer I had parted out.

Glad I planned ahead, went 6 for 6 with all bolts snapping. The sleeves just disintegrated. Also used the Blazer parts to replace missing/damaged plastic

sliders.

Before putting the wheels back on, hit the inside of the wheelhouse with a layer of spray bedliner.

5650
 

Attachments

  • s10 leaf.JPG
    s10 leaf.JPG
    19.8 KB · Views: 290
  • s10 leaf 1.JPG
    s10 leaf 1.JPG
    23.5 KB · Views: 291
  • s10 leaf 2.JPG
    s10 leaf 2.JPG
    24.2 KB · Views: 288
  • s10 leaf 3.JPG
    s10 leaf 3.JPG
    21.1 KB · Views: 292
  • s10 leaf 4.JPG
    s10 leaf 4.JPG
    19.8 KB · Views: 289

Meili

Adventurer
Turned the utility bed from a hard top to a convertible today.

Wanting to save as much straight aluminum as possible, the top was disassembled as opposed to being demoed.

Stopped counting after drilling out the first 100 rivets. Only had to make 2 small cuts on the parts removed.

Came up with an idea for the rear bumper, it will be mounted upside-down and tucked. Hard to explain, will post some pictures tomorrow.

The end result will be the area I am planning on trimming will have diamond plate bottom vs. thin aluminium it has now.
 

Attachments

  • s10 ute 23.JPG
    s10 ute 23.JPG
    74.5 KB · Views: 14
  • s10 ute 24.JPG
    s10 ute 24.JPG
    108.9 KB · Views: 13

Meili

Adventurer
Lopped off about 3 1/2" of the d/s box top today. Left the small section near the cab since I will have to lift the bed to safely cut the rest.

The net gain (loss?) is actually just shy of 4 inches due to how the, now removed, lid closed.

This puts the inside height of the bed at 18 1/2" compared to the 16" of the stock bed. I can live with the overall height only going up 2 1/2 ".

Played around with MSpaint trying to explain the plan for the bumper.

First, about 4 " will be removed, almost flush with the side door bottoms., from the rear boxes for ground clearance/departure angle.

The rear bumper will be mounted upside down and tucked.

The diamond plate on the left (blue box) will be bent flat to form the bottom of the shortened boxs. The center section (red x) of the diamond plate will be

removed.

Hopefully you understand the crude graphics!

5850
 

Attachments

  • s10 cut 4.JPG
    s10 cut 4.JPG
    144.8 KB · Views: 18
  • s10 cut 5.JPG
    s10 cut 5.JPG
    134.9 KB · Views: 18
  • s10 cut 6.JPG
    s10 cut 6.JPG
    239.6 KB · Views: 19
  • s10 cut 7.JPG
    s10 cut 7.JPG
    163.8 KB · Views: 20
  • s10 bumper 3.JPG
    s10 bumper 3.JPG
    163 KB · Views: 19
  • s10 bumper 1.JPG
    s10 bumper 1.JPG
    136.9 KB · Views: 19
  • s10 bumper 4.JPG
    s10 bumper 4.JPG
    100.7 KB · Views: 19

jswift716

Adventurer
Yours has to be one of the favorite 5 threads I follow, keep it up man you have an awesome brain between your ears

Sent from my SM-G930P using Tapatalk
 

chilliwak

Expedition Leader
It should be interesting to see the finished result Meili. Keep those pics coming. Nice work as I am sure you have been getting at er. Cheers, Chilli...:)
 

Meili

Adventurer
Only top 5? Must try harder....

I would be hell with money and a proper shop but necessity is the mother of invention.

Not much to report on the S10, installed the headliner and custom d/s grab bar.

Been searching for transport for my daughter around college. Bought this today.

Only 650 original miles. Spent about an hour cleaning it up, dont think it was ever washed.

Runs well.
 

Attachments

  • tfr 1.JPG
    tfr 1.JPG
    147.1 KB · Views: 26
  • tfr 2.JPG
    tfr 2.JPG
    153.4 KB · Views: 28

Meili

Adventurer
Well, got back home after a 2,000 miles southern loop yesterday. Delivered my daughter the moped in Tennessee and the visited some relatives

in Virginia on my way back.

The wife's old van did well, averaged 75 mph and got 24 mpg. Not bad for a 12 year old beat up Pontiac.

Spent some time in Nashville teaching my daughter how to ride. Also got her a good helmet and in true Dad fashion added reflectors!

Stopped to visit my southern Aunt and Uncle. Nice visit but bittersweet since they both have cancer and this was most likely

the last time I will see them alive. If you are a smoker you should really consider quitting, I did. OK, off my soapbox.

Not much to report on the S10, chopped the D/S box today. Funny how much quicker the second side goes.

Spending time with my oldest tomorrow, so hoping to lift the bed and finish cutting Thursday.

Good to be home.

6635
 

Attachments

  • kinetic 1.JPG
    kinetic 1.JPG
    97.8 KB · Views: 25
  • kinetic 2.JPG
    kinetic 2.JPG
    70.4 KB · Views: 25
  • kinetic 3.JPG
    kinetic 3.JPG
    53.6 KB · Views: 23
  • kinetic 4.JPG
    kinetic 4.JPG
    30.4 KB · Views: 23
  • s10 ute 25.JPG
    s10 ute 25.JPG
    108.3 KB · Views: 26
  • s10 ute 26.JPG
    s10 ute 26.JPG
    118.4 KB · Views: 24
Last edited:

chilliwak

Expedition Leader
Good to see you back safe and sound Meili after your long trip. Also sorry to hear about your relatives having cancer. I lost someone close due to lung cancer so I know what its all about. Looking forward to seeing more of your buid. Cheers, Chilli..:)
 

Meili

Adventurer
Today was productive!

To finish the cuts had to lift the bed and move it back. Even with that space, cutting was a challenge using a circular saw, sawz-all, cut off wheel and drill!

Cutting the front took a little brain power since I could not just cut it off an refit it because of material lose from cutting. Ended up cutting down, then over

then down. In the end it worked out pretty well.

I abandoned the idea of reusing the lids that I had remove earlier. Just too much work to rework them.

Ended up using some old sign material for the tops. It is a plastic sandwiched between layers of coated aluminum. Strong and lite.

Reused the aluminum angle that held the sliding lid on the inside edge of boxes. Also added angle cross braces to screw to. The ends will also have

aluminum angle on them to support the new tops.

May coat the end of the box with spray bedliner tomorrow before remounting.
 

Attachments

  • s10 ute 27.JPG
    s10 ute 27.JPG
    66.5 KB · Views: 25
  • s10 ute 28.JPG
    s10 ute 28.JPG
    48.1 KB · Views: 24
  • s10 ute 29.JPG
    s10 ute 29.JPG
    62.4 KB · Views: 23
  • s10 ute 30.JPG
    s10 ute 30.JPG
    83.5 KB · Views: 24
  • s10 ute 31.JPG
    s10 ute 31.JPG
    71.9 KB · Views: 24
  • s10 ute 32.JPG
    s10 ute 32.JPG
    66.1 KB · Views: 25
  • s10 ute 33.JPG
    s10 ute 33.JPG
    127.3 KB · Views: 26
  • s10 ute 34.JPG
    s10 ute 34.JPG
    92.3 KB · Views: 27
  • s10 ute 35.JPG
    s10 ute 35.JPG
    65.2 KB · Views: 22
  • s10 ute 36.JPG
    s10 ute 36.JPG
    97.7 KB · Views: 23

Meili

Adventurer
Added aluminum angle to the "inside" of the boxes, the full perimeter will have angle for mounting the tops.

Scuffed the end of the utility box and hit it with spray on bed liner. First went heavy on the seams and screws, then fogged the rest.

Remounted the bed hiding all the work I did!

Worked on all the latches and hinges since they are easy to get to without the tops being on. Lots of rivets and adjustments.

Roughed in, VERY ROUGH, the refrigerator, again because of ease of access.

Plenty of room to open the door and still have a 2 foot corridor. The top may become a table.

Left early to knock out the lawn since the next few days are going to be 90+. At least its going to be humid! ;)

7046
 

Attachments

  • s10 ute 37.JPG
    s10 ute 37.JPG
    68.5 KB · Views: 21
  • s10 ute 38.JPG
    s10 ute 38.JPG
    95.9 KB · Views: 22
  • s10 ute 39.JPG
    s10 ute 39.JPG
    116.9 KB · Views: 21
  • s10 frig 1.JPG
    s10 frig 1.JPG
    103.9 KB · Views: 21
  • s10 frig 2.JPG
    s10 frig 2.JPG
    75.1 KB · Views: 22
  • s10 frig 3.JPG
    s10 frig 3.JPG
    116.6 KB · Views: 22

Forum statistics

Threads
185,830
Messages
2,878,677
Members
225,393
Latest member
jgrillz94
Top