You are using an out of date browser. It may not display this or other websites correctly.
You should upgrade or use an alternative browser.
You should upgrade or use an alternative browser.
S10 Build getting started
- Thread starter Meili
- Start date
Meili
Adventurer
Had a good time at the races with friends. Chased some gremlins but the car ran 10.30's calculated. Had to run the 1/8 due to a crosswind.
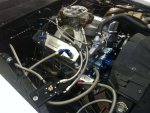
Put my "Pontiac" tools away and got my "Chevy" tools out. The Chevy tools are smaller and make less torque so you have to work harder.")
Anyway, swapped the March underdrive pulleys from the 88 to the 85. Fortunately the front of the 4.3 is the same as the 350 so
the newer tensioner,idler and belt were swapped also.
I had it worked out that with 4.10 gears (up from 3.42) combined with the underdrive everything will be turning at the same rpm as stock
at any given speed. Well not everything, I got the AMP series so the alternator will be spinning at "4.10" speed.
Never put my meter on it but used the stock gauge for the following:
The gauge would read 1 notch above the 13, no load at speed, read on the 13 loaded at speed, 1 notch below 13 at idle, loaded.
Now the gauge reads 1 to 2 notches above the 13 no matter what. The battery will be happier and more importantly the cooling fan will have all
the power they need.
Also found the previous owner had spliced a CS 130 plug on the harness but the alternator is a CS 130D, "round hole , square peg", literally.
Dug up a CS 130D plug and crimped it on for now.
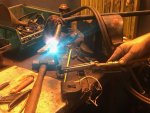
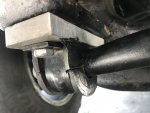
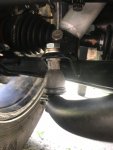
Last, adjusted the sway bar ends with the hot wrench to better match the mounts on the lower control arms. Hope to have it mounted
permanently tomorrow.
Can't happen soon enough, overloaded with camping gear, full gas tank she wallows a bit!
14509
Put my "Pontiac" tools away and got my "Chevy" tools out. The Chevy tools are smaller and make less torque so you have to work harder.
Anyway, swapped the March underdrive pulleys from the 88 to the 85. Fortunately the front of the 4.3 is the same as the 350 so
the newer tensioner,idler and belt were swapped also.
I had it worked out that with 4.10 gears (up from 3.42) combined with the underdrive everything will be turning at the same rpm as stock
at any given speed. Well not everything, I got the AMP series so the alternator will be spinning at "4.10" speed.
Never put my meter on it but used the stock gauge for the following:
The gauge would read 1 notch above the 13, no load at speed, read on the 13 loaded at speed, 1 notch below 13 at idle, loaded.
Now the gauge reads 1 to 2 notches above the 13 no matter what. The battery will be happier and more importantly the cooling fan will have all
the power they need.
Also found the previous owner had spliced a CS 130 plug on the harness but the alternator is a CS 130D, "round hole , square peg", literally.
Dug up a CS 130D plug and crimped it on for now.
Last, adjusted the sway bar ends with the hot wrench to better match the mounts on the lower control arms. Hope to have it mounted
permanently tomorrow.
Can't happen soon enough, overloaded with camping gear, full gas tank she wallows a bit!
14509
Attachments

Last edited:
Meili
Adventurer
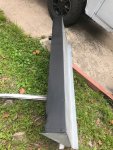
Did the "final" mounting of the 2wd front sway bar. Painted it, so it looked pretty.
Had to make a different spacer for the frame mounts to clear the skid plate. Used some leftover aluminum stock.
Used bushings, brackets that are lower profile then stock S10s from my box of leftovers to help clear the skid plates. Good to be a pack rat.
The factory brackets on the lower control arms are at an angle so that's why the end links look wonky.
It drives much better, reduced sway but should have minimal effect on articulation offroad.
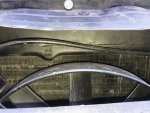
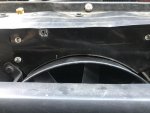
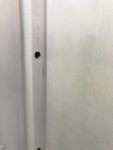
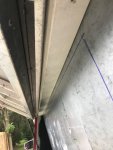
Did some air management. Noticed air coming out of the grill toward the top. Using a very high tech method of hold paper towel stripes,
found where it was coming from.
The air "wanted" to come out rather then go threw the ac condenser to the radiator.
Got out the tin-snips and repurposed a leftover piece of the back door to block the air from getting out.
The air now was going threw the condenser but out a 1/2" gap at the top of the radiator. Solve one problem, create/find another.
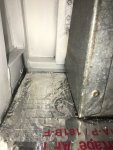
Not the best picture but loosened the radiator and installed weatherstrip to fill the gap.
Should help keep things cool, especially once I get the a/c working.
14646
Had to make a different spacer for the frame mounts to clear the skid plate. Used some leftover aluminum stock.
Used bushings, brackets that are lower profile then stock S10s from my box of leftovers to help clear the skid plates. Good to be a pack rat.
The factory brackets on the lower control arms are at an angle so that's why the end links look wonky.
It drives much better, reduced sway but should have minimal effect on articulation offroad.
Did some air management. Noticed air coming out of the grill toward the top. Using a very high tech method of hold paper towel stripes,
found where it was coming from.
The air "wanted" to come out rather then go threw the ac condenser to the radiator.
Got out the tin-snips and repurposed a leftover piece of the back door to block the air from getting out.
The air now was going threw the condenser but out a 1/2" gap at the top of the radiator. Solve one problem, create/find another.
Not the best picture but loosened the radiator and installed weatherstrip to fill the gap.
Should help keep things cool, especially once I get the a/c working.
14646
Attachments

Last edited:
Meili
Adventurer
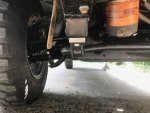
First an update on the sway-bar. The 50% less stifferer bar seems to hit the Goldilocks zone, just right.
It is soft enough not to jar your teeth like the stocker and controls sway enough that I feel confident driving it.
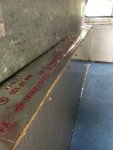
Did some interior work. Wanted to seal the back wall I had built better.
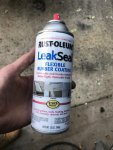
Thought about spraying inside with bed liner but decided to try Rustoleum Leak Seal.
The idea is to seal it as well as put a layer to form a thermal break, admittedly a small one!
It turned out OK. I found the trick is multiple very thin coats from far away or it globs up. Tape accordingly.
After the first coat noticed how nice the panels that I had caulked/glued with Quad looked at the seams.
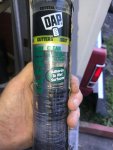
So before the next coat decided to seal ALL the seam/joints I could get to. Used Dap clear. Took a couple hours and used 2 tubes.
Still need to do the hatches. Should tighten the whole unit up.
After the caulking and second coat of Rustoleum, it looked pretty good, so decided to do some insulating. Sorry, forgot to take a "second coat" picture.
I has a long piece of 1/2" jute left over from my restoration days so started cutting and gluing.
Sprayed them on back Scotch Super 7, cut the pieces slightly oversize so they had to be stuffed in to be sure they stayed put.
Not planning on going to Antarctica or anything but should be nice and toasty when I crank up my Mr. Buddy heater in Fall or Winter!
14997
It is soft enough not to jar your teeth like the stocker and controls sway enough that I feel confident driving it.
Did some interior work. Wanted to seal the back wall I had built better.
Thought about spraying inside with bed liner but decided to try Rustoleum Leak Seal.
The idea is to seal it as well as put a layer to form a thermal break, admittedly a small one!
It turned out OK. I found the trick is multiple very thin coats from far away or it globs up. Tape accordingly.
After the first coat noticed how nice the panels that I had caulked/glued with Quad looked at the seams.
So before the next coat decided to seal ALL the seam/joints I could get to. Used Dap clear. Took a couple hours and used 2 tubes.
Still need to do the hatches. Should tighten the whole unit up.
After the caulking and second coat of Rustoleum, it looked pretty good, so decided to do some insulating. Sorry, forgot to take a "second coat" picture.
I has a long piece of 1/2" jute left over from my restoration days so started cutting and gluing.
Sprayed them on back Scotch Super 7, cut the pieces slightly oversize so they had to be stuffed in to be sure they stayed put.
Not planning on going to Antarctica or anything but should be nice and toasty when I crank up my Mr. Buddy heater in Fall or Winter!
14997
Attachments
-
 s10 insul 1.JPG83.9 KB · Views: 19
 -
 s10 insul 2.JPG100.2 KB · Views: 19
 -
 s10 insul 8.JPG110.9 KB · Views: 19
 -
 s10 insul 10.jpg356.2 KB · Views: 19
 -
 s10 insul 3.JPG40.8 KB · Views: 19
 -
 s10 insul 6.jpg82 KB · Views: 17
 -
 s10 insul 9.JPG86.2 KB · Views: 19
 -
 s10 insul 4.JPG43.9 KB · Views: 19
 -
 s10 insul 5.JPG72.4 KB · Views: 19
Last edited:
Meili
Adventurer
"Have you thought about a rear sway with all that weight and the lift?", why yes, yes I have.
Keep in mind I did add an AAL (add a leaf) which increased rear spring rate that helped control sway.
I am happy with it for now. As more is done, more weight will be added so a rear bar may become a necessity.
If it turns out I need to go that way, 1994-2002 S10/Sonomas had a 23mm bar which would be a good match to the 28mm front bar on it now.
Of course , I will modify the endlinks to help with articulation like the front.
Stock is so boring!
Meili
Adventurer
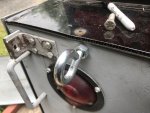
My homemade hinge for the spare overlapped the reverse lights so cut 3 inches off it and spritzed it with paint.
Since there is an abundance of excess holes in the back, added 2 heavy duty rings to the back. Never enough places to tie down stuff!
Also clearanced the locking pins so my keyed alike padlocks will fit.
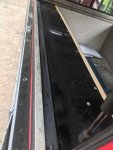
Removed the d/s pocket/well for the last time, hopefully.
Coated the bottom with the last bit of the spray on bed liner. In the picture of it, you see a 90 degree bend at the top
(bottom in the picture) that was cut off.
A friend gave see some leftover insulation that was foiled backed. Covered the black shelf with it and sealed the edges with foil tape. Getting cozier.
Reinstalled the pocket and filled the top with a thick piece of wood,screwed in from the inside. Just need to seal it up with some caulk.
15087
Since there is an abundance of excess holes in the back, added 2 heavy duty rings to the back. Never enough places to tie down stuff!
Also clearanced the locking pins so my keyed alike padlocks will fit.
Removed the d/s pocket/well for the last time, hopefully.
Coated the bottom with the last bit of the spray on bed liner. In the picture of it, you see a 90 degree bend at the top
(bottom in the picture) that was cut off.
A friend gave see some leftover insulation that was foiled backed. Covered the black shelf with it and sealed the edges with foil tape. Getting cozier.
Reinstalled the pocket and filled the top with a thick piece of wood,screwed in from the inside. Just need to seal it up with some caulk.
15087
Attachments
-
 s10 spare 31.JPG65.6 KB · Views: 20
 -
 s10 spare 32.JPG74.1 KB · Views: 19
 -
 s10 insul 11.JPG119.8 KB · Views: 19
 -
 s10 insul 12.JPG144.7 KB · Views: 19
 -
 s10 insul 14.JPG99.2 KB · Views: 18
 -
 s10 insul 15.JPG121.8 KB · Views: 20
 -
 s10 insul 16.JPG230.8 KB · Views: 20
 -
 s10 insul 17.JPG98.7 KB · Views: 20
 -
 s10 insul 18.JPG73.9 KB · Views: 21
 -
 s10 spare 33.JPG78.6 KB · Views: 21
Last edited:
Meili
Adventurer
Had to order parts, having a brake issue, proportioning valve is leaking. That's a first for me.
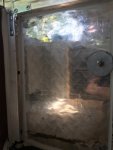
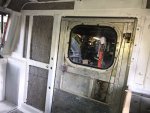
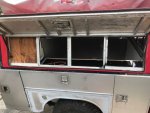
My original plan was to make the Passenger hatch closed permanently. Going to build some storage units inside so no real need for access from outside.
While working inside recently, realized how nice the breeze and the natural light is.
The D/S will be getting a sliding window but there will be no cross ventilation so...... decided to frame out the passenger side.
The new plan is to cover the whole area with 3/8" white translucent Plexiglas (repurposed old sign) for light. Eventually will add a
screened area maybe even a fan.
In really foul weather, can just close the door so it really does not need to be weatherproof but I can't help myself so it will be all sealed up.
The door will be insulated.
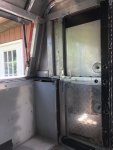
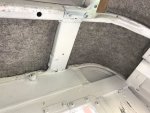
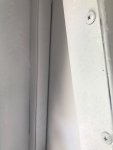
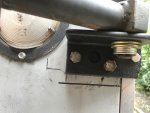
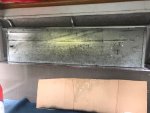
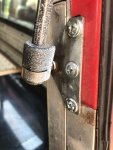
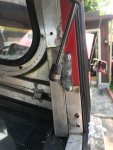
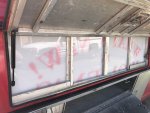
First, had to rework the lower mount for the strut with a 5 pounder. Shown in a picture of the D/S mount for comparison first.
That allowed me to splice a piece behind it. I need to pack out(in) the frame to clear the struts and latch workings.
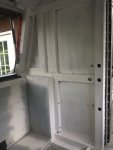
The center section with the uprights is the old rear door frame from the cap turned on it's side. The rest of the aluminum is from the rack that
came on the cap.
The plywood is standing in for the Plexiglas to show how it will be mounted.
15444
My original plan was to make the Passenger hatch closed permanently. Going to build some storage units inside so no real need for access from outside.
While working inside recently, realized how nice the breeze and the natural light is.
The D/S will be getting a sliding window but there will be no cross ventilation so...... decided to frame out the passenger side.
The new plan is to cover the whole area with 3/8" white translucent Plexiglas (repurposed old sign) for light. Eventually will add a
screened area maybe even a fan.
In really foul weather, can just close the door so it really does not need to be weatherproof but I can't help myself so it will be all sealed up.
The door will be insulated.
First, had to rework the lower mount for the strut with a 5 pounder. Shown in a picture of the D/S mount for comparison first.
That allowed me to splice a piece behind it. I need to pack out(in) the frame to clear the struts and latch workings.
The center section with the uprights is the old rear door frame from the cap turned on it's side. The rest of the aluminum is from the rack that
came on the cap.
The plywood is standing in for the Plexiglas to show how it will be mounted.
15444
Attachments

Last edited:
Meili
Adventurer
Unfortunately my Aunt, that I had mentioned a while back, passed last night. I will be making an unscheduled trip to Virginia, so today was a short day.
Leaving in 2 hours.
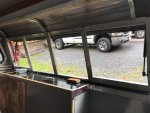
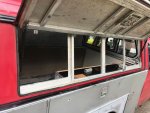
Finished packing out the top/inside of the frame using left over aluminum and 2 small sections of wood. The wood was used to conform better over some
screw heads. Got final measurements for the Plexiglas.
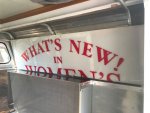
The content of the sign kinda cracks me up. Maybe I should leave it, should draw in the ladies! The letters do and will be peeled off.
Right now it is held in with one screw, locks in at the bottom. Love it when a plan works out.
Works well as a light as you can tell by the last picture!
Gotta go take a shower and pack.
15527
Leaving in 2 hours.
Finished packing out the top/inside of the frame using left over aluminum and 2 small sections of wood. The wood was used to conform better over some
screw heads. Got final measurements for the Plexiglas.
The content of the sign kinda cracks me up. Maybe I should leave it, should draw in the ladies! The letters do and will be peeled off.
Right now it is held in with one screw, locks in at the bottom. Love it when a plan works out.
Works well as a light as you can tell by the last picture!
Gotta go take a shower and pack.
15527
Attachments


Last edited:
Meili
Adventurer
FBJR, thanks.
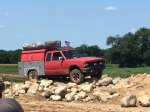
Having some brake issues but crutched it enough to make The "4X4 at the Farm" event near me.
At the gate they asked if I was sure I wanted to run the course, registration the same, about 1/2 dozen people said the same before I ever made a run.
They turned the course up a notch or 2 since last time. Added a couple rock gardens, mounds were higher, and the mud pit was deeper.
I ran everything but over the cars and enjoyed watching "better"vehicles take the bypasses.
The course workers loved the truck, one said, "that thing just goes".
Went 1 for 2 in the pit, but there were many taller,bigger tired etc etc that did not make it once.
All in all, happy with where the truck suspension is now in regards to it's offload ability.
Attachments
Last edited:
Meili
Adventurer
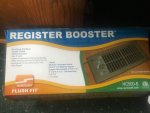
Next couple of days moving my youngest to college, yeah empty nest!
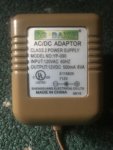
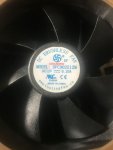
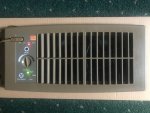
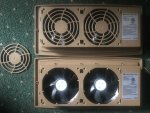
Here is a fan I bought a while back for the build. One will be used to vent the frig and one to move some air inside camper.
The thermostat function will make venting the frig condenser relatively easy. The packing box will make a nice template for cutting a hole.
Should be good in camper since the provided transformer drops power to 12v dc. Did some testing with a battery charger vs the transformer.
Hooking to the charger at the 2 amp setting, the fan output picked up. Set it to 10 amp and the output jumped again.
Ran it on and off for a couple days and the unit seems to like the extra available amps compared to the transformers 500mA.
Read online that removing the back grills cut down on wind noise, it did.
They will not blow you over, but you can feel a slight breeze 6 foot away.
For small volume I am working with, hoping they will move enough to keep it from getting stagnate inside.
15873
Attachments
Last edited:
Forum statistics
Members online
- benSan
- orlx470
- Howsay
- David_h
- gator70
- chopyourown
- nemesisnight
- tikesdad
- AlpineClimb
- Greenbarn
- bronxbomber252
- ReghettiAndMeatballs
- Overland Endeavour
- tundra_camper
- Zillon
- Madmaxwell87
- VJroverman
- BrewNut
- v-adventures
- Lhenecke
- Chinampas
- Martiny505
- bikebackchris
- 3IMOH
- pappawheely
- Ozarker
- SierraTheJKUR
- ThePartyWagon
- MobiusKB
- mudmony
- PLaBarge
- dalingsco
- AZWanderer
- Pacific Northwest yetti
- GeneralChingon
- 4runnerteq
- CoryQuackenbush
- rover26c
- mark5280
- Willsfree
- Billman369
- Oshkosh-P
- DrivnNCryin
- blcl2019
- spacecowboy7777
- Deleted Member 183
- claymond
- Balto_JLRUD
- Jedi7Taco
- wisnerma
Total: 621 (members: 70, guests: 551)