You are using an out of date browser. It may not display this or other websites correctly.
You should upgrade or use an alternative browser.
You should upgrade or use an alternative browser.
The DiscoDavis Sandglow Thread
- Thread starter DiscoDavis
- Start date
DiscoDavis
Explorer
You're doing a great job. I enjoy watching this thread.
awesome build/resto... even started following you on IG to keep up to date on the LR.
Hey thanks guys, I appreciate you following along
") . Been trundling away at the laundry list, keep forgetting to put photos up.
. Been trundling away at the laundry list, keep forgetting to put photos up.DiscoDavis
Explorer
Stickers, lift pump, light brackets
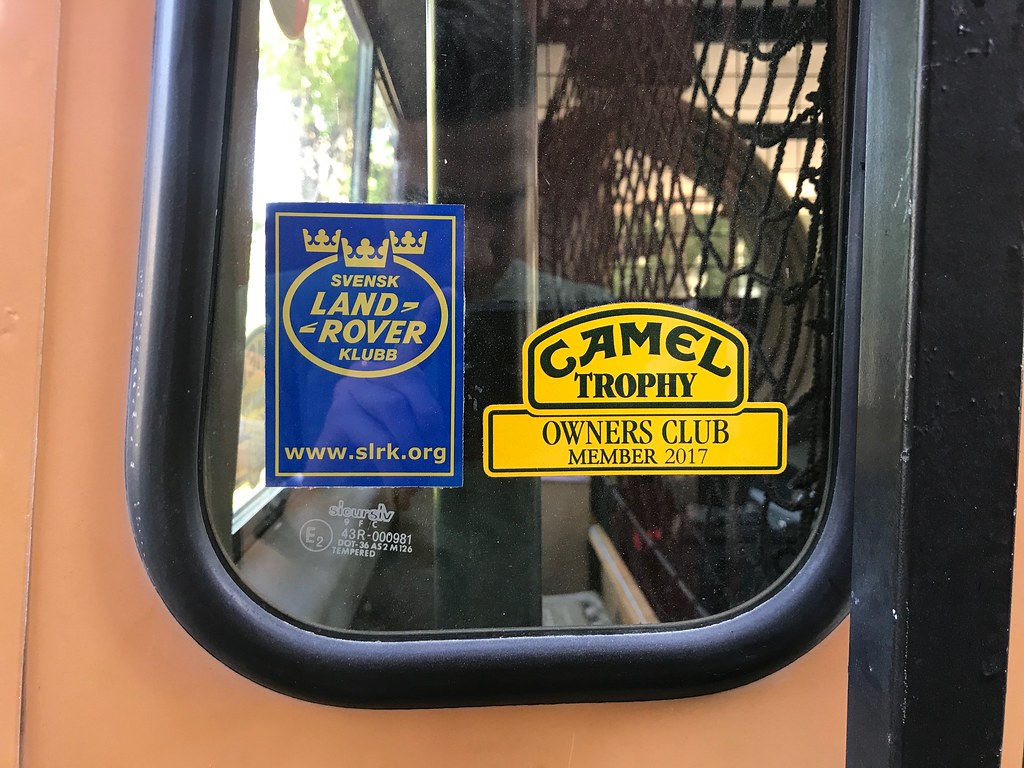
Dug a Svensk LR club sticker out from the vault. One of several Wouter provided back when the D3 was around, and the CT one came in the mail
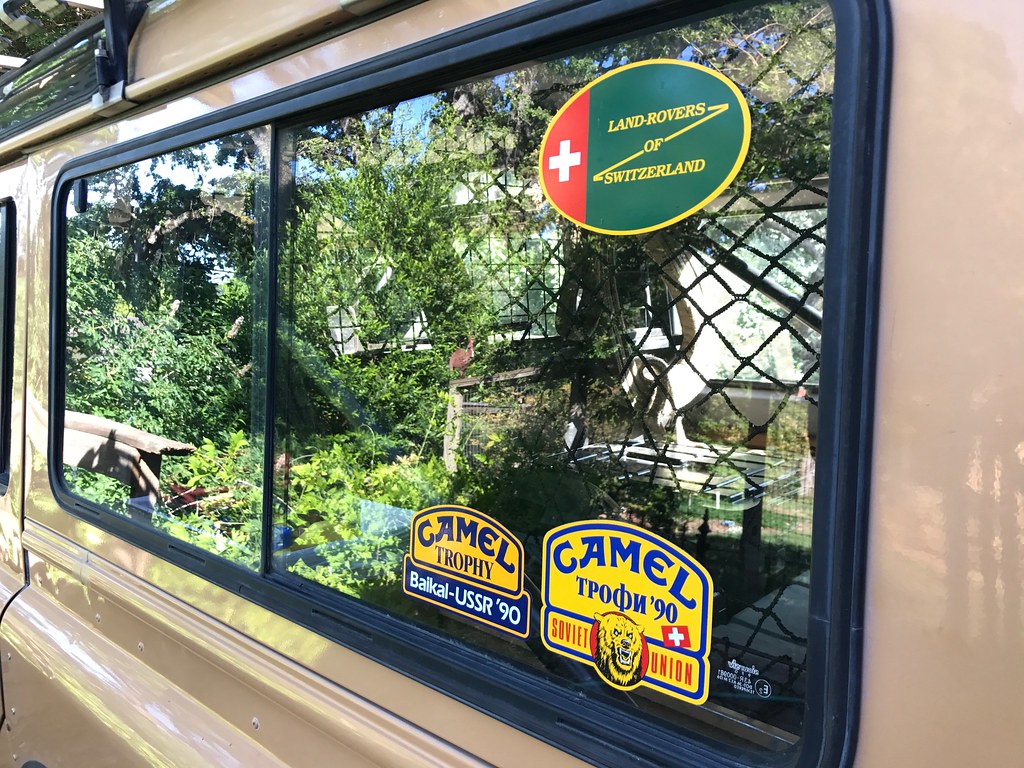
Also stuck a Swiss one on there too that Marc and Nick gifted to me last year
Baikal one came off Dutch ebay, even had the application instructions printed on the reverse side btw.
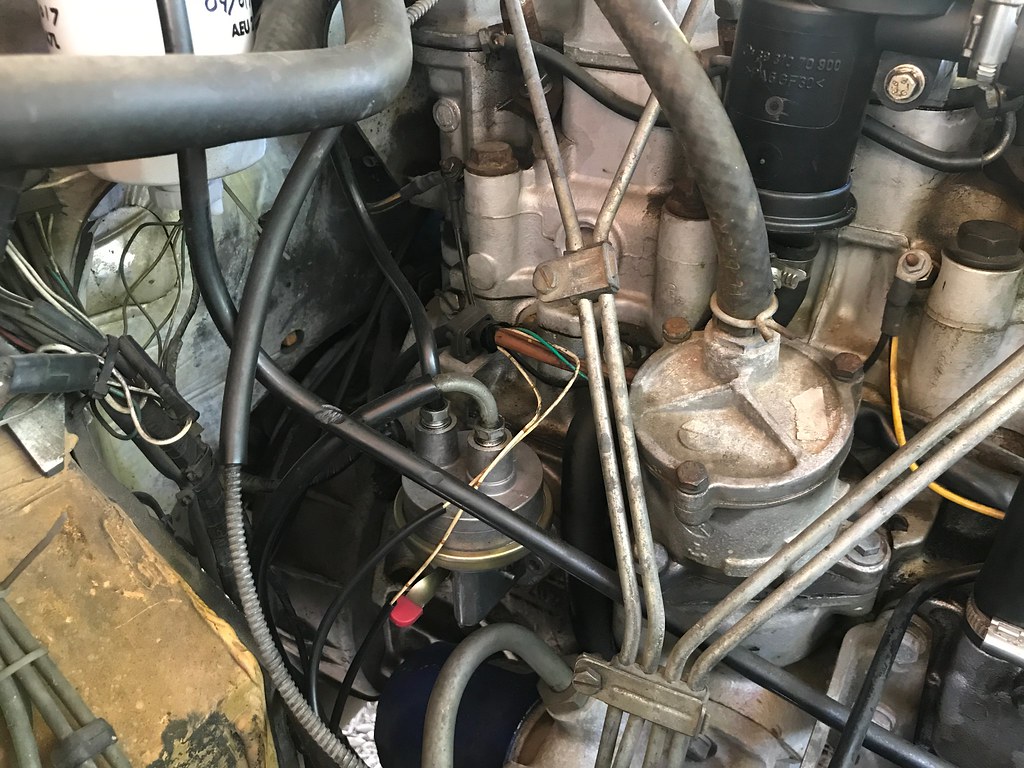
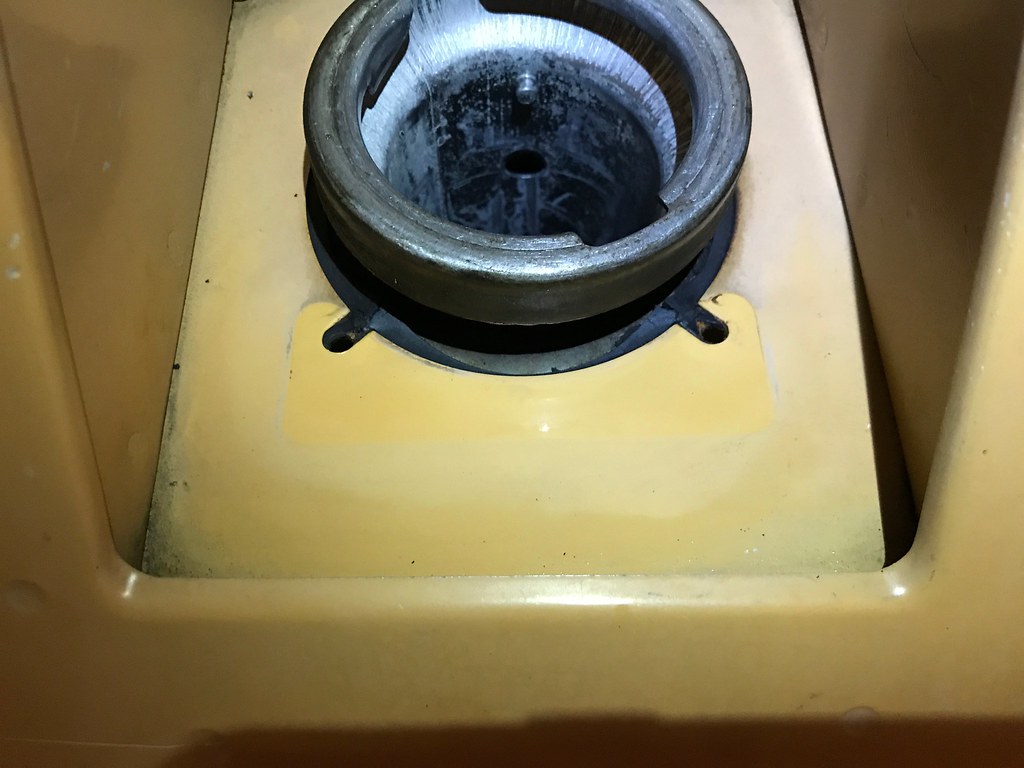
Pump
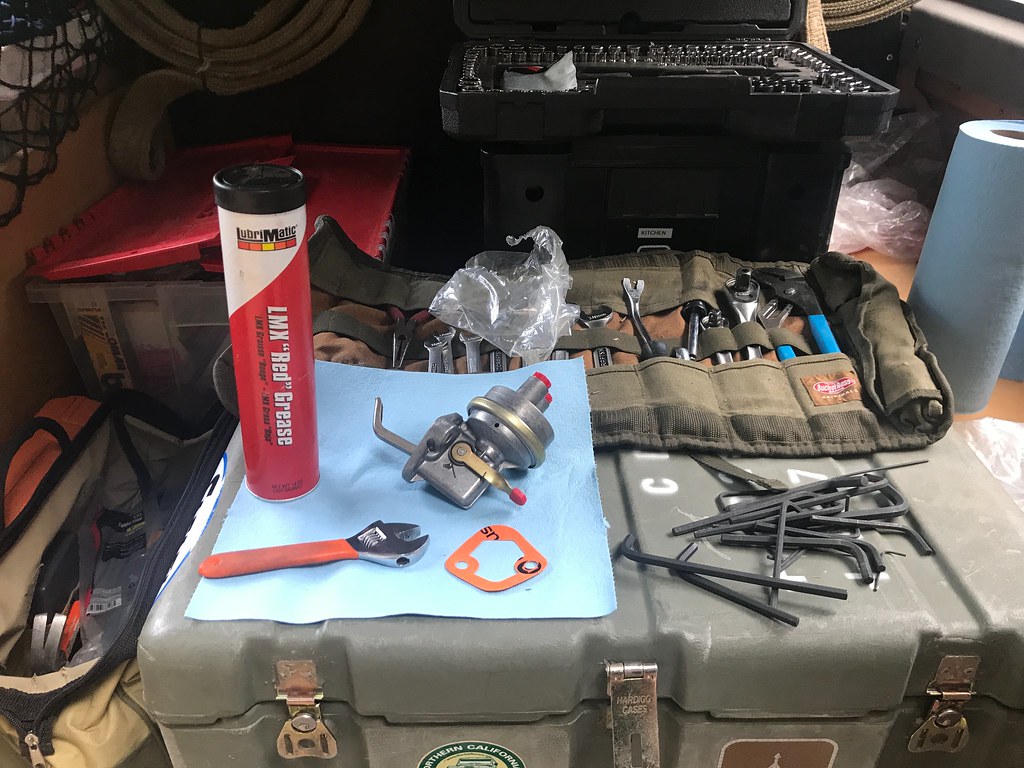
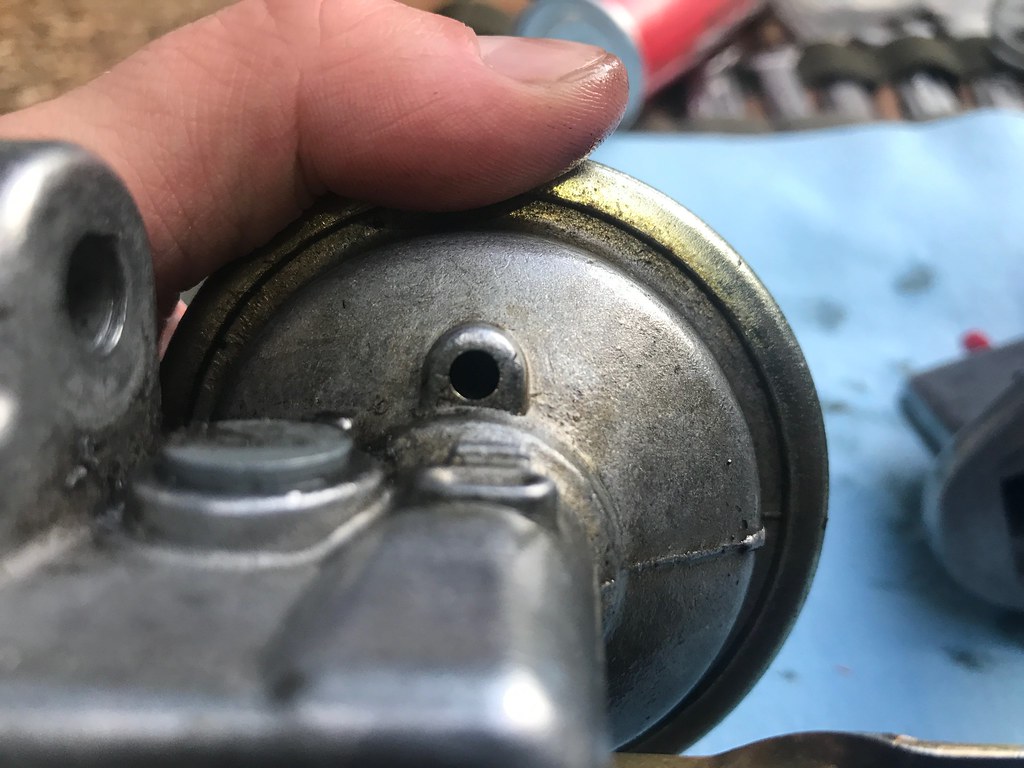
Shortly after the water pump went, noticed a drip every once in a while of diesel coming from roughly the lift pump area. My google-**** tells me if the dripping is from the relief hole (small hole on side or bottom of pump), the diaphragm is on its way out. The little orange wrench comes from a childs tool set I had, for whatever reason that one tool stuck around. Good for small fittings.
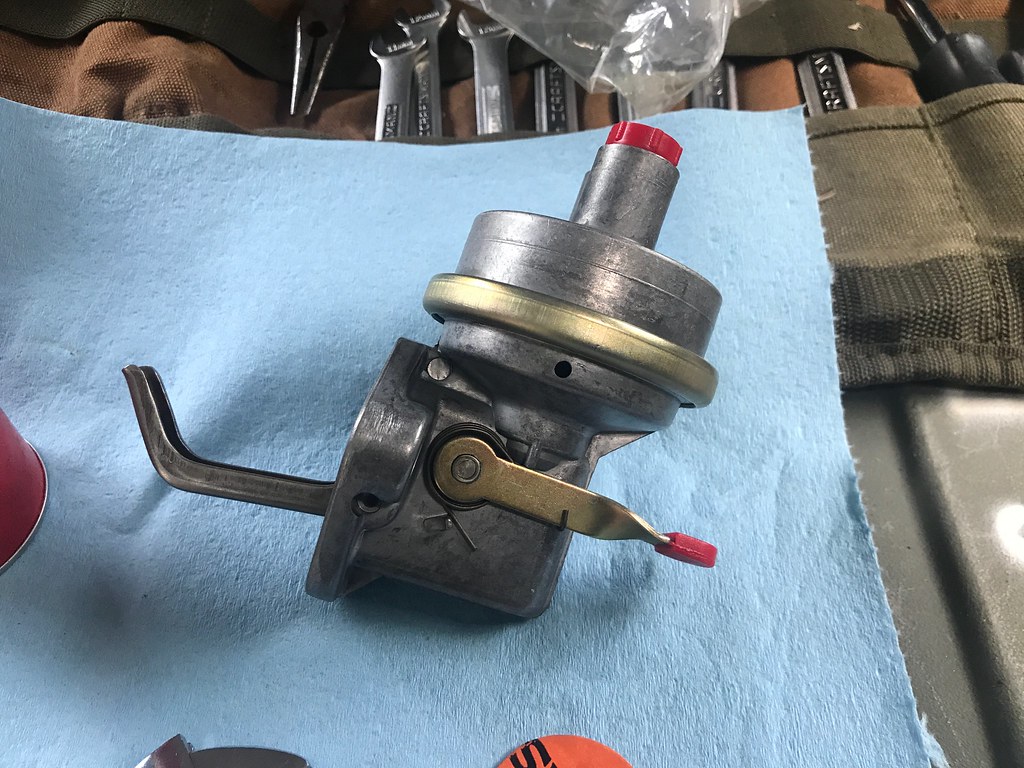
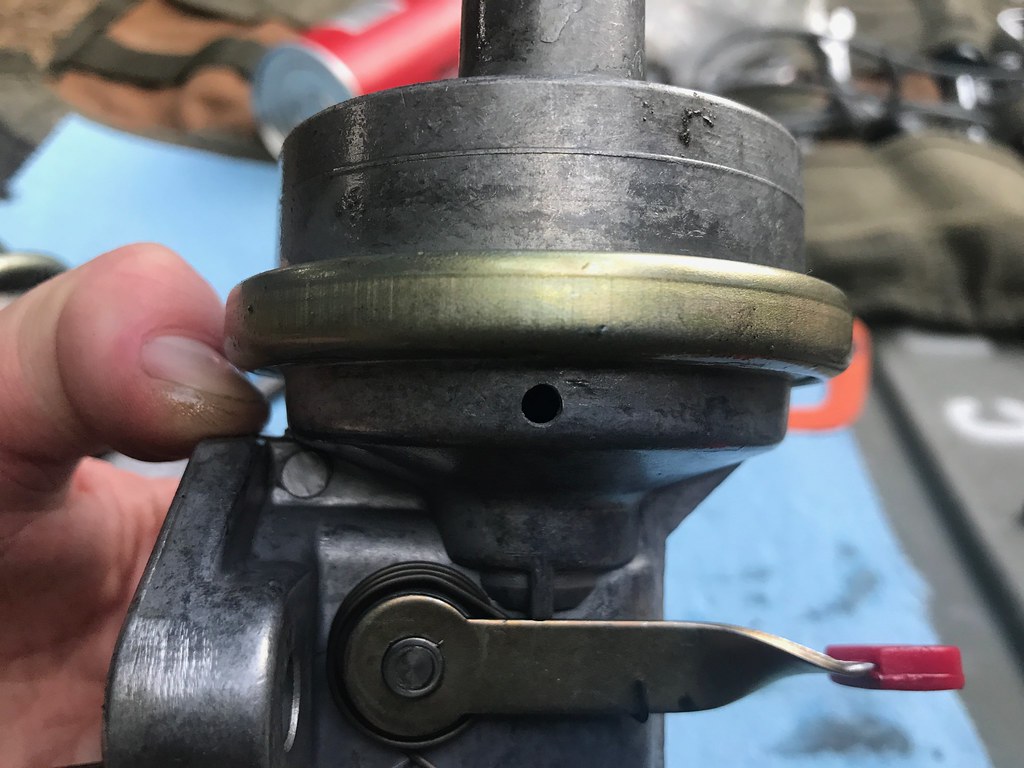
Slightly different style, but it looked like the right one, allmakes model. See the relief hole on side.

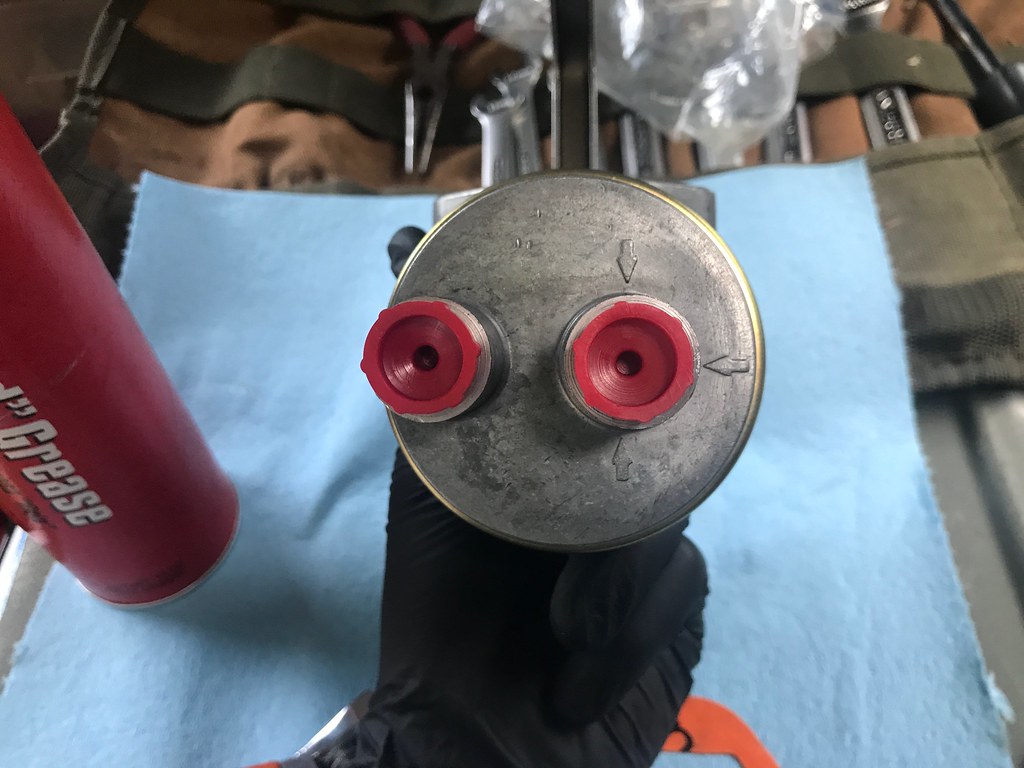
See pictogram telling which port is inlet
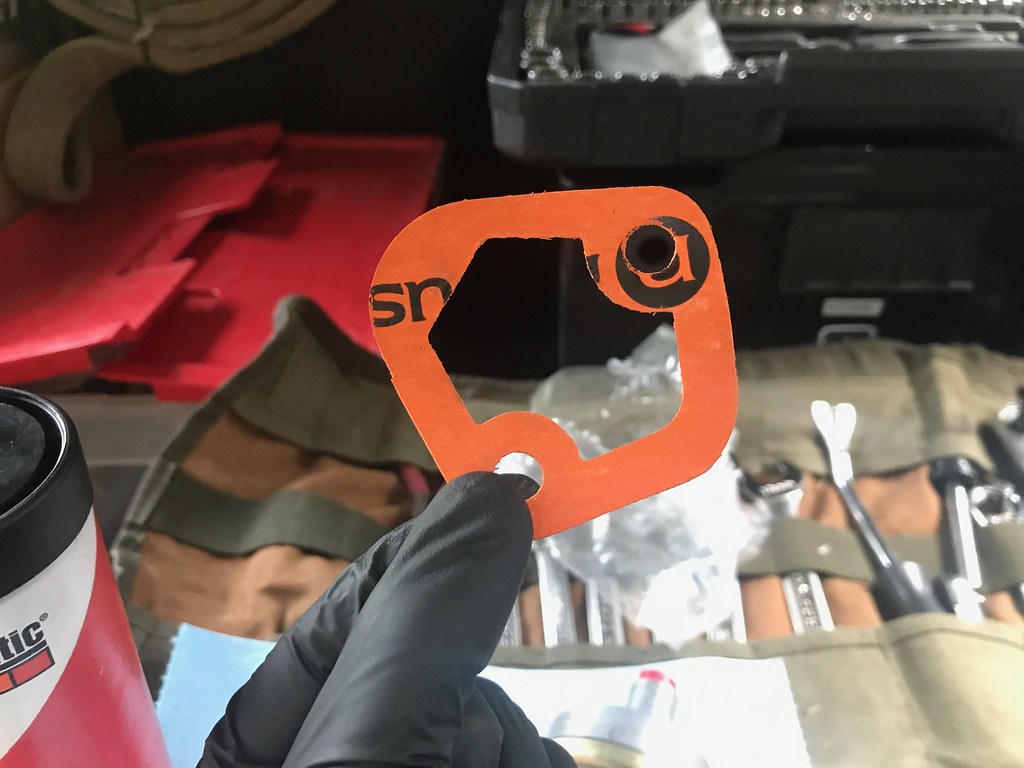
Neat gasket material, not quite the construction paper stuff I got for the water pump. Like rubbery paper. How nice would it be to have CAD files of all the little gaskets and seals for the car and just cut them out as needed...
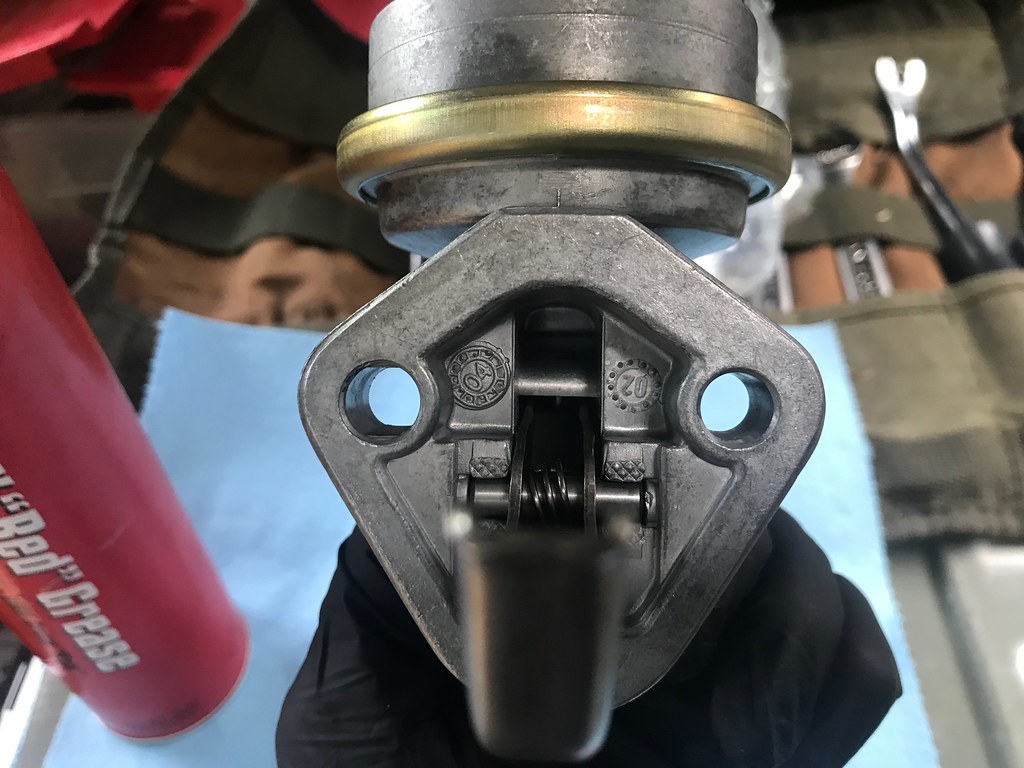
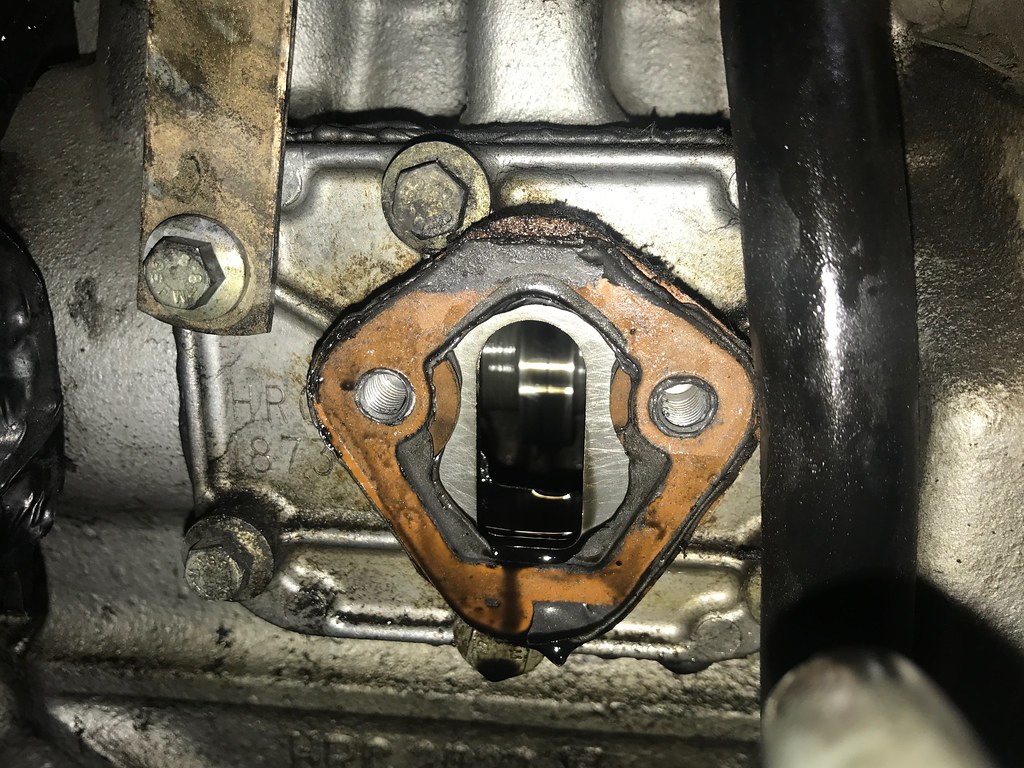
Culprit
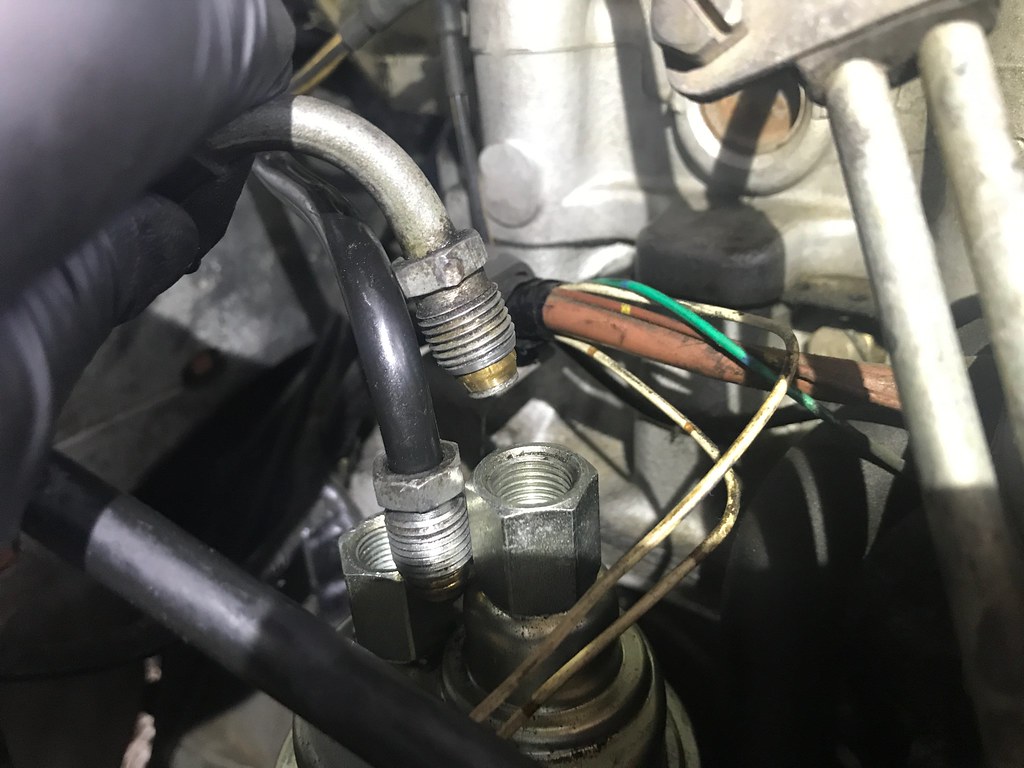
Fittings
Really like this cam-driven stuff, mechanical injection only takes 2 bolts, 2 fittings to service.
This relief hole was bottom-facing, easier to diagnose under the car? Vs replacement

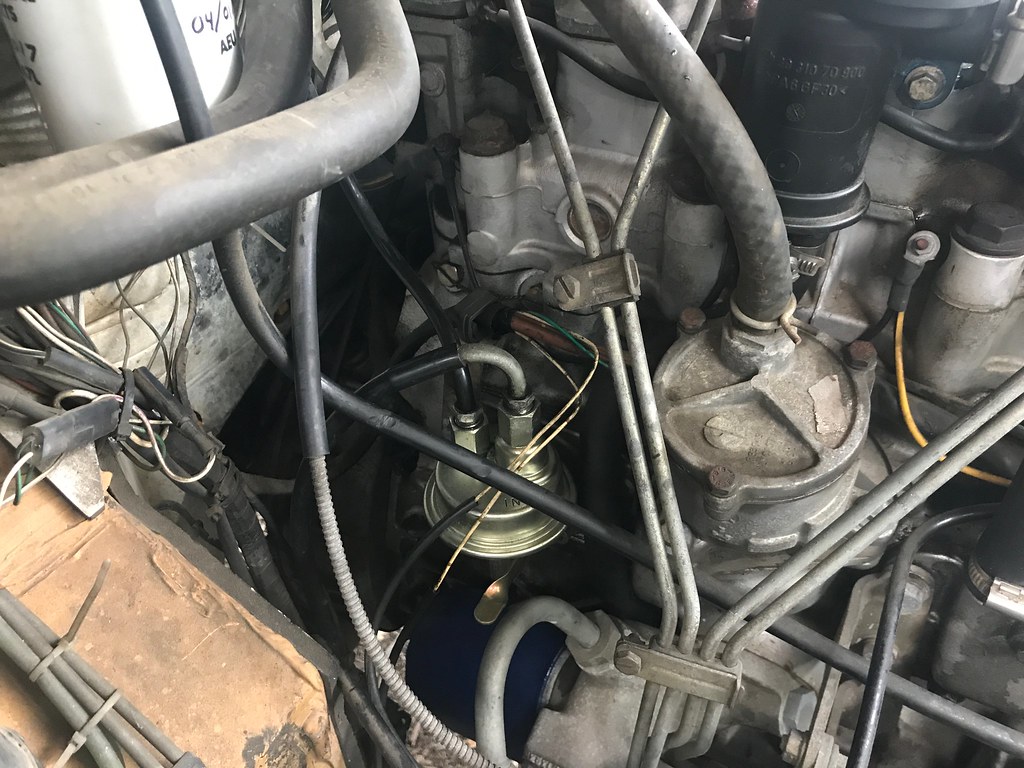
Installed
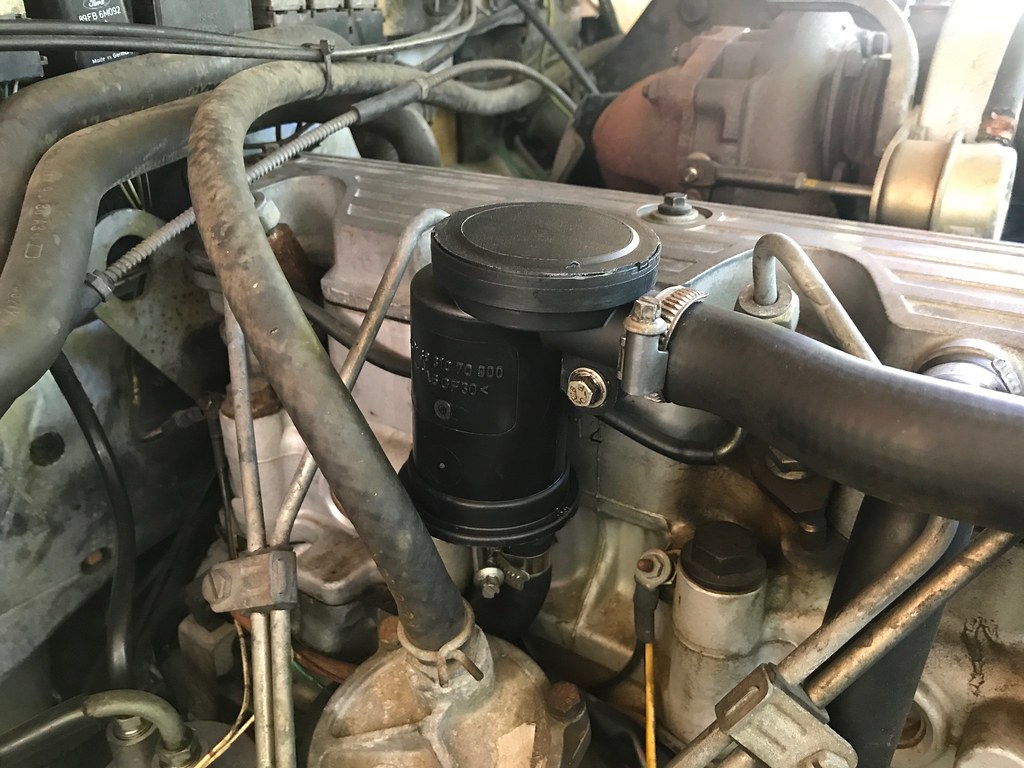
Kept getting oil breathing through into turbo inlet, new PCV. Someone on another forum relayed a few tests that were done recently on snorkels and the air restrictions they create allowing the PCV to vent more oil than normal into the air intake. Remind myself to link that in another post.
Lights
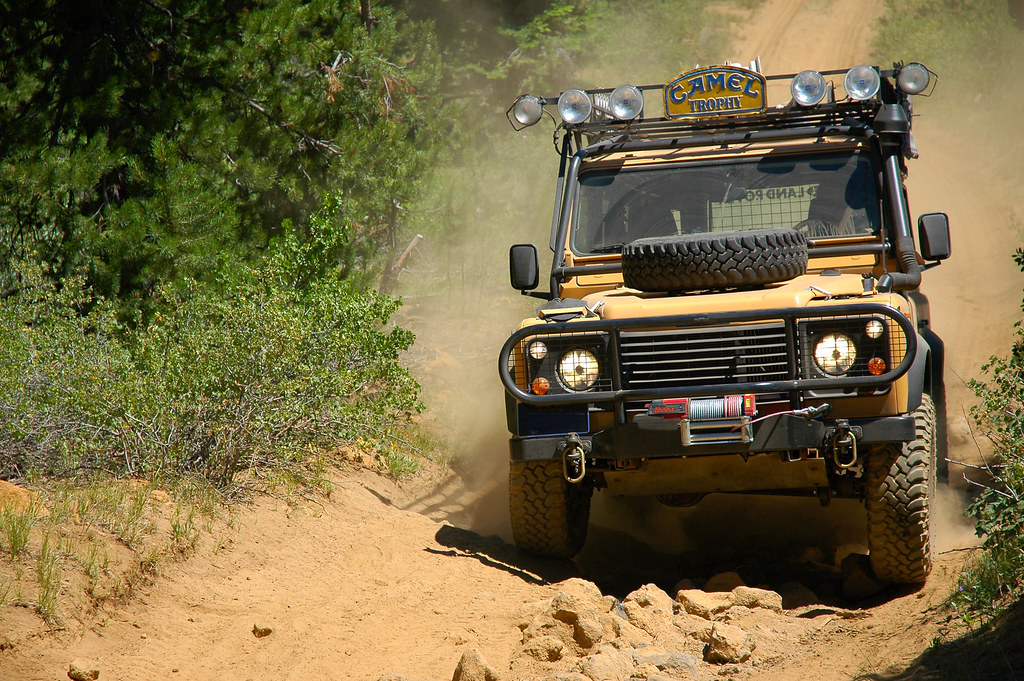
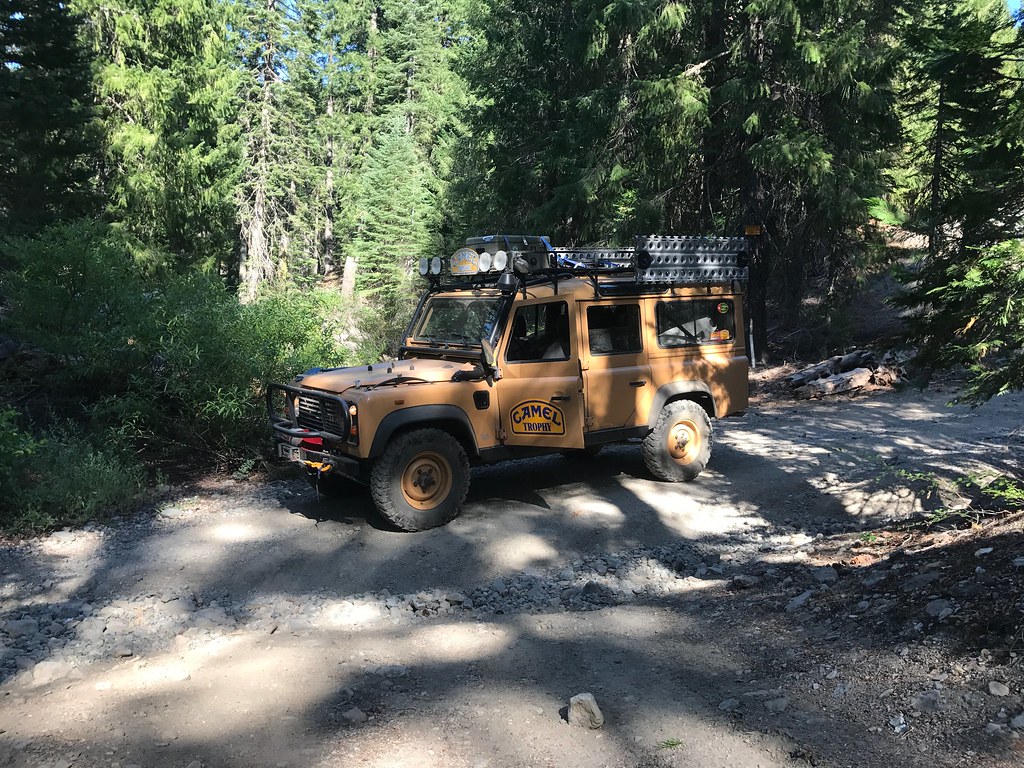
Pretty sure this is actually the same car taken years before in Oregon. Note the orientation of the lights. Photo: BHCM Bailey
Footnote: Odd that the rear door has the LAND ROVER decal when now it does not... hmmm
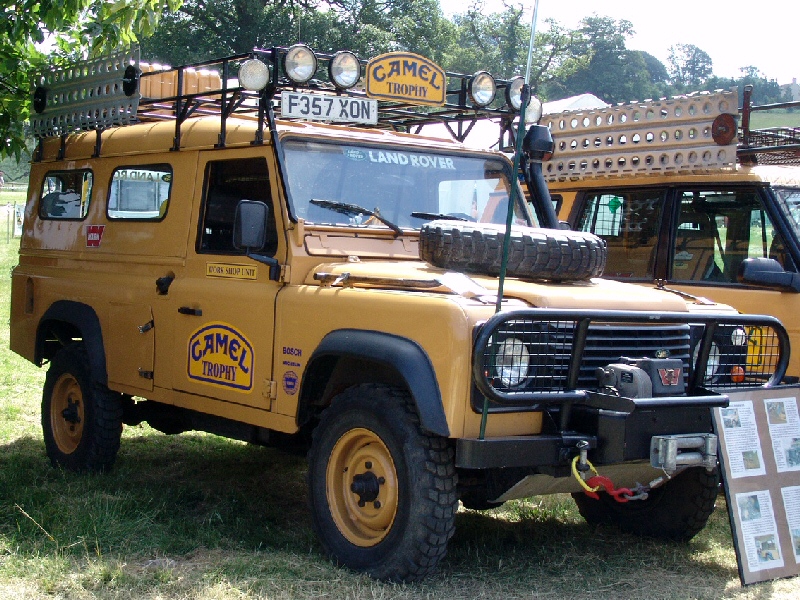
Now this is one of the 1989 workshop units. Note the orientation of the lights. Photo: AdriansTomcat
Looking way back at the late eighties events and right up to the 1990 prescout, the ninetys and one-tens used to have up to 6 rack mounted lights. On every single vehicle that had the 6 lamps, each had them with handles facing downward, so that driver or passenger could reach up and direct the lights, or more likely still, to rotate them for clearance or protection from branches. This vehicle was not fitted with limb lifters (the brownchurch bar is a later version that matches the 1992-onwards cars), and I can tell you they constantly take hits. Weirdly the light tabs on this rack were removed by a previous restoration to galvanize the rack, or re-galvanize, and welded back on backwards... Thus the lights folded horizontally and looked weird.
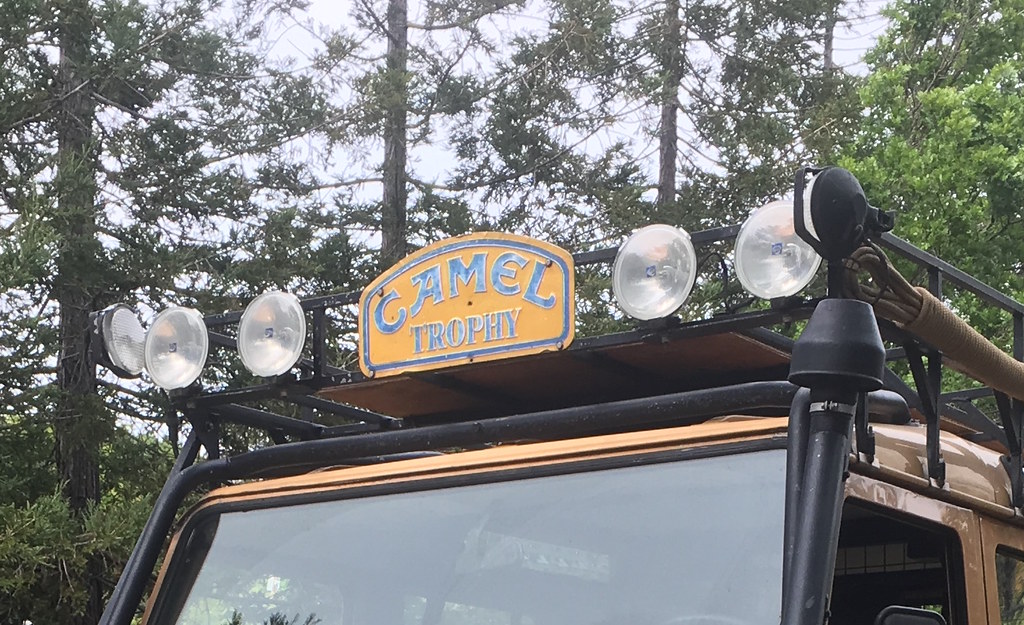
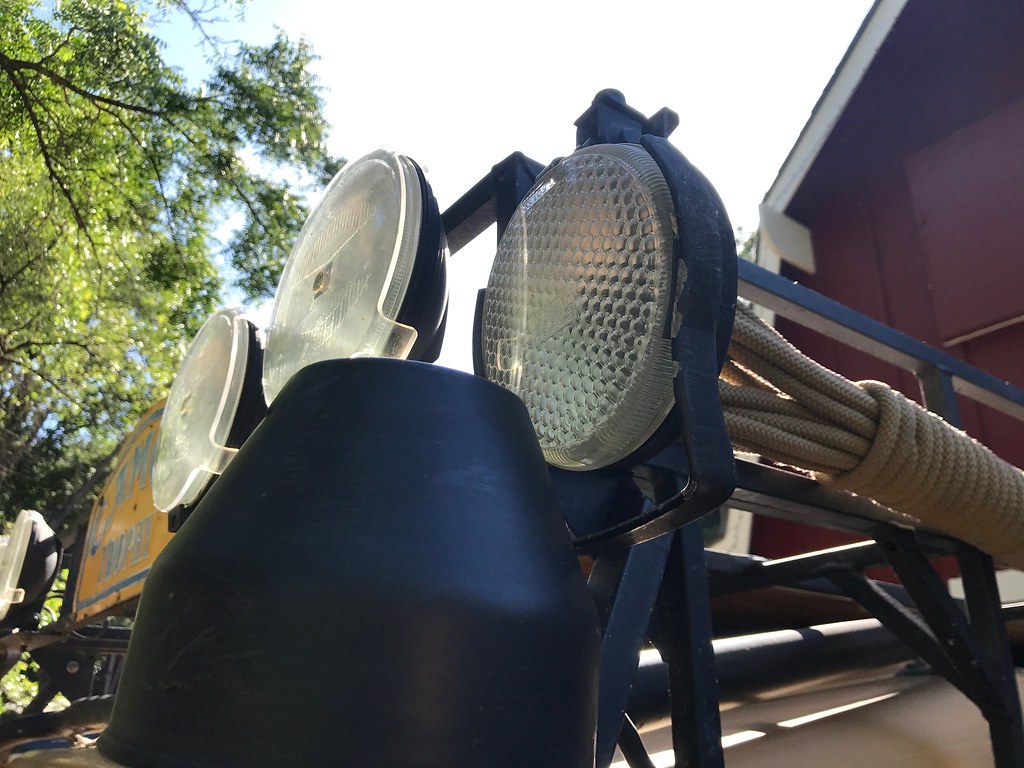
Instead of cutting off the tabs and reversing them, I just bent some mild steel tabs, painted and bolted them to adjust.
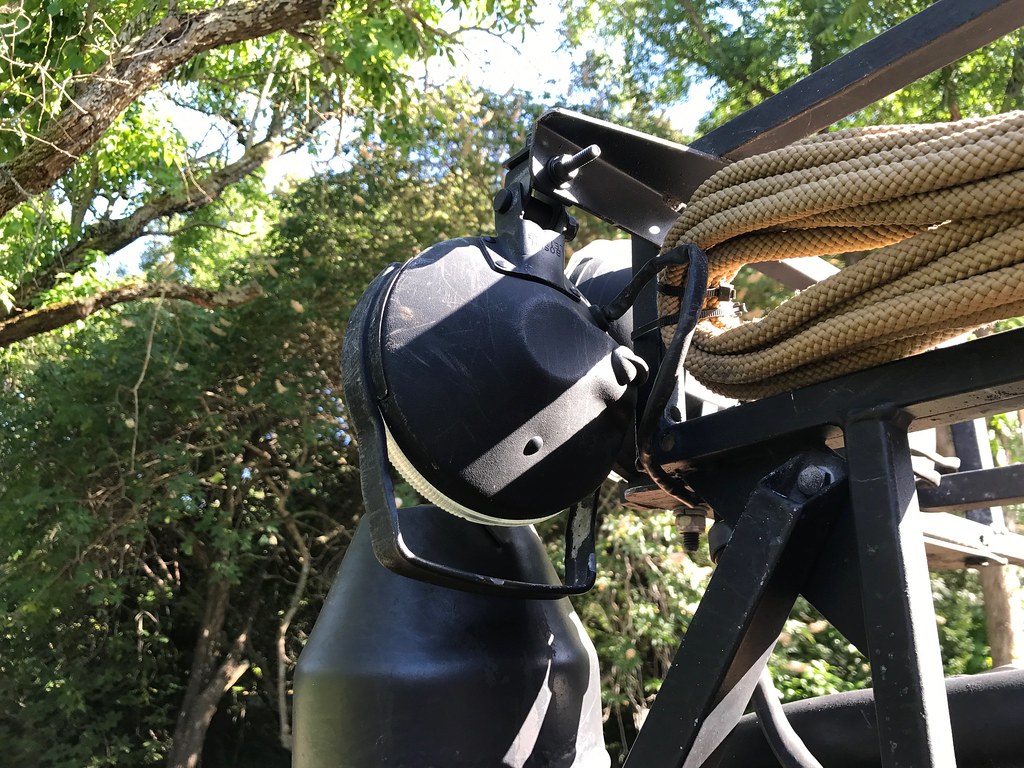
One lamp is actually higher than the other to clear the snorkel in front of it.
This is just one of several tidbits
Dug a Svensk LR club sticker out from the vault. One of several Wouter provided back when the D3 was around, and the CT one came in the mail
Also stuck a Swiss one on there too that Marc and Nick gifted to me last year
Baikal one came off Dutch ebay, even had the application instructions printed on the reverse side btw.
Pump
Shortly after the water pump went, noticed a drip every once in a while of diesel coming from roughly the lift pump area. My google-**** tells me if the dripping is from the relief hole (small hole on side or bottom of pump), the diaphragm is on its way out. The little orange wrench comes from a childs tool set I had, for whatever reason that one tool stuck around. Good for small fittings.
Slightly different style, but it looked like the right one, allmakes model. See the relief hole on side.
See pictogram telling which port is inlet
Neat gasket material, not quite the construction paper stuff I got for the water pump. Like rubbery paper. How nice would it be to have CAD files of all the little gaskets and seals for the car and just cut them out as needed...
Culprit
Fittings
Really like this cam-driven stuff, mechanical injection only takes 2 bolts, 2 fittings to service.
This relief hole was bottom-facing, easier to diagnose under the car? Vs replacement
Installed
Kept getting oil breathing through into turbo inlet, new PCV. Someone on another forum relayed a few tests that were done recently on snorkels and the air restrictions they create allowing the PCV to vent more oil than normal into the air intake. Remind myself to link that in another post.
Lights
Pretty sure this is actually the same car taken years before in Oregon. Note the orientation of the lights. Photo: BHCM Bailey
Footnote: Odd that the rear door has the LAND ROVER decal when now it does not... hmmm
Now this is one of the 1989 workshop units. Note the orientation of the lights. Photo: AdriansTomcat
Looking way back at the late eighties events and right up to the 1990 prescout, the ninetys and one-tens used to have up to 6 rack mounted lights. On every single vehicle that had the 6 lamps, each had them with handles facing downward, so that driver or passenger could reach up and direct the lights, or more likely still, to rotate them for clearance or protection from branches. This vehicle was not fitted with limb lifters (the brownchurch bar is a later version that matches the 1992-onwards cars), and I can tell you they constantly take hits. Weirdly the light tabs on this rack were removed by a previous restoration to galvanize the rack, or re-galvanize, and welded back on backwards... Thus the lights folded horizontally and looked weird.
Instead of cutting off the tabs and reversing them, I just bent some mild steel tabs, painted and bolted them to adjust.
One lamp is actually higher than the other to clear the snorkel in front of it.
This is just one of several tidbits
Conner, you don't need CAD for gaskets like that, you just need a small ball peen hammer.
(didn't your father teach you anything?? )
Simply lay the gasket material over the metal surface you want to make a gasket for and tap tap tap away. The sharp edges of the steel (aluminum, etc) are enough to cut through the material giving you an exact-fit gasket. Smaller bolt holes may not punch out completely but will mark enough that you can come back and trim them out. If you want to make a set of cheap circle punches for bolt holes, make friends with some shooters. The brass makes an excellent punch. Pick up a 50 cal, .44, .38, .22, 9mm, etc and you've got basically free punches in a variety of common sizes. (obviously I'm talking about spent brass...don't go trying to hammer on live rounds now!)
Try it some day - it's easy and surprisingly enjoyable.
(didn't your father teach you anything??
)Simply lay the gasket material over the metal surface you want to make a gasket for and tap tap tap away. The sharp edges of the steel (aluminum, etc) are enough to cut through the material giving you an exact-fit gasket. Smaller bolt holes may not punch out completely but will mark enough that you can come back and trim them out. If you want to make a set of cheap circle punches for bolt holes, make friends with some shooters. The brass makes an excellent punch. Pick up a 50 cal, .44, .38, .22, 9mm, etc and you've got basically free punches in a variety of common sizes. (obviously I'm talking about spent brass...don't go trying to hammer on live rounds now!)
Try it some day - it's easy and surprisingly enjoyable.
DiscoDavis
Explorer
Conner, you don't need CAD for gaskets like that, you just need a small ball peen hammer.
(didn't your father teach you anything??
Simply lay the gasket material over the metal surface you want to make a gasket for and tap tap tap away. The sharp edges of the steel (aluminum, etc) are enough to cut through the material giving you an exact-fit gasket. Smaller bolt holes may not punch out completely but will mark enough that you can come back and trim them out. If you want to make a set of cheap circle punches for bolt holes, make friends with some shooters. The brass makes an excellent punch. Pick up a 50 cal, .44, .38, .22, 9mm, etc and you've got basically free punches in a variety of common sizes. (obviously I'm talking about spent brass...don't go trying to hammer on live rounds now!)
Try it some day - it's easy and surprisingly enjoyable.
Huh, I had not thought of this, would be perfect in a pinch... only question I have is clearance. But hey I want to be space age
.JBinAlabama
New member
Fantastic thread! Enjoying the documentation as you go!
DiscoDavis
Explorer
Updates long overdue (sorry Kip didn't spot your reply!):
12.26.2017 backlog to Summer 2017
Found a photo from the first weekend with the car, took maybe a 250 mile cruise up and down the coast with a chase car.
(Photo: A. Klicks)(Feb 2017)
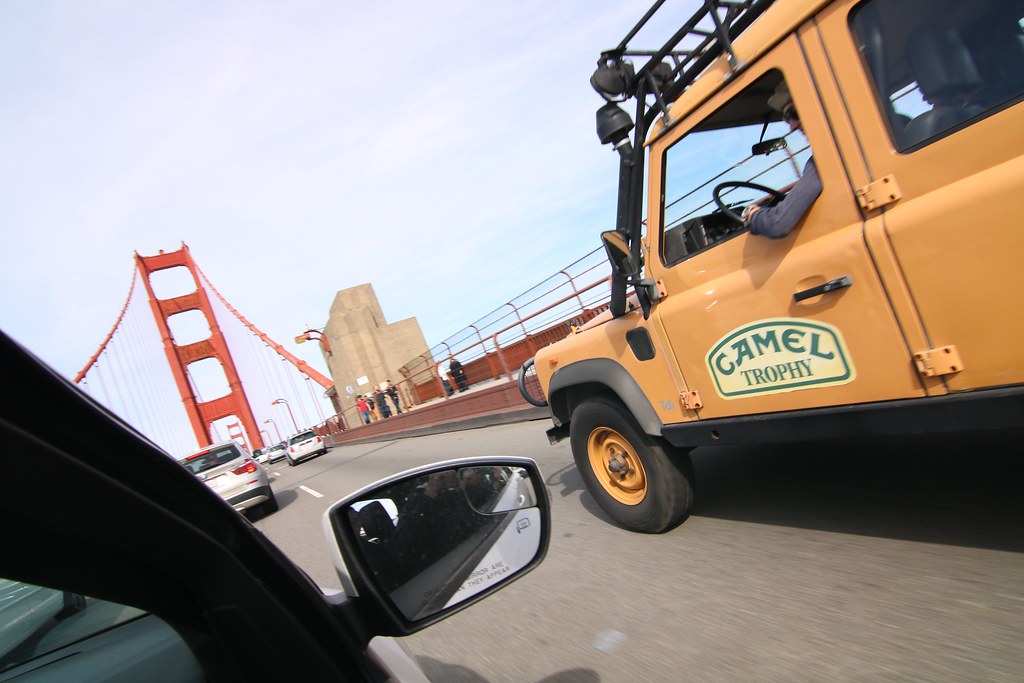
Someone sent me this DeMuro tweet, a close relative of my car's era, Pre-91 rack, has a husky. Wonder what the plate # is.
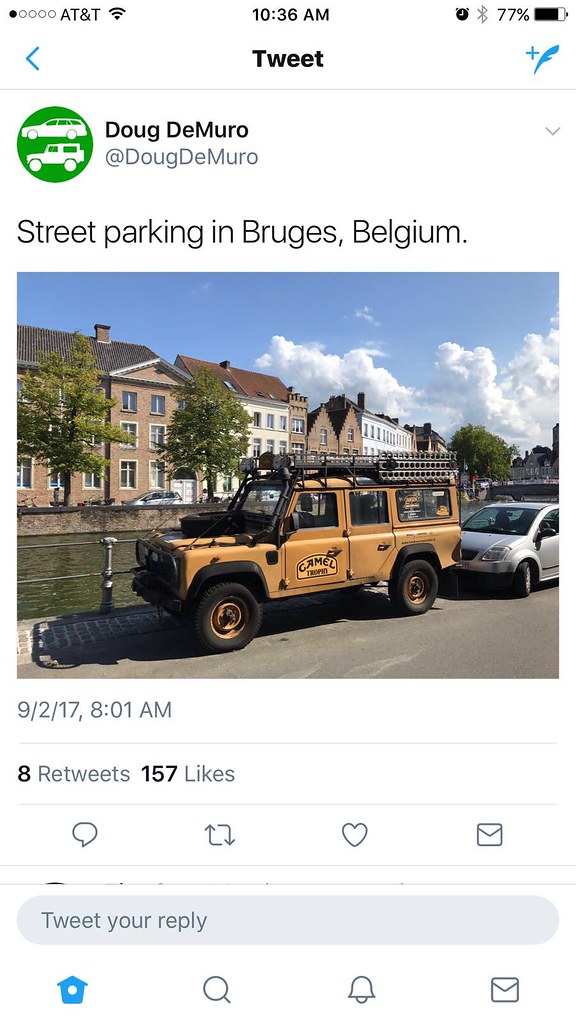
For comparison
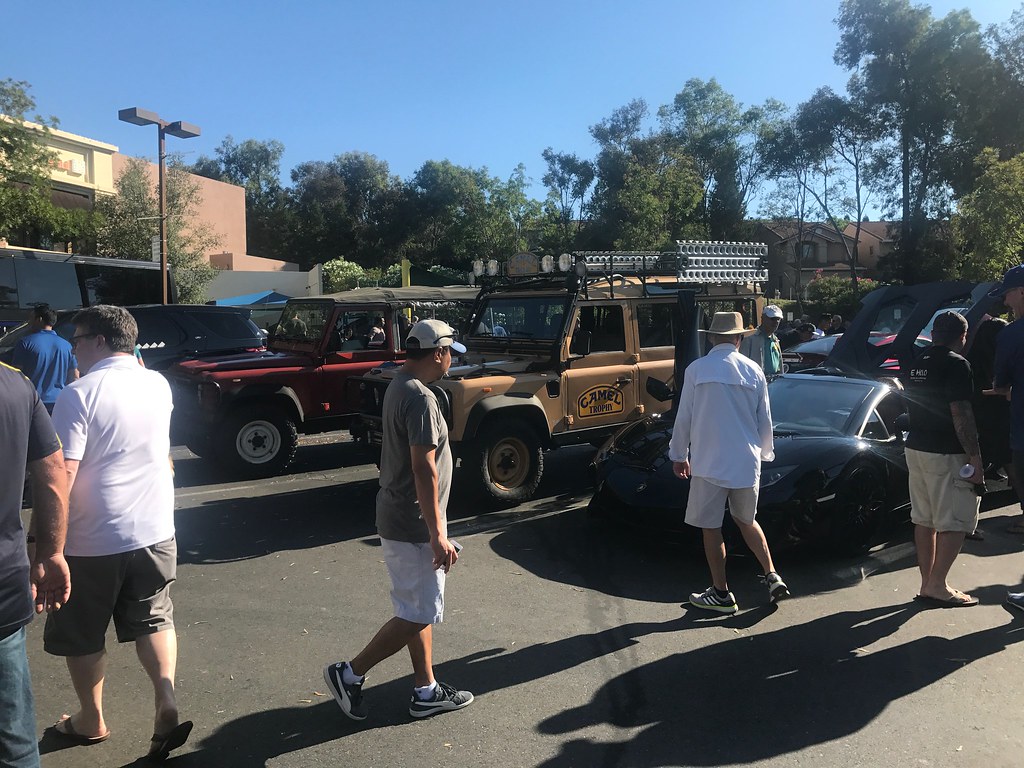
And sometime over the summer Sheepdog and I went over to a Cars and Coffee where our local dealer had saved some spots! Put us next to a Lambo, owner is a Youtuber? Had to warn her to maybe close her doors and put the top up when we went to leave, to avoid all the nice soot getting everywhere. Didn't get any good pics.
12.26.2017 backlog to Summer 2017
Found a photo from the first weekend with the car, took maybe a 250 mile cruise up and down the coast with a chase car.
(Photo: A. Klicks)(Feb 2017)
Someone sent me this DeMuro tweet, a close relative of my car's era, Pre-91 rack, has a husky. Wonder what the plate # is.
For comparison
And sometime over the summer Sheepdog and I went over to a Cars and Coffee where our local dealer had saved some spots! Put us next to a Lambo, owner is a Youtuber? Had to warn her to maybe close her doors and put the top up when we went to leave, to avoid all the nice soot getting everywhere. Didn't get any good pics.
Last edited:
DiscoDavis
Explorer
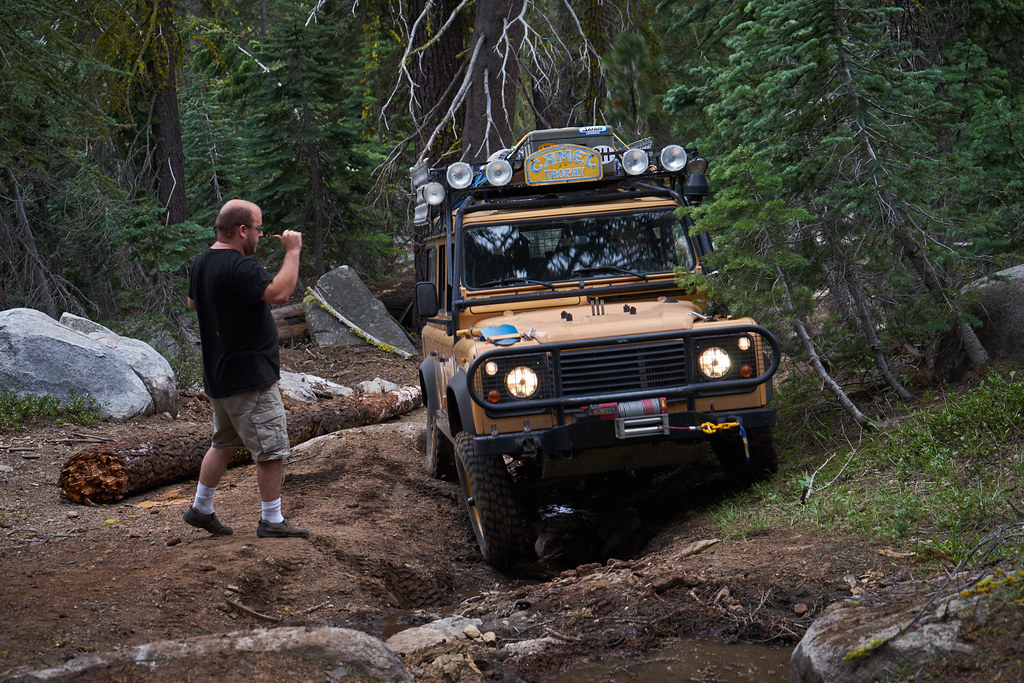
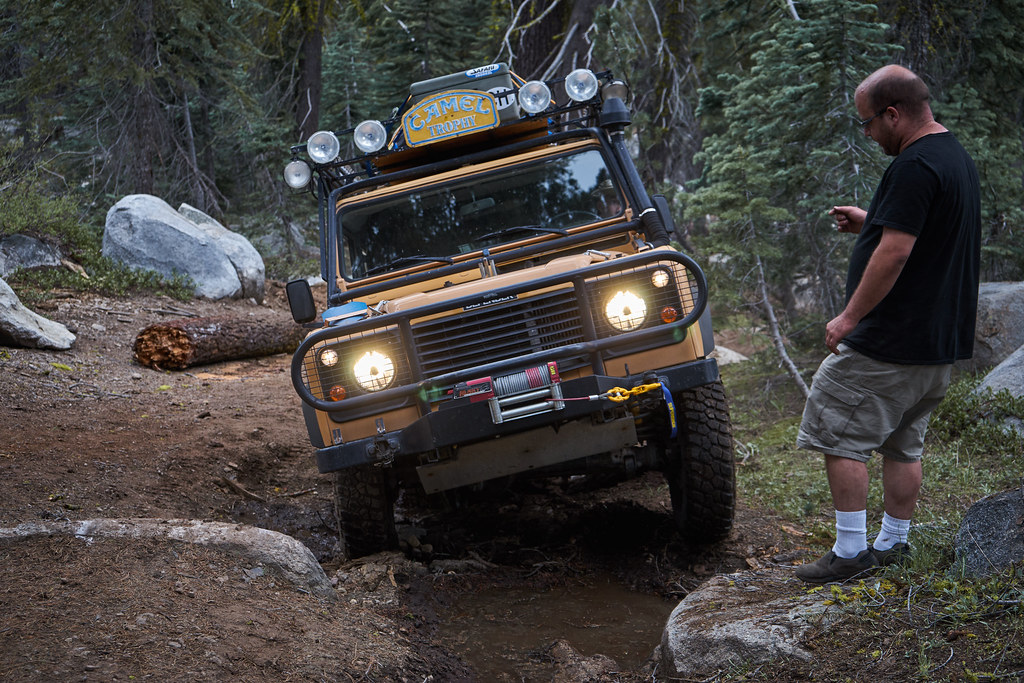
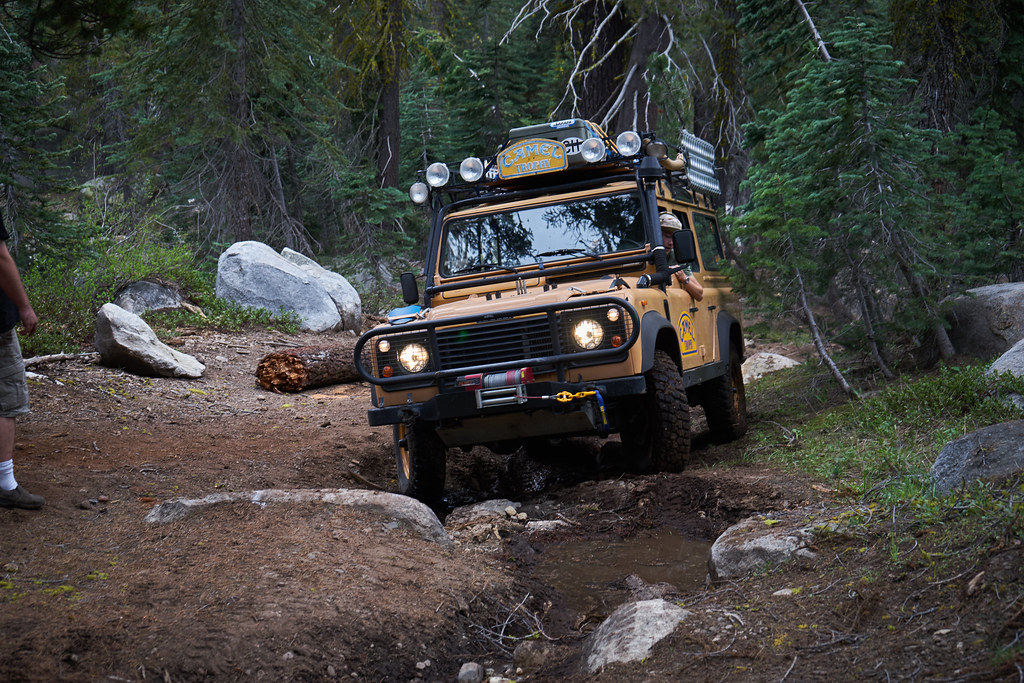
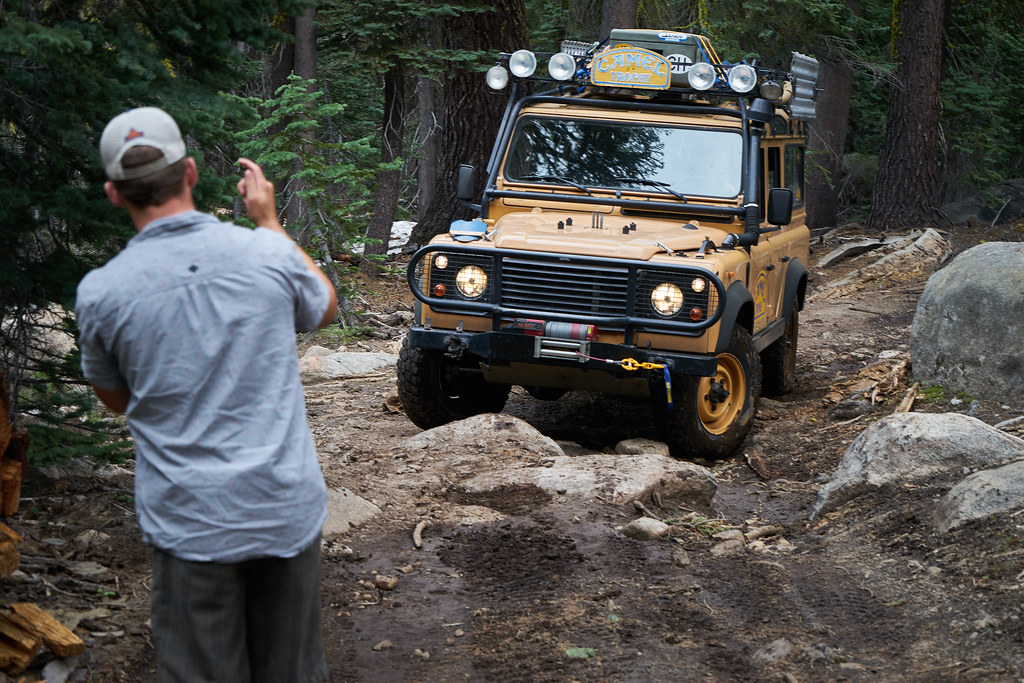
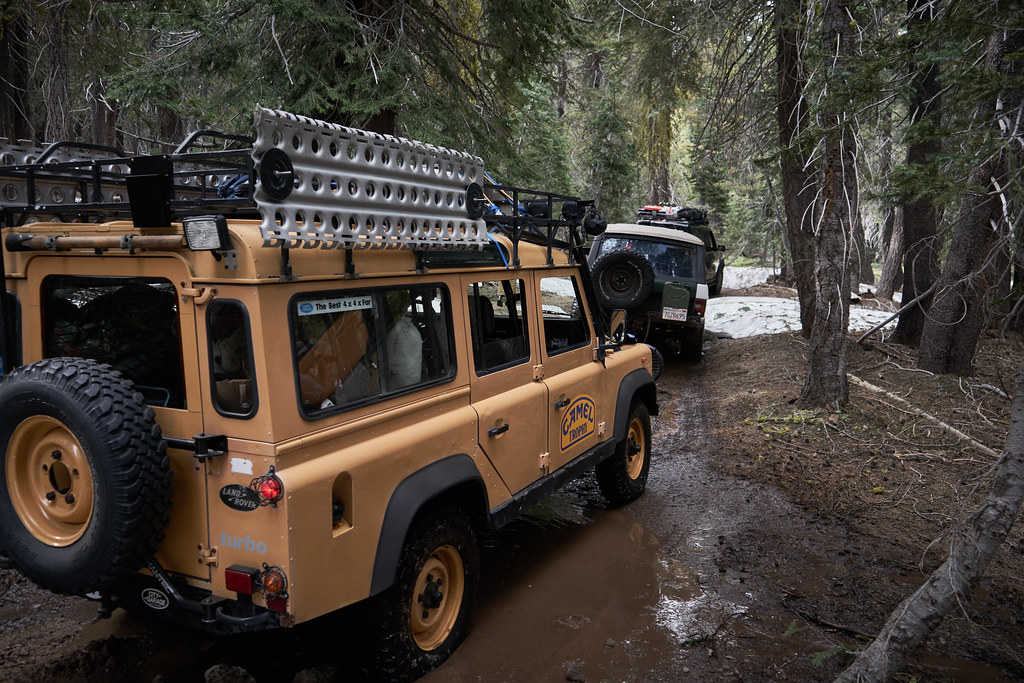
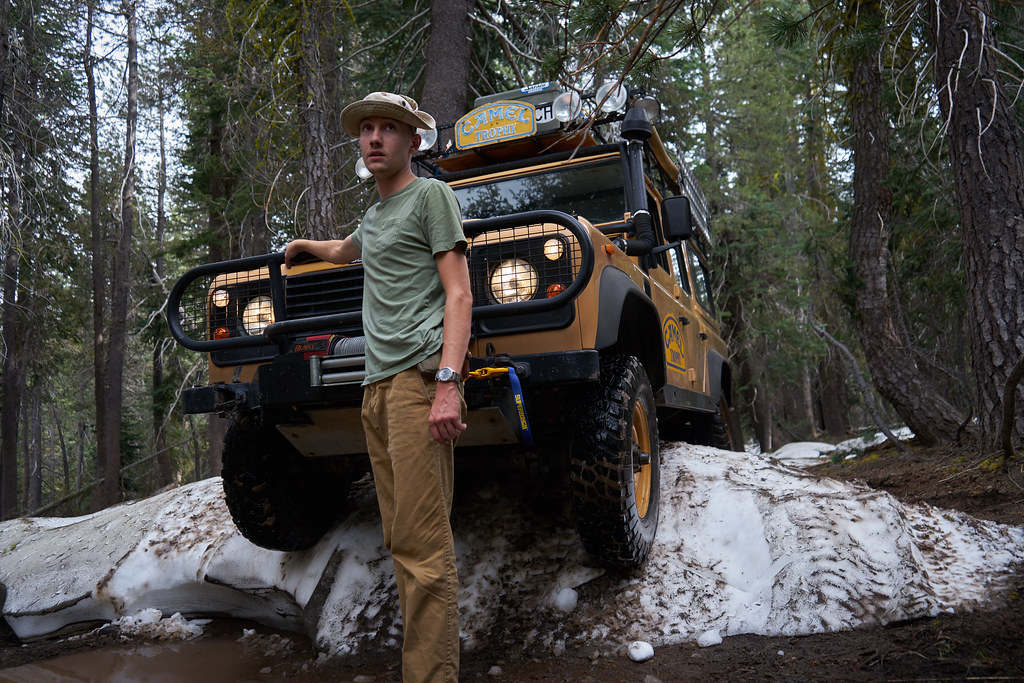
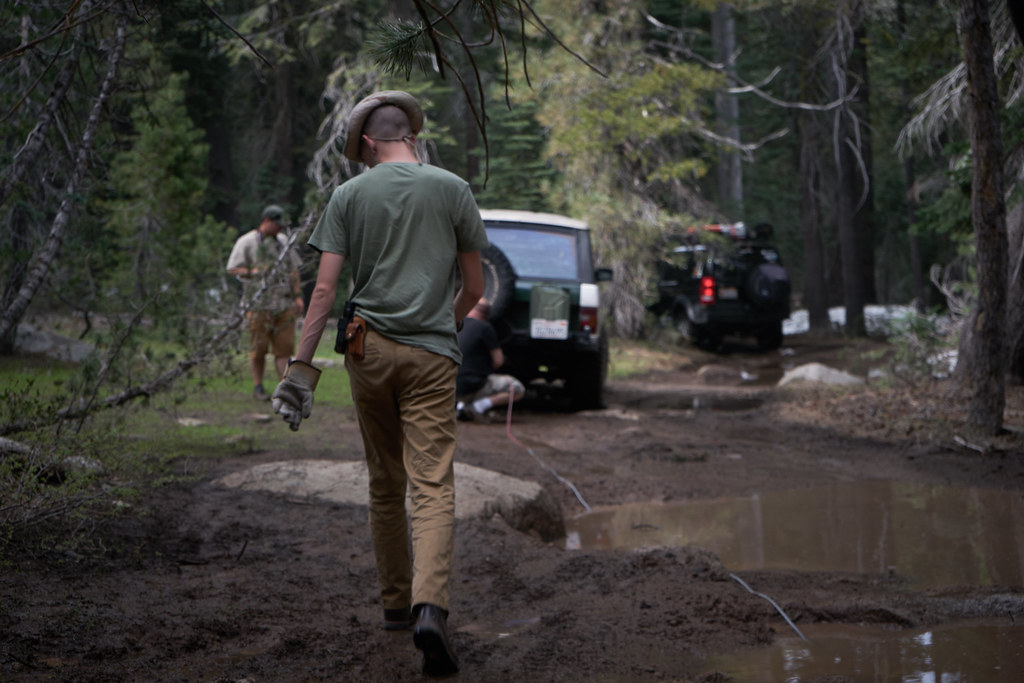
Corral Hollow weekend outing 06.24-25.2017
Went up with some landy club friends to the Corral Hollow trail in the Sierras, just above Arnold CA, near Wolfeboro scout camp, its up the pass there. Heard there was a bit of snow but the trail was good and passable.
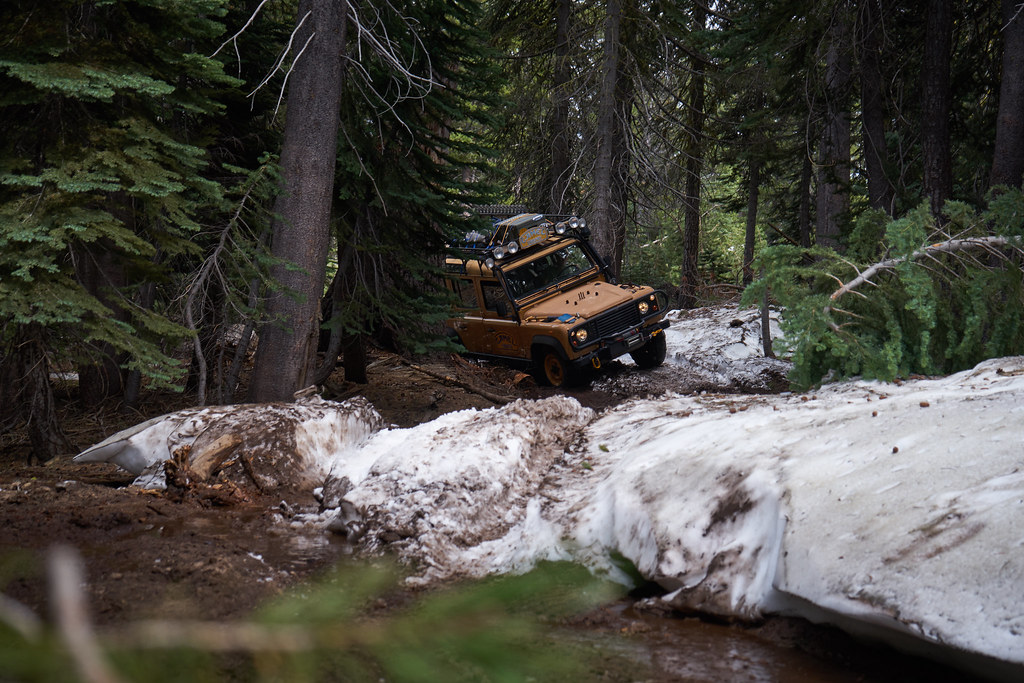
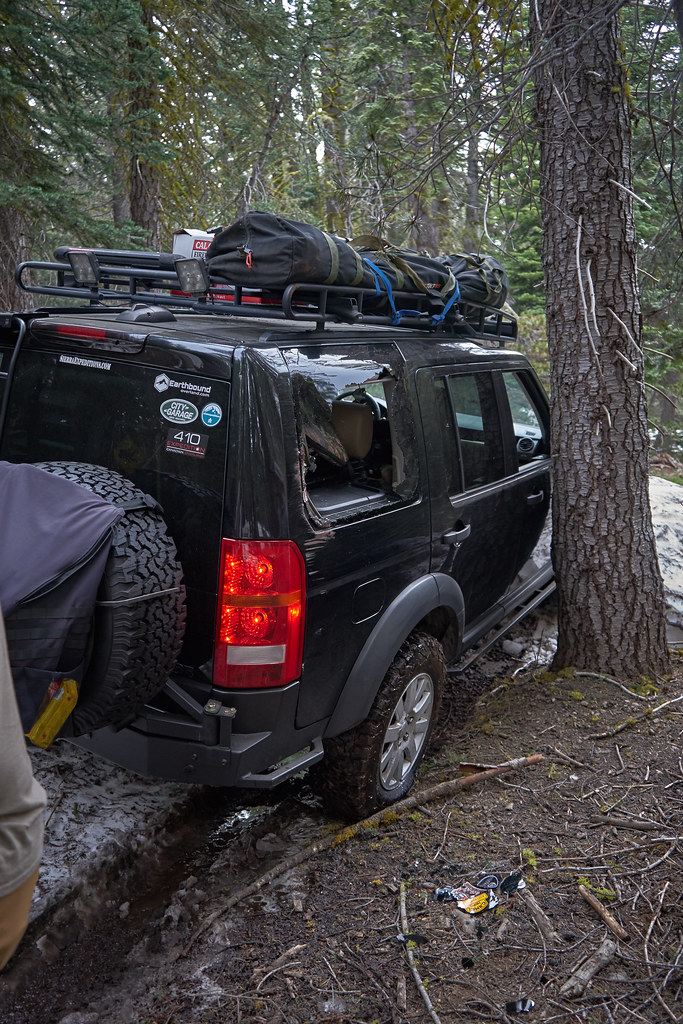
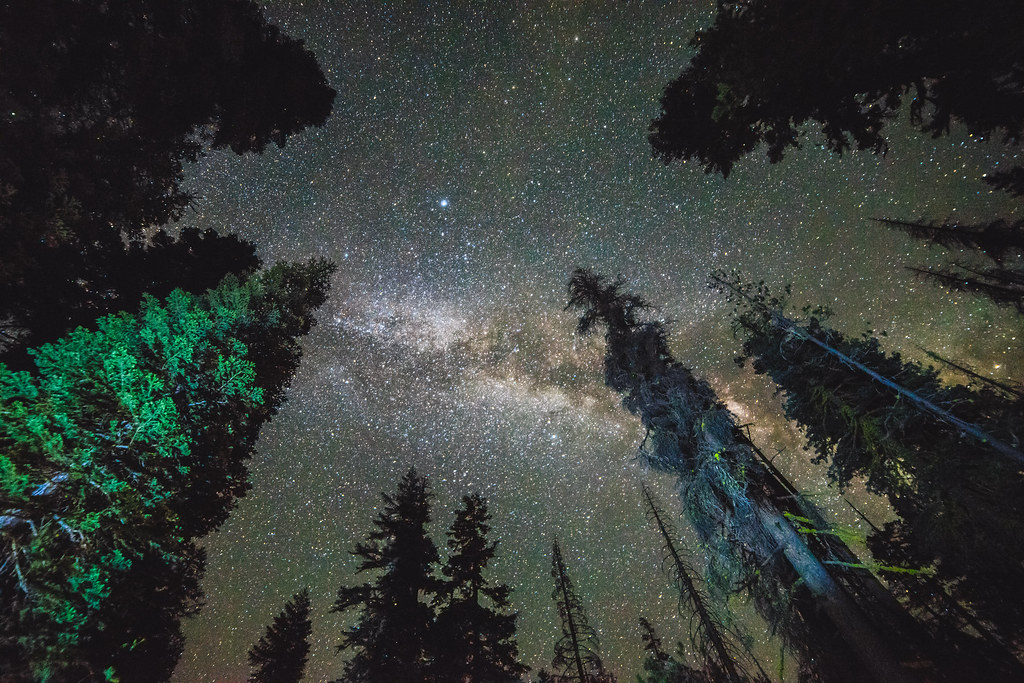
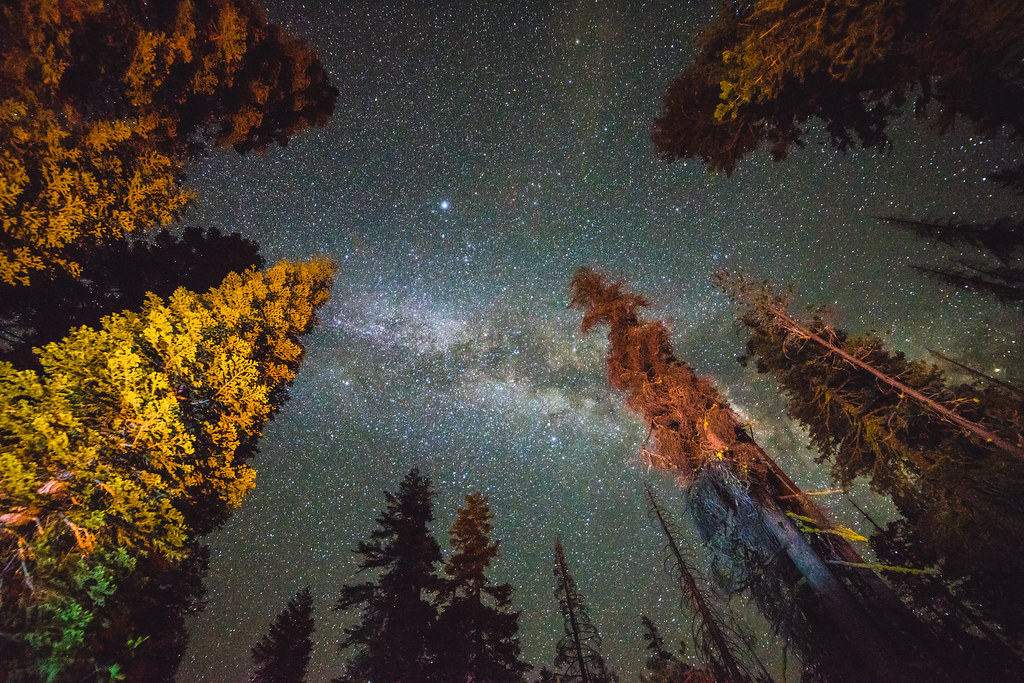
Brought two photographer passengers which yielded some pretty pictures
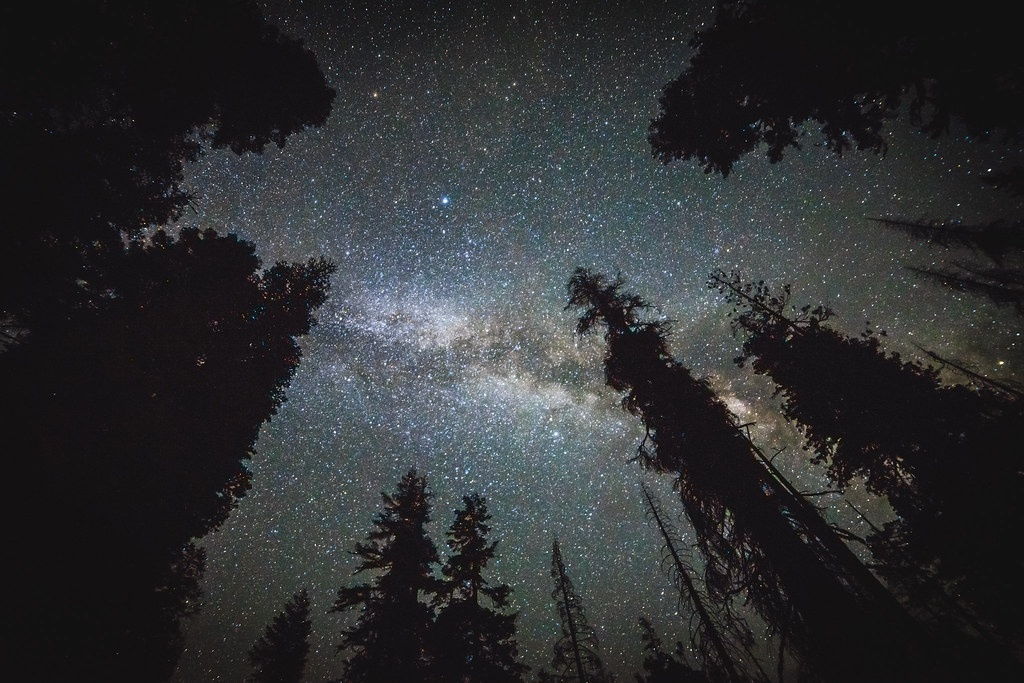
(Photo: B. Stuart) (June 2017)
(Photo: B. Stuart) (June 2017)
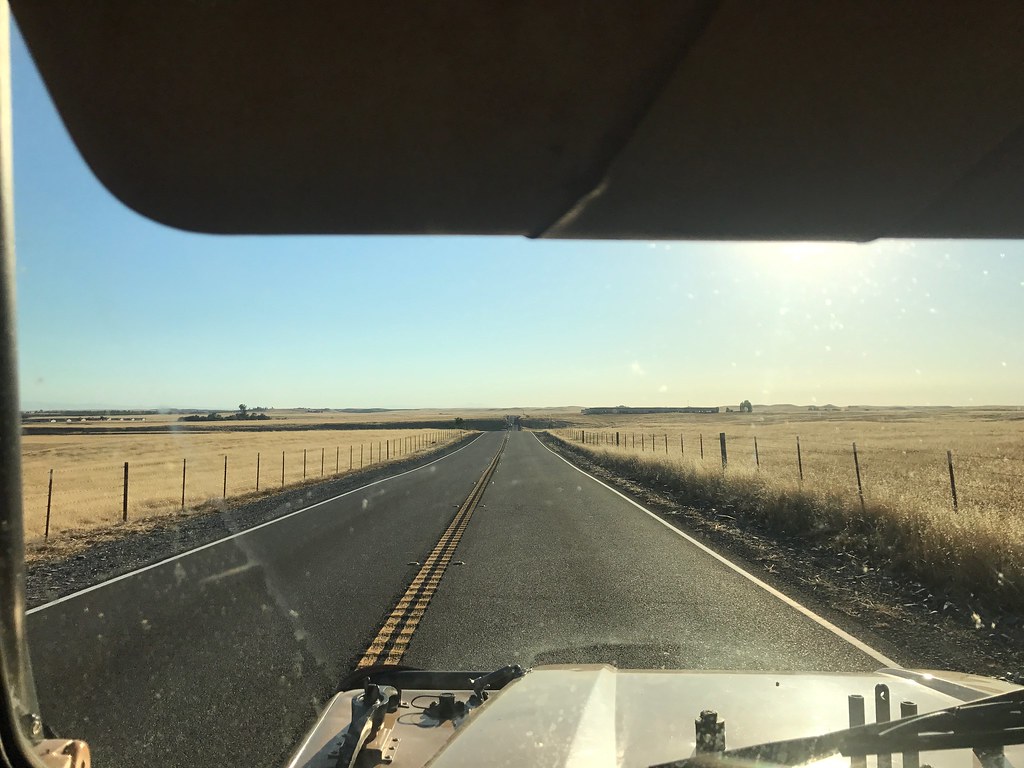
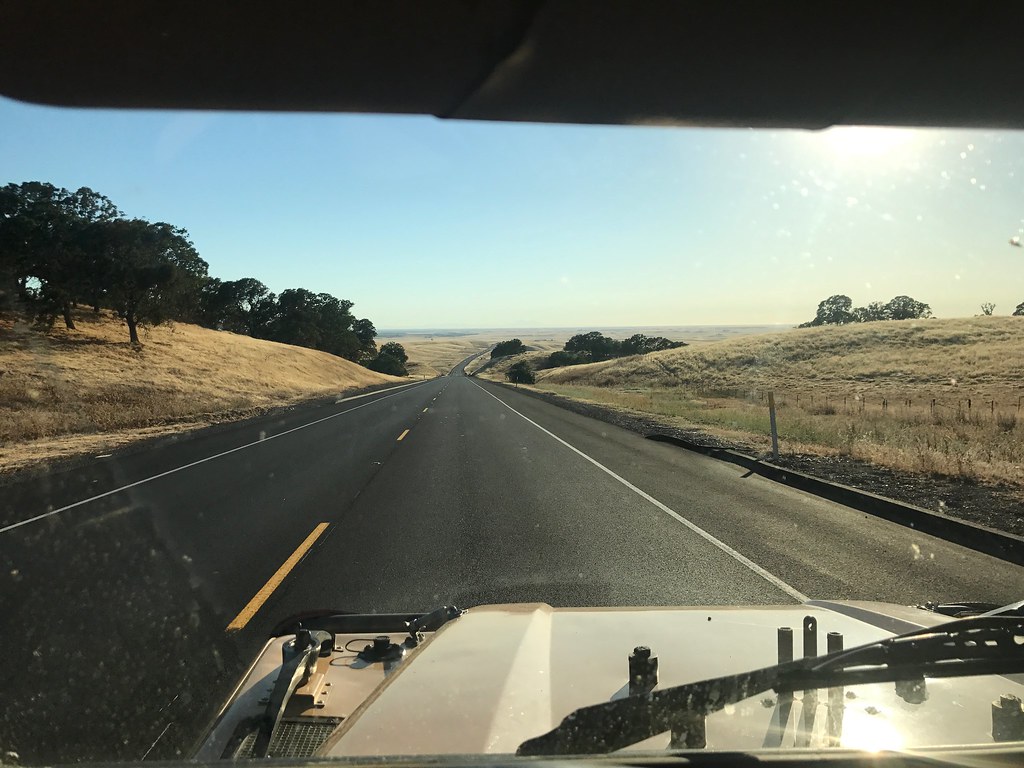
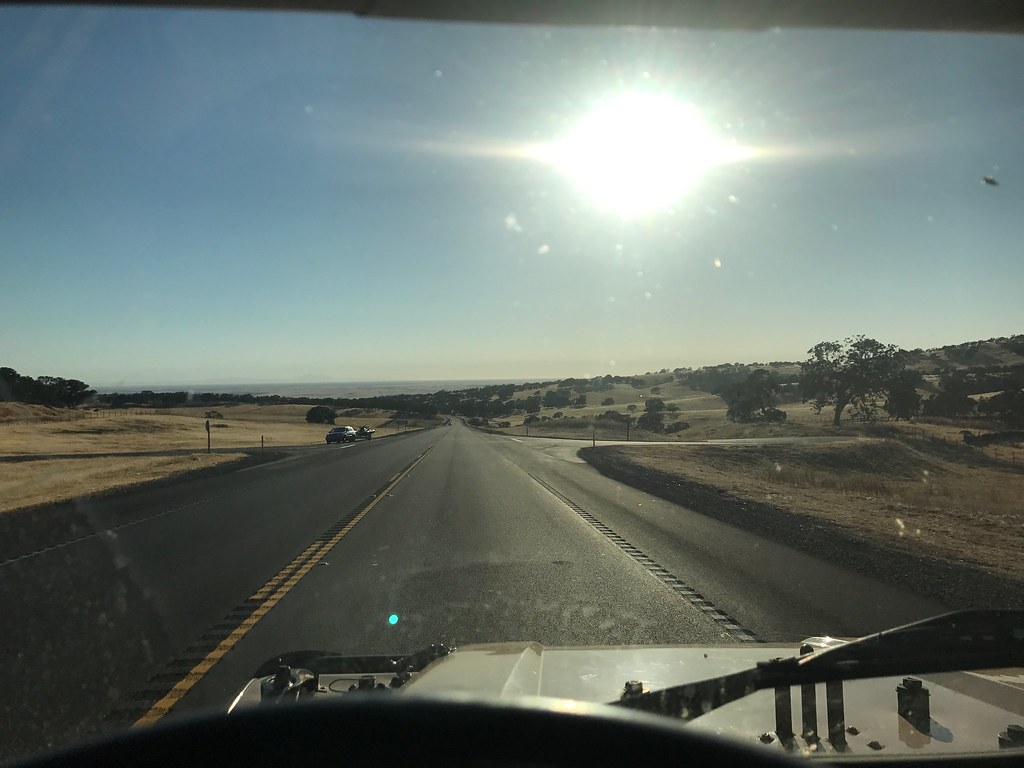
Bit of a long drive down from the SanFran Bay Area through the valley and up again into the mountains. We were the slowest in the 3 car procession, top cruising speed on the flat was approximately 62mph. On the hills going up we frequently held up cars between pullovers. Despite this, the tdi was acceptable even with the base tune.
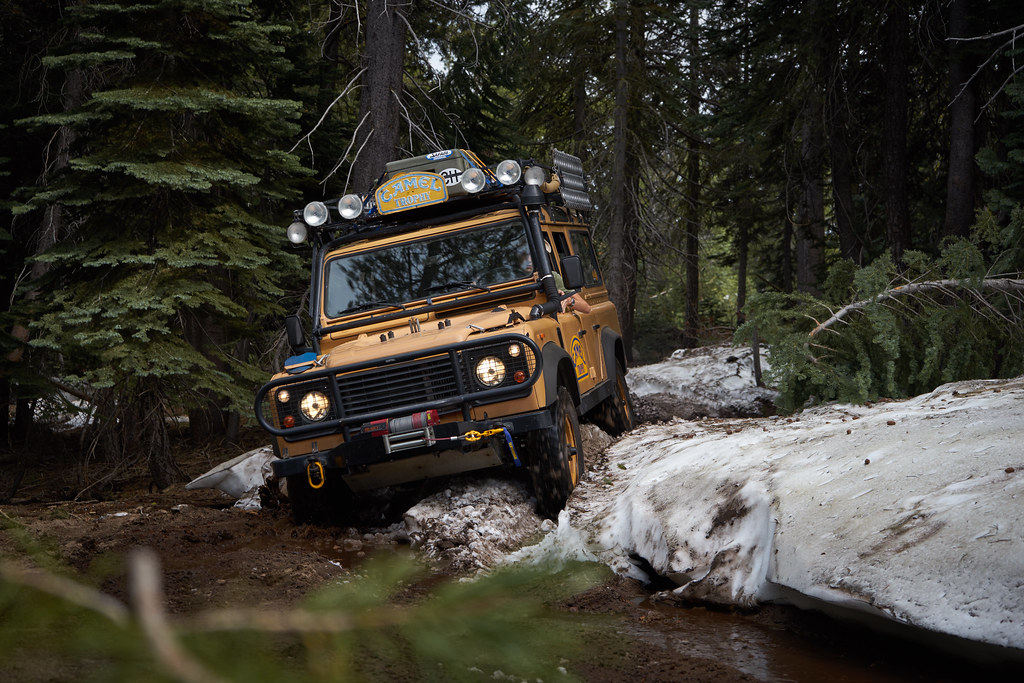
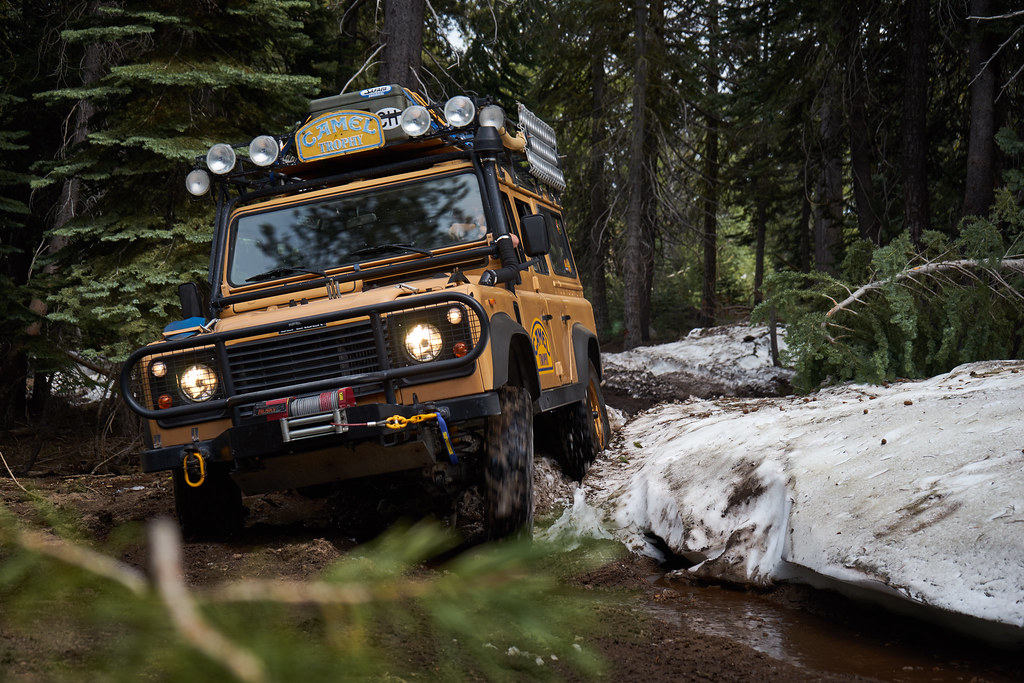
Got to the trail up the pass, turned off and aired down a bit. First was a few puddles and some very small snow fingers across the road, which turned into a sort of jeep trail
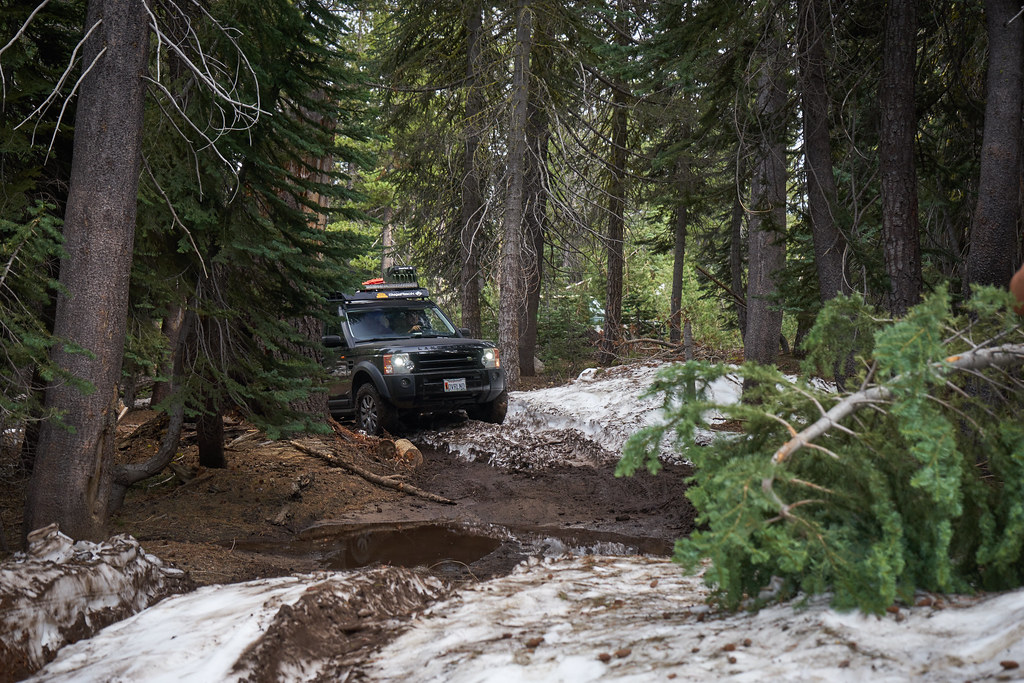
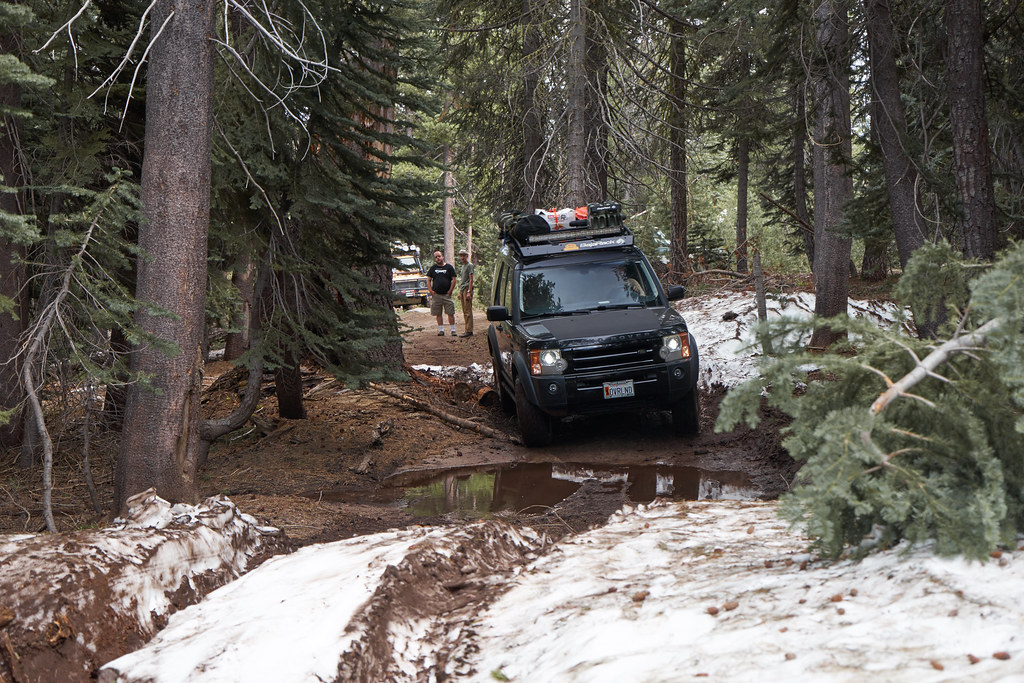

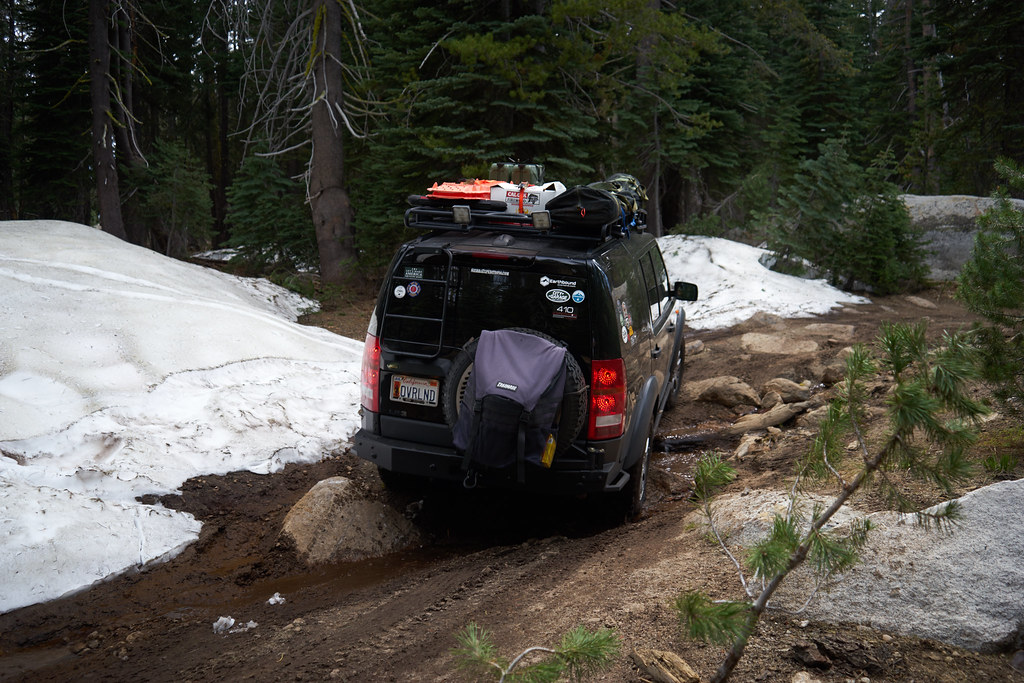
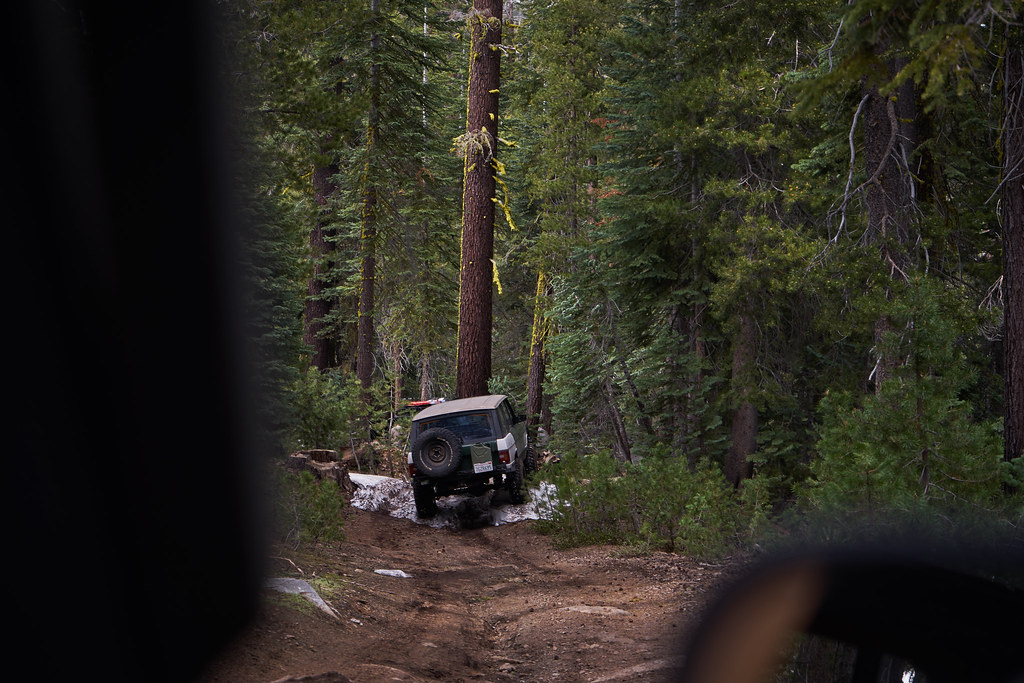
Frown. Immediately got stuck. Skinny tires and heavy camel do not like the snow. This would be a recurring theme.
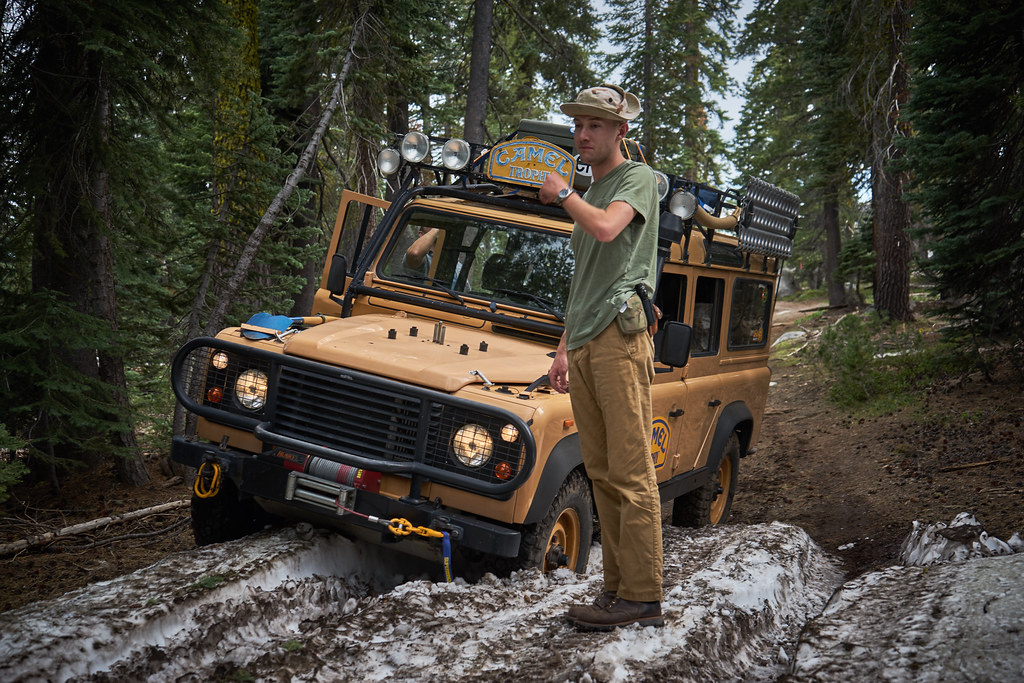
Colin snatched us out of bank 1. The bubba ropes were much gentler than the ARB snatch straps we used previous
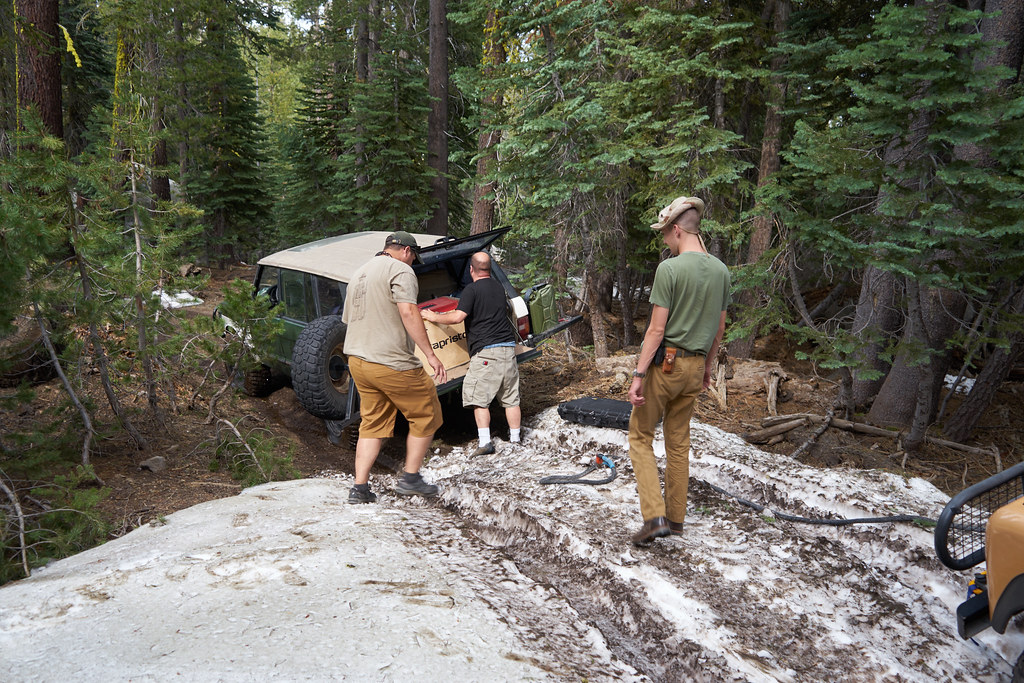
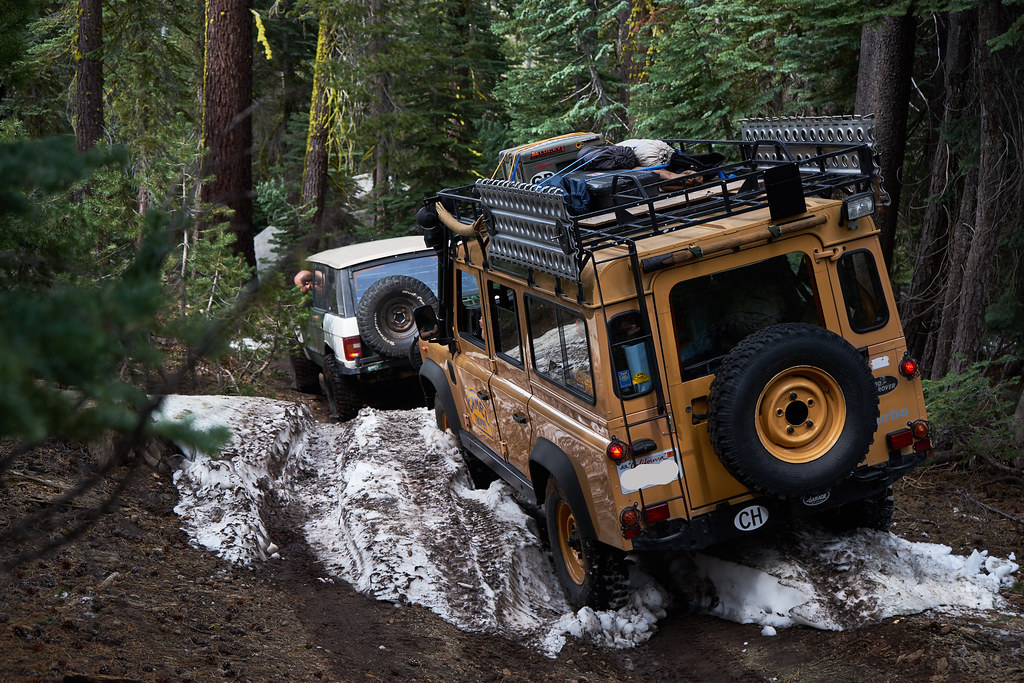
Colin wouldn't get too far ahead since he was often needed to pull us through the next snow part.

Keep in mind this was only the first hour or so off pavement...
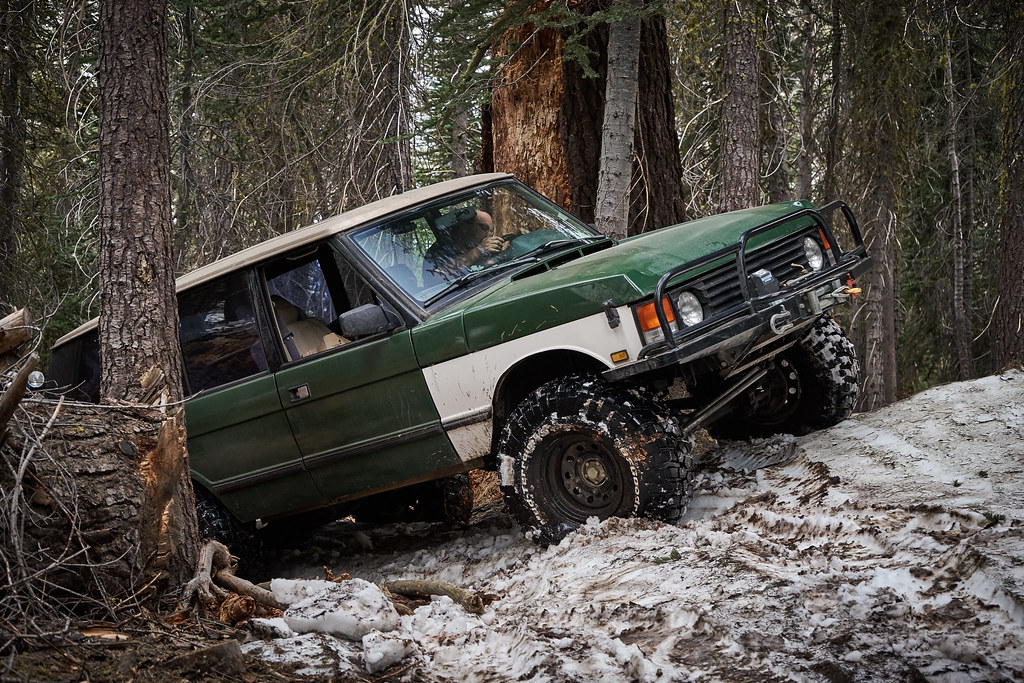
Road became horribly tippy, exacerbated by the 10 year old spongy shock absorbers the Camel had. It would sway badly in any dip, further slowing the otherwise capable group. Couldn't take the best line as we often tipped almost over into ditches or banged the rack into trees nearby. I hated this. Passengers later said they were certain we'd go over CT style a few times.


Went up with some landy club friends to the Corral Hollow trail in the Sierras, just above Arnold CA, near Wolfeboro scout camp, its up the pass there. Heard there was a bit of snow but the trail was good and passable.
Brought two photographer passengers which yielded some pretty pictures
(Photo
(Photo
Bit of a long drive down from the SanFran Bay Area through the valley and up again into the mountains. We were the slowest in the 3 car procession, top cruising speed on the flat was approximately 62mph. On the hills going up we frequently held up cars between pullovers. Despite this, the tdi was acceptable even with the base tune.
Got to the trail up the pass, turned off and aired down a bit. First was a few puddles and some very small snow fingers across the road, which turned into a sort of jeep trail
Frown. Immediately got stuck. Skinny tires and heavy camel do not like the snow. This would be a recurring theme.
Colin snatched us out of bank 1. The bubba ropes were much gentler than the ARB snatch straps we used previous
Colin wouldn't get too far ahead since he was often needed to pull us through the next snow part.
Keep in mind this was only the first hour or so off pavement...
Road became horribly tippy, exacerbated by the 10 year old spongy shock absorbers the Camel had. It would sway badly in any dip, further slowing the otherwise capable group. Couldn't take the best line as we often tipped almost over into ditches or banged the rack into trees nearby. I hated this. Passengers later said they were certain we'd go over CT style a few times.
Last edited:
DiscoDavis
Explorer
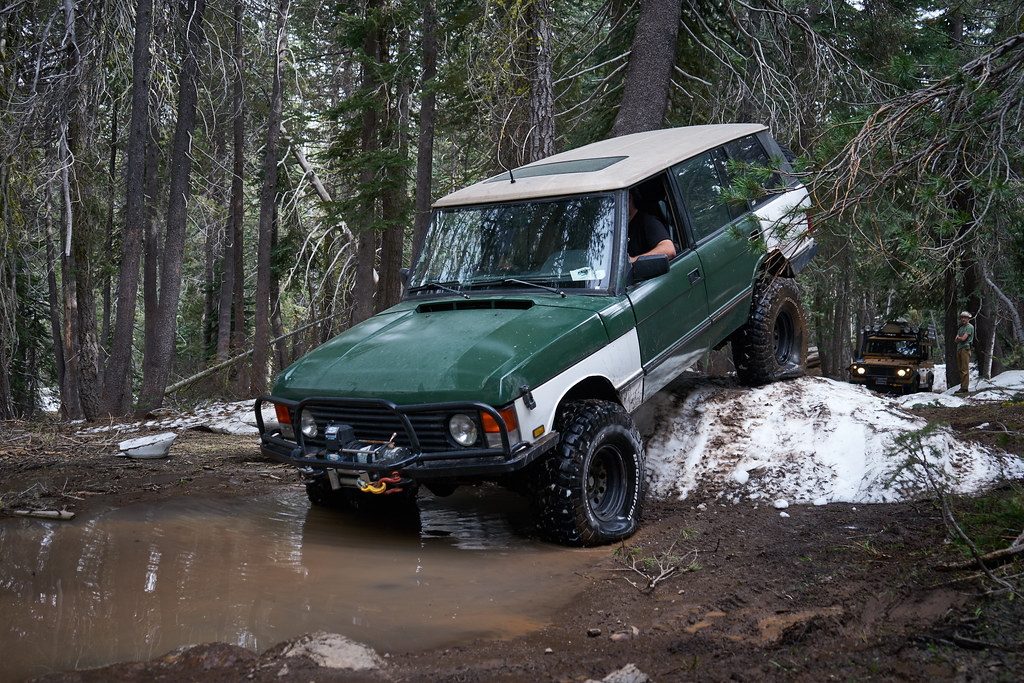
Corral Hollow Day 1 part 2
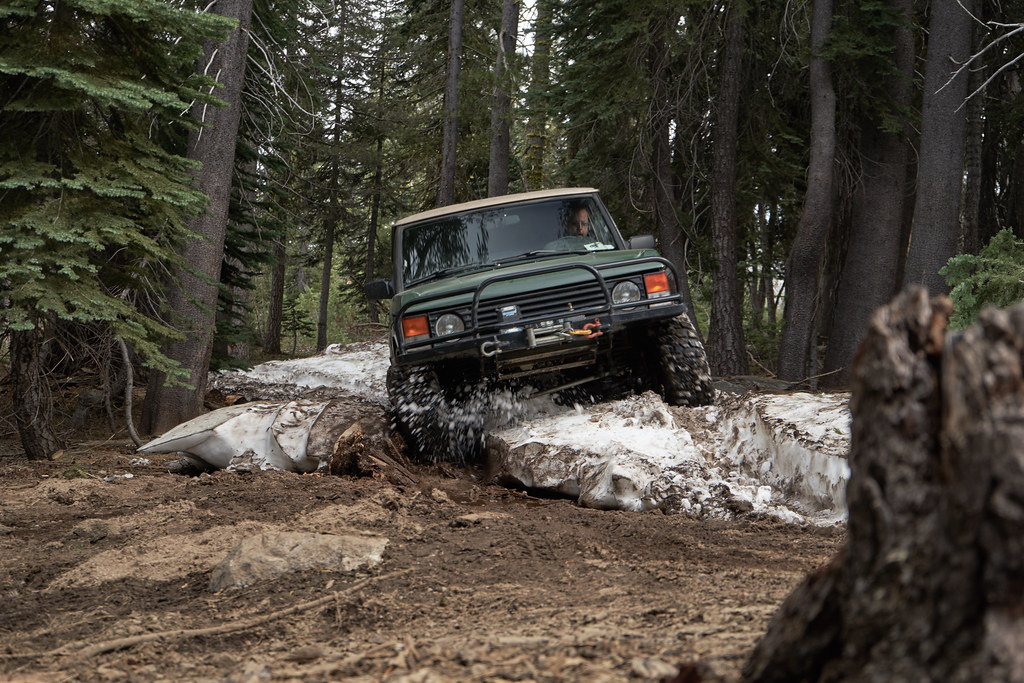
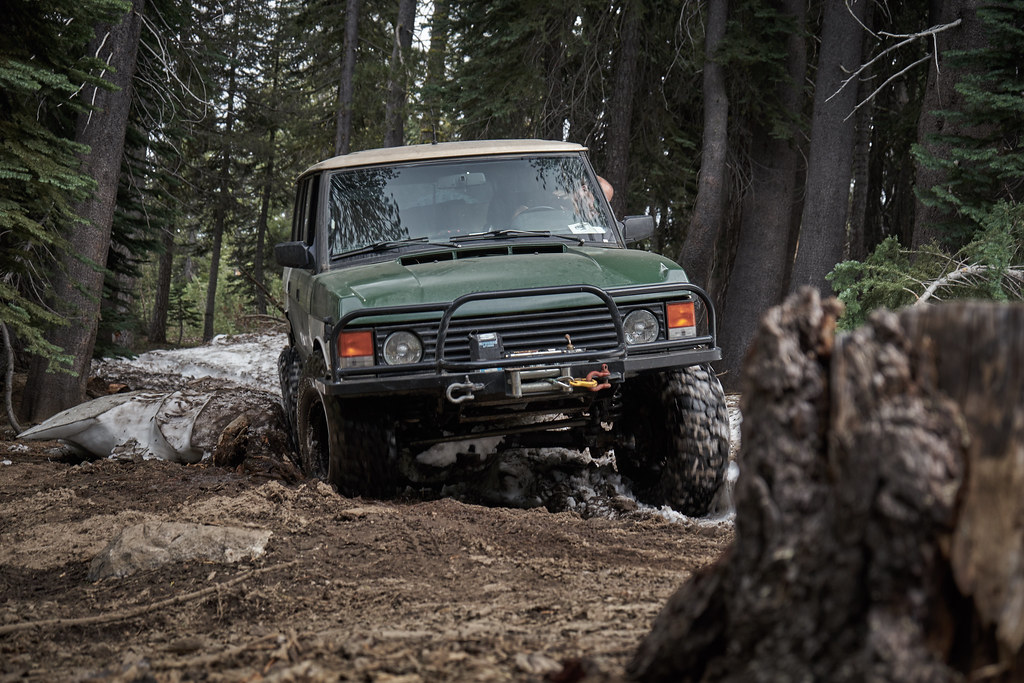
Next one
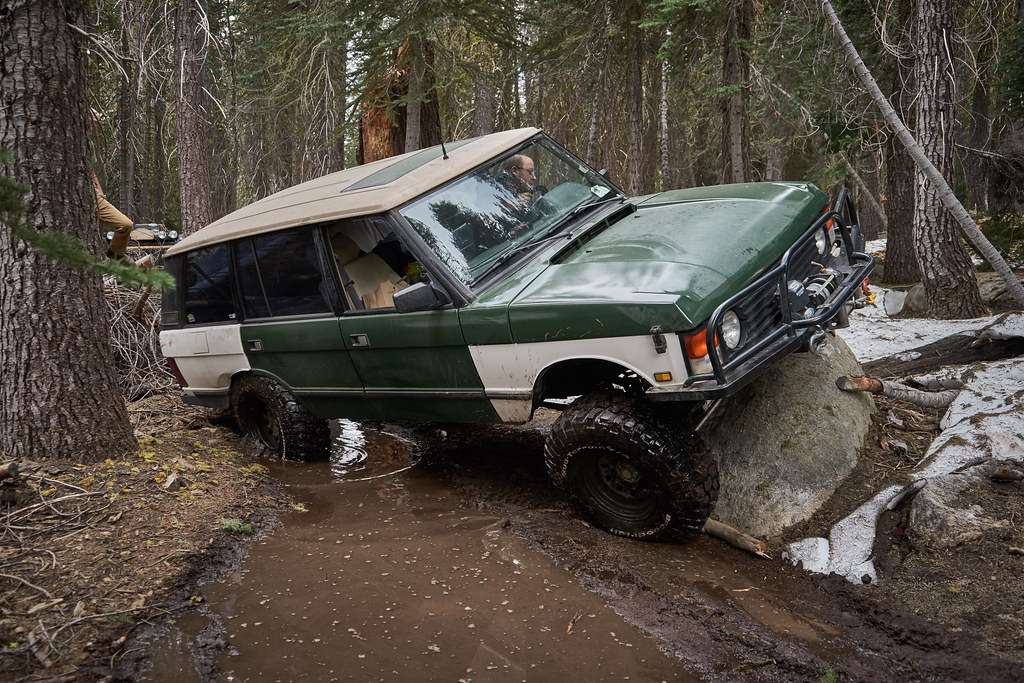
Stopped a moment before the next set of snow bumps. Our tippyness meant that we could only go straight on any obstacle, any tilt to the car would usually bang us into a tree.
Barron did it
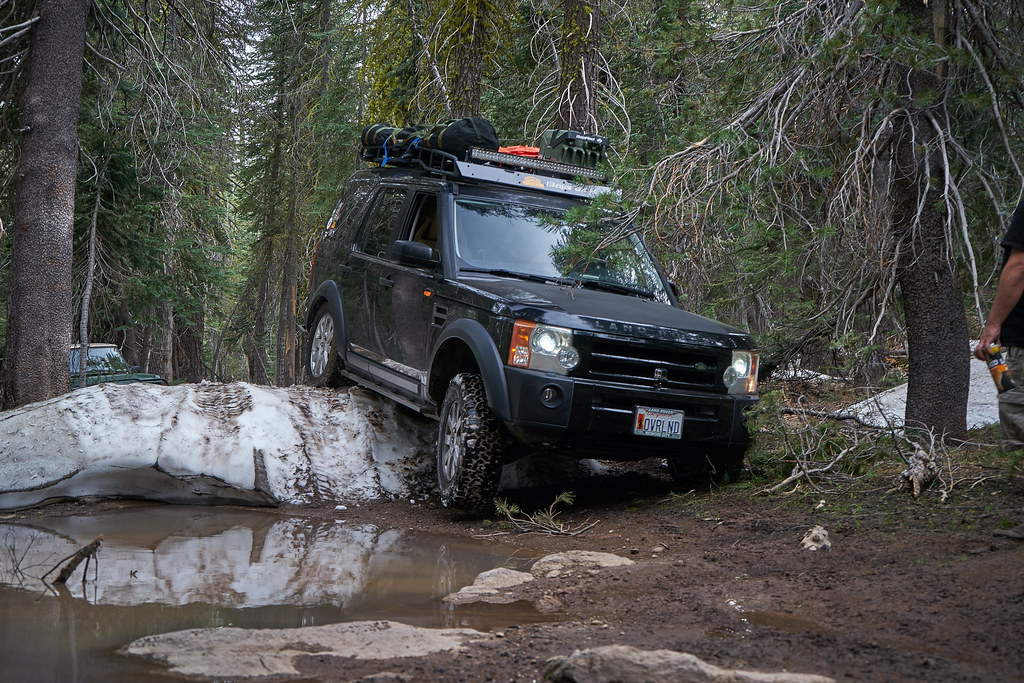
Colin did it
and... we nailed it
Long walk of shame to Colin's car yet again
And 30 seconds later we got right down
Butterfly eared the cable since we'd be using it again
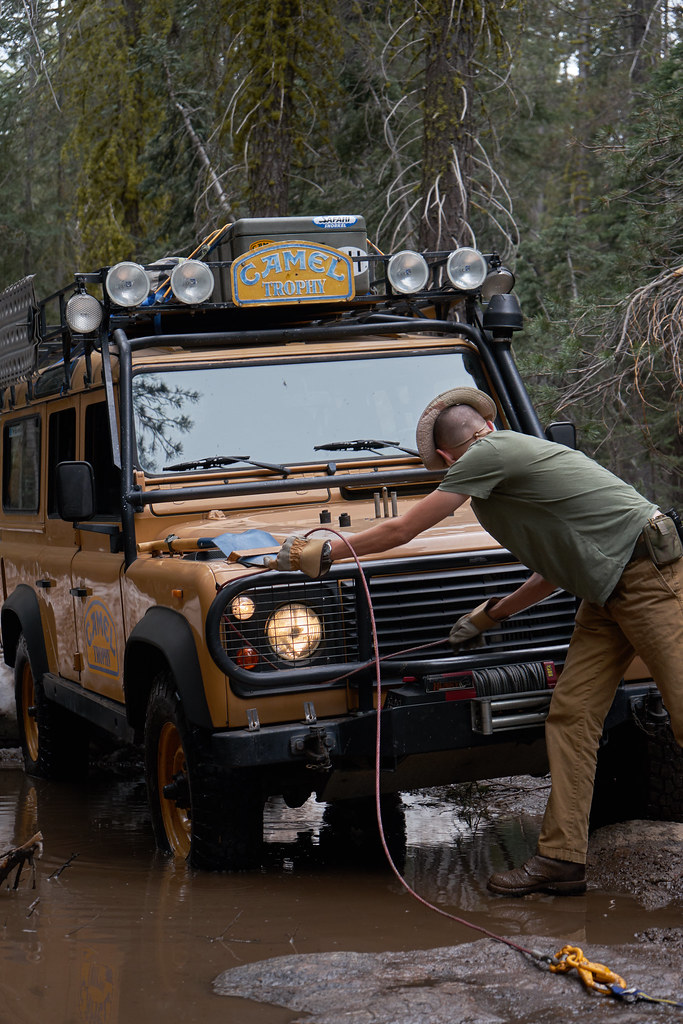
Show off
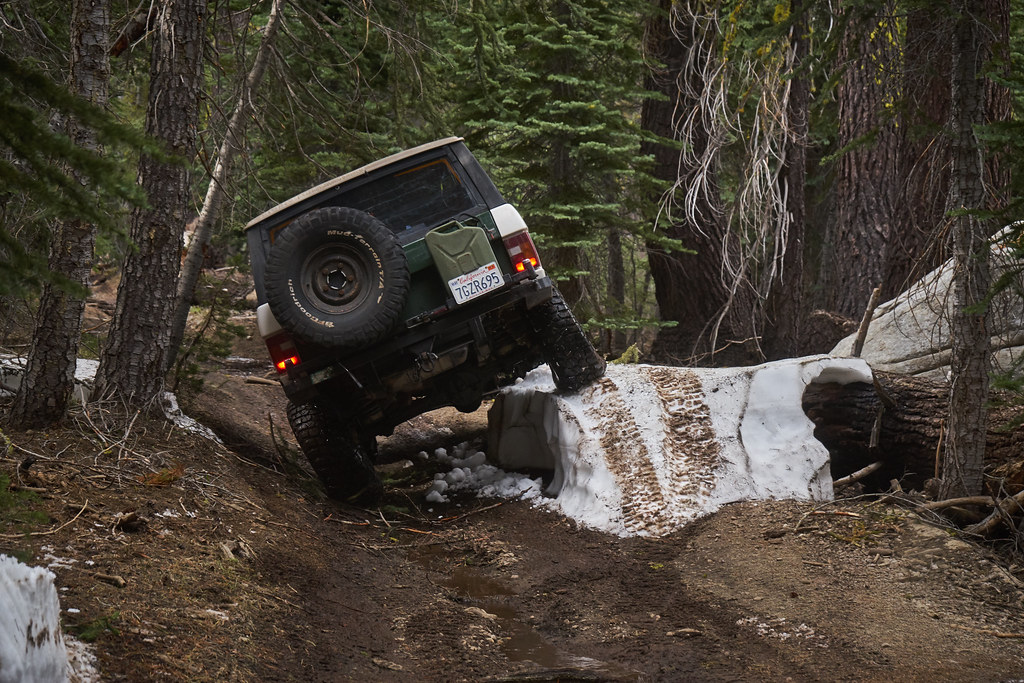
Snowbanks then went OK until
Barron slid off a few feet and just kissed a tree with his window
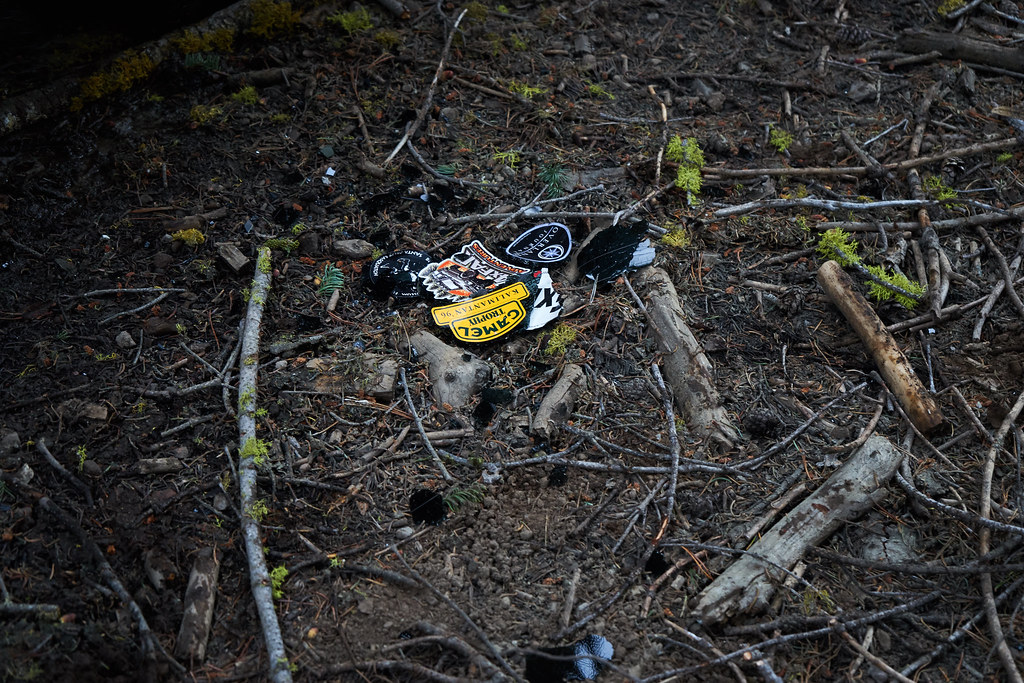
He was first in line and nobody could get around him to winch the car away from the tree. Colin had to do a 1 billion point turn to get up and around, including dodging this pebble
Once we got Barron winched off the bank, it was dark and raining. Lightning started hitting further up the road, and right as we finished a tree fell over the road not 200m in front of us, which was across a bog. Tired, we backtracked as it got dark and camped in a small clearing we passed earlier.

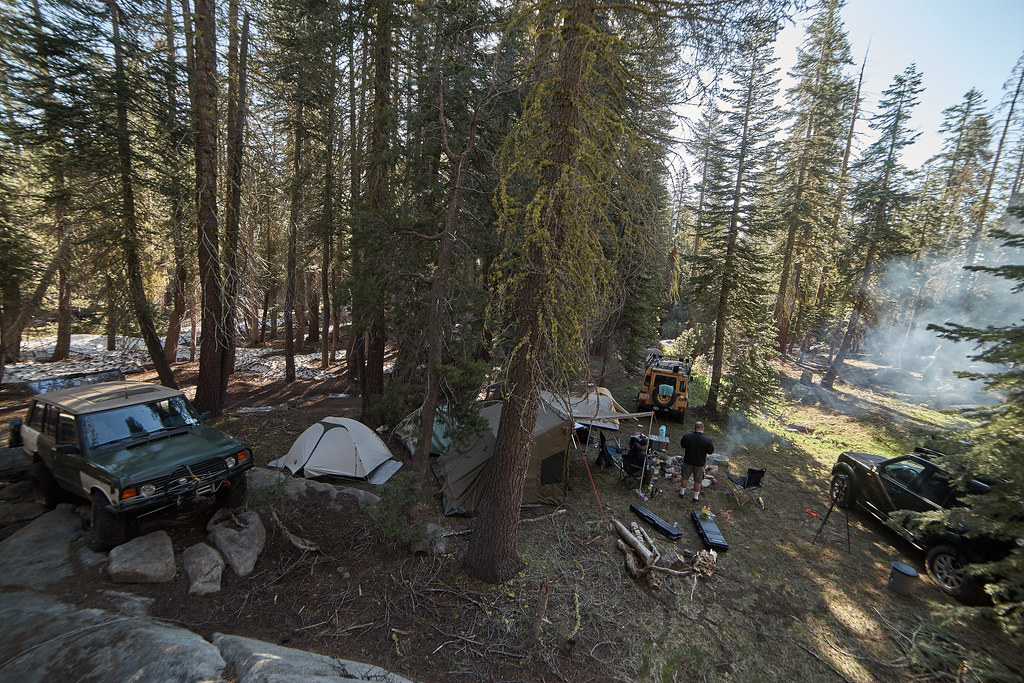
(morning after photo)
We had a few beers and Barron cooked some very nice carne asada on his wheel grill thing. Next morning we had a very cold dip in the creek next to camp. Got rid of all the adrenaline sweat from the day before.
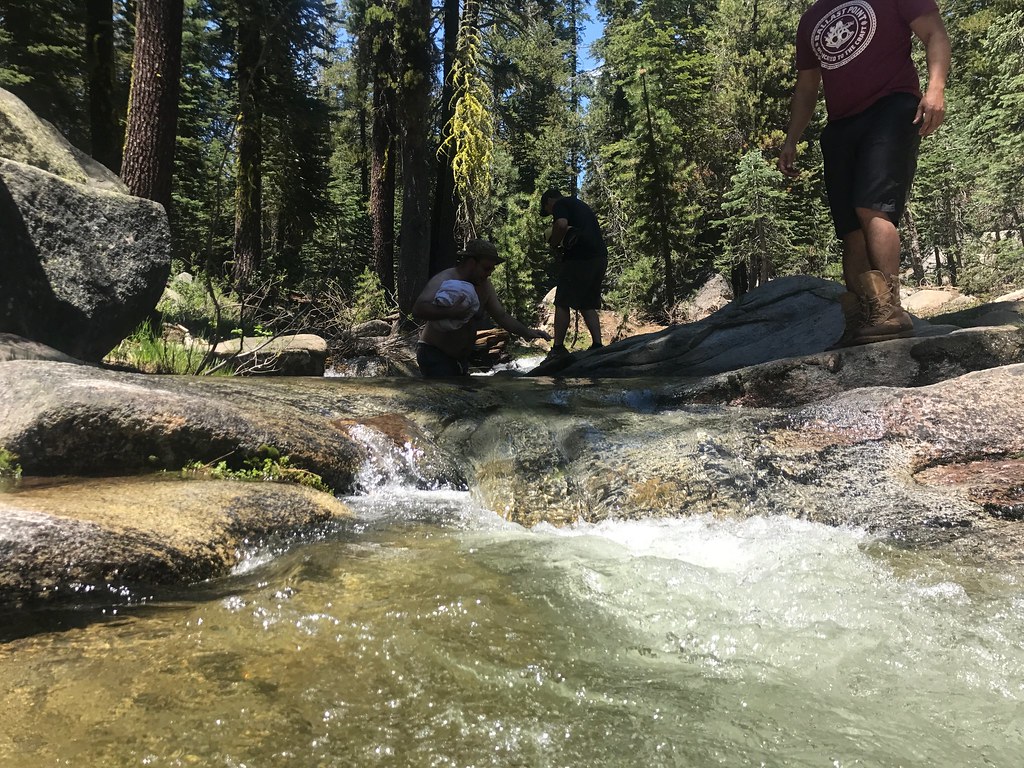
Packed up and did the same tippy trail in reverse. Once we made it out I relaxed. We maybe made it two or 3 miles up the trail, felt kind of bad but no damage beyond the window to the cars. I since heard it was much easier had we started on the other end of the loop and made it to the top.
Learned what was a mechanical priority for the car, to be continued.
Next one
Stopped a moment before the next set of snow bumps. Our tippyness meant that we could only go straight on any obstacle, any tilt to the car would usually bang us into a tree.
Barron did it
Colin did it
and... we nailed it
Long walk of shame to Colin's car yet again
And 30 seconds later we got right down
Butterfly eared the cable since we'd be using it again
Show off
Snowbanks then went OK until
Barron slid off a few feet and just kissed a tree with his window
He was first in line and nobody could get around him to winch the car away from the tree. Colin had to do a 1 billion point turn to get up and around, including dodging this pebble
Once we got Barron winched off the bank, it was dark and raining. Lightning started hitting further up the road, and right as we finished a tree fell over the road not 200m in front of us, which was across a bog. Tired, we backtracked as it got dark and camped in a small clearing we passed earlier.
(morning after photo)
We had a few beers and Barron cooked some very nice carne asada on his wheel grill thing. Next morning we had a very cold dip in the creek next to camp. Got rid of all the adrenaline sweat from the day before.
Packed up and did the same tippy trail in reverse. Once we made it out I relaxed. We maybe made it two or 3 miles up the trail, felt kind of bad but no damage beyond the window to the cars. I since heard it was much easier had we started on the other end of the loop and made it to the top.
Learned what was a mechanical priority for the car, to be continued.
Last edited:
DiscoDavis
Explorer
08/05/2017
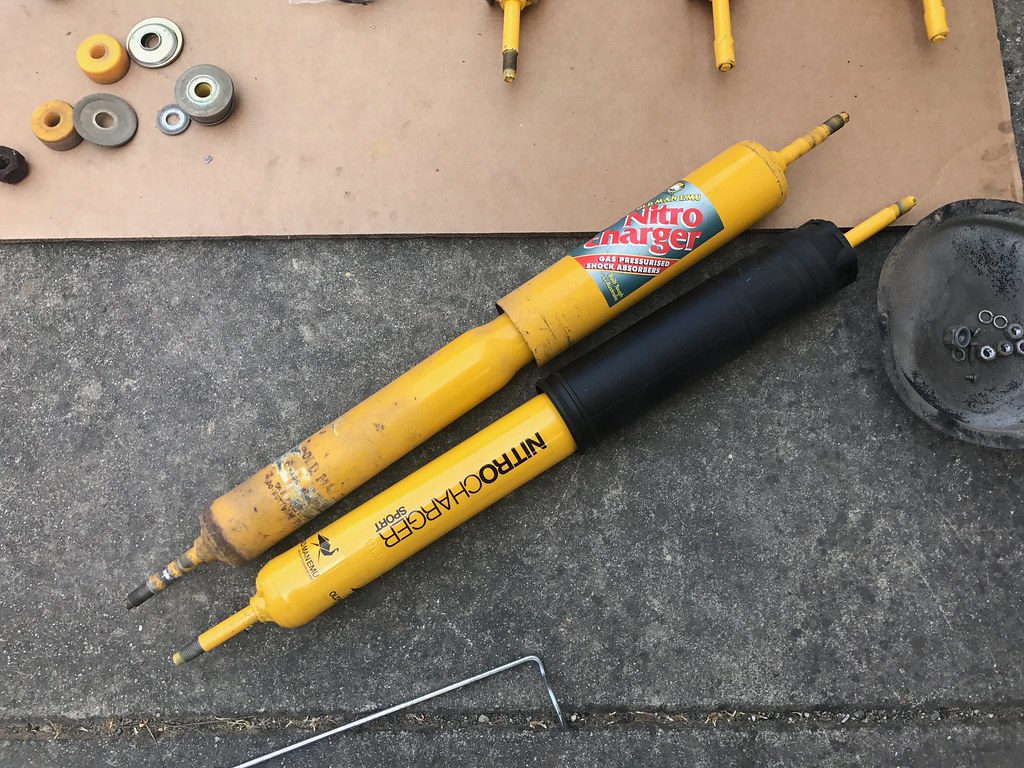
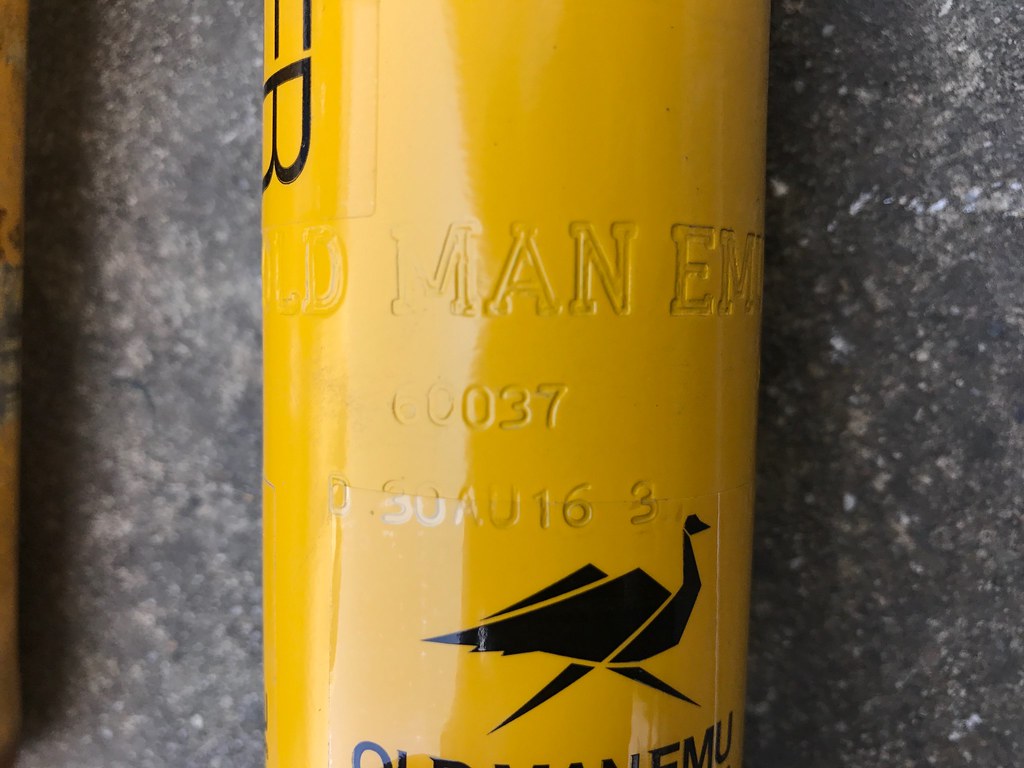
Shock absorbers
New debate about harshness/valving/origin aside, heard good things. Had nitrochargers on the car which were OK, but worn and allowed horrific sway.
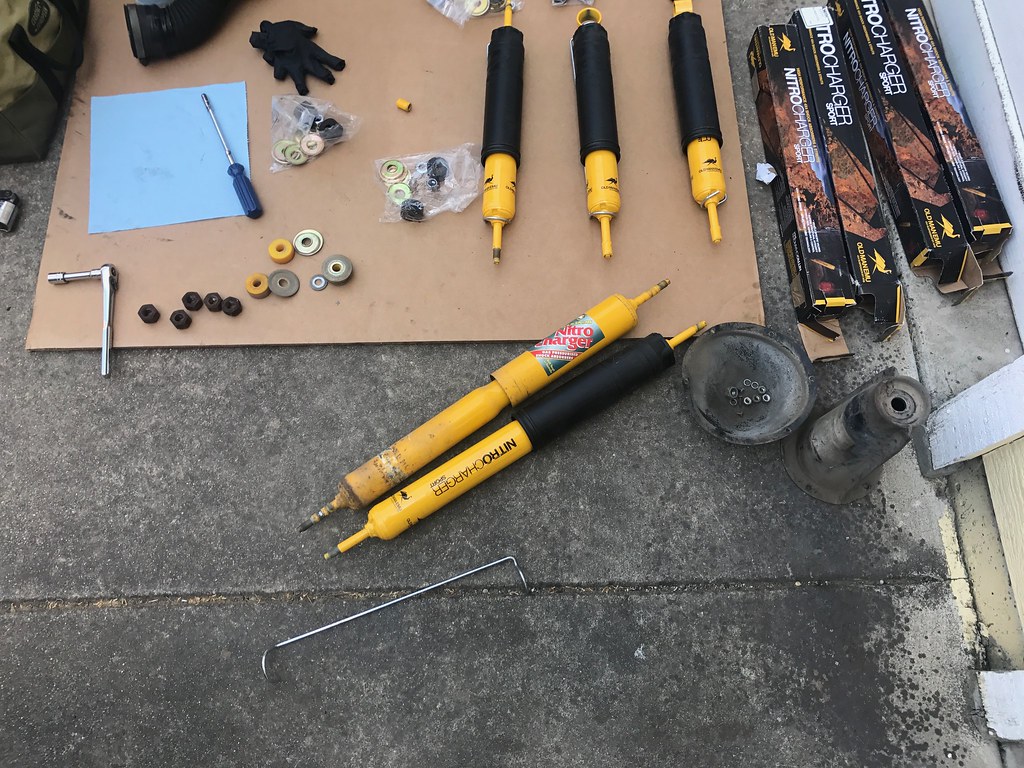
OME nitrocharger sport
N45F (front) -med
N44 (rear) - heavy
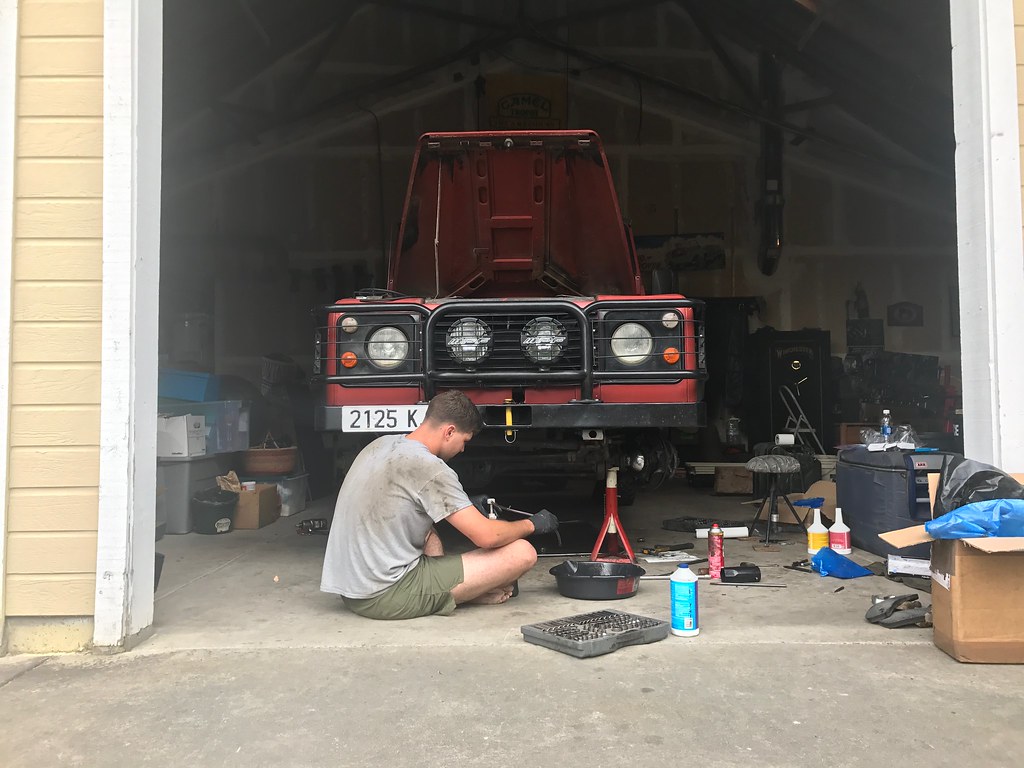
Sheepdog had bad swivel seals on the 90, so he did those

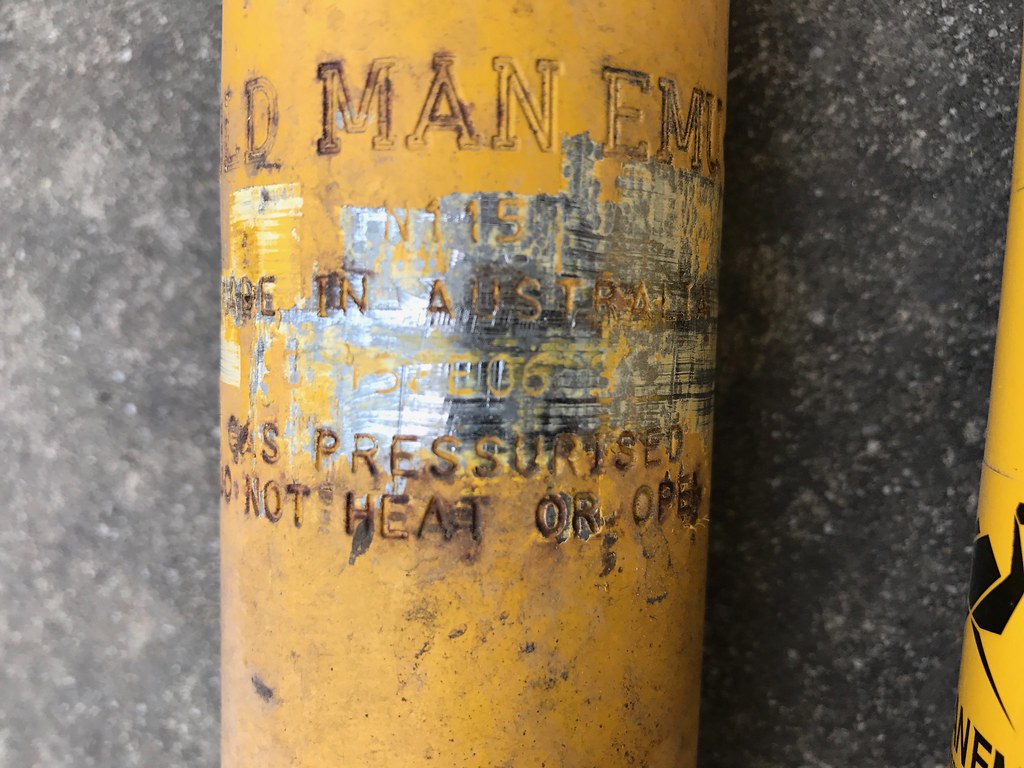
date codes 2006 old, 2016 new
the old shocks didn't have any signs of leakage which was nice.
Not actually horrible doing the change. Some finagling
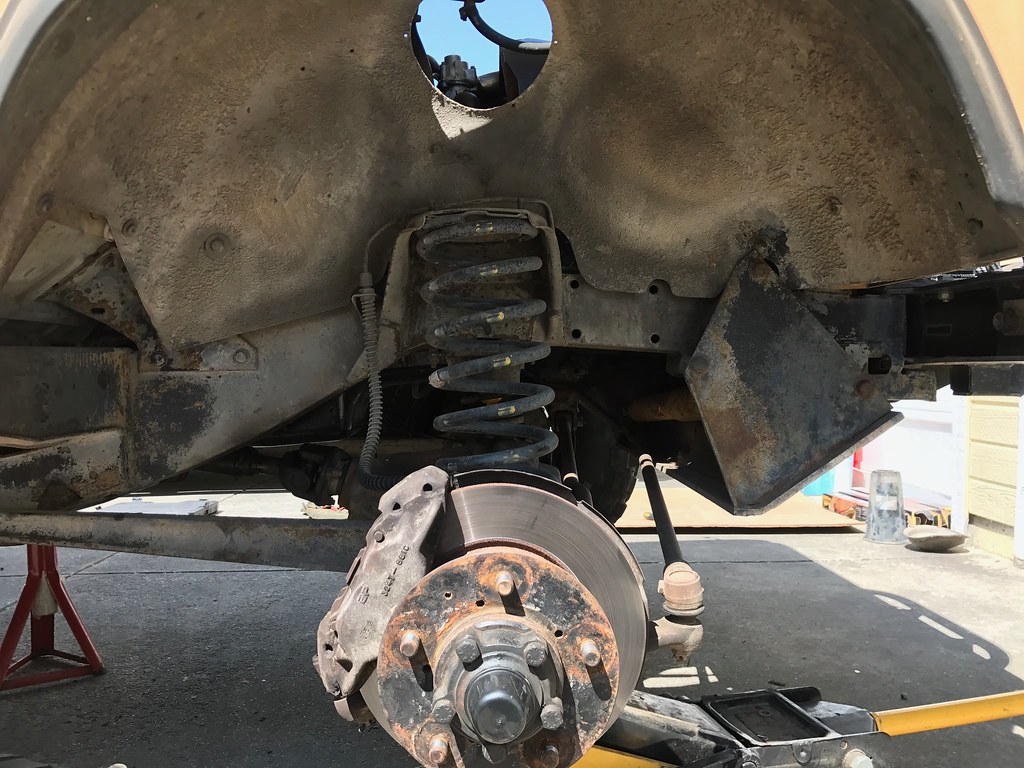


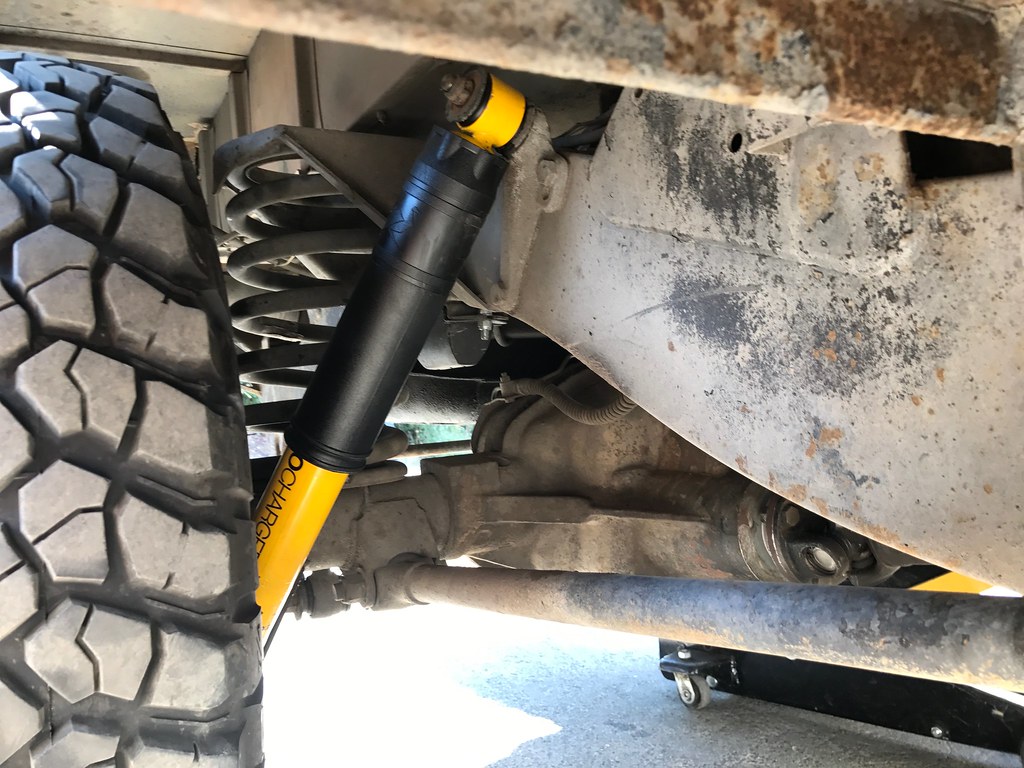
Eliminated the sway issue. The heavy set in the rear is acceptable if the car is reasonably loaded with tools and spares for daily use. All that matters is they work.
Shock absorbers
New debate about harshness/valving/origin aside, heard good things. Had nitrochargers on the car which were OK, but worn and allowed horrific sway.
OME nitrocharger sport
N45F (front) -med
N44 (rear) - heavy
Sheepdog had bad swivel seals on the 90, so he did those
date codes 2006 old, 2016 new
the old shocks didn't have any signs of leakage which was nice.
Not actually horrible doing the change. Some finagling
Eliminated the sway issue. The heavy set in the rear is acceptable if the car is reasonably loaded with tools and spares for daily use. All that matters is they work.
DiscoDavis
Explorer
12.28.2017
Coil notes
For reference, the standard CT coil setup is
Front drivers side: NRC9448
Front passenger: NRC9449
Rear drivers: NRC6389
Rear passenger NRC6904
Front axle setup is a 90 rear coil or a 110 HD coil
Rear axle setup is an HD 110 rear coil
for example Paddocs and RoversNorth sells these for a decent price. -
Neat
DiscoDavis
Explorer
06.04.2017
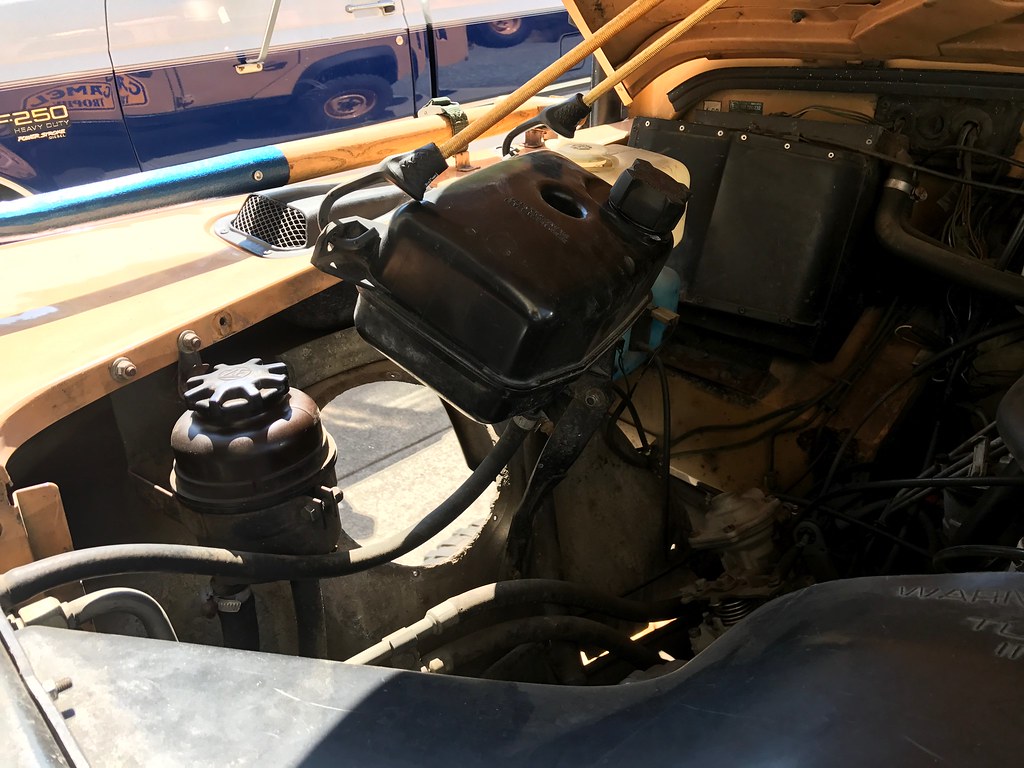
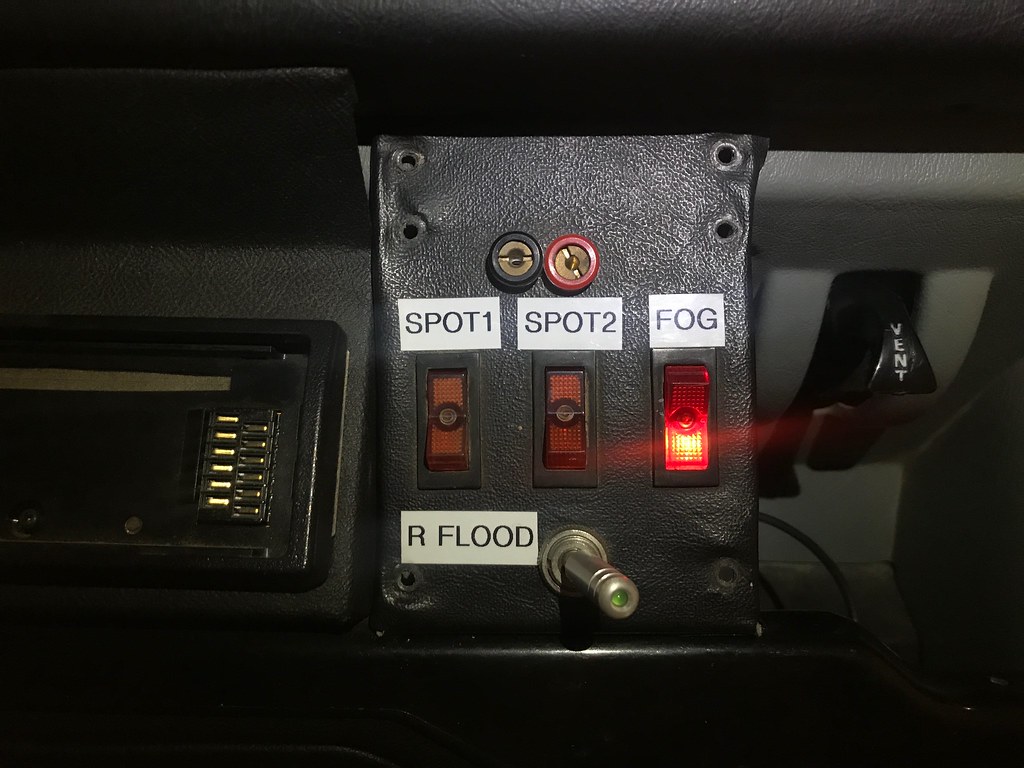
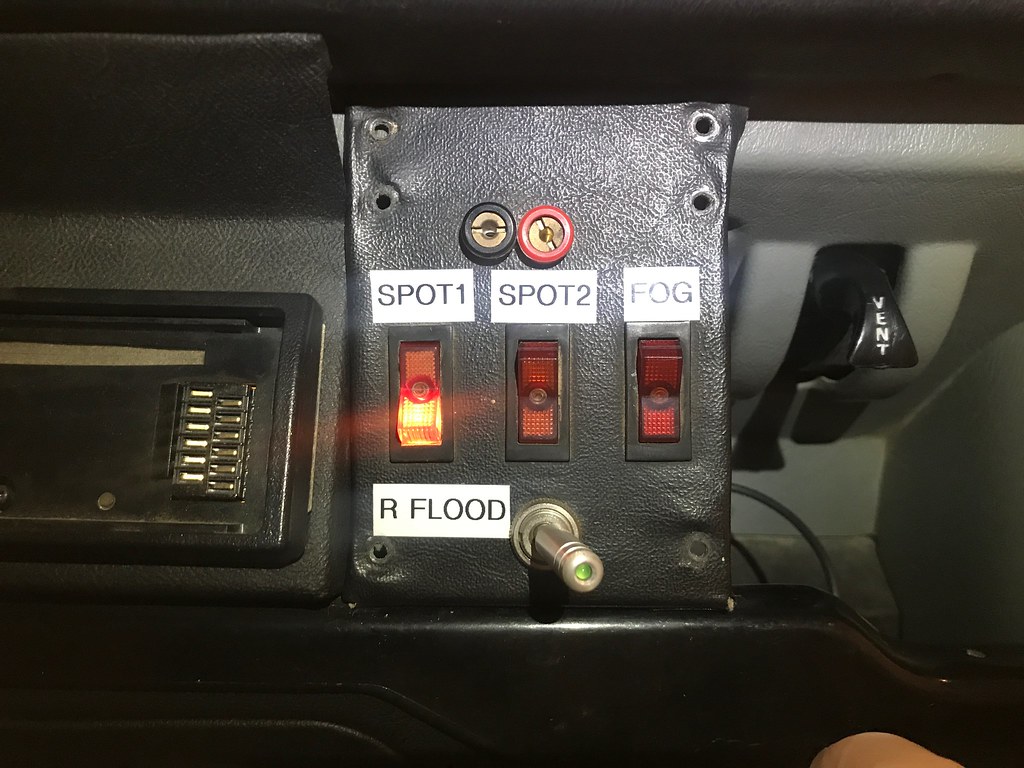
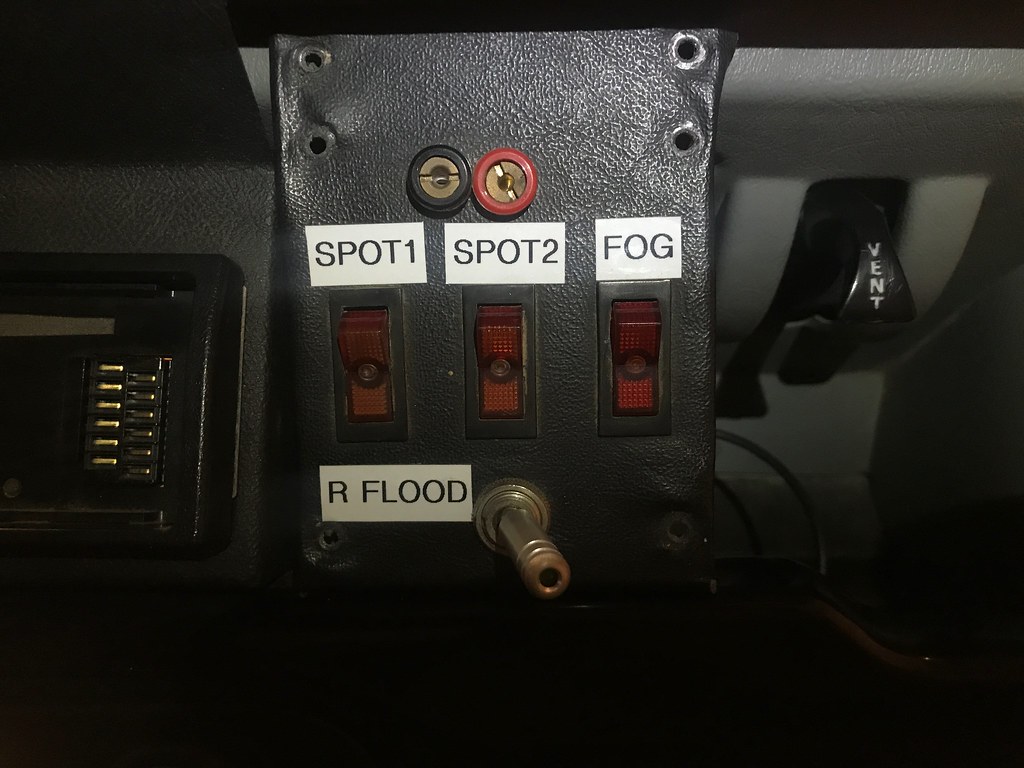
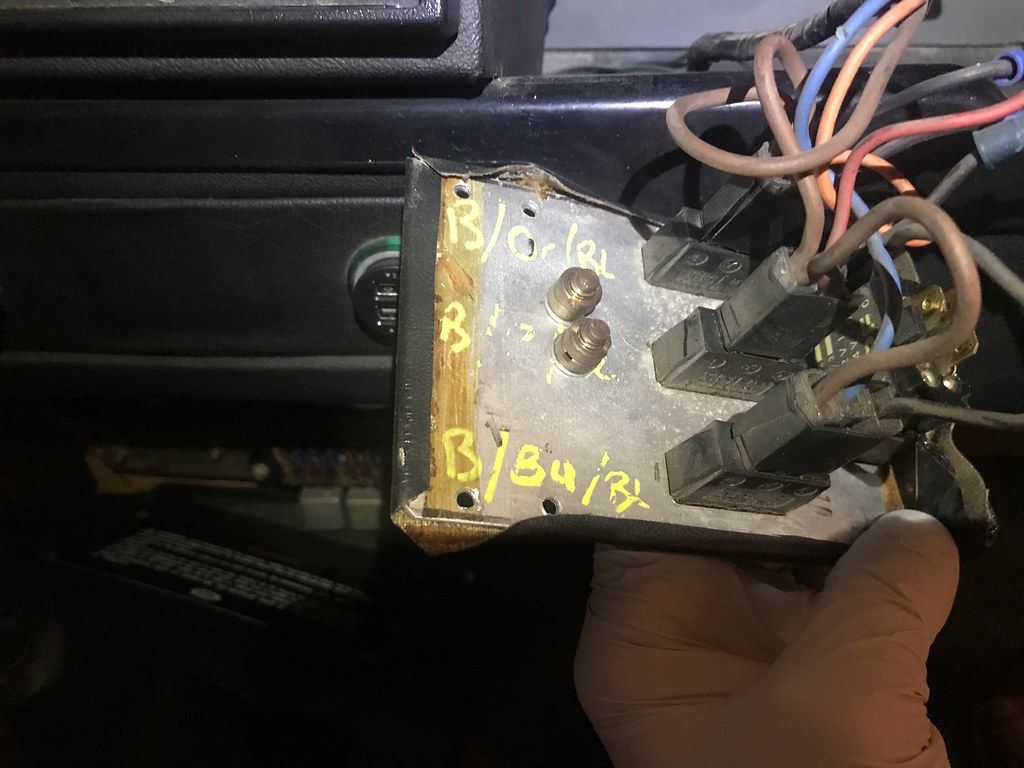
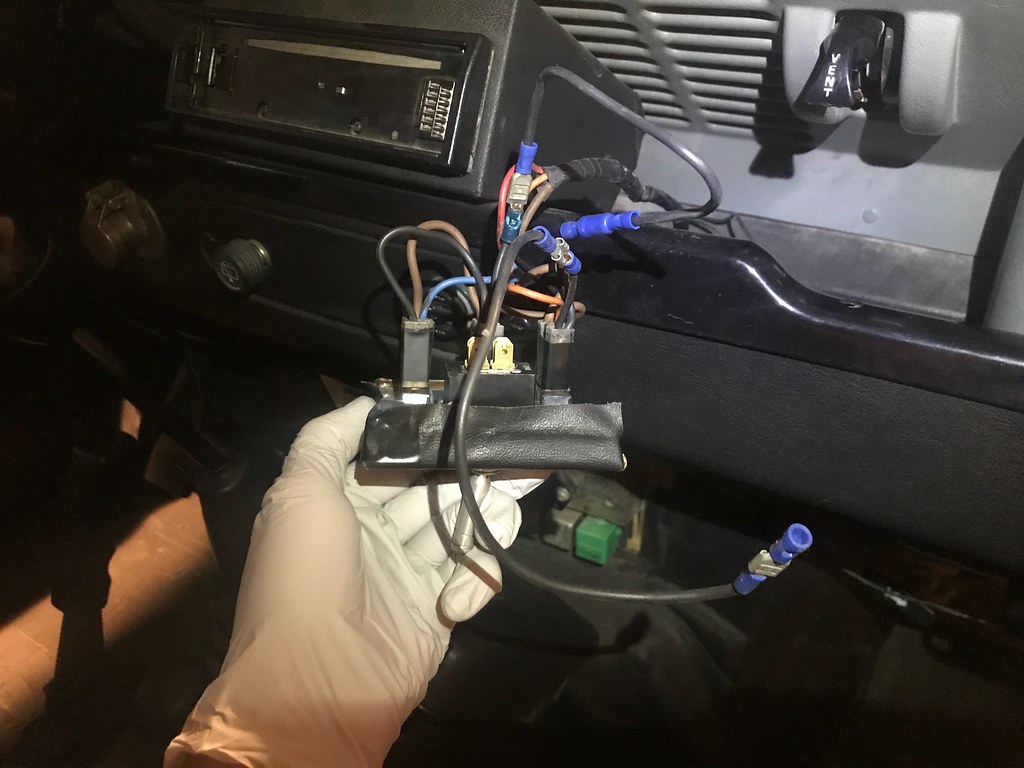
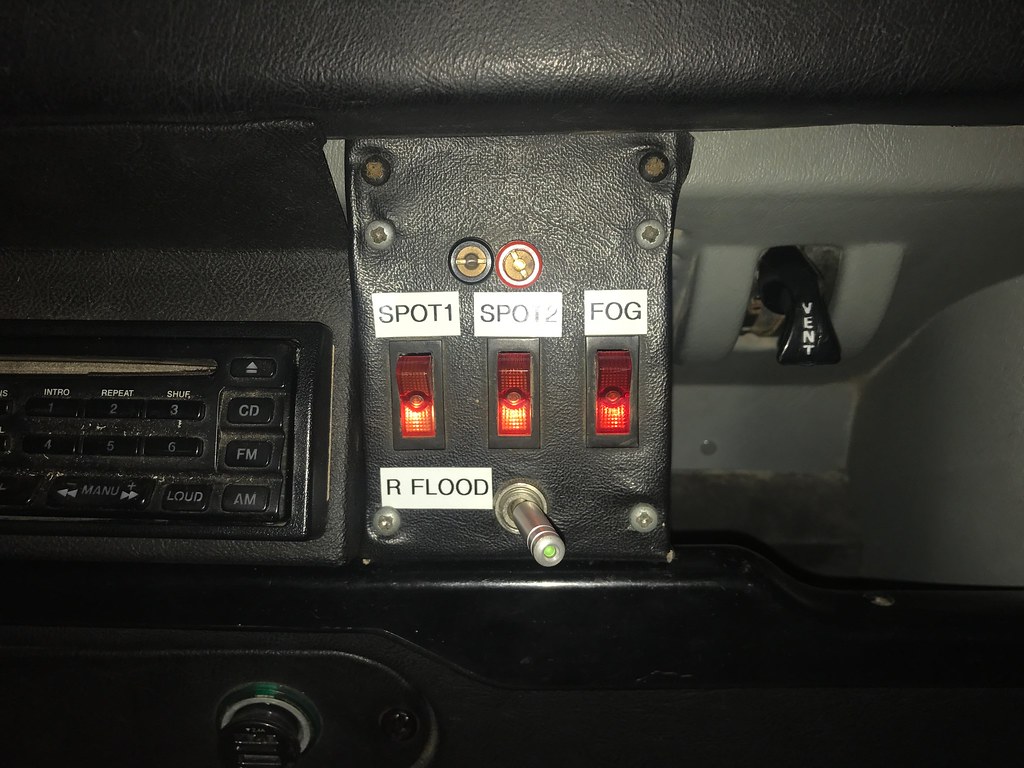
Misc electrical and labels
Roof light switches never worked right, some grounding issue. Switches should be lit when active, instead it lights the inactive ones. Took the panel apart to look, literally a bad crimp pulled out the main ground wire. Worked OK after, the actual lights themselves is another story
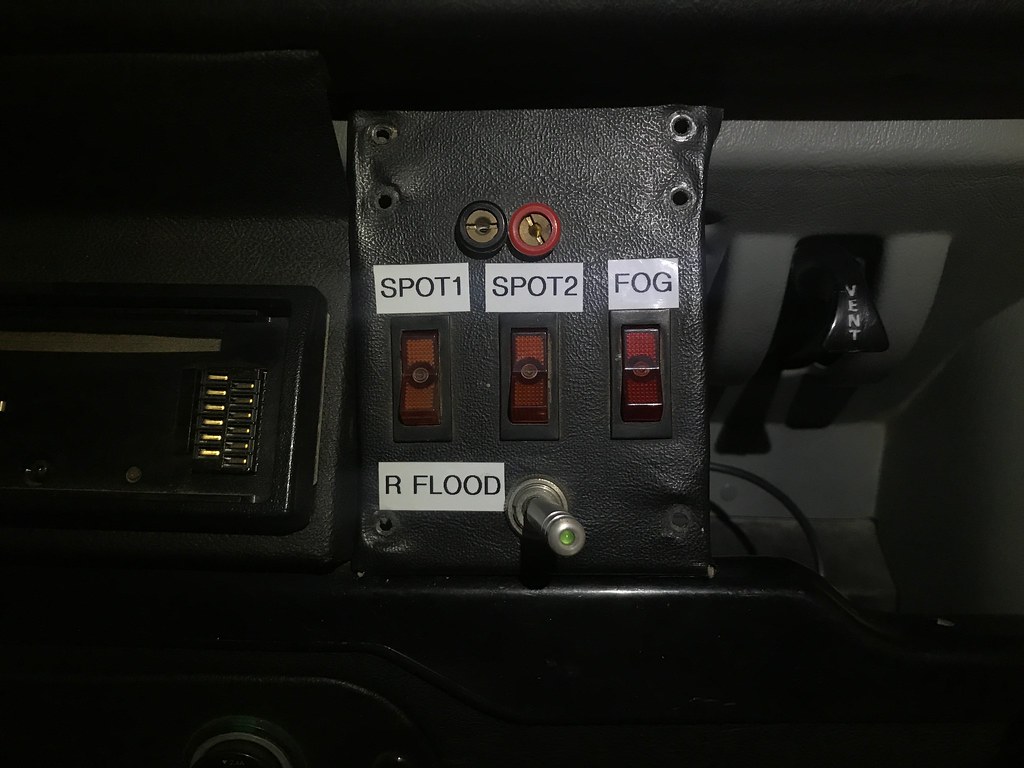
Diesel fuel plaque had worn away from spillage, replaced
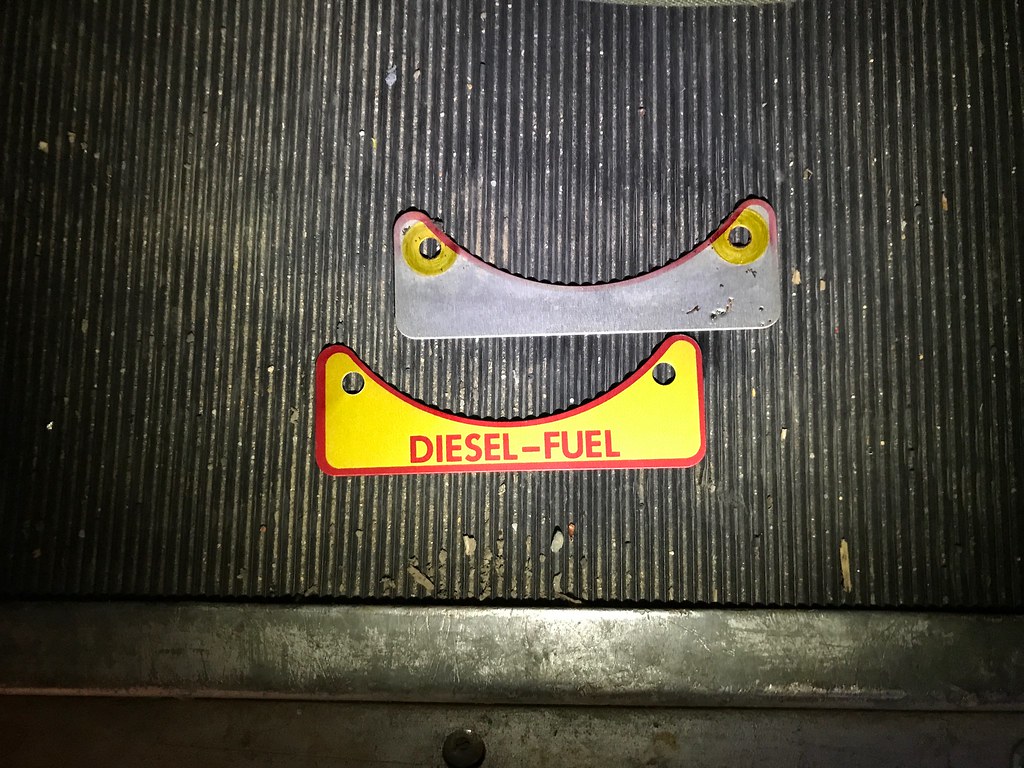
note paint fade and filler neck pin for the jerry can filler neck that pops out.
Misc electrical and labels
Roof light switches never worked right, some grounding issue. Switches should be lit when active, instead it lights the inactive ones. Took the panel apart to look, literally a bad crimp pulled out the main ground wire. Worked OK after, the actual lights themselves is another story
Diesel fuel plaque had worn away from spillage, replaced
note paint fade and filler neck pin for the jerry can filler neck that pops out.
luckyjoe
Adventurer
Corral Hollow weekend outing 06.24-25.2017
Love the Sandglow photos - keep 'em coming!
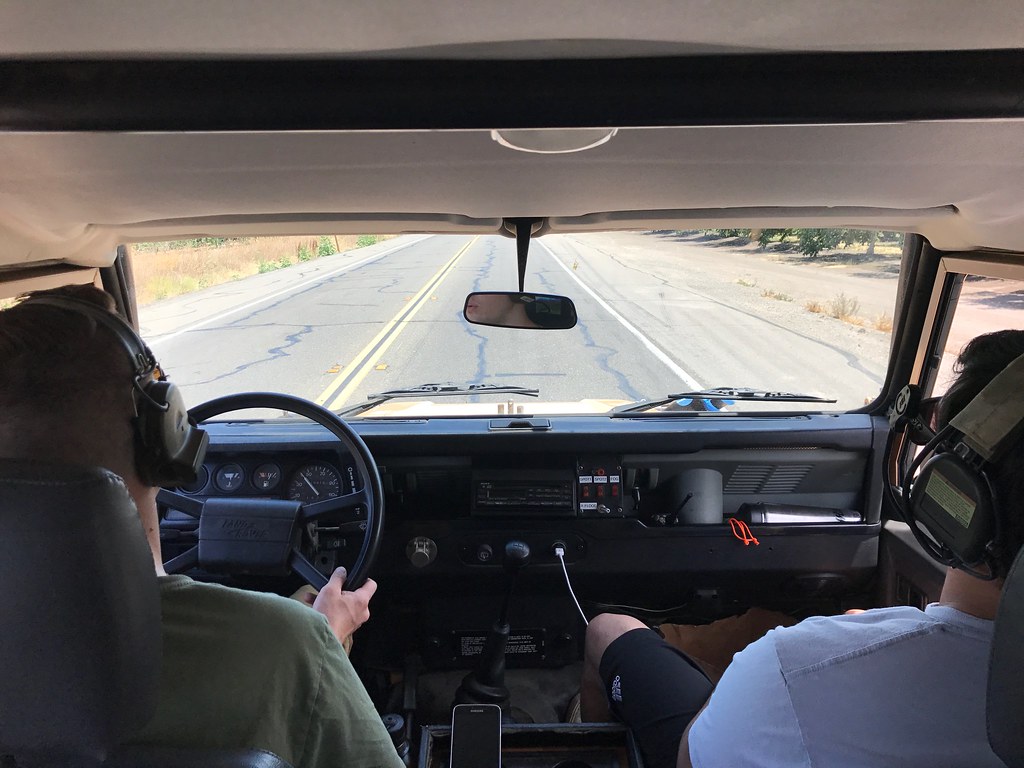
What do you use for Comm's headsets?
DiscoDavis
Explorer
Love the Sandglow photos - keep 'em coming!
Thanks
What do you use for Comm's headsets?
Drivers side is Peltor Comtac II's and passengers side is MSA Sordins, just what we have lying around from other projects
They are band aids for now, really to alleviate road noise and going hoarse on longer drives. Sometimes we have them on walkies and literally use those to talk to eachother in the car. A permanent solution is in the works, but expensive and I need more details from the one working setup I've seen.
FWIW the audio quality on the sordins is much nicer, and they were/are? cheaper!
Forum statistics
Members online
- yukonh20
- RamFam1718
- forty5thparallel
- xathor
- wild1
- kramer
- TundraBro
- Lawyerlarry
- BoToLander19o4
- Kochantrl
- Westy
- svmaple
- WillySwan
- Banas
- peculierboy
- al415
- 03rubicon
- 79 HUSTLER
- gfmale
- MotoDave
- ebrabaek
- aka_vladiator
- tango2011
- 79bj40
- kbsd
- Trailboss
- MTNWest
- Pacific Northwest yetti
- john61ct
- Clymber
- Jmanscotch
- Vogold
- hdas
- Savagenut
- CHSjay
- alanymarce
- MorrieSugg
- Jeff_DML
- freerider
- ExpoMike
- Johnboyy
- Denis 19853001
- matttahoe53
- CMARJEEP
- wazzubob
Total: 765 (members: 48, guests: 717)