You are using an out of date browser. It may not display this or other websites correctly.
You should upgrade or use an alternative browser.
You should upgrade or use an alternative browser.
[Build] Backpack 2.0 - A Climbing, Hiking, Paddling, Biking, Adventure-mobile
- Thread starter Nate_Yarbrough
- Start date
Nate_Yarbrough
New member
Subscribed
Sweet, Thanks! Welcome aboard!
Nate_Yarbrough
New member
Removing the Headliner from our Mercedes Sprinter.
I know, I know... This stuff is boring, and I promise we will get to the actual construction SOON! But, it's so important to get all of the little stuff done right first before starting the "flashy'' stuff. At any rate...lets pull out the headliner!
Blog Post with Pictures: https://adventureinabackpack.com/how-to-remove-the-headliner-in-a-mercedes-sprinter
Youtube Video: https://youtu.be/LNOwE6t-pG0
Continuing our strip down of our Mercedes Sprinter van that we are converting to a campervan, the next step was to remove the headliner. We needed to remove the headliner so that we could put insulation in the campervan and we are considering replacing the headliner with something more suited to Van Life, perhaps overhead cabinets.
Removing the headliner in a Mercedes Sprinter isn’t too hard as long as you follow the right steps in the right order. If you’re doing trial and error, it might take a little longer. But if you’ve watched this video then you should have the steps in the right order.
The first thing you’ll do to remove the headliner is to remove the torx bit bolts on the grab bars and visors. They came off pretty easily using a torx key.
After the bolts were removed, the next step was to remove the A pillars to get the headliner out from behind them. The A-frame pillars are attached with upholstery clips, so they can be removed with an upholstery clip removal tool, or, as we did it, with a chisel and prying gently. You don’t need to take them all the way off, just lay them over so you can get to the headliner.
Once those pillars are removed, the next step in removing the headliner is to unsnap the upholstery clips at the back of the headliner. These again could be removed with an upholstery clip remover, but we were able to just pull down on the headliner and remove them without breaking any. If you do break any, you can buy a pack of 20 for about six bucks. The link to the clips are in the blog post linked above.
When you unclip those upholstery clips, make sure someone is holding up the headliner, as the only thing attaching the headliner to the Sprinter at this point is the overhead light. So the last part is to unclip the wiring attaching the overhead light to the rest of the wiring. That’s all there is to removing a headliner from a Mercedes Sprinter!
Nate_Yarbrough
New member
Removing the Door Panels. Last step before actually building something...
Blog Post with Pictures: https://adventureinabackpack.com/removing-door-panels-mercedes-sprinter
Youtube Video: https://youtu.be/s9F-hElLR9E
We removed the door panels from our Mercedes Sprinter so that we could clean them and possibly add some insulation to them, if necessary (and upgrade those paper cone speakers...). This was our last step in prepping the van before we started adding to it for our conversion.
To start removing the door panels from a Sprinter, you'll need to remove the storage boxes that are at the bottom of the door panels. These just open up with a quarter turn of the latch and then pull straight up on it. It will pop right off.
Remove the trim around the door latch by simply prying it up with a chisel or other prying too. Similarly, you'll pry off the trim rings that cover the two bolts on the top of the door panel as well as the trim ring that goes around the door lock. Once all of the trim is removed, there should be six bolts exposed.
The bolts are all a torx head or star bit. You can remove these with a torx key or a torx bit on your drill. They should remove easily.
Once the bolts are removed, the panel is free, but the wiring is still connected. You will need to disconnect the wiring to the power windows and power locks by unplugging the connector wires. Those are pretty straightforward.
Finally, you will need to disconnect the door latch mechanism. This mechanism can be tricky to figure out, so watch the video to make sure you understand it. The white clip pulls up and spins around to reveal the latch clip. The clip comes straight out and that disconnects the door latch.
That is all there is to removing the door panels on a Mercedes Sprinter.
The last part of this video is removing the panels on the back doors of the Sprinter. We simply broke off the plastic rivets because we didn't plan to reuse these panels. We tried removing them gently but the clips still are not reusable if done gently. The are cheap to replace, so if you are planning to reuse the panels, you should plan to order more plastic rivets. There is a link to the exact rivets used in the blog post linked at the top of this description.
Last edited:
Nate_Yarbrough
New member
Installing Sound Dampener
Hey! We actually get to put things back into the van rather than disassembling and cleaning. Lets ACTUALLY start the build!
Blog Post and Pictures: https://adventureinabackpack.com/vanlife-tutorial-sound-proofing-a-campervan
Youtube Video: https://youtu.be/j-LoPJ_mADA
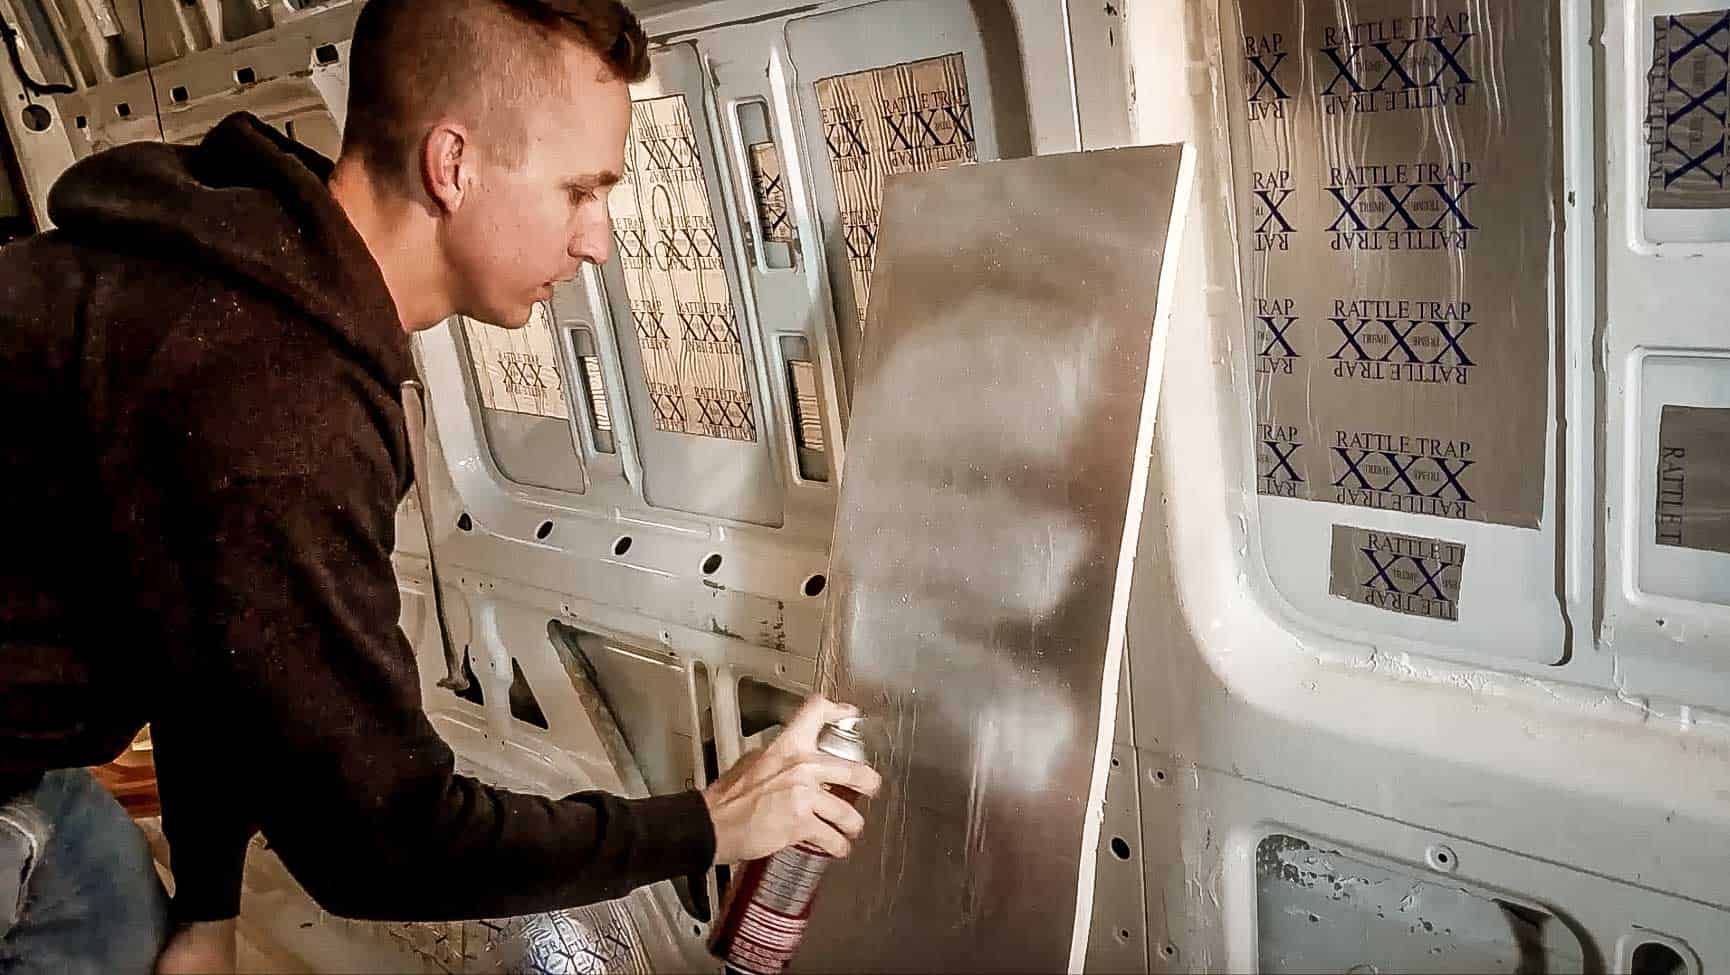
In it's previous life, our Mercedes Sprinter Van was a plumbing van. So even though it is a Mercedes, it's still a work truck and was noisy and rattled driving down the road. Since we are converting this van to a campervan, we wanted a quieter ride. So we decided to soundproof a bit with some FatMat RattleTrap Sound Dampener.
When we bought our 2007 Mercedes Sprinter, it did have some factory installed sound dampener scattered throughout, mainly on the ceiling. So our goal was to add a bit more sound dampener and make it a nicer, quieter ride for our VanLife. We did this with 50 square feet of 80 mil FatMat RattleTrap Sound Dampener. This was a good amount to cover what we needed and not have extra.
When you install FatMat RattleTrap Sound Dampener, you don't need to cover 100% of the surfaces. The law of diminishing returns here applies, so the more you cover doesn't necessarily mean the quieter it will be. Just focus on the largest areas first and then come back with any extras for smaller spots.
We started with the wheel wells, as this is the most noticeable road noise. We covered the wheel wells almost completely with the FatMat RattleTrap.
Before you install the FatMat RattleTrap, make sure your metal surface is clean and free of dust. We used a simple vinegar solution (after degreasing with dawn) to wipe down the metal and made sure it was dry before applying the RattleTrap. FatMat RattleTrap is self-adhesive.
To apply the Fat Mat Rattle Trap, cut it into small strips, about 5-6 inches wide. Remember that you don't need perfect coverage, so don't get overly concerned with being perfectly lined up.
Peel off the backing of the RattleTrap to reveal the adhesive on the back. If the RattleTrap is stiff, it's a good idea to heat it up with a heat gun or hair dryer to make it more pliable. We found this to make it much easier to apply to the curvier parts of the van. If it's warm outside, you likely won't need to apply heat. But it was cold out when we installed our RattleTrap, so it was helpful to heat it up. Make sure you remove the backing before you heat it, as the heat may cause the backing to get stuck on.
After you've placed the RattleTrap to the metal, smash it down with the included roller to make sure the edges are sealed and the adhesive is completely adhered to the metal.
That's all there is to installing FatMat RattleTrap Sound Dampener to a Mercedes Sprinter Campervan. We used 50 square feet of 80 mil RattleTrap and felt that was a perfect amount for our purposes. The end result is a much more dense sounding van with less rattling and less echos. Definitely worth the $110 and a few hours of our time!


Hey! We actually get to put things back into the van rather than disassembling and cleaning. Lets ACTUALLY start the build!
Blog Post and Pictures: https://adventureinabackpack.com/vanlife-tutorial-sound-proofing-a-campervan
Youtube Video: https://youtu.be/j-LoPJ_mADA
In it's previous life, our Mercedes Sprinter Van was a plumbing van. So even though it is a Mercedes, it's still a work truck and was noisy and rattled driving down the road. Since we are converting this van to a campervan, we wanted a quieter ride. So we decided to soundproof a bit with some FatMat RattleTrap Sound Dampener.
When we bought our 2007 Mercedes Sprinter, it did have some factory installed sound dampener scattered throughout, mainly on the ceiling. So our goal was to add a bit more sound dampener and make it a nicer, quieter ride for our VanLife. We did this with 50 square feet of 80 mil FatMat RattleTrap Sound Dampener. This was a good amount to cover what we needed and not have extra.
When you install FatMat RattleTrap Sound Dampener, you don't need to cover 100% of the surfaces. The law of diminishing returns here applies, so the more you cover doesn't necessarily mean the quieter it will be. Just focus on the largest areas first and then come back with any extras for smaller spots.
We started with the wheel wells, as this is the most noticeable road noise. We covered the wheel wells almost completely with the FatMat RattleTrap.
Before you install the FatMat RattleTrap, make sure your metal surface is clean and free of dust. We used a simple vinegar solution (after degreasing with dawn) to wipe down the metal and made sure it was dry before applying the RattleTrap. FatMat RattleTrap is self-adhesive.
To apply the Fat Mat Rattle Trap, cut it into small strips, about 5-6 inches wide. Remember that you don't need perfect coverage, so don't get overly concerned with being perfectly lined up.
Peel off the backing of the RattleTrap to reveal the adhesive on the back. If the RattleTrap is stiff, it's a good idea to heat it up with a heat gun or hair dryer to make it more pliable. We found this to make it much easier to apply to the curvier parts of the van. If it's warm outside, you likely won't need to apply heat. But it was cold out when we installed our RattleTrap, so it was helpful to heat it up. Make sure you remove the backing before you heat it, as the heat may cause the backing to get stuck on.
After you've placed the RattleTrap to the metal, smash it down with the included roller to make sure the edges are sealed and the adhesive is completely adhered to the metal.
That's all there is to installing FatMat RattleTrap Sound Dampener to a Mercedes Sprinter Campervan. We used 50 square feet of 80 mil RattleTrap and felt that was a perfect amount for our purposes. The end result is a much more dense sounding van with less rattling and less echos. Definitely worth the $110 and a few hours of our time!
Nate_Yarbrough
New member
Installing Roof Vents on our Campervan
Moving right along in our van build! We have installed the roof vents. We have opted to go without air conditioning which means we need some good airflow. Installing 2 vents should help that out. Both fans are reversible and one is mounted over where the bed will be to act as a ceiling fan.
See the blog post and pictures here: https://adventureinabackpack.com/campervan-roof-vent/
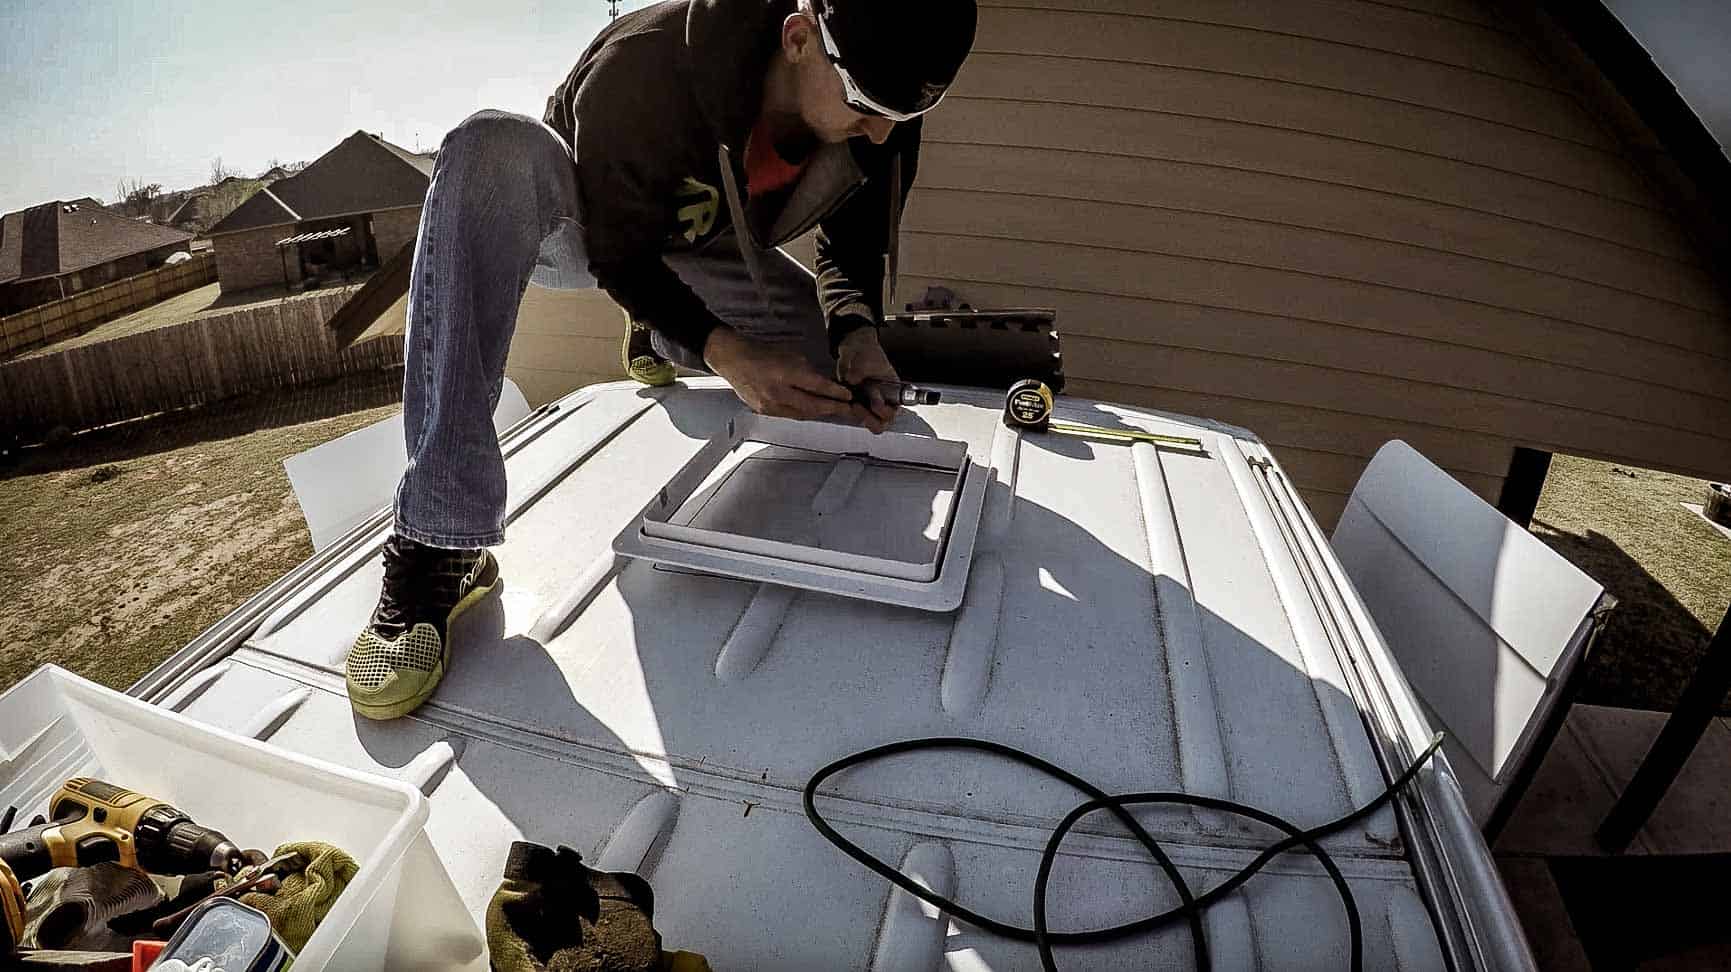
We've installed two MaxxAir MaxxFans Roof Vents on our Campervan to get maxximum airflow (see what I did there?).
This is part one of the process, as we are only doing the exterior installation. The interior portion will be done after the ceiling is installed in the van, and we will do wiring at that point as well.
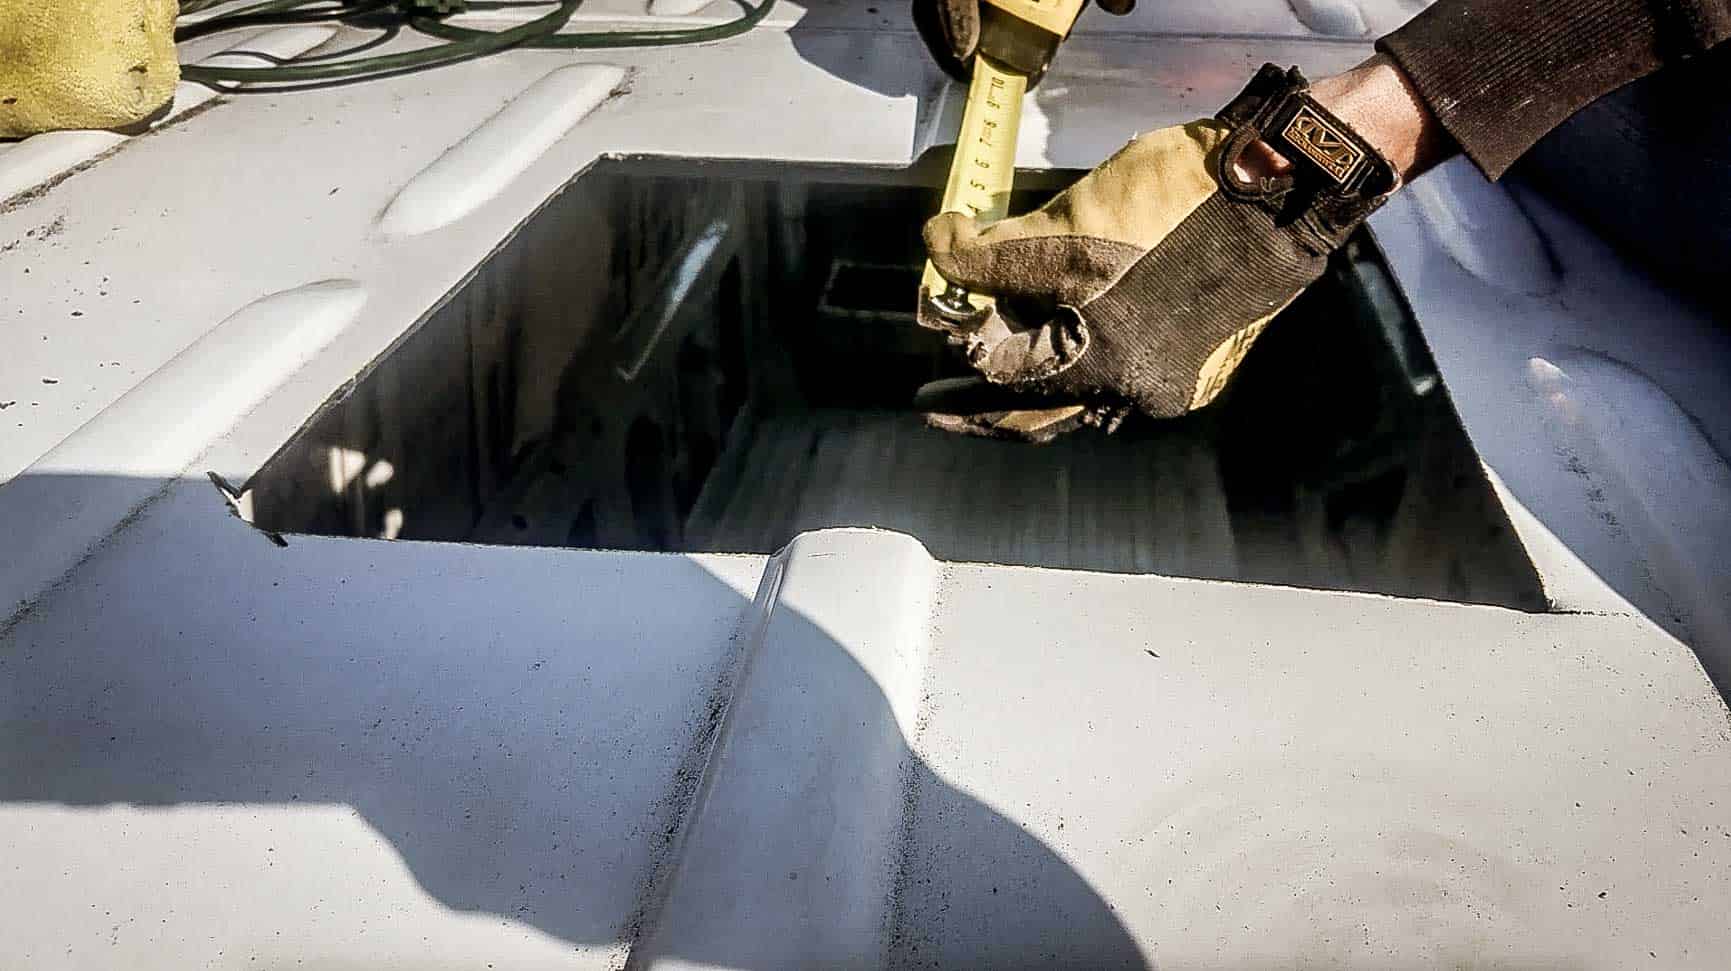
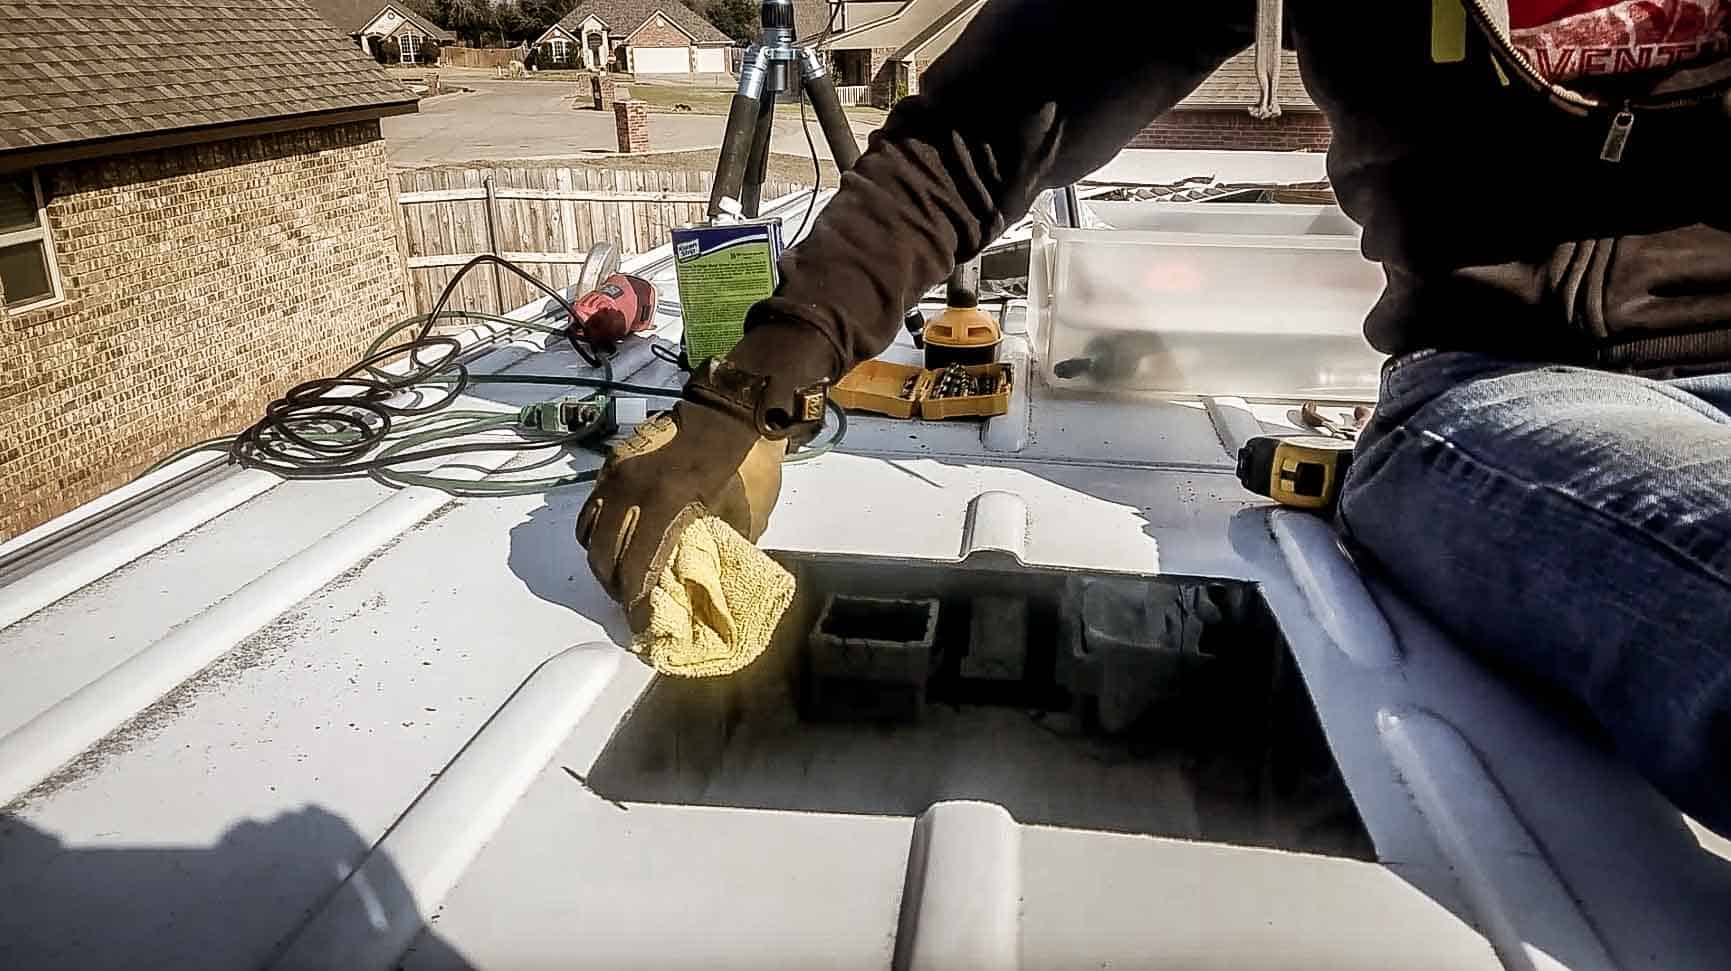
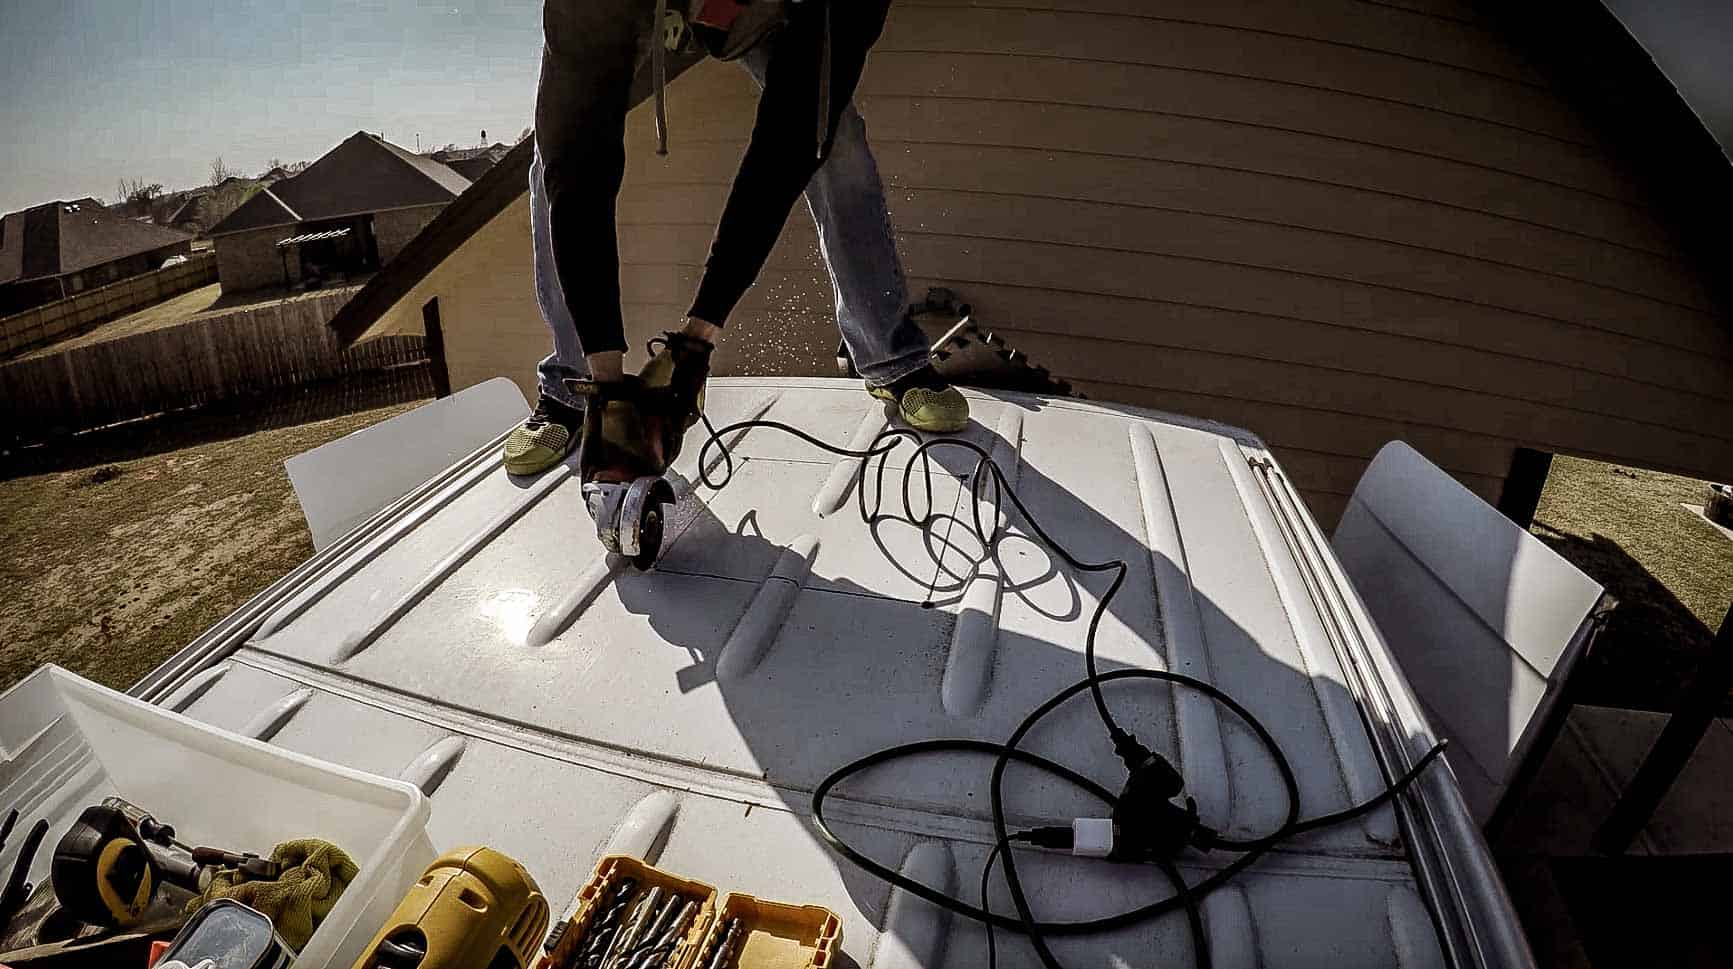
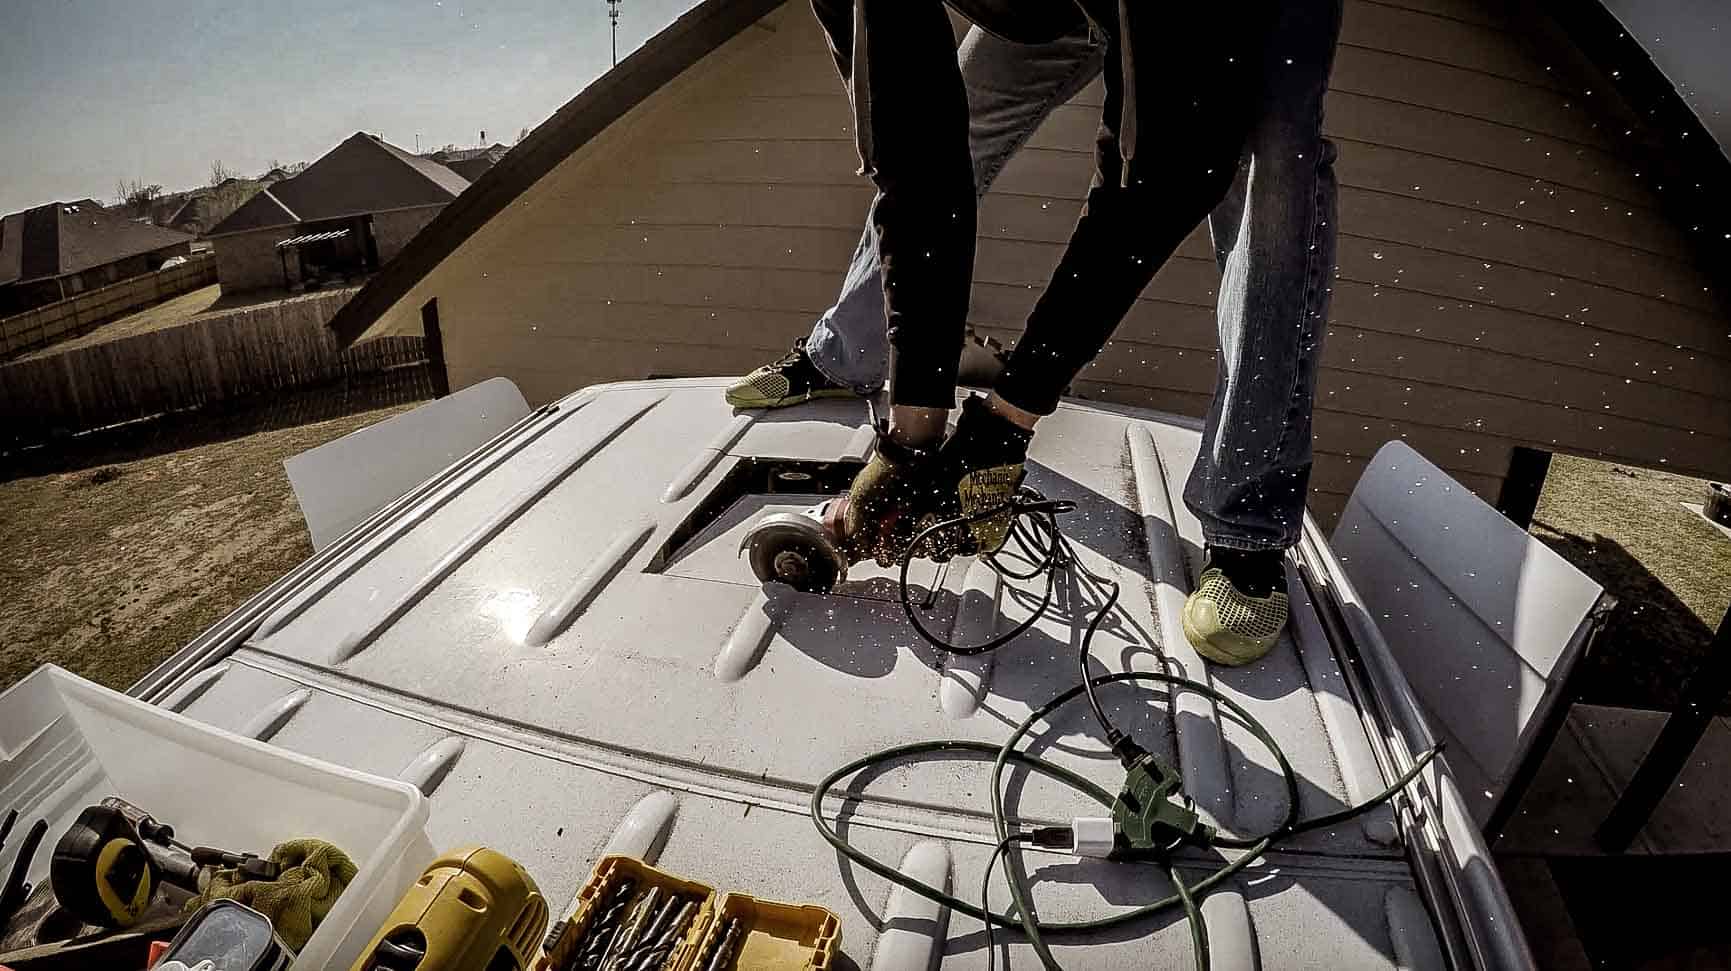
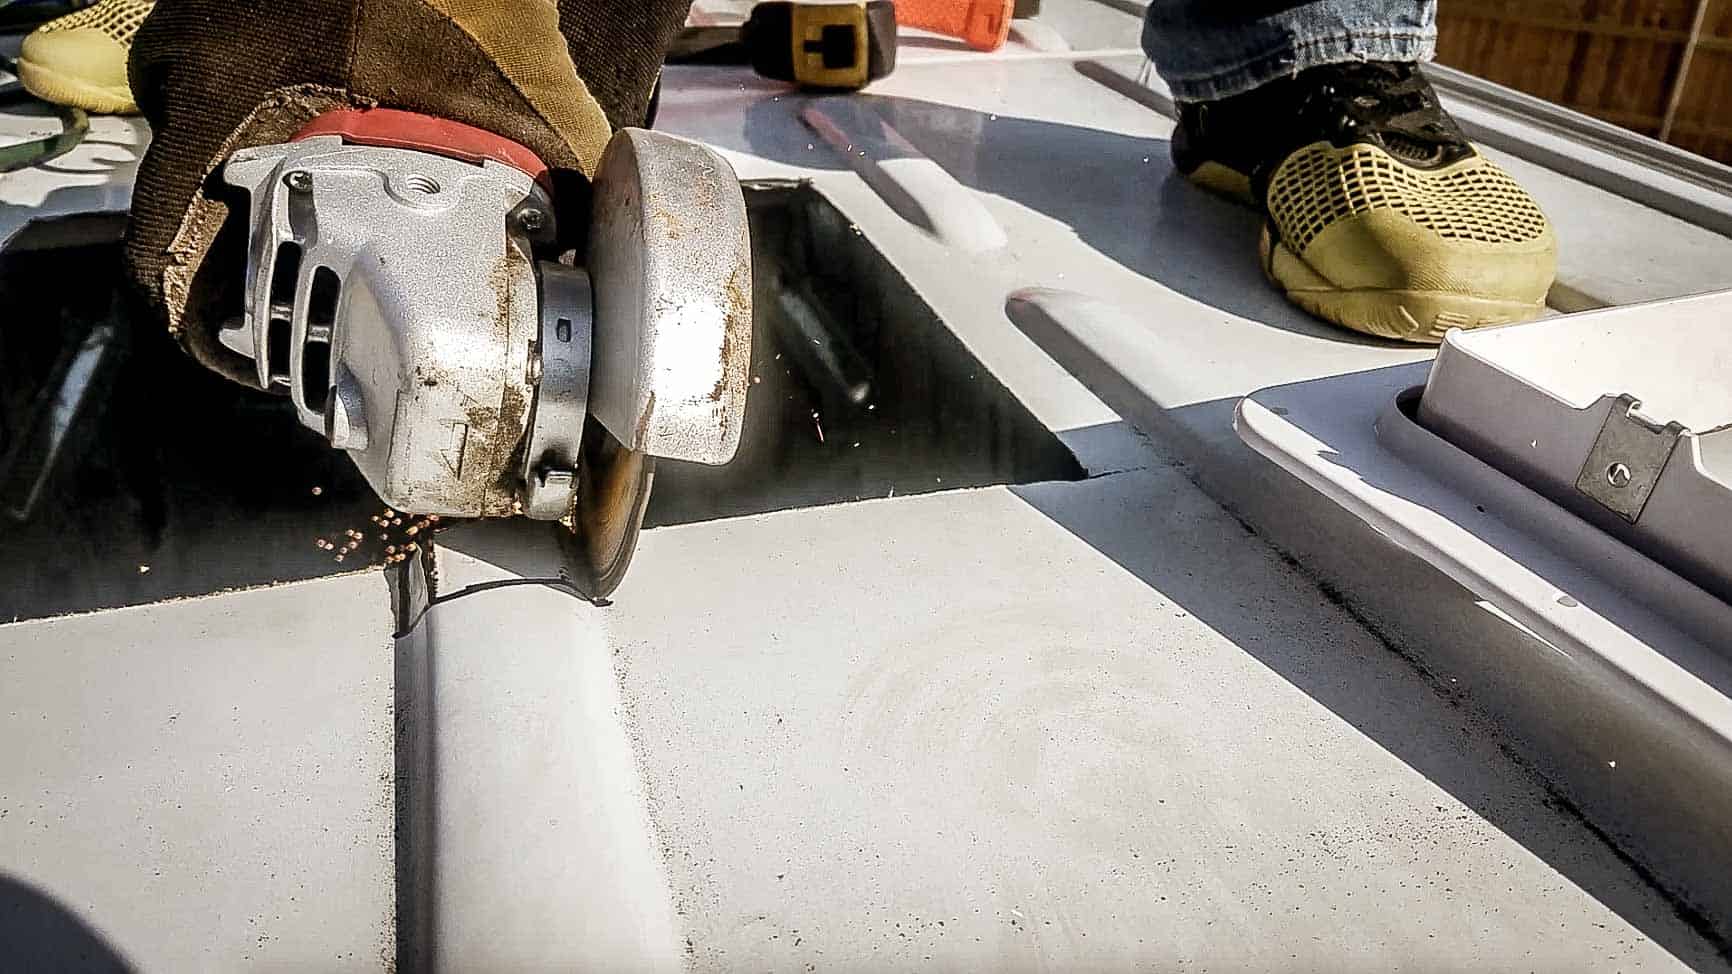
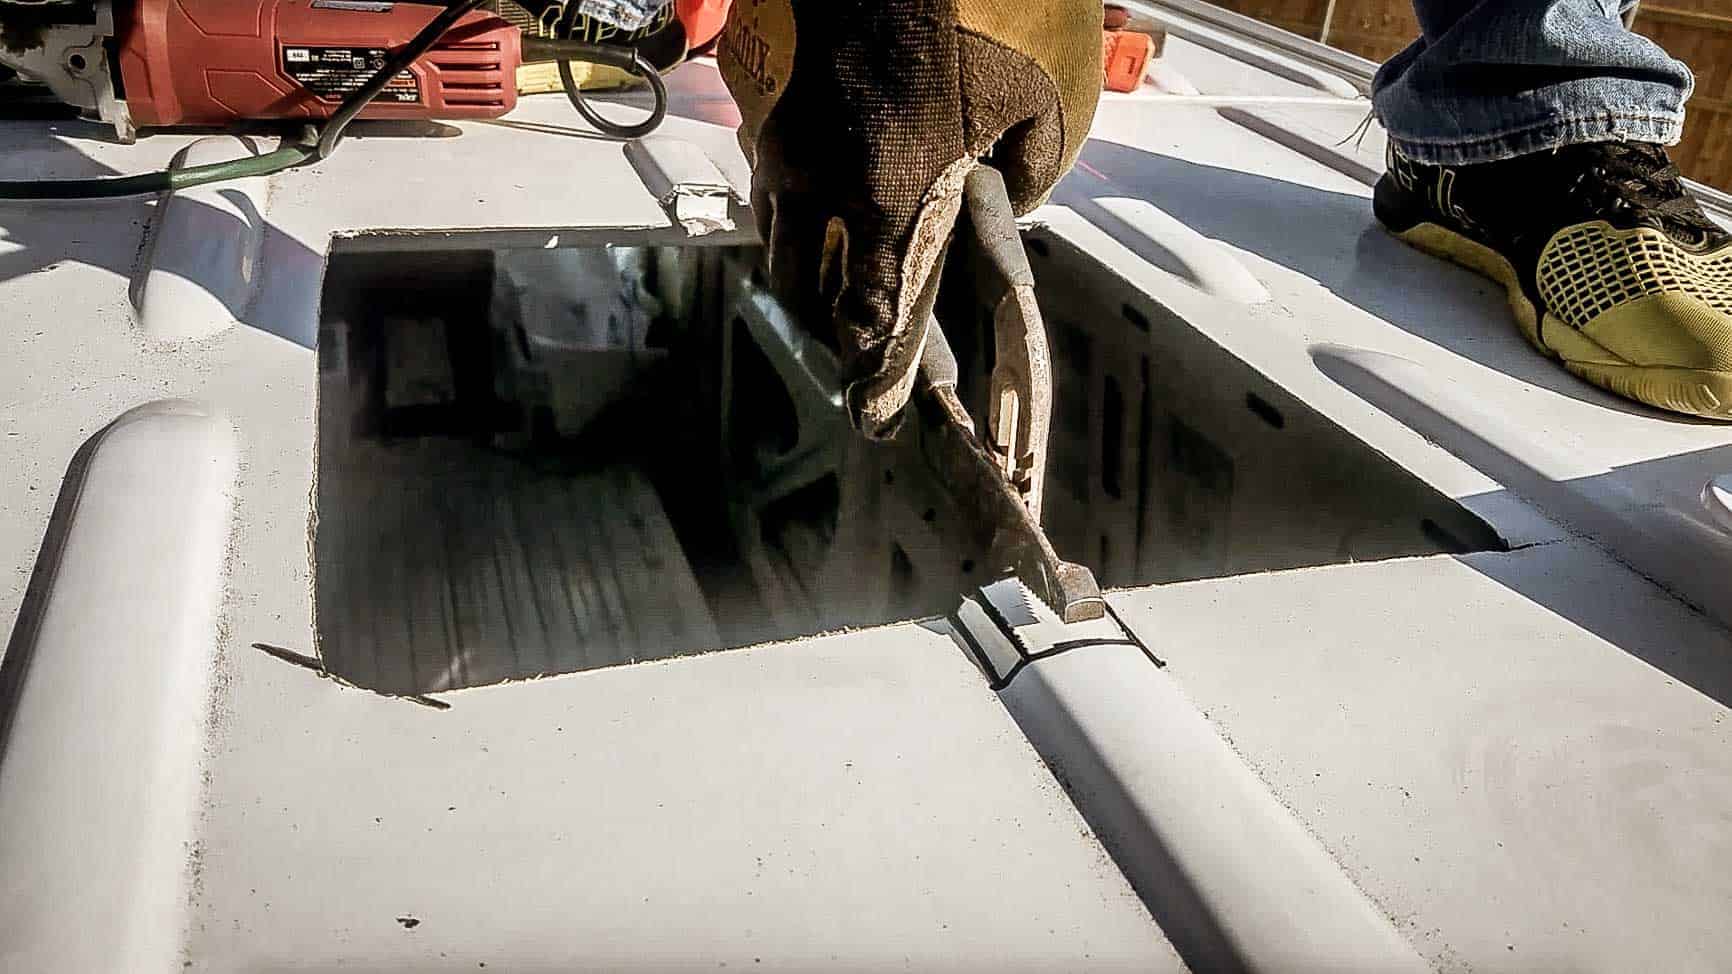
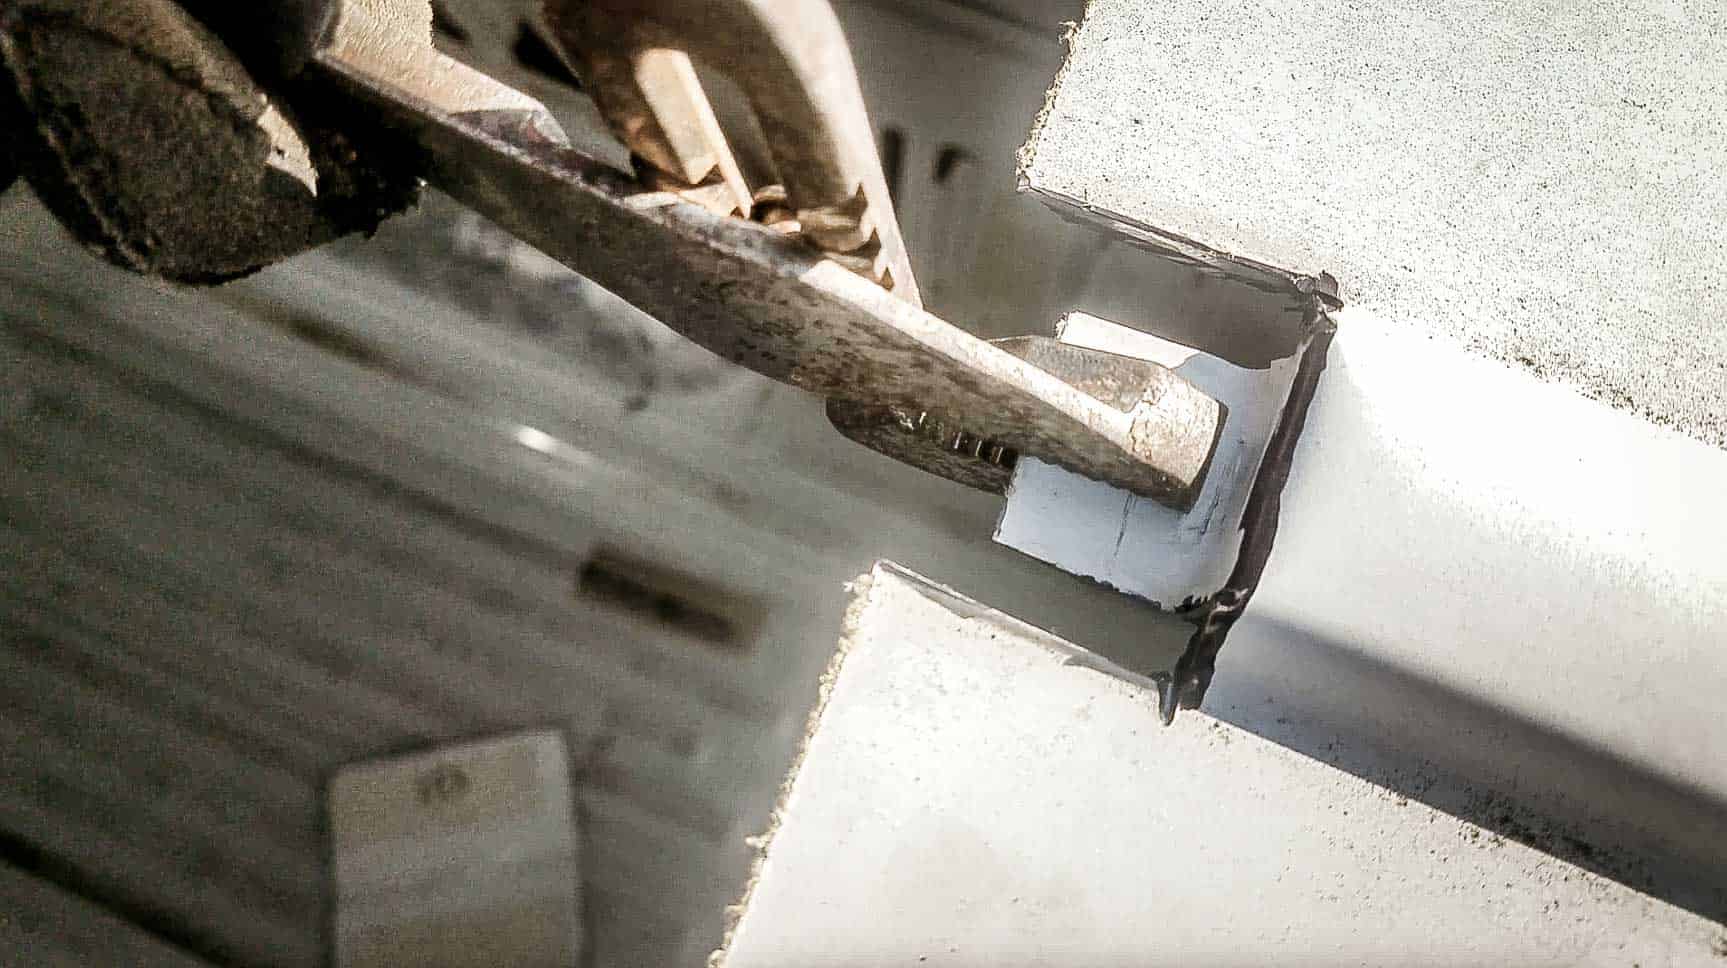
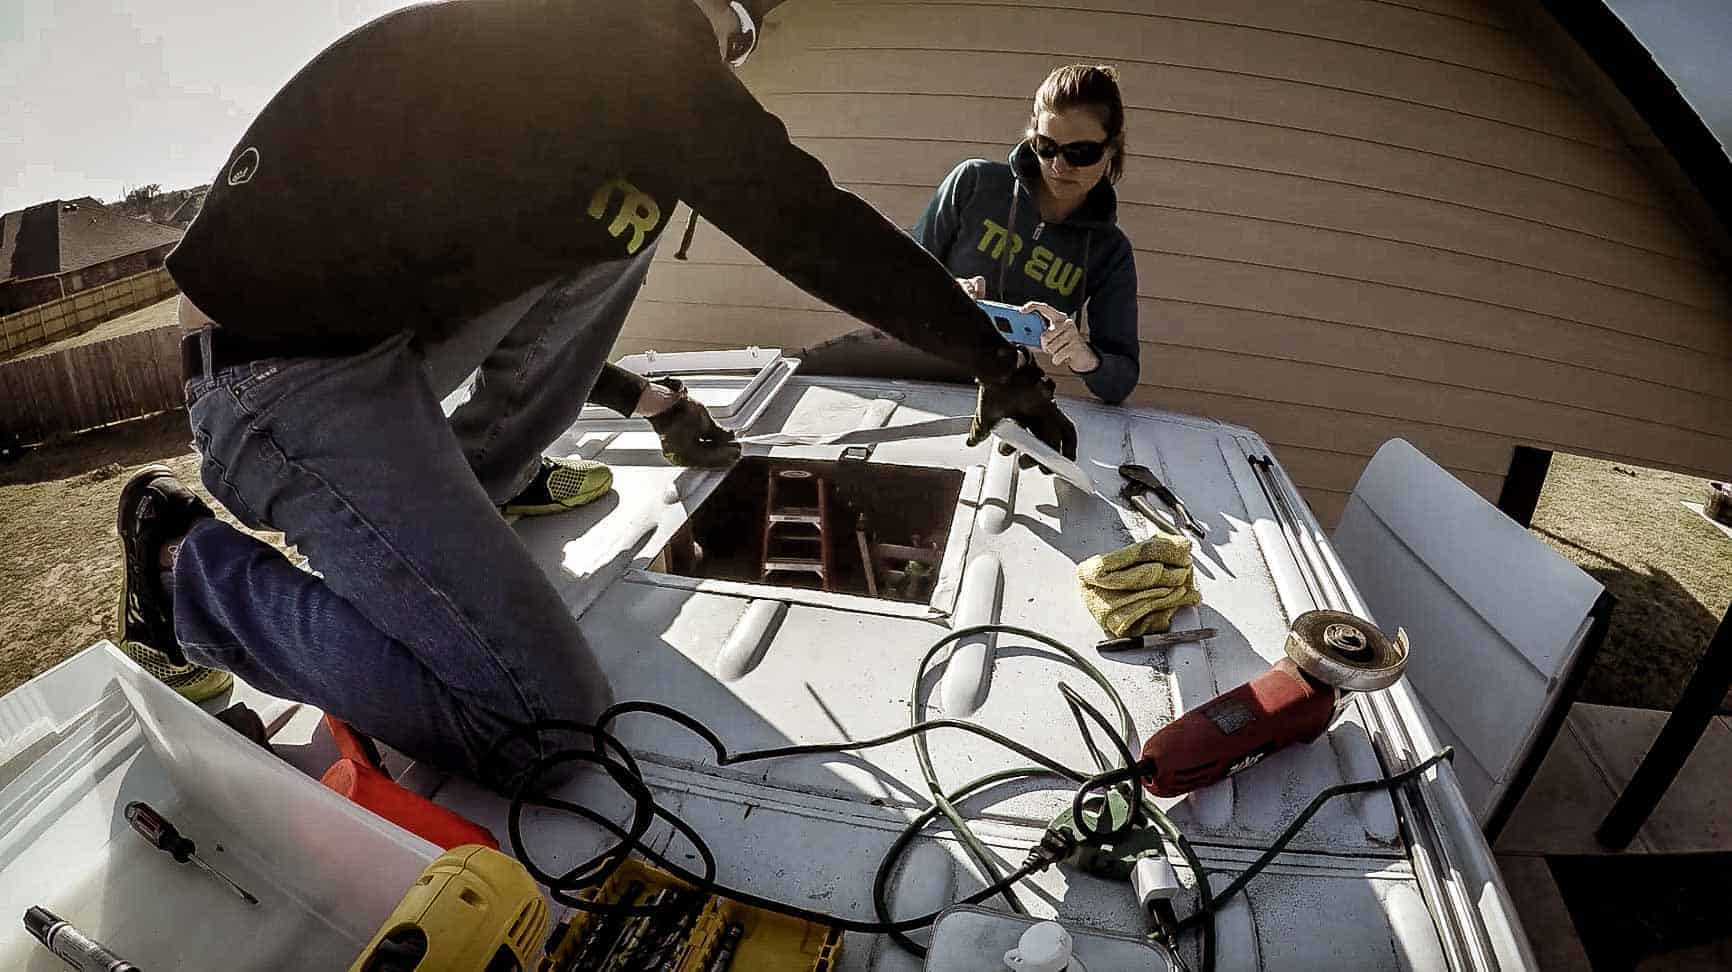
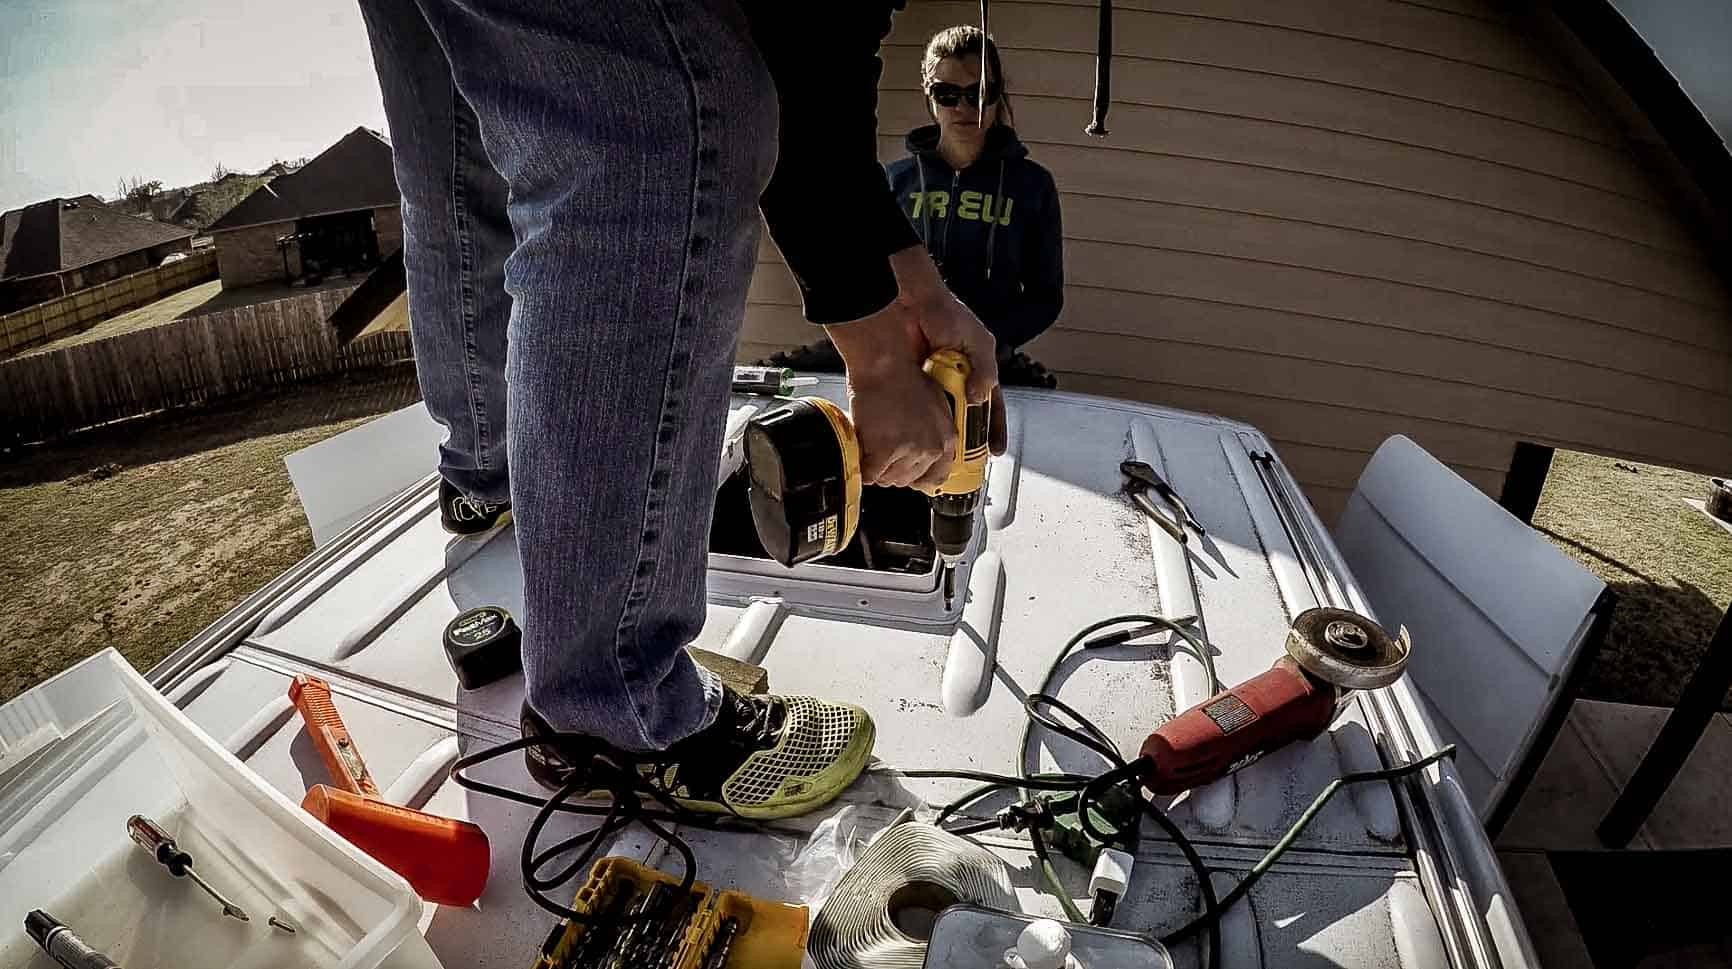
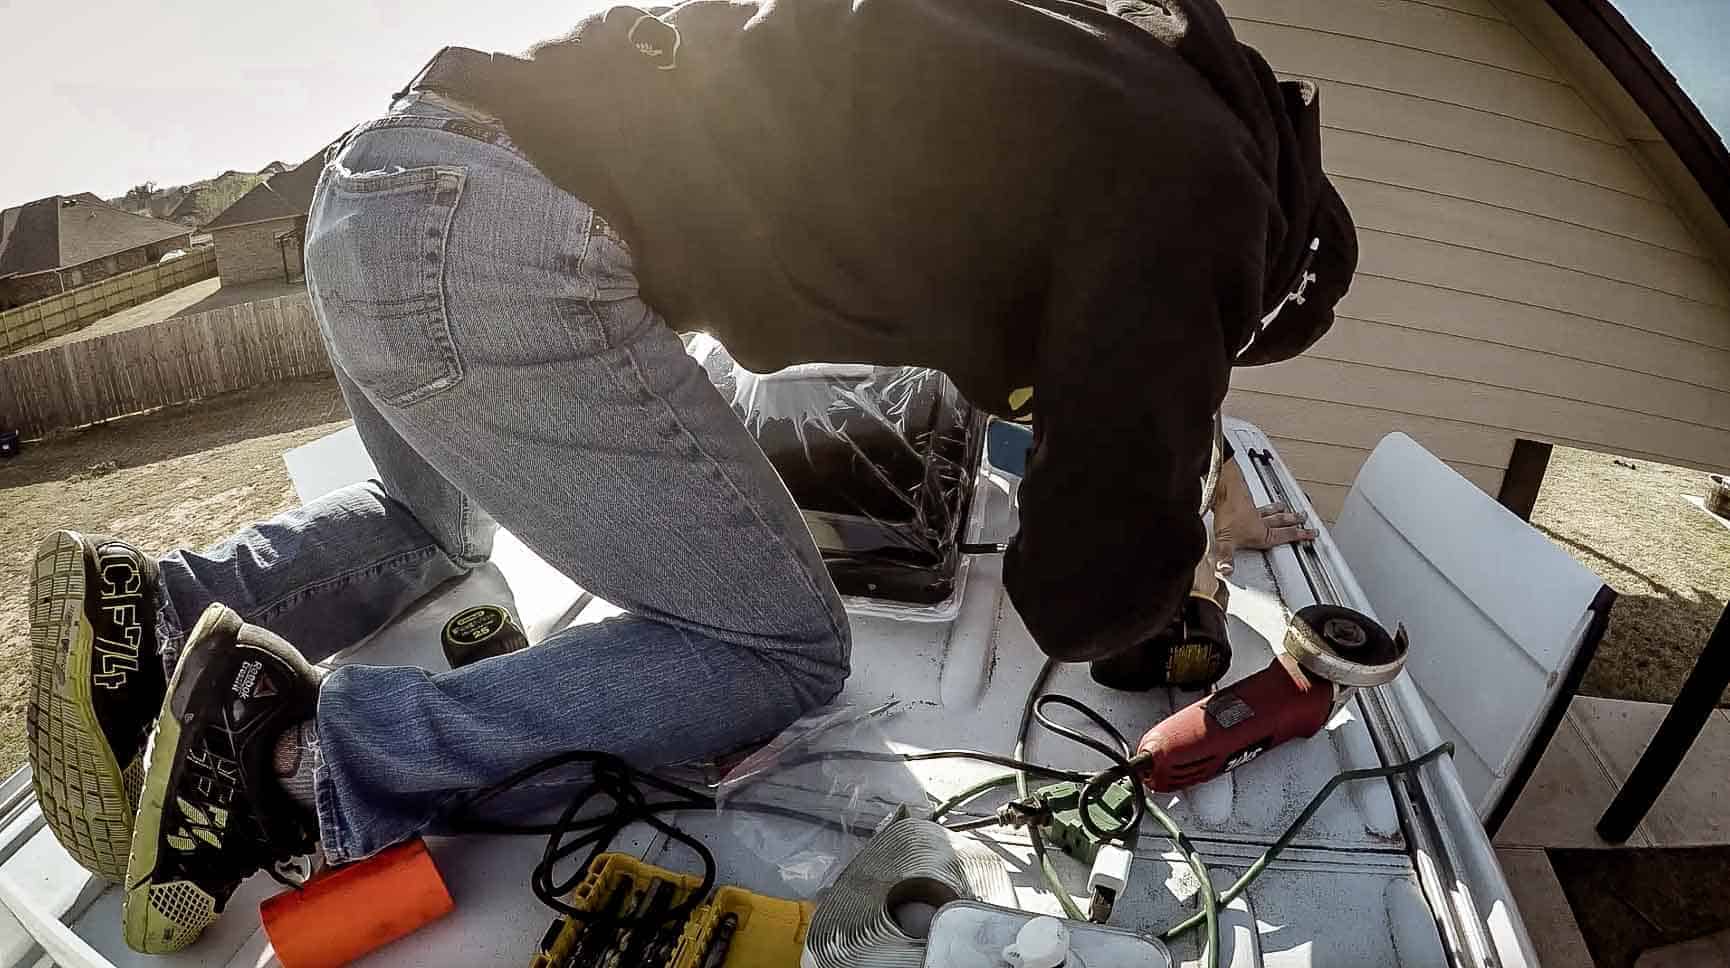
So, to get started, you'll need a 14-inch by 14-inch square cutout in your roof. This is the standard roof cutout for vent fans in RVs, so if you are replacing an existing fan, the hole should be the right size. If you are putting in a new one, as we did, you'll need to cut out the hole. We recommend using a jigsaw with a metal blade, although we used an angle grinder which worked fine. The most difficult part of this was where the structural ribs were in the way. I'd like to explain it, but it's probably best to just check out the video because it took a bit of 'artistic' cutting and bending (I think fabrication is the proper word, but that would make me a fabricator...and that, I am not...lol) of the metal to get it to fit. (https://youtu.be/_kd_Km_4oNM)
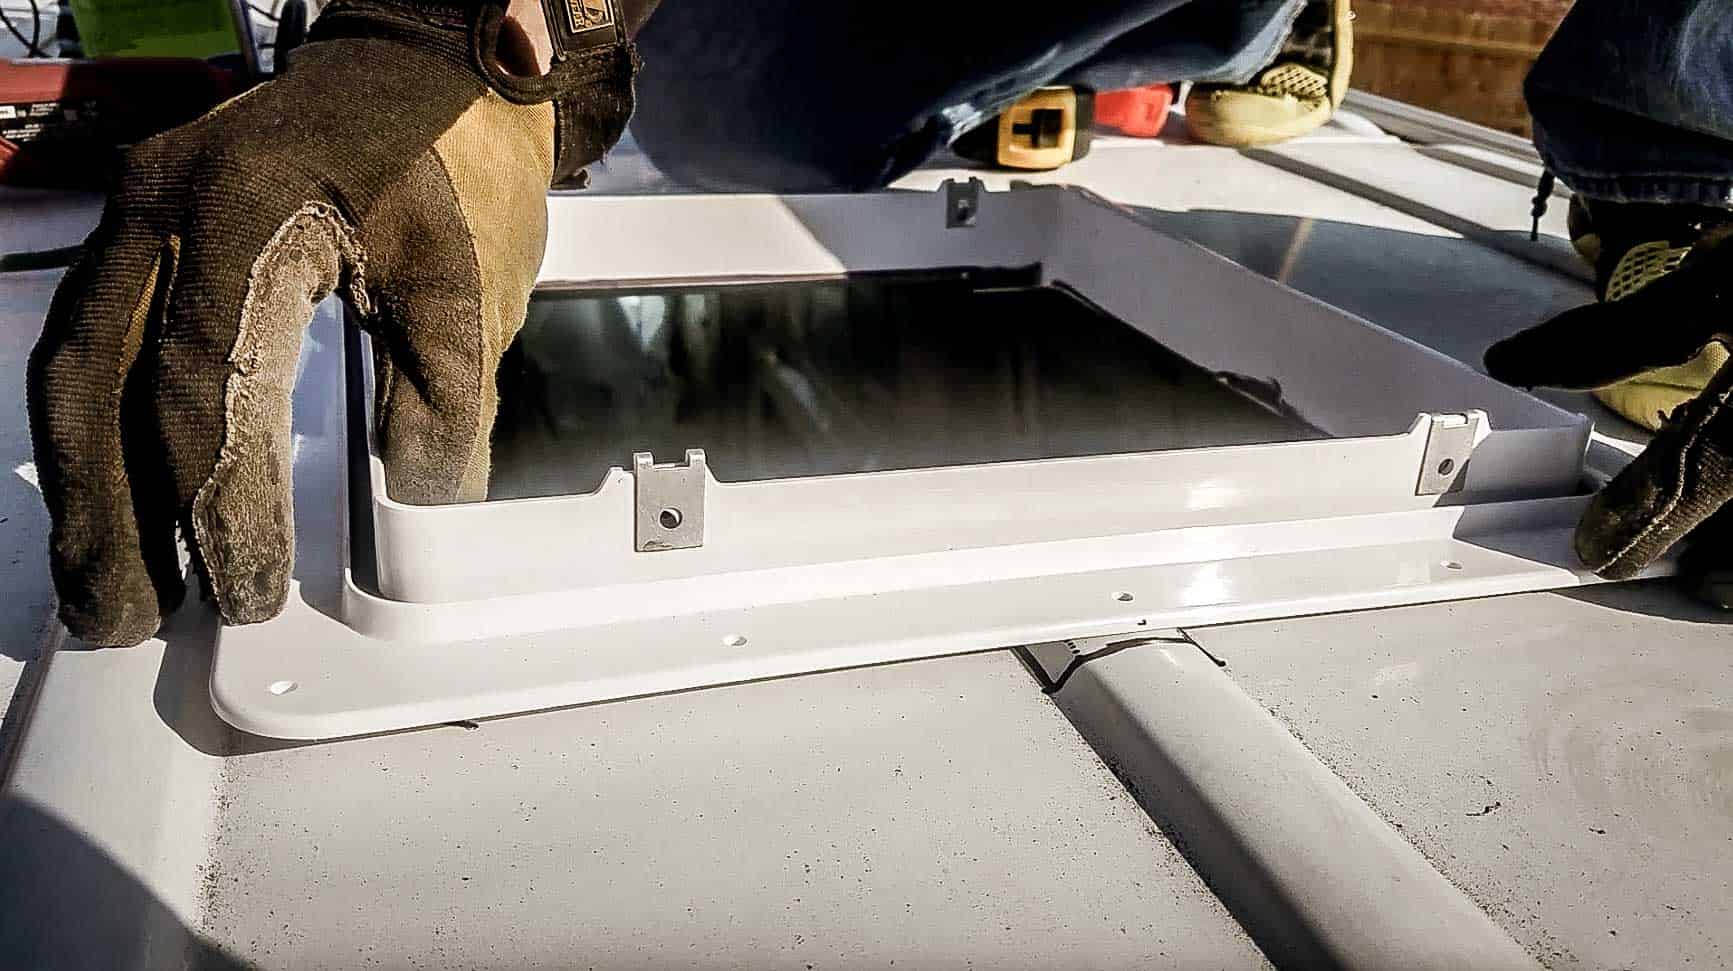
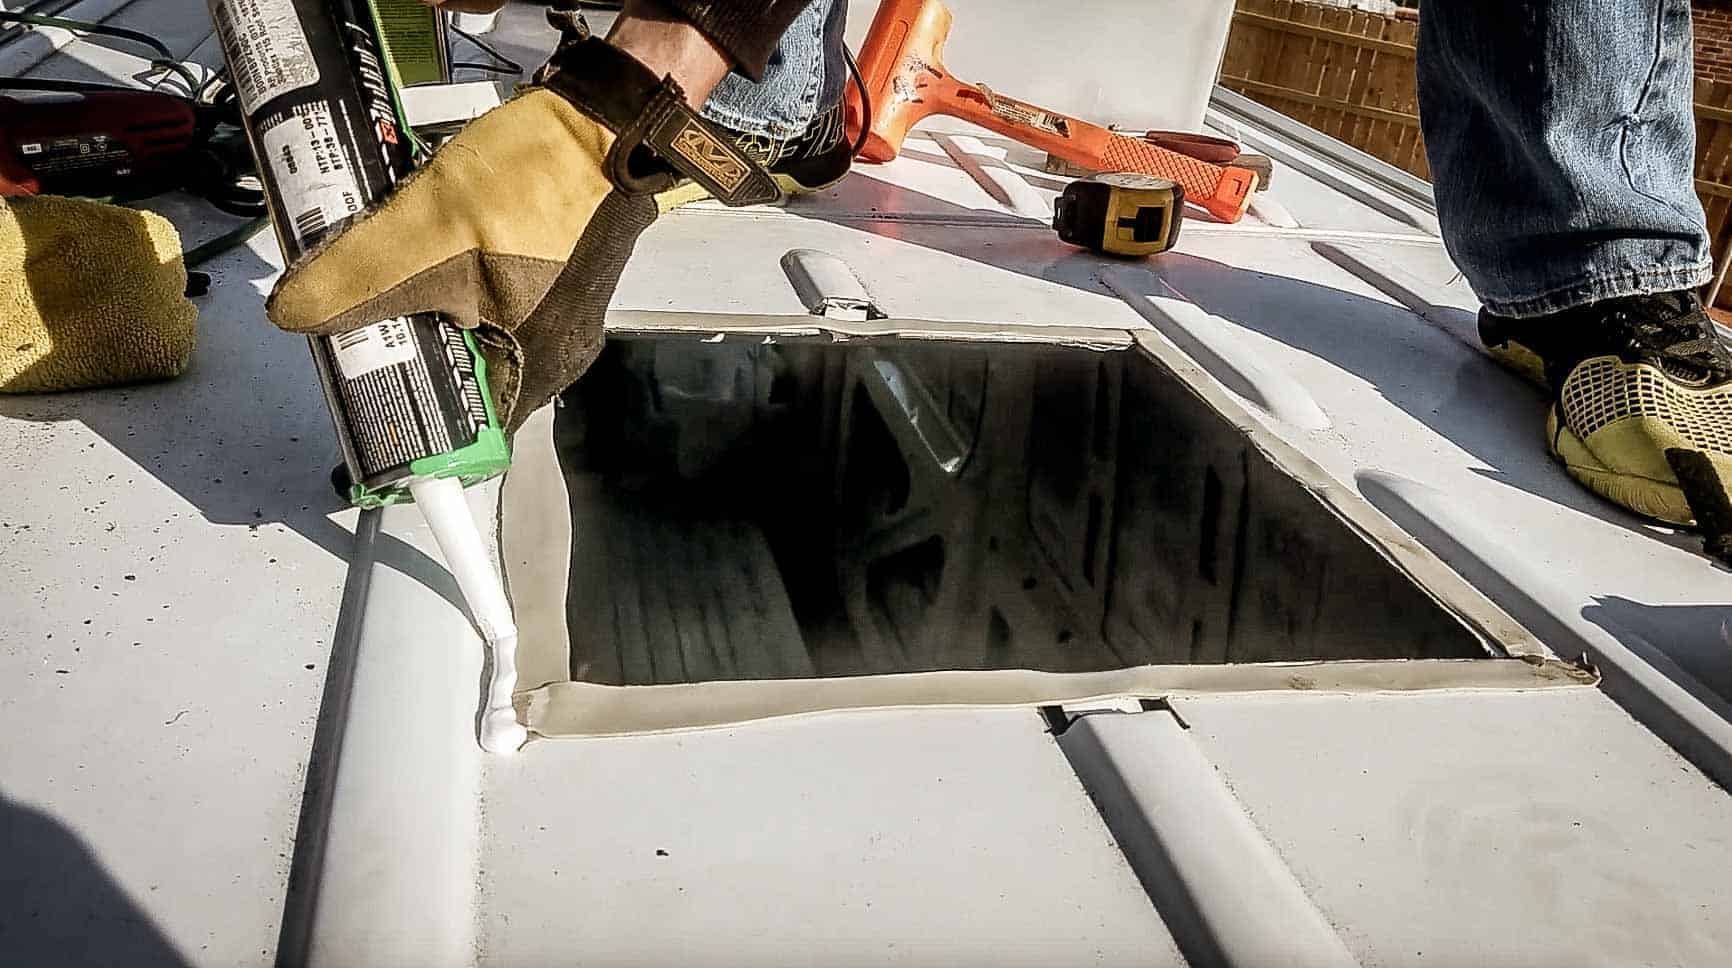
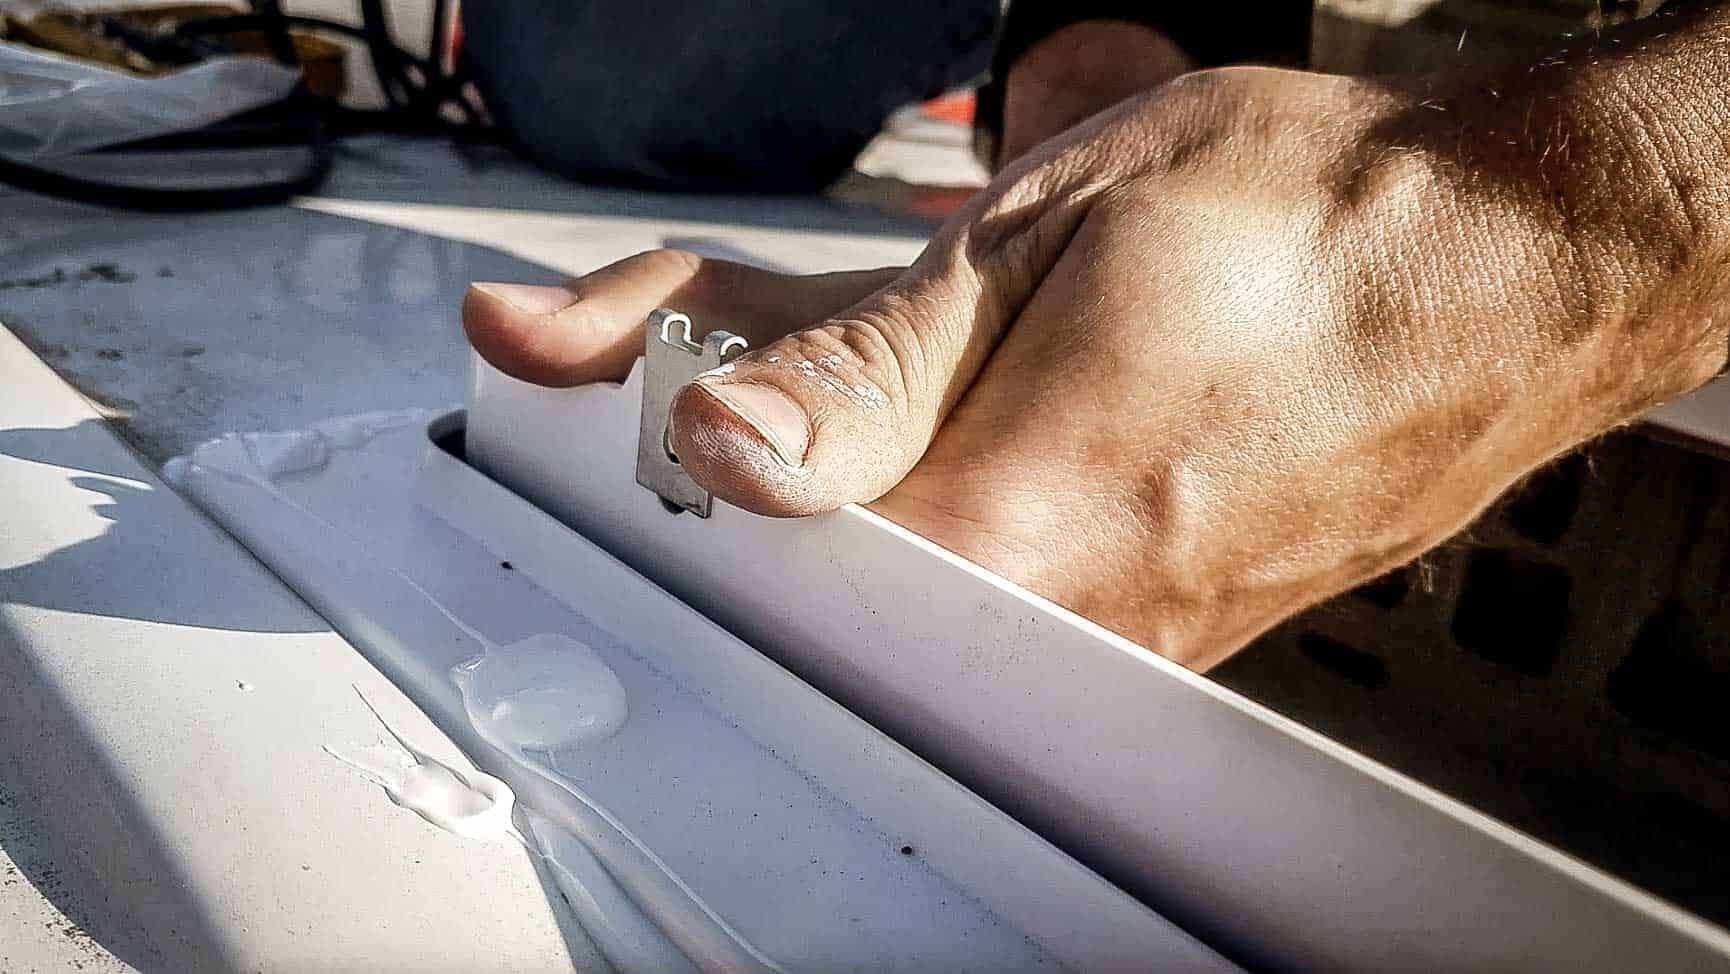
After cutting the hole, be sure to clean the metal very well so there are no flakes of metal that would interfere with adhesion. For adhesion and sealant, we used butyl tape and Sikaflex roof sealant. Placing the butyl tape down first, then lining it with Sikaflex, then put the flange of the MaxxFan in place in the hole. Sikaflex is self-leveling sealant, so it really won't ever dry completely. The reason we chose this was because it can expand and contract with the weather and not crack. After researching many ways of sealing the vents, we decided this would be the best way to prevent leaks.
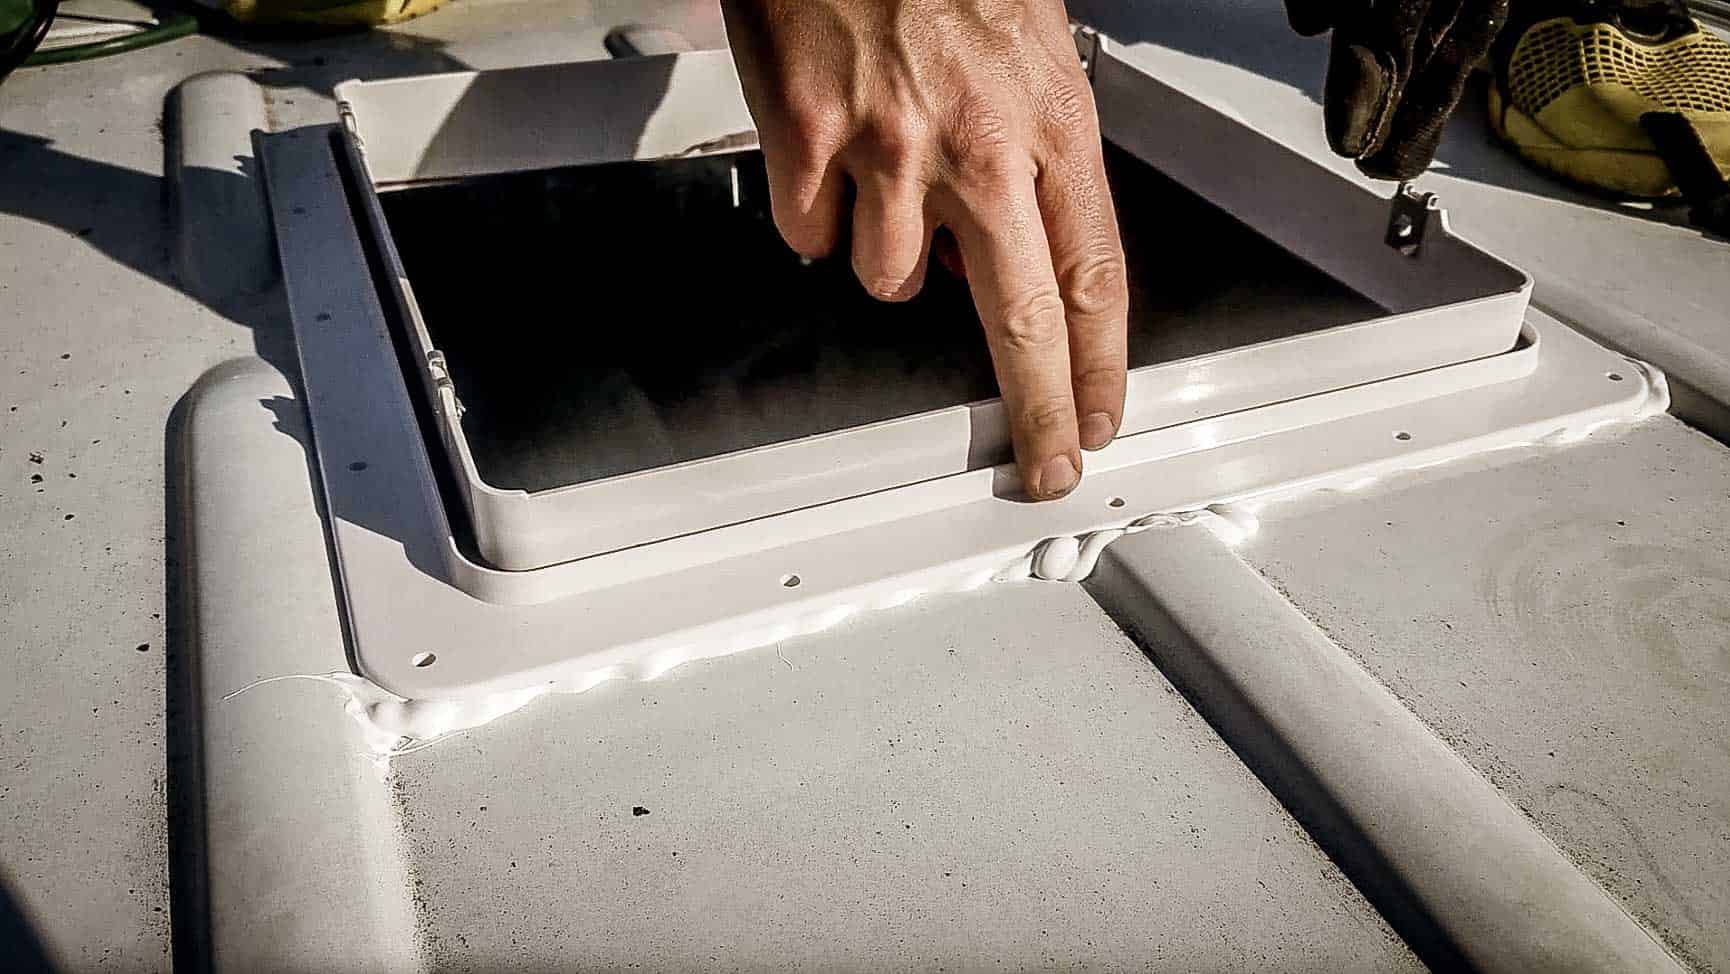
Once the flange is in place with the metal clips facing the sides of the van, go ahead and screw it to the roof with the provided screws. Follow that up with a bit more sealant around the screws to ensure no leaks will come through the screw holes.
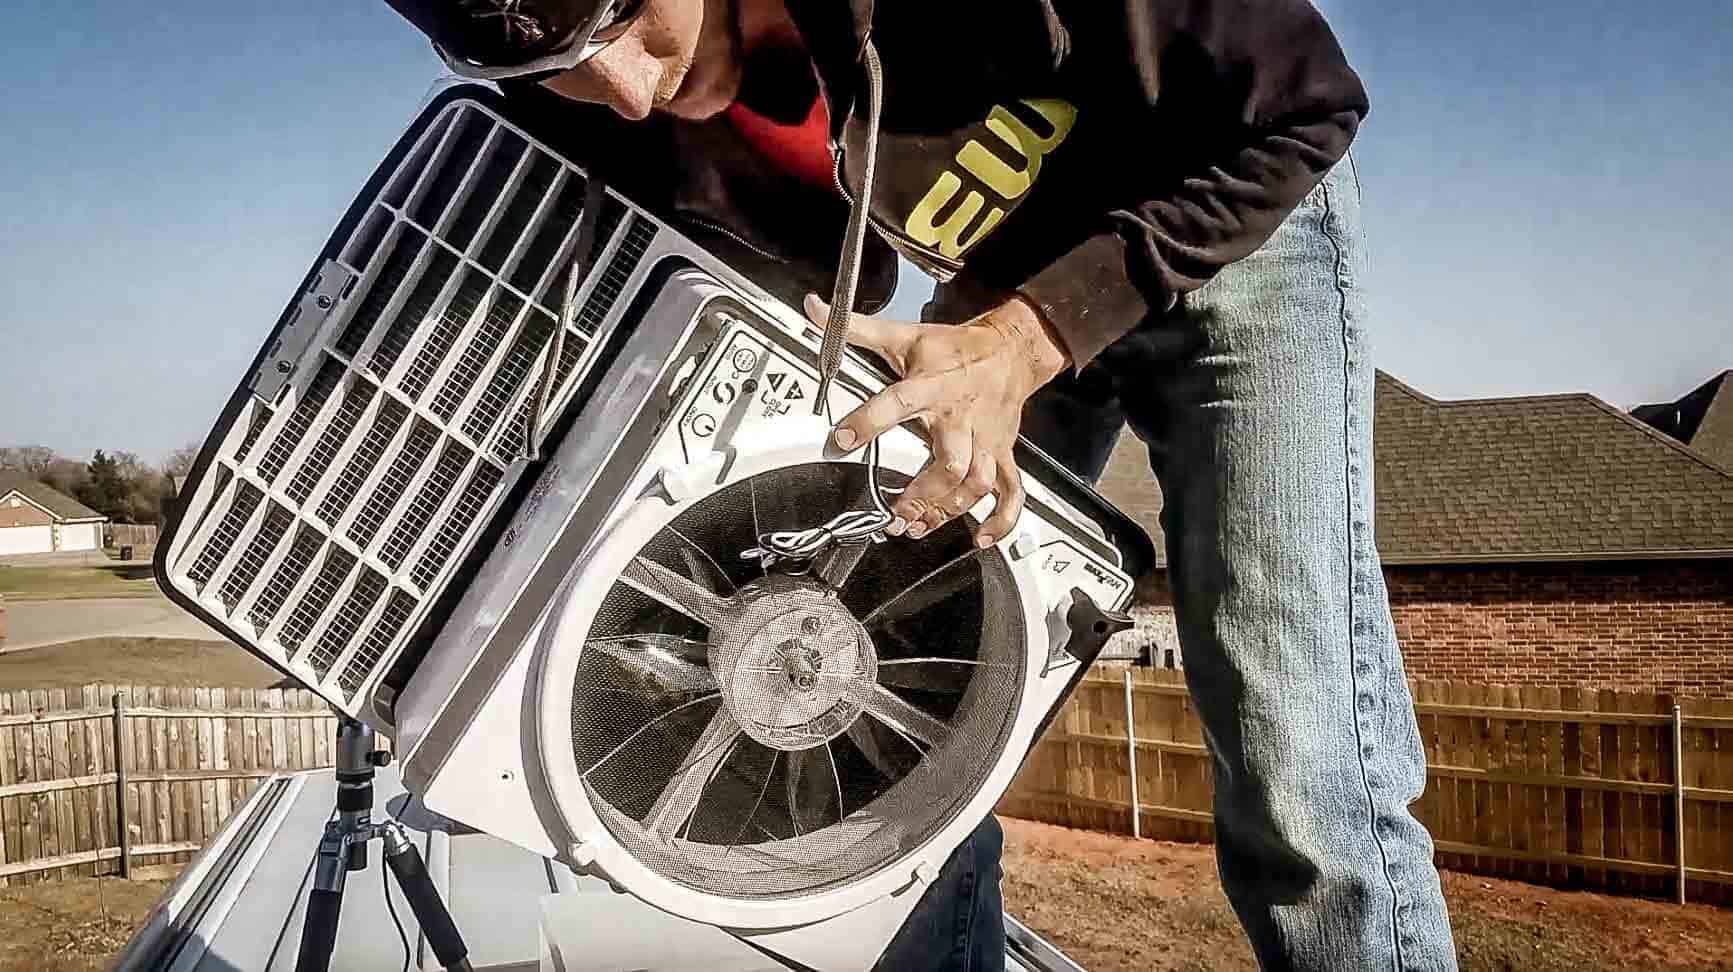
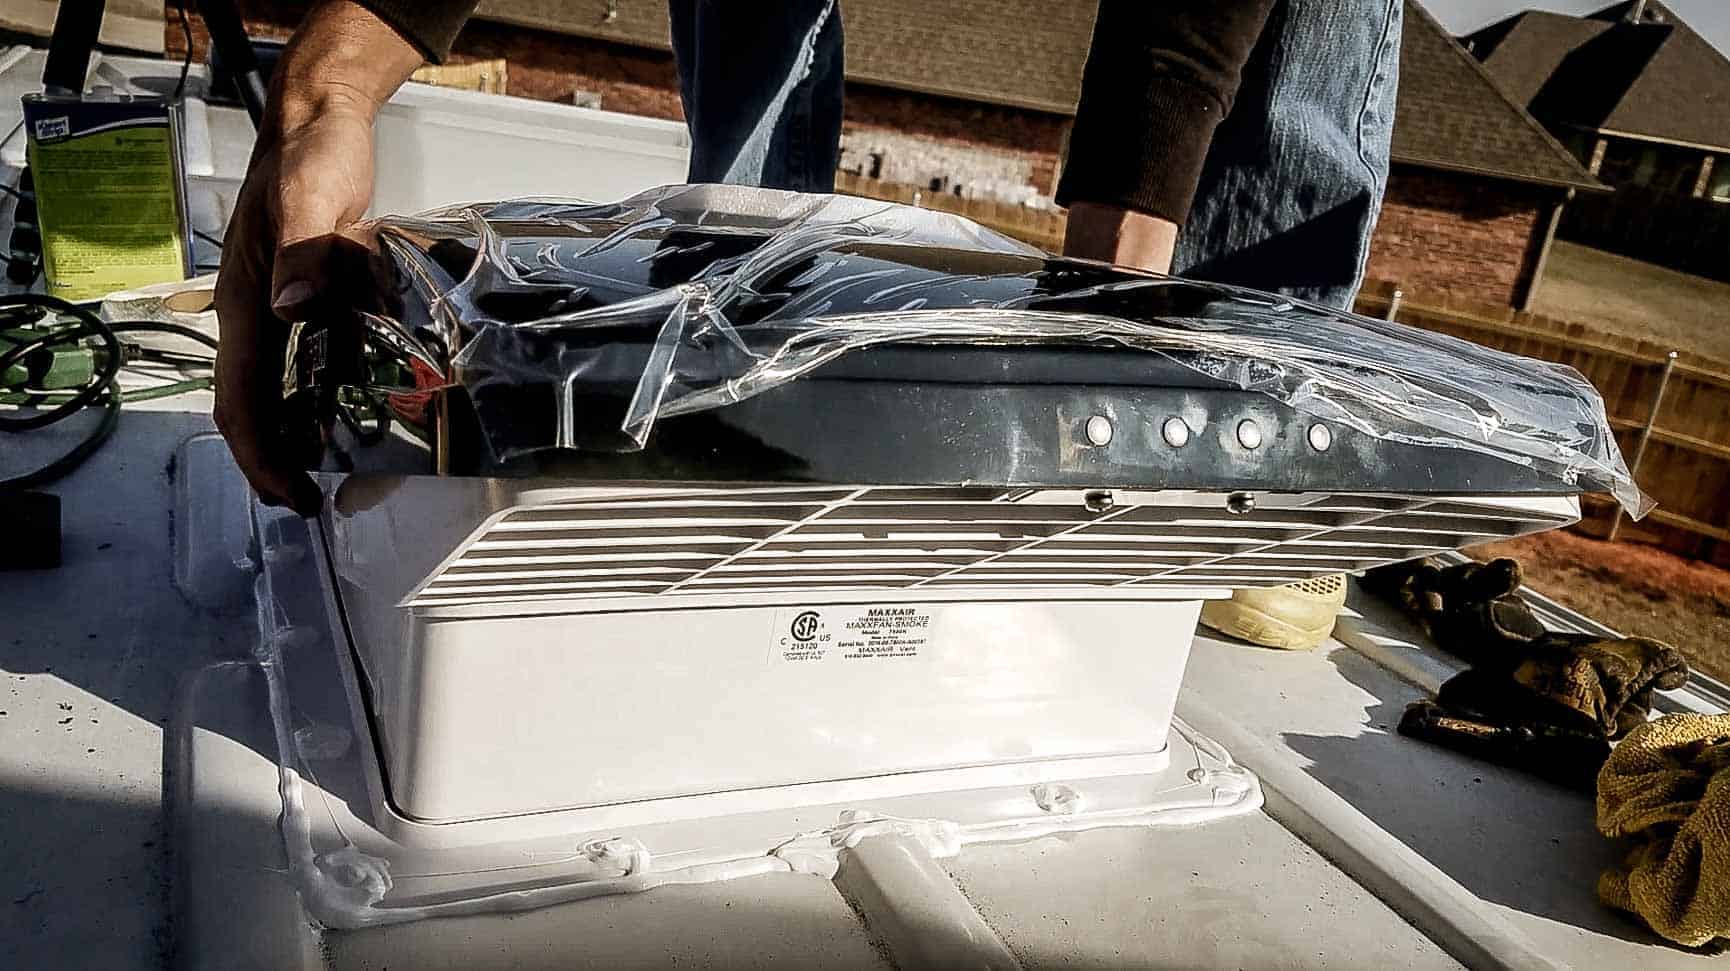
Now you are ready for the fan itself! A little tip here is to pop the metal clips up just a tiny bit so that you have wiggle room to adjust them into place. An eighth of an inch should be plenty of room. Set the fan down on the flange and line up the holes in the fan with the holes in the metal clips and screw those in place.
We have not done the interior bezel or wiring yet as the ceiling is not yet installed... That part is straightforward though and will be covered later.

Moving right along in our van build! We have installed the roof vents. We have opted to go without air conditioning which means we need some good airflow. Installing 2 vents should help that out. Both fans are reversible and one is mounted over where the bed will be to act as a ceiling fan.
See the blog post and pictures here: https://adventureinabackpack.com/campervan-roof-vent/
We've installed two MaxxAir MaxxFans Roof Vents on our Campervan to get maxximum airflow (see what I did there?).
This is part one of the process, as we are only doing the exterior installation. The interior portion will be done after the ceiling is installed in the van, and we will do wiring at that point as well.
So, to get started, you'll need a 14-inch by 14-inch square cutout in your roof. This is the standard roof cutout for vent fans in RVs, so if you are replacing an existing fan, the hole should be the right size. If you are putting in a new one, as we did, you'll need to cut out the hole. We recommend using a jigsaw with a metal blade, although we used an angle grinder which worked fine. The most difficult part of this was where the structural ribs were in the way. I'd like to explain it, but it's probably best to just check out the video because it took a bit of 'artistic' cutting and bending (I think fabrication is the proper word, but that would make me a fabricator...and that, I am not...lol) of the metal to get it to fit. (https://youtu.be/_kd_Km_4oNM)
After cutting the hole, be sure to clean the metal very well so there are no flakes of metal that would interfere with adhesion. For adhesion and sealant, we used butyl tape and Sikaflex roof sealant. Placing the butyl tape down first, then lining it with Sikaflex, then put the flange of the MaxxFan in place in the hole. Sikaflex is self-leveling sealant, so it really won't ever dry completely. The reason we chose this was because it can expand and contract with the weather and not crack. After researching many ways of sealing the vents, we decided this would be the best way to prevent leaks.
Once the flange is in place with the metal clips facing the sides of the van, go ahead and screw it to the roof with the provided screws. Follow that up with a bit more sealant around the screws to ensure no leaks will come through the screw holes.
Now you are ready for the fan itself! A little tip here is to pop the metal clips up just a tiny bit so that you have wiggle room to adjust them into place. An eighth of an inch should be plenty of room. Set the fan down on the flange and line up the holes in the fan with the holes in the metal clips and screw those in place.
We have not done the interior bezel or wiring yet as the ceiling is not yet installed... That part is straightforward though and will be covered later.
Last edited:
SirMrManGuy
Observer
Loving the matching Trew hoodies; I got one of their jackets this season and loved it, getting their bibs next.
We're also younger ex professionals (engineer and chemist) who left our jobs to bike, climb and snowboard.
We're also younger ex professionals (engineer and chemist) who left our jobs to bike, climb and snowboard.
Nate_Yarbrough
New member
Loving the matching Trew hoodies; I got one of their jackets this season and loved it, getting their bibs next.
We're also younger ex professionals (engineer and chemist) who left our jobs to bike, climb and snowboard.
I've invoiced them for the advertisement and they keep telling me the check is in the mail. I'm sure it will show up eventually. ROFL! Yeah, they make some killer gear for sure. Cool company business model too!
That's awesome! Hope it's working out for ya! Sounds like our common activities will likely cause our paths to cross at some point!

Nate_Yarbrough
New member
The best way to insulate a campervan...is the way that is DONE...
Well... I'm glad that's over... Researching 'which insulation is best' for a campervan has to be one of the most annoying things we have ever done. There are so many opinions and everybody thinks their way is the best. Well, we have determined that 'The best insulation for a campervan...is insulation is already installed...'
Full Blog Post: https://adventureinabackpack.com/how-to-insulate-a-campervan/
Video: [video]https://youtu.be/_GunFIk5vtk[/video]
Honestly, we HATED reading through all of the forums, message boards, and facebook groups talking about all of the different tactics for insulating a van because there didn't seem to be much agreement as what the best practice was. Rigid foam, expanding foam, Thinuslate, spray on foam, demin, fiberglass, blah, blah, blah...
It's way too easy to get analysis paralysis when talking about insulation and we are glad that we just picked the one we felt was the best for our case and was in line with our budget.
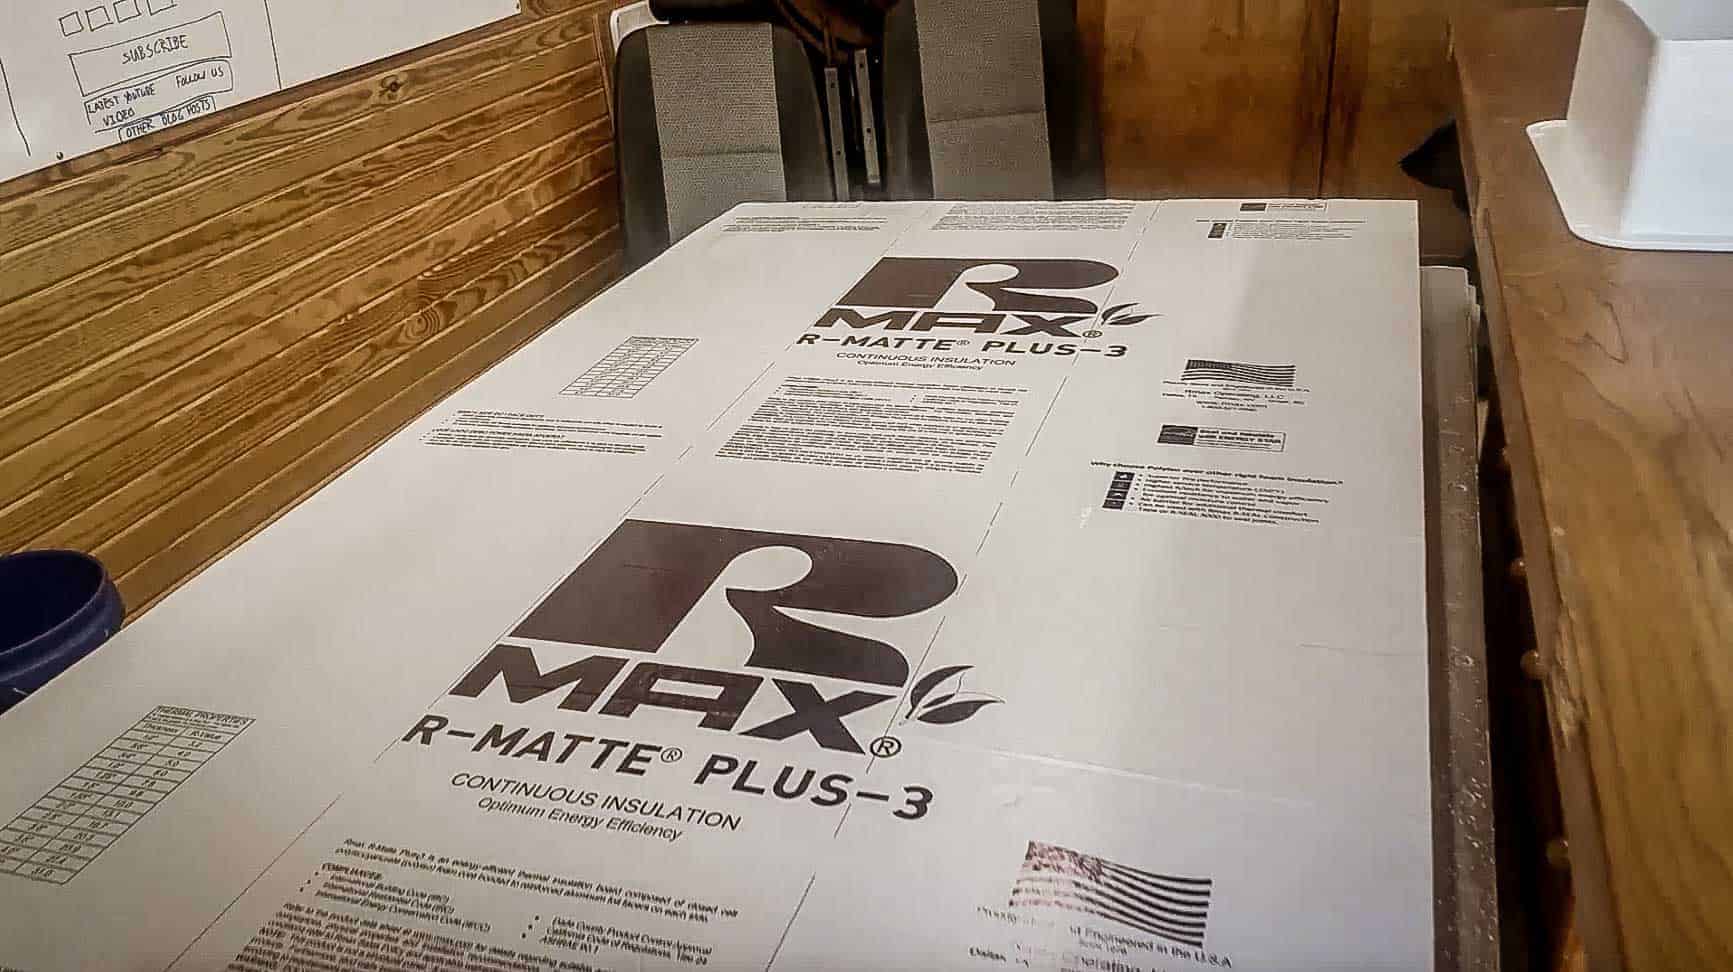
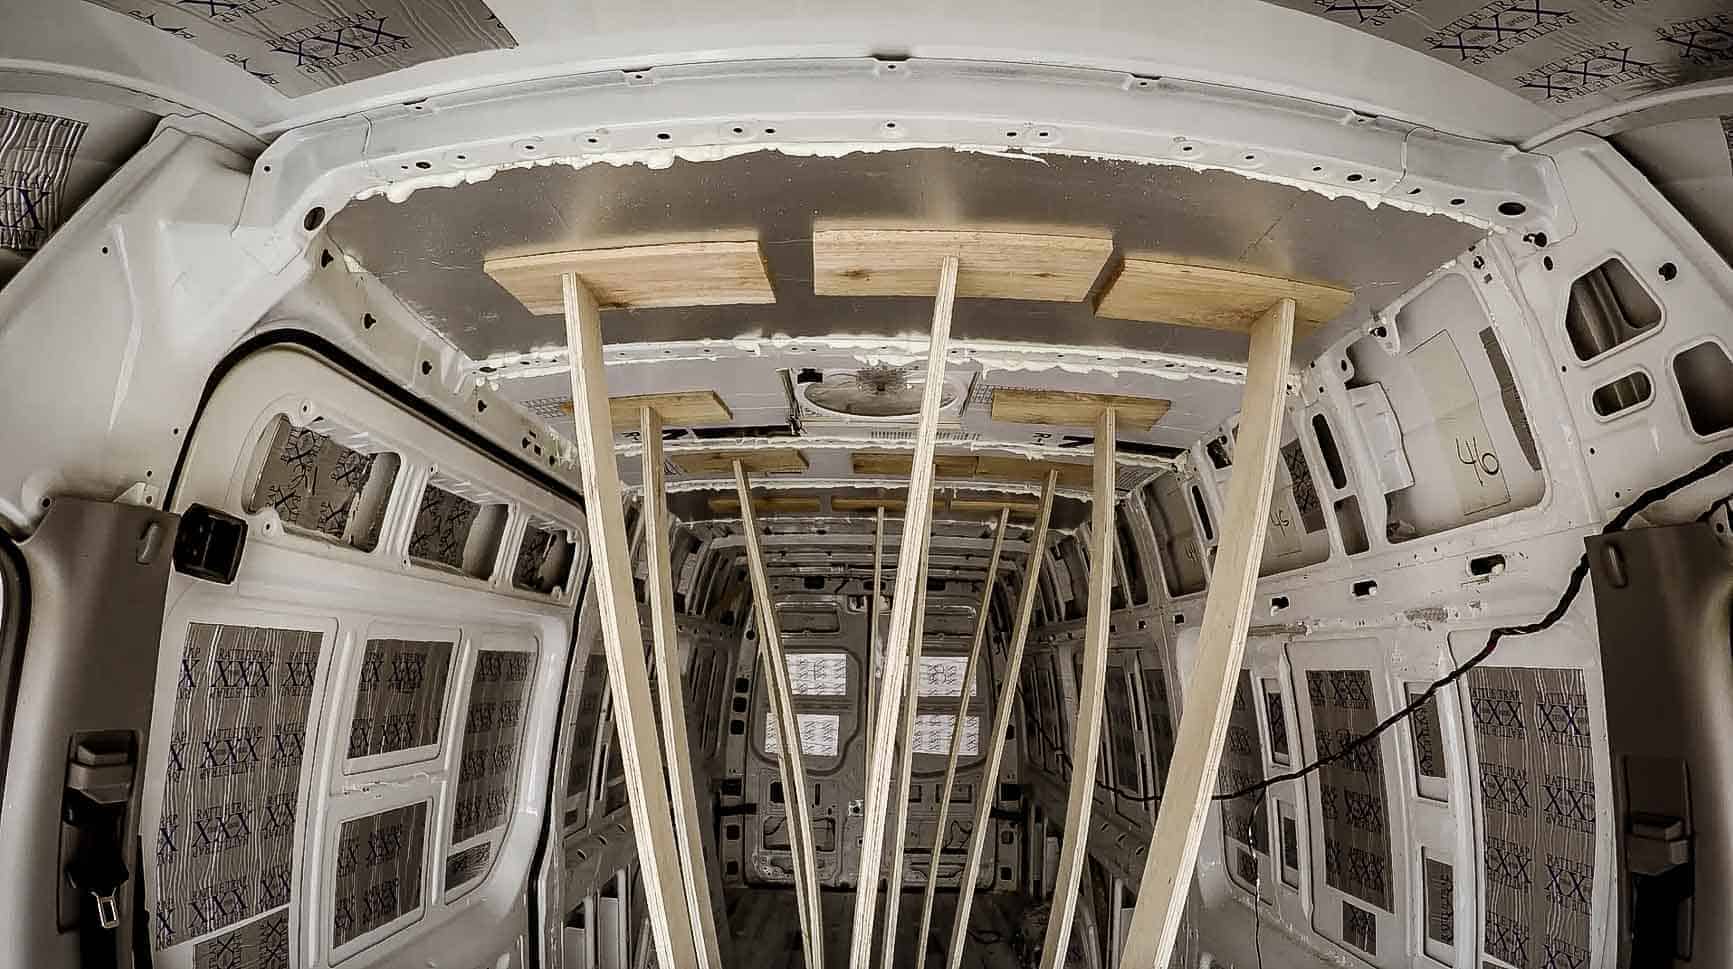
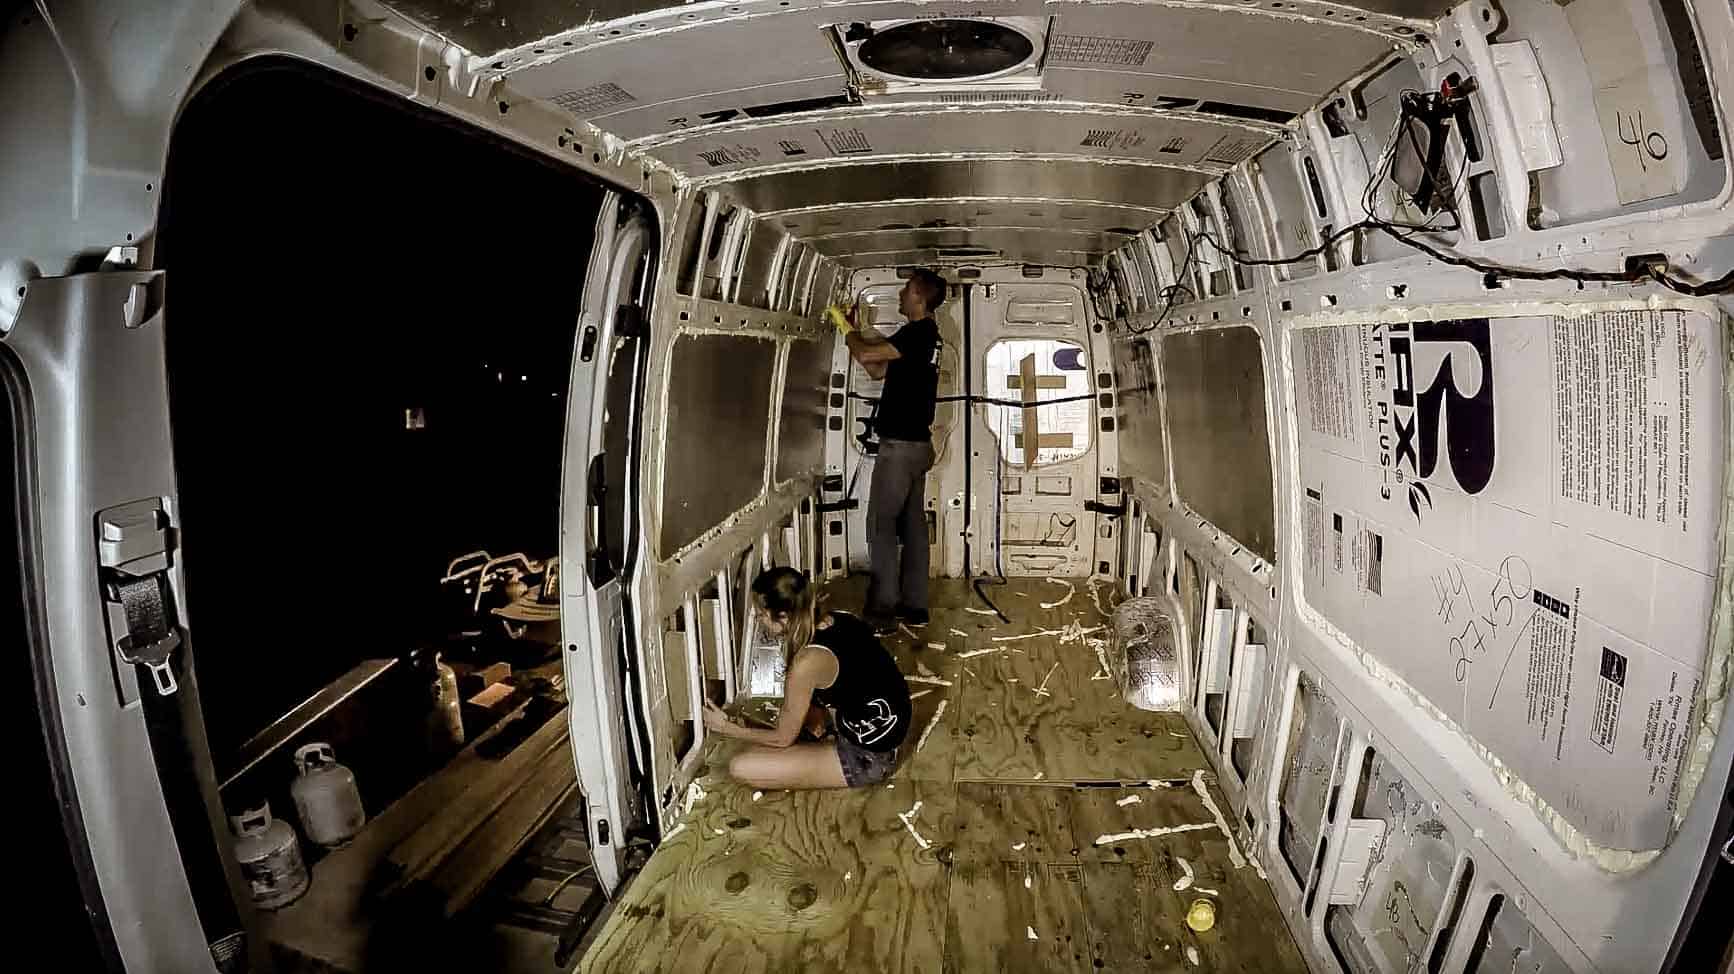
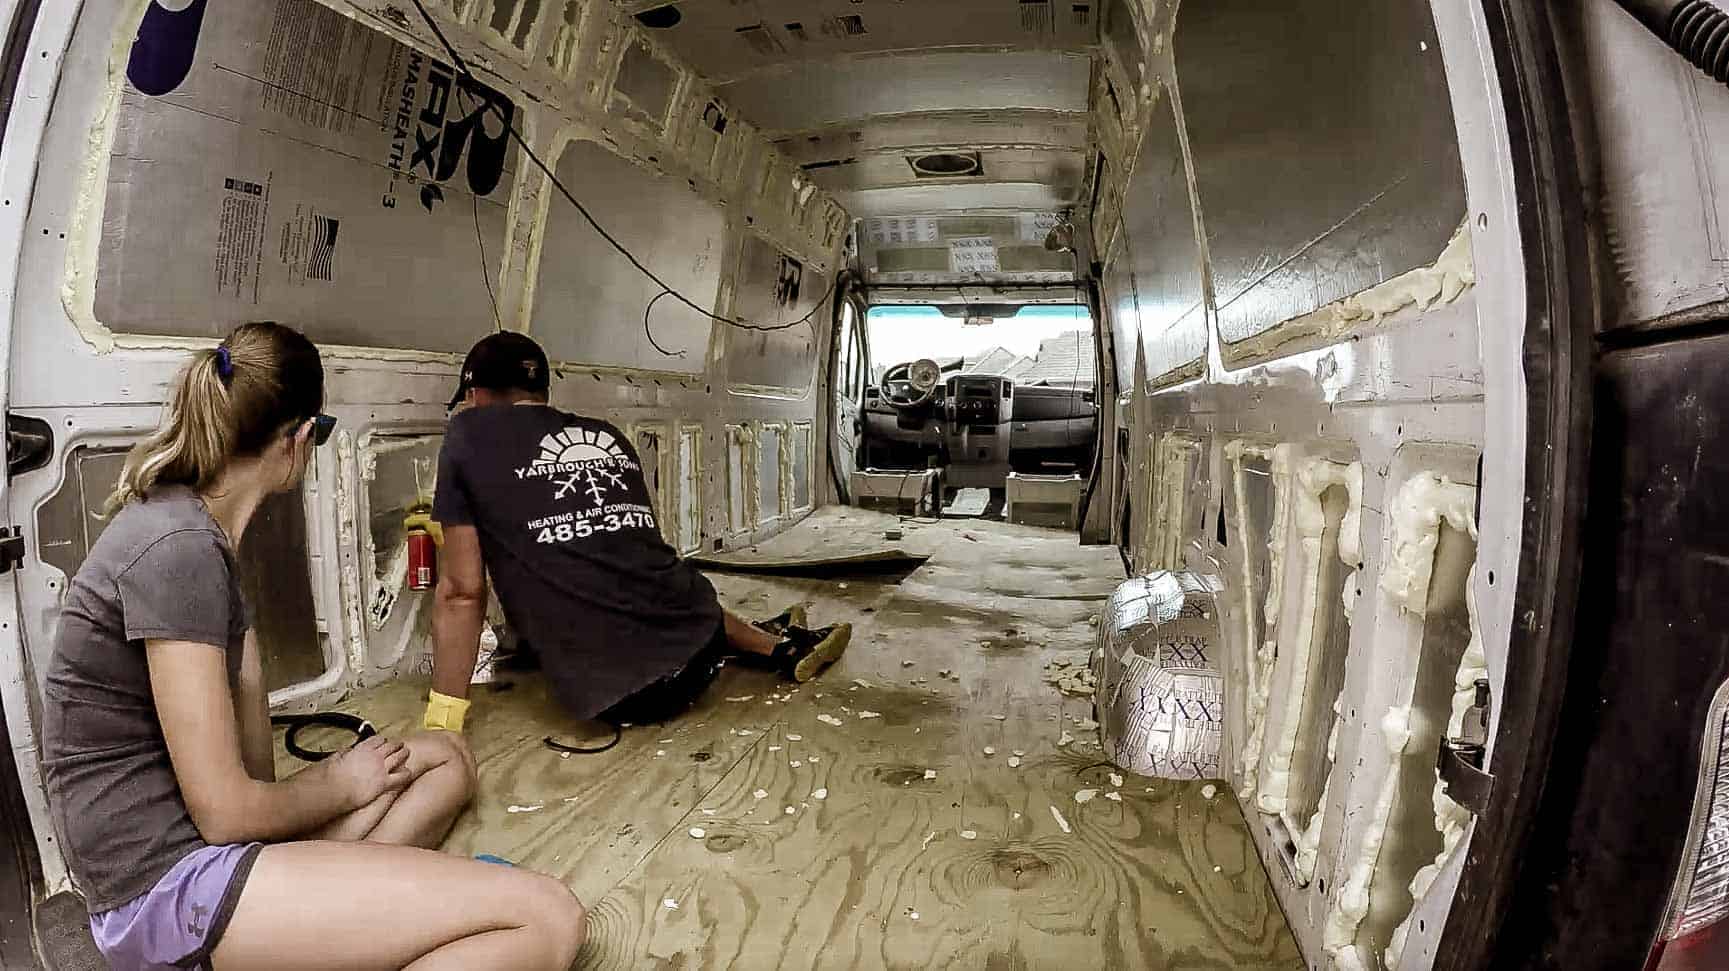
We chose to insulate (over our sound dampener, of course) with polyiso rigid foam board and expanding foam.
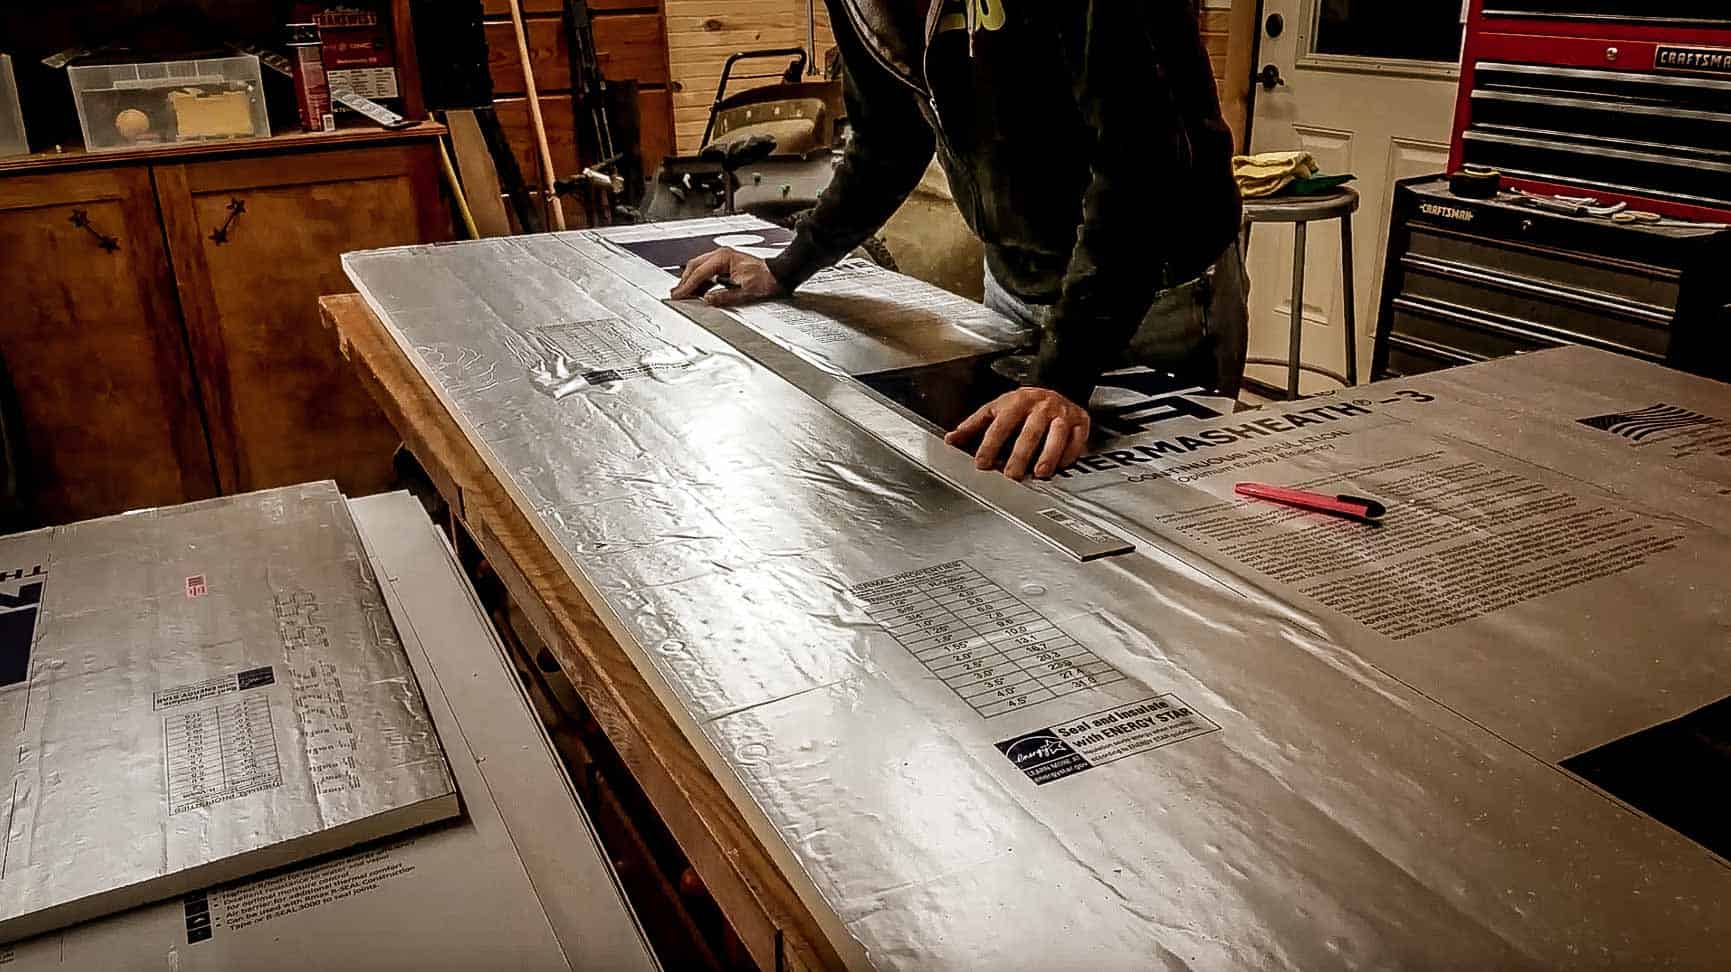
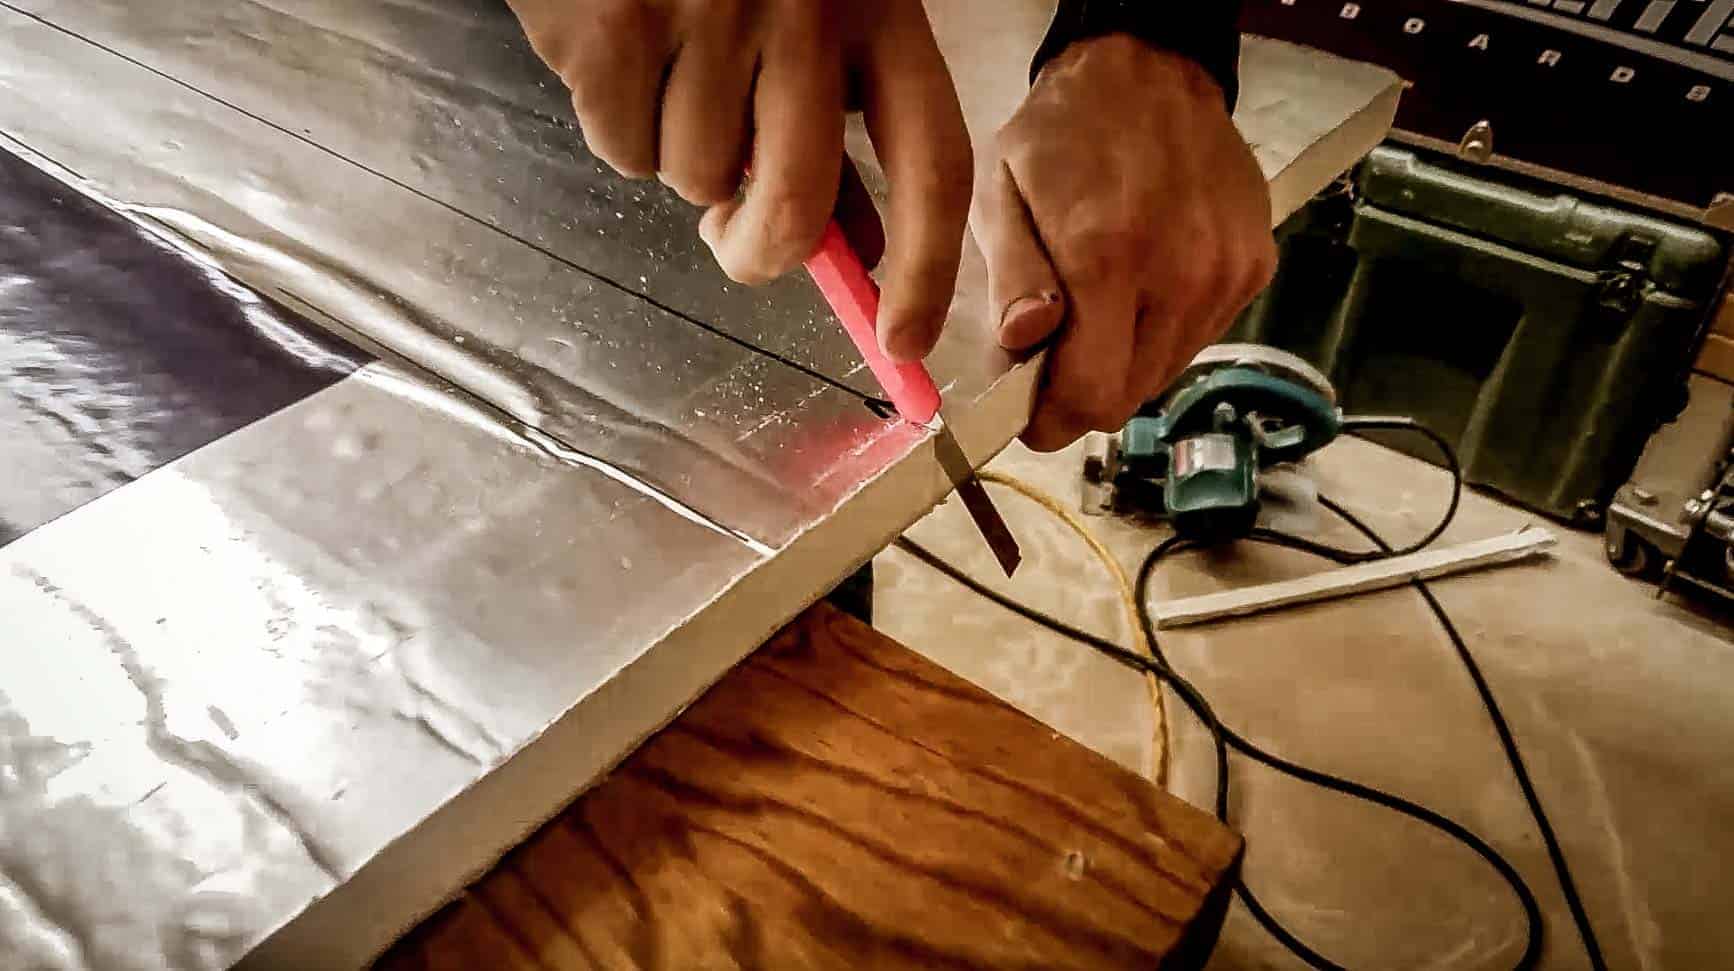
Honestly, the whole process is relatively straightforward. It's just putting insulation into the cavities and securing in place with spray adhesive and (great stuff) expanding foam. We used a mixture of 1" and 1/2" rigid foam board insulation.
Even though the process was pretty straightforward, it was incredibly tedious.
The roof was the easiest with a bit of bracing. The most time consuming were the little small pockets which Steph was able to get her hand, and 1,000,000 pieces of 5"x5" foam in.
The ribs were LIGHTLY filled with the expanding foam. The key is LIGHTLY so it does not over expand and warp the metal and so it dries properly.
The only insulation on the floor is 1/2" foam board. Ideally, we may have used more, but I am 6' 2'' and an extra inch on the floor would take away too much headroom for myself. Gotta pick your battles on that one...
Now that it's done, can we say that the method was the best/easiest/most effective? Well, no... but it is done and should be adequate for our purposes, and that is good enough for us!


Well... I'm glad that's over... Researching 'which insulation is best' for a campervan has to be one of the most annoying things we have ever done. There are so many opinions and everybody thinks their way is the best. Well, we have determined that 'The best insulation for a campervan...is insulation is already installed...'
Full Blog Post: https://adventureinabackpack.com/how-to-insulate-a-campervan/
Video: [video]https://youtu.be/_GunFIk5vtk[/video]
Honestly, we HATED reading through all of the forums, message boards, and facebook groups talking about all of the different tactics for insulating a van because there didn't seem to be much agreement as what the best practice was. Rigid foam, expanding foam, Thinuslate, spray on foam, demin, fiberglass, blah, blah, blah...
It's way too easy to get analysis paralysis when talking about insulation and we are glad that we just picked the one we felt was the best for our case and was in line with our budget.
We chose to insulate (over our sound dampener, of course) with polyiso rigid foam board and expanding foam.
Honestly, the whole process is relatively straightforward. It's just putting insulation into the cavities and securing in place with spray adhesive and (great stuff) expanding foam. We used a mixture of 1" and 1/2" rigid foam board insulation.
Even though the process was pretty straightforward, it was incredibly tedious.
The roof was the easiest with a bit of bracing. The most time consuming were the little small pockets which Steph was able to get her hand, and 1,000,000 pieces of 5"x5" foam in.
The ribs were LIGHTLY filled with the expanding foam. The key is LIGHTLY so it does not over expand and warp the metal and so it dries properly.
The only insulation on the floor is 1/2" foam board. Ideally, we may have used more, but I am 6' 2'' and an extra inch on the floor would take away too much headroom for myself. Gotta pick your battles on that one...
Now that it's done, can we say that the method was the best/easiest/most effective? Well, no... but it is done and should be adequate for our purposes, and that is good enough for us!
SirMrManGuy
Observer
If you think insulation was tedious, get to doing the framing and panels... we're on day 5.5 of that, and its been a good test of our relationship. Maybe Sprinters are better than Chevy's... looks like you have more straight edges to work with and less of a curve in the walls.
Looks good though.
Looks good though.
Nate_Yarbrough
New member
If you think insulation was tedious, get to doing the framing and panels... we're on day 5.5 of that, and its been a good test of our relationship. Maybe Sprinters are better than Chevy's... looks like you have more straight edges to work with and less of a curve in the walls.
Looks good though.
Oh man! I know what you mean. We have actually already done the walls and ceiling (I can build a van faster than I can edit videos, lol) and are working on cabinets. So tedious and the fact that I know that I have to make this part 'pretty' as well... Goodness! All worth it and I love it!
SirMrManGuy
Observer
No updates hopefully means tons of progress from being too tired to do a write-up.
We've been on the road for a bit over a week now in Canada, hopefully your almost ready to travel.
We've been on the road for a bit over a week now in Canada, hopefully your almost ready to travel.
Nate_Yarbrough
New member
No updates hopefully means tons of progress from being too tired to do a write-up.
We've been on the road for a bit over a week now in Canada, hopefully your almost ready to travel.
We have been making TONS of progress and actually are about 2 weeks out from ready to travel. When I started this thread, I SERIOUSLY underestimated the amount of projects I would be able to do from 0% start to 100% complete. Like, the walls are up 100% but I just haven't made the video yet. The cabinets (apparently, cabinets take FOREVER!) are actually being finished up today, but have taken, what feels like over a month to complete.
The inside the van solar is complete, but I had to wait to plastidip the exterior to mount the solar panels.
Our roof racks, front bumper, rear bumper, and bumper boxes won't be in until June. (but we will be taking a 1 week trip before then...because we can... lol)
Hindsight being 20/20, I wish I would have been sharing more of the random pictures along the way like we have been sharing on Instagram. Oh well, maybe next time!
At any rate, have an awesome time in Canada! Part of our plans this year include heading up to Ottawa then traversing all the way across to Oregon. We can't wait to take off!
SirMrManGuy
Observer
I know what you mean about the 100% stuff but there will be two days where all those 95% jobs all fall into place and it will suddenly be time to pack.
Keep us posted on the travels, we're heading east to west ending in BC, will probably be in ottowa in about a month.
Keep us posted on the travels, we're heading east to west ending in BC, will probably be in ottowa in about a month.
Nate_Yarbrough
New member
I know what you mean about the 100% stuff but there will be two days where all those 95% jobs all fall into place and it will suddenly be time to pack.
Keep us posted on the travels, we're heading east to west ending in BC, will probably be in ottowa in about a month.
We are FINALLY starting to see that! We will be in Ottawa in mid July. I'll have to hit you up on things to see between Ottawa and BC. That's a lot of ground to cover and I know there is a LOT there!
Forum statistics
Members online
- Indoorwindmill
- Dougnuts
- tjbrubi
- adamalli
- collk22
- Colt4522
- wfv56
- Imgoingonanadvencha
- wig
- vogelt4
- MaynardFerguson
- svmaple
- al_burpe
- mmmaaatttttt
- Jdisla4649
- mark5280
- webfoots
- Jsnable
- Jesse42
- Raisinhead
- esc IA
- Blowby
- swigs91
- AndrewTK
- deadbeat son
- pirranah
- NOPEC
- rdrop
- JCDriller
- zip
- slick621
- MotoFly23
- pugslyyy
- pinevalley
- MarcusG
- Theshwed
- Spencer for Hire
- DieselDaddy
- jnr4095
- RoverGS
- WOODY2
- gator70
- Waymin
- gregmchugh
- motosickle
- Aces st
- Kraske
- BigSkySerf
- al415
- Obsessed2findARuggedHybid
Total: 1,084 (members: 63, guests: 1,021)