Chevy Express AWD build...ghetto blaster to dirt road master

Andrews11

New member
Hi,

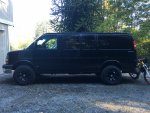
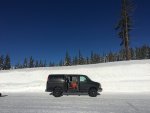
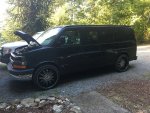
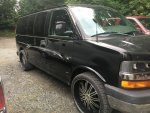
I have been slowly building my van behind the scenes while using many threads on here as a resource. I would like to thank everyone else for posting their wealth of information and I would like to add to the smaller, but slowly growing community of Chevy Express AWD vans I have came across. I originally was looking for an E series van with 4x4, but I came across a Chevy Express AWD on craigslist that was a great deal that I couldn't pass up so I went for it. As I'm writing this looking back I'm actually really happy with the AWD as opposed to a true 4x4 as I bought this for the purpose of traveling on forest service roads and heading to the slopes on snowy highways. I was not planning on doing serious wheeling so it's perfect when the AWD just kicks in and away you go. Here is what she looked like when I brought her home. Looked like she was right outa the ghetto with the 24" rims and Explorer conversion package.
IMG_5350.jpg

IMG_5369.jpg

IMG_5365.jpgIMG_5366.jpg
 

Andrews11

New member
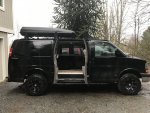
First line of work was to strip the stickers, add a lift and new tires so that she was presentable and operational. I went with the Rough County lift for a Silverado that some other members on here mentioned. Everything bolted up easily except the rear shocks do not fit exact size so I bought a pair of KYB's that are a perfect fit. After much research I went with the BFG AT 265/70/17. With the torsion bars cranked pretty good and rear blocks I don't get any rub on the fenders and about a 2.5' of lift.

IMG_5467.jpg

IMG_5922.jpg
 

Andrews11

New member
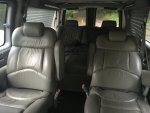
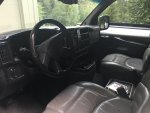
After the lift and tires I went back and forth for a few months deciding what I wanted to do with the interior since it was already a nice conversion. When I was first looking for a van I was envisioning a cargo that I would just strip down and rebuild floor to ceiling, but with conversion that fell in my lap I decided to do a hybrid build and incorporate a campervan into the existing conversion interior. I usually camp for long weekends so I was looking to build something simple, but functional to get me through a few days of off grid camping. Being in the pacific northwest with limited sun most of the year I decided against solar and just went with a bigger battery bank and a relay to charge the bank while the van is running. Without a high or pop top I will mostly be cooking outside so the only other important things were a refrigerator to keep food and a large bed that can convert into a bench seat for relaxing or passengers. My other challenge was the double pass through barn doors and I decided to keep the drivers side door accessible. Luckily the rear seats, some other interior parts and wheels were all in good shape so I was able to sling them on craigslist to subsidize the cost of the build.

I ended up keeping half the walls and ceiling as it already had prewired lights, window shades, a rear heater/AC vents and insulated. With interior being in nice shape I figured less is more.

IMG_5349.jpg

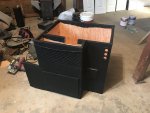
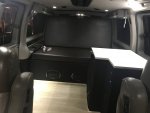
Building the box to hold the refrigerator and extra storage. I framed the rear bed with 2x4's and bolted it to the frame. The box and rest of bed is made with 3/4" plywood. Then I used speaker carpeting attached with spray glue and staples for a finished look. Cut out holes for accessory power plugs, voltage meter, and inverter. I added the netting to the box to store random things, which was salvaged from the center consul that I tossed. I used laminated melanin board for the cabinet top that hinges up to access the refrigerator. The rear bed folds into a couch with storage below and I added some speakers since I lost some when I ripped out the lower half of the interior.

IMG_5360.jpg

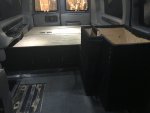
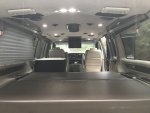
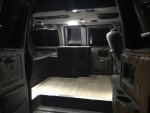
Added floor and chose a vinyl seat cover that somewhat matched the interior. The floor was laminate flooring from Home Depot that clicks together (pergo type) then I used aluminum carpet transition strips around the edges for a clean look. For seat cushions I found an inexpensive memory foam queen bed on Amazon, cut to size and stretched over a matching size thin board for stability. Then I attached velcro to the bottom of the cushion and attached it to the actual bed plywood so the cushions could be removed independently if needed.

IMG_5388.jpg

IMG_5461.jpg

IMG_5463.jpg

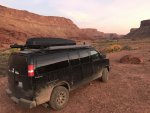
Ski box score on craigslist, which was white, black bed liner spray to match. Ready for the ARB awning to be installed to the roof rack towers whenever it decides to stop raining for the season.

IMG_5389.jpg

Next is to finish bed to include a foot cushion to sleep lengthwise, locking hinges for bed/bench back, passenger chair swivel, propane heater and exterior solar shower.
 

bdog1

Adventurer
Great project. I'm really liking the AWD option. How's it perform with the more aggressive tires? Is that common to find double doors both sides of these vans? I've only seen one here locally. (FL).


Sent from my iPhone using Tapatalk
 

Accrete

Explorer
Welcome to the forum and the AWD family : )
Fantastic looking rig you've got to explore the PNW!

Happy Adventuring.
Thom
 

Andrews11

New member
tires are great, drives very smooth, good in the ice/snow. The double doors are pretty rare, but I see them around. I actually didn't want them because I wanted to build a counter/cabinet across the entire drivers side for more storage, but you work with what you have.
 

45Kevin

Adventurer
The double doors are pretty rare, but I see them around. I actually didn't want them because I wanted to build a counter/cabinet across the entire drivers side for more storage, but you work with what you have.

I have the double doors on the DS and hope eventually to turn them into a slide-out. Rough measurements tell me that a sliding door from the PS will fit the opening. I figure cabinetry, maybe kitchen or just storage that when closed go to the inside edge of the drivers seat and then slide out to give a bunch of extra room on the inside when parked.
 

SGNellett

Adventurer
I have the double doors on the DS and hope eventually to turn them into a slide-out. Rough measurements tell me that a sliding door from the PS will fit the opening. I figure cabinetry, maybe kitchen or just storage that when closed go to the inside edge of the drivers seat and then slide out to give a bunch of extra room on the inside when parked.

I wonder if there is a european version of that van that would have what would amount to a driver side sliding door here in the USA? If you could source the door itself, it would sure seem like it save you lots of body work and fabrication if the opening is consistent...
 

Andrews11

New member
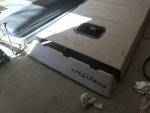
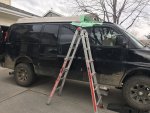
After using my van for the last year traveling the north western US I quickly realized that it would be much nicer to be able to stand inside and have a functional kitchen. That way it would be more of a 4 season camper that I could also use during ski season. I went back and forth about getting a fiberglass high/bubble top, but I didn't really like the look of them. I really liked a pop top idea, but there are not really any options for unless I wanted to drop a ton of money. Then I came across a wrecked VW Westfalia on craigslist and it got my wheels spinning. I did a little research and saw a couple of guys with the Chevy Express platform that used a doner VW pop top and it looked like it fit pretty good. So I went over to see the van, took some measurements form the wrecked 86 Westfalia and it actually measured up pretty damn well so I went for it. What the van currently looks like before the build begins.

IMG_7071.jpg
 

Andrews11

New member
Before I begin I make no claims to be a great welder, fabricator, or builder so there is a chance I may do stuff *** backwards, but if it makes sense to me with my skill set, tools available and materials, that's how it's going to happen. That being said, I only have really seen pics of retrofitted pop tops floating around the internet, but nothing too detailed so i'm kind of in uncharted waters. I'm going to try and document as much as I can so hopefully someone else can use my build as a template (assuming it comes out well).

After thinking it over a while I decided to ditch the front luggage rack of the pop top since I have a sunroof, which will also complicate things since the luggage rack fit the front pretty well too. The back pop up section would start perfectly after the sunroof, but without the luggage rack the front will need to be enclosed. I originally thought I could cut the front of the luggage rack and make sort of a fairing to mount up to the front of the pop top, but after cutting it didn't line up well so it was to plan B.

IMG_7324.jpg
 

Andrews11

New member
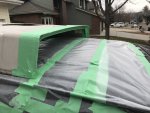
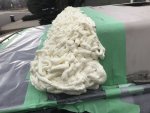
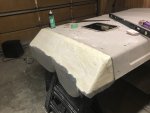
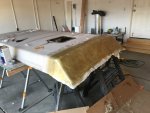
Plan B was to put the pop top on the van and use expanding foam to make a mold in the exact potion that it would be sitting on the van. I used some wax paper to cover the area so that it could easily peel off and started squirting away.

IMG_7328.jpg

IMG_7329.jpg

IMG_7336.jpg
 

Andrews11

New member
The foam actually worked pretty well to mold, however it didn't hold its form too well in around the most important part along the roof line where its ribbed. I plan to fiberglass the mold so I figured I could just cut the mold to a general convex shape of the roof a little larger then it needs to be for now. Then once the fiberglass is laid I could just place the whole top on the van and cut the excess off to fit snug.

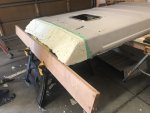
I used a wood board measured equally from each end of where the fiberglass will mount to the existing pop top corners so that it created a nice uniform angle to shape the fairing. Then I used a long wood saw and cut along the angle, I was actually pretty happy how well it worked.

IMG_7349.jpg

Then I slowly shaved the rest with a small saw until looked symmetrical. To create a smooth finish and fill in the gaps I used some drywall sparkle since it was cheapest filler I cold think of. That gave me the general shape I needed to lay the fiberglass.
 

Andrews11

New member
I laid wax paper over the mold so that I could cut out and remove the foam after the fiberglass is set. I used some spray glue so that the wax paperer would stay when I started to brush in the fiberglass resin, but the foam reacted to the glue and it deformed parts of my mold so that was a day wasted of repair and curing new parts of the foam. Once that was resolved I stated with the fiberglass. This was my first attempt at laying fiberglass and took a little leaning curve, but in general I think it turned out pretty well. Before starting I knew that the fiberglass outer surface would not have a perfect look once its laid. So I planned to sand, add some fiberglass bondo to the low spots then sand again to a finished product to paint. Probably not the correct way to do it if you ask a pro, but I think it should work fine.

IMG_7363.jpg

Fiberglass completed ready for sanding, for my first time with fiberglass i'm happy with the results. Next ill remove the foam and probably do a layer or two of glass in the inside of the pop top along the transition of the existing pop top and new glass just to be sure its structurally sound. After ill temporarily put the top back up on the van roof and trim the new fiberglass to get a sealed fit.

IMG_7370.jpg
 

Choff

Adventurer
I did almost the same thing as you are doing, only I put a Vista Cruiser Roof from a Olds Vista Cruiser Station Wagon with glass and sunroof, could not stand up in Van, but it sure was cool.
That was back in the late 70's
Take your time and learn as you go
I am still vanning and own a 2005 GMC AWD with both side doors also, been driving it for 9 years daily and love it.
KEEP ON TRUCKING!!!
 

Forum statistics

Threads
188,205
Messages
2,903,751
Members
229,665
Latest member
SANelson
Top