The Camp 4x4 Bus - 1973 Suburban 8.1 Swap & Build

camp4x4

Adventurer

Why yes... :)

No major projects have gotten checked off lately, but I have been making slow, steady progress on completing the doors. In a recent update I'd got the first of the rear glass in. Since then I've got all 4 pieces in! There's definitely a few tricks to these, and having two or three people doing them seems pretty much required. I don't know how I would have managed these myself at all.


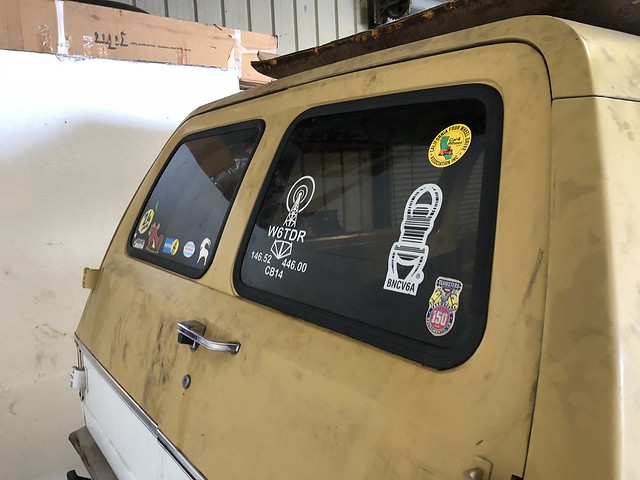
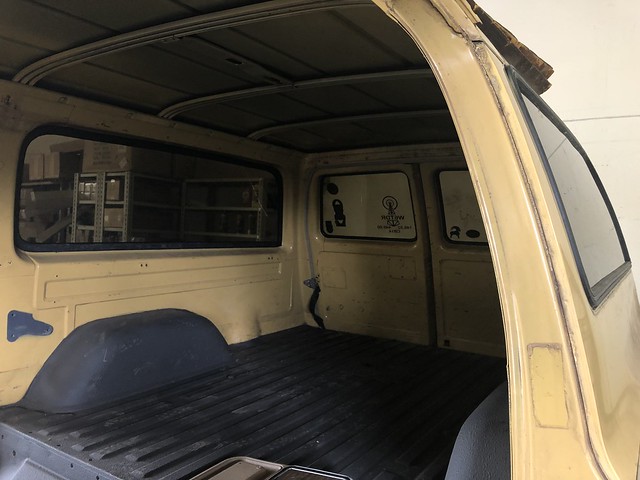
The barn door glass required putting the glass in the seal first, then running some small paracord in the channel that the body is supposed to go in, all the way around, so that the ends cross each other at the bottom. Apply liberal amounts of silicone lube to the rubber and the body. With your helper holding the glass and seal from the outside, and without un-crossing the paracord ends, place the paracord ends inside the truck. Using both ends still crossed, lift up and inwards on them so the lip of the seal pops over the body edge. Now work one end along the seal so it pulls the lip of the seal over the body edge. Do this all the way around and you'll have the seal in place! Make sure to keep the rubber lubed so there's no friction on the body or the string: this could cause the rubber to rip.

The side glass is kind of the opposite: the seal goes on the body first, then the glass gets worked in. Start with the one sharp corner, and the glass on the outside. Place the corner of the glass in the seal channel, then use plastic body panel tools to work the seal lip from behind the glass to in front of it. I found that having a third person with a panel tool on the inside helping push the lip out while I held the recently popped-out section in place worked very well. It is slow and tedious but it works little by little. Again, liberal use of silicone lube spray helped a ton. Once the glass is in the seal, install the locking strip. I HIGHLY recommend getting the specialty tool for this. You can do this with panel tools too, but the specialty tool makes it sooooo much easier. Fortunately there's a window guy in the same complex as my buddy's shop, so I was able to borrow his. I think LMC has them for like $20 or something... seems like a lot, but we're talking moments with the tool vs who knows how many very frustrating minutes without it. My sanity would have been worth $20.

The other Sunday I had a couple gearhead friends over as slaves happy, helpers. Colleen and her husband Glen got a ton of work done on my doors: he got all OCD on the speaker hole placement and she did a ton of soldiering on the switch and motor wiring. I'm gonna be down working on putting all the doors together now that the windows are all pulled from the '87, the seals are ready and the various holes needed are cut. I think these should be ready to go on over the weekend.


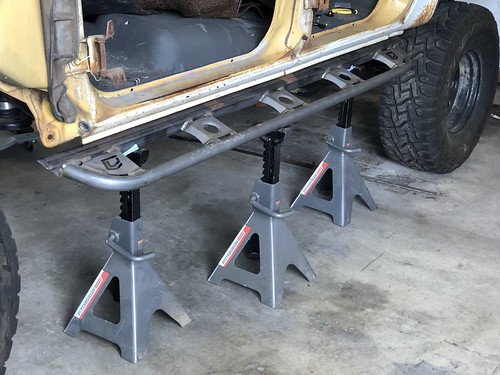
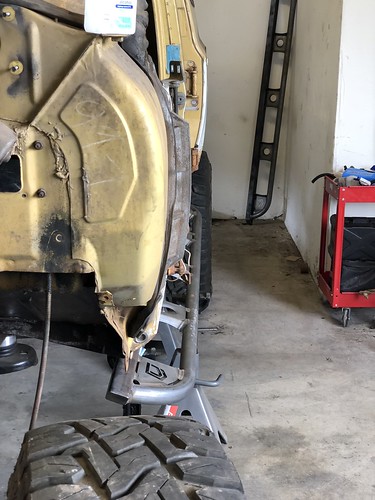
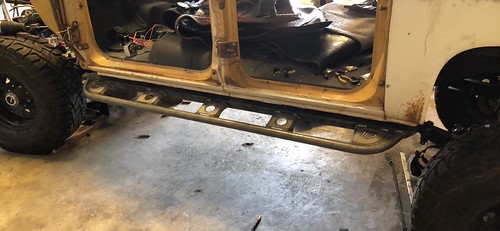
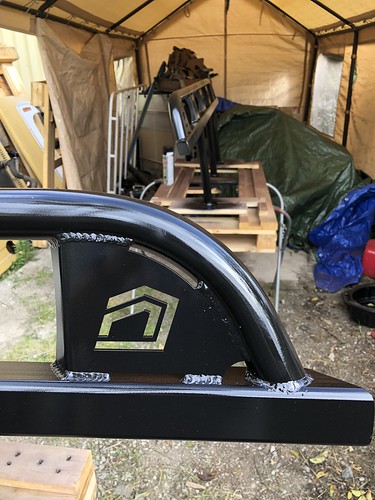
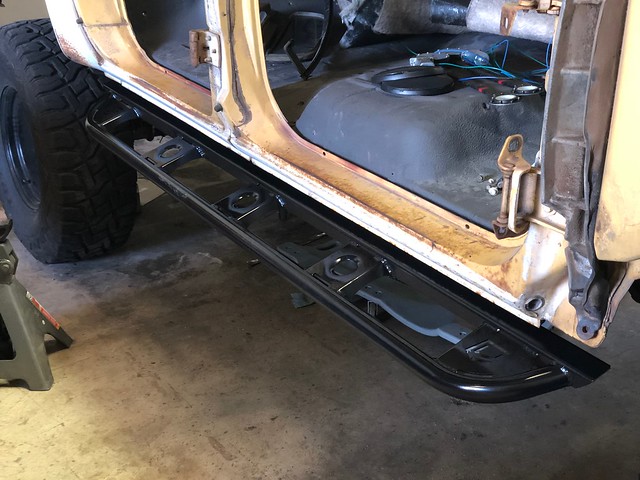
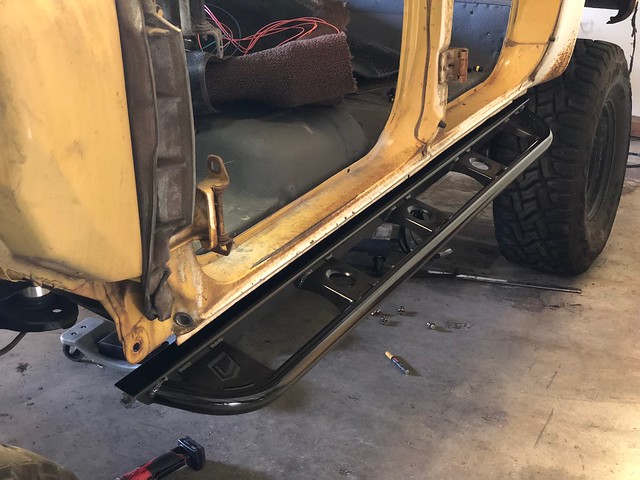
Speaking of the weekend, Saturday by buddy, Patrick, will be coming up from SLO and helping me get the Chassis Unlimited rock sliders built up! :D It's his welder I've held hostage been storing for him forever, and Saturday we're going to put it to good use. These sliders come semi-built, so all we have to do is figure out the cuts needed for the frame stand-offs then weld them to the frame plates and slider body. I'm hoping that it should be fairly straight forward since the plates will be on a nice, straight, level piece of the frame. At the very least I expect we'll get the thing tacked together so I can do the tedious final welding over the next week.

The weekend after this one my dad is coming around for 5 days, and I'm taking the week off work to really spend some time hammering on the remaining projects. Our goal for his time here is to get the thing fired up! Tasks remaining to that end include:
  1. Plumbing the fuel lines
  2. Installing the fuel filter and pressure regulator
  3. Connecting the wiring harness
  4. Powering the wiring harness
  5. Installing a starter
  6. Installing the core support and new radiator
  7. Plumbing the radiator
So that's gonna be a fair amount of work but I think totally do-able in the days he'll be here.
 

marshal

Burrito Enthusiast
the amount of progress is unacceptable. get back in the shop and take more photos and go-pro videos.
 

chilliwak

Expedition Leader
I say the progress is coming along nicely Aaron. Some things just take more time. Always good to have some helpers. Thanks for the info on installing windows. I am going to have to replace the side window on my 2dr Yukon so your tips will come in handy. Cheers, Chilli...:cool:
 

camp4x4

Adventurer
Sliders! That was my weekend. I've had this "universal kit" from Chassis Unlimited for about a year. My buddy, Patrick, swung up from SLO for Saturday to help me get these on. Mock up was pretty easy, figuring out the angles, NOT SO MUCH. I wanted to angle the sliders down a bit so the outriggers could act as steps. Overall I'm really happy with them. They're painted right now, just gotta swing down Weds. to put them on.


FBJR

Adventurer
Looks good. Will there be a buffer between them and the body as some rubbing "may" occur?
 

chilliwak

Expedition Leader
I agree with FBJR, those are some nice looking sliders. They look like they can handle the weight of that truck easily. I look forward to seeing them mounted on your truck. Cheers, Chilli...:cool:
 

camp4x4

Adventurer
Looks good. Will there be a buffer between them and the body as some rubbing "may" occur?

Yeah, with the 1/2 ton chassis there's a fair amount of flex, so I expect there'll be a bit of seam rub. But, I don't plan on doing much of anything about it initially... I'm gonna run some tests at Hollister Hills to see just how much impact it'll actually have.

I agree with FBJR, those are some nice looking sliders. They look like they can handle the weight of that truck easily. I look forward to seeing them mounted on your truck. Cheers, Chilli...:cool:

They're skookum as frig, that's for sure!

And here's them mounted:


I'm thinking I'll do some skateboard grip tape on the tube section where people will be stepping on it to get in the truck. Overall super happy with 'em.

Won't be doing anything until Saturday when my dad gets into town, but then I'll have a solid week off work with him around to get ******t DONE! Not done-done, but I expect we'll be making a ton of progress. Plans include plumbing the fuel system, installing the core support, radiator and plumbing the cooling, as well as finishing the doors. Hopefully we'll get the wiring harness on and get it to fire at least. Fingers crossed.
 

bknudtsen

Expedition Leader
Word of warning about skateboard tape... if you wear shorts, expect to take skin off your hamstrings when you slide out. Been there, done that.
 

camp4x4

Adventurer
Word of warning about skateboard tape... if you wear shorts, expect to take skin off your hamstrings when you slide out. Been there, done that.
These are the things you don't think about the first time you do something... thanks for sharing you're hard-earned wisdom!
 

chilliwak

Expedition Leader
I really like the look of your sliders installed Aaron. The black paint is also a nice contrast with the yellow of the truck. Awesome job. Cheers, Chilli..:cool:
 

Darkrider

Adventurer
Finally got fully updated on this, Great looking project i am looking forward to seeing how your overhead switch panel idea works out as i am trying to work out solutions for a similar mod for my K5. Right now i am researching the idea of doing an incar computer based off of the Raspberry Pi that i may end up using in that same general area.
 

camp4x4

Adventurer
Finally got fully updated on this, Great looking project i am looking forward to seeing how your overhead switch panel idea works out as i am trying to work out solutions for a similar mod for my K5. Right now i am researching the idea of doing an incar computer based off of the Raspberry Pi that i may end up using in that same general area.

RPi carputer idea is rad. I've been looking around at options for doing that. For now I'm not going to be doing it with this truck, but we're going to use an RPi in my dad's 24 Hours of LeMons Miata as a race dash connected to my Race Capture Pro MKII.

I'm getting pretty close to getting the headliner up, so I'll have more info on the switch pod soon.

My dad is in town this week and we're making great progress on stuff. Not 100% we're gonna get it fired this week since I found I was missing some misc. connectors I wasn't thinking of for the oil cooler setup, but we're getting lots of other things done besides. The roof rack is going on tomorrow, which I know doesn't sound super awesome, but once the roof rack is on, then the headliner and trim can go on, which means the switch pod goes on. We should have all the doors on this week as well. That's been a major project getting those converted to power.

Once I'm done with the doors the engine will start going together pretty quick... Hoping to fire it very soon. :D


chilliwak

Expedition Leader
Nice looking roof rack. I can understand your work progresion with getting the rack installed and then working down from there. I cant wait to hear you fire that beast up. Cheers, Chilli...:cool:
 

FBJR

Adventurer
Nice rack (he he)

What will be the overall height with that? Trying to keep mine under 7ft so I can access most parking garages.
 

Forum statistics

Threads
185,816
Messages
2,878,498
Members
225,378
Latest member
norcalmaier
Top