McBride
Adventurer
Devon,
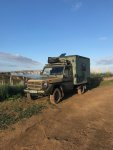
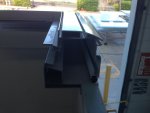
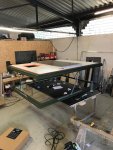
What a cool build platform.
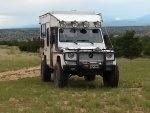
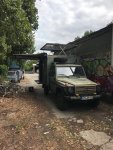
I picked up a G camper a few years ago and have learned a thing or two about not just keeping the weight down but paying close attention to how it's distributed, inside and outside the vehicle It originally had two spares on the roof above the cab and removing those made a huge difference in how it drove. You just can't have that much weight up high. There's nothing like spending a day on a rough dirt road flopping around. It's not only fatiguing but much harder on the vehicle. G's are tough but they have weight limits. Exceed them and something will break.
I'm sure you know this but it's important to keep the weight low, and put the heavy stuff between the axles, and close to the centerline of the vehicle when possible. The latter is pretty hard on a camper build bit the first two are easy.
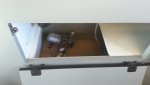
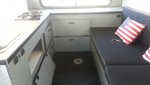
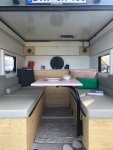
Upper cabinets and the weight that goes in them are a performance killer. So are 3/4" plywood box type cabinets, counters and lazarette lids. Drawers are heavy and a serious waste of space. Metal slides are too heavy.
With good design and engineering you should be able to build out your interior and keep it all under 300lbs. 250lbs would be better and 200lbs would be very impressive. Lemme know if you need any ideas regarding that.
I was lucky that the guys who built mine used their heads and were able to keep the total vehicle weight pretty close to 7000lbs. It's nimble, has a low CG, drives flat and while the 5 cylinder turbo diesel is wound up at 55mph, it pulls the weight easily.Yeah, I'm a slow guy too! It's slow but it's suprisingly quick. There's a difference between slow and underpowered.
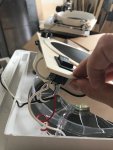
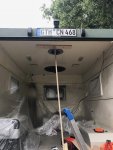
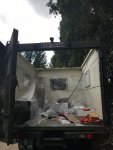
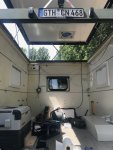
Do you know the current weight of the ambulance? Is the box insulated? What is the inside of the box skinned with? Do those side and rear windows open? Does it have the factory rear sway bar setup?
For all things mechanical JTrein is right in mentioning Clubgwagen and PointedThree Forums. Their is a ClubG member out of Germany who sells Gparts worldwide. He is the king of the 250GD. You'll definitely want to know him - first class guy.
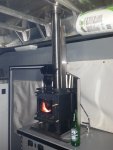
Oh, and for heating, I tried several things over the years and ended up with a Cubic Mini wood stove. It suits my camping style perfectly and it's some serious heat. Most of my camping is in the winter. I remove it in the summer.
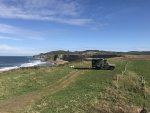
Anyway, looking forward to watching your build. Are you going to drive around Europe before you bring it home?
William
What a cool build platform.
I picked up a G camper a few years ago and have learned a thing or two about not just keeping the weight down but paying close attention to how it's distributed, inside and outside the vehicle It originally had two spares on the roof above the cab and removing those made a huge difference in how it drove. You just can't have that much weight up high. There's nothing like spending a day on a rough dirt road flopping around. It's not only fatiguing but much harder on the vehicle. G's are tough but they have weight limits. Exceed them and something will break.
I'm sure you know this but it's important to keep the weight low, and put the heavy stuff between the axles, and close to the centerline of the vehicle when possible. The latter is pretty hard on a camper build bit the first two are easy.
Upper cabinets and the weight that goes in them are a performance killer. So are 3/4" plywood box type cabinets, counters and lazarette lids. Drawers are heavy and a serious waste of space. Metal slides are too heavy.
With good design and engineering you should be able to build out your interior and keep it all under 300lbs. 250lbs would be better and 200lbs would be very impressive. Lemme know if you need any ideas regarding that.
I was lucky that the guys who built mine used their heads and were able to keep the total vehicle weight pretty close to 7000lbs. It's nimble, has a low CG, drives flat and while the 5 cylinder turbo diesel is wound up at 55mph, it pulls the weight easily.Yeah, I'm a slow guy too! It's slow but it's suprisingly quick. There's a difference between slow and underpowered.
Do you know the current weight of the ambulance? Is the box insulated? What is the inside of the box skinned with? Do those side and rear windows open? Does it have the factory rear sway bar setup?
For all things mechanical JTrein is right in mentioning Clubgwagen and PointedThree Forums. Their is a ClubG member out of Germany who sells Gparts worldwide. He is the king of the 250GD. You'll definitely want to know him - first class guy.
Oh, and for heating, I tried several things over the years and ended up with a Cubic Mini wood stove. It suits my camping style perfectly and it's some serious heat. Most of my camping is in the winter. I remove it in the summer.
Anyway, looking forward to watching your build. Are you going to drive around Europe before you bring it home?
William