dustboy wants to build a camper...

dustboy

Explorer
The madness begins

Well, it's beginning. This will either be the dumbest thing I've ever done, or the coolest.

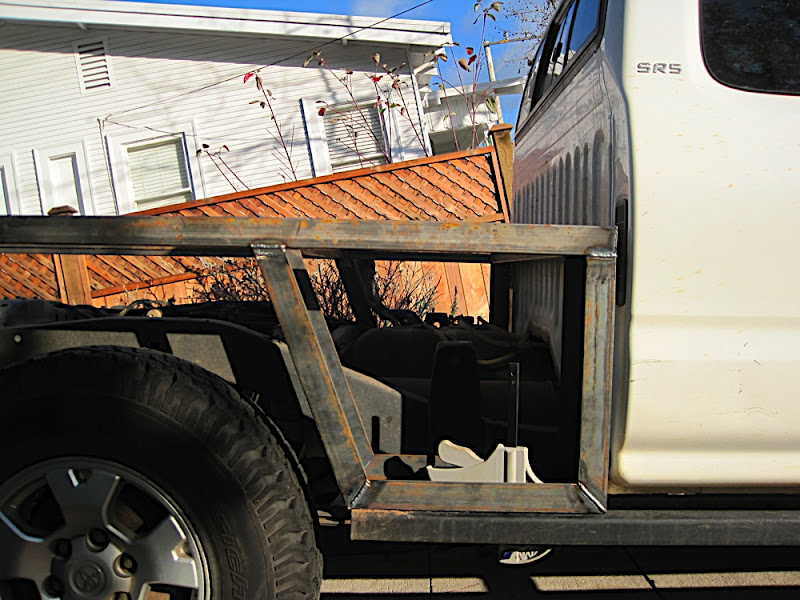
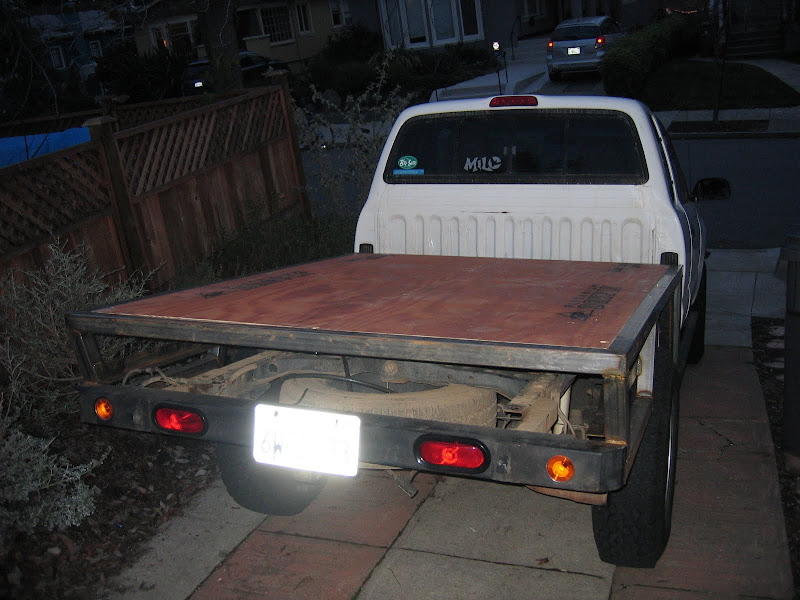
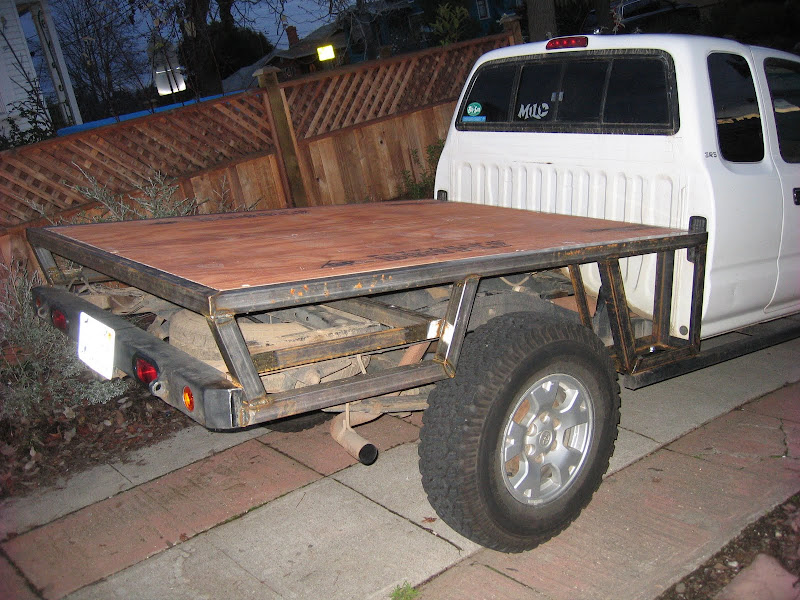
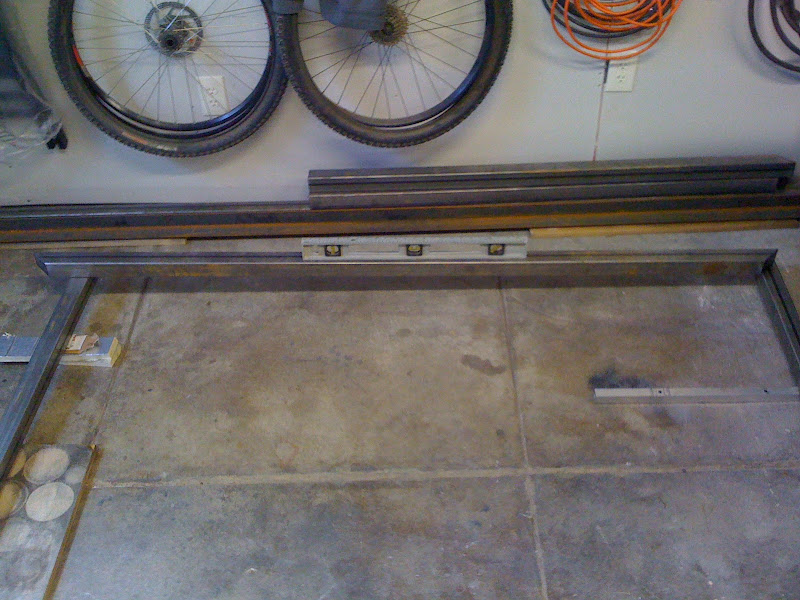
I scored 5 nice clean 10' sticks of 14 ga 2x2 box from the scrap yard, and 4 10' sticks of 12 ga 2x2 angle iron. Altogether they weigh about 175 lbs, I'm hoping this flatbed will be at least as light as the factory bed plus my current sleeping platform..always optimistic.

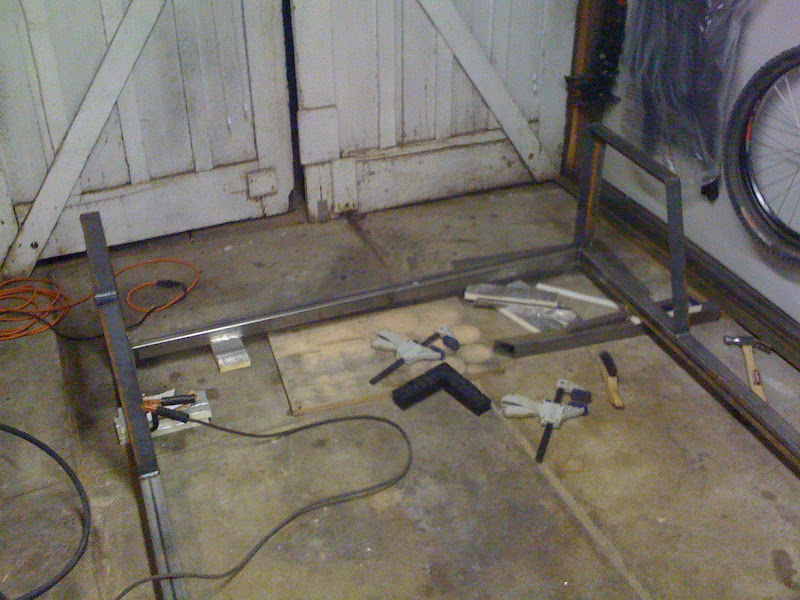
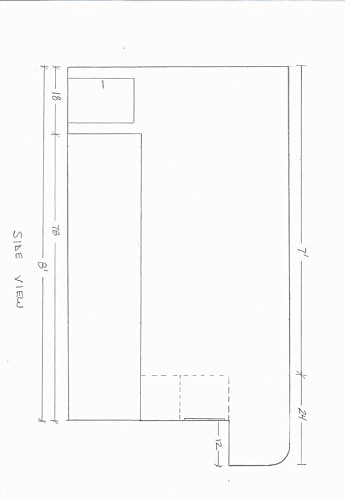
To start I cleared some floor space in my tiny garage. Next step was to lay out the perimeter of the top of the bed. This thing will be built upside down, since I need a flat plane to start from. The bed will be 80" x 64".

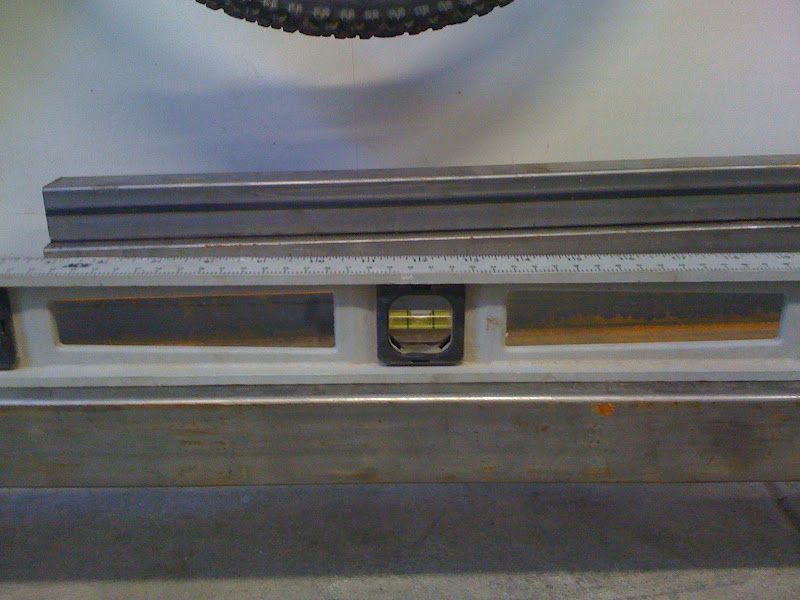
The floor of my garage is FAR from flat, so to get a proper start to the project, I carefully laid out the pieces and used a level to get them all in the same plane, putting pieces of whatever was laying around to prop them at the right height.
IMG_0343.JPG

IMG_0342.JPG

IMG_0345.jpg


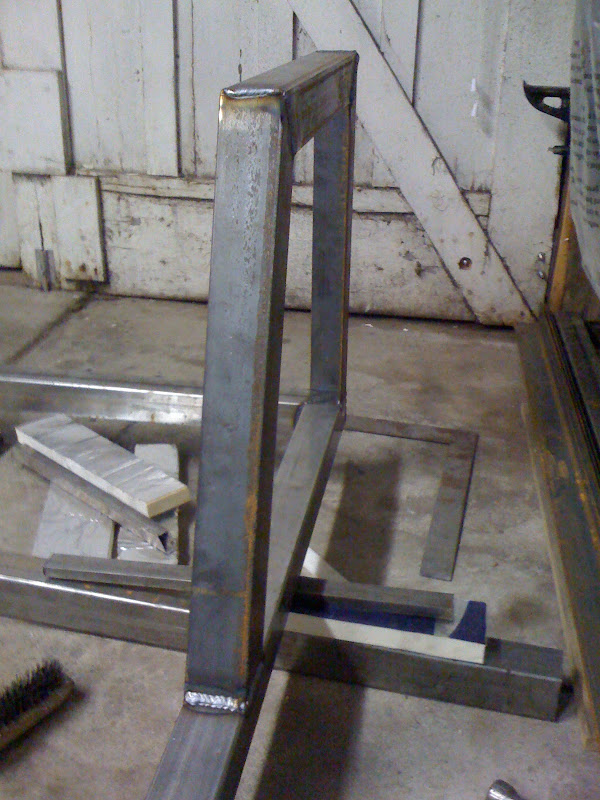
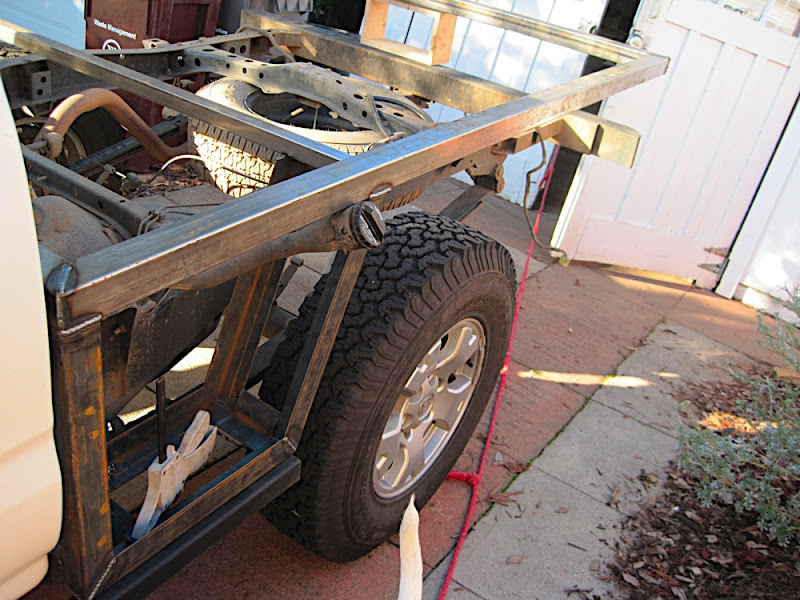
Next I tacked the outside corners together. My crappy saw cuts miters at just a hair over 45*, which is actually good because when you lay out a square like this, all the outside corners will touch.

IMG_0346.jpg


Since only the outside corners are tacked, the whole frame can now be squared. This is easily done by measuring diagonally across the corners, when the two measurements match, the frame is square.

IMG_0348.JPG


Once everything is perfect, I tack welded all the corners so the frame can't move, and it's ready to do the final welds. That's as far as I got last night, my buddy called with tickets to the Supercross race, so the rest of the night was smuggled margaritas, dirtbikes and pyrotechnics.
 
That confirms my suspicion. Two different types of metal with water between is a battery, and if I recall my Mr. Wizard correctly, the chemical reaction is what causes corrosion.

Dusty Boy you are correct. We have this issue in aviation and we use two coats of paint and sealant (aviation grade) between dissimiler metal. I would think that the automotive business would use some thing similer for bonding unibody vehicles. Your build ideas are running along the same lines as mine. In Seattle a company makes ute beds (flat beds) not cheap but appear to be built well.
 

rusty_tlc

Explorer
That confirms my suspicion. Two different types of metal with water between is a battery, and if I recall my Mr. Wizard correctly, the chemical reaction is what causes corrosion.
I believe galvanic corrosion is the technical term.
 

dustboy

Explorer
I'm having a hard time finding stop/turn/tail lights, I can find plenty of the round/oval flush mount type. What I want is a unit that combines brake/tail and an amber turn. I have seen these on some custom truck bodies.

something like this:
lite.jpg
 

IdaSHO

IDACAMPER
I'm hoping this flatbed will be at least as light as the factory bed plus my current sleeping platform..always optimistic.

Good luck with that!

Every flatbed I have installed or built has been quite a bit heavier than the factory bed, including fancy aluminum beds.

Looking good though!
 

dustboy

Explorer
Okay, build is moving along, now is the part where I have to hustle, because at the moment the truck is not legal to drive.

My brother came over and helped me take off the box bed. Got the beginnings of the flatbed set on the frame, so I can continue fabrication.

IMG_0507.JPG


The height of the flatbed will allow me to put all kinds of storage underneath, and I plan to have a small sink and countertop that will pull out from the back.

IMG_0505.JPG


Going to bolt the angle straight to the rock sliders.

IMG_0511.JPG


You can see here, the filler neck ended up in an excellent location, I will need to shorten it maybe an inch or two. I think it will work nicely if it sits inside the box, just behind the door.

IMG_0508.JPG


The rear bumper will be integrated into the flatbed.

IMG_0510.JPG
 

dustboy

Explorer
Today's progress, got everything framed out. One issue that is bugging me is that the frame crossmember that holds the spare has a hump in the middle where the winch is, and it takes up a lot of useful space. I like having the option of keeping the spare there, because in flatbed mode I won't have anywhere else to put it. Hmm.

Fun with sheetmetal tomorrow. Gotta figure out some tail lights too! I have cabinets to deliver on Thursday, so it's gotta roll!

IMG_0512.JPG


Got tail lights put in today, not all that stoked on how they turned out due to lack of products that fit my needs. The Kragen/Autozone route seemed as good as anything, and I just rigged them up. Yes, the lights were an afterthought in my design, they took a backburner to the more interesting features, so I ended up cutting them into the bumper. Pics tomorrow.

Seriously thinking about building the shell directly on the flatbed, and not making it removable. The camper shell I had before had very little room for cargo, and I still never took it off..maybe if I really need a flatbed, a better solution is to rent a trailer! A permanent shell would be lighter, less chance for leaks, and way easier to build. What do you think?
 
Last edited:

dustboy

Explorer
Decked out, taillights in. Had to put a bigger bulb in the turn signals, the flasher was way too fast and the lights were not bright enough. Decking is 3/4" "DryPly" subfloor, it's designed to be used in new construction where the floor might get rained on before construction is complete. It has a tongue-and-groove that I ran on the center seam to keep the two pieces in alignment. It has a nice sanded top, I'll probably put some marine spar on it later.

IMG_2788.JPG


IMG_2789.JPG


Oh yeah, the flatbed frame has significantly stiffened the truck frame. Also, the suspension in the rear is very harsh right now (I added leafs to support the old setup), there is not near enough weight in back.
 
Last edited:

4cruzer

Adventurer
oh man E I think it looks fabulous. Well done...
Thought about painting as you go? Might see surface rust start to show...
Well done man.
 

dustboy

Explorer
I've gotten this far, and I'm pretty happy with the results. I'm stuck on a few decisions before I frame out the shell.

1. The shape of the shell is somewhat limited by the fabrication skills and tools that I have. No compound curves, etc. I think it looks better to radius the top longitudinal corners like so:

taco%20shell.jpg


But aerodynamically (wind noise), I think this would be better:

taco%20shell%202.jpg


2. The height of the shell is another question, but I think I've settled on 38" interior above the deck. That gives me roughly 8" above the cab height. Functionally, higher is better, but results in rougher aerodynamics and overhead clearance issues.

3. I think I've gotten over the cabover idea. Don't want roofline to be that high, don't need the extra storage.

4. Permanent attachment. I go back and forth, but in the end I don't think I'll ever really pull the shell off, and the need for a headache rack on the flatbed subtracts precious inches from my interior bed length. See also: leaks.

5. Rear door will be lift-type to allow long material to hang out the back while driving, and provides an instant awning. However it eliminates the possibility of spare tire and jerry can mount.

Please weigh in if you have comments.

Also, MOD: maybe this thread should be moved to "Other Custom Campers"??

Hey look! It's my 500th post! I need a hobby.
 

Rbertalotto

Explorer
For some ideas, here is a slide in I'm starting construction on. Using "wacky wood" I'm going to have curves on the sides and the leading edge.......

CamperTopSideView-vi.jpg


CamperTopRear-vi.jpg


CamperTopBulkhead-vi.jpg
 

Forum statistics

Threads
185,883
Messages
2,879,164
Members
225,450
Latest member
Rinzlerz
Top