Unimogadventures - Our build and travel thread

Overland Hadley

on a journey
I only wish I was finished, so I can be out doing what it is supposed to do instead of being a garage ornament :)

I know the feeling, but you have to enjoy where you are at.

Kind of like traveling, it is about the journey not the destination. Enjoy where you are at in the journey of your build.
 

GroupSe7en

Adventurer
This is the point, during a long project, where I usually cut some corners just to get it done - and hate myself for it later!

Nice build - keep it going!

Cheers,
Mark
 

canals1164

Observer
iain
its looking good I know what you mean by you just want to be finished, i bought cheap shower tray today after much thought I know i shouldnt fit it.
I should put at back of shed and buy a good one tomorrow.
impatience is a terrible thing!
good luck
ian
 

Iain_U1250

Explorer
Time for another update - this week I've been concentrating on the water system, the mudguards and the the bullbar.

First up the mud guard - I had to make something that would be able to take a tyre blowing out and the tread flapping around and not taking out the brake booster.

DSC04377.jpg

I made a loop out of 25mm heavy wall pipe, and a 5mm steel plate to make a bracket. The mudguards are 3mm chequerplate aluminium, and about 30% wider than the OEM ones. The bracket below was the first attempt - I forgot that the camper subframe moves independently from the chassis - this first bracket would have torn out the moment we went off-road. the new one hangs off the camper subframe.

The major work was the bull bar - fitting the lights. I have decided to go with standard 7" H4 units. The main reason is that I can get them in most countries unlike the OEM ones or fancy things like the HID projectors etc. The ones in my Defender work well with the Philips +70 globes. I also will need to swap over the inserts when I get to countries that drive on the wrong side of the road. I will buy a set of left hand dipping inserts, and just change them at the border.

It is pretty important to get the alignment right, or at least making sure that I can adjust the headlights enough to get the right alignment. TO ensure there is enough light, the main beam is supplemented by the Mog sized Hella Rally 4000's - together with the 7" H4 they have an "adequate" amount of light. When things are really dark, there is another four Rally 4000's on the roof rack :)

DSC04381.jpg


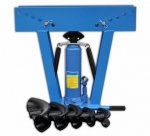
I use and engine crane to move the bullbar around - which weighs in around 75kg.


DSC04398.jpg

I fitted a 25mm strip of steel to create a surround and then added a bit more bits of steel to fill in some of the gaps. The tricky part was to ensure the I have enough space around the lights to allow them to be aligned properly.

DSC04406.jpg


I got the first of the storage drawers from the sheetmetal shop - this one fits under the seats and hold all the food.

DSC04409.jpg

The drawer will hit the table support, so the partition matches the open position. To get to the back part of the drawer, the table will have to be taken off.

DSC04411.jpg


I also did a lot of work on the water system, although it doesn't look like it. The water tanks are in, and I started mounting the water pumps. i first mounted them on the rear bulkhead - but that worked like a drum and the noise from the pumps was unbelievable. I then fitted some dynamat to it that worked a bit, but it was still noisy, so I fitted a heavy piece of craftwood to the bulkhead then attached the pumps to that.

DSC04355.jpg

Then I made up a sheet of heavy ply to take the pumps onto the other side of the cabinet - this worked and the pumps are as quiet as I can get them.

DSC04420.jpg

The water system is fairly complicated. Two shower heads and a sink. They have both hot an cold water. I'll have a four stage pre-filter for everything that goes into the tanks - various filters and charcoal canisters that are fine enough to take out bacteria and that water will be used for showering and dish washing

There is a separate drinking water system - which has it's own special filter. The "Seagull IV" is currently one of the best on the market - takes out everything including viruses according to the test done in Overland Journal. The drinking water system has a tap inside on the sink, and another in the rear hatch, so we can have safe water wherever we go.


The hot water system is a bit more complicated. The big grey tank in the photo is the geyser, runs off the engine cooling system or the Webasto heater so we will always have hot water. Since the water heater runs off the engine cooling system, this water can reach 80-90 degrees, it has to have a tempering valve which adds cold water to the hot system to bring it down to a temperature that can be set between 40 to 60 degrees. There is a shower head inside the cabin, and another on a 4m long hose in the rear hatch. There is also a hot mixer tap in the sink. The high pressure cold water system mirrors the hot water, with connections to the shower heads and the sink and the tempering valve.

The water tanks also have to be able to be drained, so the low pressure feeds have drains on them - so we can dump the water as necessary.

Finally I got most of the lining panels, including the two angle roof lining panels. The interior is getting much closer to being finished.

DSC04412.jpg
 

smontic

Observer
Then I made some attachment points - using M10 rivnuts and M10 bolts through the double skin part of the cab, I fashioned up the lower attachment points

View attachment 69867

I Iain, your work is superb!
I want to build a roof rack like yours, do you have some picture of the interior of this attachment?
I have read that Merceds disapprove to buld holes on this point, what do you think about that?
Thanks!
 

Iain_U1250

Explorer
The rear mounts on the back of the cab have two rivnuts and two holes through the double skin part. The B pillar can have holes in them, the A pillars - the ones either side of the windscreen are not supposed to have holes drilled in them according to the body builder guide. I can't show the inside of the B pillars, they are sealed. The rivnuts are fitted from the front - no need to get to the other side.

http://www.aimfasteners.com/about_rivnut.html
 

smontic

Observer
The rear mounts on the back of the cab have two rivnuts and two holes through the double skin part. The B pillar can have holes in them, the A pillars - the ones either side of the windscreen are not supposed to have holes drilled in them according to the body builder guide. I can't show the inside of the B pillars, they are sealed. The rivnuts are fitted from the front - no need to get to the other side.

http://www.aimfasteners.com/about_rivnut.html

Now I have understood!!!
I have buyed a pipe bender for that work, I hope it works well!
 

Iain_U1250

Explorer
Which pipe bender did you buy - I got a JD2 model 32 bender - I tried with the simple hydraulic ones which were 1/10th the price of the JD2, and it could not bend the pipe neatly.
 

smontic

Observer
Which pipe bender did you buy - I got a JD2 model 32 bender - I tried with the simple hydraulic ones which were 1/10th the price of the JD2, and it could not bend the pipe neatly.

Hi iain, I saw your bender and I'm sure it works better than the pneumatic one. It's bad that here in Italy it is impossible to find this kind of bender and a shipment from abroad is too expensive for me. So I decided to try this

3918-4.jpg
 

Attachments

  • 3918-4.jpg
    3918-4.jpg
    50.9 KB · Views: 26

Iain_U1250

Explorer
That's the one I tired, the main thing was it would flatten the inside of the pipe without making a smooth bend. I've seen it work on the right type of pipe, very heavy wall and low strength. I used a thin walled high strength pipe to cut down the weight a bit.
 

smontic

Observer
Hi Trausti,

thanks for your suggestion. My new pipebender is arrived yesterday, I hope to try it next week-end to see how it works.
I would try to bend a 40x1,5 or 50x1,5 mm pipes.

Simone
 

Iain_U1250

Explorer
The long weekend has given me an opportunity to do some more work on the truck, to date it has been rather slow going since I went back to work, with most of the work being small jobs I can finish in an evening or weekend.

This being a four day long weekend I got time to do a bit more. I fetched the centre roof panel on Friday morning early, and then spent the rest of the day checking the wiring diagrams, fitting a few more cables into the conduits as one the roof goes in, there will be next to no chance that I can get any more wires inside. I also sorted out the last bits of insulation in the roof, to ensure that we keep the heat in or out.

After sanding, cleaning and priming the supports, it was time to bring in the panel - it just fits in from the front. About three years ago I planned to fit this panel in through the front - so it was good that it fitted. The original plan was not to have a rear window so we could put the spare tyre on the back, but early on we decided we liked the idea of having windows on all three sides of the bed, so the full width rear window went in and the spare goes on the roof.


DSC04491.JPG

The "bump" in the roof is a recess I decided to fit to create a bit of extra headroom over the main walkway, Its only 50mm ( 2") but it makes a big difference, creating a nice feature as well.

Sliding it in as easy, the panel, despite being 3.3m long and 1.2m wide, it only weighs around 13kg. I used the blankets to protect the paintwork on both the truck and wood insert. Then it was a case of fitting the roof panel and holding it in place - Using the every sort of prop I have to hold it in place, the panel is finally in.

DSC04502.JPG


With the interior full or props, I decide to finish the starting battery box. It has taken a long time to find a good position for it, so many thing to consider, security - a big truck battery is a nice target for thieves, - having the heavy weight of a big battery hanging off the side of a truck - the Optima 31A weighs 27kg, so the box has to be a substantial structure and have a decent strap to tie it down. I have to find a space on the chassis rail that has decent mounting points and then the normal things for a battery box, fully lined with plastic to prevent shorts, vents, drain holes in case any water gets in etc.

After making quite a few cardboard prototypes, I finally found a place for it, and got some steel bent up during the week and after spending the day at the beach yesterday, after dinner I decided to spend a few hours working on the battery box - I was making good progress, so I just carried on working - and completely lost track of time. At 2:00am I got a call from the missus, wondering where I was. I decided that it would be enough for the night.

DSC04494.JPG

After the Easter Bunny has delivered the load of chocolate ( I got a quite a few myself) I decided to put the sugar high to good use and work and finished it off in a few hours. I decided to fit an isolation switch, not sure how many amps the reduction gear starter motor draws, but I fitted a 1000A Hella switch I got off fleabay for a good price. I welded a tag on the side of the box so that I can put a pin or something through the handle of the switch to keep it in place.

DSC04496.JPG

This is what it looks like in position, getting the heavy battery in and out with the box in place is not easy, the thing is damn heavy. Anyone trying to steal it will need a few muscles as there is not much space, still after getting it in and out 6 or 7 times this afternoon to check the fitting etc, I know it is possible you just need to be able to curl 27kgs with one hand :)

DSC04500.JPG
 

Forum statistics

Threads
185,839
Messages
2,878,740
Members
225,393
Latest member
jgrillz94
Top