john lovett
Observer
Hi, I'm new to this forum, although I have been following it for some months. I really appreciate the huge amount of information posted by members and figured it was my turn to add to the knowledge base. I started this thread to document the challenge of turning an ex water-board truck into a campervan.
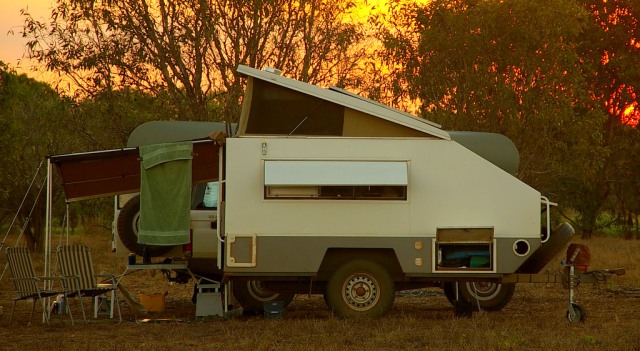
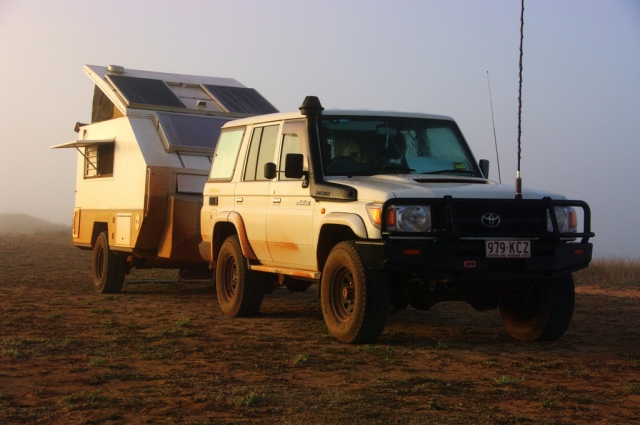
After 10 years happily towing this small, lightweight, off road caravan all over the country, we have once again decided that a single vehicle would suit our needs better. We generally only camp for a couple of days in the one place and, for us, the extra mobility far outweighs the occasional advantage of being able to drive away from where we set up camp.
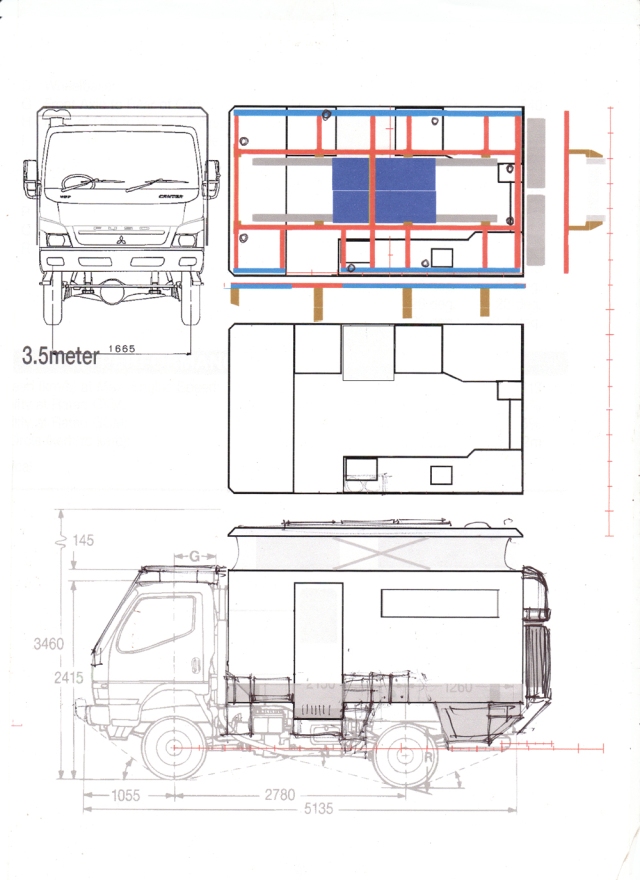
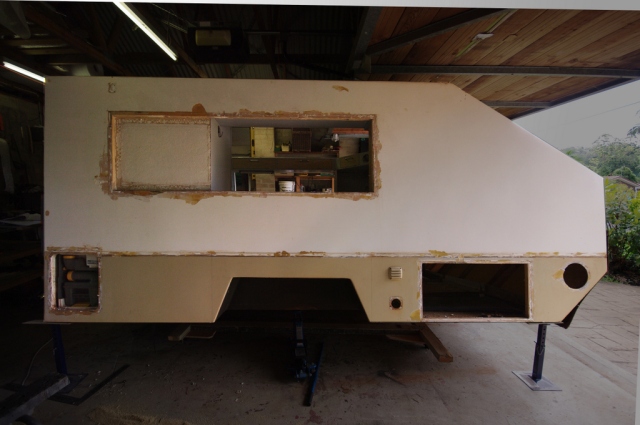
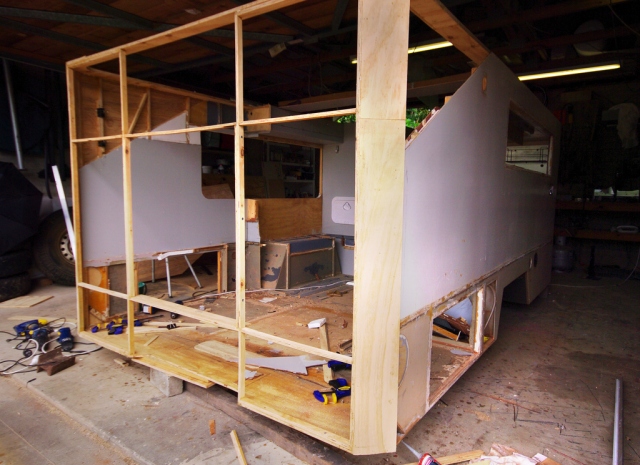
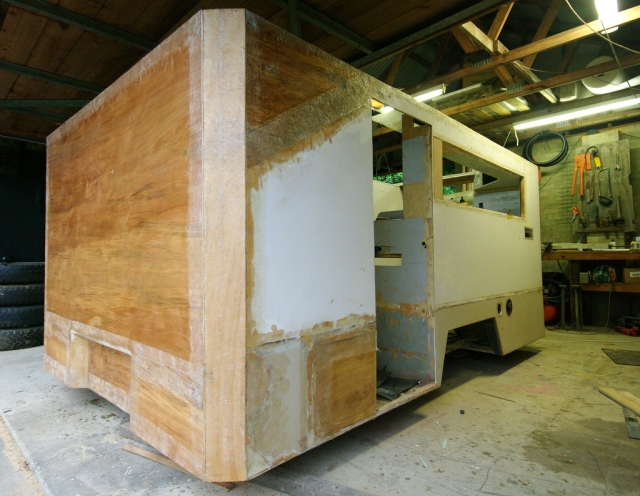
Rather than sell the caravan, we will modify it to fit on the back of a Four wheel drive Mitsubishi Canter truck. The van is made of lightweight ply, foam and epoxy. It is very strong and weighs (without chassis, water and gear) around 500kgs.
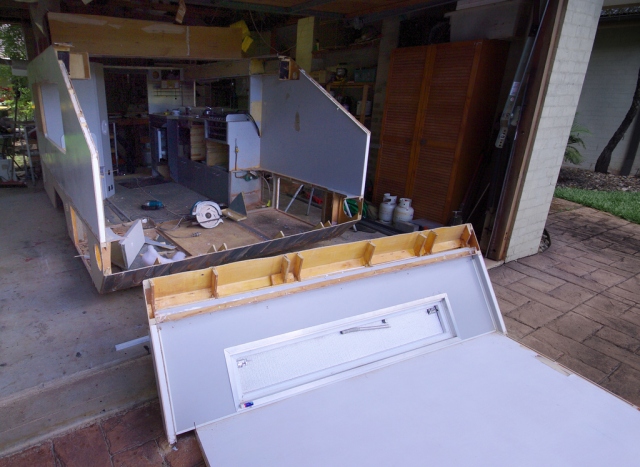
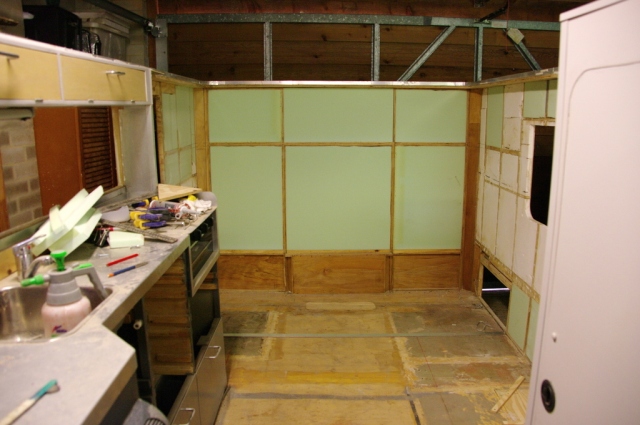
The plan is to chop the front off, shorten it by 100mm, run a pop up roof the full length of the van and move the door from the back to the passenger side. The double bed will be replaced by 2 bunks to give more interior space. An extra fridge will be fitted under the bottom bunk to replace the Engel we used to carry in the back of the Landcruiser.
We were lucky enough to find an ex water-board short wheel base 4×4 Mitsubishi Canter, Cab chassis in excellent condition. After a couple of test drives we convinced ourselves that, once some weight was added to back, the rough ride would be ironed out and the vehicle would be perfect for what we want.
I’m not a mechanic or an engineer or a welder or cabinet maker. But with help and information from a lot of more knowledgeable people than I, progress is being made.
I hope this post encourages anyone considering doing this sort of thing to get hold of some tools, make lots of inquiries and be patient and persistent until the job is done.
Sound Deadening Cab
Perched on top of a clattery diesel engine is not the ideal place to cover long distances, so before anything else, we decided to strip the cabin and line it completely with 30kg of barium impregnated vynol.
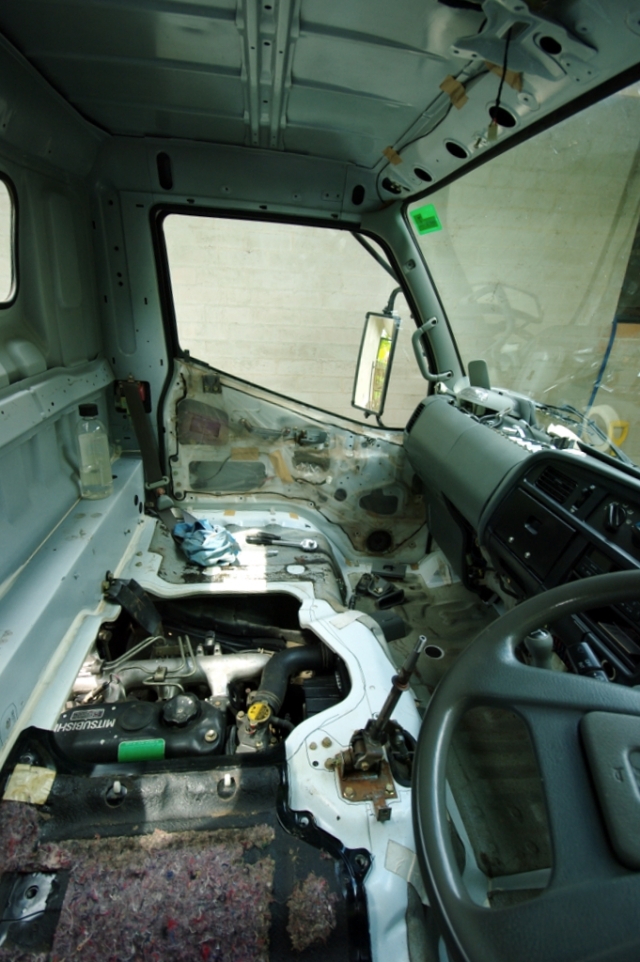
Seats, lining, floor mats, door trim, head lining were all removed, painted metal was washed down with grease and dust remover and the sound deadener was put in place with contact adhesive.
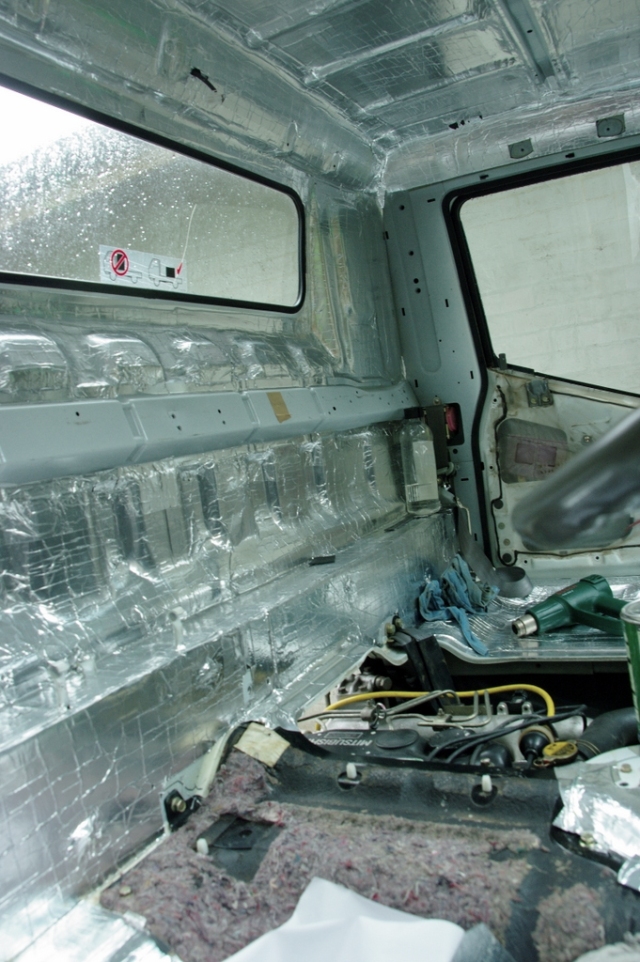
Panels that used to resonate with an tinny ring now make a dull, heavy thud
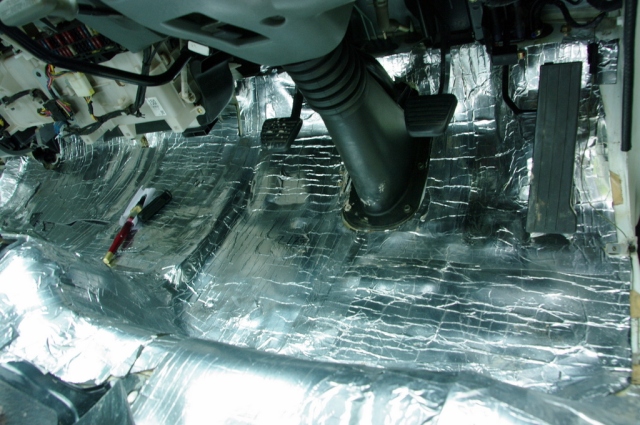
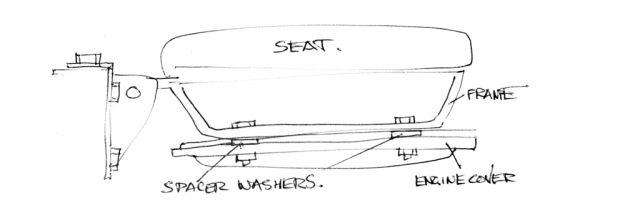
The floor was covered and a layer of deadener coated the engine covers. When all the lining, seats etc were reinstalled and spacer washers were placed between the seat frame and engine cover to create a better seal, there was a noticeable drop in cabin noise. Next, smooth out the bumpy ride and it will be the ideal touring vehicle!
The sound deadening material came from a Melbourne based company Solavis. A 1m x 6m roll was, when I purchased it, $85 through their ebay store. To stick this down I used around 3 litres of gel type contact adhesive. Solavis also sell aluminium tape to seal the joins. The truck cab required 2 rolls.
I don’t know if this stuff is any better or worse than Dynamat, but it’s a hell of a lot cheaper and I’m more than happy with the result
Subframe
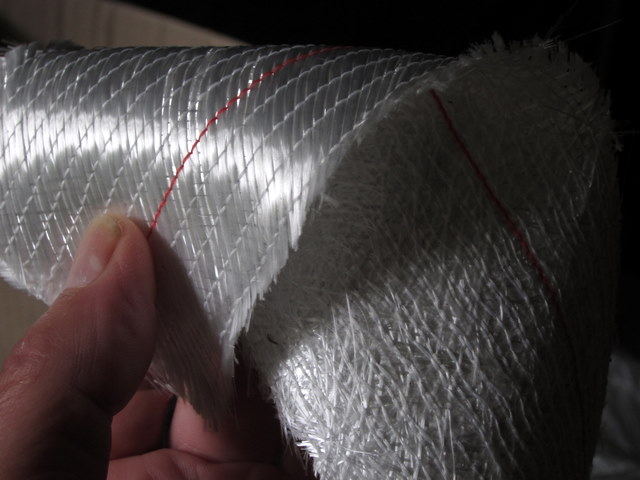
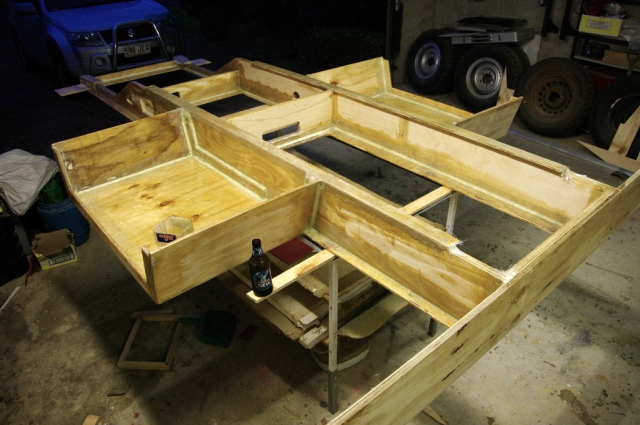
Before work started modifying the caravan, a subframe had to be built to allow the box to sit rigidly on the chassis without stopping the chassis from twisting. After much scribbling, head scratching and research, I decided to use laminated ply and fiberglass rather than steel. The laminated subframe will be lighter than steel and will better absorb any movement between chassis and subframe – causing the subframe to wear rather than fracturing the chassis.
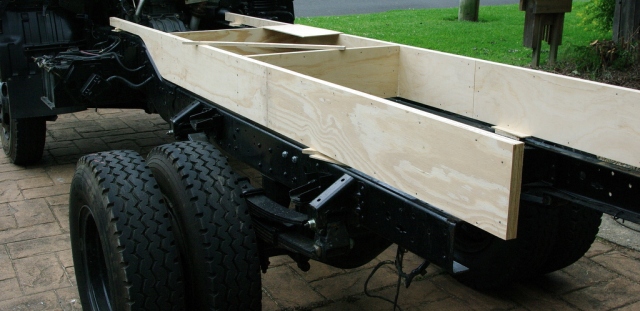
40mm waterproof ply rails and cross members
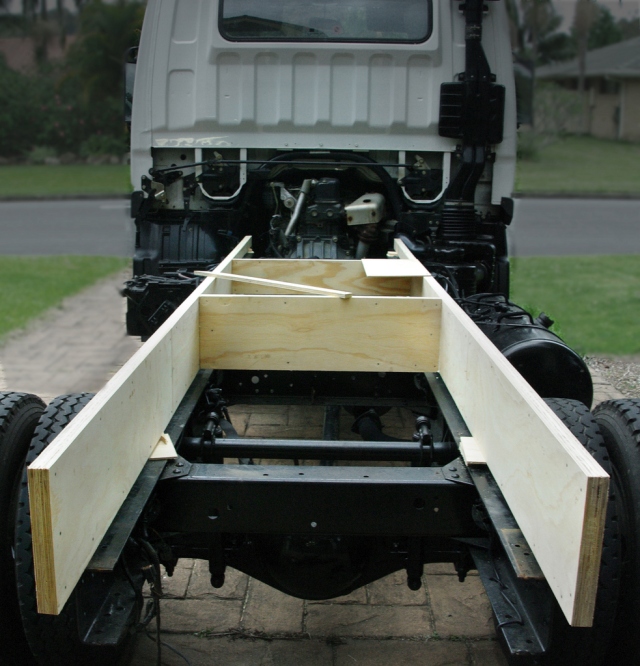
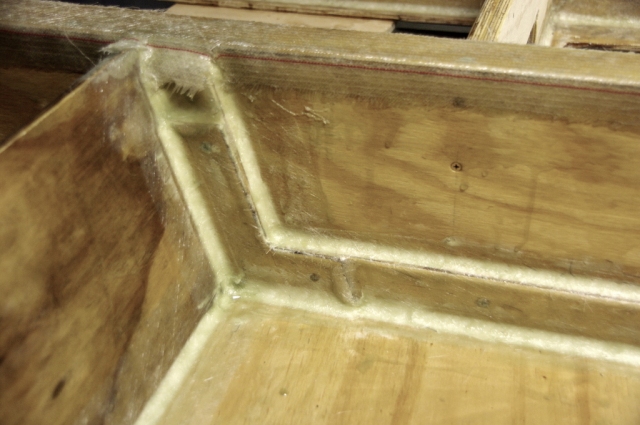
Q-Cell fillets add strength to all the joints
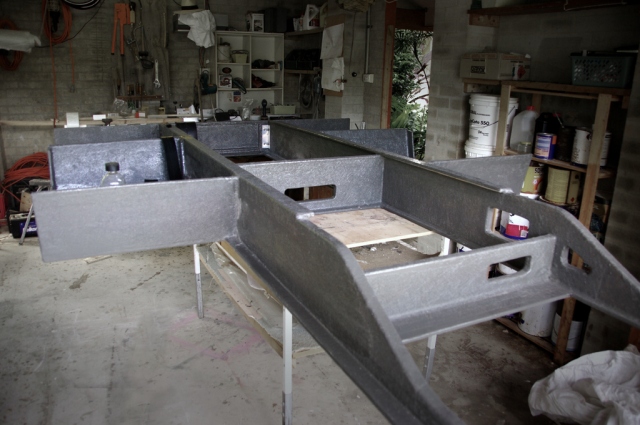
Once wrapped in a double layer of fiberglass mat, the subframe becomes strong and robust without being too heavy.
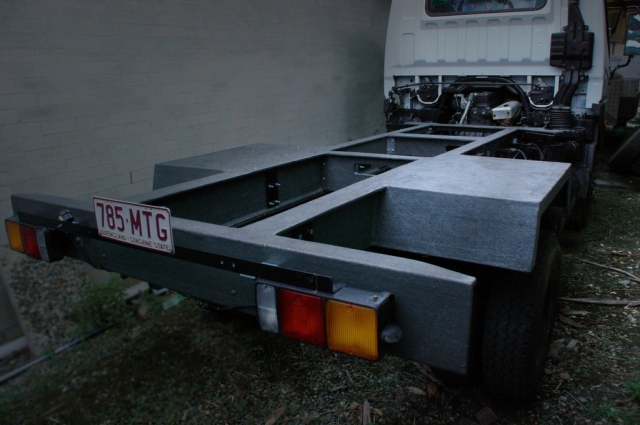
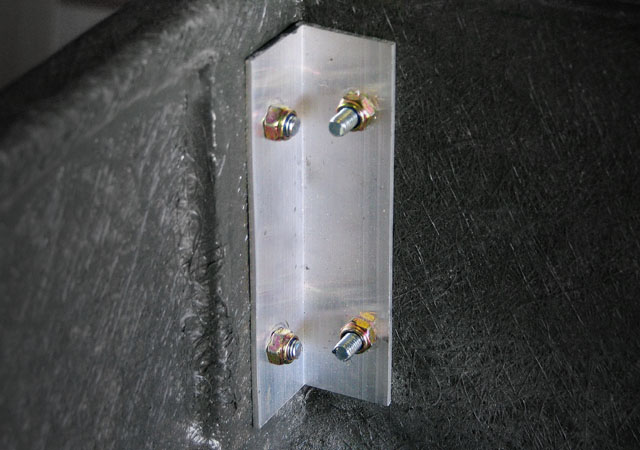
The subframe is attached to the chassis with 8 steel mounts and sits on two strips of nitrile rubber.
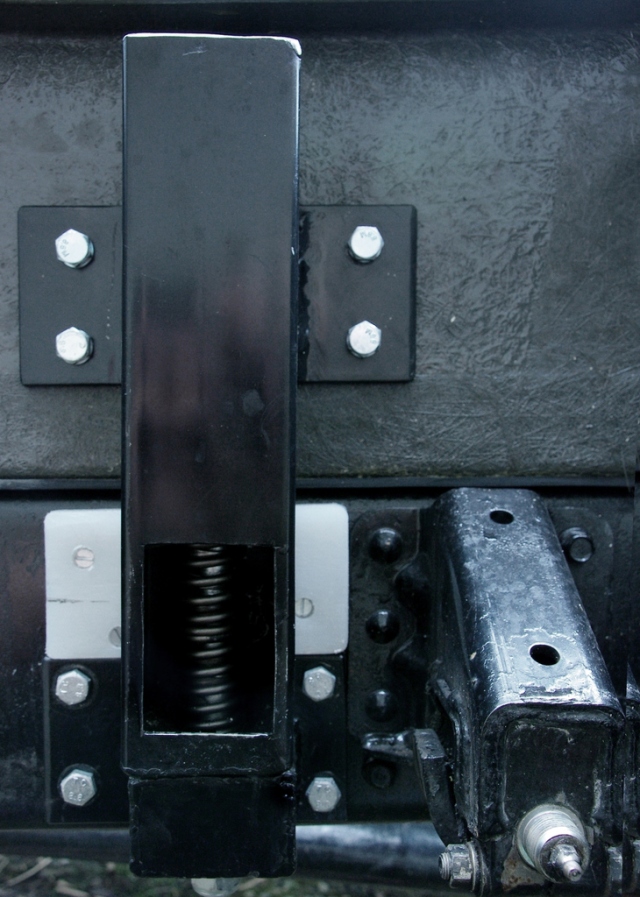
The four front mounts are spring loaded to allow chassis flex. Nylon plates stop any steel against steel friction
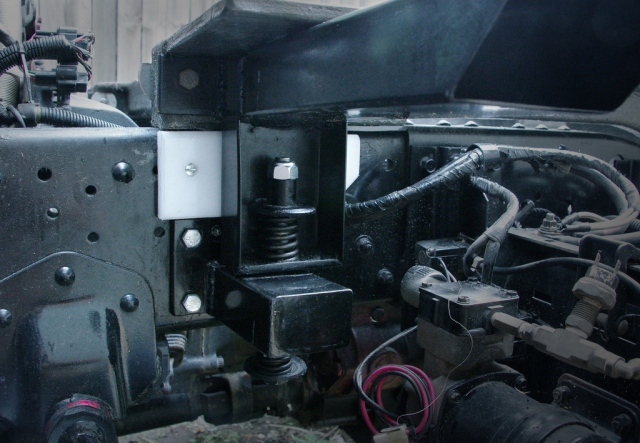
The two front mounts incorporate support arms that will bolt through the box.
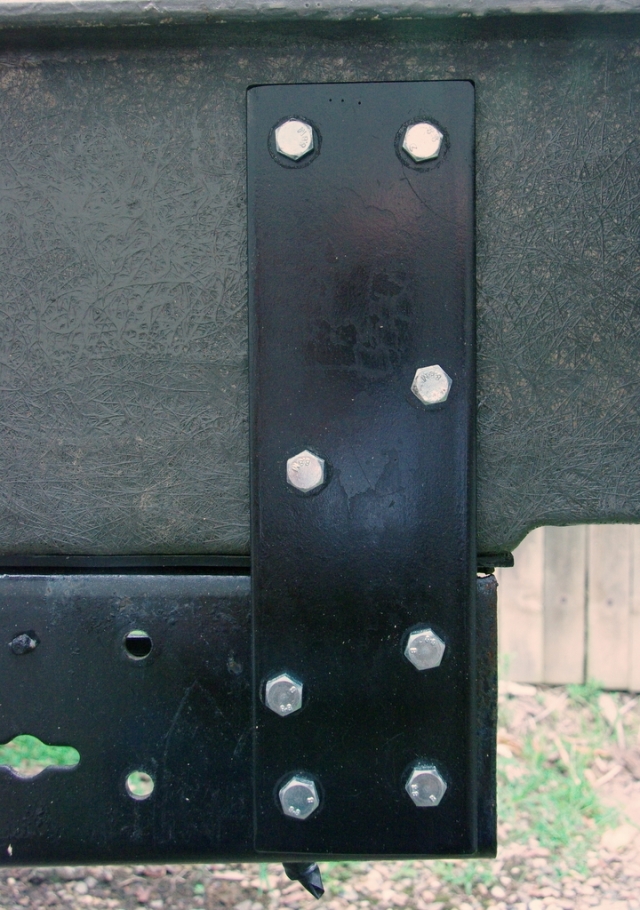
The 4 rear mounts are 10mm fishplates
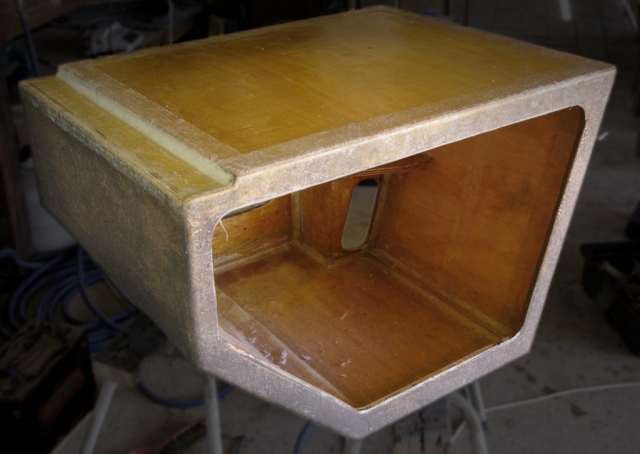
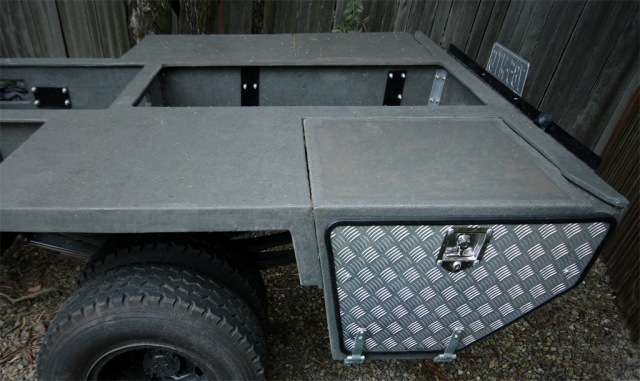
Two rear storage boxes bolt to the end of the subframe. The cavity between the storage boxes will hold 2 large water tanks.
After 10 years happily towing this small, lightweight, off road caravan all over the country, we have once again decided that a single vehicle would suit our needs better. We generally only camp for a couple of days in the one place and, for us, the extra mobility far outweighs the occasional advantage of being able to drive away from where we set up camp.
Rather than sell the caravan, we will modify it to fit on the back of a Four wheel drive Mitsubishi Canter truck. The van is made of lightweight ply, foam and epoxy. It is very strong and weighs (without chassis, water and gear) around 500kgs.
The plan is to chop the front off, shorten it by 100mm, run a pop up roof the full length of the van and move the door from the back to the passenger side. The double bed will be replaced by 2 bunks to give more interior space. An extra fridge will be fitted under the bottom bunk to replace the Engel we used to carry in the back of the Landcruiser.
We were lucky enough to find an ex water-board short wheel base 4×4 Mitsubishi Canter, Cab chassis in excellent condition. After a couple of test drives we convinced ourselves that, once some weight was added to back, the rough ride would be ironed out and the vehicle would be perfect for what we want.
I’m not a mechanic or an engineer or a welder or cabinet maker. But with help and information from a lot of more knowledgeable people than I, progress is being made.
I hope this post encourages anyone considering doing this sort of thing to get hold of some tools, make lots of inquiries and be patient and persistent until the job is done.
Sound Deadening Cab
Perched on top of a clattery diesel engine is not the ideal place to cover long distances, so before anything else, we decided to strip the cabin and line it completely with 30kg of barium impregnated vynol.
Seats, lining, floor mats, door trim, head lining were all removed, painted metal was washed down with grease and dust remover and the sound deadener was put in place with contact adhesive.
Panels that used to resonate with an tinny ring now make a dull, heavy thud
The floor was covered and a layer of deadener coated the engine covers. When all the lining, seats etc were reinstalled and spacer washers were placed between the seat frame and engine cover to create a better seal, there was a noticeable drop in cabin noise. Next, smooth out the bumpy ride and it will be the ideal touring vehicle!
The sound deadening material came from a Melbourne based company Solavis. A 1m x 6m roll was, when I purchased it, $85 through their ebay store. To stick this down I used around 3 litres of gel type contact adhesive. Solavis also sell aluminium tape to seal the joins. The truck cab required 2 rolls.
I don’t know if this stuff is any better or worse than Dynamat, but it’s a hell of a lot cheaper and I’m more than happy with the result
Subframe
Before work started modifying the caravan, a subframe had to be built to allow the box to sit rigidly on the chassis without stopping the chassis from twisting. After much scribbling, head scratching and research, I decided to use laminated ply and fiberglass rather than steel. The laminated subframe will be lighter than steel and will better absorb any movement between chassis and subframe – causing the subframe to wear rather than fracturing the chassis.
40mm waterproof ply rails and cross members
Q-Cell fillets add strength to all the joints
Once wrapped in a double layer of fiberglass mat, the subframe becomes strong and robust without being too heavy.
The subframe is attached to the chassis with 8 steel mounts and sits on two strips of nitrile rubber.
The four front mounts are spring loaded to allow chassis flex. Nylon plates stop any steel against steel friction
The two front mounts incorporate support arms that will bolt through the box.
The 4 rear mounts are 10mm fishplates
Two rear storage boxes bolt to the end of the subframe. The cavity between the storage boxes will hold 2 large water tanks.