Personally I plan to use PEX for my system when it arrives. It is easy to install, repair, flexable to a point and sturdy. You can get nearly any style fitting you need for it. Keep a couple of shark bite in the truck for field repairs if you ever need to, or use use them as quick dis-connects.
You are using an out of date browser. It may not display this or other websites correctly.
You should upgrade or use an alternative browser.
You should upgrade or use an alternative browser.
On Board Hot Water Shower System
- Thread starter TheJosh
- Start date
McZippie
Walmart Adventure Camper
Isn't pex really pricey though? And the tool is expensive too?
IMHO: Sharkbite connectors and pex are worth any extra money. Sharkbites don't need any installation tools they click on and release with a free tool. Very easy to drain the system for winterizing.
.
FWIW: Went through the same thought process for hot water (heat exchanger or propane) and instead used a 5 gallon 120 volt home under-sink unit . Use the engine alternator and an inverter for power. Set the water temp at max (scolding hot) and mix with cold to get about 8 gallons of very hot water. Requires about 20 minutes of engine running time to heat the water.
Simple plumbing and wiring.
Last edited:
loren85022
Explorer
Does anyone have some off road experience with water lines using shark bite connectors? I'm looking at them for a water heater on a trailer. They look convenient, but would appear vulnerable to leaks with larger temp swings and frame flexing. That's not uncommon for all piping to a certain extent, but a system using threaded connectors and / or hose clamps seems easier to field repair.
A 50ft roll of 1/2" pex locally here is $15 (superpex - hot water and UV rated)
Cutter (cheap ones $3) better ones $8-15, but if you can use a utility knife but it is harder to get a nice strait cut.
Crimps are about $.10 each
Crimper locally $24 - Ebay $30 Just make sure to get the crimper style below not the style that is sized for each pipe size. The crimper below will do any size pex with the correct fitting without needing any other tools.
http://www.ebay.com/itm/Pex-Cinch-C...229?pt=LH_DefaultDomain_0&hash=item27bd967315
Fittings vary from $.39 to $2 and shark bites are $5-10 depending on fitting.
The shark bites I would use sparingly, and as a field repair as there are no tools required to use them. Once they are installed the should be as durable as nearly any other connection on a vehicle, very similar to push-lock fittings that are used for DOT air brake lines which I am certain they were based off of. In fact my OBA and garage are both plumbed using it upto 175 PSI and free of leaks to date.
I would use a shark bite as a quick disconnect in your lowest point to act as a drain when required for winter just ensure the pex is supported.
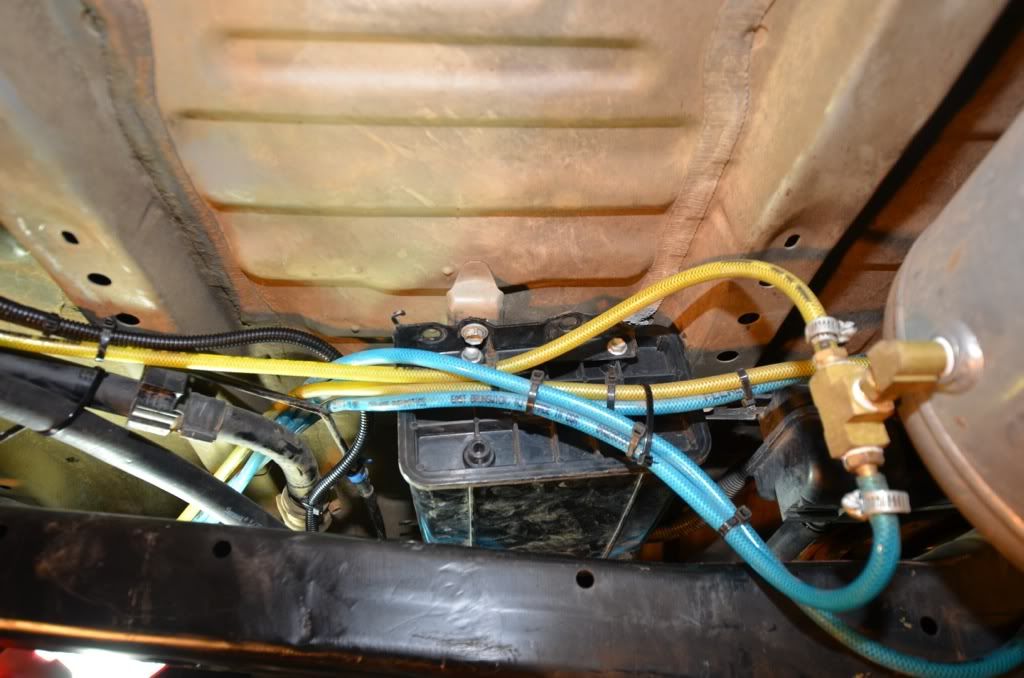
As for the carbon filter I relocated mine on the last truck and if yours is like mine all I had to do was lenghten the hoses and wiring harness to it, just make sure to mount it in the same orientation it is currently in.
Personally I think pex is the best suited for mobile use due to the fact that is the easiest to install and route, fittings are cheap, and it won't colapse like soft hose over time. Only concern would be routing near exhaust, but it not supposed to burn just melt.
Cutter (cheap ones $3) better ones $8-15, but if you can use a utility knife but it is harder to get a nice strait cut.
Crimps are about $.10 each
Crimper locally $24 - Ebay $30 Just make sure to get the crimper style below not the style that is sized for each pipe size. The crimper below will do any size pex with the correct fitting without needing any other tools.
http://www.ebay.com/itm/Pex-Cinch-C...229?pt=LH_DefaultDomain_0&hash=item27bd967315
Fittings vary from $.39 to $2 and shark bites are $5-10 depending on fitting.
The shark bites I would use sparingly, and as a field repair as there are no tools required to use them. Once they are installed the should be as durable as nearly any other connection on a vehicle, very similar to push-lock fittings that are used for DOT air brake lines which I am certain they were based off of. In fact my OBA and garage are both plumbed using it upto 175 PSI and free of leaks to date.
I would use a shark bite as a quick disconnect in your lowest point to act as a drain when required for winter just ensure the pex is supported.
As for the carbon filter I relocated mine on the last truck and if yours is like mine all I had to do was lenghten the hoses and wiring harness to it, just make sure to mount it in the same orientation it is currently in.
Personally I think pex is the best suited for mobile use due to the fact that is the easiest to install and route, fittings are cheap, and it won't colapse like soft hose over time. Only concern would be routing near exhaust, but it not supposed to burn just melt.
Last edited:
theksmith
Explorer
when you relocate your canister, be sure to use either a true multi-purpose hose or fuel/fuel-injection hose so that the vapors don't eat up some of the other types of rubber hose. when i relocated mine i was concerned that the time to pressurize the system during the self test might be off and throw codes due to the increased volume of the system with all the extra hose, but there were no issues.
on the hot water system, PEX wouldn't make tight enough turns for me so i used 3/8 braided clear tube and barbed fittings even though i usually hate hose-clamps. it's at the upper limits for temp rating of that hose, but it's holding up so far. the only problem was that it get soft when hot, so i had to significantly re-tighten all the hose clamps down on the first use once there was hot water flowing through the system - since then all good. however, i'm currently using a jerry-can for water source and plan to eventually re-plumb everything based of a permanent tank - so i'm eager to see what you use and how it works for you.
good luck, and nice going so far!
TheJosh
Explorer
when you relocate your canister, be sure to use either a true multi-purpose hose or fuel/fuel-injection hose so that the vapors don't eat up some of the other types of rubber hose. when i relocated mine i was concerned that the time to pressurize the system during the self test might be off and throw codes due to the increased volume of the system with all the extra hose, but there were no issues.
on the hot water system, PEX wouldn't make tight enough turns for me so i used 3/8 braided clear tube and barbed fittings even though i usually hate hose-clamps. it's at the upper limits for temp rating of that hose, but it's holding up so far. the only problem was that it get soft when hot, so i had to significantly re-tighten all the hose clamps down on the first use once there was hot water flowing through the system - since then all good. however, i'm currently using a jerry-can for water source and plan to eventually re-plumb everything based of a permanent tank - so i'm eager to see what you use and how it works for you.
good luck, and nice going so far!
wow thanks for the input on the charcoal canister. the only hose i had was braided fuel lines so that worked out perfect!
theksmith
Explorer
Thanks for pointing out that sharp bends are not possible with PEX unless you use an elbow.
yes, with proper planning you may not need tight bends... but then again, you might have crazy ideas like i did!

TheJosh
Explorer
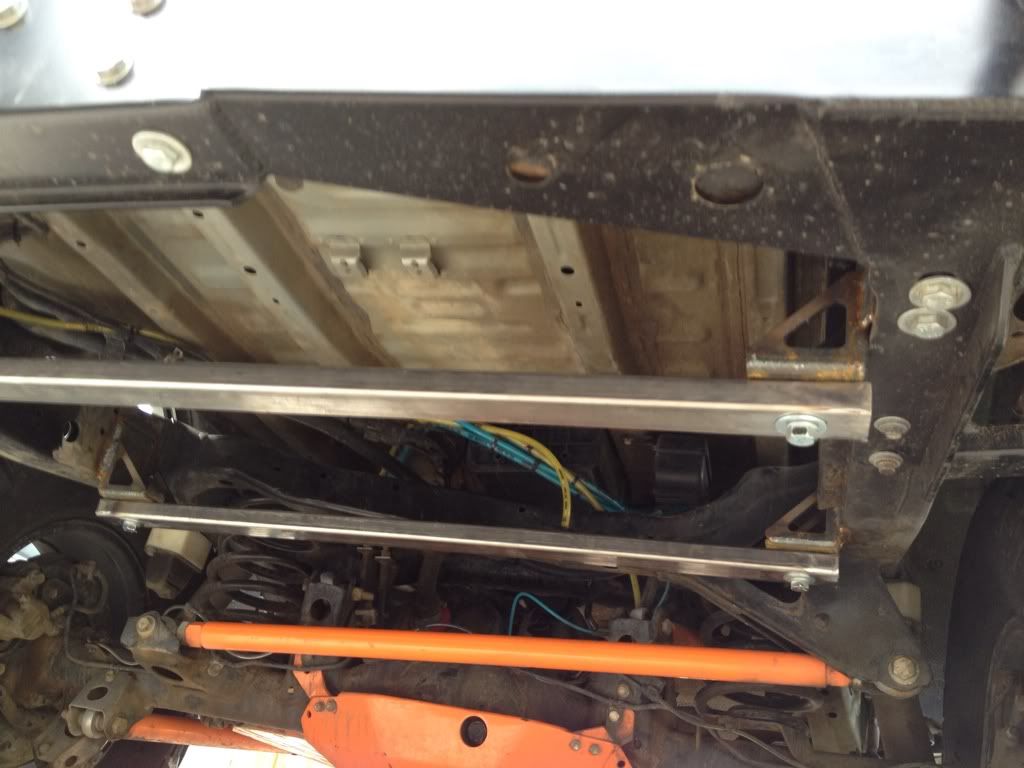
i received my 12gal tank yesterday and fitted it up last night. now i have plenty of room. one thing i was worried about previously was access to remove and install the other tank since it was so snug. now that its 6 inches shorter it won't be any issue. I'm playing with ideas of how to do the cross members. now i think i might weld two rectangular cross members in the middle of the the cargo area going fore to aft and then weld two angle brackets on the driver and passenger side to mount the skid plate too.
im also toying with the idea of how ill hook up the shower, maybe underneath for a clean look or through the bumper for easy access.
haven't had any time yet to finish up relocating my charcoal canister yet. my truck is still on ramps and work has been insane!
got stuff done...
finally finally finished moving the charcoal canister. that thing is a PITA!! its mounted really secure and all lines are hooked back up
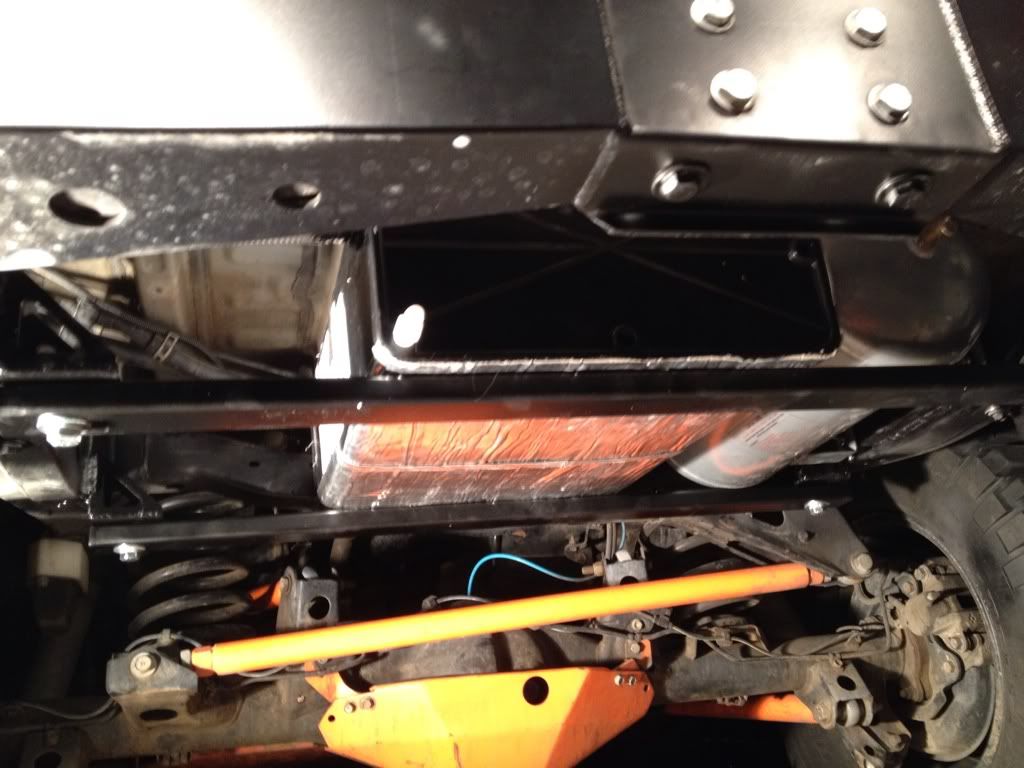
the new 12 gallon tank is fitted now. a lot more room for me to plumb. i will probably mount the pumps on the rear of the tank for easy access. i changed my mind once again about how i want the cross members. I'm thinking of welding a gusseted "L" bracket (4) 2 on each side on the inside of the frame that drop down ever so slightly. the i can have two cross members just bolt to the brackets so they are completely removable. i think this will be the easiest way to mount up the tank and remove if needed
heres the tank
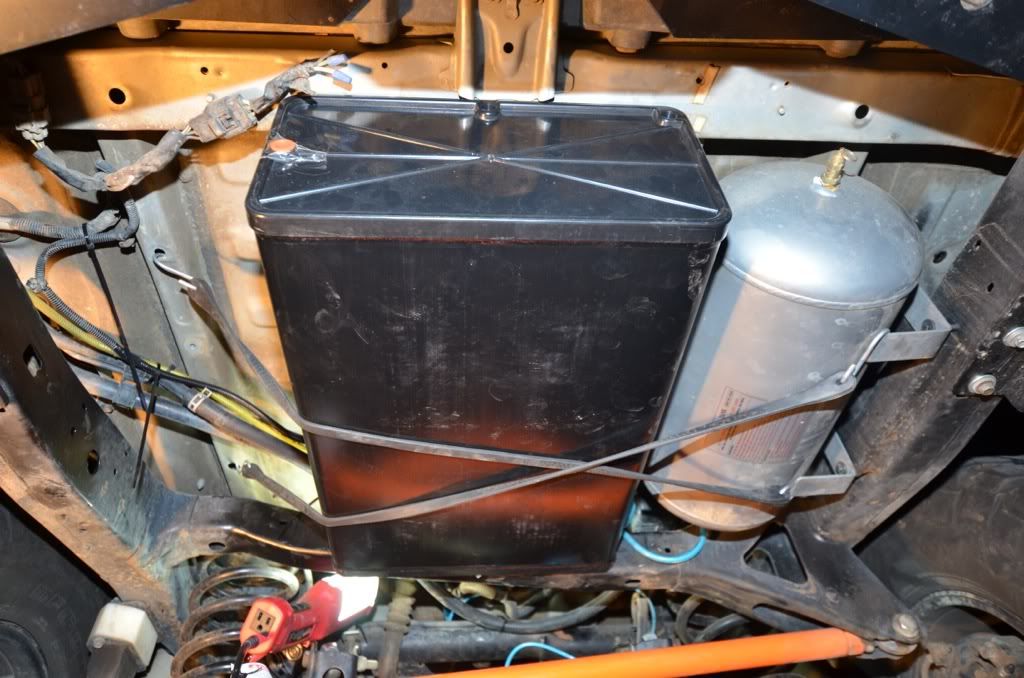
space for plumbing lines and pump
im also toying with the idea of how ill hook up the shower, maybe underneath for a clean look or through the bumper for easy access.
haven't had any time yet to finish up relocating my charcoal canister yet. my truck is still on ramps and work has been insane!
got stuff done...
finally finally finished moving the charcoal canister. that thing is a PITA!! its mounted really secure and all lines are hooked back up
the new 12 gallon tank is fitted now. a lot more room for me to plumb. i will probably mount the pumps on the rear of the tank for easy access. i changed my mind once again about how i want the cross members. I'm thinking of welding a gusseted "L" bracket (4) 2 on each side on the inside of the frame that drop down ever so slightly. the i can have two cross members just bolt to the brackets so they are completely removable. i think this will be the easiest way to mount up the tank and remove if needed
heres the tank
space for plumbing lines and pump
Jackson"N"jeeper
New member
I and my family have used this system propane
Unit on several camping trips and I find it
To be excellent. Used it during Katrina as propane
was readily available to us, and received nothing
but kudos from those first responders who used it.
Thanks for your input
Unit on several camping trips and I find it
To be excellent. Used it during Katrina as propane
was readily available to us, and received nothing
but kudos from those first responders who used it.
Thanks for your input
High_Country
Adventurer
Great thread. I'm interested to see how it all works out. I too liked the idea of using a heat exchanger due to the simplicity. One thing that hasn't been mentioned much is safety. Please please make sure you instruct everyone that uses it to test the water first before dousing themselves in it! You definitely don't want to badly burn anyone with scalding hot water in the middle of nowhere.:Wow1:
Good write up and thanks for all the photos and progress updates.
Good write up and thanks for all the photos and progress updates.
Borrego60
Rendezvous Conspiracy
http://www.expeditionportal.com/forum/threads/63643-03-Tundra-helton-heater-install?highlight=helton Try this thread, installed a helton on my tundra.
TheJosh
Explorer
got a lot of stuff done with the On Board Water System this weekend
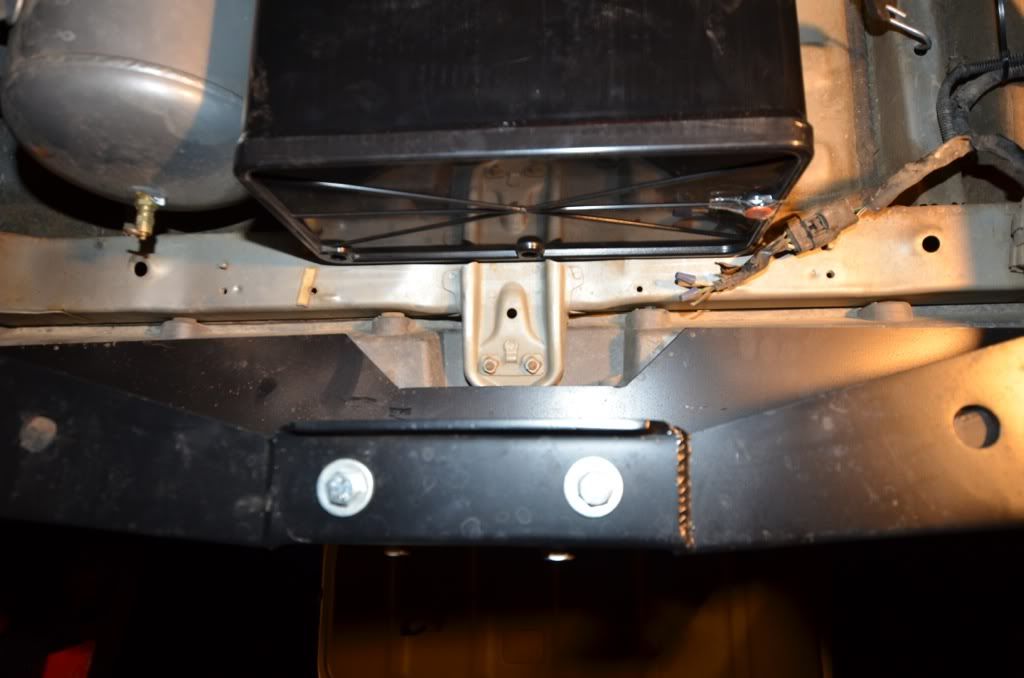
Welding up some mounts (thanks to my buddy eric for the fab work)
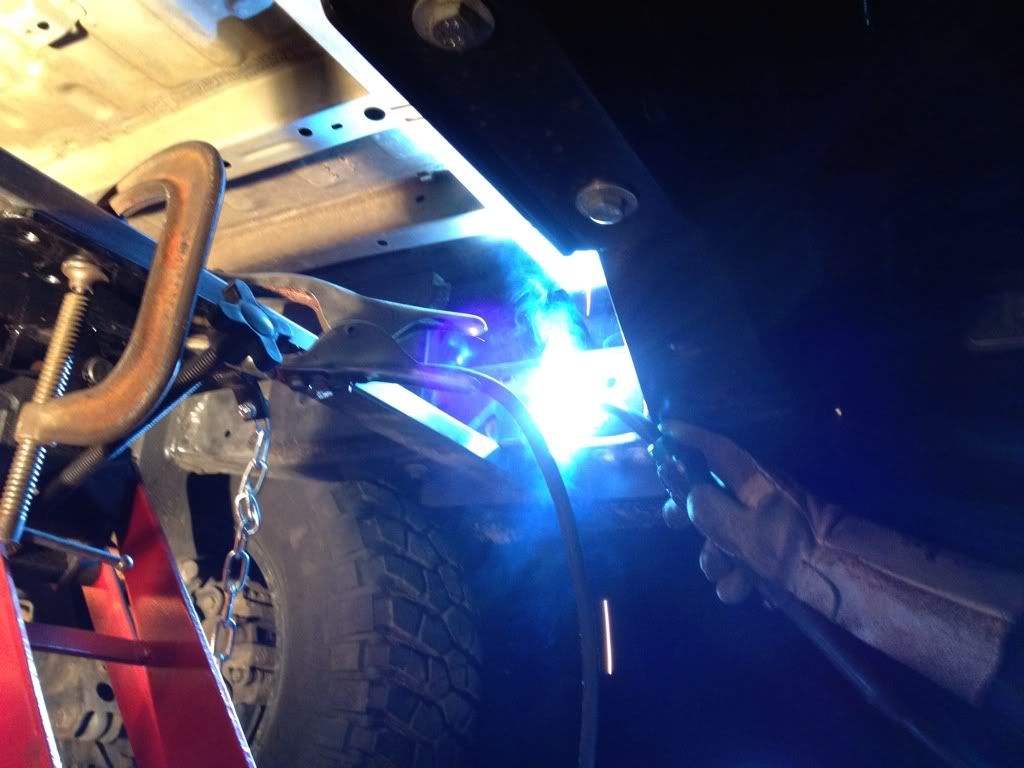
crossmembers boxed, grinded down and mocked up
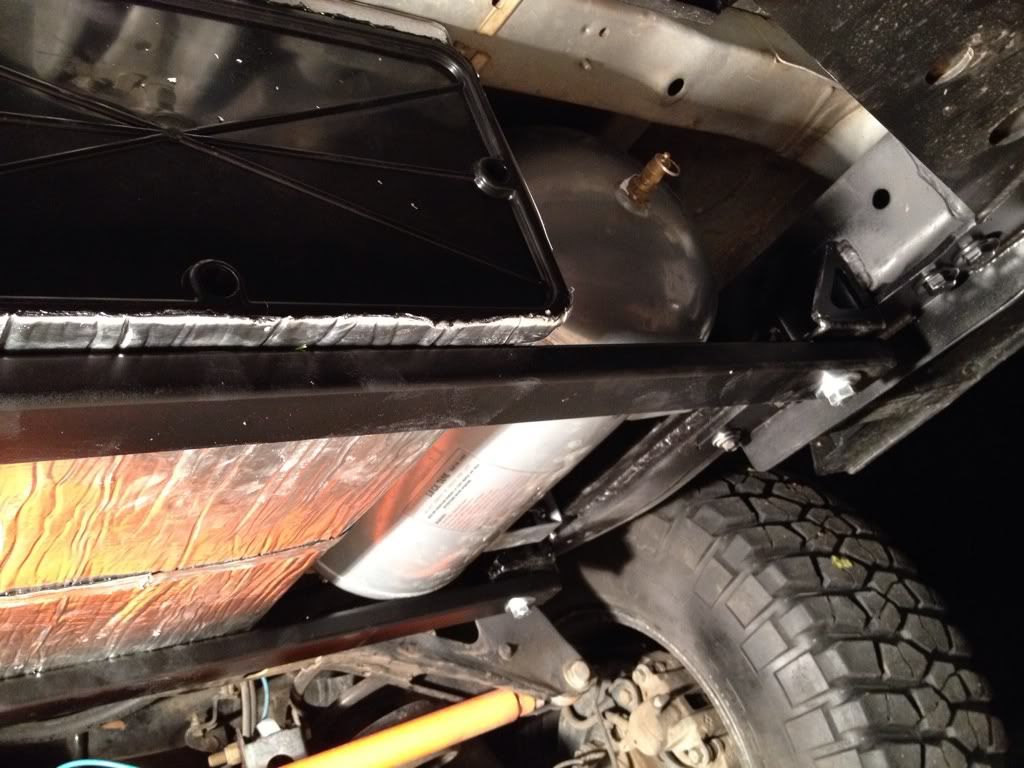
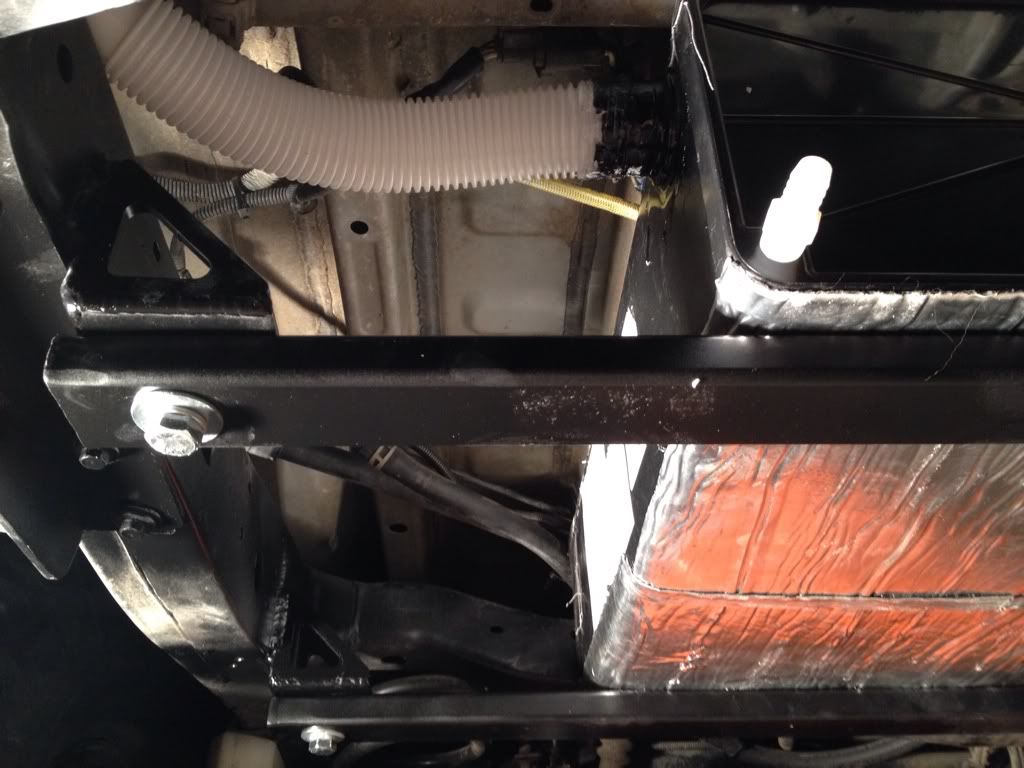
then i primed and painted the mounts and cross members. i reinstalled the air tank and moved a few fittings around. i wrapped the top and bottom of the water tank in some B-quiet just to assist with vibration and retaining heat (used the last i had left) for padding on the top of the tank i used a 1/2 high density insulfoam liner and ill do the same on the bottom under the mounts when i do final installation (still want to drive around a bit and see how it holds up
i still need to install the pump and wire that up. i was originally planning on just running 1 pump that would pump the water to the heat exchanger and the bank into the tank then i can switch it to run to the shower. but after many time thinking about it i may end up running 2 pumps, 1 for the heat exchanger and 1 soley for the shower, it'll actually simplify the system where ill be able to control the system from inside the cargo area versus manually switching a valve underneath the truck.
i plan to have the pump switches inside the cargo area with the water temp meter above it, installed on the little access panel on the left.
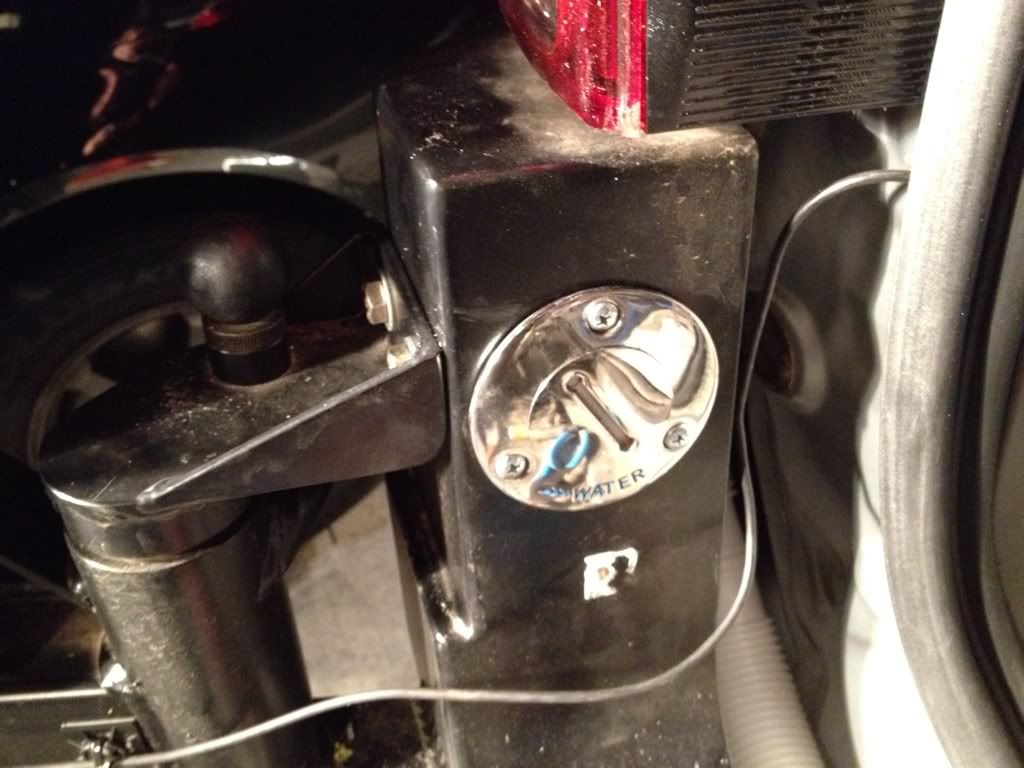
also installed the fresh water fill valve into the bumper. came out very clean!
Welding up some mounts (thanks to my buddy eric for the fab work)
crossmembers boxed, grinded down and mocked up
then i primed and painted the mounts and cross members. i reinstalled the air tank and moved a few fittings around. i wrapped the top and bottom of the water tank in some B-quiet just to assist with vibration and retaining heat (used the last i had left) for padding on the top of the tank i used a 1/2 high density insulfoam liner and ill do the same on the bottom under the mounts when i do final installation (still want to drive around a bit and see how it holds up
i still need to install the pump and wire that up. i was originally planning on just running 1 pump that would pump the water to the heat exchanger and the bank into the tank then i can switch it to run to the shower. but after many time thinking about it i may end up running 2 pumps, 1 for the heat exchanger and 1 soley for the shower, it'll actually simplify the system where ill be able to control the system from inside the cargo area versus manually switching a valve underneath the truck.
i plan to have the pump switches inside the cargo area with the water temp meter above it, installed on the little access panel on the left.
also installed the fresh water fill valve into the bumper. came out very clean!
HillbillyfromAL
Explorer
That looks like its going to be one nice setup. Also you only need vacuum rated (clear braided) hose drawing the water into the pump. I used the furl line for everything after that and it's been working great. Your setup is alot more involved than mine.