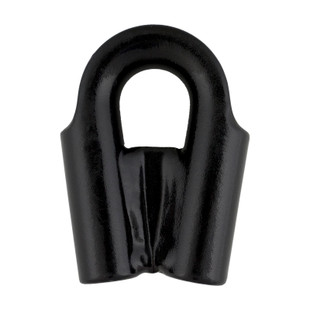
For something fun to do and have a piece of useable kit, I decided I would make my own winch extension with soft eyes.
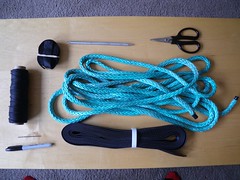
List of parts used:
• 7/16” Amsteel Blue
• 3/4” nylon tubular webbing
• 1” Bluewater Milspec Tubular webbing
• #15 Tarred whipping twine
• Splicing Fid
• Lockstitch Needle
• Marking Pen
• Tape
• Scissors
Step 1:
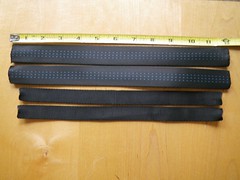
Cut the material needed for the softeyes. For extra protection I decided to double layer the eyes. Bluewater Milspec Climbing webbing was used for the outer layer. This was cut to 12” sections. The inner layer is comprised of standard ¾” nylon tubular webbing cut in 11” sections. The difference in lengths will allow the inner layer to stay nicely tucked under the outer layer making for a nicer appearance.

Step 2:
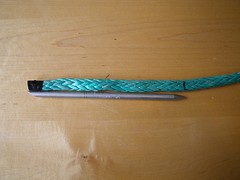
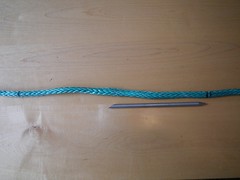
Mark your bury with a total of three Fid lengths. (Fid=21 X diameter of rope). First mark is one fid length from Bury end. I mark it with a single line. Next go two fid lengths from Mark One and make Mark Two.
Step 3:
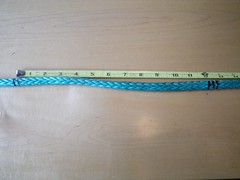
Create your eye length. I used a length of 12” for this. Start at Mark Two and measure out your eye and make Mark Three. Diameter: 12”/3.142 = 3.82”. I mark this as Mark Three.
Step 4:
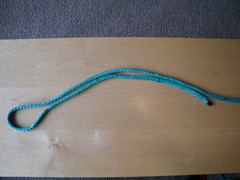
By putting Mark Two and Three together you will see the size of your eye and be able to properly note where Mark Four needs to be. Mark Four is where your Bury will exit for removal of the Fid and to a secondary taper of the rope. Make sure Mark Four is beyond the end of your bury. This can also be done by measuring out four fid lengths from Mark Three.
Step 5:
Creating the initial Taper. Start Mark One. Mark touching pairs of strands. Skip a pair. Mark a pair. Skip a pair. Mark a pair. When you have done this, pull out the marked strands. Cut them off. After that I make sure to actually retuck the cut ends so that the taper is nice and clean looking. This will allow the splice to move smoothly and prevents the cut ends from getting frayed out during the process.


Step 6:
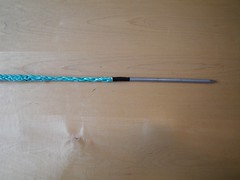
Attach the Fid.
Step 7:
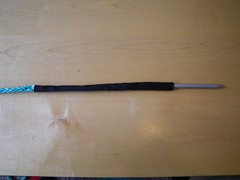
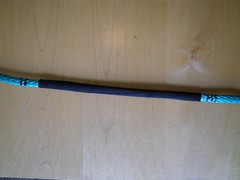
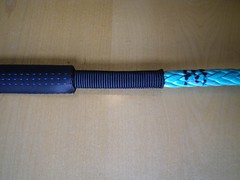
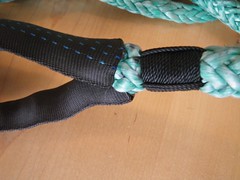
Run the webbing onto the rope. Start with the ¾” webbing. Pull it down the between Mark Two and Mark Three. Make sure the webbing is not twisted. As you can see it is twisted in the pictures. Just a simple twist and it will be nice and straight. Next repeat the process with the 1” webbing and side it over the 3”4” piece When done make sure the 1” webbing is overlapping the ¾” by ½” on both side and centered between Mark Two and Mark Three.
Step 8:
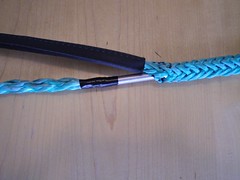
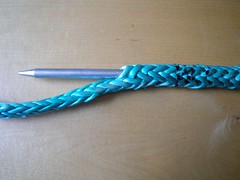
Now it is time to start the bury. Take your fid and insert it at Mark Three. Make sure you have not twisted the rope and your webbing on the eye will be nice and straight when the eye is pulled tight. Keep milking the fid down and exit at or beyond Mark Four.
Step 9:
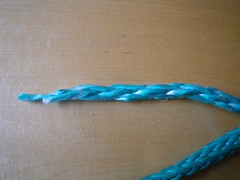
Secondary Taper. Take off the Fid that has just exited Mark Four. From the bury end cut three single strands in a row just a few inches from the end. This is very similar to the initial taper in Step 5, but don’t skip strands. This step can be left out but I like taking the extra step.
Step 10:
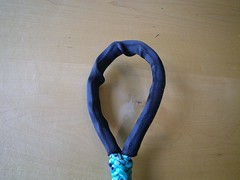
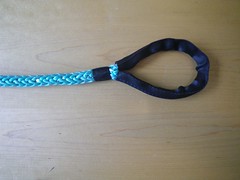
Pull the bury end through until the eye comes and round the ends of the webbing touch. This is basically making Mark Two and Mark Three lay on top of each other. From this point make sure to keep Mark Two and Mark Three lined up and start to milk the outer layer of rope down over the Bury. If your Mark Four was properly marked off the bury end will disappear inside the rope. IF not you will have to pull it out. Reattach the fid and bury it again only exiting further down. You will only make this mistake once.
Step 11:
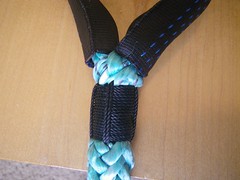
Now it is time for locking the splice. This could be done in many different ways. Standard lock stitch. Standard Whip Lock. However, I like the appearance and extra locking assurance of a Stitched Whip Lock. You will need approximately 72” of #15 Tarred Twine for this. Here is a link on how to tie this.
Step 12:
Now this step is a big one and extremely important. Go back to step one and do it again for the other end.
Step 13:
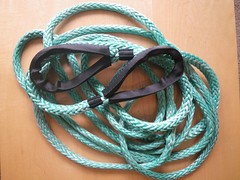
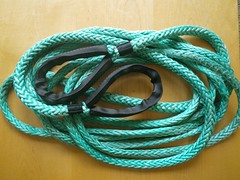
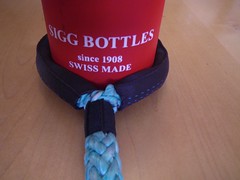
Enjoy your handy work. Show your kids. Impress your wife. Sadly, throw it in your recovery bag and never see it again until you need it.
Notes:
The 1” webbing came from REI
The ¾” webbing from http://www.strapworks.com
#15 Tarred Twine from Gourock. This is what comes in Viking’s kit.
http://gourock.com/mcart/index.cgi?ID=187191000&PID=IT970&code=13
NOTICE:
What ever length of extension you need, know you will need six feet more. 56’ of rope is needed to make a 50' extension with 3.82" eyes.
Extra resources:
Samson Rope Splicing Instructions:
http://www.samsonrope.com/splicing-instructions.cfm
Viking Splicing Kit:
http://www.vikingoffroad.com/produc...e-Splicing-Kit%2d-for-5{47}16"-&-3{47}8".html
List of parts used:
• 7/16” Amsteel Blue
• 3/4” nylon tubular webbing
• 1” Bluewater Milspec Tubular webbing
• #15 Tarred whipping twine
• Splicing Fid
• Lockstitch Needle
• Marking Pen
• Tape
• Scissors

Step 1:
Cut the material needed for the softeyes. For extra protection I decided to double layer the eyes. Bluewater Milspec Climbing webbing was used for the outer layer. This was cut to 12” sections. The inner layer is comprised of standard ¾” nylon tubular webbing cut in 11” sections. The difference in lengths will allow the inner layer to stay nicely tucked under the outer layer making for a nicer appearance.


Step 2:
Mark your bury with a total of three Fid lengths. (Fid=21 X diameter of rope). First mark is one fid length from Bury end. I mark it with a single line. Next go two fid lengths from Mark One and make Mark Two.


Step 3:
Create your eye length. I used a length of 12” for this. Start at Mark Two and measure out your eye and make Mark Three. Diameter: 12”/3.142 = 3.82”. I mark this as Mark Three.

Step 4:
By putting Mark Two and Three together you will see the size of your eye and be able to properly note where Mark Four needs to be. Mark Four is where your Bury will exit for removal of the Fid and to a secondary taper of the rope. Make sure Mark Four is beyond the end of your bury. This can also be done by measuring out four fid lengths from Mark Three.

Step 5:
Creating the initial Taper. Start Mark One. Mark touching pairs of strands. Skip a pair. Mark a pair. Skip a pair. Mark a pair. When you have done this, pull out the marked strands. Cut them off. After that I make sure to actually retuck the cut ends so that the taper is nice and clean looking. This will allow the splice to move smoothly and prevents the cut ends from getting frayed out during the process.


Step 6:
Attach the Fid.

Step 7:
Run the webbing onto the rope. Start with the ¾” webbing. Pull it down the between Mark Two and Mark Three. Make sure the webbing is not twisted. As you can see it is twisted in the pictures. Just a simple twist and it will be nice and straight. Next repeat the process with the 1” webbing and side it over the 3”4” piece When done make sure the 1” webbing is overlapping the ¾” by ½” on both side and centered between Mark Two and Mark Three.


Step 8:
Now it is time to start the bury. Take your fid and insert it at Mark Three. Make sure you have not twisted the rope and your webbing on the eye will be nice and straight when the eye is pulled tight. Keep milking the fid down and exit at or beyond Mark Four.


Step 9:
Secondary Taper. Take off the Fid that has just exited Mark Four. From the bury end cut three single strands in a row just a few inches from the end. This is very similar to the initial taper in Step 5, but don’t skip strands. This step can be left out but I like taking the extra step.

Step 10:
Pull the bury end through until the eye comes and round the ends of the webbing touch. This is basically making Mark Two and Mark Three lay on top of each other. From this point make sure to keep Mark Two and Mark Three lined up and start to milk the outer layer of rope down over the Bury. If your Mark Four was properly marked off the bury end will disappear inside the rope. IF not you will have to pull it out. Reattach the fid and bury it again only exiting further down. You will only make this mistake once.

Step 11:
Now it is time for locking the splice. This could be done in many different ways. Standard lock stitch. Standard Whip Lock. However, I like the appearance and extra locking assurance of a Stitched Whip Lock. You will need approximately 72” of #15 Tarred Twine for this. Here is a link on how to tie this.


Step 12:
Now this step is a big one and extremely important. Go back to step one and do it again for the other end.
Step 13:
Enjoy your handy work. Show your kids. Impress your wife. Sadly, throw it in your recovery bag and never see it again until you need it.


Notes:
The 1” webbing came from REI
The ¾” webbing from http://www.strapworks.com
#15 Tarred Twine from Gourock. This is what comes in Viking’s kit.
http://gourock.com/mcart/index.cgi?ID=187191000&PID=IT970&code=13
NOTICE:
What ever length of extension you need, know you will need six feet more. 56’ of rope is needed to make a 50' extension with 3.82" eyes.
Extra resources:
Samson Rope Splicing Instructions:
http://www.samsonrope.com/splicing-instructions.cfm
Viking Splicing Kit:
http://www.vikingoffroad.com/produc...e-Splicing-Kit%2d-for-5{47}16"-&-3{47}8".html
Last edited:

