G'day from Australia. Motoz MN GLX R: Evolution of a Warrior

motoz

Adventurer
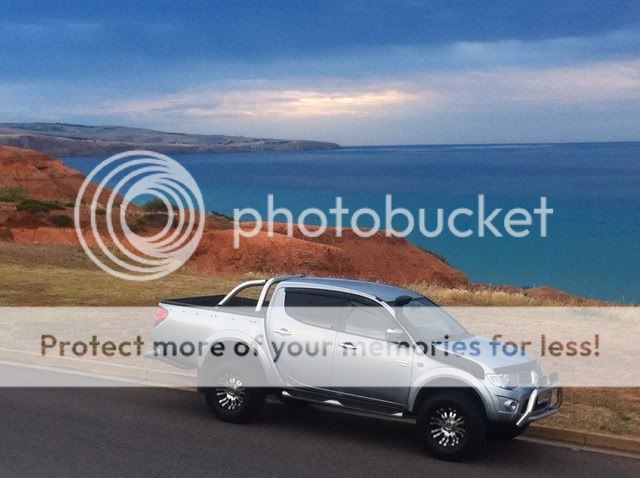
Hello all. Ive got a lot from your site so I thought I'd join and share the build of my Mitsubishi Triton (L200) with you good folk here. It all started about a year ago. There was something about the shape and style of the Triton that rang a cord with me. Then from doing a lot of reading on other models compaired to the Mitsi it was an easy decision.

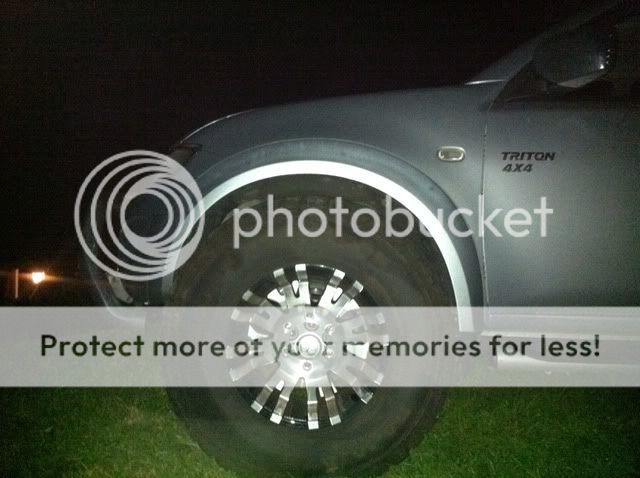
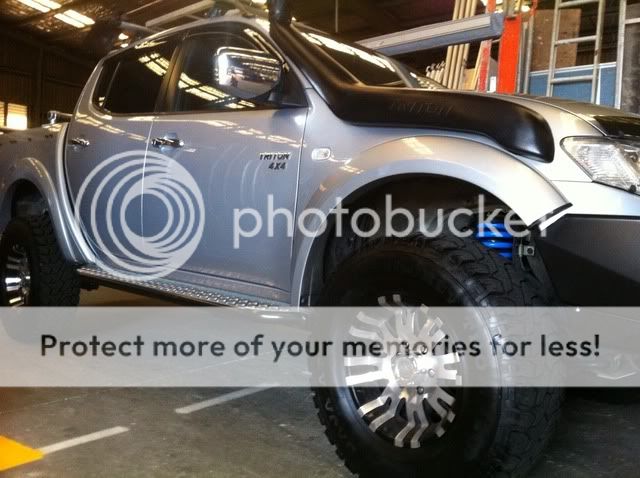
I first planned on getting an ML though after a few months of looking a Silver MN came up and after a bit of negotiation with the seller I grabbed a bargain.

8ac92c78.jpg


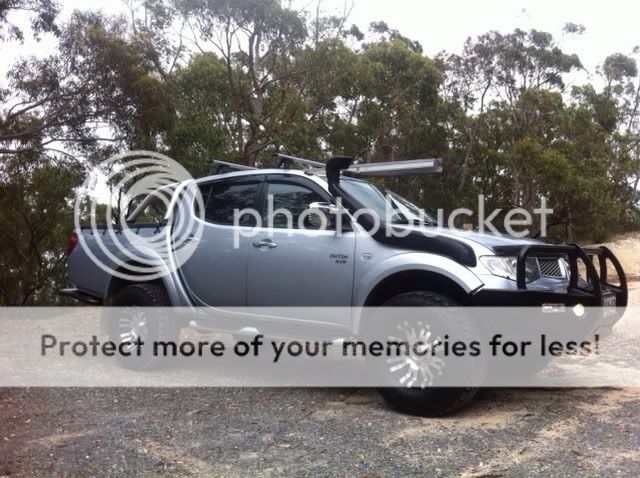
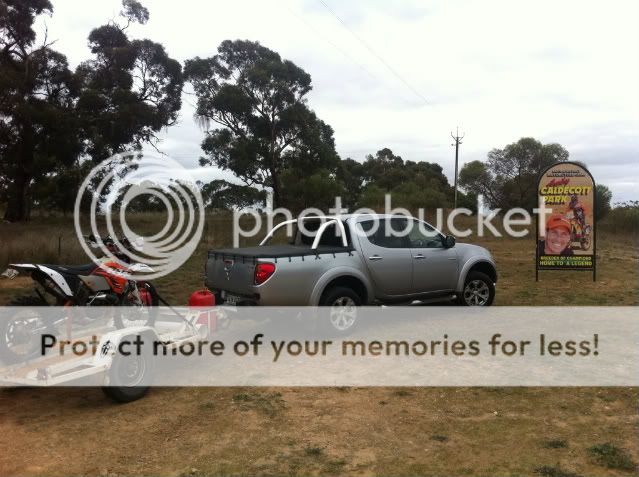
It was stock as a rock with the exception of a tub liner, soft cover and a Prodigy P2 brake controller. The previous owner had a smallish Jayco van so he had the e-brake fitted. I grabbed it after work on a Friday night went home and loaded the dirt scooter on the back for a weekend riding the Big Desert park. Nothing like getting straight into it !!!

8193310c.jpg


The car ran great though there were a few things that caught my attention.

LIKES:
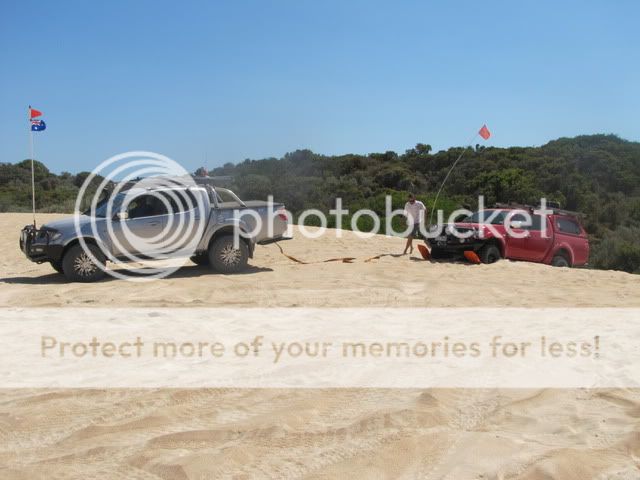
10.2l/100 loaded up towing the bikes for a weekend away riding.
AUX jack in the center console to connect the ipod
super smooth auto
Interior space
quiet on the road
power

DISLIKES:
The seats, no support
Hi Beams, my tourch is brighter
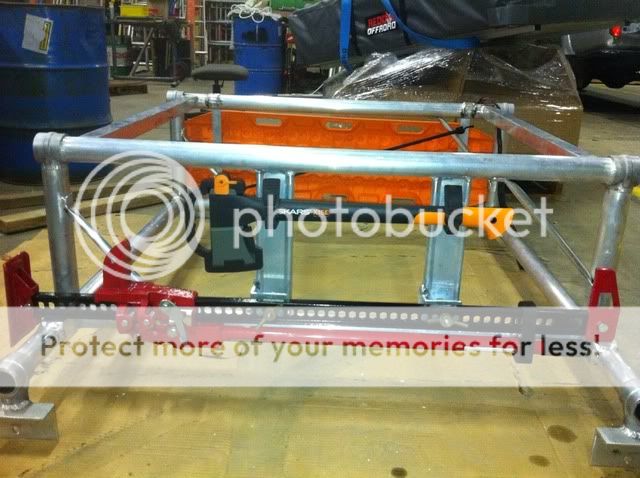
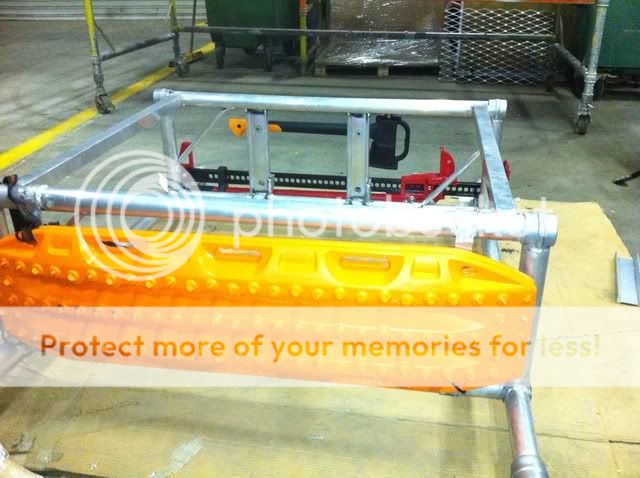
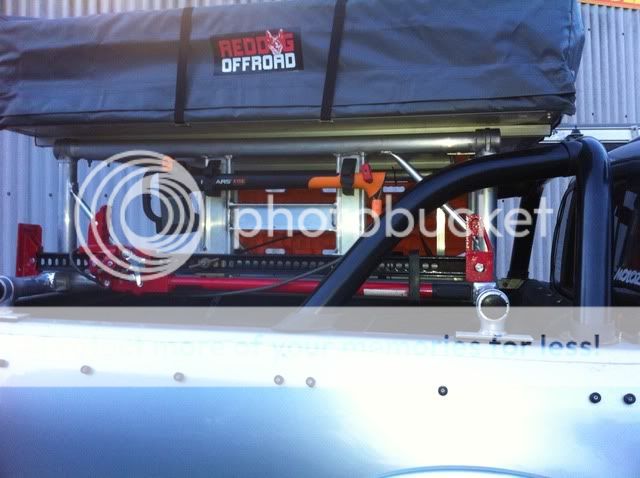
Rear overhang and the super low factory tow bar, ML tub anybody ???
Steering is quite heavy
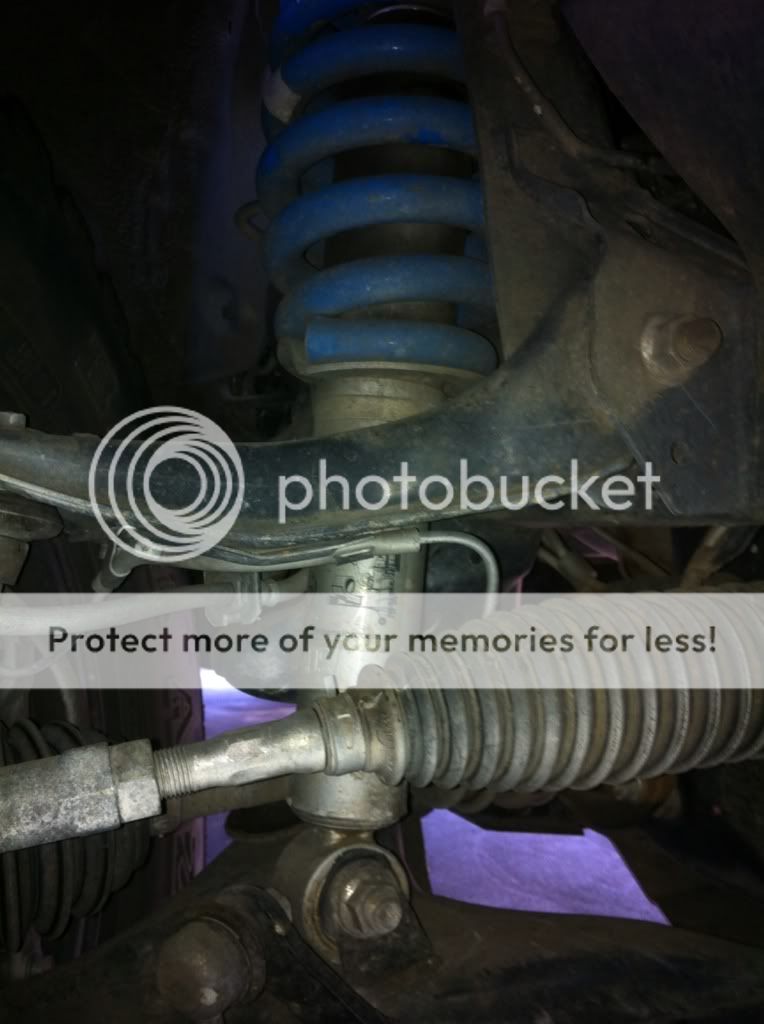
Suspension is a little suss, excess body roll

:D
 

off-roader

Expedition Leader
Very nice. It's really too bad we never got those in the States.

For the head lights is it because they are dirty/scratched up?
 

motoz

Adventurer
My other half was keen to get away for a holiday so not havin been up North for a bit the Flinders Ranges in South Australia was an easy choice. We went to Willow Springs and took the Tri along the Skytreck to see how it wheeled offroad.

A full trip report and pics can be found: http://www.newtriton.net/phpbb/viewtopic.php?f=26&t=8791&p=174014&hilit=+skytreck#p174014

The vehicle went great though I was itching to get some changes happening. First on the list was some underbody protection. Reeldreamer was starting to sell 3mm Stainless bash plates so I put a call out to the S.A members and we got ten sets sent over to my work. It was a great way to meet some local members.

Next on the list was some interior comfort. I got a set of deploy safe airbag compatiable sheep skin covers off ebay. 25mm with foam inserts. These helped a lot though the lack of support was giving me the ****s. Mattz put me on to the spacers from did3.2 so a PM was sent and within a week we were sorted...

P1010096.jpg
4d8c9642.jpg
043442f9.jpg


After the trip I was washing the car and noticed a lot of oil weeping from the TB and the outlet of the Turbo. On closer inspection it was dripping from the IC also...

:eek:

042835b0.jpg
e4e9638a.jpg


I decided to fit a Provent filter to the CCV system. Some say that the oil going through the system isn't such a bad thing and it keeps everything lubricated. I think they only plumb it that way because they have too. I cant see how oil mist going through the turbo mixing with any particles that may make it through the airfilter then turning to valve grinding paste can be a good thing...

194a9050.jpg


the filter arrived and at the same time I'd been in contact with Alex about one of his SS blanks. The Tri was running a little rough and had a surging issue. I took it to Mitsi and complained about the oil weeping, surging, increased fuel useage and lack of power. They booked it in and said that I had the 'older' style manifolds fitted and that they needed to be replaced with the new design... :roll:

They reflashed the ECU, replaced the manifolds and cleaned the TB all under warrenty. It was that night I fitted the Provent and blank. Straight in no holes drilled and 30k kms later never had a CEL or limp mode.

:D
 

motoz

Adventurer
Very nice. It's really too bad we never got those in the States.

For the head lights is it because they are dirty/scratched up?

Thanks mate. They really are a great Touring (expedition vehicle)

I formed my list of mods that I wanted to do and set my budget and created a timetable. I saved for the next couple of months, researched, changed direction a few times then set the wheels in motion.

The standard tyres were not the best, the suspension was like a boat in the ocean and the rear GLX R towbar had had me hooked up on more that one occasion. These three were on the top of my list to get sorted. I had a big ride to go on in the Victorian High Country so getting the suspension and tyres was first on my list.

I read all the reviews then decided to go with a full kit from Ultimate. I contacted Jack and told him what mods and barwork I was about to add and he made a package to suit. 50mm lift allround, though without the steel barwork fitted it was a little higher. I had the rolling stock left over from my last 4B. I chose the rim design a year before to suit the Triton I hadn't even bought yet... :lol:

the ol bus

45ea7eed.jpg


The tyres are MT ATZ 4 Rib on 16 x 8 Pro Comp Alloys with 0 offset. A trial fit on the Tri pre lift proved it wasn't going to happen without some upward elevation... :lol:

27c7b555.jpg


I still needed to perform a little inner guard massage to shoehorn the big boots in...

With the shiny blue springs in, the 33's under guard the the increased track of the 0 offset it was starting to have the stance I had in my minds eye...

P1010084.jpg


I also fitted a Mitsi bonnet protector and slimline window deflectors at the same time. The High Country ride went well till one night after a couple lemonades I got talked into going wheeling with a mate in his 6" twin locked 100 series. I got cross rutted and dropped the barge *** into the dirt leaving a golf ball size dent. A RB6 rear step bar from TJM replaced the standard Mitsi offering as soon as we got back. We joined the S.A crew for a weekend away to the Bridal track and an overnight camp just out of Melrose. It was a great trip with a great group of people.
 

motoz

Adventurer
Next on my mod list was to fit a UHF. I had the unit left over from the 4runner so put it to use. With no real space to fit it I just used Velcro and attached it to the LHS of the center console. Crude yet very effective. If I ever fit a double din GPS stereo I'll look to move it to the factory radio din spot.

60f562fa.jpg


As there was no front bar yet I ran the coax under the carpet and bought it up between the tub and the cab then mounted the whip on top of the rollbar. Ive since moved it to a bracket I made that attaches to the awning track.

With coms, suspension, wheels and tyres sorted I took a break and saved some more. A week later I was watching a snorkel for sale on ebay. I was at the time trying to source a Rallyart style one from Asia though that deal fell in a heap. The opening bid was $149 and with no bids and 30sec to go I entered $149 and won a snorkel.

The following Saturday armed with a drill, tape, Sikaflex and a 6 pack to ease the nerves I attacked the car and bolted on the purchase...

78b2c297.jpg
b5de88fa.jpg
c71baf0e.jpg


Although its a fairly easy job it still took me 5 hrs. Must have been the cans...

:lol:

A job came up at work in Kangaroo Island. It required a 4wd to access the location so with the only 4B in the fleet I accepted the task...

9792060e.jpg


The job took me a couple hours then I had a day and a half to explore the Island. I drove to all the major locations and took a few pose shots while there...

6fa8483a.jpg

267e129e.jpg

484c0f50.jpg


On returning from that 'work' trip I soon realized I needed some roof racks. I ended opting for the Rhino HD Aero bars with the track mounting system. I shopped high and low with $600 fitted being the best deal I could get. Steep yet acceptable. It was at the same time I got the front bar. The T13 Delux got the nod. I chose it due to the features and look as the curved lines really suit the front of the Triton.

1d30d620.jpg


I really like the shape and the fact that they have gutsy recovery points and recessed fog lights.

fb577beb.jpg


I got the shop to fit it as work was going gang busters at the time. Having since helped a bloke to fit his it was the best $180 ive ever spent ... :lol:

I grabbed an Awning off a mate to attach to the racks. With the Barwork and Awning fitted the touring guise was starting to take form...

5b4aa926.jpg


;)
 

motoz

Adventurer
The next big outing for the Tri was the Beachport to Robe weekend during the Australia Day Long Weekend. The only mods done in the leadup to this trip was the fitting of the shovel holder to the racks, the purchase of a set of Maxtrax on special at Supercheap for $230. I knocked up a quick Aluminium holder for the trax at work a few days before we went.

9237ab03.jpg
c094756b-e021-bc13.jpg
c094756b-e039-fa02.jpg
c094756b-e04f-c6ff.jpg


They got used several times during the trip, none by me I might add...

IMG_5343.jpg


IMG_5292.jpg


P1010264.jpg


During the trip the front end began to sag. It dropped about 30mm :eek: :shock: :oops:
you can notice from the trip pics that the Tri was sitting like a top fuel dragster rather than a touring rig. Over the rolling access tracks this 30mm drop was causing the 33's to get very friendly with the front guards, flares and inner arch covers. :(

A buzz to Ultimate, a big heap of photos and measurements later and a new pair of front springs were sent over. A huge thanks to Brendan for working through the issues with me and getting the stance back to normal. These guys have great after sales service and really stand by their products. ;)

d025a2dc.jpg
87223142.jpg


with the stance back to normal the next wave of mods was about to start. A set of Hazzard Engineering (WASP 4x4) sliders were added. Hugh makes a great product and they really are a solid bit of gear...

6fecf10b.jpg
11610c91.jpg


he did some mods to a mates rear ARB step bar that came up a treat also...

5ab6fa5f.jpg
e2abd04b.jpg


;)

It was another fantastic trip with great crew. I was super chuffed with how the Tri ran in the sand over the weekend. We didn't get stuck once and made it up everything we tried.
 

motoz

Adventurer
I promised myself that I had finished with all the bar work though post our last big trip up through the Flinders then over to the West Coast a custom steel tray may be on the cards... more about that to come.

So with the exterior ticking along well I turned my attention to the dark art of 12v DC electrics. :lol:

First up was a power source. I'm always on the hunt for a bargain and about six months ago came across a Powersonics 120ah deep cycle battery, Projecta 600w sine wave inverter, 120w fold out solar pannel and a LCD TV / DVD combo. The bloke selling it had split from his missus and was selling everything from the Caravan for cash before she got her hands on it :lol:

The stuff was only 6mths old and after a haggle I bought the lot for $550. With a few tips and ideas from NTN I decided to mount the battery on top of the RB6 rear bar. I went about making a rack and some roost protection...

e491ff26.jpg


the battery aint no light weight at almost 30kg's !!! I used some 8mm polly sheet and with a little heatgun and angle grinder work made a roost guard to protect it from stones off the rear tyres...

fcf1462f.jpg


I'll grab some pics of it mounted underneath and edit later. I mounted a CTEK D250s duel behind the rear seat, running 6 B&S (13mm2) cable from the front to the CTEK then the same from the AGM back.

e6c01c15.jpg


edeaaa58.jpg


I threw in a couple of extra 12v sockets in to run a little drinks fringe that we keep on the back seat.

After the Oz Day long weekend trip and the wind gusts we dealt with I decided that I had had enough of ground tents. I'd been keen on getting a RTT (roof top tent) for a while and spoke to Glen from 4WD Supplies about ordering one in.

With the tent arriving the next challenge was working out how to mount it to the vehicle. I don't have a canopy and am way too much of a tight *** to justify the $3k that ARB want for there offering. :eek:
I was cooking a pig, while having a beer and staring at the Tri and came up with a removable rack design to fit the RTT, Jack, Maxtrax etc. I wanted to keep it light weight, low mounting and have everything within easy reach.

86a6ed85.jpg


I also didn't want to lose any tub space so decided to have it sitting on top of the gunnels. After a bit of head scratching and a sketch or two I knocked up a basic frame...

5769b6a9.jpg


It worked pretty well. I used large turnbuckels to tie down to the factory tub points. I used the time to get the roll bar powder coated black to match the rest of the barwork...

856926ec.jpg
 

motoz

Adventurer
With the basic frame made next came the customization. It started off as just wanting to mount a Hi Lift and Maxtrax as per usual I got a little side tracked and ended up adding an Axe and Fire Extinguishers... :lol:

95cdda33.jpg
9180feb6.jpg


mounted on the tub with the RTT...

0f4e66dc.jpg


I fitted 5mm SS cable through the equipment and its all locked in place. You never know when someones need for your stuff is greater than yours. ;)

On our recent trip the frame worked a treat. We went through some quite damaged and corrigated roads while enroute to the Googs Track. The frame didn't move an inch and held up to all the wheeling. It fits the 60lt ARB fridge and Space Cases under and we can still use the soft cover on top.

7ae230ba.jpg


93a6403c.jpg


I've got a lot of ideas from members from this site. The rack design ended up being more about what I had at hand rather than going out and buying material to use. There's still room for improvements though. I think thats part of the issue though I'm always thinking of how to modify and streamline our setup so its ready to go.

Here's a few more shots from our last trip before I get back to the build thread.

c5237582-1.jpg
bfce1ef1.jpg
 
Last edited:

motoz

Adventurer
Let There Be Light !!!

while I was fitting the second battery I started to think about aux lighting. I found a seller on ebay and bought a 5m roll of LED strip lights. These come in two different sizes which refer to the LED diode size. Either 50 / 50 (5mm2) or 30 / 28. They come in a varierty of colors though for white either cool or warm white (blue'ish of yellow'ish)

led-strip-light-3528-ip20.jpg


I bought the 30/28 in cool white. This is more than enough light when cut in 1m lengths. It has a 3m adhesive backing so just cut, solder, peel and stick !!! I installed it on the bottom of the RTT to light up the tub and tailgate for cooking etc.

a5405f7c.jpg
f3425ce7.jpg
(sorry about the dodgy iphone pic)

While at the same store I a pkt of 8 x T10 lights. These have 5 x 50/50 white LED's. These have really solid contacts and I replaced the roof & map lights in the front as well as all the door lights. They throw out a great light with minimal draw.

5332c43f.jpg


I also got this cool wireless dimmer that I wired into the LED strip light I fitted to the top hoop of the RTT. It has a remote so you can not only turn it of and on while in bed but dim the lights right down to enhance the mood... :cool:

LED20Strip20Light20DImmer.jpg


All this came to a grand total of $16.95 with free freight !!!

With everything apart I fitted a gutsy LED worklight that I wired straight into the reverse circut. This thing throws out a serious amount of light and is great to light up the campsite.

After hearing that a mate had his RTT stolen of the top of his ML while it was parked out the front of his house I followed his lead and bought some lockable tie down straps.

44108e79-1.jpg
4-straps.gif


I got them from Roof Rack City. There a webbing strap with a lockable cam. They have a 2.5mm strip of braided SS wire rope down each side of the strap. There made by Kanulock and come in various lengths. The 4m straps sold as a pair will go around the RTT with about 30cm to spare.

bc12cc71.jpg


If they really want it you can't stop them though If you can make it bloody hard and less attractive you've had a win. Theives are lazy creatures otherwise they'd probably just get jobs :lol:

;)
 
Last edited:

motoz

Adventurer
I now have a man crush.

And reason #2,590,589,385,382 to move to Australia.

Beautiful build. I'll drink to that.

Errrr... thanks mate... I think...

No seriously though you could do a lot worse things in life than move to Australia. It really is an amazing place.

The vehicle started out as just a tow rig for my main passion being offroad bikes. Yet I seem to be having more fun these days getting out there with the missus and exploring in the 4B. I've always been into the customization thing I just cant seem to leave things standard for too long.

Here's a few pics of the dirt scooter if anyone is interested...

1476c084.jpg
e01be289.jpg
e17f1575.jpg
15b45499.jpg


yet I digress back to he build thread...
 

motoz

Adventurer
We were lucky enough to get given the old camper trailer recently from the farther in law. They've had it for the last 20yrs and its itching for a revamp and new lease of life. I've come up with a few ideas of how I can modify it to suit our needs. I'd like to use the RTT on top of a custom rack and storage tray.

It needs a bit of work though I think its a solid base to start with and gives us another option for extended trips away where you'd want to setup in one spot for a few days and explore. Here's a couple pics of how it is at the moment...

87f63be8.jpg
45f150c7.jpg
7b3f16c9.jpg
15c77723.jpg


The plan it to remove the current top and make a new one that includes a kitchen area on one side and storage on the other. To fit twin 60lt polly water tanks underneath, recovery hitch, awning and fridge box on the front. This is a similar design to the one I want to make;

pilbara-shadow.gif
It's going to be a long term project yet I'm sure I'll be quizzing the people in here to make this build happen.

:)
 

motoz

Adventurer
the love afair with the strip lights continues...

There has been a few times while out when I could have used some decent lighting while tooling under the bonnet. Sometimes the head torch just doesn't cut it and the fluro work light is a PITA to get in the right position. I was toying with the idea of adding some of the LED striplight I had left over so here's the install.

I cut just under a metre of light and soldered the cable onto the end. I ran the 3mm twin core sheathed cable under the bonnet lining and bought it out near the feed lines for the windscreen washer jets...

94439ccb.jpg
7c1bca6a.jpg


I then ran the wires along the inside of the LHF guard and cliped them into the washer feed line stays...

3a82103e.jpg


From there I fitted the pin switch to the radiator support pannel. There is already two holes in this so it made the install pain free. The negative wire is connected to the base of the switch. Once again I soldered and placed heat shrink over the connection...

08071fdb.jpg


The positve side was run back to the battery via a 2amp fuse. I then went about securing all the wires and fitting the strip light. It stick's along the bottom edge of the bonnet right where the second support brace turns up at 45 deg to meet the bonnet skin...

5fd6166c.jpg
de7cc311.jpg


I had to wait till dark to see if I'd stuck it on the right angle. It came up a treat and throws out a serious amount of light into the engine bay...

1a538006.jpg

185771ff.jpg


This should make it a lot easier next time were away and I need to do some tooling.

I also got around to mounting the dimmer box for the RTT lights. This is a great bit of kit, the keyring remote stays clipped in the tent and with push button on / off as well as a dimmer is $7 well spent.

1791b0d0.jpg
20bb6c52.jpg
2cee4ffa.jpg


I still want to add a run of light inside the track of the awning as well as a couple other little projects.

to be continued...
 

Forum statistics

Threads
185,897
Messages
2,879,321
Members
225,497
Latest member
WonaWarrior

Members online

Top