ColoDisco
Explorer
Soooo.. I had a chance to try out my solar setup in moab for a week of boondocking. Here goes. I have the following setup in my 1987 starcraft astrolite.
I will have a price breakdown at the bottom of the post.
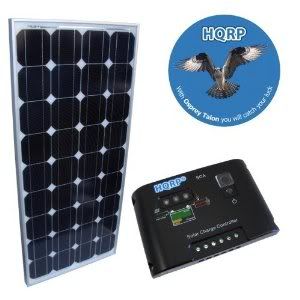
[ame="http://www.amazon.com/gp/product/B002OSAB2I"]Amazon.com: HQRP KIT (85W Monocrystalline Solar Panel 85 Watt Power 12V DC, Solar 10A Charge Power Controller / Regulator 12V / 24V 10 Amp) + HQRP Coaster: Patio, Lawn & Garden[/ame]
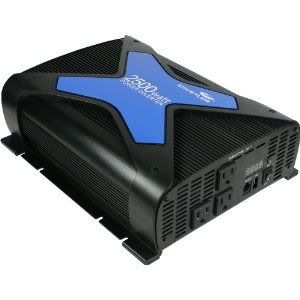
[ame="http://www.amazon.com/gp/product/B003R7LQDI"]Amazon.com: Whistler Pro-2500W 2,500 Watt Power Inverter: Patio, Lawn & Garden[/ame]
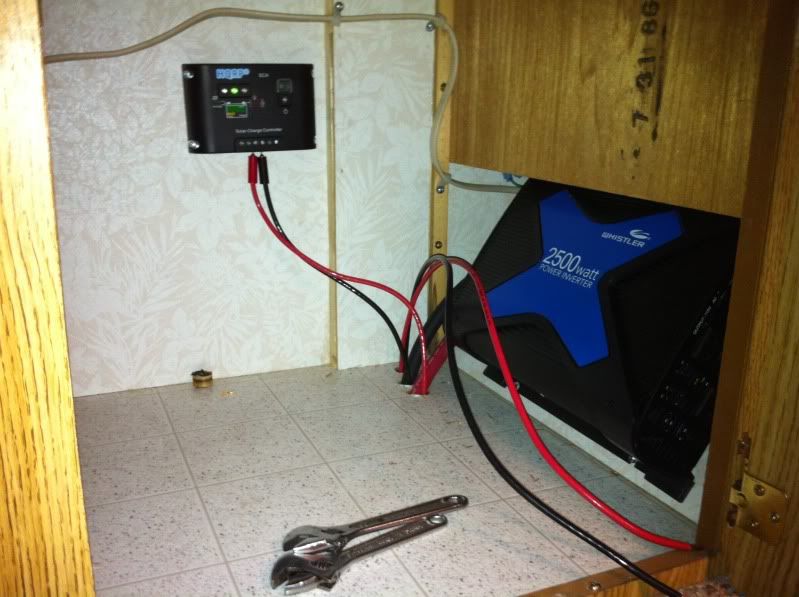
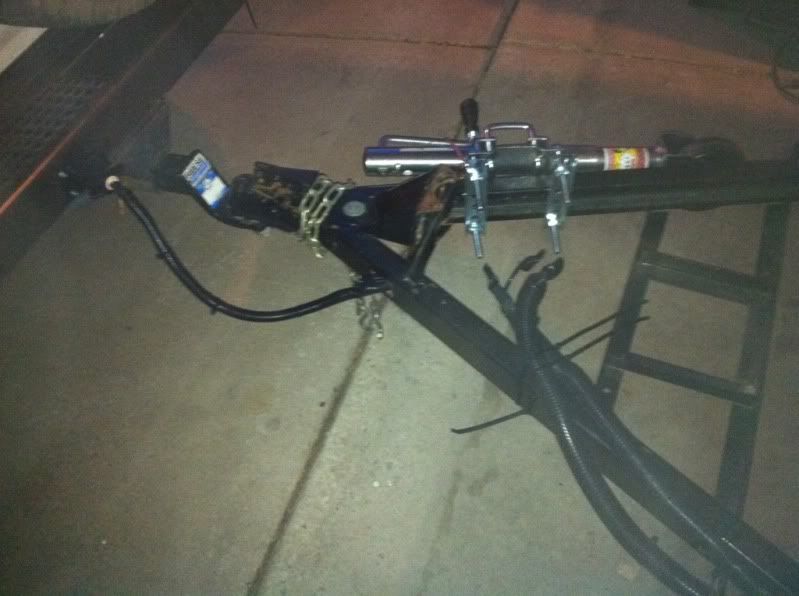
I have a bit of a elaborate connection through my Popup. I will start with the power from the Discovery. I have power and ground going from the Disco to the Popup through a 7 pin connector. It runs through the charge controller to the battery through 8 gauge red and black wire bought at Lowe's. I used screw in stereo gold plugs to connect the 8 gauge to the controller. Seen here:
I installed a battery and battery box purchased through walmart. Group 27 deep cycle/marine 120ah maxx battery.

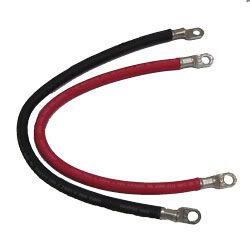
With sound advice from a solar guru I know at work I ran a 5 foot run of 2/0 cable from the inverter to the battery from Storm Copper. I covered all wires with corrugated wire sheathing bought at Lowe's for external protection. I used only insulated clamps with self tapping stainless screws to attach the cables to the frame. I used a small run of 8 guage negative cable to ground the inverter to the chassis. I also filled all the drilled holes with clear 2x flexible silicone sealant to keep weather and bugs out. Cheapest best cable you will find with free shipping.
http://store.electrical-insulators-and-copper-ground-bars.com/
As seen here:
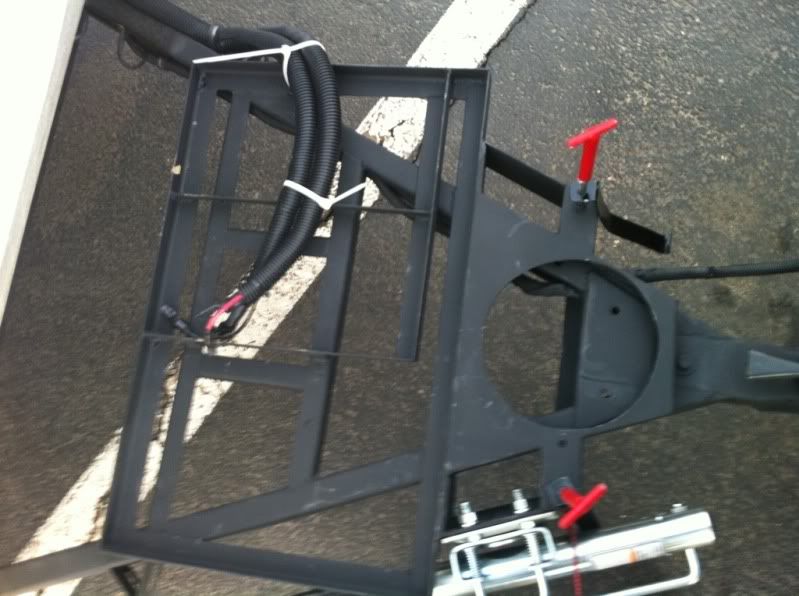
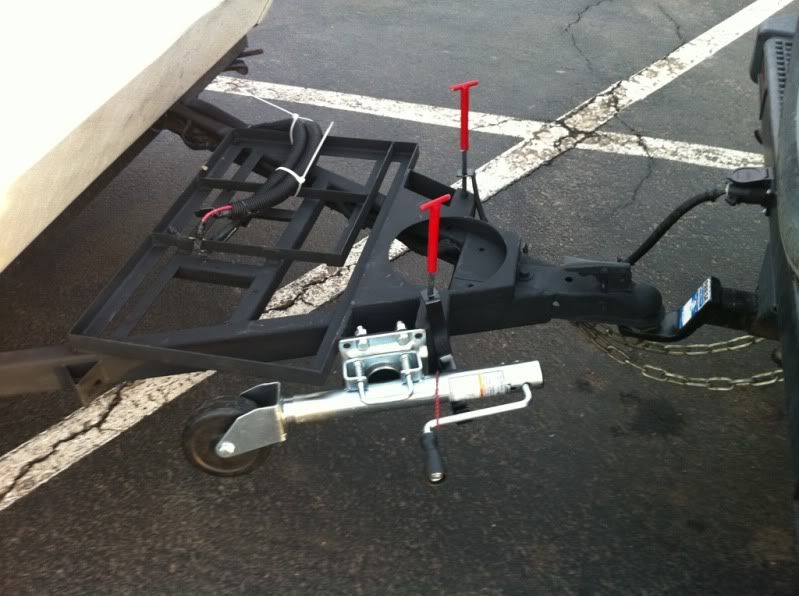
As you can see I have room for 2 batteries. I plan on turning it into a 24v setup down the road. I had some custom fab work done to accommodate 2 batteries, storage bin for jacks etc and a full size propane tank. I thought I had a picture of this up close in action but I do not. I will have to take one. Here is the before and after the fab work:
Before:
After:
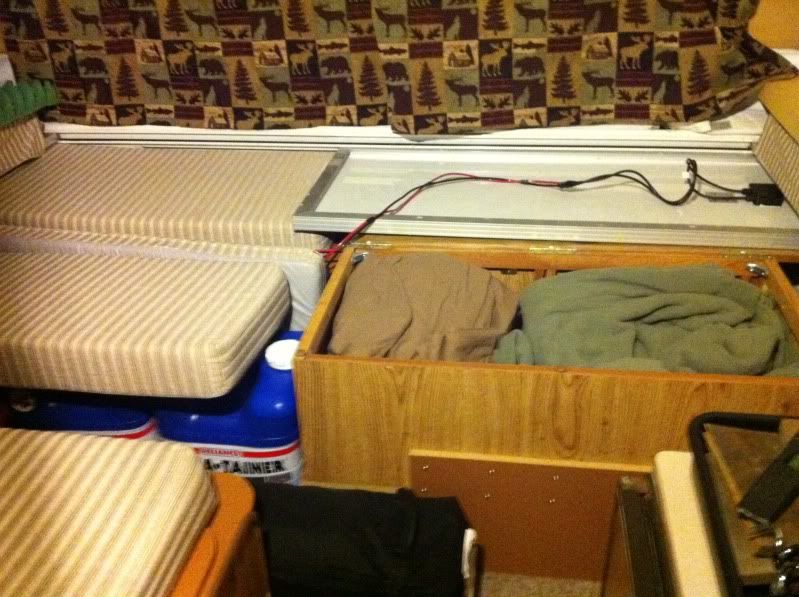
I did a direct connect with the same 8 gauge wire to the panel connecting it with a female 7 pin trailer socket on a 10 foot run of wire. What this allowed me was the option to just plug the Disco into the Popup and charge the battery while driving, then simply unplug the truck when setting up and plugging in the panel directly to the solar charge controller giving me easy plug and play operation. The 10 foot run of cable gives me flexibility to park the Popup under a tree in any direction and just setting my panel where I want it. Pic of that later. As for panel storage during travel I found a sweet spot below the queen bed and on top of the collapsed kitchen counter seen here:
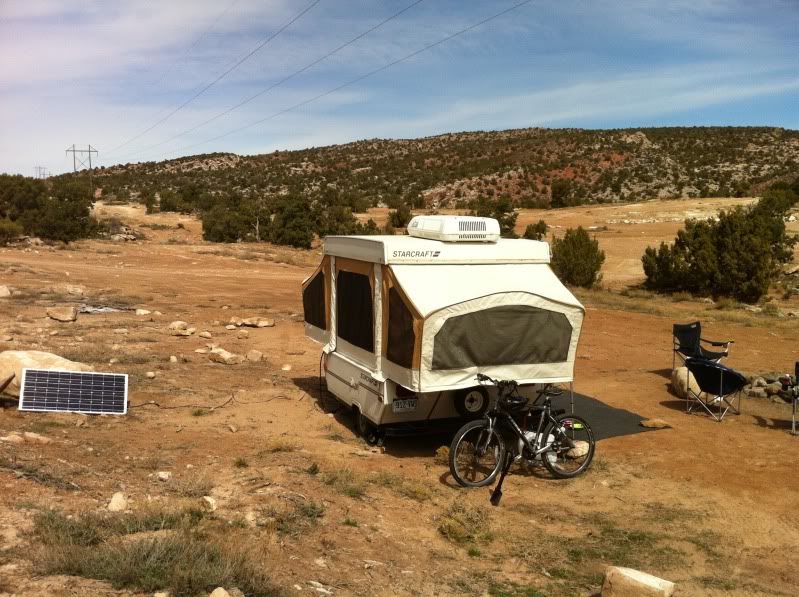
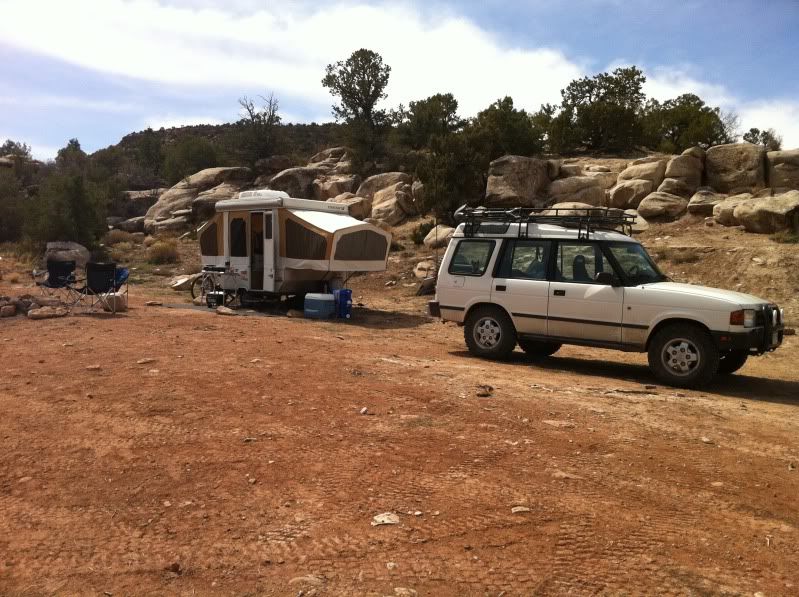
And some campsite pics:
Final cost breakdown for my solar setup keep in mind I have prime membership at amazon so I did not pay shipping on everything:
Panel with charge controller w/shipping: $321.86
Inverter: $179.99
2/0 cables from Storm Copper: $60.00
Battery and Batt box from walmart: $85.00
60' of 8 gauge cable from Lowe's: $30.00
7 wire tow connections from Home Depot: $60.00
Misc hardware from Lowe's: $50.00
Total cost for my solar set up as it stands: $786.85
Future expense to add another battery and box with tie in cables from Storm copper: $105
I was asked by a good friend with a PU if this was cost efficient. Of course it is as it is renewable energy.
As for the performance. I do not have any onboard lighting so did not have alot of nights of draining. I also do not have a furnace onboard. We used a mr. buddy heater connected to the big propane tank and this worked perfectly.
We did use a Dolce Gusto coffee maker every day but it did not work everyday. Not because of power but because we were new to the machine and did not understand how to use it. 1 night we charged a laptop, camera battery and ran the coffee maker in the morning and it only went down to 11.1v and recharged by 10am completely. Really impressed with the setup I already have and intend to use some more power hungry items like a real refrigerator in place of the icebox which did not work very well. Kept food at 50 degrees with a iceblock or 40 degrees with just a bag of ice on the shelf. Neither temperature made me feel good about eating the food.
We do not intend to get a generator yet but still have all the shore power plug in with the converter installed in case we want to plug in. I keep her plugged in while at home anyway.
I also intend to add a lift with sliders to the underside giving me way more flexibility for offroad trails. I picked the bottom of the line camper to keep weight down but see that a onboard fresh and grey water tank will be in order down the line including a sink. Aquatainers are convenient except they are not stable enough when offroading.
I will have a price breakdown at the bottom of the post.
[ame="http://www.amazon.com/gp/product/B002OSAB2I"]Amazon.com: HQRP KIT (85W Monocrystalline Solar Panel 85 Watt Power 12V DC, Solar 10A Charge Power Controller / Regulator 12V / 24V 10 Amp) + HQRP Coaster: Patio, Lawn & Garden[/ame]
[ame="http://www.amazon.com/gp/product/B003R7LQDI"]Amazon.com: Whistler Pro-2500W 2,500 Watt Power Inverter: Patio, Lawn & Garden[/ame]
I have a bit of a elaborate connection through my Popup. I will start with the power from the Discovery. I have power and ground going from the Disco to the Popup through a 7 pin connector. It runs through the charge controller to the battery through 8 gauge red and black wire bought at Lowe's. I used screw in stereo gold plugs to connect the 8 gauge to the controller. Seen here:
I installed a battery and battery box purchased through walmart. Group 27 deep cycle/marine 120ah maxx battery.
With sound advice from a solar guru I know at work I ran a 5 foot run of 2/0 cable from the inverter to the battery from Storm Copper. I covered all wires with corrugated wire sheathing bought at Lowe's for external protection. I used only insulated clamps with self tapping stainless screws to attach the cables to the frame. I used a small run of 8 guage negative cable to ground the inverter to the chassis. I also filled all the drilled holes with clear 2x flexible silicone sealant to keep weather and bugs out. Cheapest best cable you will find with free shipping.
http://store.electrical-insulators-and-copper-ground-bars.com/
As seen here:
As you can see I have room for 2 batteries. I plan on turning it into a 24v setup down the road. I had some custom fab work done to accommodate 2 batteries, storage bin for jacks etc and a full size propane tank. I thought I had a picture of this up close in action but I do not. I will have to take one. Here is the before and after the fab work:
Before:
After:
I did a direct connect with the same 8 gauge wire to the panel connecting it with a female 7 pin trailer socket on a 10 foot run of wire. What this allowed me was the option to just plug the Disco into the Popup and charge the battery while driving, then simply unplug the truck when setting up and plugging in the panel directly to the solar charge controller giving me easy plug and play operation. The 10 foot run of cable gives me flexibility to park the Popup under a tree in any direction and just setting my panel where I want it. Pic of that later. As for panel storage during travel I found a sweet spot below the queen bed and on top of the collapsed kitchen counter seen here:
And some campsite pics:
Final cost breakdown for my solar setup keep in mind I have prime membership at amazon so I did not pay shipping on everything:
Panel with charge controller w/shipping: $321.86
Inverter: $179.99
2/0 cables from Storm Copper: $60.00
Battery and Batt box from walmart: $85.00
60' of 8 gauge cable from Lowe's: $30.00
7 wire tow connections from Home Depot: $60.00
Misc hardware from Lowe's: $50.00
Total cost for my solar set up as it stands: $786.85
Future expense to add another battery and box with tie in cables from Storm copper: $105
I was asked by a good friend with a PU if this was cost efficient. Of course it is as it is renewable energy.
As for the performance. I do not have any onboard lighting so did not have alot of nights of draining. I also do not have a furnace onboard. We used a mr. buddy heater connected to the big propane tank and this worked perfectly.
We did use a Dolce Gusto coffee maker every day but it did not work everyday. Not because of power but because we were new to the machine and did not understand how to use it. 1 night we charged a laptop, camera battery and ran the coffee maker in the morning and it only went down to 11.1v and recharged by 10am completely. Really impressed with the setup I already have and intend to use some more power hungry items like a real refrigerator in place of the icebox which did not work very well. Kept food at 50 degrees with a iceblock or 40 degrees with just a bag of ice on the shelf. Neither temperature made me feel good about eating the food.
We do not intend to get a generator yet but still have all the shore power plug in with the converter installed in case we want to plug in. I keep her plugged in while at home anyway.
I also intend to add a lift with sliders to the underside giving me way more flexibility for offroad trails. I picked the bottom of the line camper to keep weight down but see that a onboard fresh and grey water tank will be in order down the line including a sink. Aquatainers are convenient except they are not stable enough when offroading.