Boomer the Quadravan 4x4 Camper

spencyg

This Space For Rent
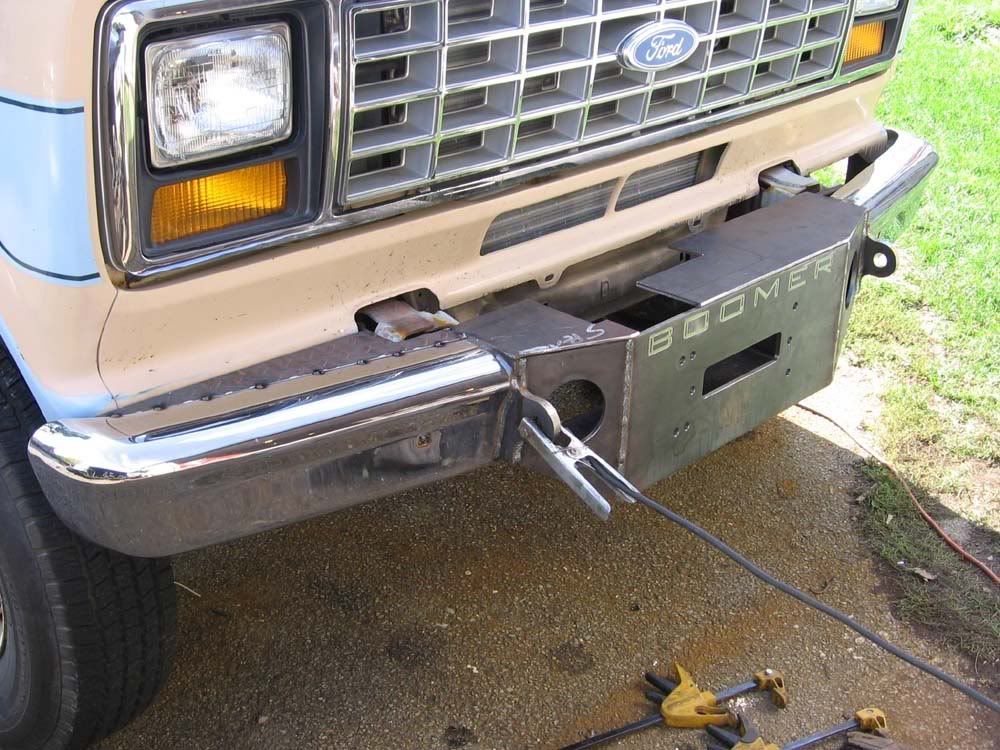
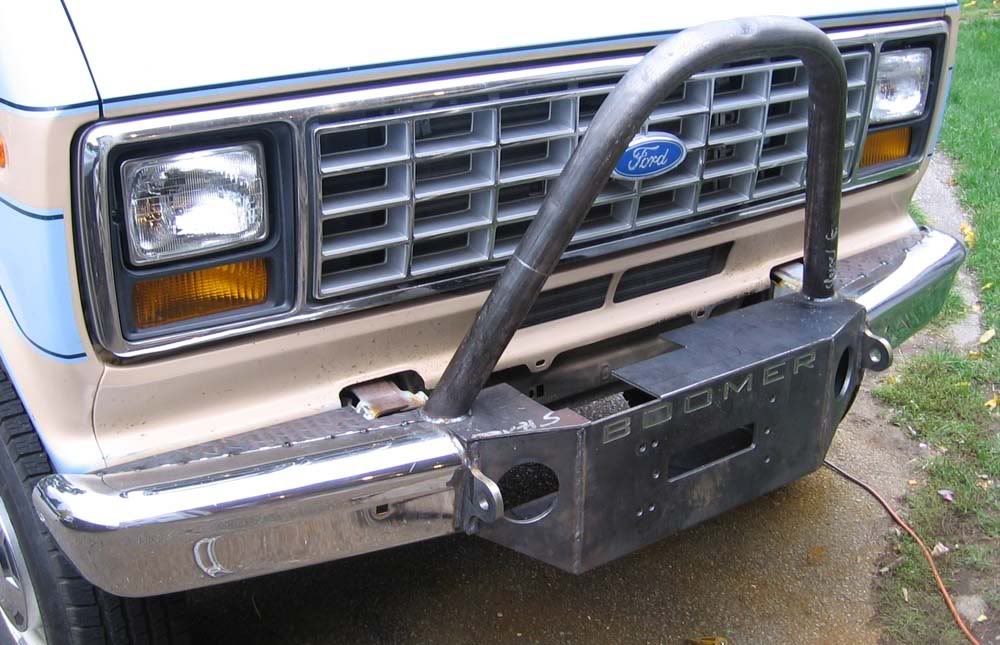
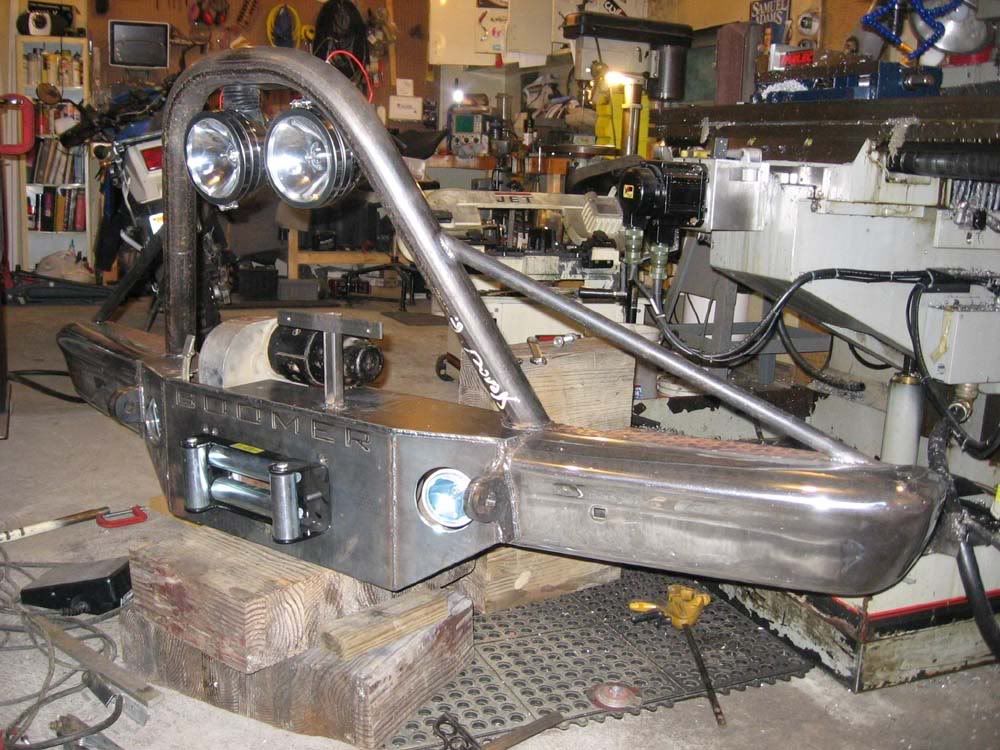
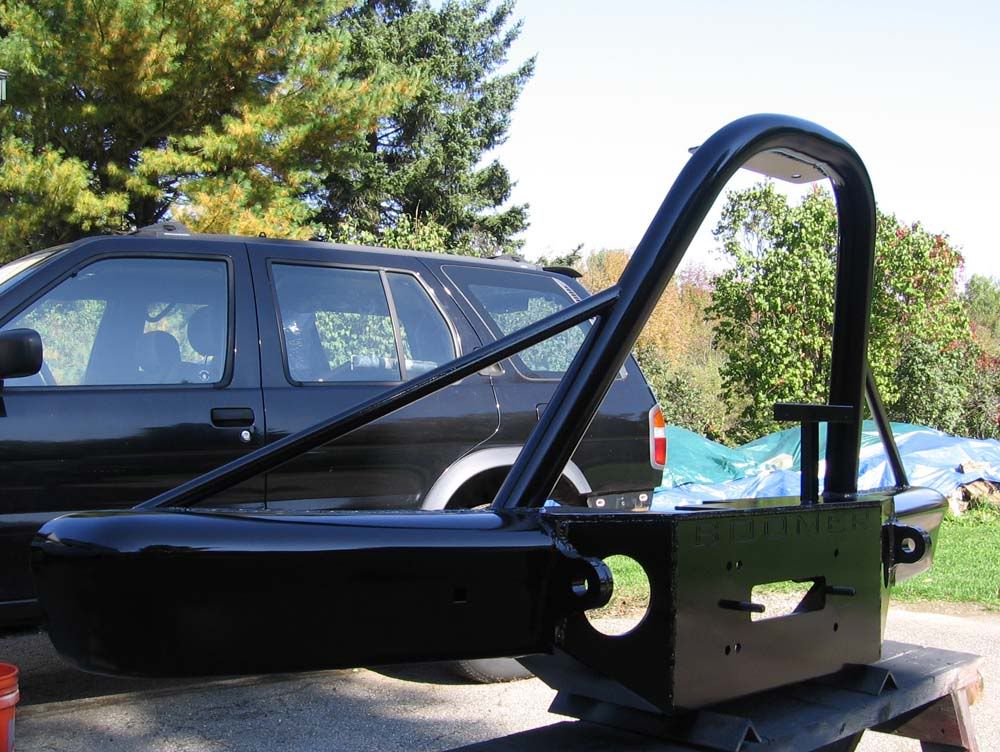
Boomer the Quadravan 4x4 Camper - Full Build Thread

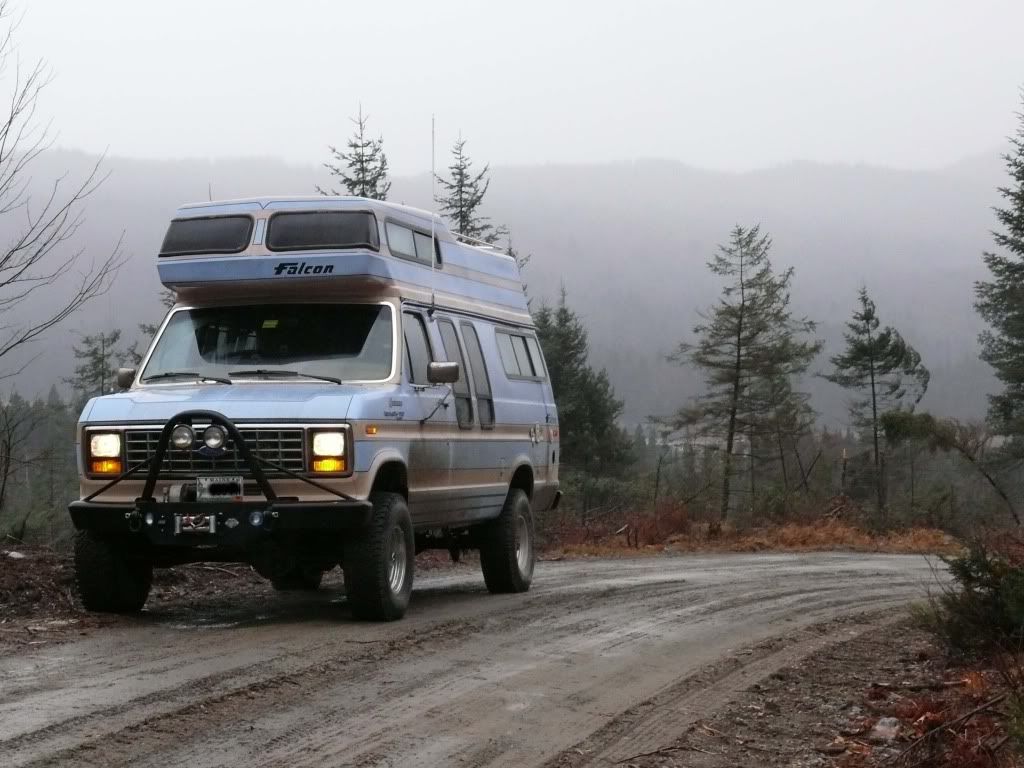
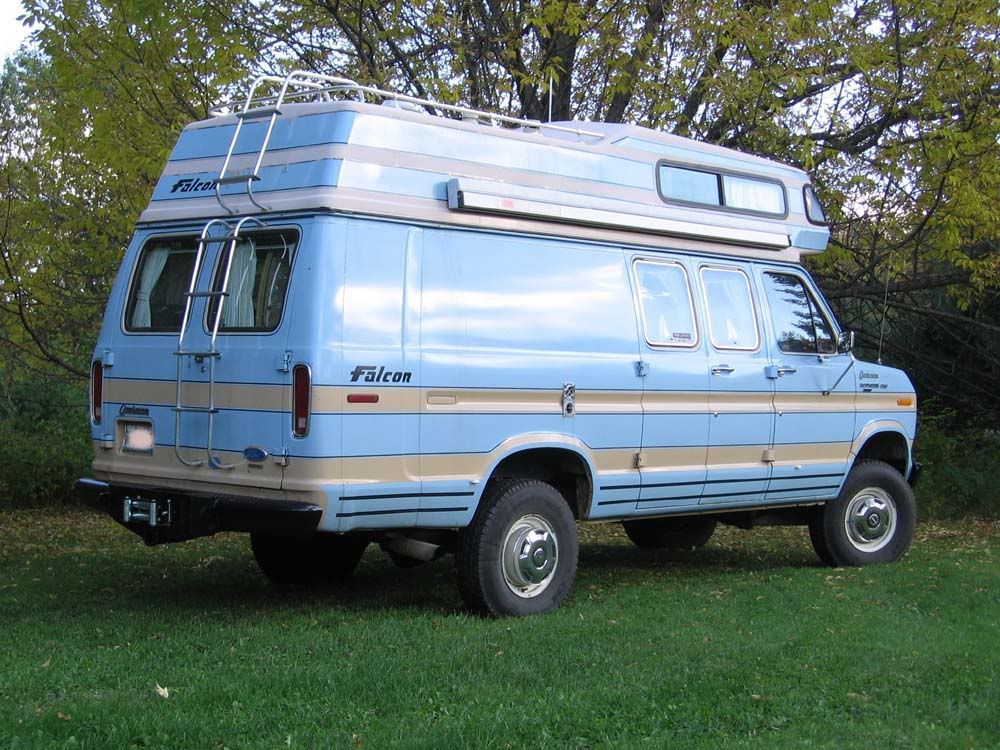
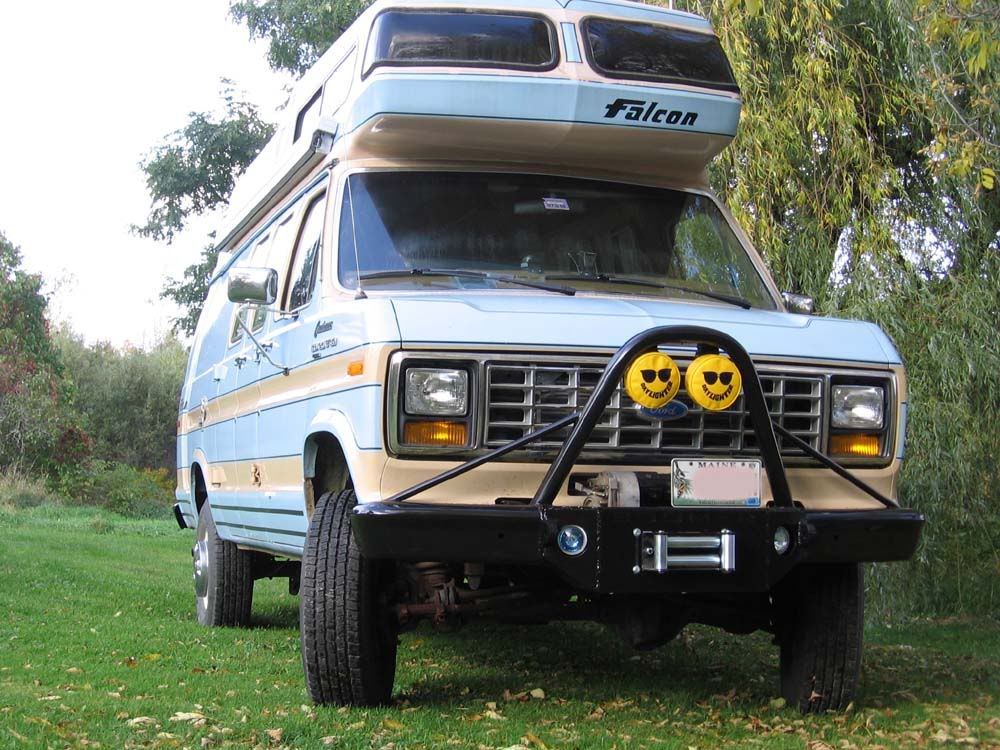
For those of you who have been here awhile you'll recognize Boomer. For those who don't, this is it...

P1040940.jpg


Boomer, The Beginning. Chapter 1

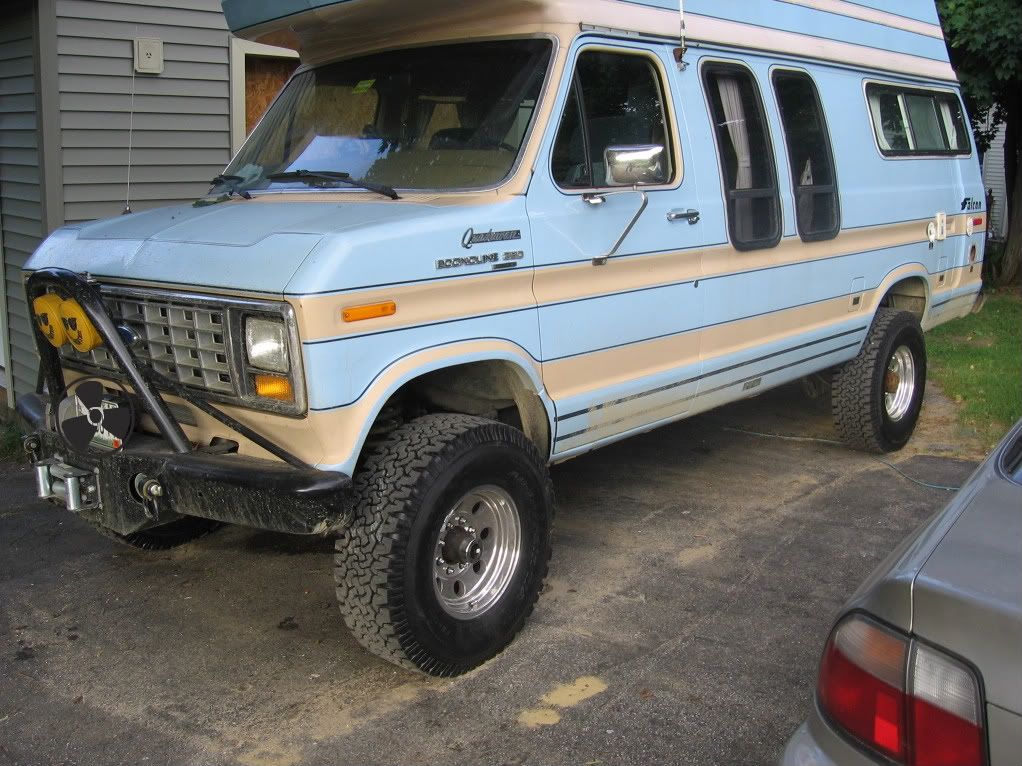
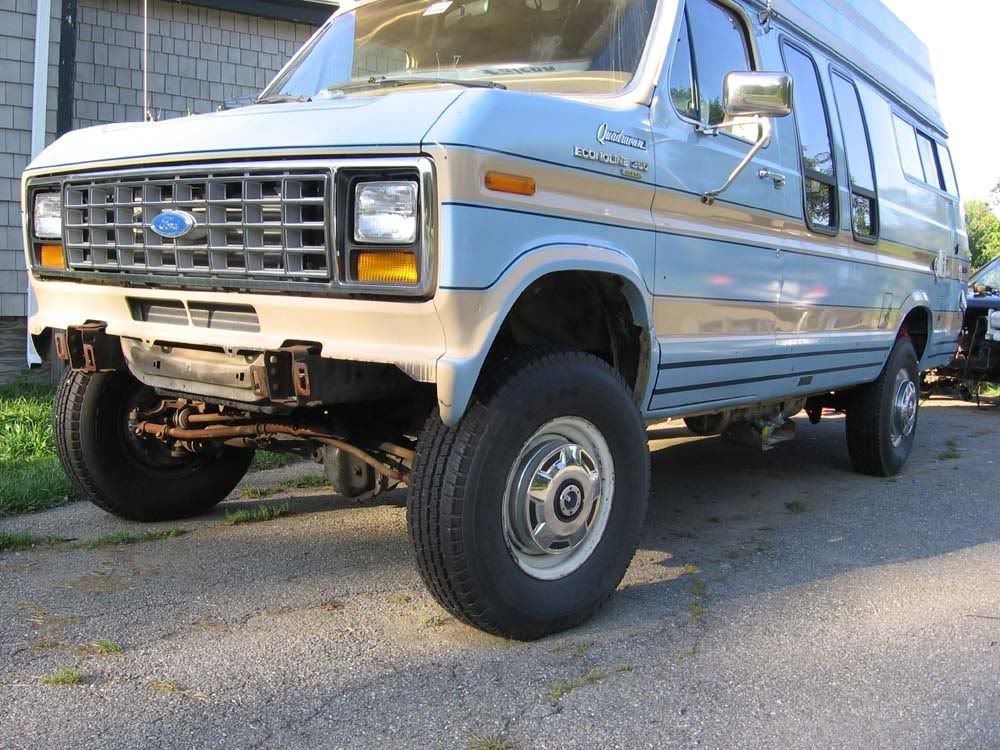
So I was driving down a road up north where we used to live and there was this van for sale. It looked a little taller than what you'd expect so I stopped to take a look. Low and behold it was a 1986 Ford Extended Econoline E350 with a 6.9L International Diesel and a factory 4WD conversion. The sellers were the original owners in their 80's. The van was rust free and had 60,000 miles on the odometer.

Sold.

Now, what you must understand is that I already had an Extended Econoline E350 with a Diesel. This van also had a name and its name was "The White Whale". I also had a transfer case and a 4WD front axle which were intended to be installed in the van. The big point here being the transfer case and axle WEREN'T installed in the van and Boomer was ready to go, so of course this was the smartest thing I have ever done.

My wife was not convinced.

Whatever. It was awesome.

So eventually I sold the "White Whale" and associated future running gear so as to better focus on the important things.
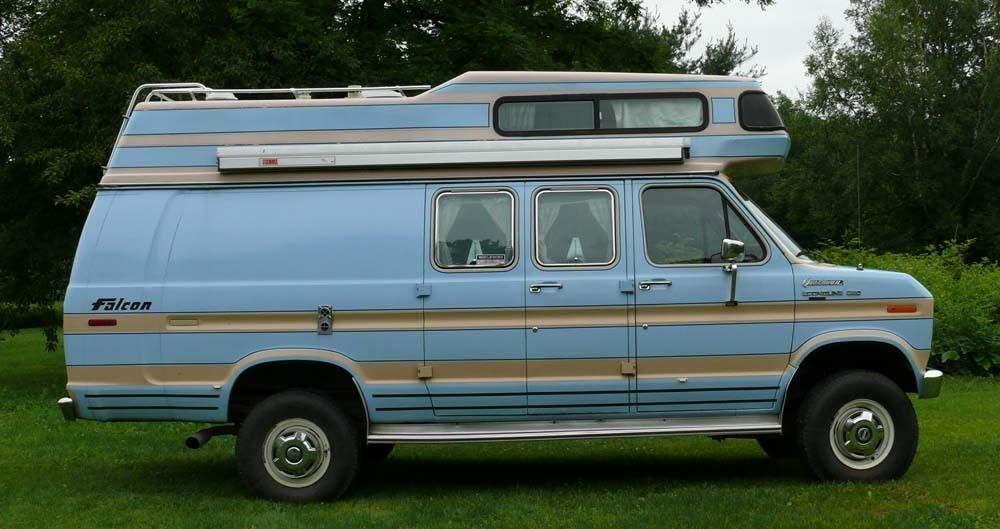

BoomerSide.jpg


LTX2.jpg


Boomer1.jpg


Shag Carpet: Check

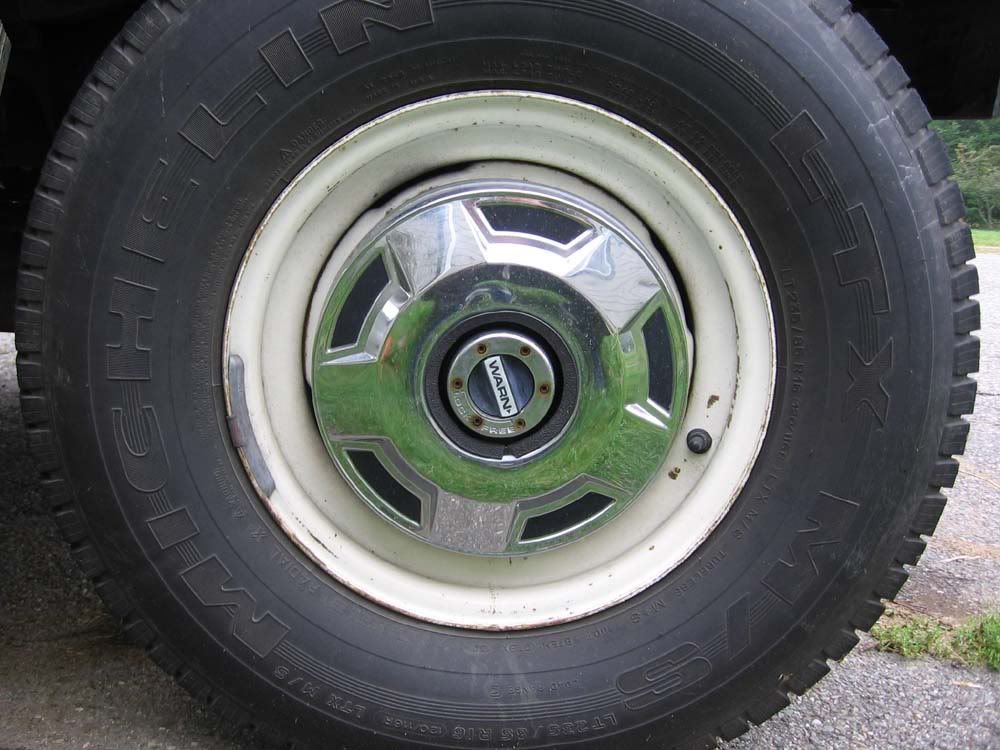
Dogdish Wheels: Check

Running Boards: Check

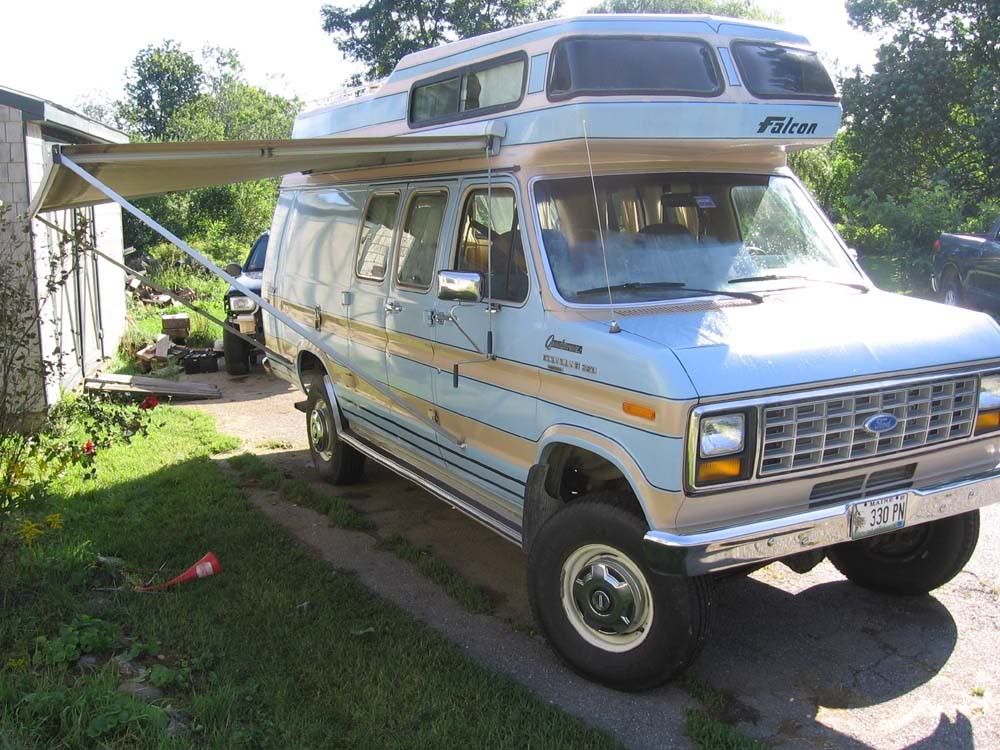
Circus Stripe Awning: Check

After digging into my new acquisition the following list of basic specifications were generated

1986 Ford E350
4WD conversion by Quadravan
Camper Conversion by Falcon, Elkhart IN
International 6.9L IDI N/A Diesel
C6 3 speed Auto transmission
NP205 Transfer Case
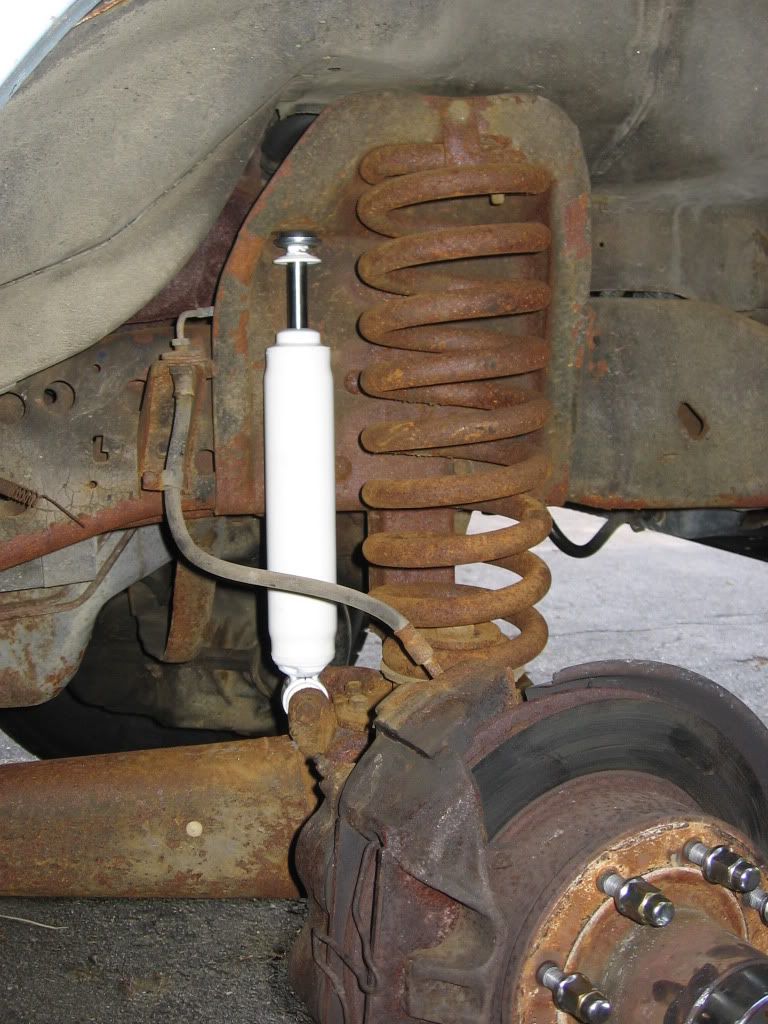
Dana 60 Rear Axle, 3,55 gears
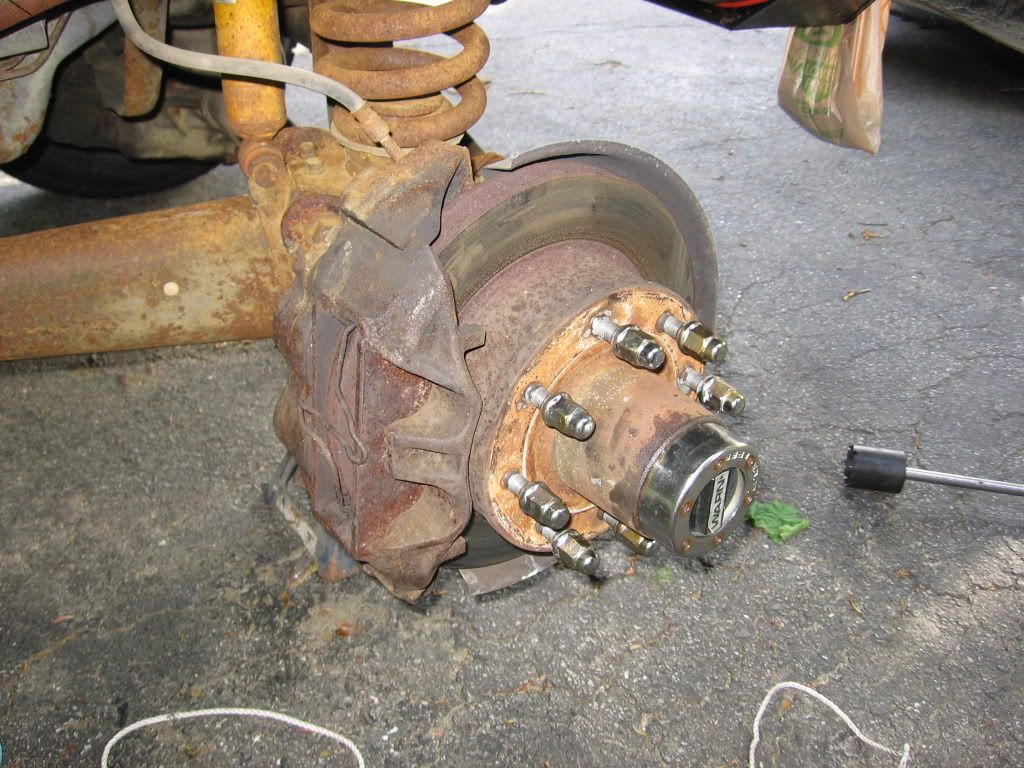
Dana44HD Front Axle, 3.55 gears
Warn Manual Lockout Hubs
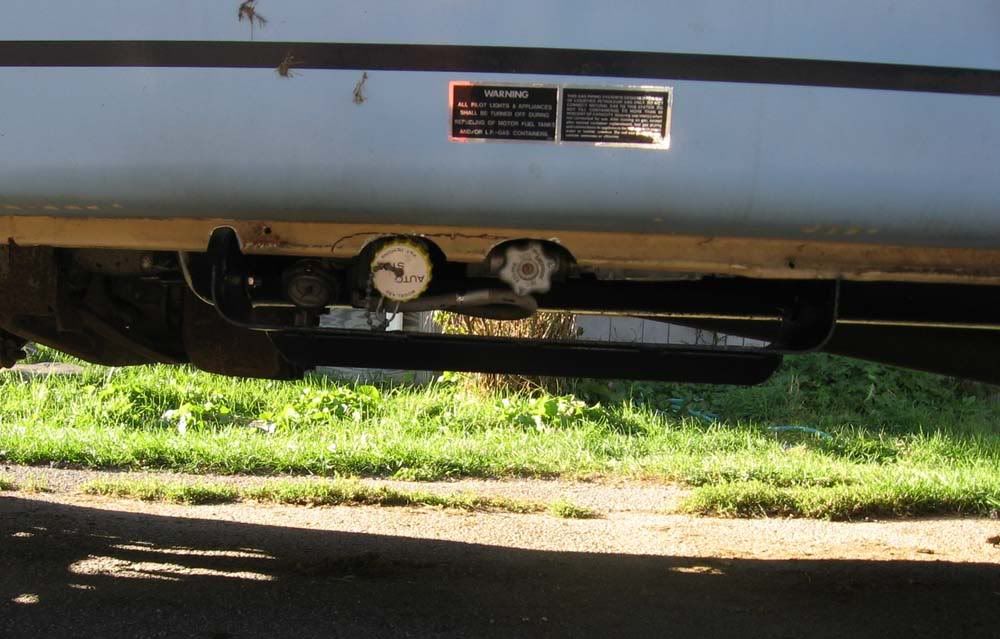
40 gals onboard diesel in 2 tanks
20 gals onboard water in 1 tank
20 gals onboard blackwater in 1 tank
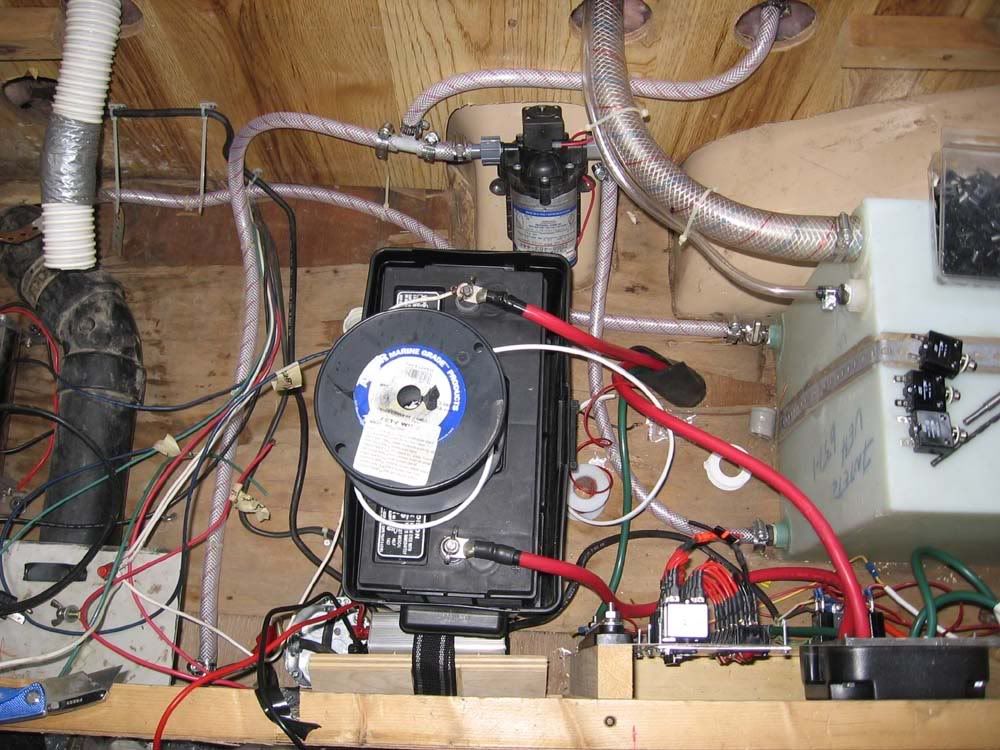
2 starting batteries
2 dead house batteries
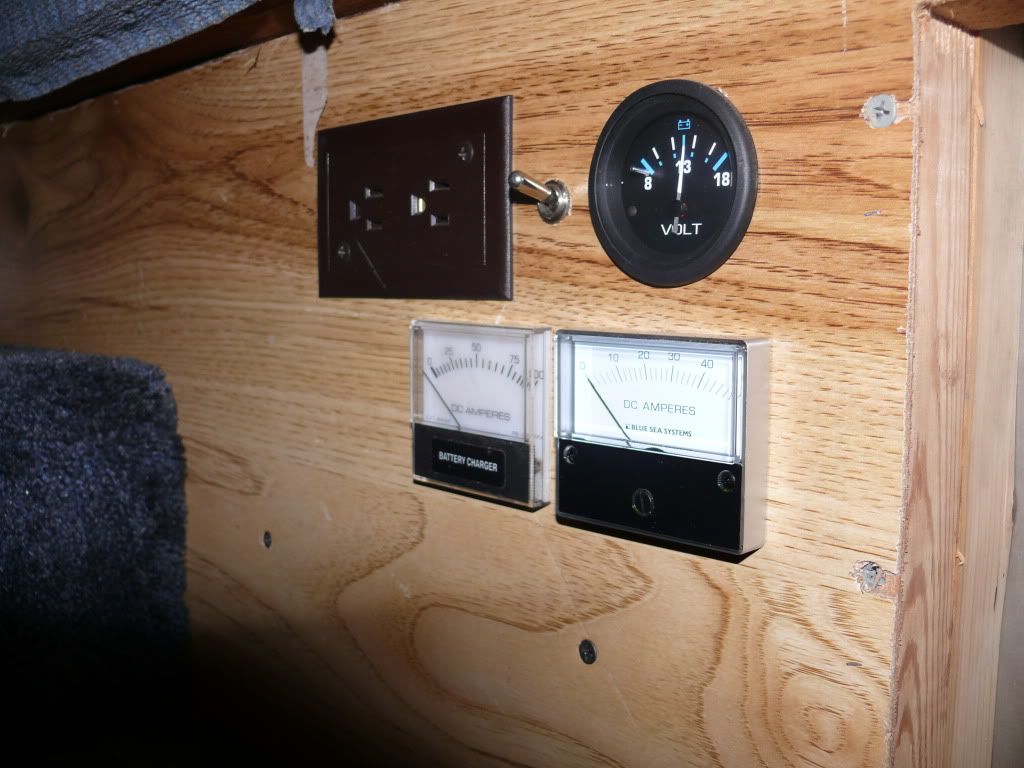
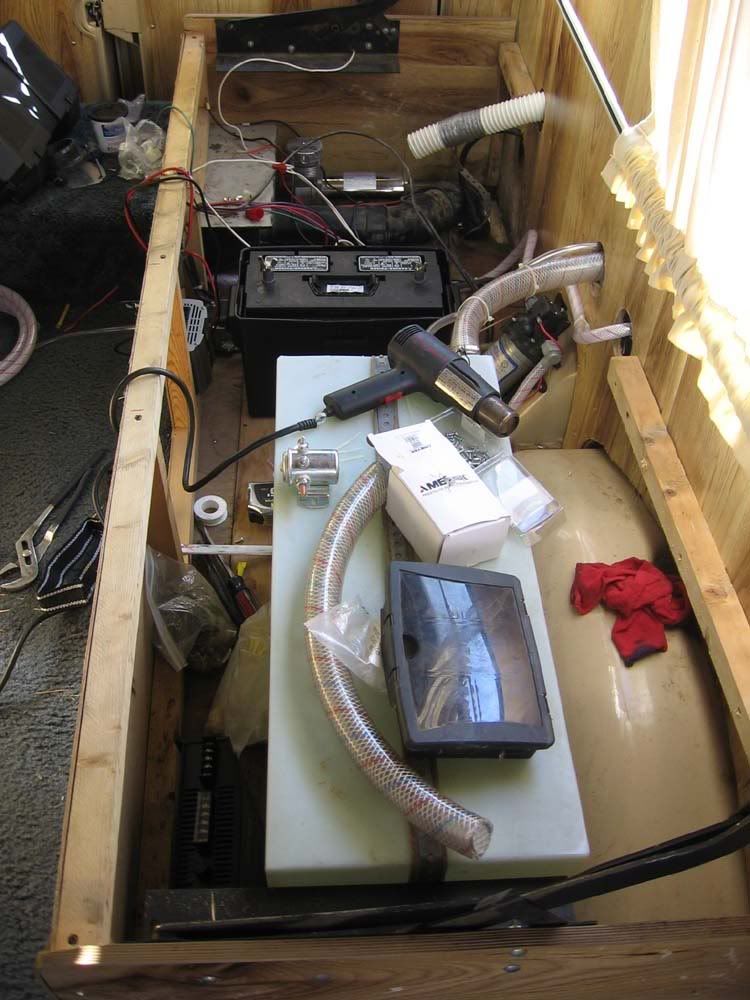
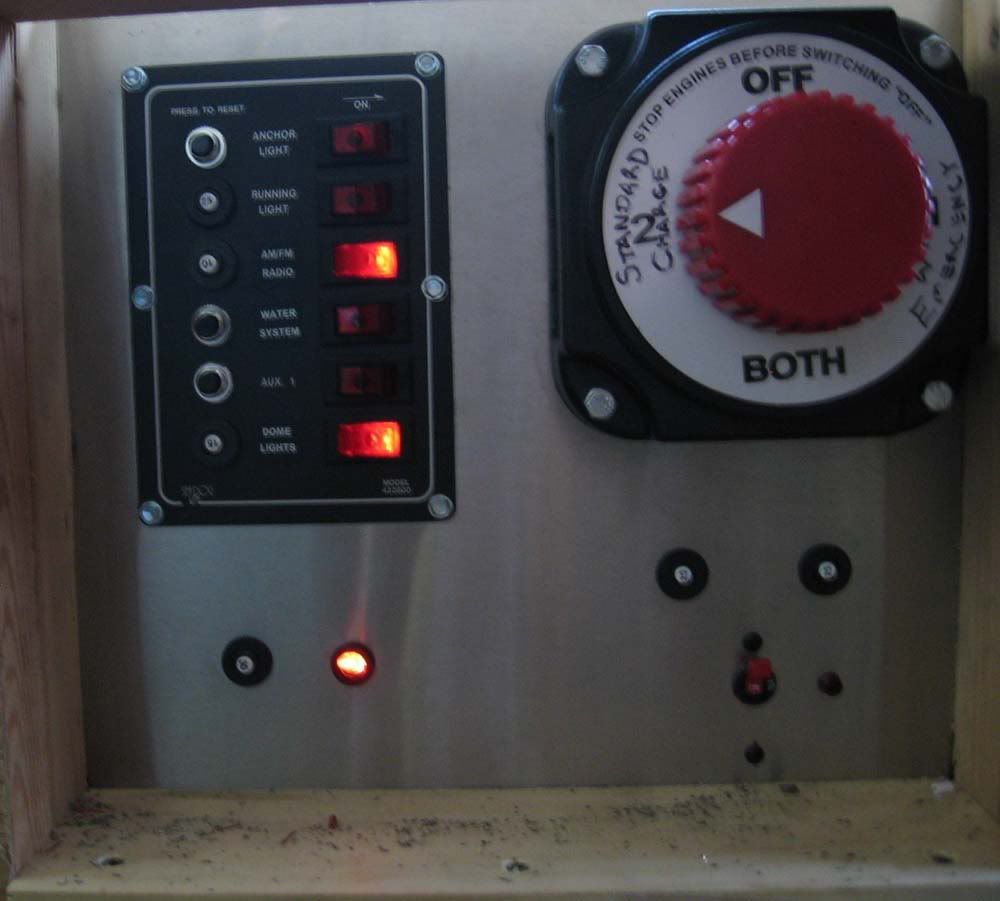
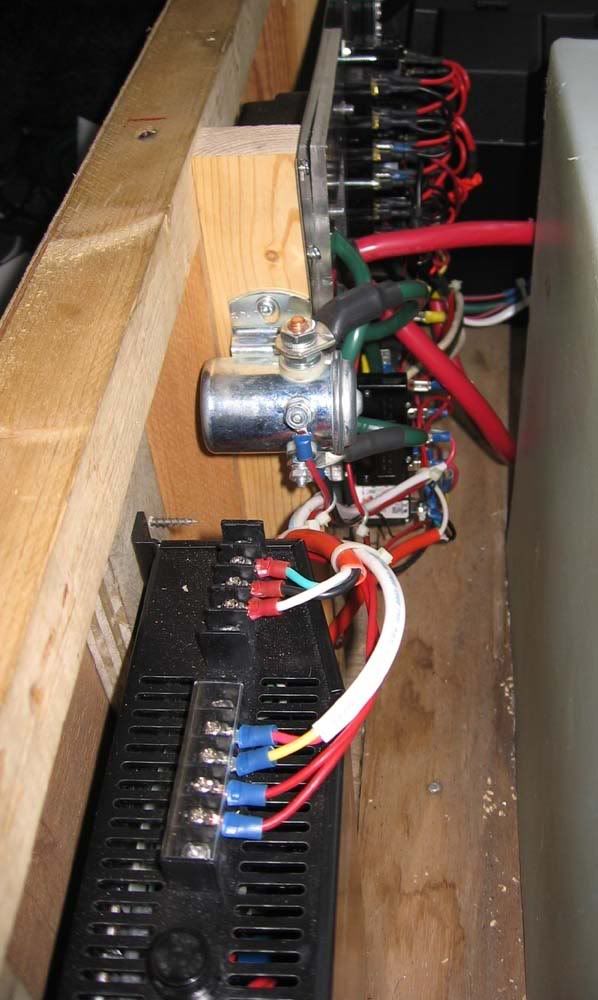
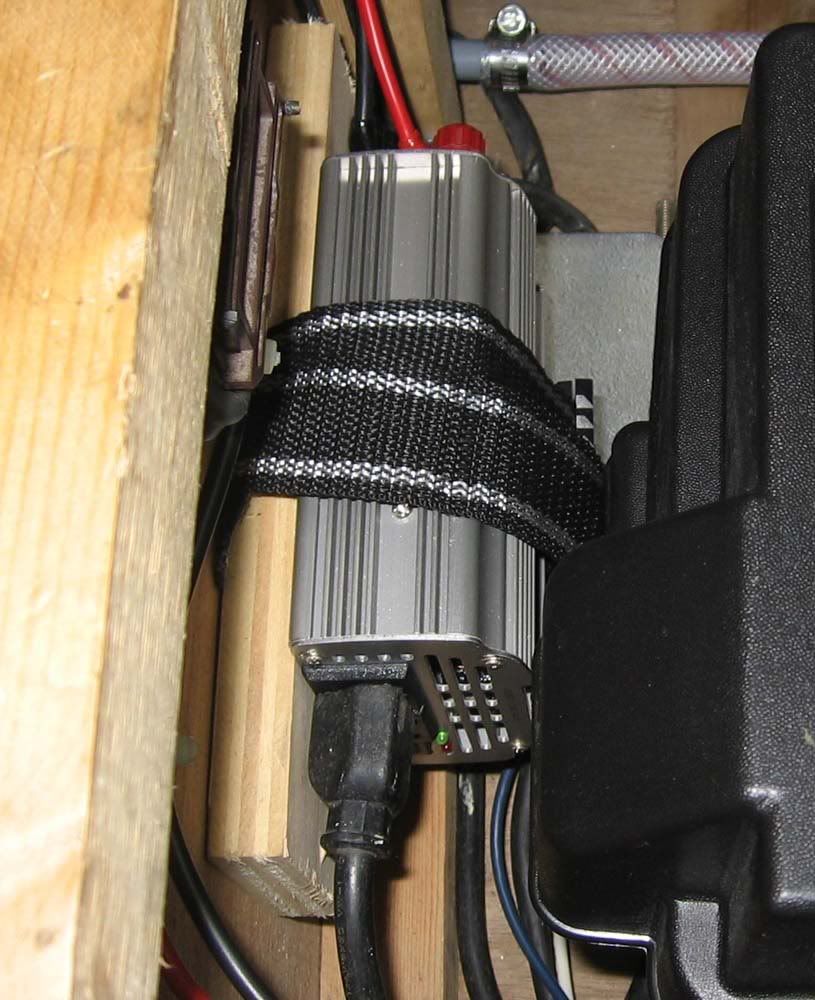
Scary electrical system
Scary plumbing system
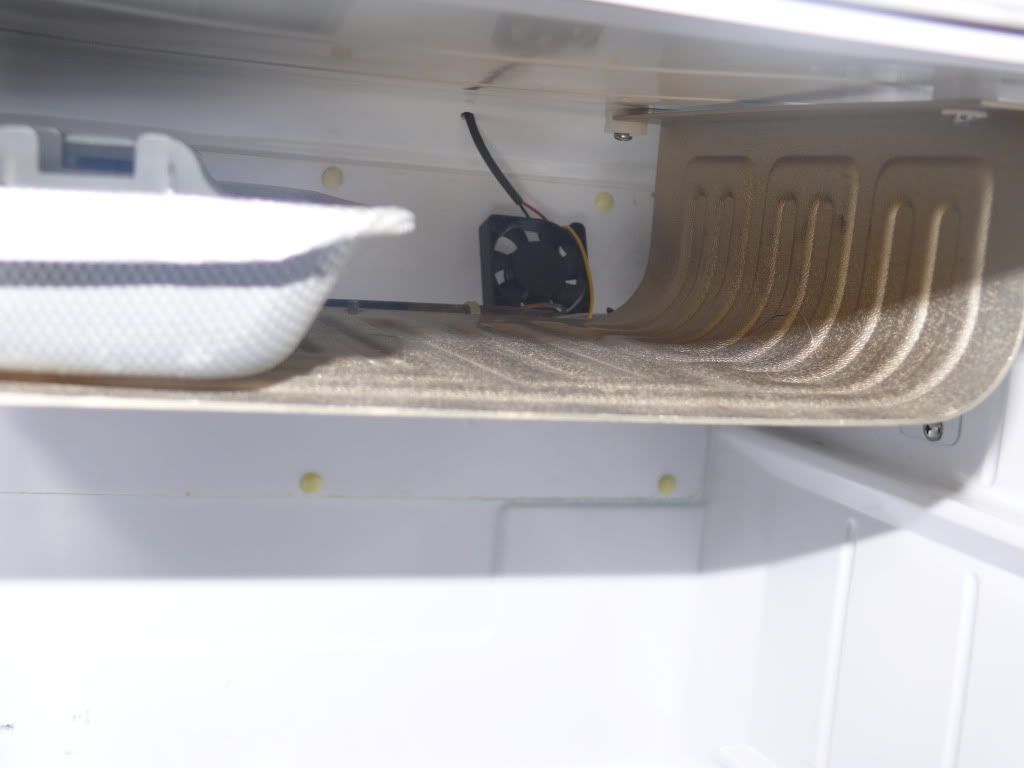
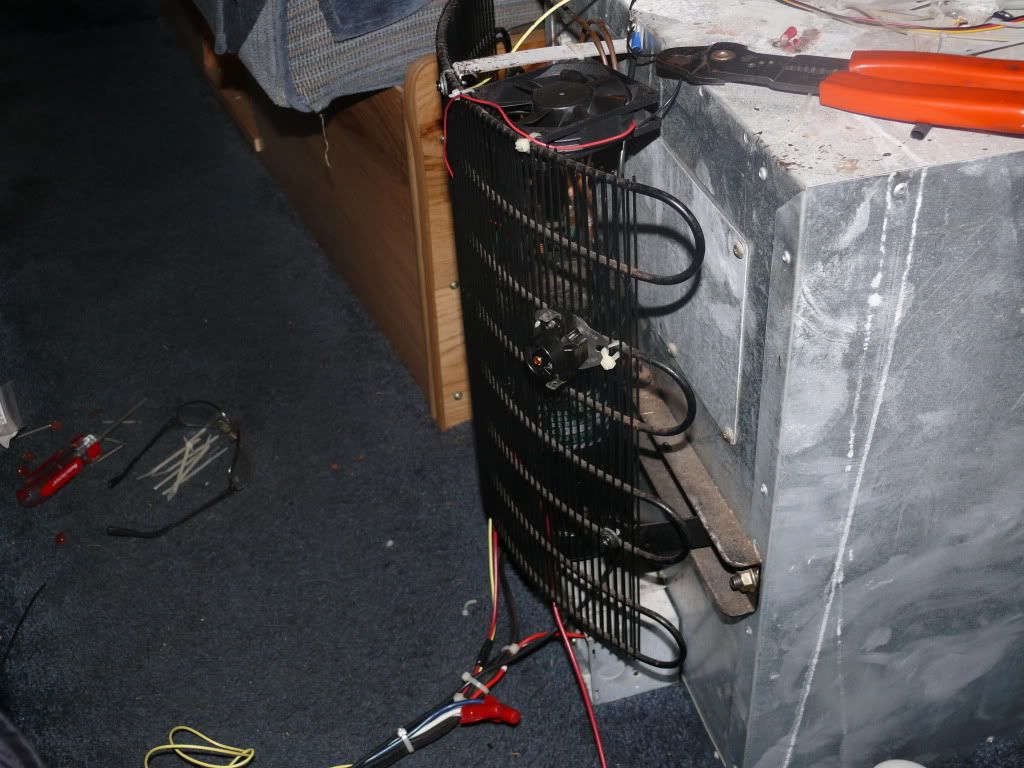
12V Refrigerator
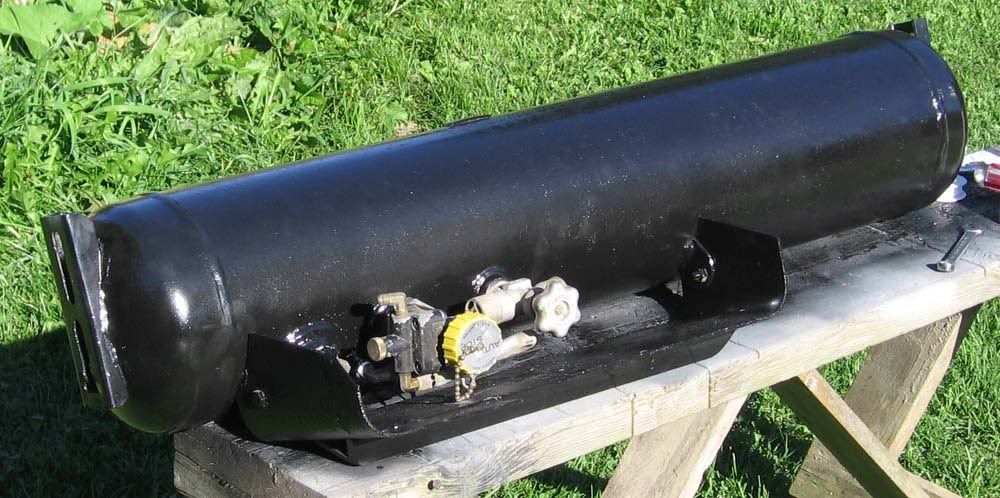
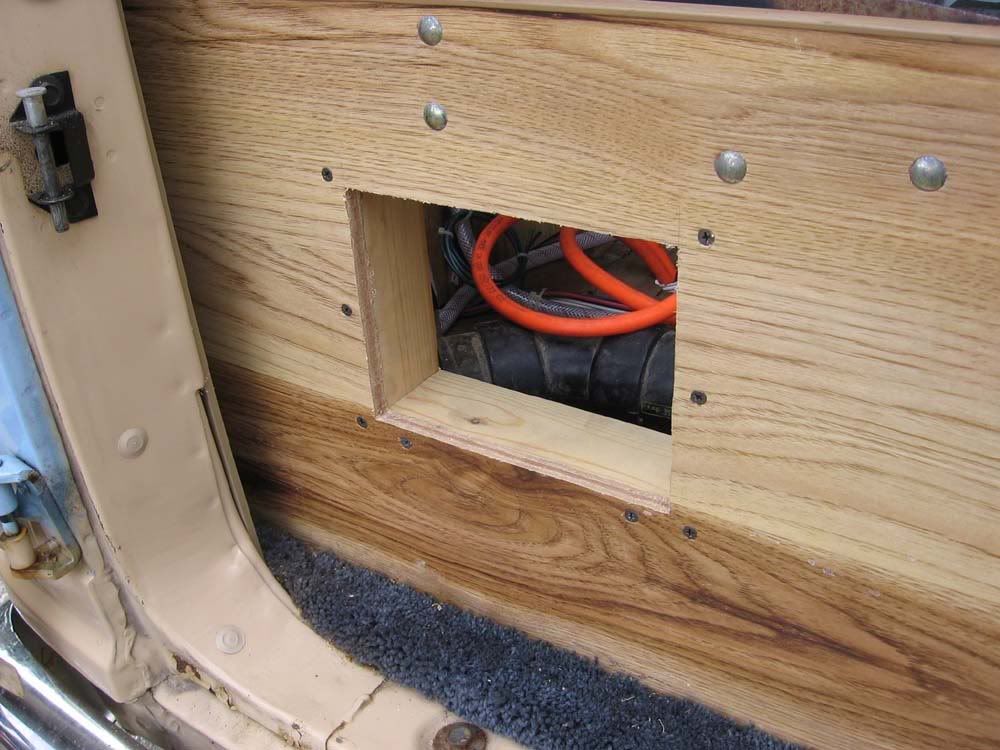
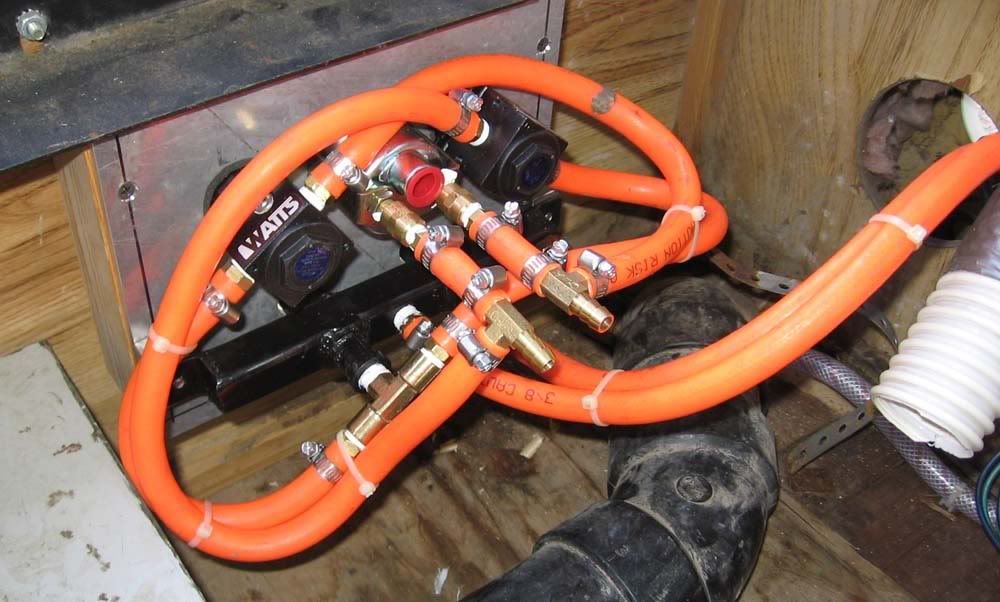
Scary propane system w/ frame mount DOT propane tank
Propane Heating Furnace
Propane cooktop
RV Toilet
AM Radio
2 dead mice
1 funnel
1 tire iron
3 cheese crackers, partially eaten

So after a proper mouse burial and a cheese cracker snack it was time to get to work.

Stay tuned for Chapter 2. Electrical.
 
Last edited:

spencyg

This Space For Rent
Electrical. Chapter 2

So there were a number of issues to address in the initial modification plan. The electrical system for the camper functions were borderline dangerous, the refrigerator wasn't working, and the plumbing system was shot. In a previous life I was a systems designer for a yacht company and have spent my whole life around boats, so a marine grade upgrade to all systems was something I considered mandatory. Typical RV systems meet minimum standards and I wanted this to be right, especially given the type of use Boomer was intended to be subject to.

Boomer3.jpg


BoomerWiring4.jpg


Elec6.jpg


Elec3.jpg


2 new 105A house batteries, new circuit breaker distribution panel, and all new wiring. I also installed a permanent 120V 2 bank battery charger to keep the house bank and starter bank continually topped off when Boomer wasn't being used. In addition, a new system for disconnecting the house bank from the starting bank was necessary. The main disconnect switch needed to allow me to manually connect both banks in the event of an emergency, but normally I wanted the house bank to charge off the alternator when the van was running, but disconect automatically when the van was off. This was accomplished with a 300A solenoid activated from the run circuit on the diesel. It works without me thinking about it. During the rewiring I brought all non-running gear circuits back to the house bank. Everything but the running lights and diesel functions tie to the house bank so I don't have to ever worry about running down the start batteries.

While establishing the new electrical system I also installed a small 400W inverter tied in with the various 120V outlets scattered around the van.

Elec5.jpg


And installed a new outlet up in the driver/passenger area.

PowerSocketDash.jpg


The plumbing system wasn't really all that exciting of a refit. The tank was fine as was the on-demand pressure pump. Most of the hose needed replacement, but beyond that it was easy peasy.

The refrigerator also ended up being a simple fix. Broken wire lead to soldering and heat shrinking lead to great success.

While I had the tools out, I also installed a couple switches up front for future fog and flood lights.

LightSwitches.jpg


So now I had a safe electrical system, a plumbing system that wasn't leaking, and a refrigerator to keep stuff cold.

And the overland gods smiled down.

And then he started assembling an onboard air system.

In chapter 3.
 
Last edited:

NorthernWoodsman

Adventurer/tinkerer
Just curious Spency. I think I missed whatever controversy there might have been, if any at all, but why did your original Boomer thread vanish? It was one of my top three favorite threads on this whole site?
 

spencyg

This Space For Rent
Just curious Spency. I think I missed whatever controversy there might have been, if any at all, but why did your original Boomer thread vanish? It was one of my top three favorite threads on this whole site?

Various reasons not worth rehashing here. The thread is up in a more streamlined fashion now. No worries.


Onboard Air and Propane. Chapter 3

So at this point I had repaired some electrical issues as well as water and refrigeration. I had a propane system in desperate need of attention so this was the next focal point.

The original tank was frame mounted and was pretty rusty. I pulled it down from its mountings and gave it a good cleaning and shot it with paint.

PropaneTank1.jpg


Since I was mucking around down there, it was time to loose the running boards.

BumpersOff3.jpg


BumpersOff1.jpg


It really was an awe inspiring moment. Just the removal of the running boards released the slightest glimmer of "hey...this thing might actually be cool"

On we pushed.

So with the running boards removed I reinstalled the propane tank and moved it up higher in the frame cavity to aide in trail clearance.

PropaneTank2.jpg


I had to notch a little bit of rocker to allow clearance to the fill port, but not biggie. Then, off to the filling station.


FAIL.


They started filling it and LP was pissing out of the valve, the tank...everything. I returned home and ripped the entire tank out for good. The new plan was going to be portable 20 or 30 lb tank mounted to....something....later.

Brushing myself off and drowning my discouragement in some undoubtedly fine brew (this was 5 years ago....I forget) my thoughts drifted toward onboard air

A few credit card bills back, I'd purchased a Viair 160C compressor to mount in Boomer. It was time to drag it off the shelf and hook the stinker up.

OA2.jpg


It was fully sealed and had a 100% duty cycle so I didn't feel the need to treat it nicely by mounting it in the cabin. Besides, its frickin loud.

So I rubber mounted it to the frame and ran air and electrical connections inside through various anti-chafe grommets. A buddy had given me an old portable makita air compressor tank which I modified to fit up on the rear frame.

AirTank1.jpg


AirTank2.jpg


AirTank3.jpg


Complete with safety pressure release!

Attention then turned to the actual system. I had intended to install airbags in the rear suspension to counter a tragic saggy shorts issue which Boomer demonstrated when fully loaded w/ fuel, water, and supplies. I needed to accommodate this system whilst providing for quick disconnect points for tire filling, etc.

First the sawsall was dusted off...

OA3.jpg


Followed by the CNC mill...

OA4.jpg


...and the welder...

AirParts1.jpg


...and the hose clamps...

OA7.jpg


and BAM

Onboard Air complete with LH and RH airbag regulators.

OA6.jpg


Chapter 4: Cutting, Welding, and Winches.
 
Last edited:

spencyg

This Space For Rent
Bumper Fab. Chapter 4

At this point it was time to do something rather drastic. The intended function of the van was going to be adventure travel, and with that comes unknown obstacles, the desire to see deep into the dark night, and not worry about brushing up against the occational tree, deer, moose, whathaveout.

So it was time for some bumpers. This chapter highlights the construction of the rear assembly.

I kinda knew what I wanted but when it comes to bumper fabrication I usually like to let the build dictate its own outcome. I start with the basics of recovery points which need to be tied directly to the frame and then work out from there. In this case I started with the rear since it was going to be the easier end to fabricate. The intention was for the style to match front to rear so this was a practice run for the front.

Had to start here. Just had to.

BumpersOff2.jpg


I started with recovery points which were doubled up 1/2" A36 steel plate profiled in the CNC mill.

RearBump1.jpg


RearBumper3.jpg


Once those were tabbed into the frame extensions I started planning where the rear Ramsey REP8000 winch would be located.

RearBumper2.jpg


At this point I made the decision to use portions of the original bumper in the design. It was a risky move but in the end it has been one of the things most people have commented about. The stock steel bumpers are 1/8" steel so strength wasn't an issue, and it inserts a little organtic design into an otherwise utilitarian function. At first I wasn't sure about it but now it is one of the things that I believe really set Boomer apart.

IMG_4418.jpg


IMG_4419.jpg


IMG_4422.jpg


IMG_4424.jpg


So we welded. And we ground. And we welded more.

RearBumpSwingGuessets.jpg


RearBumpPlatedDone.jpg


RearBumpPlated2.jpg


RearBumpPlated.jpg


And after some paint we ended up here...

RearBumperPainted3.jpg


While I was building the bumper I accomodated for future swing out carrier sockets. To this day I still have not fabricated those swing out carriers but have every intention of finishing them up this spring. I also haven't wired up the rear winch (gag!!) but this will hopefully happen at the same time. There is a built-in Class 3 reciever socket which ties back to the frame in addition to being built into the 3/8" thick bumper plates. I have towed 10k lbs with the hitch without any issues (well...there were issues, but they had nothing to do with the hitch....we'll reserve that story for an upcoming chapter).

BumpersDoneRear.jpg


So the rear bumper was complete and it was time to move up to the front.

The fabrication of the front bumper started similar to the rear. Just like before, the recovery points started off the build and then everything built out from there.

FrontBumperTabs.jpg


For the front winch plate I had something special in mind. I wanted recessed driving lights and since I needed to use the CNC mill to get the plate profiled, I figured this was the time to blast Boomer's name into something permanent. My wife had come up with the name when we first bought the van and for some reason it stuck.

FrontBumperPlate1.jpg


From there we built out again and made sure there was clearance for the old Warn 5671 8000lb winch.

FrontBumperWinch1.jpg


...and test fit the driving lights...

FrontBumperLights1.jpg


...and fit the front stock bumper sections.

FrontBumper3.jpg


I was debating a light bar and wasn't sure how to make it look right. I wanted radiator/grill protection as well, so I just started bending pipe until I found what I thought looked good.

FrontBumper4.jpg


With lots of grinding and welding we ended up with this...

BumperFinished2.jpg


After paint

BumperPaint1.jpg


Installed

BumpersDoneFront2.jpg


The rear bumper weight is around 150lbs without the winch, and the front bumper came in around 220lbs without the winch. Adding the weight on the front didn't have much effect on ride quality or height, but the back was squatting even worse. It was time to put in those airbags.

Chapter 6 : Throwing away some dog dishes, Baggy Shorts, and big life changes.
 
Last edited:

spencyg

This Space For Rent
Saggy Shorts. Chapter 5

Old Springs and New Bumpers lead to the inevitable. It was time for some bags.

The airbag system was an airlift "kit" intended for 1980's Econoline Vans. Of course they didn't build this for one that came from the factory lifted. I ended up having to fabricate lower and upper mounts complete with lift blocks to get the bags from pulling off the frame or axle when unloaded. There isn't a lot of fancy fabrication involved in this....tried to keep it simple and robust.

AirliftSpring1.jpg


Plumbing was extremely easy given I'd already done all the hard work in the systems box. The dual regulators and a dual needle air pressure gauge have made this system very easy to adjust and has been absolutly trouble free for the last 5 years. I do need to get a spare bag to keep with me since the function of these bits of the rear suspension are so critical to safe driving, especially when loaded up.

So we had a van with nice bumpers, good systems, self extraction capabilities. One thing still wasn't good. Those damn wheels.

I admit it. I am a big fan of nice looking wheels. I think they can easily make or break the asthetics of any vehicle and have been known to spend some good money to have my ride look right. Boomer didn't escape this same expectation.

I came across a set of 5 new Eagle Alloy 058's in 16x8 8 bolt for a price I couldn't refuse. At this time I didn't have money for tires and the tragically pedestrian looking 235-85-16's which Boomer came equipped with were in unfortunately good shape.

So I went over to the local tire shop and had the tires swapped over.

NewWheels1.jpg


AirliftSide1.jpg


Aaaahhh. Much better.

So at this point Boomer was good to go for awhile. This was good because in September of 2008 the economy took a tumble and my business took some unrecoverable hits as a result. We decided it was time for a big change and started looking for jobs in the southern part of the state. Luckily both my wife and I were able to land some good positions in our prospective fields and we packed it up. The shop was boxed up and moved to a new house we bought in Portland over the next 10 months. The house up north we own to this day and rent it out (could be a whole chapter book on its own).

Chapter 7: Pain, Family, and Adventure Traveling
 
Last edited:

225

Village Idiot
21 posts and you're already talking **********.

That is just super.

Sorry if I came across like that. It was just really hard to find the thread after I singed up. After I did, then I had to come back here and click on the link again.
 

spencyg

This Space For Rent
*CAUTION* Detour Ahead. Chapter 6

So I used to ride motorcycles. Stupidly.

I'm a firm believer in good clean fast fun, but let me tell you something about motorcycles.

"For every action there is an equal and opposite consequence."

In my particular circumstance I didn't grow up around dirtbikes like some did, so after a stint riding on the street and having the multitude of tickets and near misses to prove it I decided it was time to "slow it down".

Enter Kawasaki KLR.

KLRGlam2.jpg


IMG_4370.jpg


I bought the bike as a non-running piece of junk and built it from the ground up. Now this bike was everything my old SV wasn't. It was slow, comfortable, and could go anywhere. WAY more places in fact than I should have been going. Back in '08 I was taking in the sights at the New England Forest Rally with some buddies. All of us on our spiffy enduros. Speed, Dirt, blind corners and a bunch of drunk driving Irishmen (That was not an overgeneralization, they were driving, and they were drunk and they were literally all wearing irish flags as shirts). I, being I, was traveling at a high rate of speed around the blind curve and bingo bango bongo. I didn't actually crash, but jacked my extended and locked left leg so hard against a rock that it push my pelvis over an inch from the rest of my spine and I immediately blew out 2 discs in my back.

Ouchie.

I could still walk and function but I was in a huge amount of pain for the next 2 weeks or so. Eventually I seemed to recover and got back to work.

(Desperately trying to get us back to a Boomer thread here....)

So we moved South and within a month of me starting my new job my back problems showed up again in full force. Eventually I lost all feeling in my left leg and foot.

Surgery ensued.

Recovery happened.

Boomer didn't get touched for about a year.

Eventually however I started to come back into my own, slowly slowly. We had our first kid during this time period so life certainly wasn't on a stand still. Regardless, it was good to get the shop set back up and start thinking about projects once again.

The first project I was able to do in the driveway of the new house was to finally get the lights and front winch wired up.

LightsWorking.jpg


I also dug into some front wheel bearing issues. After all the back problems I had to start getting used to having folks nearby who could assist me when any sort of heavy lifting or manouvering needs to happen. Moving Boomer's 100lb wheel/tire package is no exception. Luckily I'm surrounded with good people who are always ready to help out. Having a shop they can have access to as a result doesn't hurt either :)

IMG_4608.jpg


While I had the front end apart I installed new shocks all around. The Rancho RS5000's have been marginal performers and I have a plan to modify the front end suspension in the near future. When this plan is put into action I will undoubtedly upgrade all dampers to remote reservoir Bilstein 5000 series units.

IMG_4609.jpg


The surface rust on the frame and suspension components was starting to bother me, so I took my time with a wire brush and scraper and cleaned it all up as best I could. I then used a rust converter from Napa Auto Parts which turns all of the surface rust to a stable catalized primer. 3 coats of brushed on Rustoleum Semi Gloss Black on all the frame and suspension. It has held up without any further issues for 3 winters so far. I need to touch up a couple spots in the spring, but rust is no longer something I'm thinking about constantly.

P1060613.jpg


Chapter 7: More lighting and electrical, interior work and some new tyres ( ;) ).
 
Last edited:

Zodiac.

QuadravanZ
I tried to register at northeastoverland but the registration process is giving me dung. There doesnt appear to be anything I can do to complete the "captcha" process.

Looking forward to seeing the evolution of Boomer whenever I get it sorted out.
 

T.Low

Expedition Leader
dang, I need another forum to register for like I need another stink eye from a Syncro driver!
 

spencyg

This Space For Rent
Farkle. Chapter 7

Once Boomer was to the point where it was actually comfortable to live in and drive down the road with we started to adventure with it. A number of trips within the Northeast confirmed the awesomeness of Boomer while at the same time highlighting some additional features we wanted to add.

A the first small ticket item was a porch light. I wanted something to light the awning after the sun went down and found a neat little LED strip in Australia which cost more to ship than it did to buy....

IMG_4779.jpg


It draws about 0.25A which means I can just forget about it and leave it on during the duration of a camping setup.

Because power in and power out are such critical monitoring points with a "heavily laden" rig like Boomer, I installed some gauges to help me better understand what was coming in to the house bank and what was going out.

Volt Meter
Charge Ammeter, 0-100A
Draw Ammeter, 0-50A

P1060617.jpg


After spending some time watching the Ammeters during various adventures it was clear the refrigerator was our largest power draw. We were averaging about 2.5 days from full house batteries to dead house batteries. Each battery is rated at 105AH but realistically only 80% of that is truly available within the voltage the equipment requires to run. So 210AH gets derated to 168AH. Given that we could go approx. 2.5 days or 60 hours on 168AH this meant we were drawing about 2.8AH. Watching the fridge which draws 5A when running and cycled about 20 minutes per hour this all made sense. Lights, fans, and camera/phone charging accounted for the remaining current draw, but the fridge was the killer.

I did some research and found some people who had success adding circulation fans both inside the actual fridge as well as on the condenser coils.

So I did.

P1060719.jpg


P1060720.jpg


P1060726.jpg


Winner Winner Chicken Dinner.

The box cooler was probably the largest contributor to the success. Both the box fan and the condenser fan were just 12V PC fans. Nothing fancy. The total current draw went from 5A to 5.25A, but the refrigerator cycle time dropped from 20 min/hr (1.67Ah) to 15 min/hr (1.31Ah). This let us go over 3 days on the same battery bank which made all the difference when out in the field.

Given the addition of a family member we also needed to give up the luxurious 2 captain chair/ dance hall floor scenario we had grown accustomed to.

We needed to still have that floor space for the baby sleeping accomodations, so it was time to come up with a quick disconnect seat base.

P1060724.jpg


P1060725.jpg


This system has been awesome. I'm a big fan of tractor lynch pins. I use 'em everywhere. You may find a lynch pin in my bathroom kit...everywhere.

The base disconnects with lynch pins which are rated to the same standard as Grade 8 bolts. I Beefed up the chair base to spread the load of the pins along a greater area of the plate and it has performed flawlessly for the last 3 years. We had a second kid last spring and I have yet to build another base. It is about to happen.

Now, those tyres.

They were starting to become the lamest part of Boomer. I didn't have a ton of disposable cash and did some looking around. After a bunch of research I decided to give retreads a try, ordering a set of All Terrain units from Treadwright.

They were awesome.

IMG_4780.jpg


NewTires2.jpg


That was exactly what Boomer needed. From hopeful to heroic. I lost about 1MPG with the tyre change but the ride quality greatly improved and frankly, the improvement in curb appeal was worth it.

Chapter 8: Preparations.
 
Last edited:

iridewheelies

Adventurer
T.Low, you get stink eye? Uh oh, I'm selling my syncro right now and switching to a full size chevy. Will I lose all my friends on the samba?
 

Forum statistics

Threads
185,783
Messages
2,878,184
Members
225,329
Latest member
FranklinDufresne
Top