barlowrs
Explorer
Well after beating the crap out of my cross member and other underbelly parts, I figure its time to protect my girls belly…time for more armor! (My ½ ton truck is now pushing several tons with all the armor..haha).
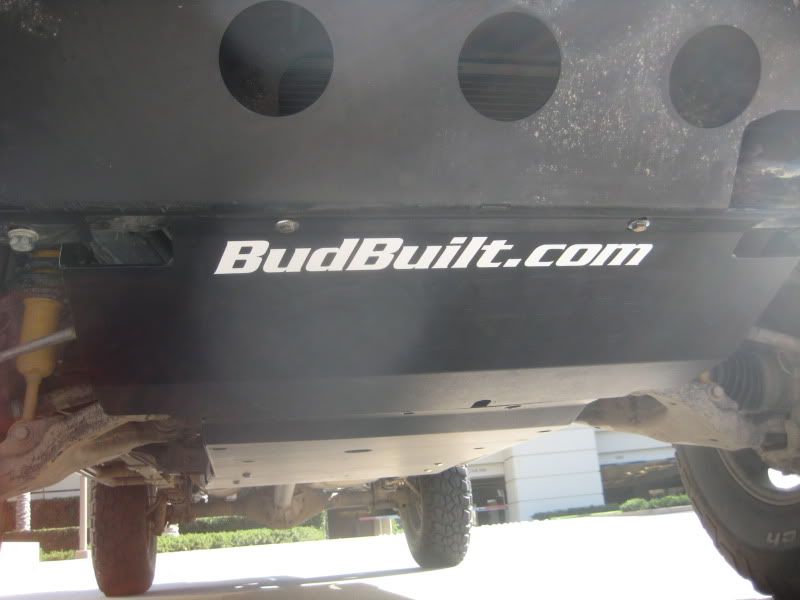
As far as skids go, budbuilt is one of the best, and that is what I chose. These things are beautifully built and fit like a dream. Every hole lined up and there was no issues with the craftsmanship. I did however, run into one problem, and that is going to be the main focus of this write-up: The skids do not play nice with an all-pro bumper.
I know many people are running an all-pro plate bumper like me, and many people have often wondered if the bud built skid kit would fit. The short answer is yes, it does, however, it does require some modification to both the skid and the bumper. So here we go:
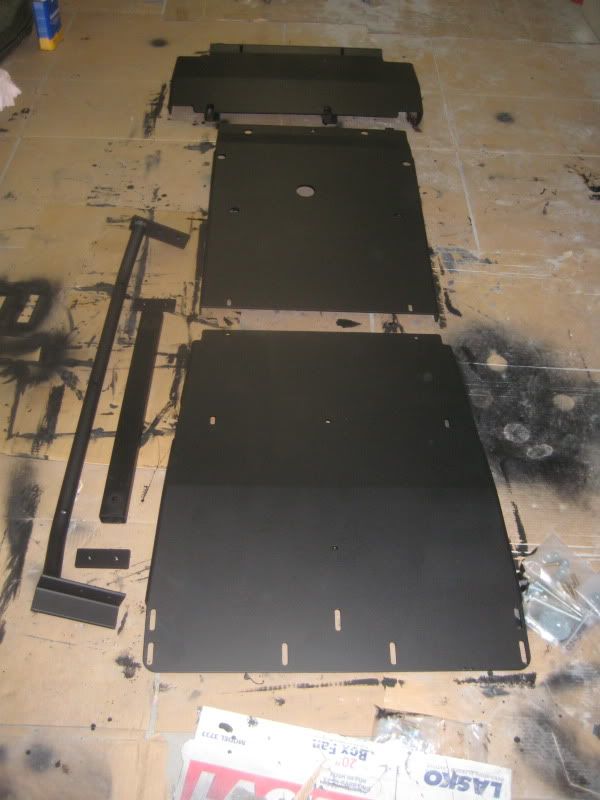
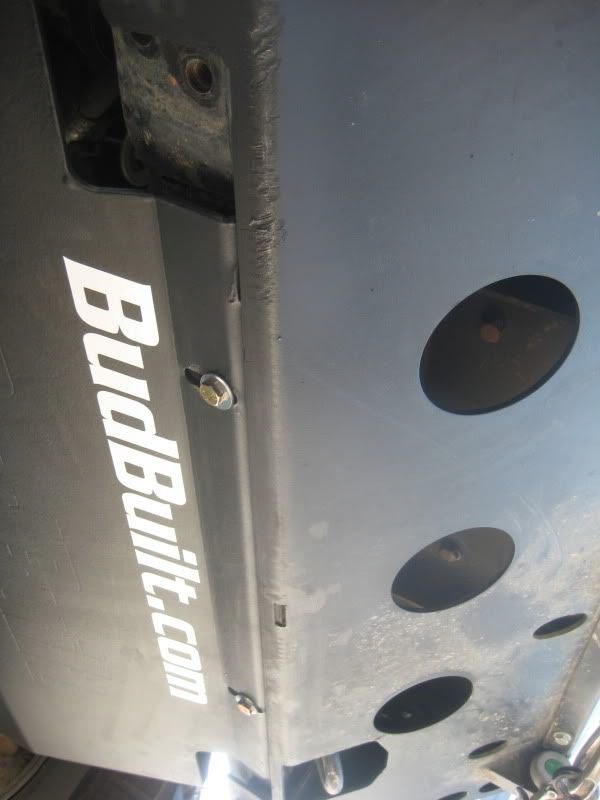
First things first, some paint. Because these are skids and I intend to use them as such, I chose standard old flat black rustolium. This is very easy to touch up after scraping the hell out of them on a rocky trip (this is what all my armor is painted with). The skids come VERY clean, I didn’t get a picture, but honesty, it looked like they polished them…they were sexy. Standard paint procedures here though, scuff them up with some sand paper or scotch pad, clean with acetone, and pile on the layers of paint.
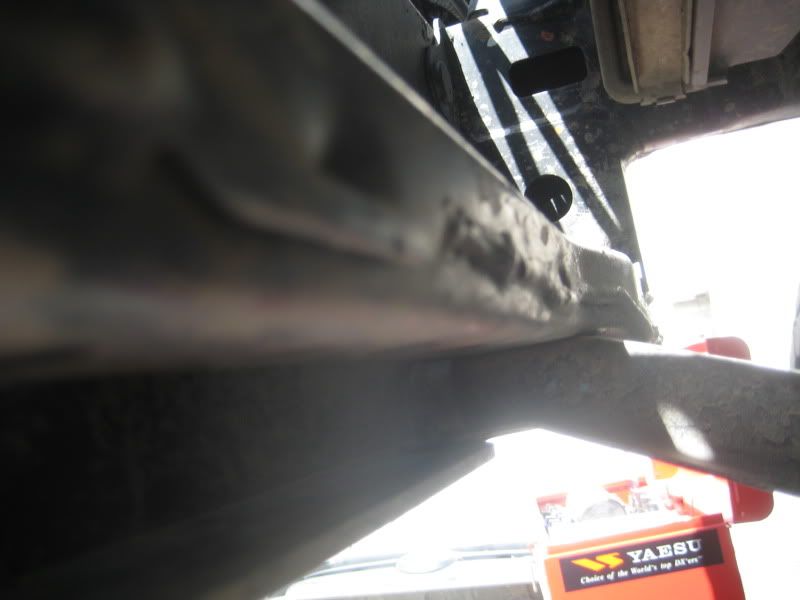
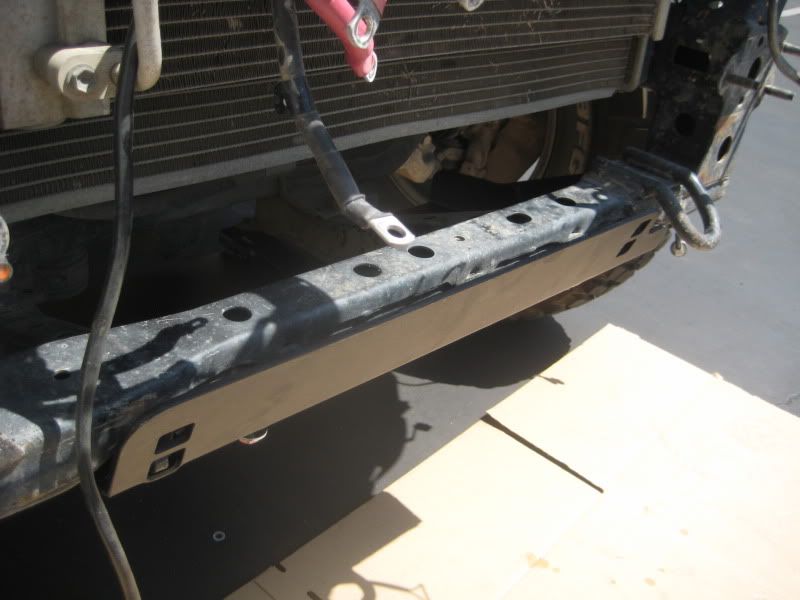
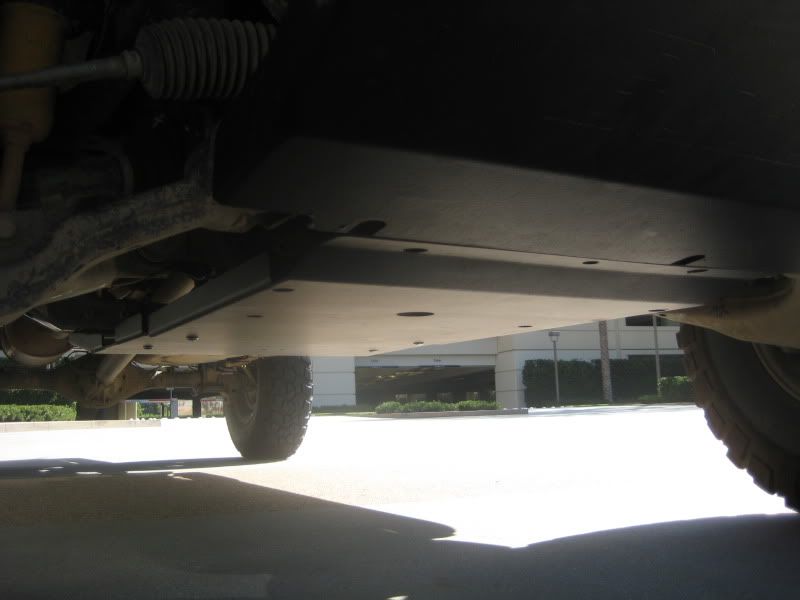
Once they are painted, its time to get to work. Start with the forward skid, this is where you will run into issues with the all-pro bumper. The skid utilizes the stock skid supports. Unfortunately, when my allpro bumper is mounted in the correct position, it is tight against the bottom of these supports; therefore there is no clearance for the skid to mount (this is also why a stock skid will not work with the allpro bumper:
(Sorry for the horrible picture):
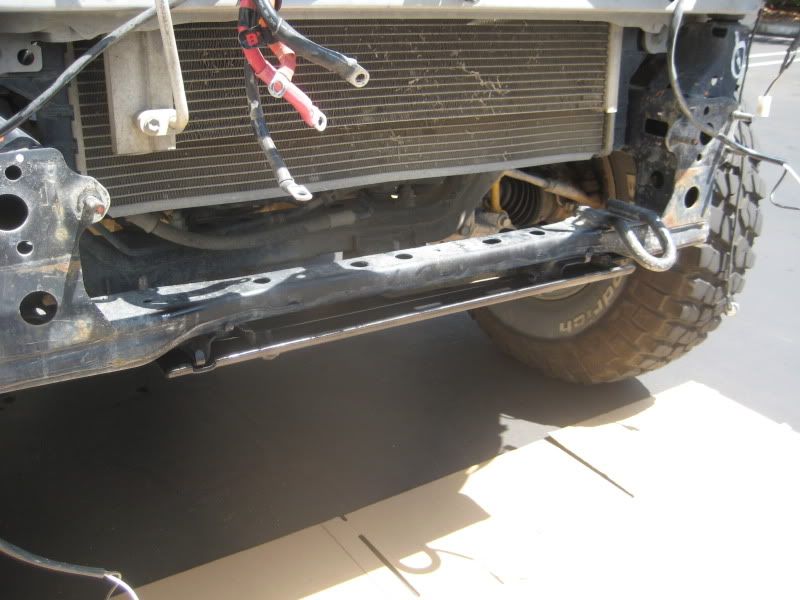
Luckily, the allpro bumpers bottom two bolts are located on the outside of where the skid mounts, so it is possible to trim the bottom lip off the bumper, but still use the lower two bolts. A quick pass with a plasma, and you are good to go (you can see what I mean below):
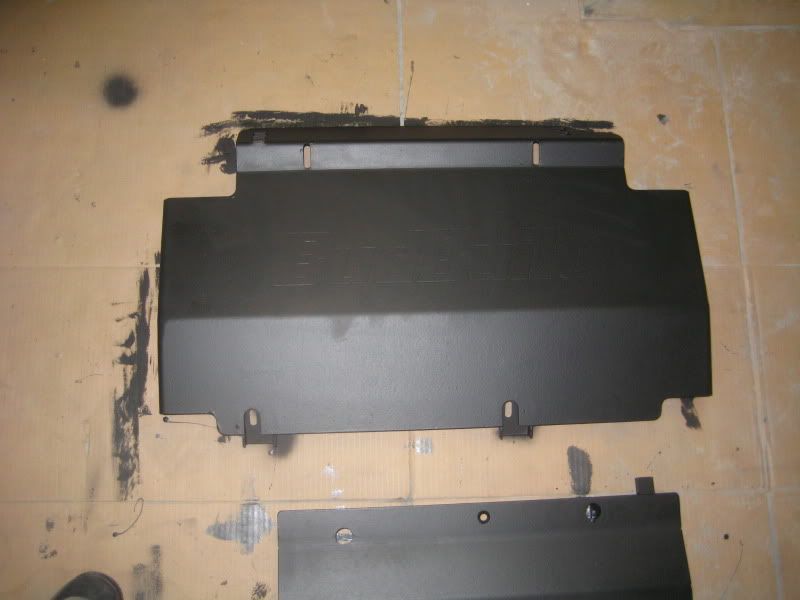
Now, this allows for the proper clearance between the bottom of the bumper and the skids, however, the skid itself still needs to be modified. When the skit is mounted, you can see that the front lip is not bent at a 90 deg (does not go up vertically) but instead sticks out forward a bit:
Because the allpro bumper has a vertical support right at this location, the front lip must be trimmed to allow the bumper to mount properly. Once again, a quick pass with a plasma and you are good:
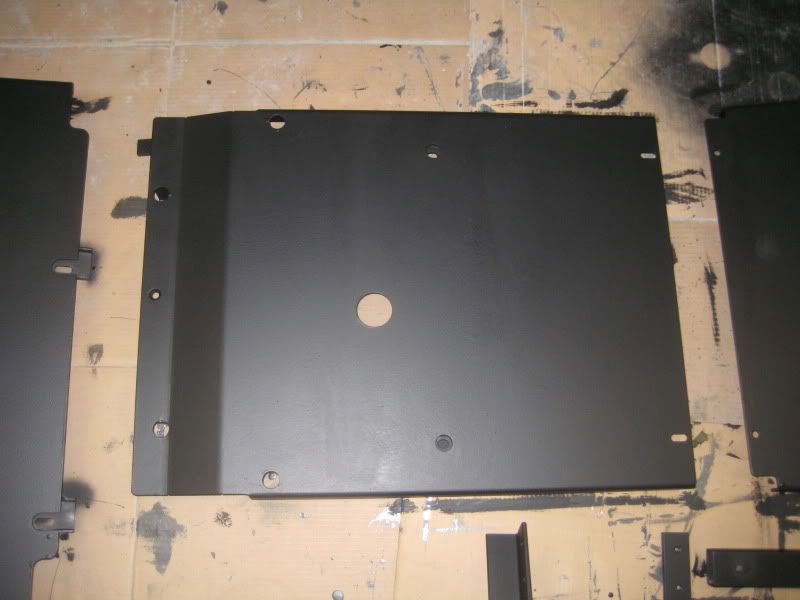
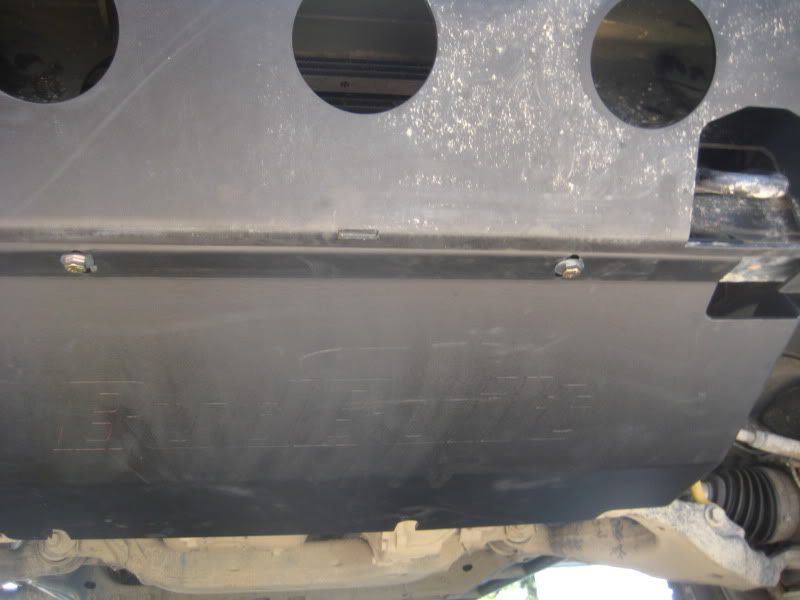
Once this is complete, the bumper and skids bolt right up as they should. The rest of the install on the skids is very strait forward, and once again, because everything is manufactured so well, everything lines up perfectly making it very hassle free. Budbuilt already has a very good write-up on installing the skids so I will not get into all that.
Once they are all bolted up, here is the final product:
If you have any questions, feel free to hit me up.
As far as skids go, budbuilt is one of the best, and that is what I chose. These things are beautifully built and fit like a dream. Every hole lined up and there was no issues with the craftsmanship. I did however, run into one problem, and that is going to be the main focus of this write-up: The skids do not play nice with an all-pro bumper.
I know many people are running an all-pro plate bumper like me, and many people have often wondered if the bud built skid kit would fit. The short answer is yes, it does, however, it does require some modification to both the skid and the bumper. So here we go:
First things first, some paint. Because these are skids and I intend to use them as such, I chose standard old flat black rustolium. This is very easy to touch up after scraping the hell out of them on a rocky trip (this is what all my armor is painted with). The skids come VERY clean, I didn’t get a picture, but honesty, it looked like they polished them…they were sexy. Standard paint procedures here though, scuff them up with some sand paper or scotch pad, clean with acetone, and pile on the layers of paint.
Once they are painted, its time to get to work. Start with the forward skid, this is where you will run into issues with the all-pro bumper. The skid utilizes the stock skid supports. Unfortunately, when my allpro bumper is mounted in the correct position, it is tight against the bottom of these supports; therefore there is no clearance for the skid to mount (this is also why a stock skid will not work with the allpro bumper:
(Sorry for the horrible picture):
Luckily, the allpro bumpers bottom two bolts are located on the outside of where the skid mounts, so it is possible to trim the bottom lip off the bumper, but still use the lower two bolts. A quick pass with a plasma, and you are good to go (you can see what I mean below):
Now, this allows for the proper clearance between the bottom of the bumper and the skids, however, the skid itself still needs to be modified. When the skit is mounted, you can see that the front lip is not bent at a 90 deg (does not go up vertically) but instead sticks out forward a bit:
Because the allpro bumper has a vertical support right at this location, the front lip must be trimmed to allow the bumper to mount properly. Once again, a quick pass with a plasma and you are good:
Once this is complete, the bumper and skids bolt right up as they should. The rest of the install on the skids is very strait forward, and once again, because everything is manufactured so well, everything lines up perfectly making it very hassle free. Budbuilt already has a very good write-up on installing the skids so I will not get into all that.
Once they are all bolted up, here is the final product:
If you have any questions, feel free to hit me up.
 Ah yes... the first dictum of off-road modification: nothing is ever "bolt-on."