deminimis
Explorer
This process is scattered about, so thought I'd put it into one thread in case it helps anyone:
Background: Truck camper with 210AH battery bank and a single Shell 110 solar panel (due to age, it has probably lost about 5% of its original capacity). I also have a propane generator on board. The goal was to be able to watch a movie or cook a Hot Packet without having to fire up that cursed generator. As always, "Project Creep" took over. After identifying what products I was going to need, I started with the easiest. I replaced my original, never gave me any problems (but I had some concerns due to a years back rumored recall of them), automatic transfer switch with a Parrallax ATS 301 (this ATS is used to switch from shore to genny). I installed a second Parrallax ATS 301 to switch from shore/genny to inverter (the inverter I chose does not have an internal ATS). I chose an inverter without an internal ATS in part because the majority of my 12v systems is in one slide and my 120v system is in the other, opposite slide. Since the inverter needed to be close to the batt bank, I didn't want to run 120 from the one slide to the inverter's ATS and then back again. Make sense? The second is powered (shore/genny) via a 30amp breaker from the main panel or by the inverter. From the second ATS, I powered a Blue Sea sub panel (all outlets and microwave). This way the shore/genny power everything and the inverter,when in use, is limited to manageable items (otherwise I may try to power the hot water heater or AC if those items were accidentally left on).
Second ATS (metal housing at the rear, prior to final wiring):

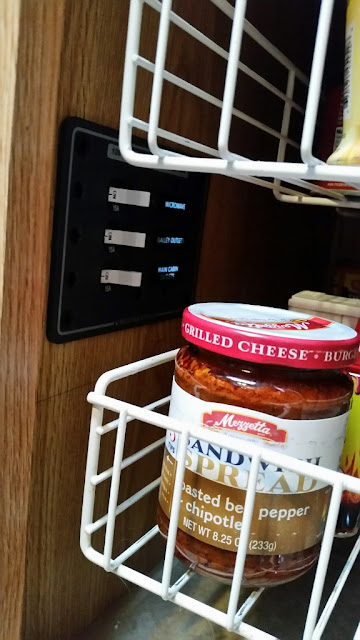
Sub panel (close to main panel, but hidden away in the pantry):
Next step was to add a second panel at 160W (Carmanah CTI-160). Sorry, no pics.
The worst part of the upgrade was installing a second battery box (same as the OEM one) so I could increase my on-board batt bank to 420 amps. The area I finally chose already had a small compartment door. Unfortunately, it was wider than needed (a big hassle) and not tall enough (not a big hassle). I cut the hole and framed it between the ext and int walls for added strength. I used salvage ext wall fiberglass to cover the sides where the orig hole was too big, and filled any voids with Marine Tex, polished to a gel coat like shine with the wet finger trick.
The cut hole with some new framing visible, but without the ext skin repair (covered in plastic to retain heat for glues to cure as it was in the low 20's).

Not happy with the first attempt (it was sitting a bit higher than the other):

Second and final redo. Worked out well.
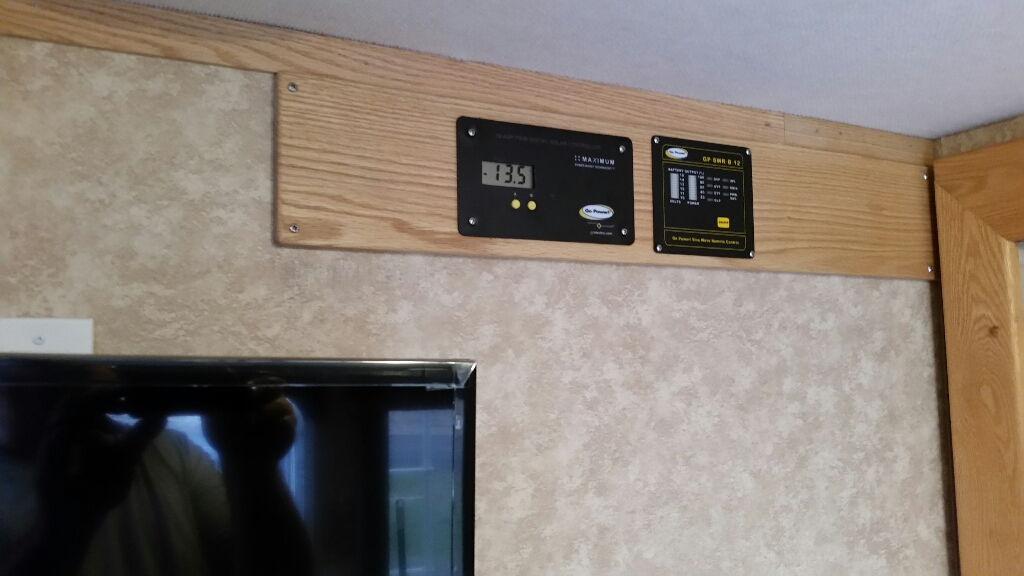
Not my best work, but made a panel out of 1/4" oak for the controller (moved it so I could see the readout when the slide was closed) and the new inverter remote:
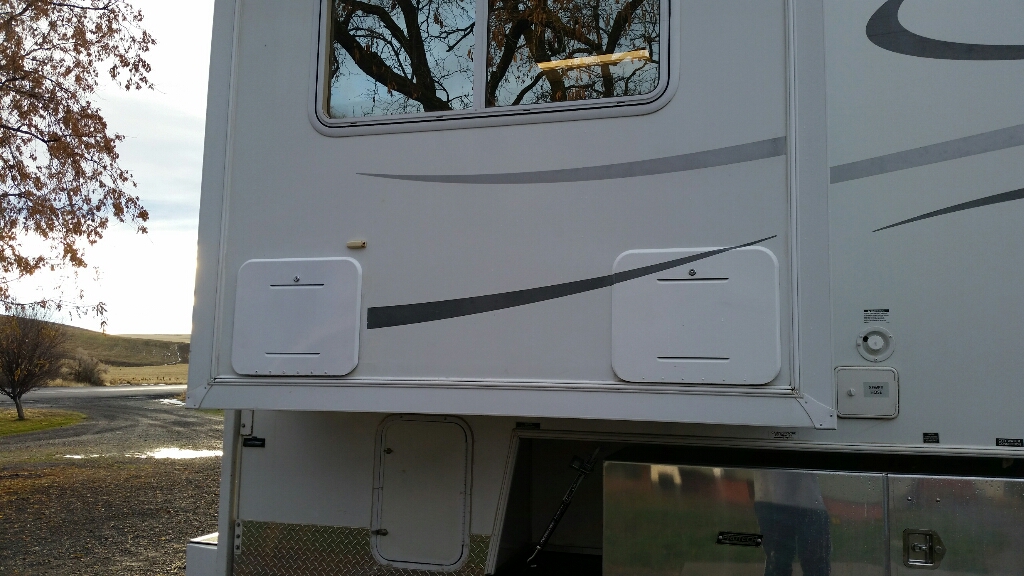
A couple of pics up, you can see a small sewer hose storage door (absolutely worthless -Never used it). By removing that, I could easily access the space behind the wall for running wires (solar, controller and inverter remote, as well as romex). Since all my electrical is in slides, it created an added level of misery. 10/2 Romex does not behave well in a slide. So I ended up terminating the Romex in a junction box and using 10 THHN from the junction box to the inverter). This wire behaves much better when moving the slide in and out).
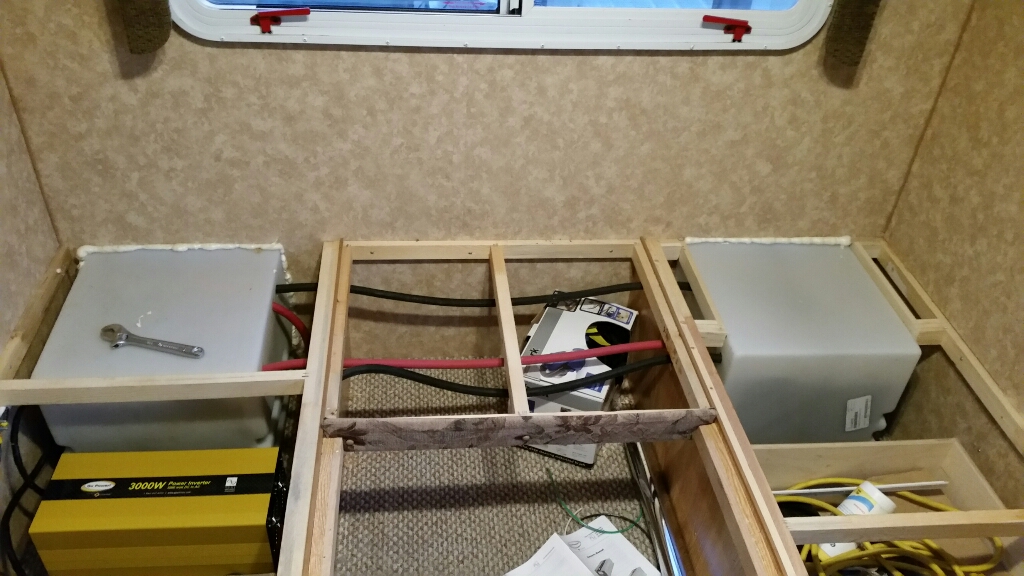
Batteries all connected with 4/0. Definitely a difficult and heavy cable to work with, but as good as it gets for voltage drop, so I managed.
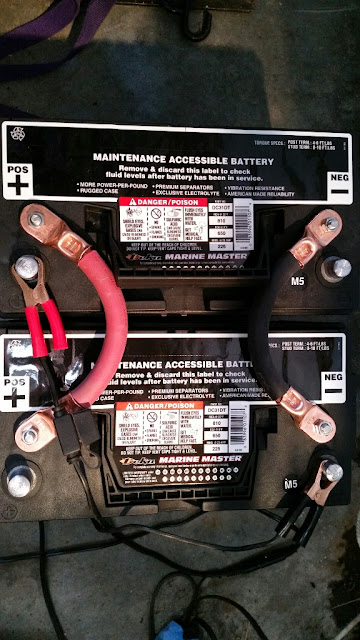
Batts wired up, as well as inverter. I still need to run a 12v hot 6awg over to the new bank for better distribution (got the wire last night, so I'll do that tonight), as well as secure the cables, inverter, etc.
Final two panels arrive today and I'll install them this weekend (max total of 590w). Since there is a risk, albeit ever so slight, that I could surpass the 30amp limit of my controller (under the most ideal conditions, I could, theoretically, produced approx 32.5 amps), I'll install a type 1 30 amp auto reset circuit breaker before the controller. Sort of a Band Aid approach until my wallet has recovered enough for a new 45 Amp MPPT controller. Next month, I'll add a Blue Sea ACR so I can harvest some of my 400+ amp truck alternators for big loads or just charging while heading down the road. I think this setup should satisfy our thirst for electricity. If not, I have room for a couple additional smaller panels. I could build a battery box (or two) for another 210AH on the flatbed (space directly below the slide, aft of the top box and forward of the camper as seen in an above pic(s)) that I would connect to the house batts via an Anderson connector, but thinking we'll be okay.
The final tally is well north of $3k. I shopped all the components pretty hard and found some good deals here and there. Did not plan on going so crazy in one single push, but some items (like my preferred panels and the inverter) popped up fairly cheap for what I suspect is a very limited time. So, I struck while the iron was hot. When all said and done, I still come up well under the the cost (it was a smoking deal) of the barely used diesel genny I was considering last month. I need to get this thing buttoned up this weekend as we're hitting the slopes for a few days next week (it will be snowing the whole time, so all the solar work will be for naught, insofar as it relates to this outing. If given the choice, I'll take the snow).
This is how I wired the two 12v battery banks (4 12v batts). It is not to scale (not even close) All battery cable is 4/0 (b/t all the batts and to the inverter). The 12v systems wire is 8AWG (-) and 6AWG (+) as the positive wire has a bit longer run.

Anyway, hope this helps those undertaking something similar.
Background: Truck camper with 210AH battery bank and a single Shell 110 solar panel (due to age, it has probably lost about 5% of its original capacity). I also have a propane generator on board. The goal was to be able to watch a movie or cook a Hot Packet without having to fire up that cursed generator. As always, "Project Creep" took over. After identifying what products I was going to need, I started with the easiest. I replaced my original, never gave me any problems (but I had some concerns due to a years back rumored recall of them), automatic transfer switch with a Parrallax ATS 301 (this ATS is used to switch from shore to genny). I installed a second Parrallax ATS 301 to switch from shore/genny to inverter (the inverter I chose does not have an internal ATS). I chose an inverter without an internal ATS in part because the majority of my 12v systems is in one slide and my 120v system is in the other, opposite slide. Since the inverter needed to be close to the batt bank, I didn't want to run 120 from the one slide to the inverter's ATS and then back again. Make sense? The second is powered (shore/genny) via a 30amp breaker from the main panel or by the inverter. From the second ATS, I powered a Blue Sea sub panel (all outlets and microwave). This way the shore/genny power everything and the inverter,when in use, is limited to manageable items (otherwise I may try to power the hot water heater or AC if those items were accidentally left on).
Second ATS (metal housing at the rear, prior to final wiring):
Sub panel (close to main panel, but hidden away in the pantry):
Next step was to add a second panel at 160W (Carmanah CTI-160). Sorry, no pics.
The worst part of the upgrade was installing a second battery box (same as the OEM one) so I could increase my on-board batt bank to 420 amps. The area I finally chose already had a small compartment door. Unfortunately, it was wider than needed (a big hassle) and not tall enough (not a big hassle). I cut the hole and framed it between the ext and int walls for added strength. I used salvage ext wall fiberglass to cover the sides where the orig hole was too big, and filled any voids with Marine Tex, polished to a gel coat like shine with the wet finger trick.
The cut hole with some new framing visible, but without the ext skin repair (covered in plastic to retain heat for glues to cure as it was in the low 20's).
Not happy with the first attempt (it was sitting a bit higher than the other):
Second and final redo. Worked out well.
Not my best work, but made a panel out of 1/4" oak for the controller (moved it so I could see the readout when the slide was closed) and the new inverter remote:
A couple of pics up, you can see a small sewer hose storage door (absolutely worthless -Never used it). By removing that, I could easily access the space behind the wall for running wires (solar, controller and inverter remote, as well as romex). Since all my electrical is in slides, it created an added level of misery. 10/2 Romex does not behave well in a slide. So I ended up terminating the Romex in a junction box and using 10 THHN from the junction box to the inverter). This wire behaves much better when moving the slide in and out).
Batteries all connected with 4/0. Definitely a difficult and heavy cable to work with, but as good as it gets for voltage drop, so I managed.
Batts wired up, as well as inverter. I still need to run a 12v hot 6awg over to the new bank for better distribution (got the wire last night, so I'll do that tonight), as well as secure the cables, inverter, etc.
Final two panels arrive today and I'll install them this weekend (max total of 590w). Since there is a risk, albeit ever so slight, that I could surpass the 30amp limit of my controller (under the most ideal conditions, I could, theoretically, produced approx 32.5 amps), I'll install a type 1 30 amp auto reset circuit breaker before the controller. Sort of a Band Aid approach until my wallet has recovered enough for a new 45 Amp MPPT controller. Next month, I'll add a Blue Sea ACR so I can harvest some of my 400+ amp truck alternators for big loads or just charging while heading down the road. I think this setup should satisfy our thirst for electricity. If not, I have room for a couple additional smaller panels. I could build a battery box (or two) for another 210AH on the flatbed (space directly below the slide, aft of the top box and forward of the camper as seen in an above pic(s)) that I would connect to the house batts via an Anderson connector, but thinking we'll be okay.
The final tally is well north of $3k. I shopped all the components pretty hard and found some good deals here and there. Did not plan on going so crazy in one single push, but some items (like my preferred panels and the inverter) popped up fairly cheap for what I suspect is a very limited time. So, I struck while the iron was hot. When all said and done, I still come up well under the the cost (it was a smoking deal) of the barely used diesel genny I was considering last month. I need to get this thing buttoned up this weekend as we're hitting the slopes for a few days next week (it will be snowing the whole time, so all the solar work will be for naught, insofar as it relates to this outing. If given the choice, I'll take the snow).
This is how I wired the two 12v battery banks (4 12v batts). It is not to scale (not even close) All battery cable is 4/0 (b/t all the batts and to the inverter). The 12v systems wire is 8AWG (-) and 6AWG (+) as the positive wire has a bit longer run.
Anyway, hope this helps those undertaking something similar.
Last edited: