HSKR4X4
Adventurer

This write-up is for the Jeep JK 2 door Rough Country Gas Tank Skid. The install went fairly easy and took right under an hour to install with a buddy and myself working on it (including taking the photos). The only issues that we came across were just tightening the bolts a little too much at the beginning, which left issues with fitment. The other, was the rear outside mounting bracket being in an awkward spot to get bolts loosened and tightened. In the Rough Country Install PDF, they have the Jeep on a lift and the rear wheel is pulled which obviously made the install easier. I'm extremely happy with the way the skid plate turned out and the fitment is perfect! I would highly recommend to anyone in the market looking for skid plates. As of right now the skid plate is only $149.99 while other competitors are easily a $100 or more. This kit is a direct bolt on, so there is no need to cut or drill new holes. All hardware and mounting brackets are included and you will reuse some of your OEM bolts.
Now to the install write-up.
Tools I used
Safety Glasses
1/2" Ratchet
18mm Socket
5/8" Socket
Drive Socket Extension-Short
Drive socket Extension-Long
Cordless Impact Driver with Extension Socket Bit (speeds up the loosing and tightening once bolt is broke free with Ratchet)
5/8" Ratcheting Wrench (helps for the rear outside mounting bracket)
Jack Stands are recommended, but we didn't use due to buddy and I being fine holding in place during the install.
Notes
I did use some of Rough Country's steps on PDF to make sure everything was going in the correct areas, but my write-up install will be a little different. I found a few things that'll make the install go easier and also some information I didn't see in their PDF.
After the install I took to a buddies shop so I could share better photos than the ones I took laying under Jeep. You will notice in the install write-up the Rough Country Skid will already be installed
Step 1
Remove all four 18mm bolts from the OEM transfer case skid and remove skid completely.
Here is transfer case skid removed

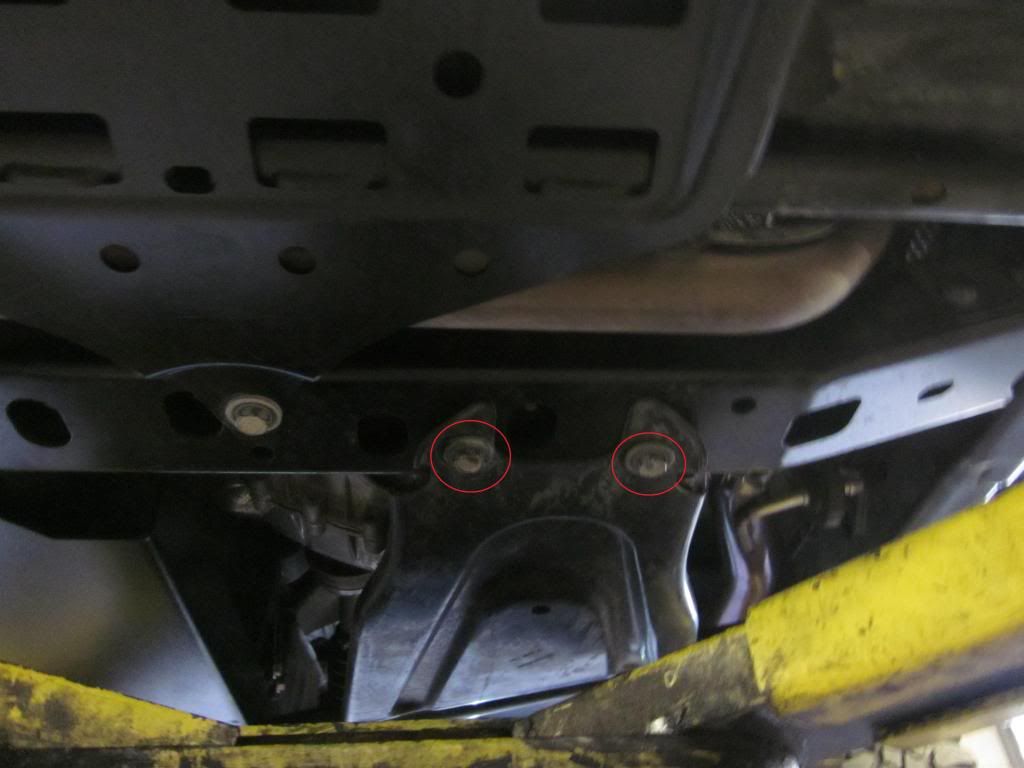
Step 2
Remove the two outer 18mm bolts from cross member
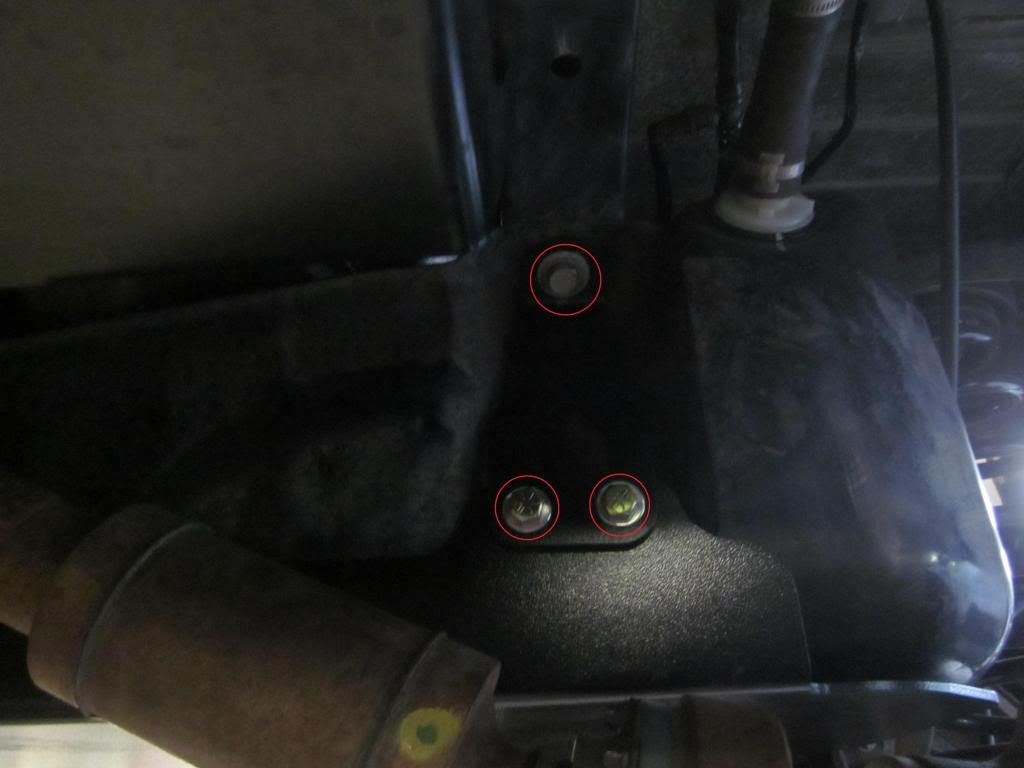
Step 3
Remove the 18mm outer frame bolt
Step 4
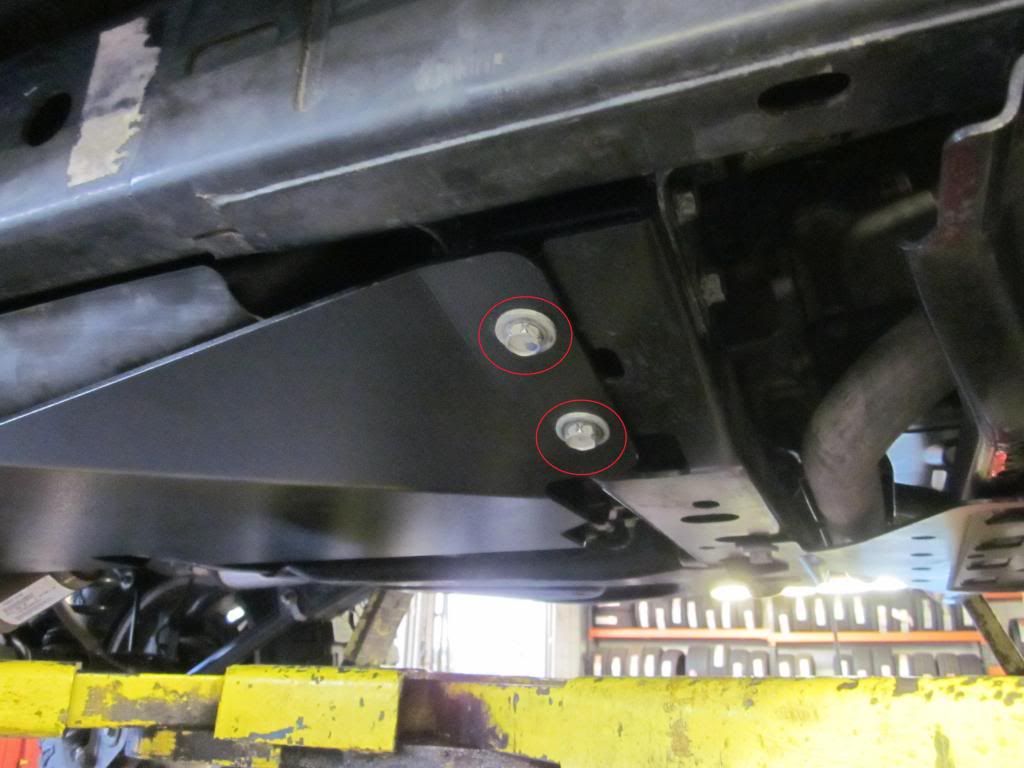
Raise the Rough Country Skid up to match the two outer holes where you just pulled the two 18mm bolts from cross member at, and the one from rear outer frame. You will reuse the OEM bolts and hand tighten the bolts in place

Step 5
Remove the inside gas tank 18mm bolt an install the “U Shaped” middle hanger bracket. You will reuse the 18mm bolt you just used for top part of bracket and for lower part of bracket you will use the supplied 7/16”x 1” bolts and washers. When tightening down, just make sure all bolts are hand tightened for now with 18mm socket and 5/8” tool.
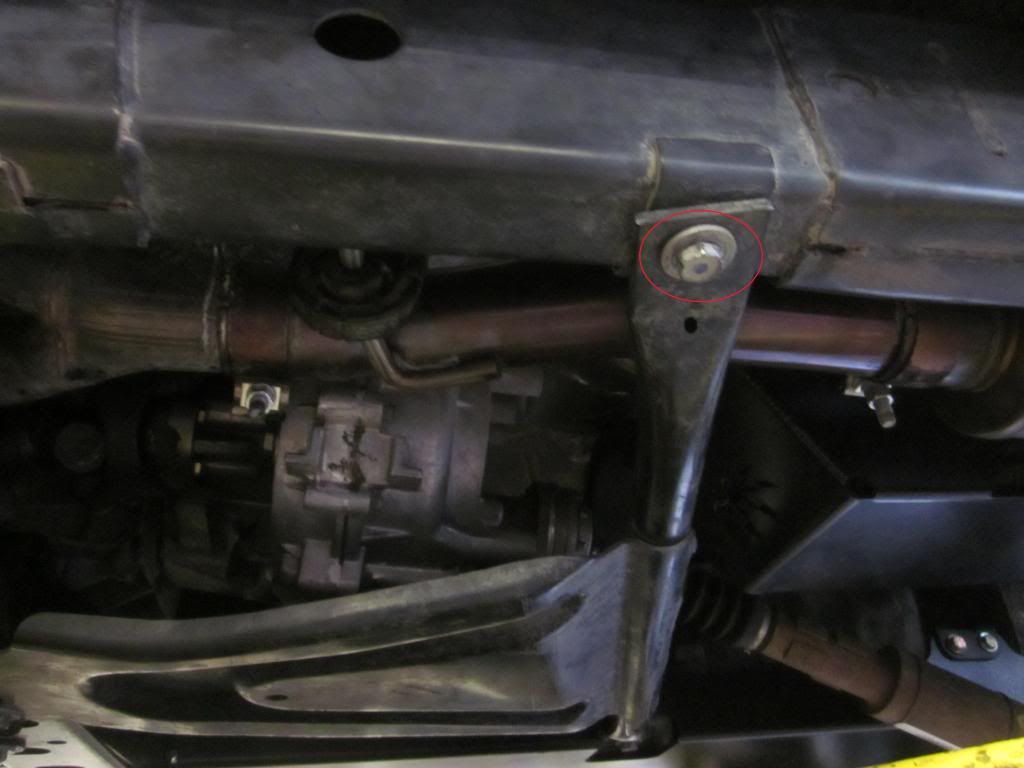
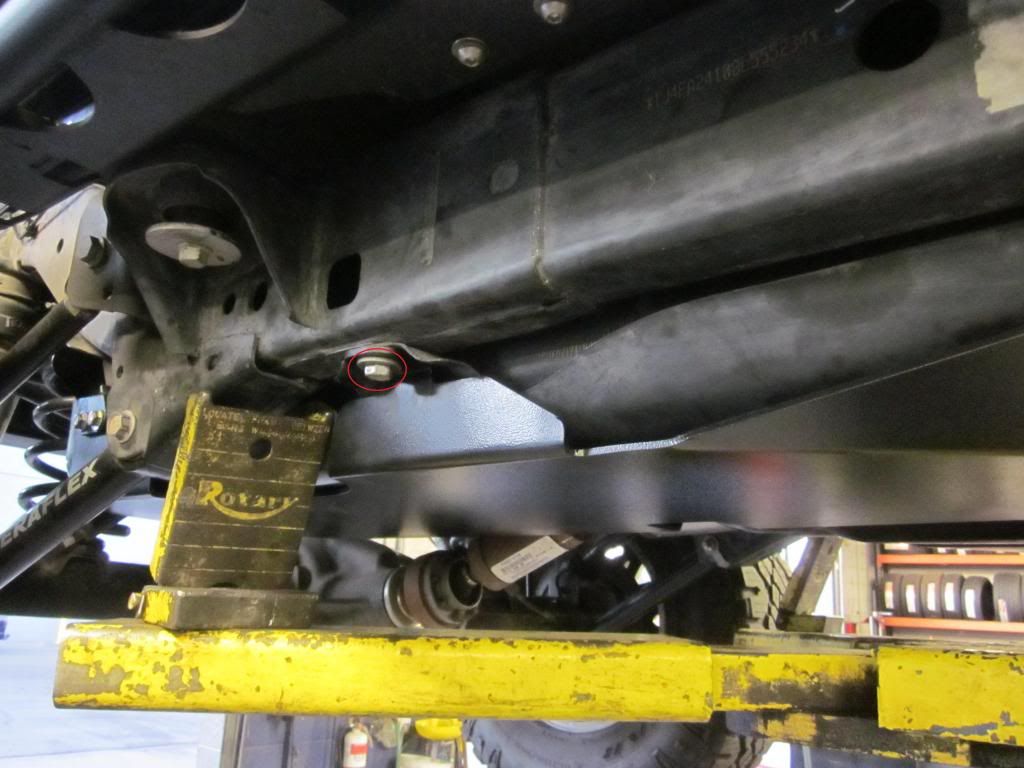
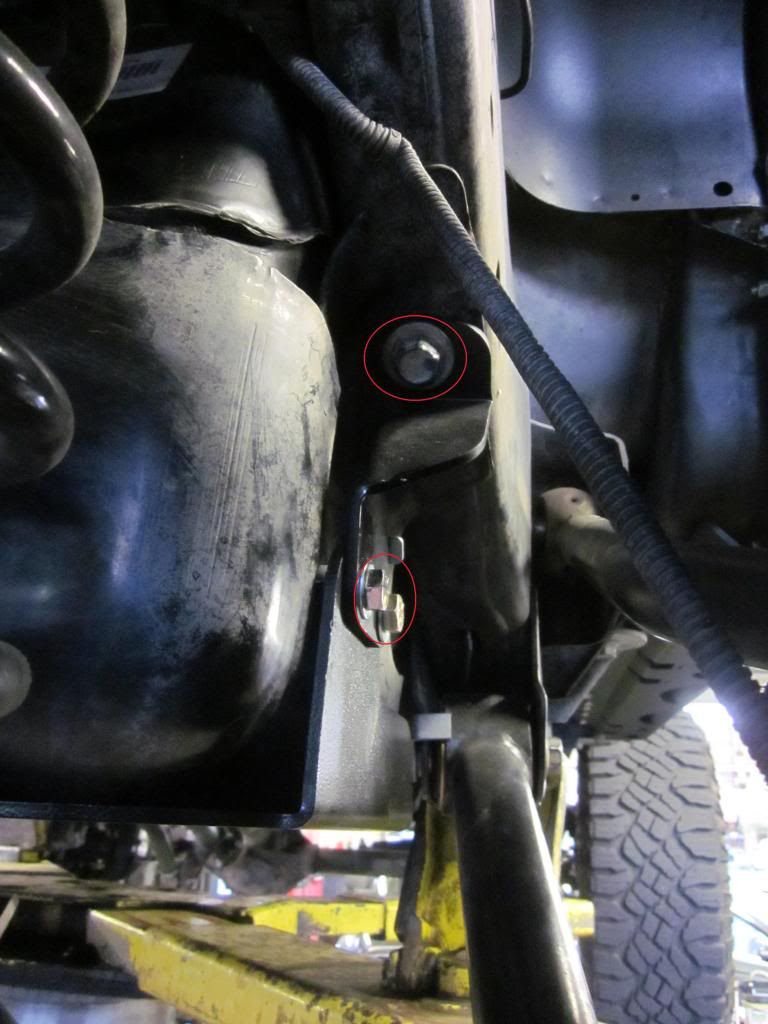
Step 6
Remove the rear inner factory 18mm bolt and install the rear inside hanger bracket (hole in middle of bracket) You will reuse the 18mm bolt once again and the two 7/16”x 1” supplied bolts and washers for bottom two holes of bracket. When tightening down, just make sure all bolts are hand tightened for now with 18mm socket and 5/8” tool.

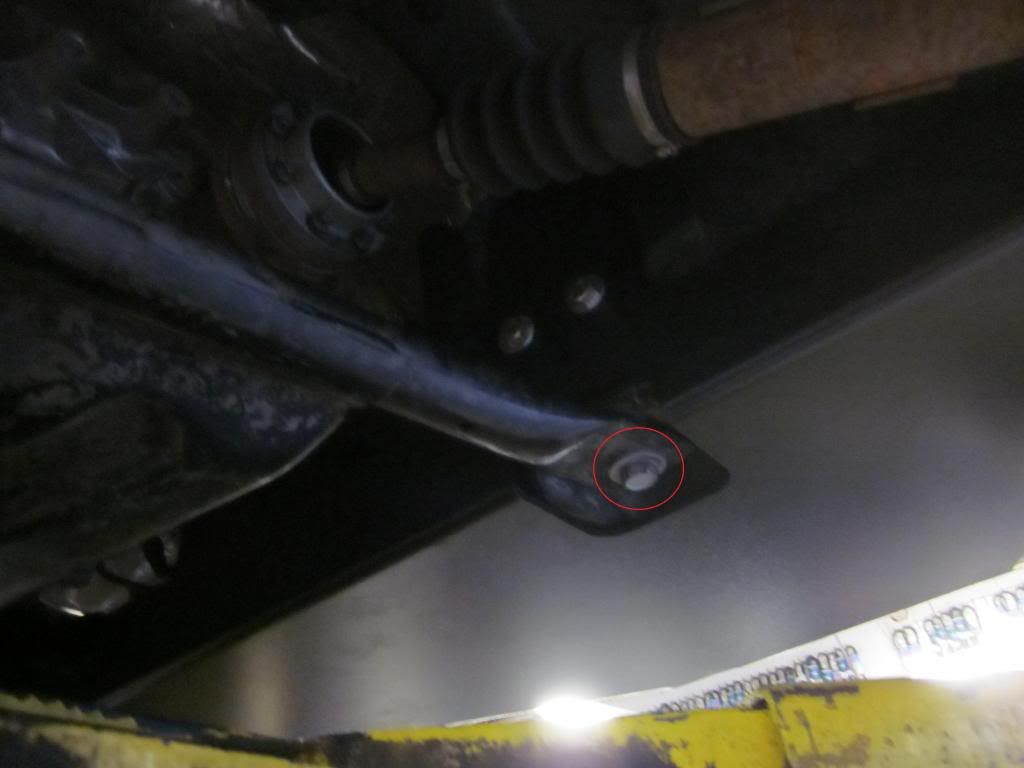
Step 7
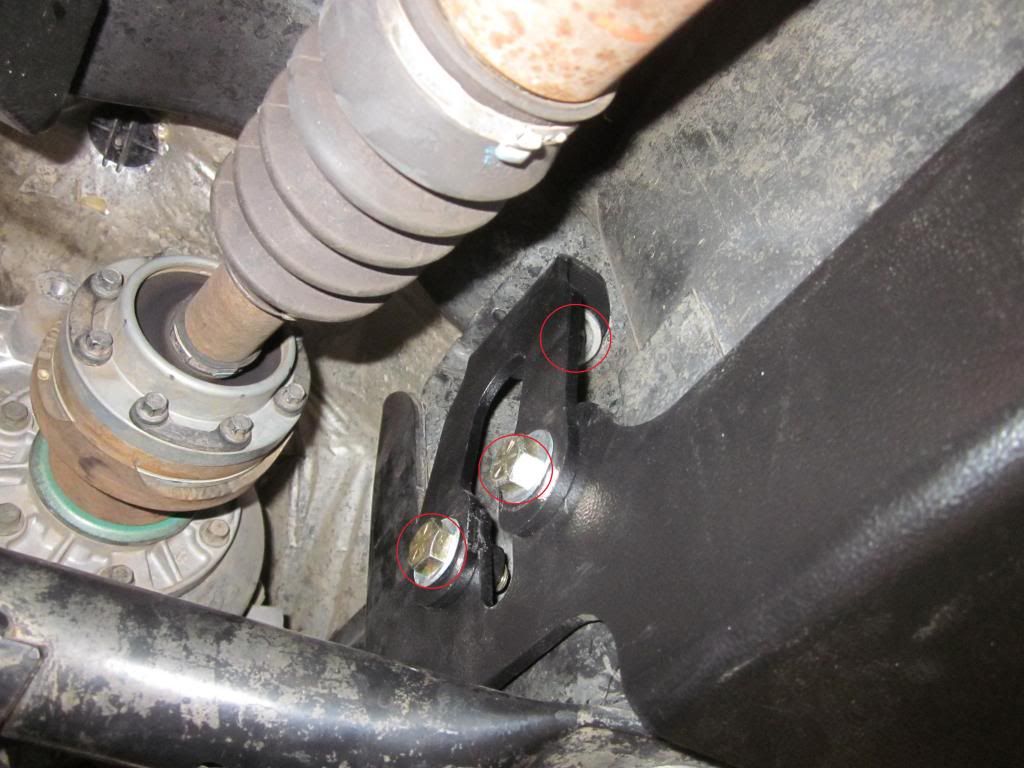
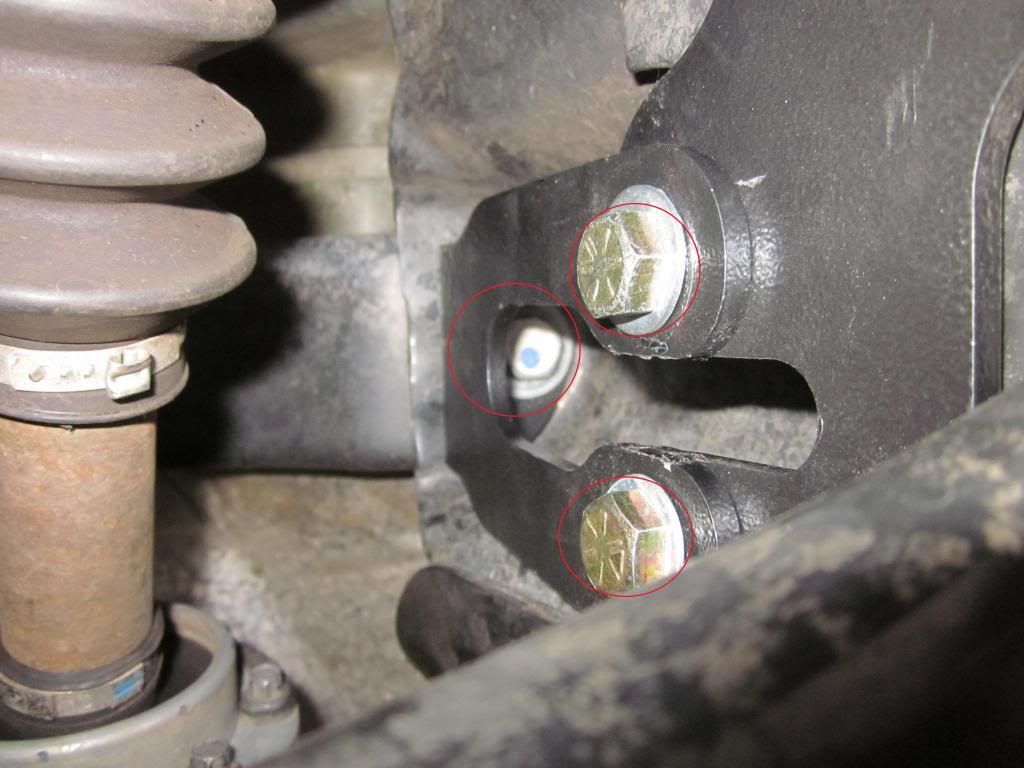
Remove the rear outside factory 18mm bolt. I found this location to be a little bit of a pain due to not having wheel pulled like in the Rough Country video. I used my 18mm socket with the long drive socket extension to get bolt out. Once you have the 18mm bolt removed, grab the rear outside bracket and hand tighten the 18mm bolt back in place with extension. Now that you have the bracket in place, grab the flag nut and place on back side of skid plate and insert your last two 7/16”x 1” bolts and washers. Hand tighten the 7/16”x1” bolts with your 5/8" Ratcheting Wrench.
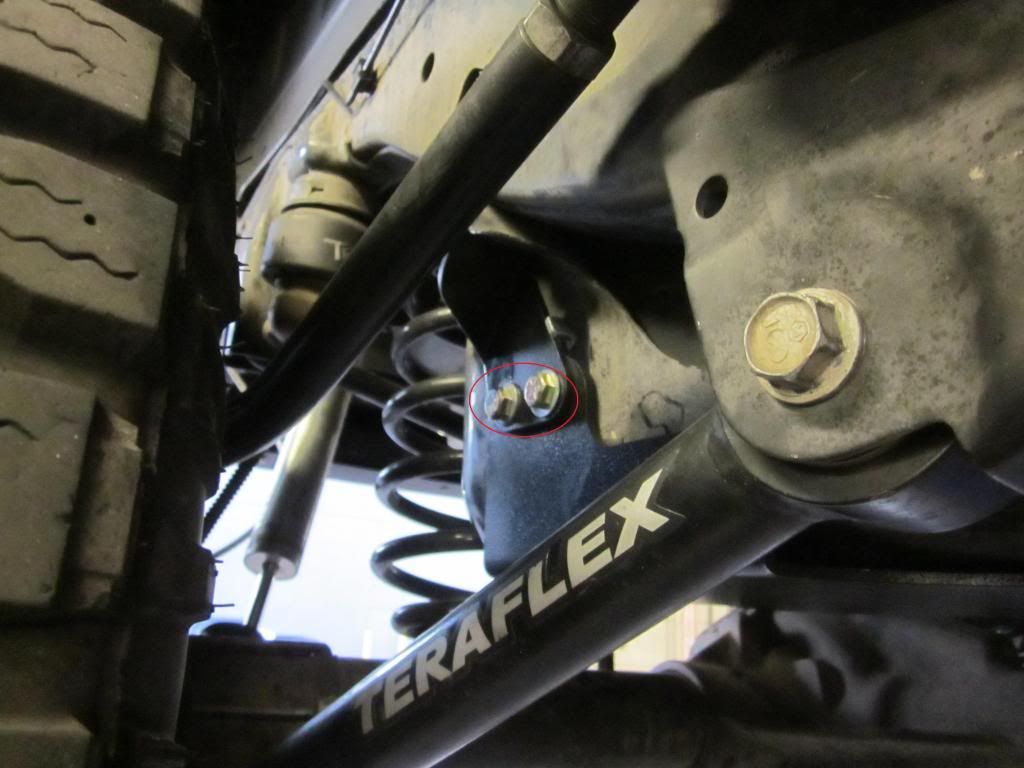
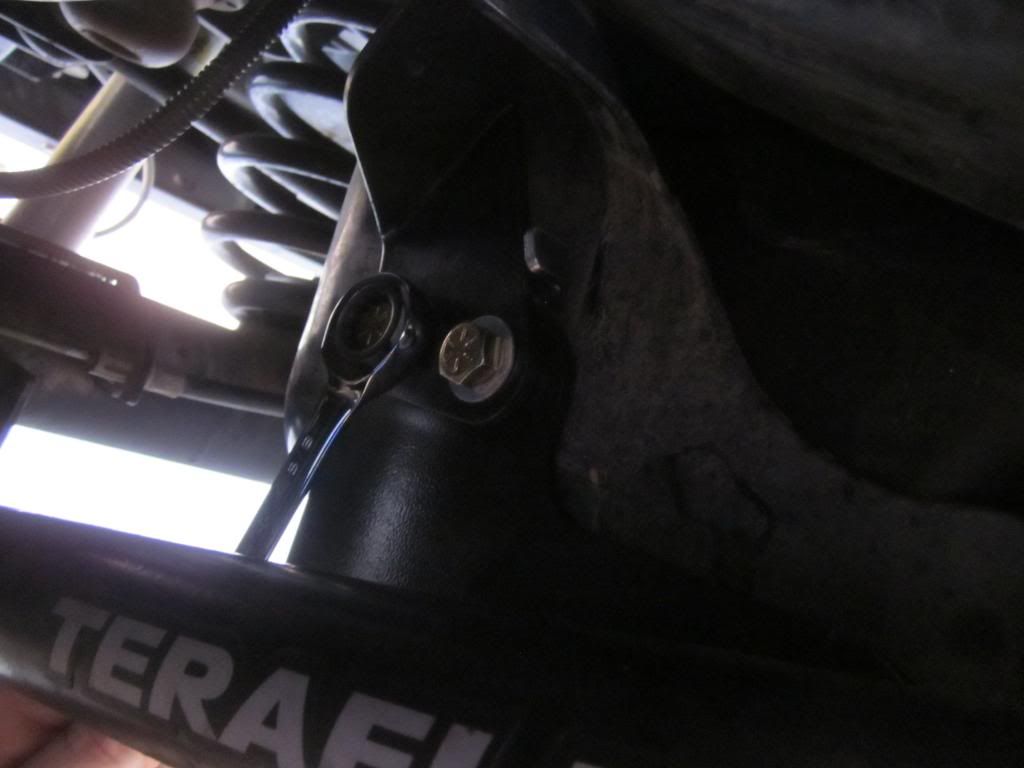
Step 8
Look over skid and make sure everything is now lined up. Once you have looked over your work, it’s now time to FULLY TIGHTEN ALL BOLTS and reinstall the OEM transfer case skid that you pulled off at the beginning.
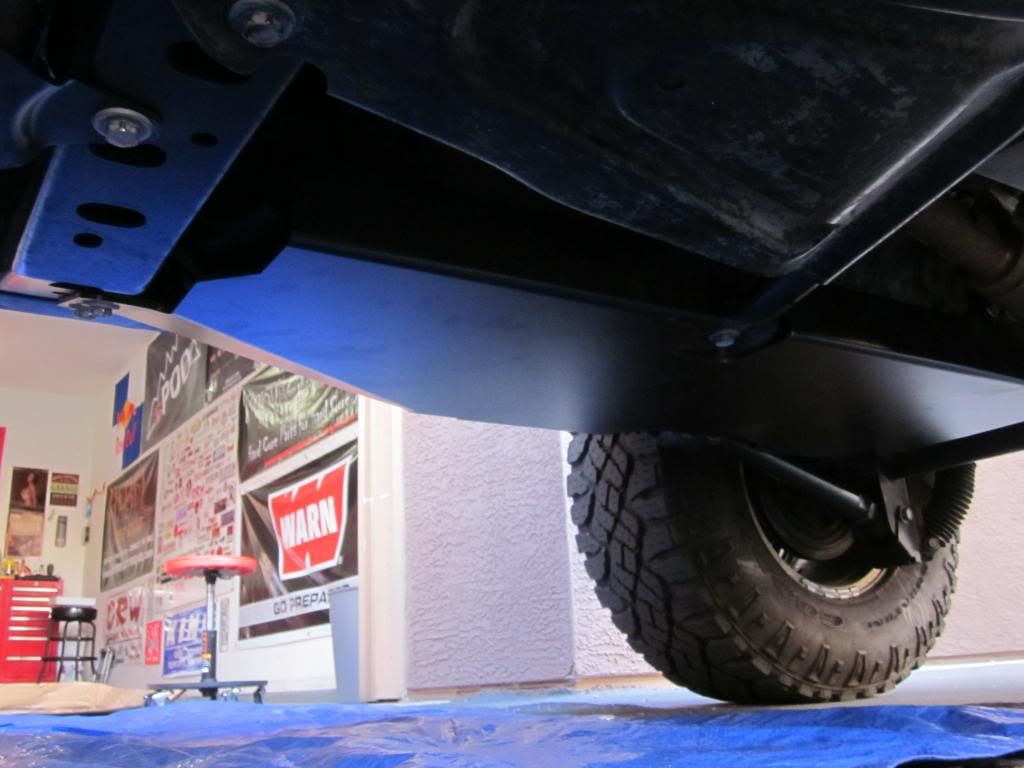
Here are some pics of what your Rough Country Gas Tank Skid should look like when finished