Before taking your lock cylinder apart watch this video here. The Montero lock cylinder is almost identical in design except for the number of pins (tumblers). Also, it's much more difficult on the Montero lock cylinder to remove the exterior metal cap (keyhole surround).
____________________________________________
Montero door lock cylinders are removed by first taking off the interior door panels to reveal the door cavity. After accessing the lock cylinder inside the door cavity, remove the door lock actuator rod that is connected to the lever on the rear of the lock cylinder. It is held in place by a plastic sleeve clip.
The lock cylinders are retained in the door by a U-shaped metal retaining clip that fits around the outer shell of the lock cylinder. The retaining clip can be slid up or down (depending on its orientation) with a large slotted screwdriver. This loosens the lock cylinder and allows it to move outward from the door.
A wired switch is clipped onto the rear of the lock cylinder and must be removed before the lock cylinder is completely free.
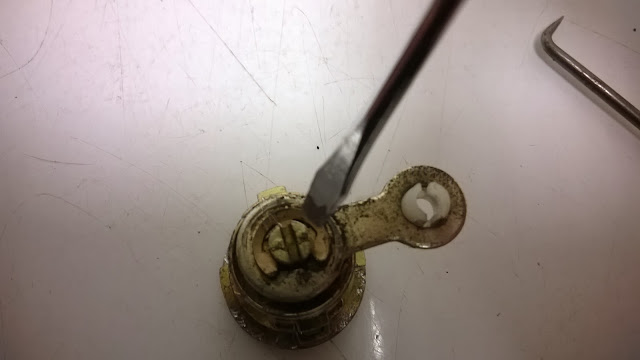
This is what you then have. This e-clip holds the rear lever on.

Remove it with a small slotted screwdriver here.
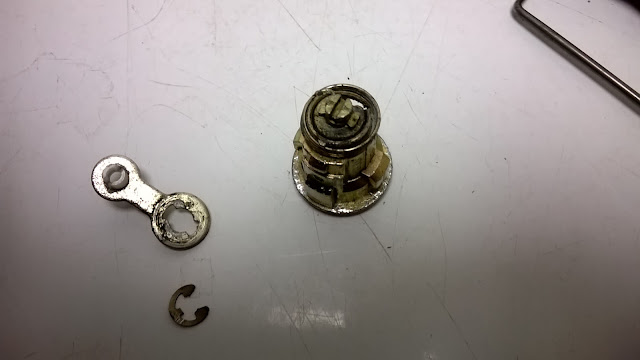
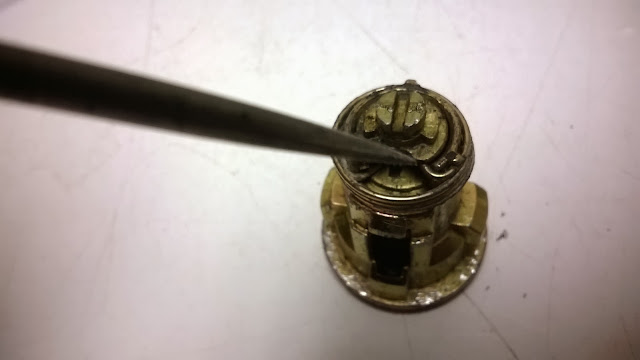
Next, remove this spring with a pick.
Like so.


Next remove the keyhole surround. It's the outer metal ring in this picture.
It's pressed in place and a tiny lip must be carefully pried up around the circumference of this section. Judging by the difficulty I had removing the keyhole surround without completely destroying it, I don't think these locks are meant to be serviceable. But it can be done.

This is what you get with the keyhole surround removed.

Now the inner plug can be pulled out from the outer shell.

These are the tumblers. Four on top, four on the bottom.

The tumblers stick up from the plug into the shell and act as obstructions, not allowing the plug to turn within the shell.

The tumblers are pulled inwards, flush with body of the plug when the proper key is inserted, which allows the plug to spin freely in the shell. This is not the correct key for this set of tumblers so they are not entirely flush, but they're close, and one can see how they are pulled inwards.

To rekey the lock, pull the tumblers out with needle nose pliers, making sure not to loose the tumbler springs. Move and/or replace the tumblers so that when the key is inserted all the tumblers are completely flush with the body of the plug.

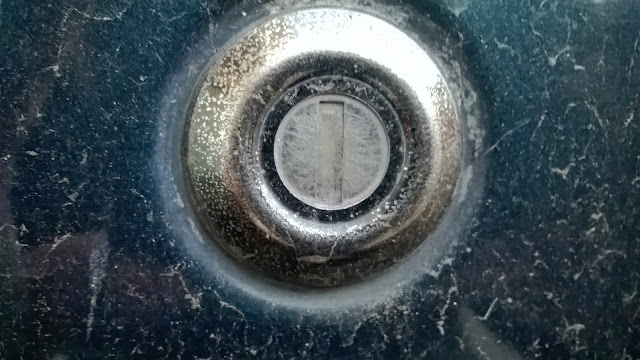
Here's the lock reinstalled with slight damage to the keyhole surround sustained during removal. It was the least amount of damage I could do.

____________________________________________
Montero door lock cylinders are removed by first taking off the interior door panels to reveal the door cavity. After accessing the lock cylinder inside the door cavity, remove the door lock actuator rod that is connected to the lever on the rear of the lock cylinder. It is held in place by a plastic sleeve clip.
The lock cylinders are retained in the door by a U-shaped metal retaining clip that fits around the outer shell of the lock cylinder. The retaining clip can be slid up or down (depending on its orientation) with a large slotted screwdriver. This loosens the lock cylinder and allows it to move outward from the door.
A wired switch is clipped onto the rear of the lock cylinder and must be removed before the lock cylinder is completely free.
This is what you then have. This e-clip holds the rear lever on.
Remove it with a small slotted screwdriver here.
Next, remove this spring with a pick.
Like so.
Next remove the keyhole surround. It's the outer metal ring in this picture.
It's pressed in place and a tiny lip must be carefully pried up around the circumference of this section. Judging by the difficulty I had removing the keyhole surround without completely destroying it, I don't think these locks are meant to be serviceable. But it can be done.
This is what you get with the keyhole surround removed.
Now the inner plug can be pulled out from the outer shell.
These are the tumblers. Four on top, four on the bottom.
The tumblers stick up from the plug into the shell and act as obstructions, not allowing the plug to turn within the shell.
The tumblers are pulled inwards, flush with body of the plug when the proper key is inserted, which allows the plug to spin freely in the shell. This is not the correct key for this set of tumblers so they are not entirely flush, but they're close, and one can see how they are pulled inwards.
To rekey the lock, pull the tumblers out with needle nose pliers, making sure not to loose the tumbler springs. Move and/or replace the tumblers so that when the key is inserted all the tumblers are completely flush with the body of the plug.
Here's the lock reinstalled with slight damage to the keyhole surround sustained during removal. It was the least amount of damage I could do.
Last edited: