barlowrs
Explorer
Well after getting stuck over seas for work for a few weeks, I am back on schedule with my compressor install. So, here it is, hope it helps some people or give them some inspiration.
My plan was to have a compressor that could fill tires, blow out filters, etc, while at the same time, run some basic air tools for trail. I wish I could fit a york or belt driven compressor, but if you have ever looked inside the engine bay of one of these V6 tacos, that was clearly not an option. I researched a lot, and came to the conclusion that the PD-1006 compressor that is strapped onto the top of a Puma assembly was the best option. Here are the stats for the compressor:
¾ HP Running
1 HP Peak
3.4 CFM (not bad for a 12V compressor)
135PSI Working pressure
150PSI Max Pressure
In addition, here is a list of some of the other toys that go along with it:
2.5 gallon Viar Tank (yes the puma came with a tank, but it was too small for my liking)
90 PSI On / 120PSI Off Pressure Swtich
140 PSI Blow Off
18” Steel Leader Hose
PA61A Load Genie Unloader/Check Valve
80A Resetable Water Proof Breaker
100 A Relay
Interstate Metal encased water separator
75 ft of Nylon Tubing
7 port manafold
A LOT of compression fittings and other fittings
A lot of 4 AWG Wire
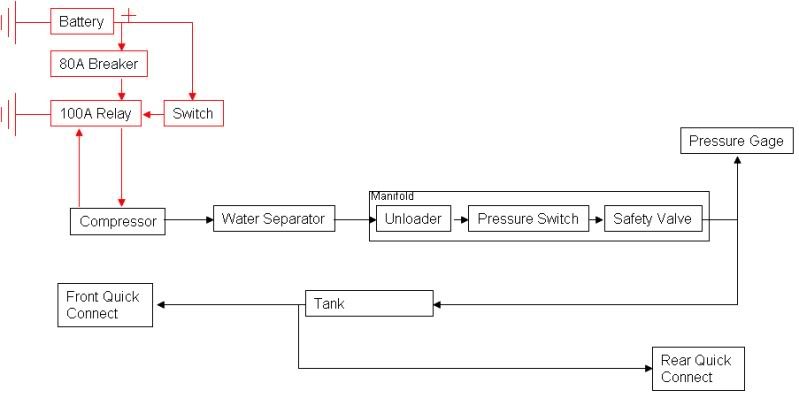
Hmm, there is probably a bunch of other stuff, but that is the basics….The scheamit I ended up coming up with went something like this. (Red is Electrical, Black is Air):
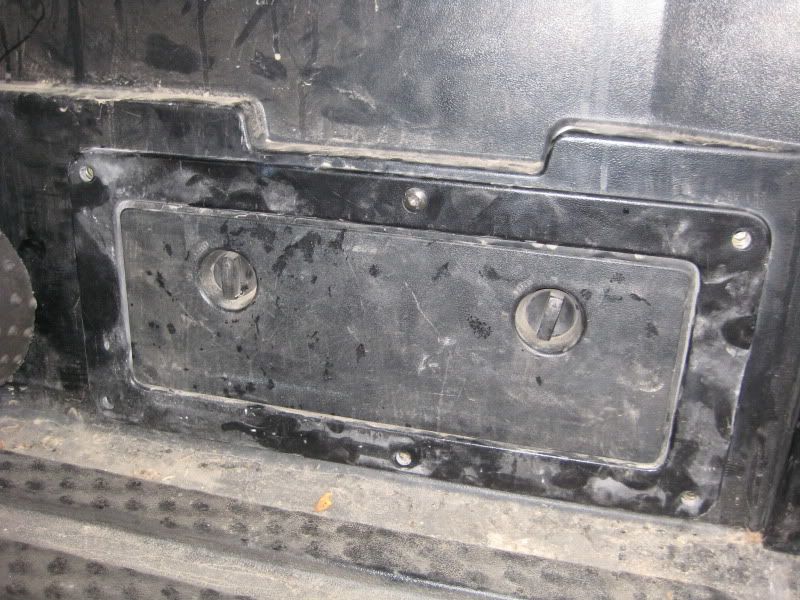
So…now it came time to mount it all. I wanted the compressor out of the elements best I could, but under the hood posed a few problems, first of all, it is very hot there, and heat is bad for compressors. Also, as we already established there is not much room, and this compressor is not a small one by any means. I thought about under the rig, but that is to exposed to the elements. Finally I fount a nice solution. Behind door number 1!
First thing I had to do was relocate the factory 120V plug. I do use this a lot, so I didn’t want to just get rid of it. Instead I made a harness and extended it to the other side of my bed.
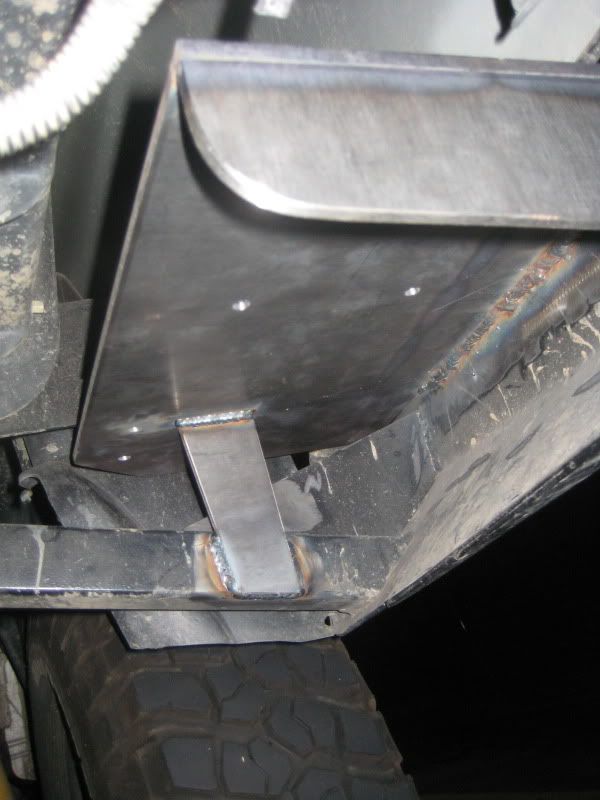
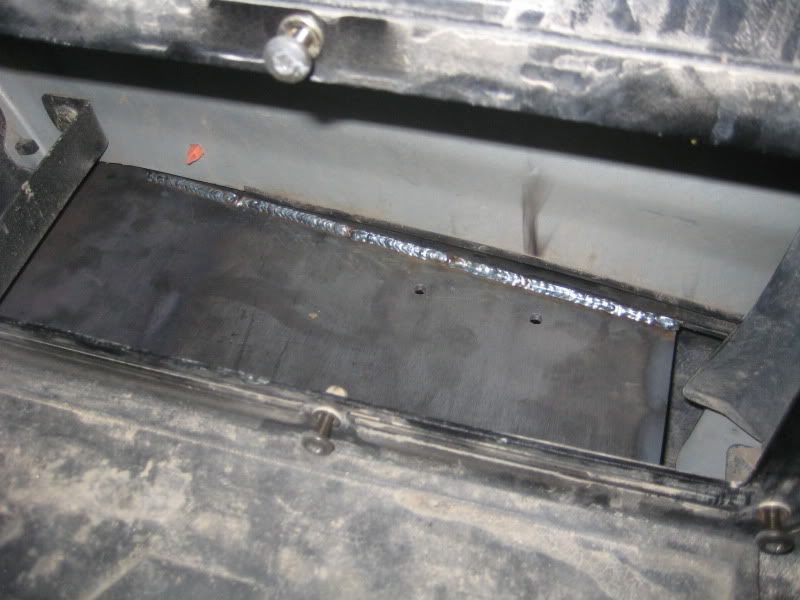
That left me a nice opening to play with. Because I have the CBI rear bumper, I have a large opening behind the cubby hole, and a lot of steel to weld to. I created a little shelf that welds directly to the bumper. Because this compressor is pretty hefty, I needed the shelf to be strong since it is cantilevered off the bumper, I used ¼” Plate and added some nice gussets for bracing. Here are few pics of the shelf and the bracing.
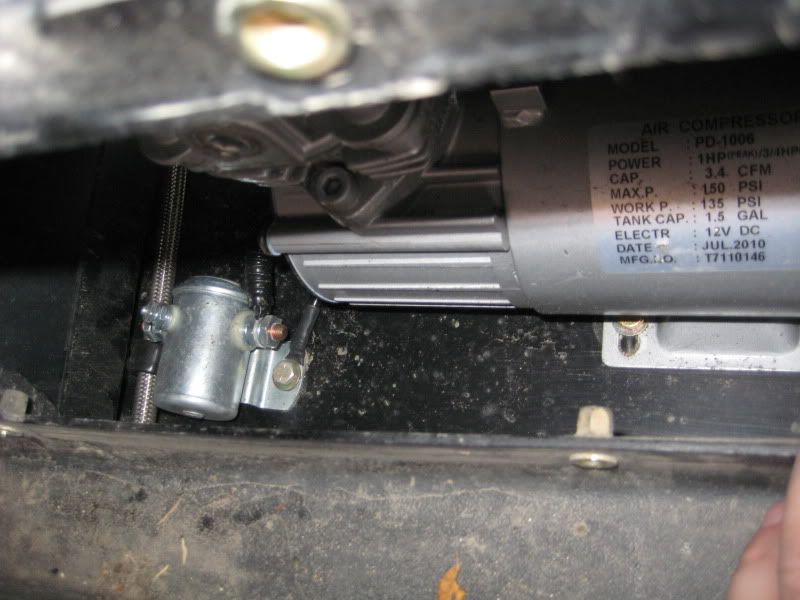
This also give me a nice place to mount the 100A relay. Here you can see the relay. In addition I added a separate ground strap..just to be safe. Non proper grounding is a bad thing.
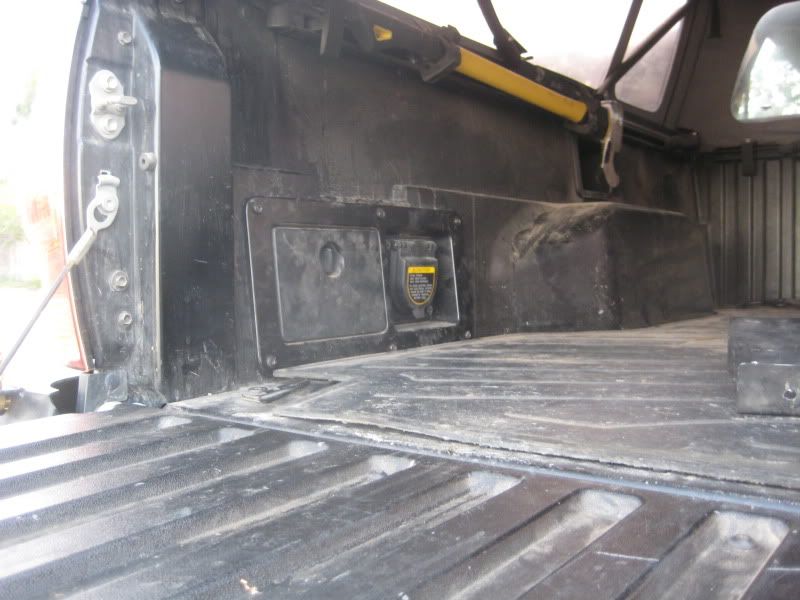
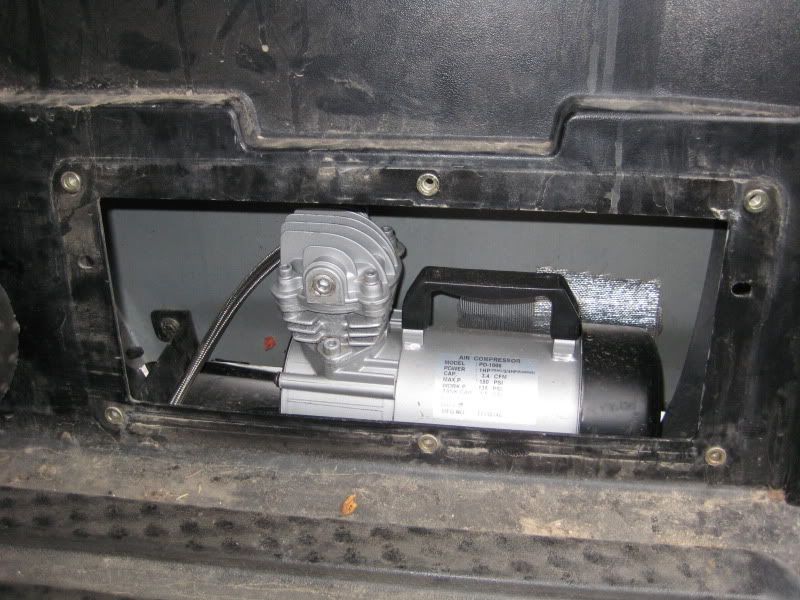
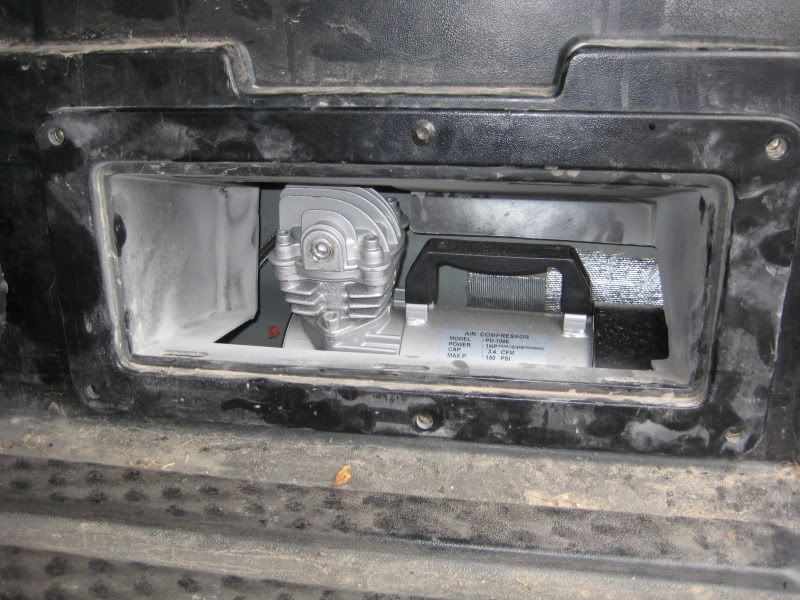
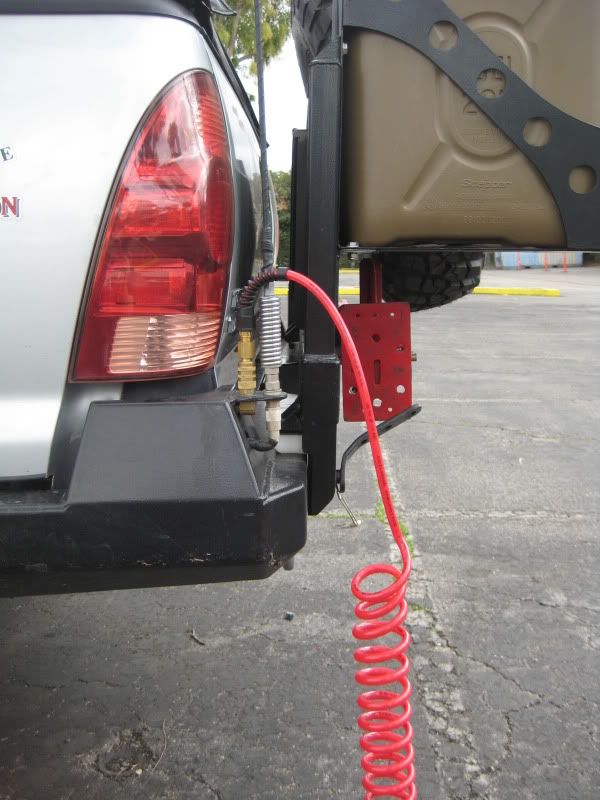
Next was to mount the compressor and trim the cubby to fit around it. The cubby provides some nice protection for the compressor while also proving enough space for her to breath. I also added some fiberglass heat shielding behind it so my body paint doesn’t start to melt on the outside. With the cover closed, you would never know I had a compressor there (the first pic in the post is with the compressor already mounted….didn’t see it did you!?)
Cubby Mounted:
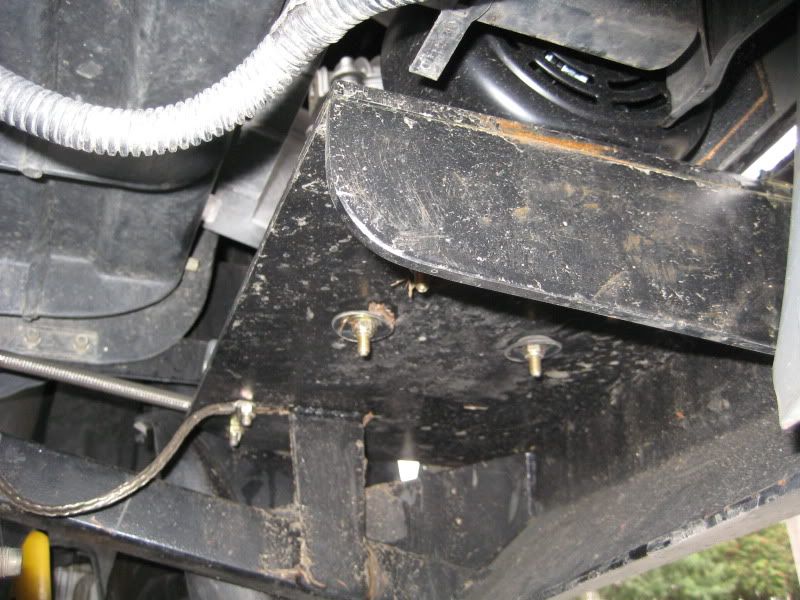
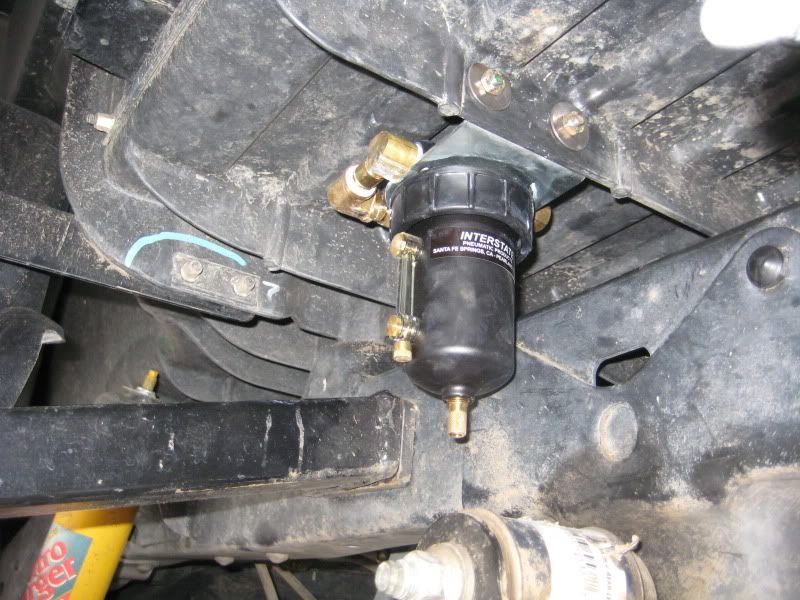
Now for all the accessories. The water filter is mounted right above my rear shackle, This makes it accessible to drain, but protects it because the suspension would hit before any rocks hit it. I also opted for a metal encased filter to be safe.
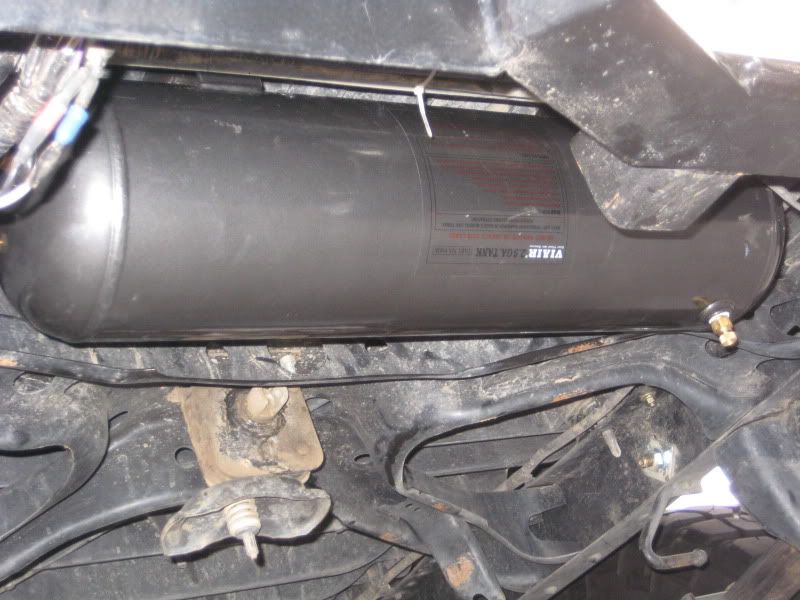
The tank is mounted right in front of my rear bumper. It is just the perfect height to not hang below the bumper (even the drain cock).
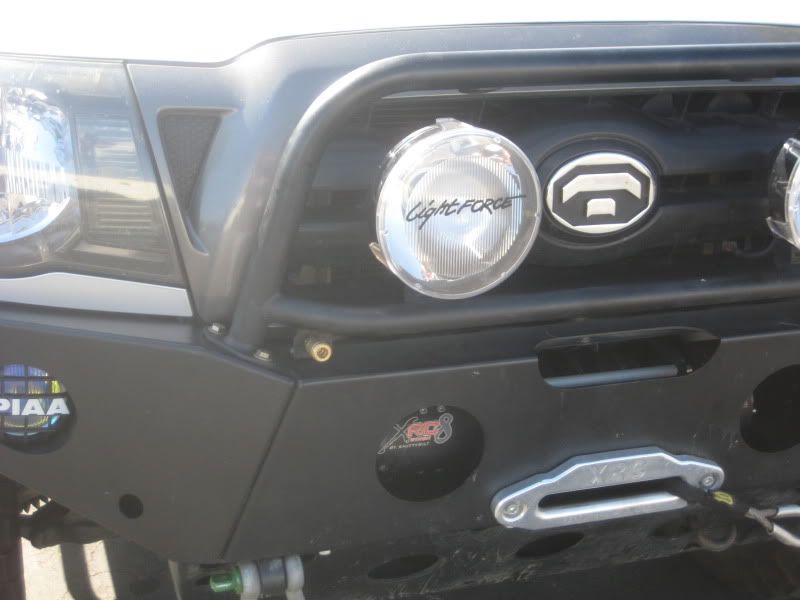
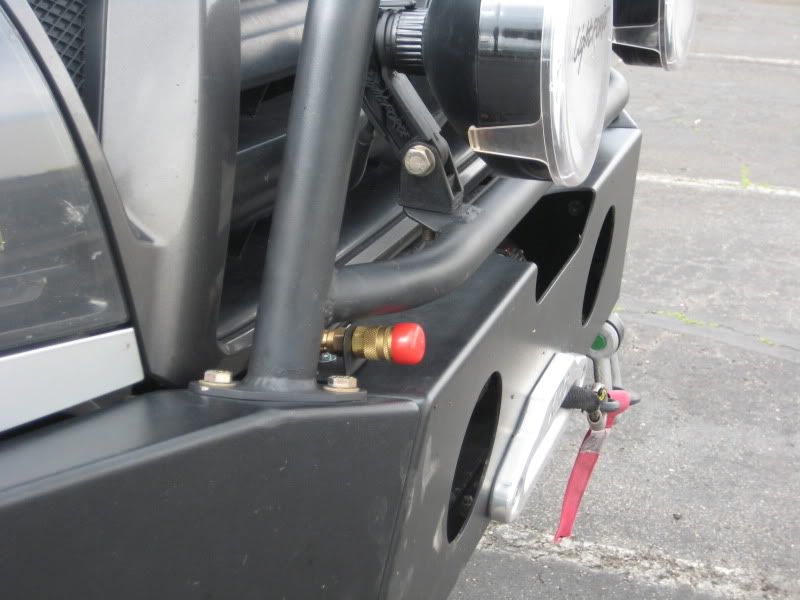
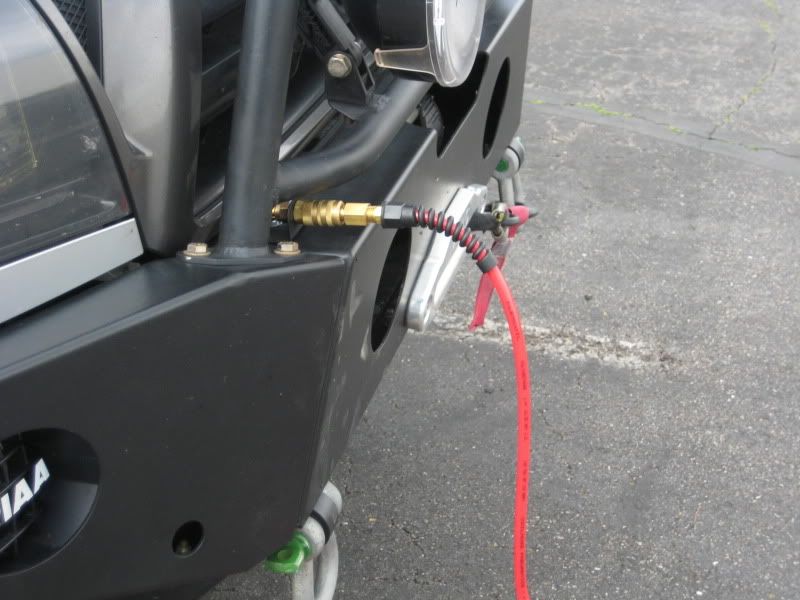
I then decided to go with two quick connects, one up front and one out back. I made a little bracket for the front one and bolted it to my Allpro bumper
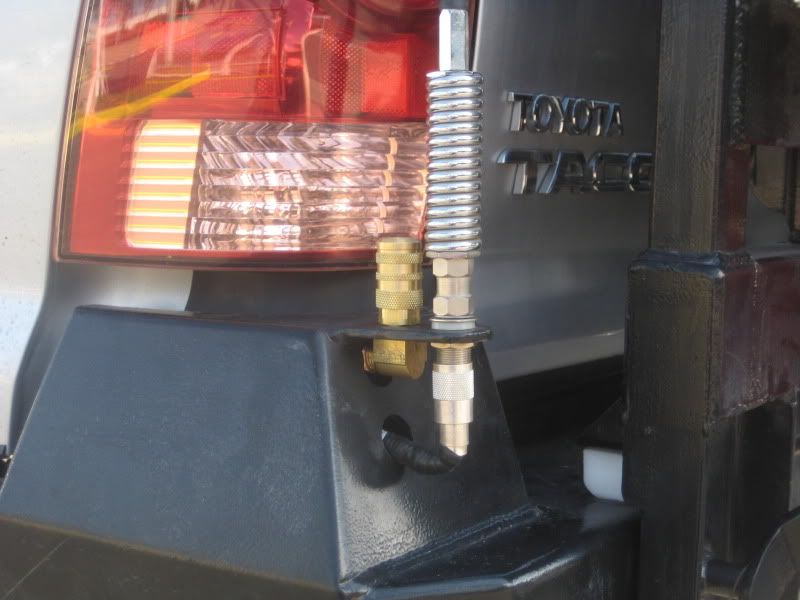
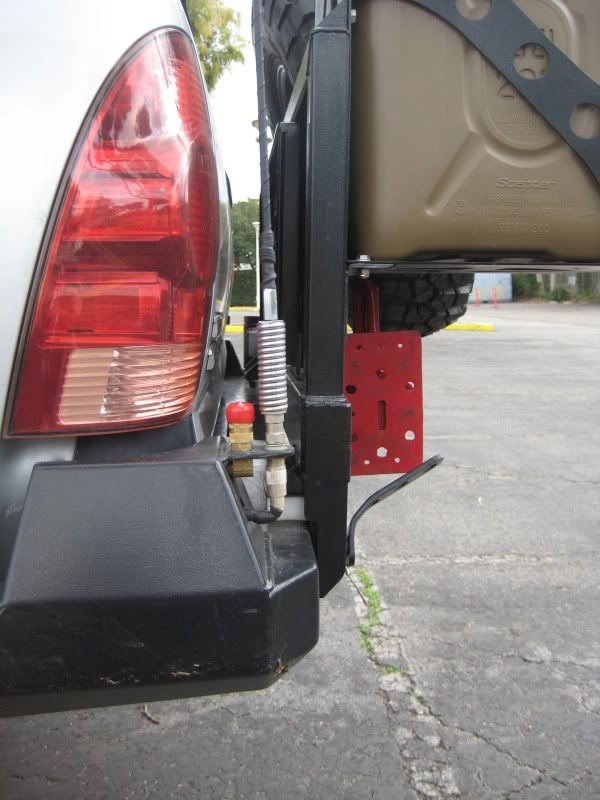
For the rear, I decided to mount it vertically off of the antenna tab on the CBI bumper. Mounting it vertically is a bit risky as moisture could flow down into the system, but I have some nice covers grabbed from work.
The wiring will be in another write-up as I revamped my aux fuse block mount to make room. That should be up in a week or two.
Thanks
My plan was to have a compressor that could fill tires, blow out filters, etc, while at the same time, run some basic air tools for trail. I wish I could fit a york or belt driven compressor, but if you have ever looked inside the engine bay of one of these V6 tacos, that was clearly not an option. I researched a lot, and came to the conclusion that the PD-1006 compressor that is strapped onto the top of a Puma assembly was the best option. Here are the stats for the compressor:
¾ HP Running
1 HP Peak
3.4 CFM (not bad for a 12V compressor)
135PSI Working pressure
150PSI Max Pressure
In addition, here is a list of some of the other toys that go along with it:
2.5 gallon Viar Tank (yes the puma came with a tank, but it was too small for my liking)
90 PSI On / 120PSI Off Pressure Swtich
140 PSI Blow Off
18” Steel Leader Hose
PA61A Load Genie Unloader/Check Valve
80A Resetable Water Proof Breaker
100 A Relay
Interstate Metal encased water separator
75 ft of Nylon Tubing
7 port manafold
A LOT of compression fittings and other fittings
A lot of 4 AWG Wire
Hmm, there is probably a bunch of other stuff, but that is the basics….The scheamit I ended up coming up with went something like this. (Red is Electrical, Black is Air):
So…now it came time to mount it all. I wanted the compressor out of the elements best I could, but under the hood posed a few problems, first of all, it is very hot there, and heat is bad for compressors. Also, as we already established there is not much room, and this compressor is not a small one by any means. I thought about under the rig, but that is to exposed to the elements. Finally I fount a nice solution. Behind door number 1!
First thing I had to do was relocate the factory 120V plug. I do use this a lot, so I didn’t want to just get rid of it. Instead I made a harness and extended it to the other side of my bed.
That left me a nice opening to play with. Because I have the CBI rear bumper, I have a large opening behind the cubby hole, and a lot of steel to weld to. I created a little shelf that welds directly to the bumper. Because this compressor is pretty hefty, I needed the shelf to be strong since it is cantilevered off the bumper, I used ¼” Plate and added some nice gussets for bracing. Here are few pics of the shelf and the bracing.
This also give me a nice place to mount the 100A relay. Here you can see the relay. In addition I added a separate ground strap..just to be safe. Non proper grounding is a bad thing.
Next was to mount the compressor and trim the cubby to fit around it. The cubby provides some nice protection for the compressor while also proving enough space for her to breath. I also added some fiberglass heat shielding behind it so my body paint doesn’t start to melt on the outside. With the cover closed, you would never know I had a compressor there (the first pic in the post is with the compressor already mounted….didn’t see it did you!?)
Cubby Mounted:
Now for all the accessories. The water filter is mounted right above my rear shackle, This makes it accessible to drain, but protects it because the suspension would hit before any rocks hit it. I also opted for a metal encased filter to be safe.
The tank is mounted right in front of my rear bumper. It is just the perfect height to not hang below the bumper (even the drain cock).
I then decided to go with two quick connects, one up front and one out back. I made a little bracket for the front one and bolted it to my Allpro bumper
For the rear, I decided to mount it vertically off of the antenna tab on the CBI bumper. Mounting it vertically is a bit risky as moisture could flow down into the system, but I have some nice covers grabbed from work.
The wiring will be in another write-up as I revamped my aux fuse block mount to make room. That should be up in a week or two.
Thanks