Anak
Stranger
Rather than a full hijack of the BroBurban thread it seems better to make this its own thread. Apparently some folks have not yet heard of this issue. I don’t intend to rewrite the book on this subject, but simply add some detail that I found lacking in my own experience.
If this is the first you are hearing of this subject then I recommend a search on the subject. You will probably find most information in the diesel realm as those are the folks who are most likely to have racked up the high mileage.
Merchant Automotive has this problem covered. They sell a kit to replace the thin pump housing with a nice billet piece that will distribute the wear over a larger area. They also have an illustrated 12 page pdf of the installation instructions: http://www.merchant-automotive.com/custompages/tcpv2.pdf
Here is a link to their kit, including a list of affected vehicles: http://www.merchant-automotive.com/10001-Transfer-Case-Pump-Upgrade-Kit.aspx
Basically, once you get over 100K miles you need to start thinking about taking care of this issue before it becomes a problem.
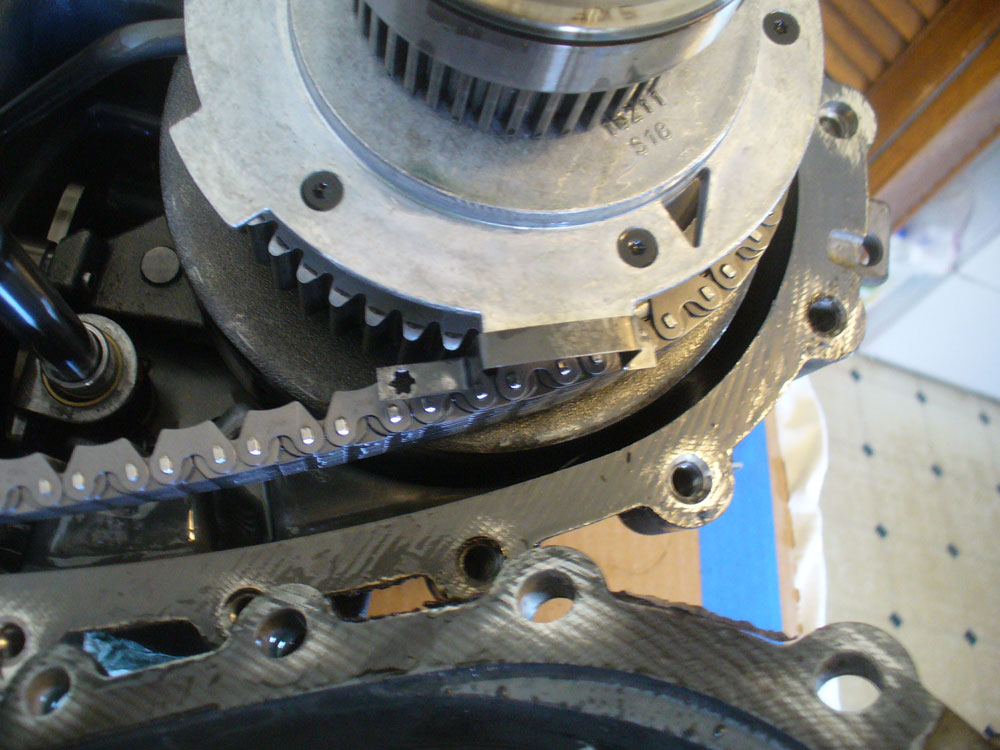
You will need to remove the transfer case from the vehicle. Be careful with all the aging plastic connectors. I got mine apart without breaking any tabs, but I was being deliberate about that. The instructions I found said that it is not necessary to remove the transmission mount. That was not correct for my application (’02 Suburban, 2500, 4L85e (MN8), NP246). That meant this was the perfect time to replace the transmission mount. I also took this opportunity to replace the chain as I figure with over 100K miles on it that will be the next issue to come up in the T-case.
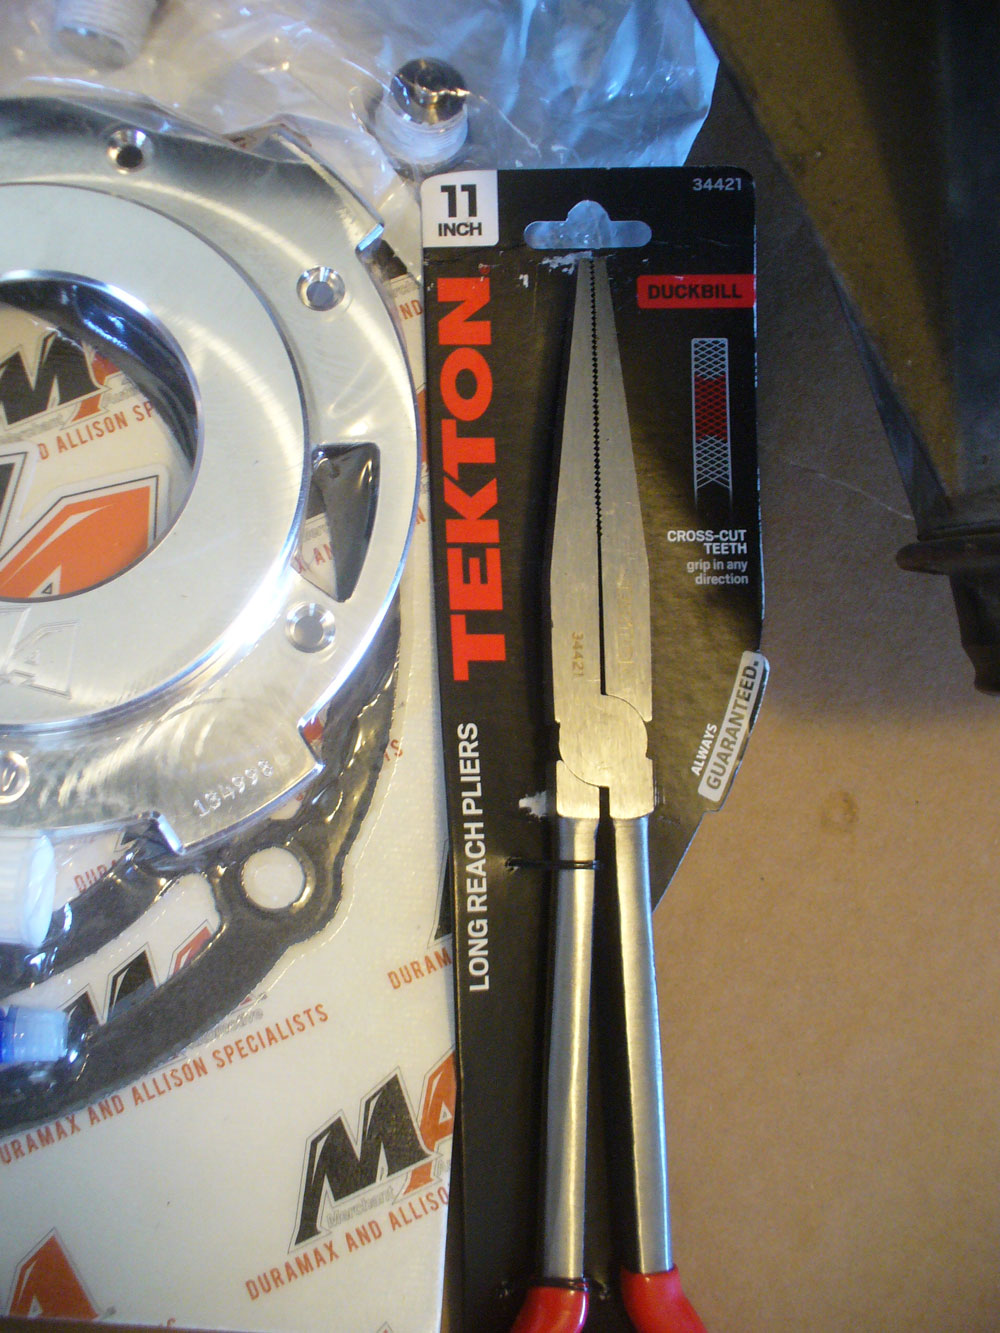
Where I found Merchant Automotive (MA) instructions to be lacking was in regard to the releasing of the snap ring inside the case. The first issue is the snap ring pliers themselves. MA doesn’t provide a brand and model number, and lacking a tool truck to source a pair off the bit shown in one picture in the instructions I had to look for what everyone else was using. The Tekton 11” duckbill pliers (P/N 34421) seemed a popular option, so I ordered them. They work. Note that in use you will be using the back sides of the jaws, but the length from the pivot is what matters here.
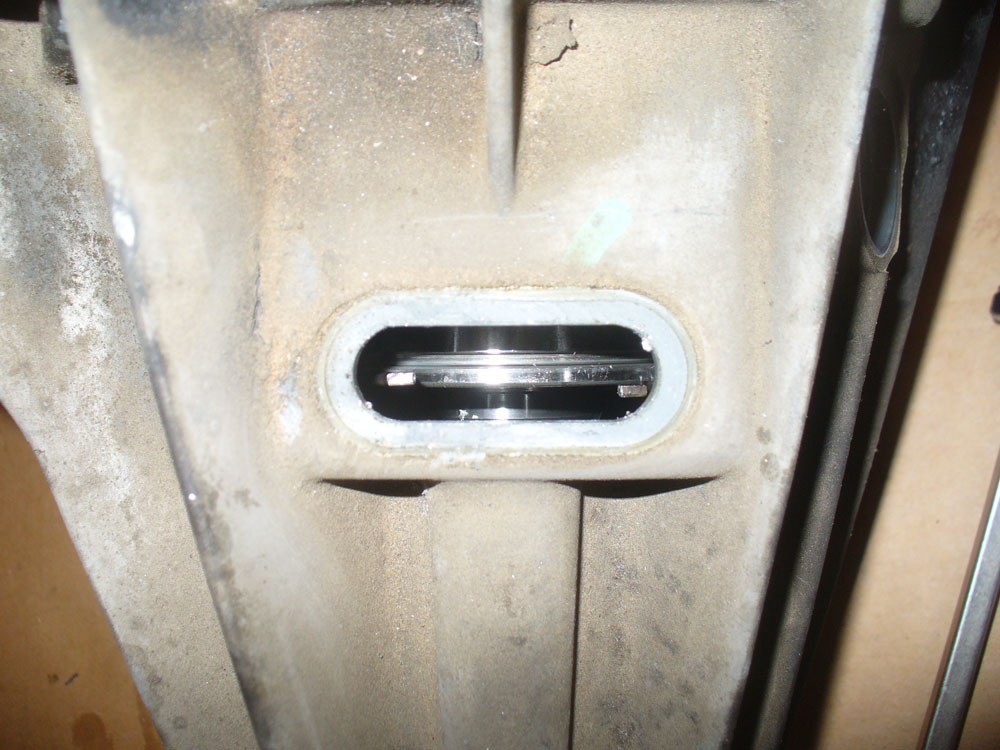
The second issue was in getting the snap ring to release and the case halves to separate. According the instructions it should be a matter of pushing the reluctor gear forward with a screwdriver. I was not getting any results no matter which way I pushed what. What I finally settled for was getting the snap ring pried open and resting outside of the groove. Hopefully these two pictures will make it clear what I did:
Without flash:

With flash:
Then I could work on separating the case halves.
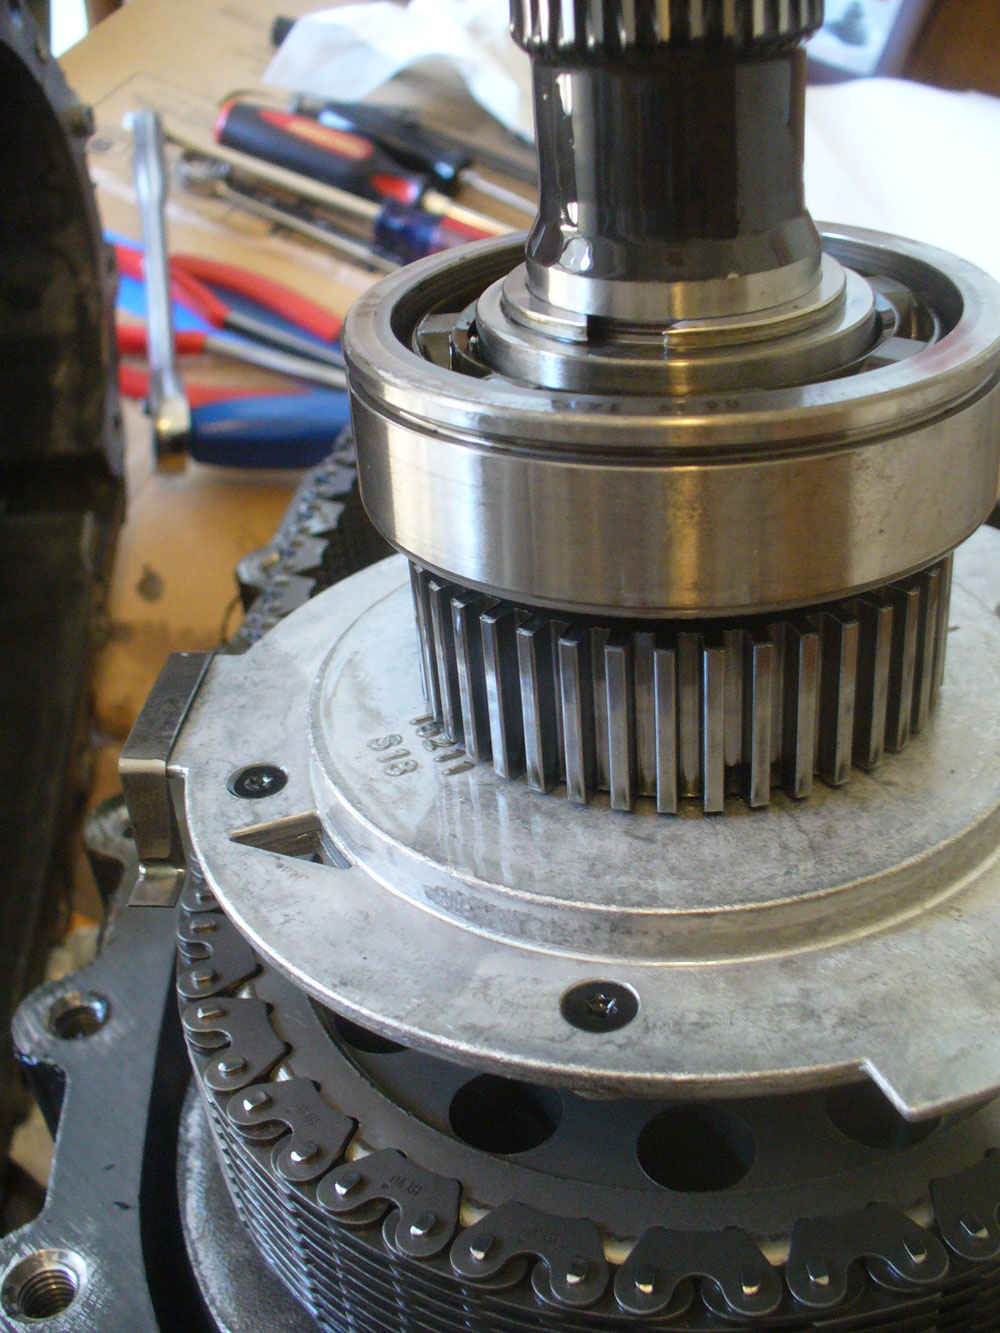
Once things were apart I was able to see what I had been working with. Here is the reluctor and the bearing:
And here is the snap ring, as trapped in the case:

Hopefully those pictures will help someone else as they try to puzzle through that detail.
As to the pump rub problem itself, here is what I found in my 115K miles NP246:
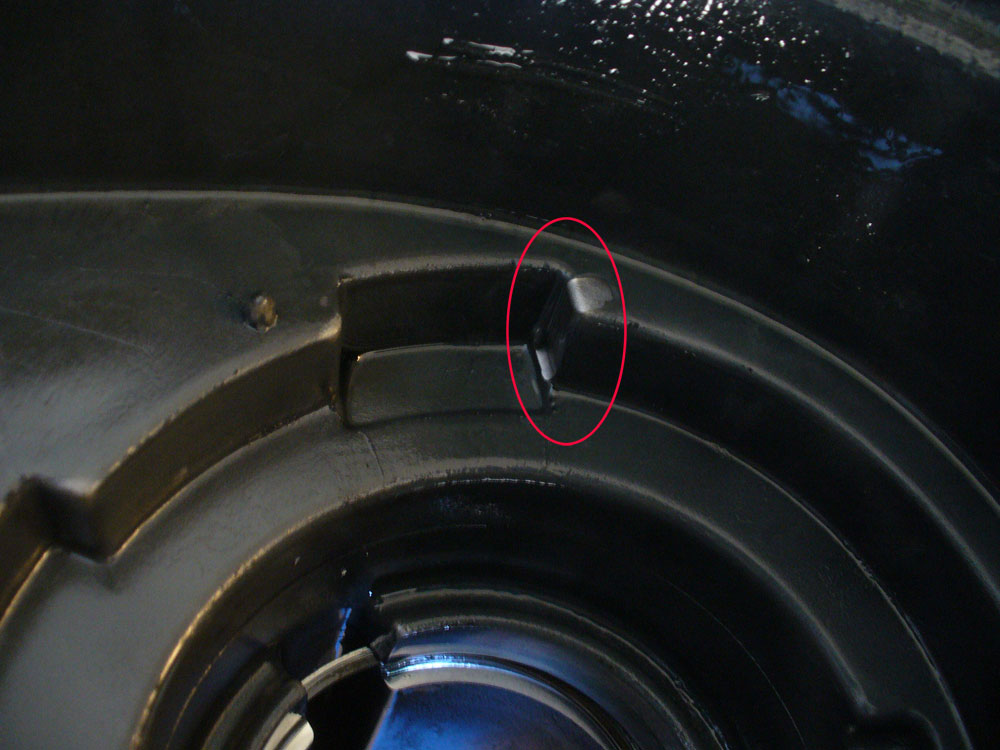
The metal tab that is intended to distribute the wear was present, and sort of in place. Just no longer attached to its button:
Here is the fix:

And note that there is a magnet worth cleaning out:

Again, note that these are just some of the extra details. There is a bunch of information already out there. More than anything this is to help make folks aware of this issue so they can address it before it becomes a problem. And if you do wait too long, it is possible to purchase just the case half. The bummer would be running the case dry while out in the middle of nowhere. That is why this issue should be important here.
If this is the first you are hearing of this subject then I recommend a search on the subject. You will probably find most information in the diesel realm as those are the folks who are most likely to have racked up the high mileage.
Merchant Automotive has this problem covered. They sell a kit to replace the thin pump housing with a nice billet piece that will distribute the wear over a larger area. They also have an illustrated 12 page pdf of the installation instructions: http://www.merchant-automotive.com/custompages/tcpv2.pdf
Here is a link to their kit, including a list of affected vehicles: http://www.merchant-automotive.com/10001-Transfer-Case-Pump-Upgrade-Kit.aspx
Basically, once you get over 100K miles you need to start thinking about taking care of this issue before it becomes a problem.
You will need to remove the transfer case from the vehicle. Be careful with all the aging plastic connectors. I got mine apart without breaking any tabs, but I was being deliberate about that. The instructions I found said that it is not necessary to remove the transmission mount. That was not correct for my application (’02 Suburban, 2500, 4L85e (MN8), NP246). That meant this was the perfect time to replace the transmission mount. I also took this opportunity to replace the chain as I figure with over 100K miles on it that will be the next issue to come up in the T-case.
Where I found Merchant Automotive (MA) instructions to be lacking was in regard to the releasing of the snap ring inside the case. The first issue is the snap ring pliers themselves. MA doesn’t provide a brand and model number, and lacking a tool truck to source a pair off the bit shown in one picture in the instructions I had to look for what everyone else was using. The Tekton 11” duckbill pliers (P/N 34421) seemed a popular option, so I ordered them. They work. Note that in use you will be using the back sides of the jaws, but the length from the pivot is what matters here.
The second issue was in getting the snap ring to release and the case halves to separate. According the instructions it should be a matter of pushing the reluctor gear forward with a screwdriver. I was not getting any results no matter which way I pushed what. What I finally settled for was getting the snap ring pried open and resting outside of the groove. Hopefully these two pictures will make it clear what I did:
Without flash:
With flash:
Then I could work on separating the case halves.
Once things were apart I was able to see what I had been working with. Here is the reluctor and the bearing:
And here is the snap ring, as trapped in the case:
Hopefully those pictures will help someone else as they try to puzzle through that detail.
As to the pump rub problem itself, here is what I found in my 115K miles NP246:
The metal tab that is intended to distribute the wear was present, and sort of in place. Just no longer attached to its button:
Here is the fix:
And note that there is a magnet worth cleaning out:
Again, note that these are just some of the extra details. There is a bunch of information already out there. More than anything this is to help make folks aware of this issue so they can address it before it becomes a problem. And if you do wait too long, it is possible to purchase just the case half. The bummer would be running the case dry while out in the middle of nowhere. That is why this issue should be important here.
