Tepui Autana - great tent, great service

Whito123

New member
First off my apologies for the lack of photos. I'll add some better shots next time I open the tent... It was 98 here today and I plumb forgot to take pics as I went forward.

I emailed Adam on Memorial Day Monday. The order was placed Tuesday and Kyle processed it right away. The tent was delivered by 2pm today. I was expecting one week delivery, not next day. Amazing service and experience. Even the local delivery driver was friendly and helpful. Packaging was excellent and very protective.

The install went easier than expected, and I was impressed that Tepui even included a ratcheting 13mm wrench to help tighten the mounting nuts. I'm happy to say the install was complete in under two hours with less cursing than usual. The Gobi Stealth rack made the install easy. Big shout out to Sam at Axia Off-road in Phoenix for the Gobi install.

The directions were well written, and the YouTube videos were especially helpful.

I haven't installed the annex yet, but first impressions are that this is an impressive unit with great attention to detail. All the components seem to be of very high quality.

Can't wait for the first shakedown trip soon.

Adam and Kyle, thanks again.

image.jpg
image.jpg
image.jpg
 

Box Rocket

Well-known member
Good looking Jeep! The Siberian Camo tent will look good with it. Thanks for posting your experience, and thanks for joining the Tepui Team. #TeamTepui
 

Yarjammer

Wellreadneck
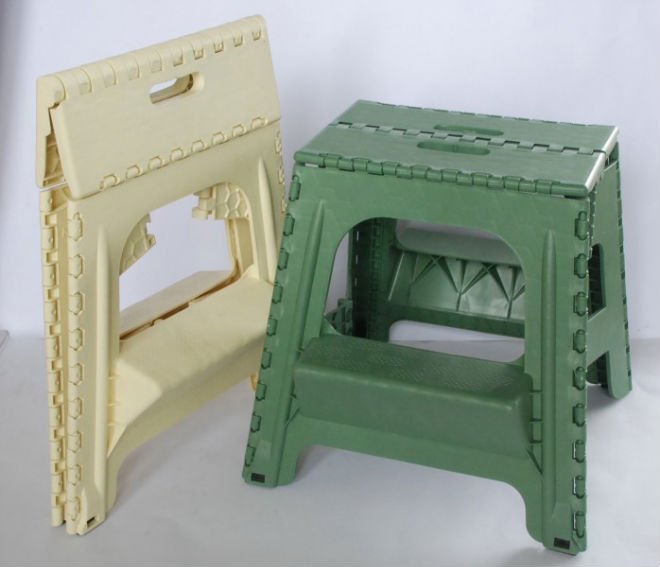
If you are on the shorter side like me (I'm 5'9") I'd recommend getting one of those plastic folding steps when zipping the annex on. Maybe I'm just out of shape, but keeping my arms up in the air while coercing the annex zipper around the perimeter in the summer heat can wear you out fairly quick. It is much easier when you get your arms at a much better angle. With 37s, 2.5" lift and Gobi, the tent base is up there pretty high for me. You're going to love that tent; I know I love mine.


364303966_262.jpg
 

Whito123

New member
Love it so far. The anti-condensation mat arrived sooner than expected. Once installed, I find it much harder to fold the RTT to store it. The Velcro retaining straps that go under the travel cover don't hold under the strain very well. Small complaint but I'm thinking of replacing the Velcro with a nylon/plastic set of clips that can be pulled to tighten.

Here's what it looks like opened up:

image.jpg
 

WillBeck

Adventurer
Love it so far. The anti-condensation mat arrived sooner than expected. Once installed, I find it much harder to fold the RTT to store it. The Velcro retaining straps that go under the travel cover don't hold under the strain very well. Small complaint but I'm thinking of replacing the Velcro with a nylon/plastic set of clips that can be pulled to tighten.

Here's what it looks like opened up:

View attachment 349901

What velcro retaining straps? I have the ruggedized model, which may be different, but it came standard with the anti-condensation mat, and has a strap with a buckle that holds the mattress and any bedding in place while folding the tent back up.
 

Whito123

New member
"What Velcro retaining straps?"

The outside retaining straps that hold the folded RTT flat so you can zip the travel cover on.
 

Whito123

New member
Changed out velcro to buckles

OK, I went ahead and switched out the velcro straps that hold the folded tent together with a set of nylon buckles. It isn't necessarily about having the ability to compress the tent more, it is about the buckles holding better than the velcro. Previously, after installing the anti-condensation mat, my tent wanted to spring back when folded, and the velcro straps just wouldn't hold together. Now, things work perfectly. The parts probably cost less than a buck (100' of 1" webbing and a bag of buckles on Amazon is quite cheap).

Old and new:

IMG_8864.jpg

Installed:

IMG_8865.jpg

PS: Here's a tip on how I sewed the webbing: our sewing machine (I think it is a $299 Singer from Amazon) has a button-hole foot. Using that foot and the stitch setting for "bar tack" makes a perfect way to join two pieces of webbing together. I put two or three bar tacks across each joint, and the sewing machine does it all automatically in about 30 seconds. I just hold my foot on the switch and position the webbing to start. It is stupid easy... I'm no damn seamstress and even I figured it out... ;)
 
Last edited:

Forum statistics

Threads
190,023
Messages
2,923,283
Members
233,266
Latest member
Clemtiger84
Top