Arivalsend
Adventurer
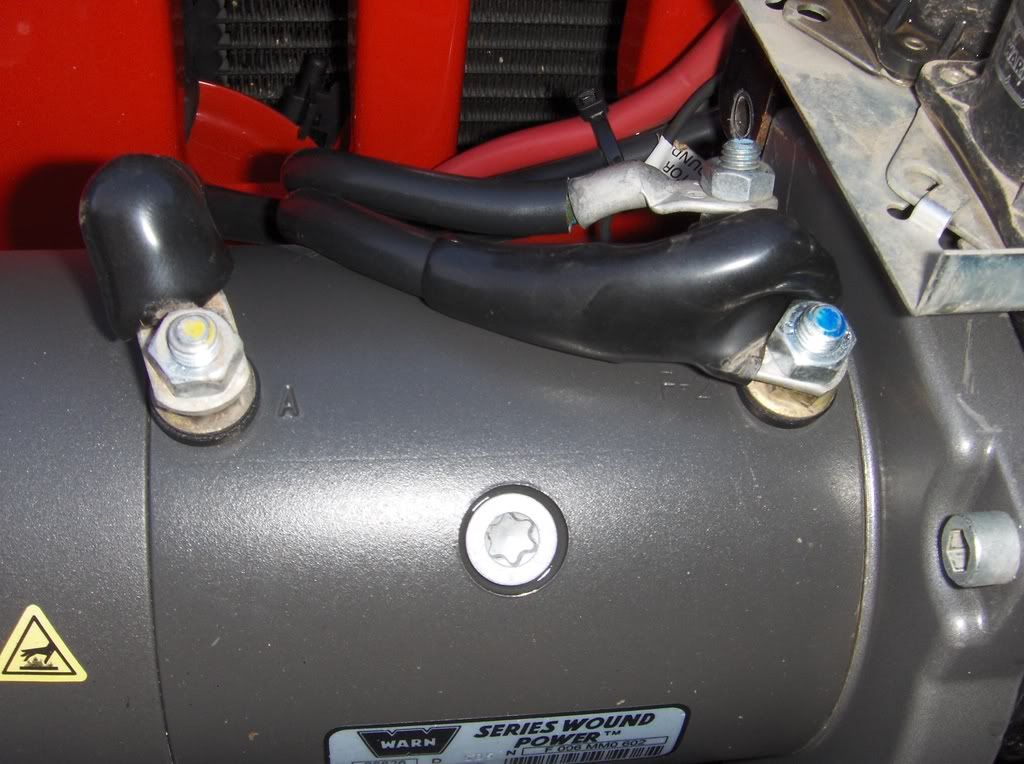
I recently picked up a new to me XD9000 to put into my ARB. I got it for a pretty good price, the only downside being that it's solenoid was disconnected and in a box alongside it. I have the solenoid back together but I cannot figure out how to wire it back onto the winch assembly. I am working with several different wires, but as they are all black I have no idea which goes where. There area 2 wires that come off of the winch itself, labeled F1 and F2, these I know go back up to the solenoid, but I am not sure to which connection point. The Expo Portal overveiw the Frontier Crewcab had a similar writeup and even had a couple snapshots of the same solenoid as mine. Great pictures Mark but I don't know which black wire goes to which terminal.
There is another wire with no label that I am assuming runs up to the battery to power the unit (These are all big guage wires). Another I have read to attach to engine block, but I am not sure where to attach this; the solenoid or the winch?
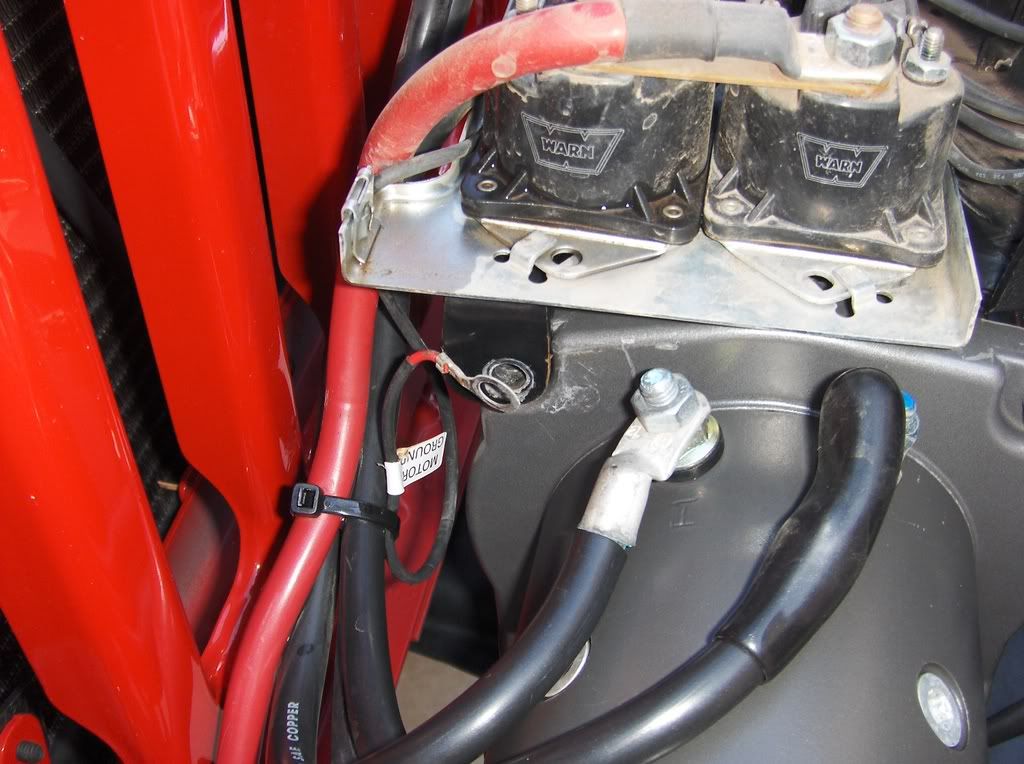
So, 4 heavy guage wires that need a home. There is also one small guage wire off of the solenoid, again black, that looks as though it is a ground wire, it has a round connection fitting at the end.
Any help would be great guys. I don't want to botch this up and fry my winch. But I do want to get it hooked up to see if I do in fact have a working winch. As at this point I have what looks like a winch.
thanks all
There is another wire with no label that I am assuming runs up to the battery to power the unit (These are all big guage wires). Another I have read to attach to engine block, but I am not sure where to attach this; the solenoid or the winch?
So, 4 heavy guage wires that need a home. There is also one small guage wire off of the solenoid, again black, that looks as though it is a ground wire, it has a round connection fitting at the end.
Any help would be great guys. I don't want to botch this up and fry my winch. But I do want to get it hooked up to see if I do in fact have a working winch. As at this point I have what looks like a winch.
thanks all

") Cheers
Cheers